


|
|
|
#11
 06-14-2020, 12:26 PM
|
||||
|
||||
|
Quote:
And, I can google translate the text. But I still didn't see how you fitted the cockpit! So my question still stands..."can I come back to it and fit the cockpit later?" What do I have to do right to make that possible, if anything?
__________________
SUPPORT ME PLEASE: PaperModelShop Or, my models at ecardmodels: Dave'sCardCreations 
|
|
#12
06-14-2020, 12:52 PM
|
||||
|
||||
|
I skipped the cockpit on my two X-15 builds and someone can correct me if I'm wrong, but I think as long as you build the basic cockpit tub, you could, in theory, come back later and add the cockpit details as a drop-in assembly.
|
|
#13
06-14-2020, 12:53 PM
|
|||
|
|||
|
Hello airdave,
as far I remember your plan, to make the cockpit as an alternative may fail. The cockpit "room" is a part of the hull-structure. It is necessary for the frontsection. On the pics you can see long small paper stripes left and right from the backside. these stripes close the open sides between outer hull and the cockpit"room" walls. Sorry for my bad English. But nevertheless I hope (of course) it helps. The only thing I made removeable was the ejection seat. Sincerely peaceglue!
__________________
Friendly PeaceGlue
|
|
#14
06-14-2020, 01:12 PM
|
||||
|
||||
|
Quote:
That's not to say you couldn't tweak Ken's design and add that feature....
|
|
#15
06-14-2020, 01:22 PM
|
||||
|
||||
|
Quote:
That the tub itself may have to go in...but I can omit the interior details.
__________________
SUPPORT ME PLEASE: PaperModelShop Or, my models at ecardmodels: Dave'sCardCreations
|
| Google Adsense |
|
#16
06-14-2020, 02:01 PM
|
||||
|
||||
|
Quote:
__________________
Glenn
|
|
#17
06-14-2020, 04:01 PM
|
||||
|
||||
|
I am struggling a bit trying to figure out the cockpit tub assembly.
I'll have to go through peaceglue's photos, and all the other photos i have collected so far. I wish Ken had done a diagram of the cockpit...his text instructions are there, but I do love me a picture or two! Anyway, I have discovered that there isn't a "tub" that can be built and dropped in later. The "tub" is formed using two of the bulkhead formers, so I am putting that together and will install the two formers as one unit. I making up paper tabs right now to join everything together, but I'm already thinking about creating a few joiner strips for the kit. I'll take some photos and show you my method once I get that far. It looks like half of the cockpit will be installed, so I may as well finish it and put the rest of the details in place. Regardless, I still may glue the canopy down in the closed position.
__________________
SUPPORT ME PLEASE: PaperModelShop Or, my models at ecardmodels: Dave'sCardCreations
|
|
#18
06-14-2020, 09:04 PM
|
||||
|
||||
|
Looking great Dave!
Mike
__________________
Cardstock Property Tables and Terms Flying Cardstock Models http://www.papermodelers.com/forum/m...uers-projects/
|
|
#19
06-16-2020, 03:24 PM
|
||||
|
||||
|
I posted something yesterday, but its not here. Maybe I didn't publish the post?
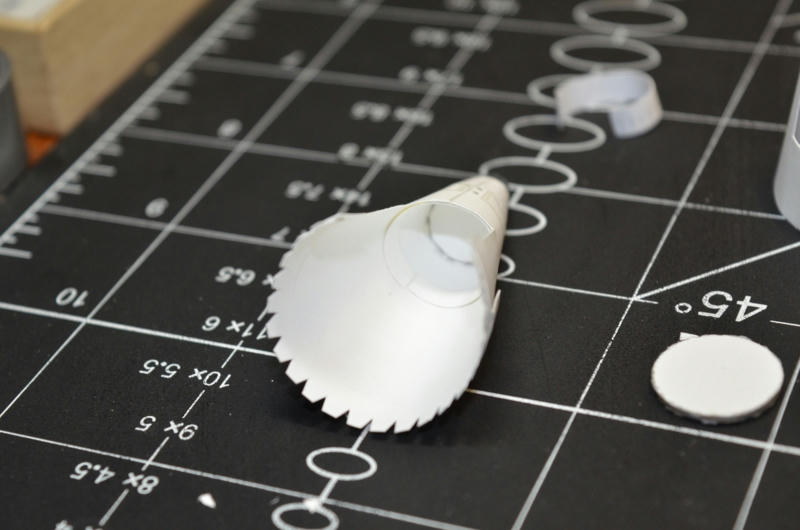
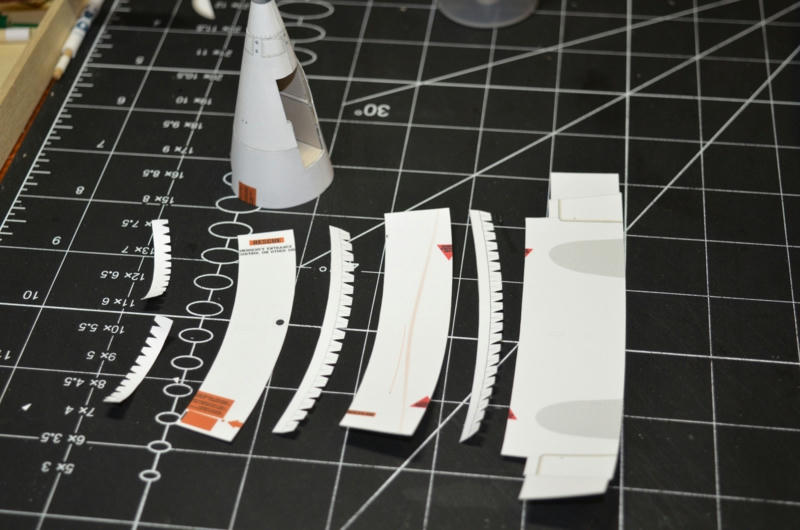
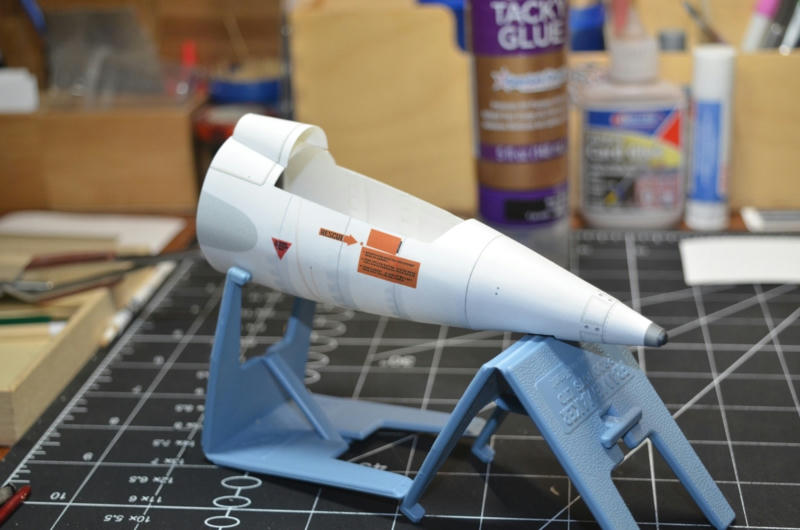
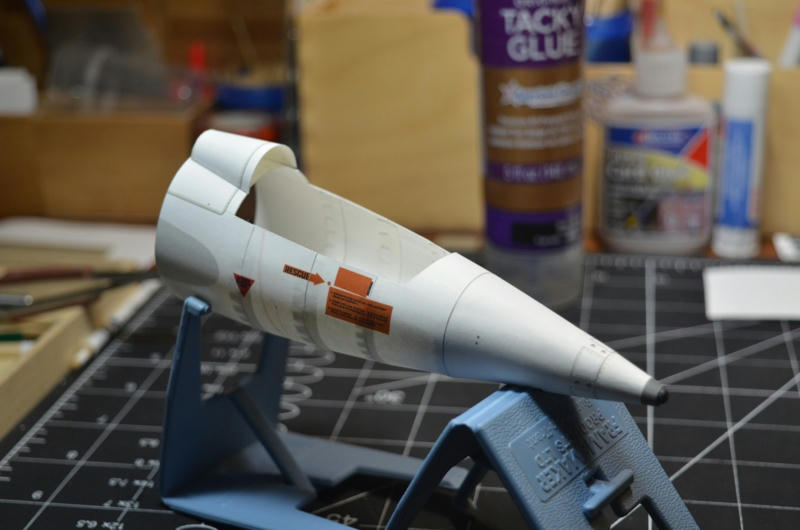
I'll try again... Cockpit Tub is complete and other cockpit parts are ready for fitting. The two bulkheads that frame the cockpit "tub" are now part of the entire tub and I will slide the entire assembly into the fuselage from the rear opening before I attach the next fuselage section.. 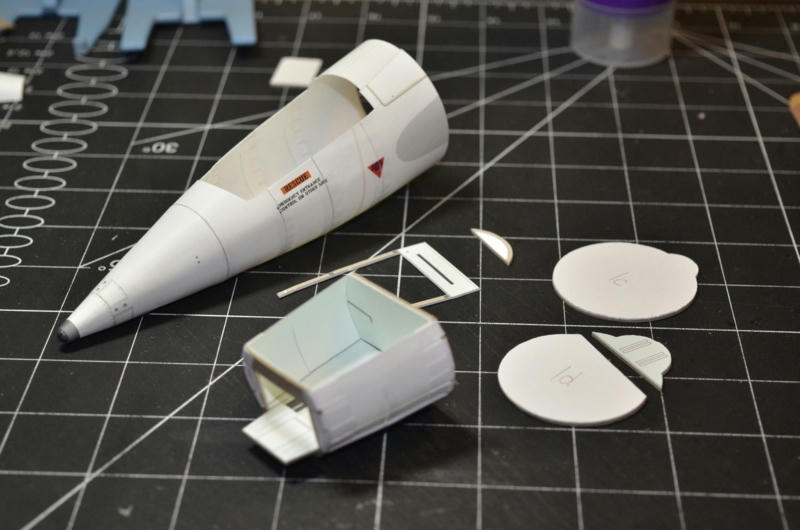 Since I am not good with edge gluing parts together, I added thin paper strips to hold everything together. By wrapping paper tabs around everything, it made for a quicker and easier assembly, and stronger cockpit. 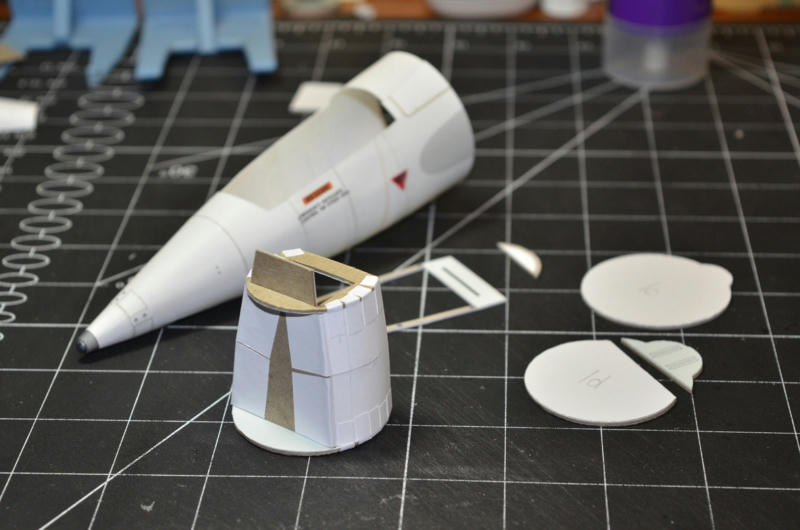 ... The cockpit tub is solid but is now a bit too big to fit into the fuselage. I'm not exactly sure why, since the paper strips are very thin and it added less than .5mm to the diameter of the bulkheads. I had thought about this, thats why I pre-cut the bulkhead formers inside the printed lines to make them smaller. But the tub is still way too tight and it sits too high in the opening. So I applied a bit more glue to the seams inside the cockpit 'tub' and I sanded down the bulkhead formers and all the edges of the 'tub' ...eventually it will fit into the fuselage. I'll make it fit! And then...the other part that is the side rail edges of the cockpit opening is way too narrow for the tub...about 1mm too narrow!...maybe another byproduct of the oversize 'tub' I don't know? So I have added a second layer of printed part that folds over the sides effectively making the part another .6mm wider. It should help fill in some of the space. 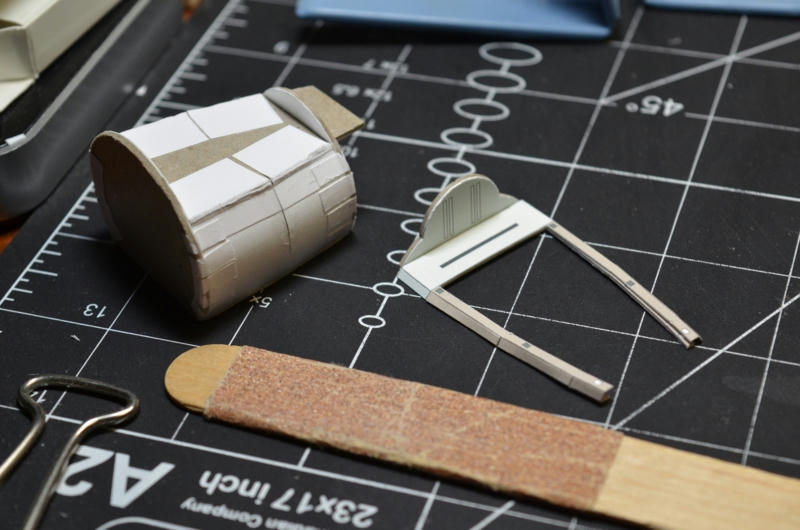 ... The Instructions say to "Install 4c into upper edge of part 4." 4c being the small crescent shape former part, and #4 is the fuselage section at the front of the cockpit opening. But there is no indication as to exactly where to fit the part 4c ...should it be way underneath?...forward? back? straight up? angled? 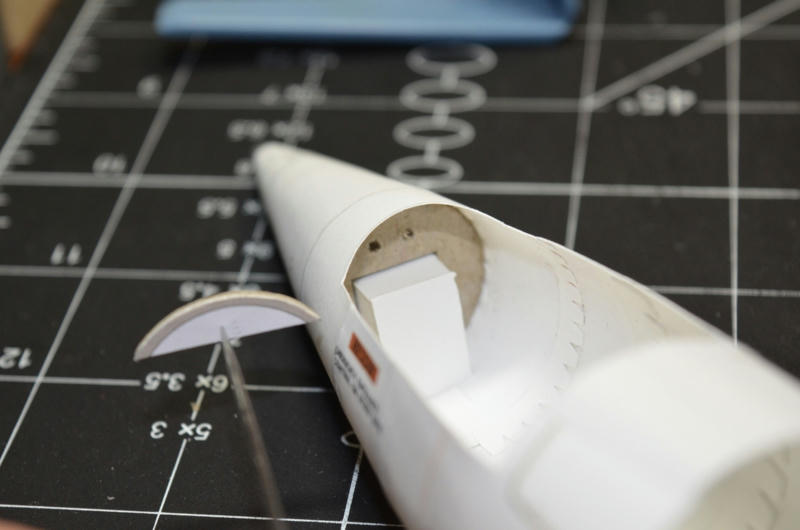 It appears as though it might sit at the front edge of the Side Rails. So I glued it there (to the side rails). Is this going to cause me trouble during installation?  ... I dry fitted everything I have assembled so far...I'm still unsure how the instrument panel and cowling will fit, but it looks like everything is coming together. My adjustments to the size of the tub seemed to have worked and I will be able to pull the fuselage tight and get the side rails glued up properly within the opening. 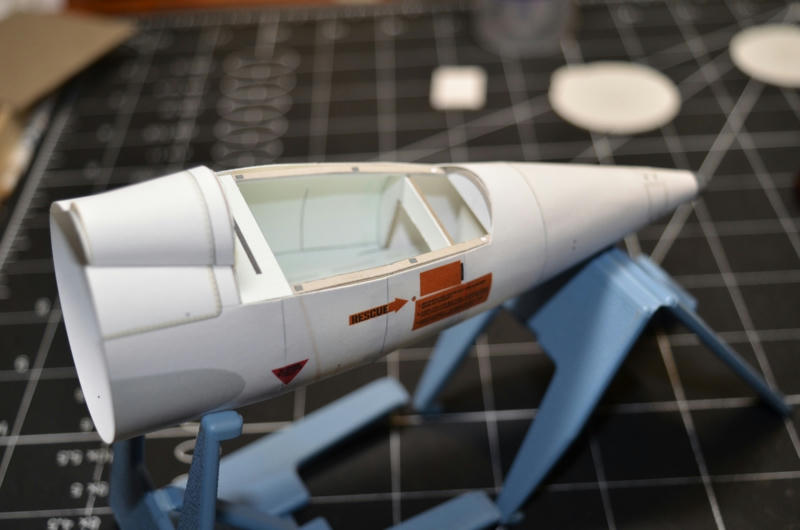 Please tell me if something is way wrong here. ...
__________________
SUPPORT ME PLEASE: PaperModelShop Or, my models at ecardmodels: Dave'sCardCreations
|
|
#20
06-24-2020, 08:46 PM
|
||||
|
||||
|
With my current house clean up and repair situation, I have lost my paper modeling workspace.
And while I managed to set up my computer desk, I have only the basics connected (no printer), so I can't print the necessary parts to continue with this build anyway. It may be a week...or two...or more...before I can get back to test building. But for those interested in this project, I just wanted to post an update.
__________________
SUPPORT ME PLEASE: PaperModelShop Or, my models at ecardmodels: Dave'sCardCreations
|
| Google Adsense |
 |
|
|


 Linear Mode

