


|
|
|
#11
 07-26-2010, 06:31 PM
|
|||
|
|||
|
love the razorback and the support for the fuselage
consistseeker 
|
|
#12
07-27-2010, 08:40 AM
|
||||
|
||||
|
Quote:
I already know how a Thunderbolt canopy opens, my point was I wanted to see how well the parts separated into the two halves, how well I could make it fit to the model in an opened position and how well my "inner" and "outer" parts worked. (I have already created inner and outer layers to sandwich some clear acetate) 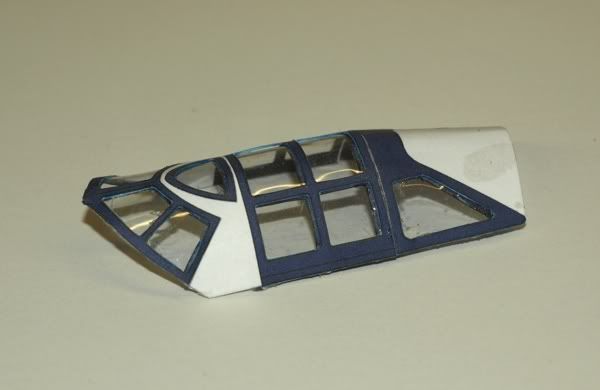 but my problems were: inexperience with these types of canopies...just not sure what I was doing with plastic glues and such and the innacuracies of the Marek design. ...the basic canopy parts just weren't fitting very well, and my opening canopy idea made things worse. I made a few changes to marek's original design (compare in the following photos) first I separated the rear Canopy section from the Razorback spine. Now the rear canopy is a separate part that mounts on top of the spine. second, I enlarged all the parts by about 1-2%, to compensate for the fit over the spin and to give a little more side length to the main Canopy. third, I changed the angles between the rear and center sections of Canopy, so now the top transitions better from spine angle to level canopy. and fourth, I enlarged the upper bulb of the forward section. I find this to be the most awkward part of the assembly, it just doesn't fit right. But I can't redesign the entire canopy. At least now you have a little extra material to work with...form it, glue it and then trim off any extra as I did. 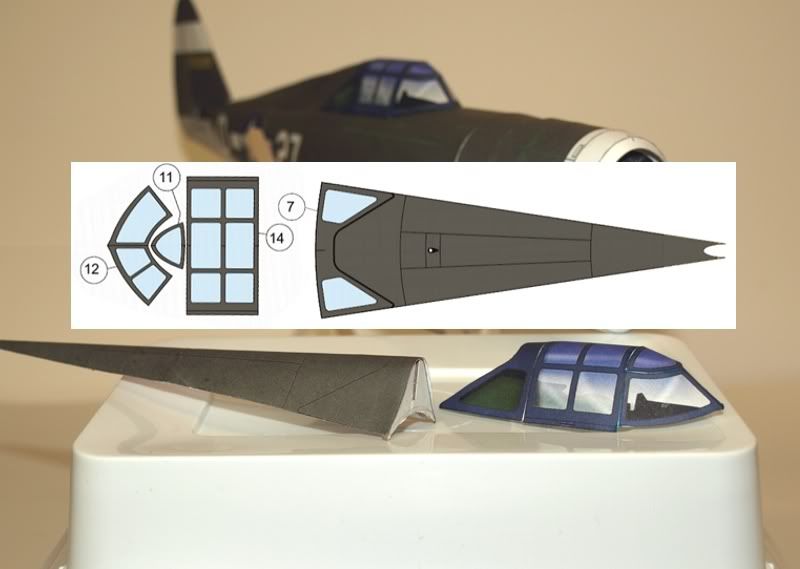 and the final fit of the fully altered canopy (its not the best gluing job...when removing the first test canopy, I did some damage to the spine surface. i should have changed the entire spine for the last canopy, but I'm too lazy!) 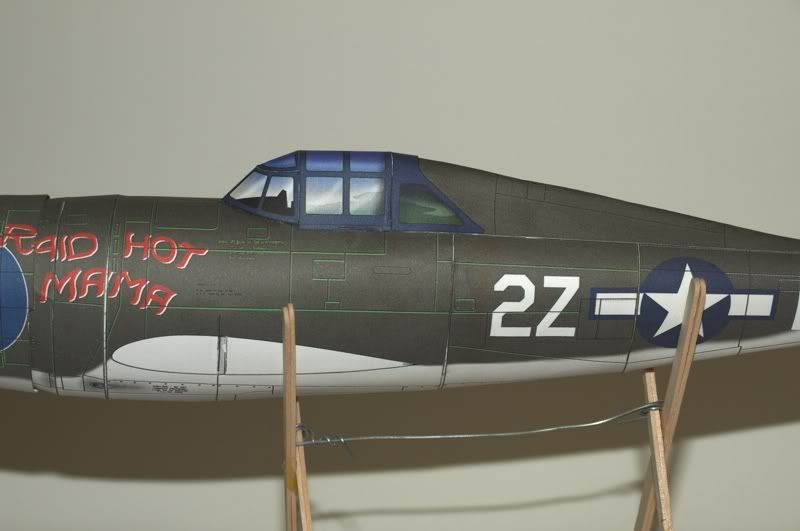 another thing you will notice in this last picture... I modified the Intercooler Vents one more time! The kit still includes the opening vent door parts but if you decide to leave the fuselage unaltered, the artwork depicts fully closed doors, thus leaving the USAF Insignia fully intact.
__________________
SUPPORT ME PLEASE: PaperModelShop Or, my models at ecardmodels: Dave'sCardCreations
|
|
#13
07-27-2010, 05:19 PM
|
|||
|
|||
|
Looks good, but I think a vacuformed canopy would be the ultimate way to go. Looks great so far.
Peter
|
|
#15
07-28-2010, 12:51 PM
|
||||
|
||||
|
thanks!
Thats about it for Razorback related issues... from this point its the same build as with any of the Thunderbolts. I have fitted the wing spars, both front and rear. Need to get the Tail surfaces in place to keep working on the fairing issue.  This is my fourth evolved design for the Fairing and the best so far! Front and top fit is right on!... the goal now is to extend the fairing and incorporate the horiz. fairings into the same piece (eliminating two parts completely!) if all goes well, I will just add fairing strips for the undersides of the horiz. Tails. This will greatly improve the overall design and look of this part of the model. 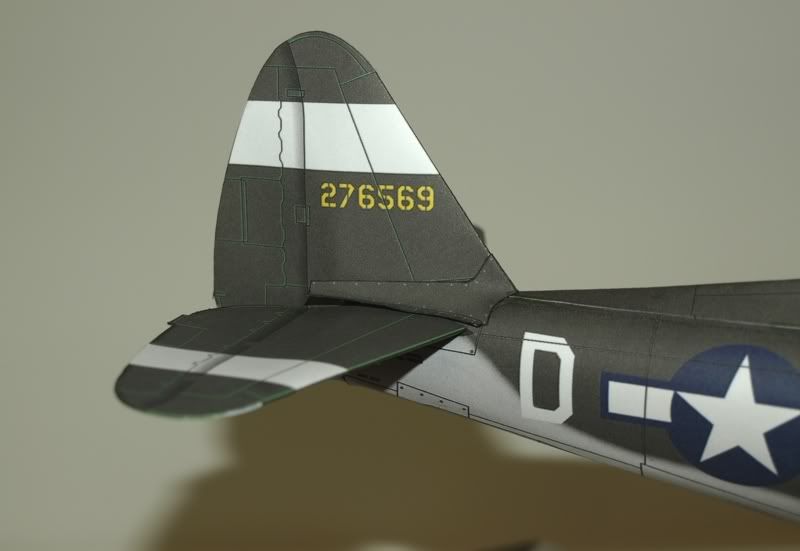
__________________
SUPPORT ME PLEASE: PaperModelShop Or, my models at ecardmodels: Dave'sCardCreations
|
| Google Adsense |
|
#17
08-02-2010, 08:29 AM
|
||||
|
||||
|
getting ready to skin the wings now...
and I remember back to the first P-47 build (Chautauqua) and I am reminded of the fact that the wing formers are pretty basic. (Refer back to post#15) Wing former consists of: main spar spanning wing to wing, 2 inner wing forms (that fit close to the fuselage) and 2 large stiffeners that also serve to maintain the right angle between the spar and inner formers. I didn't like the fact that there is no outer wing formers to help hold the wing shape, to help avoid crushing and to strengthen the area where I am now attaching wing Pylons. So...its time for another modification! Pretty straightforward, the pictures probably explain it best: 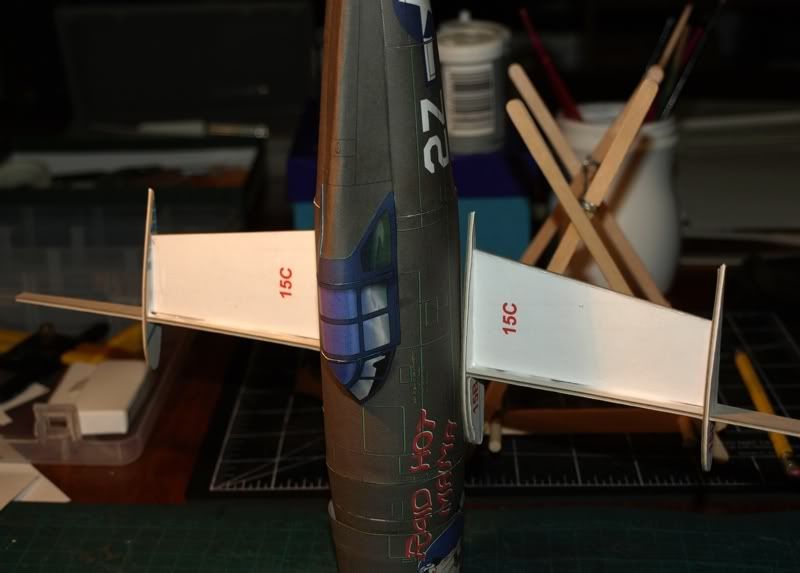 and the outer wing forms are positioned at the wing pylon mounting point. You may notice, I doubled up the front portion of the inner wing forms. I had the extra parts so I decided to use them just to create a little more gluing surface for the skins. This is also the area where you stretch and form the wing root fairing, so a little more rigidity here is a bonus.  This former modification is included in my P-47 kits from here on. These new Former parts have been added/changed. If I get a chance, I will eventually go back and update the first couple of P-47 kits. Wing skinning seemed to go a lot quicker, with the new outer form holding the wing shape while I glued the trailing edge, using some strip tabs for strength. Inner edges of the wings match the fuselage really really well! But its a little tricky getting them glued into place. I have no tips for this...my "attack and bash" method to building doesn't help, you just need to be patient and careful with your glue. 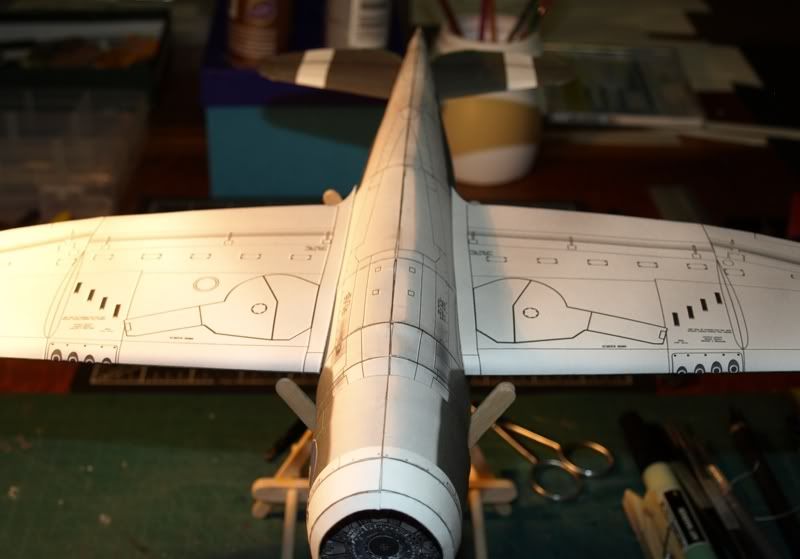
__________________
SUPPORT ME PLEASE: PaperModelShop Or, my models at ecardmodels: Dave'sCardCreations
|
|
#18
08-02-2010, 08:40 AM
|
||||
|
||||
|
I mentioned the Wing Pylons
(which I designed for the first two P-47s to handle the Extra Range Fuel Tanks) ...same parts again, but this time to carry Wing Bombs. I found a nice WW2 photo, of this Squadron P-47, showing an installed Wing Bomb...which I used as design reference for these Bombs. 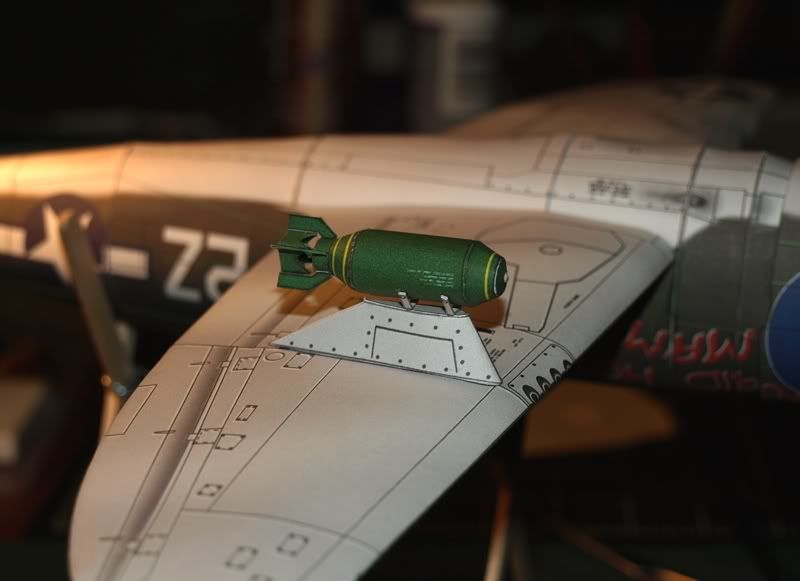 Heres a nice view, from above, of both Wing mounts in place. 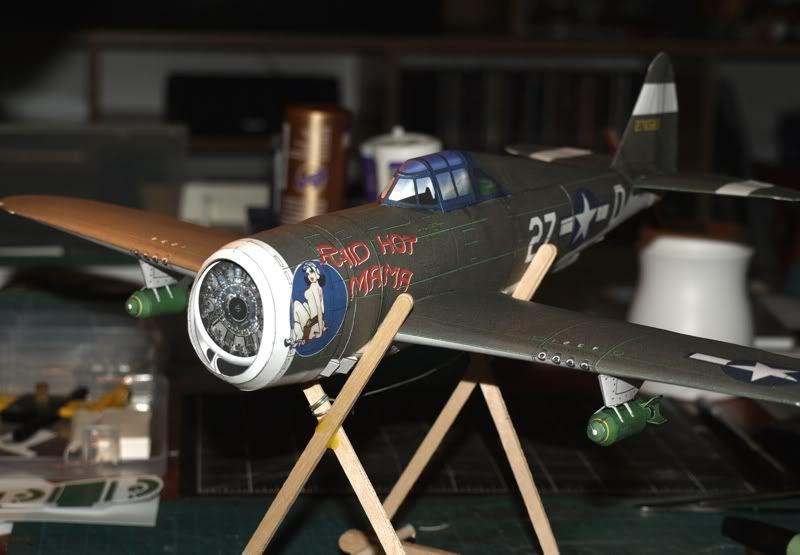 and to finish off the Wing installation, fit the fairings. Same fairings I designed for the first two planes, although I have made a small modification to the leading edge angle (to better match the wing shape when wrapped under the leading edge) and a small modification to the paint (to better match the leading wing edge paint). In the following photo, the wrap around ends of the fairing have been cut off for measurement, but the full fairing has a small wrap under section with matching paint scheme (so the visual effect is the same). Again, all these mods are applied to the kits. 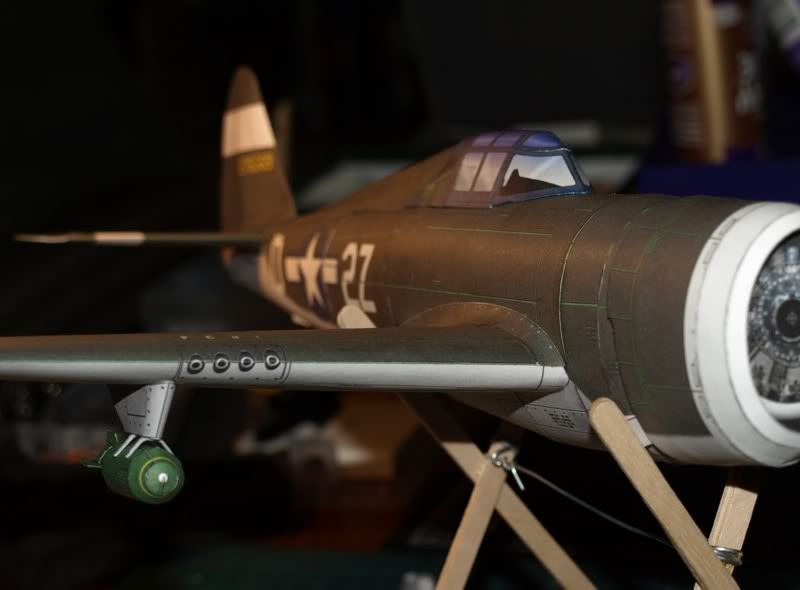
__________________
SUPPORT ME PLEASE: PaperModelShop Or, my models at ecardmodels: Dave'sCardCreations
|
|
#19
08-02-2010, 08:51 AM
|
||||
|
||||
|
and I finally got a Tail Fairing sorted out.
This last design fits really well, with upper and lower separate parts. (sorry the photo doesn't show that great...after gluing and pulling off four sets of test fit fairings, the Tail surface began to get quite messed up! You can see one of the patches I had to apply to the fuselage (upper left of the D)) I haven't quite got all the fairing glued down, but you can see the shape and how it lines up much better with the Tail parts. This new design also eliminates the need for upper fairings for the horizontal tails. 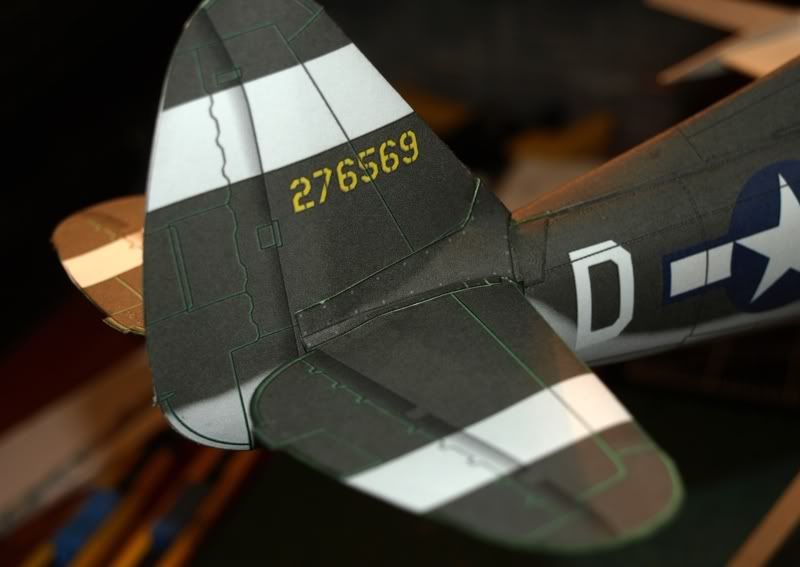 Fitting the underside fairings was easy as pie! but revealed one BIG error on my part. As I was gluing the fairings in place, I began to think they might look a little better painted gray, to match the underside of the plane. uh.....yes...the underside of the plane is gray... so why are the tail wings not gray?? lol ...back to the kit, to remove the green paint from the underside of the Tail Wings and the lower fairing parts! This issue only applies to this kit (Raid Hot Mama) but has been fixed!! 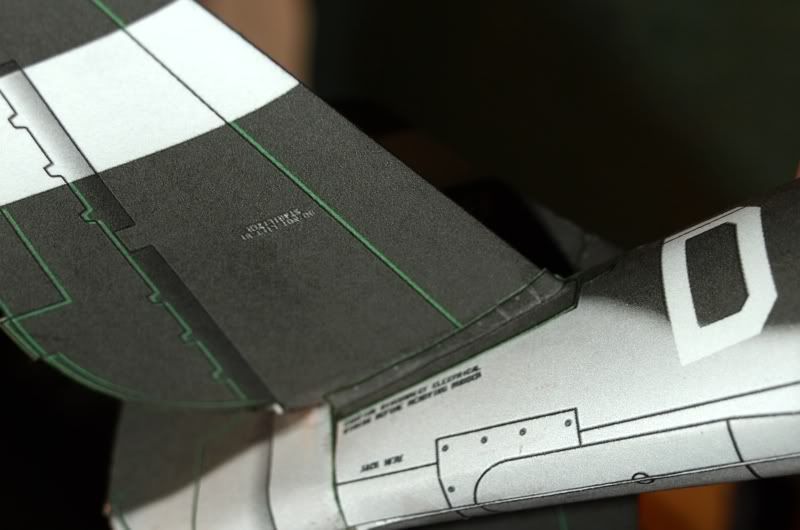
__________________
SUPPORT ME PLEASE: PaperModelShop Or, my models at ecardmodels: Dave'sCardCreations
|
 |
| Thread Tools | |
| Display Modes | |
|
|


 Linear Mode

