


|
|
|
#1
 07-26-2010, 09:42 AM
|
||||
|
||||
|
P-47D "Razorback" Thunderbolt - AirDave Prototype
Well, its time to get a Razorback D model sorted out!
I've already got one Paint scheme lined up for the first release, so my goal is to sort out any issues with the D version I have created. Originally I started with the Marek P-47D Thunderbolt and made all the necessary changes to create a P-47M and N versions. Most obvious change is the two different wing types. And as everyone knows, there were significant model issues to sort out as well: Internal Formers shape and Size adjustments Fuselage section shape and fit modifications Engine and Propellor Assembly redesign Landing Gear redesign Complete detail markings redesign and complete Repaint Addition of Wing Pylons, Landing gear inserts, Fuel tanks, Bombs, etc When turning to the Razorback D model, I was disappointed to see that Marek opted for a fuselage spine extension part rather than a new fuselage. Effectively the model is the same Bubbletop D version, with a spine part added. When I finally started this prototype test build, it turned out to be much better than I had anticipated though... it was obvious that it needed a number of modifications, but with carefully fitting the effect was very good indeed (imo). Anyway, follow through as I test build and make all the redesigns as I go. Please understand...this is quick and dirty build!! I am not edge colouring, dry fitting, or being very patient with the build. Glue is messy, fingers are dirty and work area is disorganized! MY goal is to deal with important and obvious areas that need redesign and getting to those assembly steps requires no wasted time or effort. Initially, this is the same fuselage build as with the M and N versions and all goes together as planned. This plane has all the adapted and modified fuselage sections. 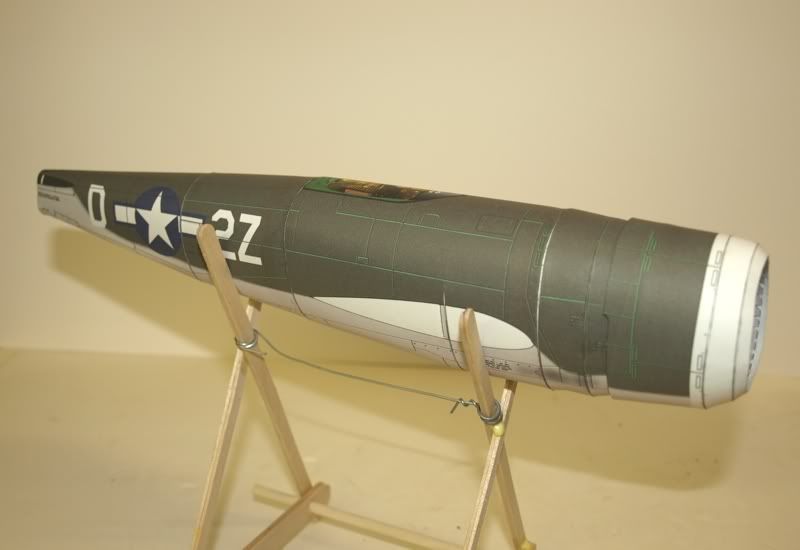 You will notice the fake cockpit image transferred over from the M version, although I know it will have to be redesigned because of a smaller cockpit openeing. You also get a sneak peek at the first paint Scheme available with the Razorback D version. 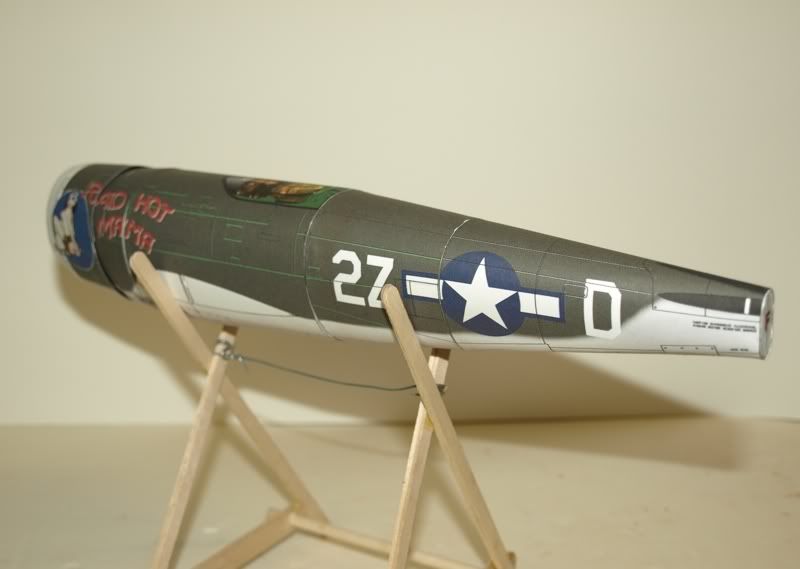
__________________
SUPPORT ME PLEASE: PaperModelShop Or, my models at ecardmodels: Dave'sCardCreations 
|
| Google Adsense |
|
#2
07-26-2010, 09:51 AM
|
||||
|
||||
|
Aircraft is, of course, "Raid Hot Mama", a P-47D-15 razorback from the 510 FS, 405 FG, flown by Lt. John Drummond in 1944.
I have a couple of photos of the original plane noseart and there is at least one plastic model version of this plane. I also found a couple of artistic versions of the noseart (with innacurate colours) ...but from all that, I was able to create the new NoseARt for this model. 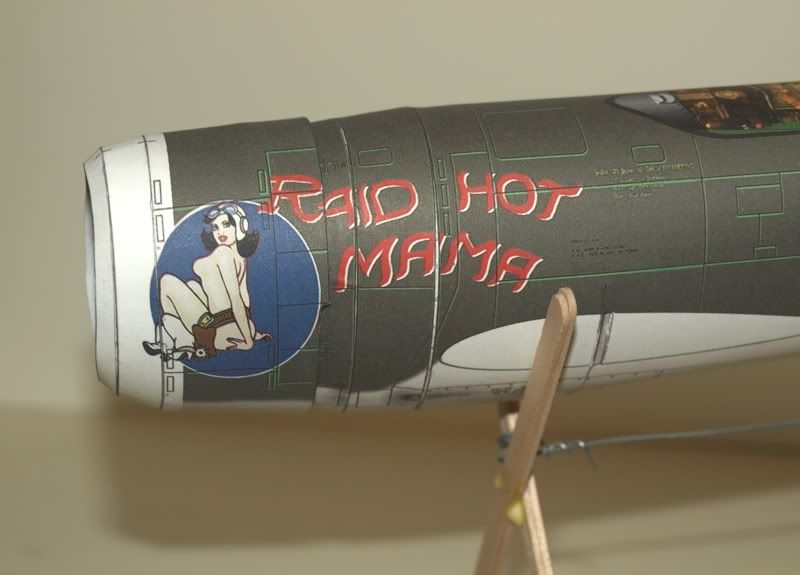 You can see I am at the point where I am test fitting the Canopy and "razorback" fuselage. This is just a cool shot of the new engine artwork, so I thought I would throw it in. 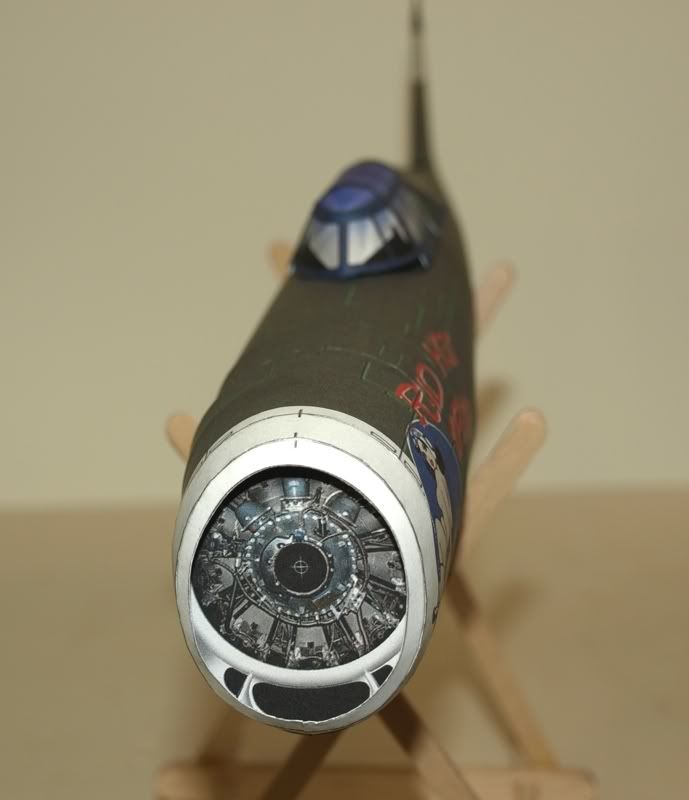 First issue I had with the "razorback" was the overall length of the part. Marek's original design has the spine part running into the Tail fin, whereas the tapered back should end in front of the Tail. I also had an issue with achieving the correct shape to the spine. The sides become concaved as you move back from the canopy and without creasing the part, I couldn't retain the shape. 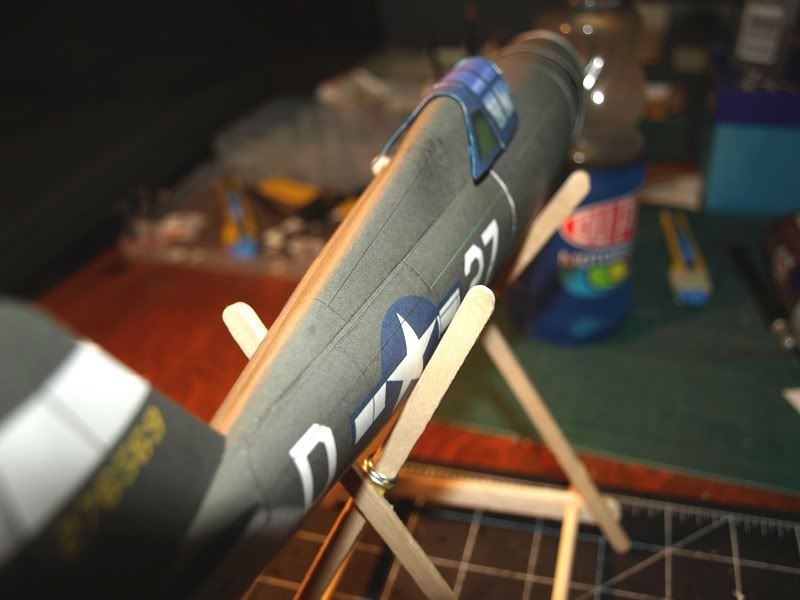 I can also see I have some tweaking to do with the canopy. overall look is good, but I'd like to make it fit a little better, it needs to be slightly upsized and I wonder if I can separate the sections for an opening Canopy? 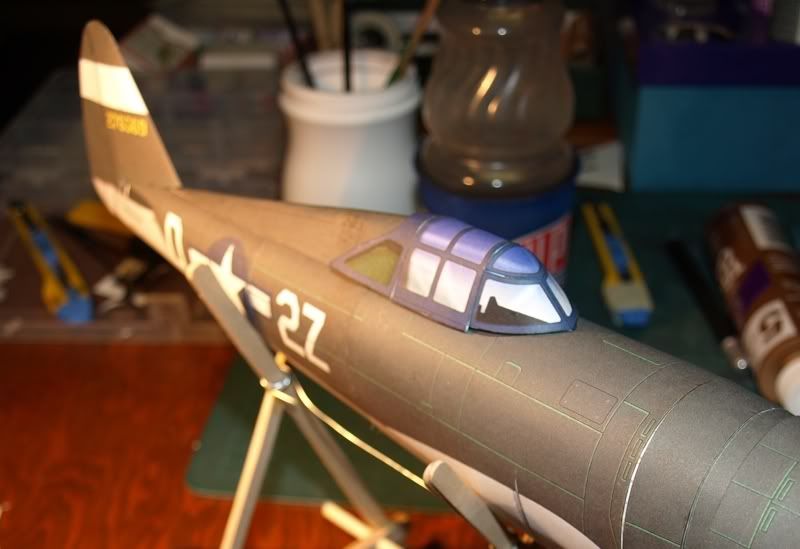 . .
__________________
SUPPORT ME PLEASE: PaperModelShop Or, my models at ecardmodels: Dave'sCardCreations
|
|
#4
07-26-2010, 10:03 AM
|
||||
|
||||
|
To improve the fit of the spine extension I had to make two major changes.
First the overall length has been shortened as well as the sides trimmed slightly, to create a better taper... allowing the razorback to end at front of the tail fin. And a simple 2 part former has been added to the inside of the razorback extension to help it retain the proper shape. With some edge colouring, the fit would be almost perfect. 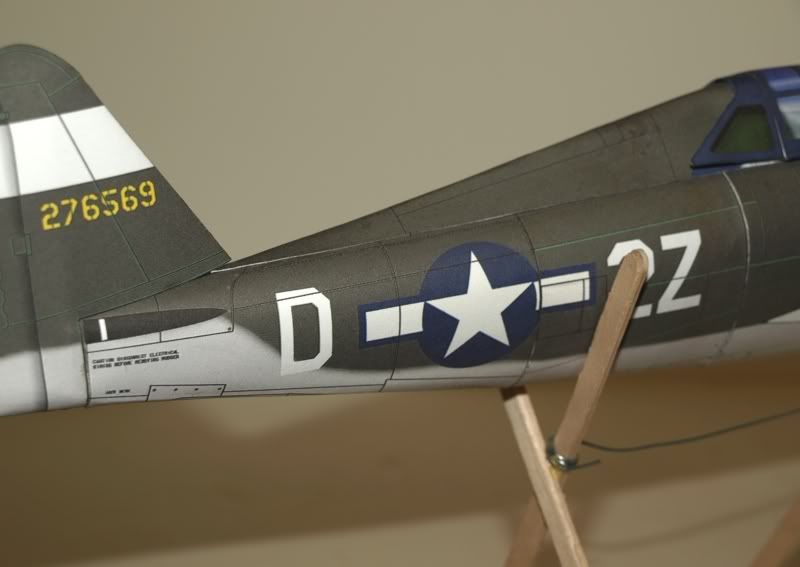 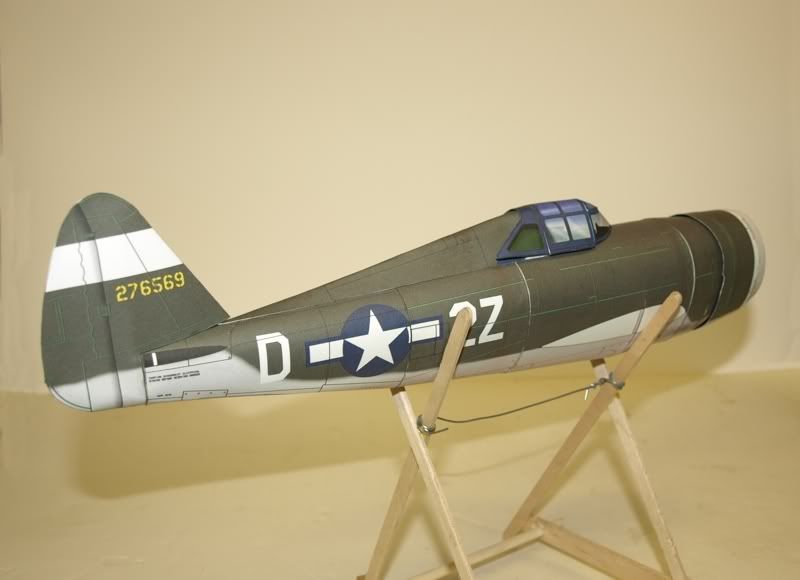 The canopy is being a little trickier...I haven't been able to design an opening canopy, but I have a few modifications to the canopy itself for a better fit. The overall size has been increased, the angle from rear to middle section has been changed. The forward section needs a few tweaks to allow it to sit better on the fuselage. And the biggest modification is the rear canopy section has been removed from the spine extension. As you see in the last photo, it is now a separate part that will sit over top of the new spine extension. I'll print out a new copy of the canopy parts and get them fitted for some new photos. 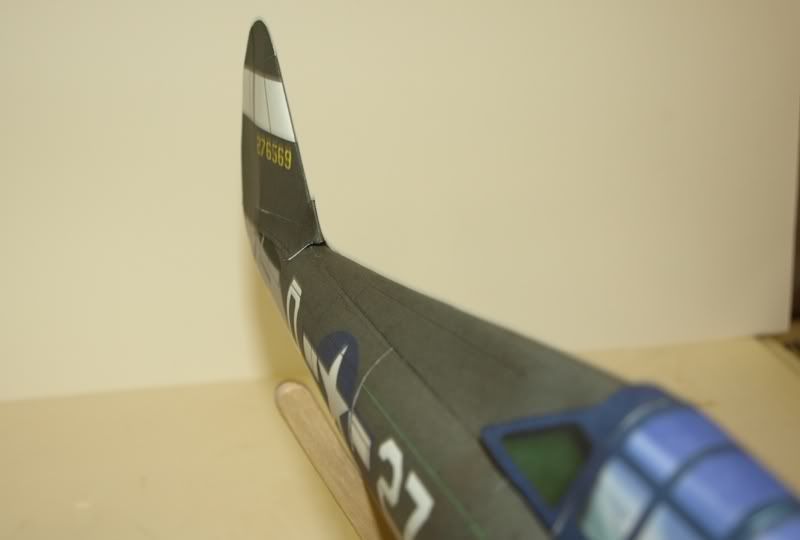 Right now I am sorting out a new Tail fairing setup...mainly to make sure the end of the razorback part is hidden, but it might also work better for other models. more to come...
__________________
SUPPORT ME PLEASE: PaperModelShop Or, my models at ecardmodels: Dave'sCardCreations Last edited by airdave; 07-26-2010 at 10:15 AM.
|
|
#6
07-26-2010, 01:19 PM
|
|||
|
|||
|
Can't wait!
|
|
#7
07-26-2010, 01:40 PM
|
||||
|
||||
|
Real nice Dave! A definite purchase!
|
|
#9
07-26-2010, 02:23 PM
|
||||
|
||||
|
Looks good Dave, I like it.
When you talk about an opening canopy, do you mean you want it to move, on rails? Or just one that you can position either open or closed, depending on builder preference? If the latter, it simply slides back and separates at the greenhouse/windshield segment. I'm sure you can see it on many photos.
__________________
Put on hold build (someday I'll finish): F-35A Lightning II 1:72 Previous builds: cMags' Card Model Builds
|
|
#10
07-26-2010, 03:16 PM
|
||||
|
||||
|
Nevertheless, it looks great, Dave.
|
| Google Adsense |
 |
|
|


 Linear Mode

