


|
|
|
#41
 10-21-2016, 02:07 PM
|
|||
|
|||
|
The self-supporting paper rangefinder is nothing short of astounding.
__________________
This is a great hobby for the retiree - interesting, time-consuming, rewarding - and about as inexpensive a hobby as you can find. Shamelessly stolen from a post by rockpaperscissor 

|
|
#42
10-22-2016, 03:25 AM
|
||||
|
||||
|
Hi,
thx gents for being so frindly to me..  the stairs to the fire control shelter had to be made to and the reworked range finder (because it was a bit to short)... 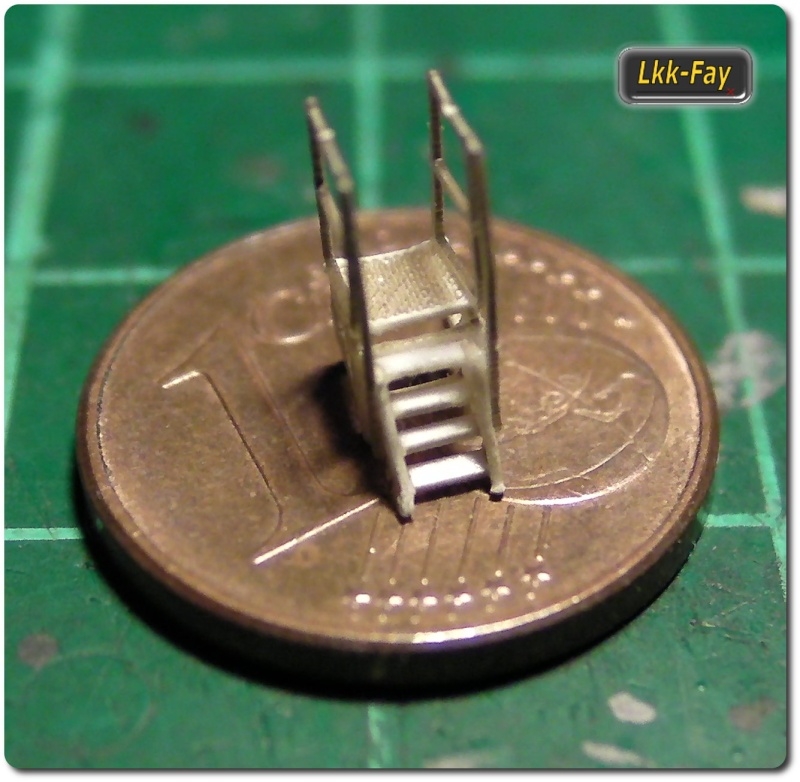 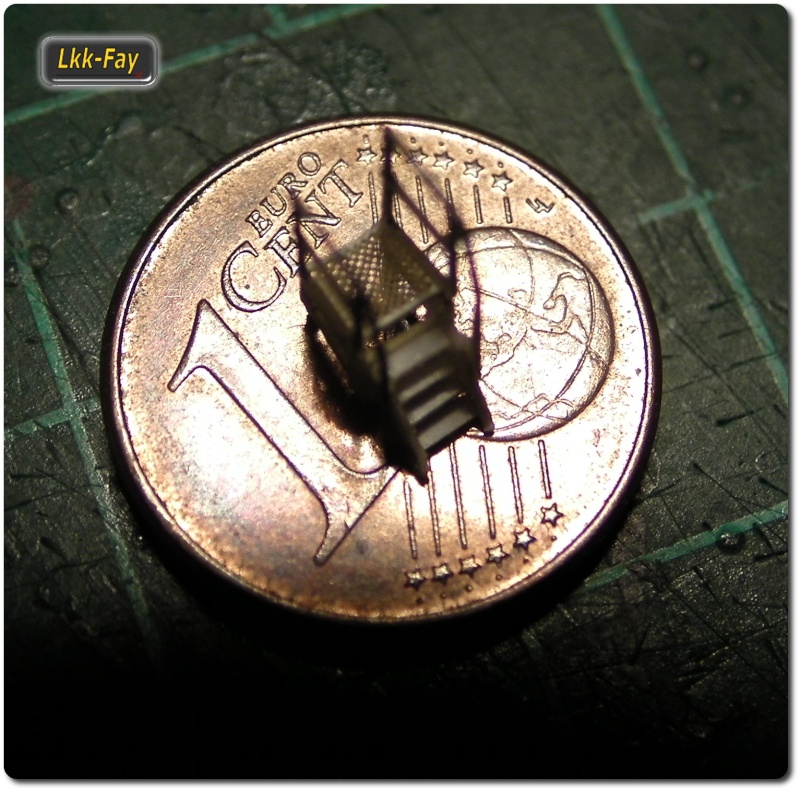 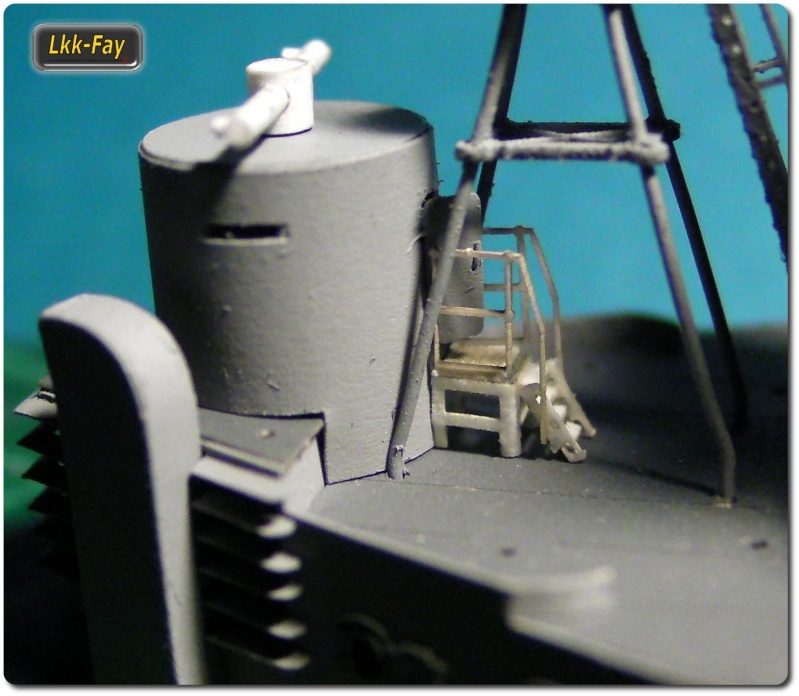  Huge spotlights .... These were lined inside with alufoil. the compass platform was provided with a surrounding panel and the first ladder was installed on the side of the cooling tower. The movable spotlights were equipped with four micro handles(paper) on the front .... 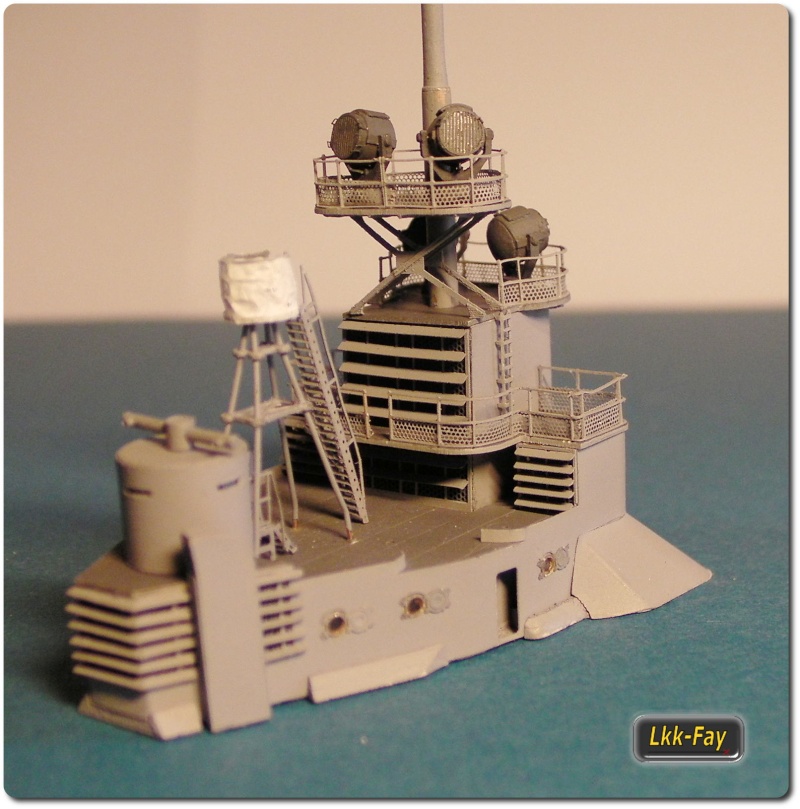 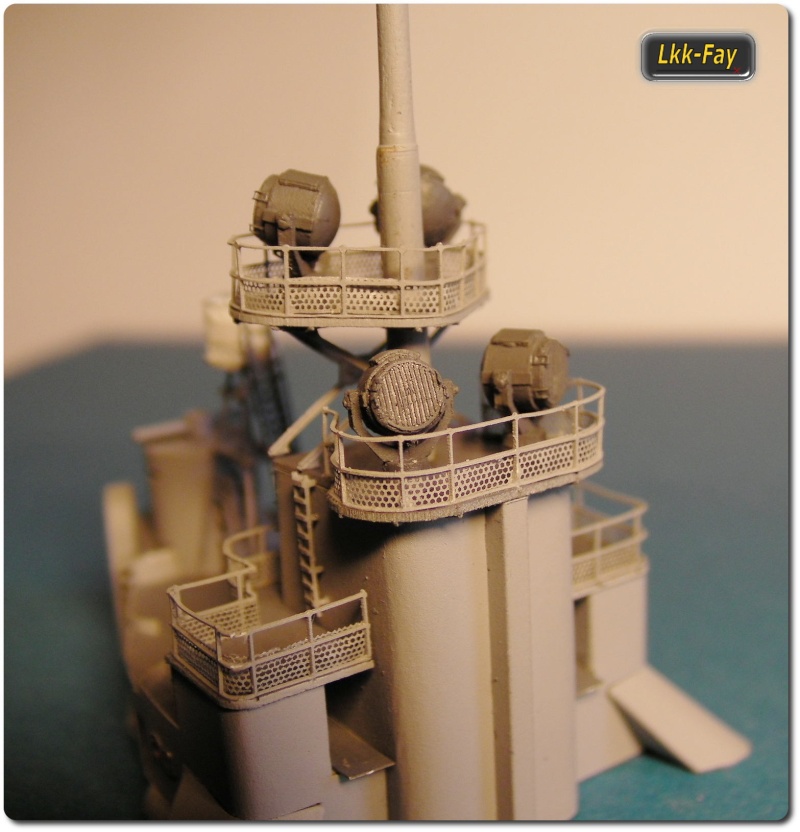 for this structure was also the need to design a other kind of companionways i call them "combination companionways" in perforated sheet metal Style. They have a foldable connector(up to 180°) for the railing. In the pictures it looks as if they have too much air below, but that comes through the underlying paper ... (Again, the top platform is still not fixed and is not yet optimal.  ) )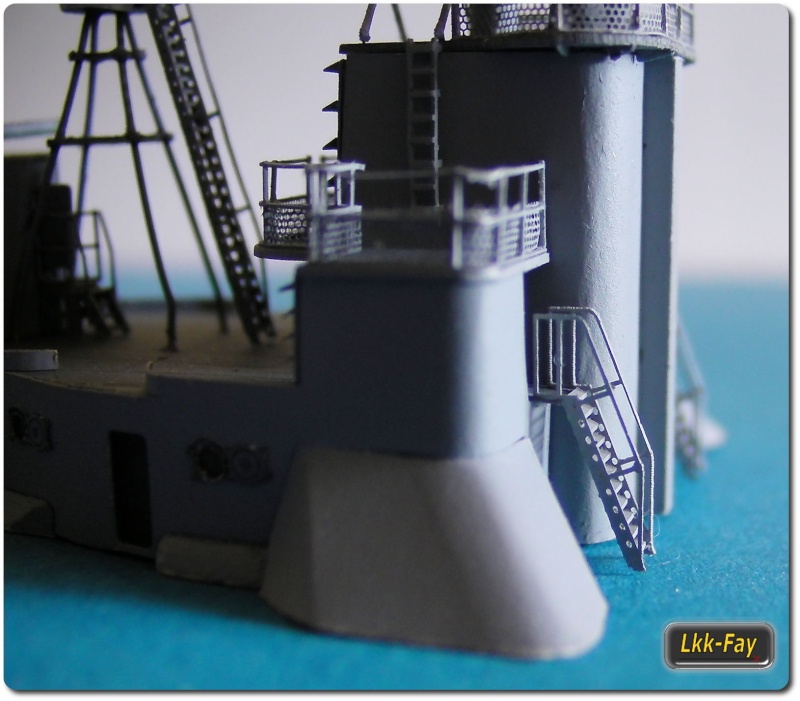 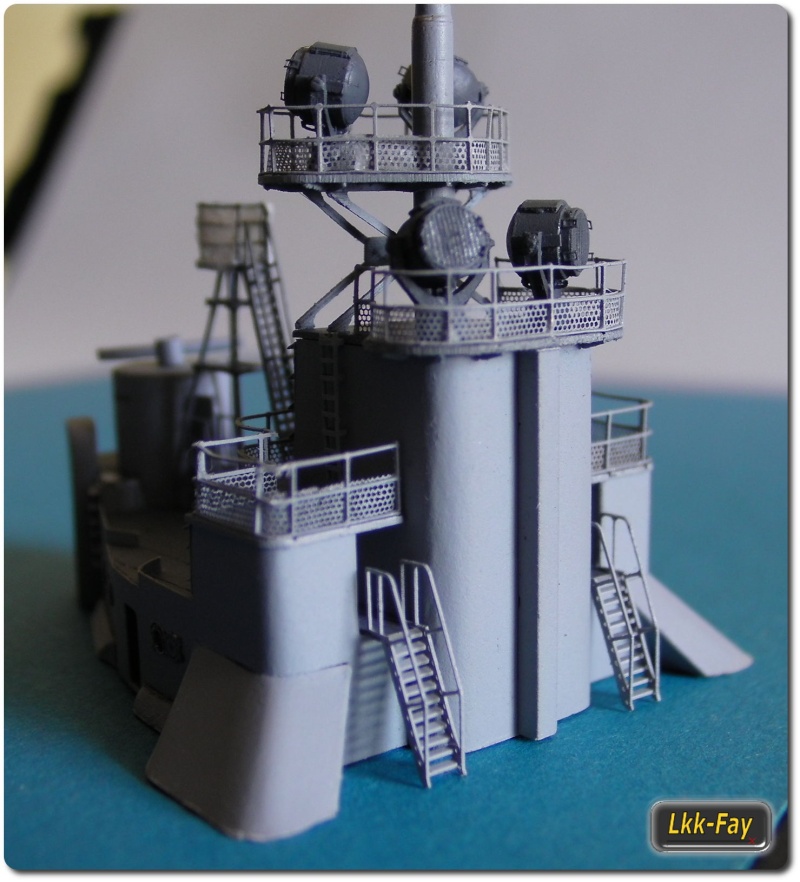 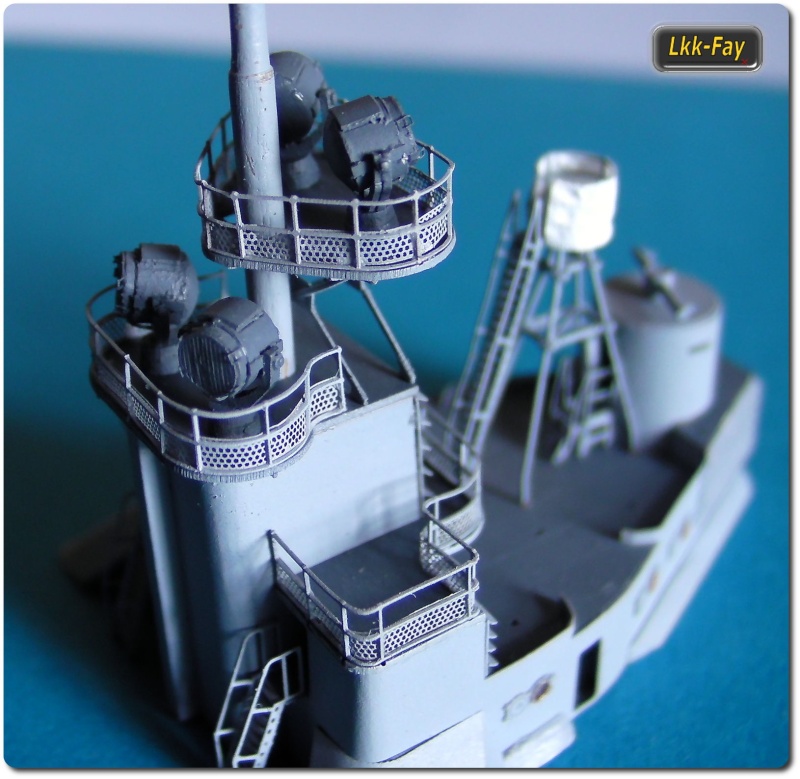 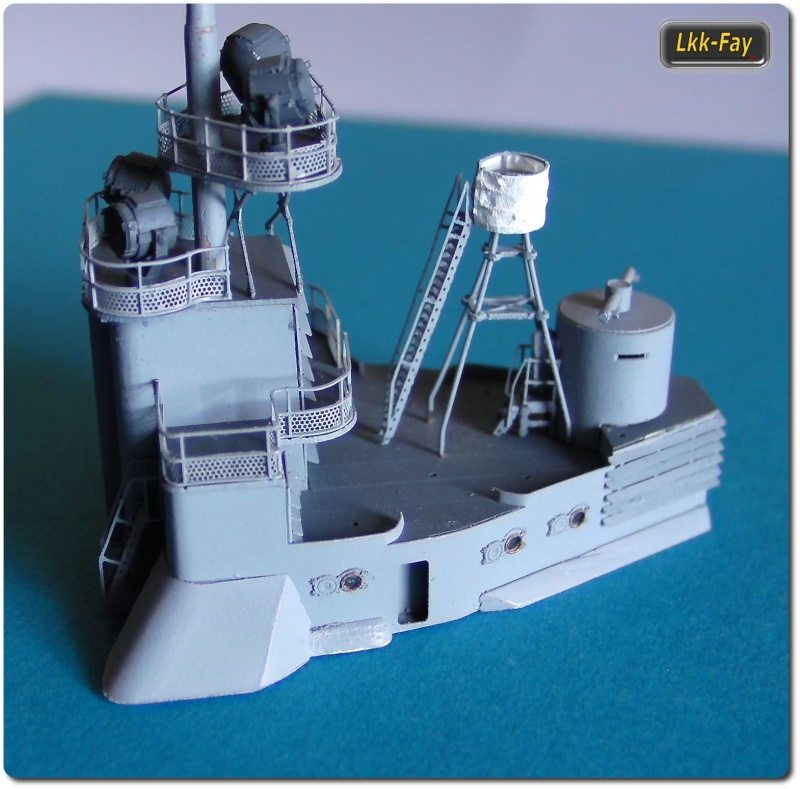 Regards Martin
__________________
and here a quick Link to my Shop http://www.lasermodelle.de Last edited by Lasermodelle; 10-22-2016 at 04:02 AM.
|
|
#43
10-22-2016, 12:02 PM
|
||||
|
||||
|
Hi,
and now to give you an impression where we are at that Time...       The production of the 8.8 was done ... The first Prototype was showed previously (was not that great done...) So i present you now a not already painted one w/o the shield so you can see i did not use some plastic for the barrel. But where is sunlight is also .... i discovered later that the barrel tends easily to get broken and so i used inside 0.3mm wire to make it a bit more stable. 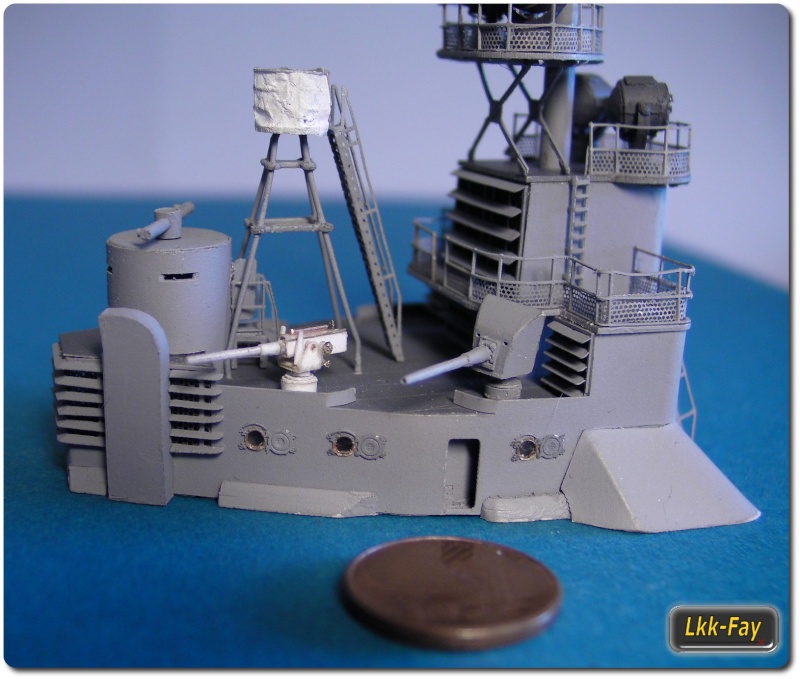 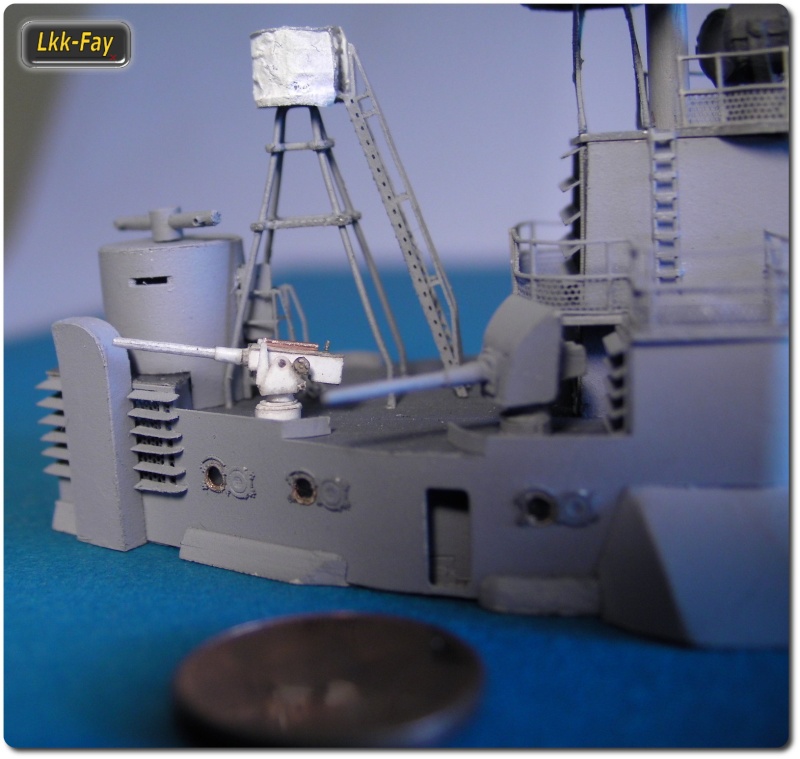 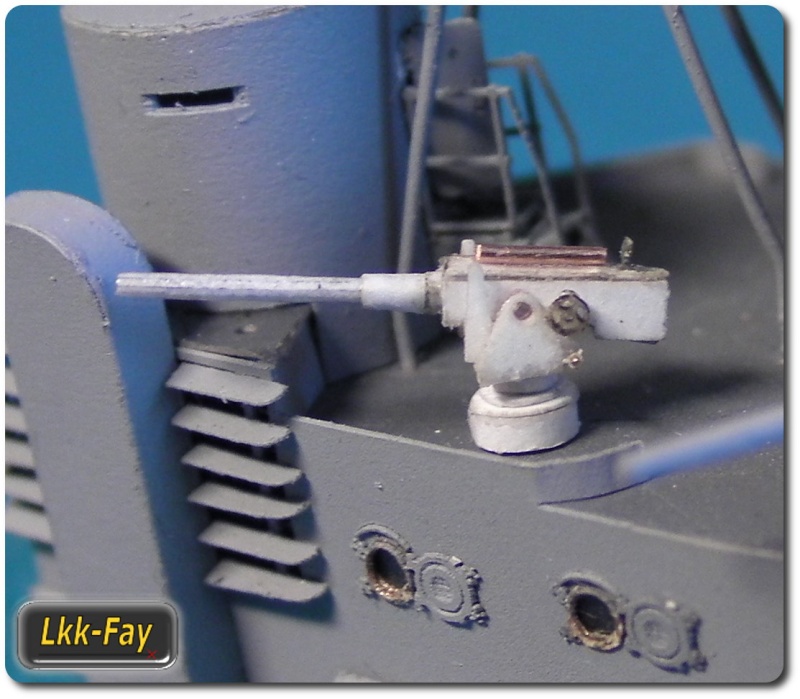 The gun have over all 20 Parts and additional wire for the hand wheels and the barrel Note for the photo relatetd guys here... This are alltogether macro pictures taken whit an distance to the Object between 2-3 cm It is finally done, the aft deck is ready.The 8.8 have been seated and the splinter protection walls (is this term right ???) right next to them. Ladders placed, doors mounted and crampons are seated. 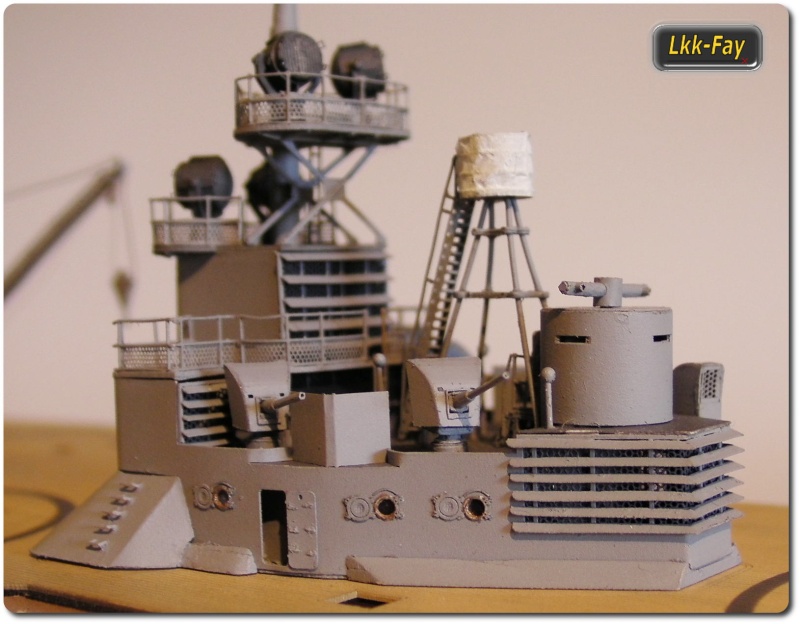  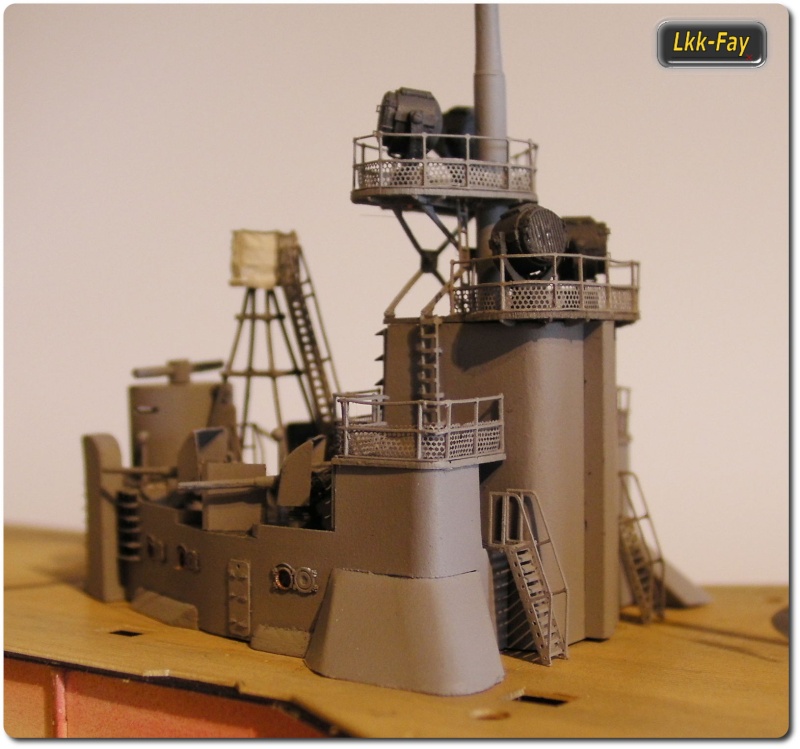 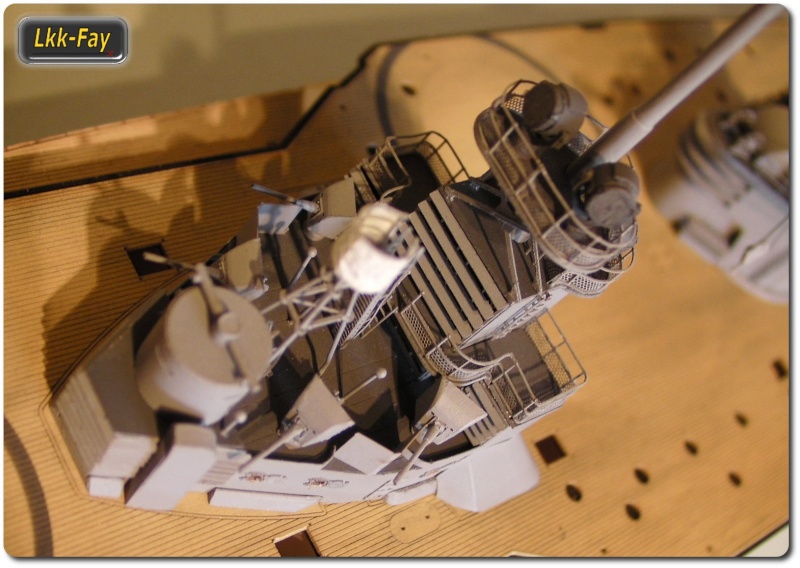 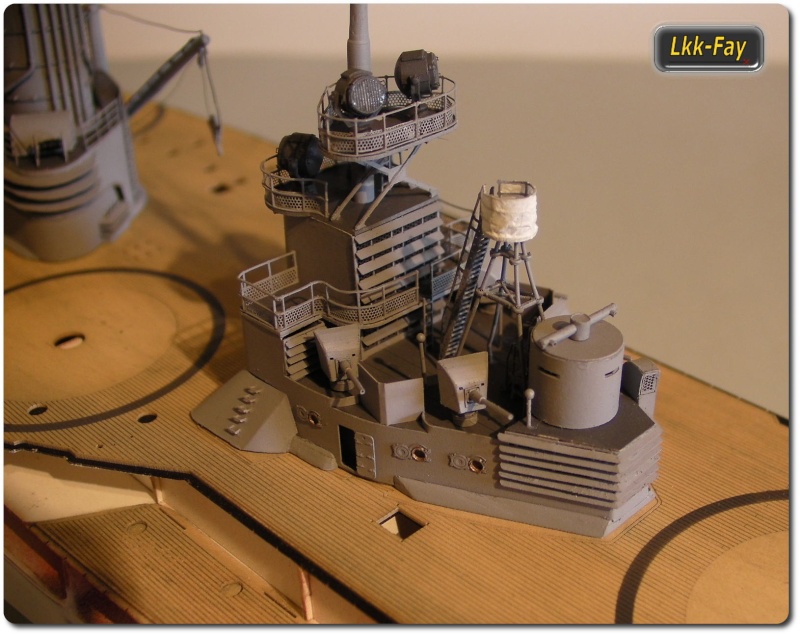 So I was turning to the bridge ....
__________________
and here a quick Link to my Shop http://www.lasermodelle.de
|
|
#44
10-25-2016, 03:51 AM
|
||||
|
||||
|
Hi,
the first parts for the bridge are arranged here together... 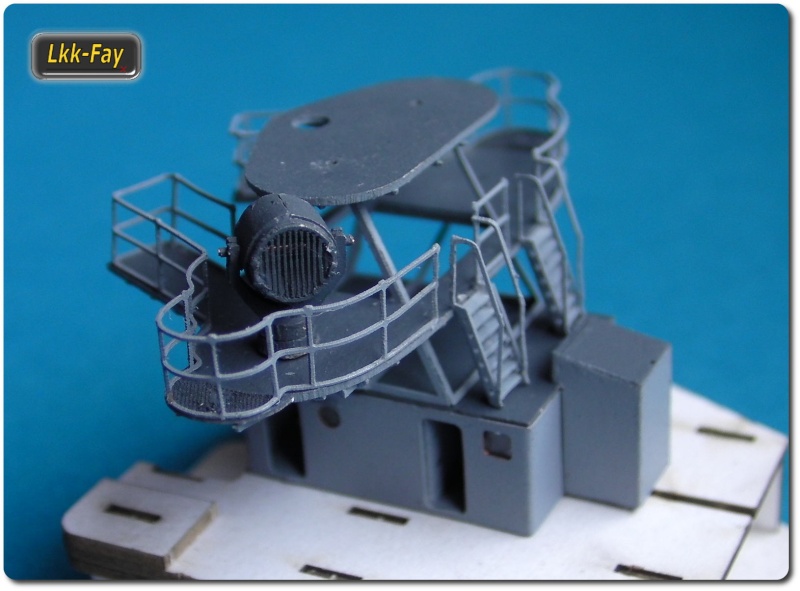 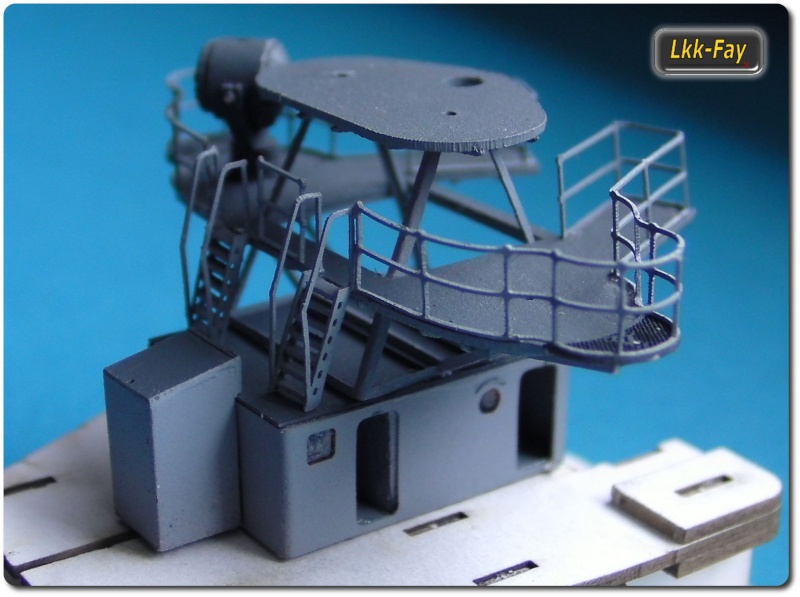 The chartroom has the dimensions of 15,1 by 20,6 mm (w/o ventilation shaft) and the spotlight is just for testing purpose placed here. 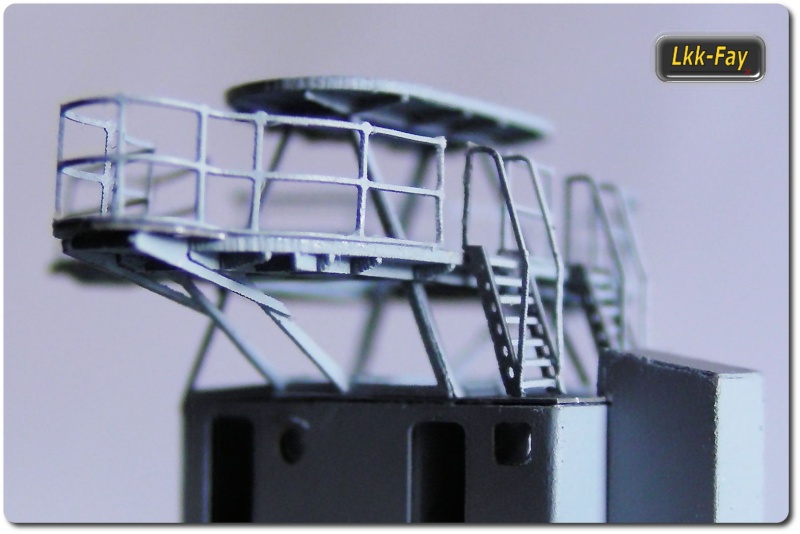 Also under the platforms your will find the necessary structures.... 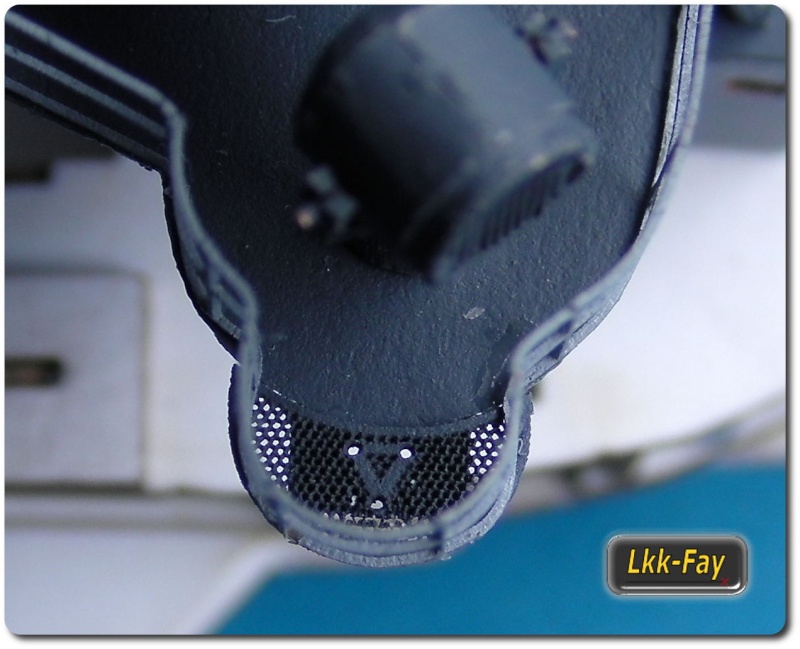 The platforms of the MG stands are equipped with an extremely fine LC-mesh. Regards Martin
__________________
and here a quick Link to my Shop http://www.lasermodelle.de
|
|
#45
10-25-2016, 12:15 PM
|
||||
|
||||
|
The level of detail and superb workmanship make this a work of art. Well done!
Dave
|
| Google Adsense |
|
#46
10-26-2016, 04:06 AM
|
||||
|
||||
|
Hi,
@chaparral2d: Thx for tis kind words. But let me clarify one thing. It takes not an Artist to build such a model out of the Kit but you should know what you do whit the Material and the Paint. In other words it is on the Scale from 1 to 5 a 5. The first bridge prototype is dead, long live the second prototype ... I had forgotten two port holes in the back (aft) and on the side walls was a slight compression next to the doors, windows and port holes.... 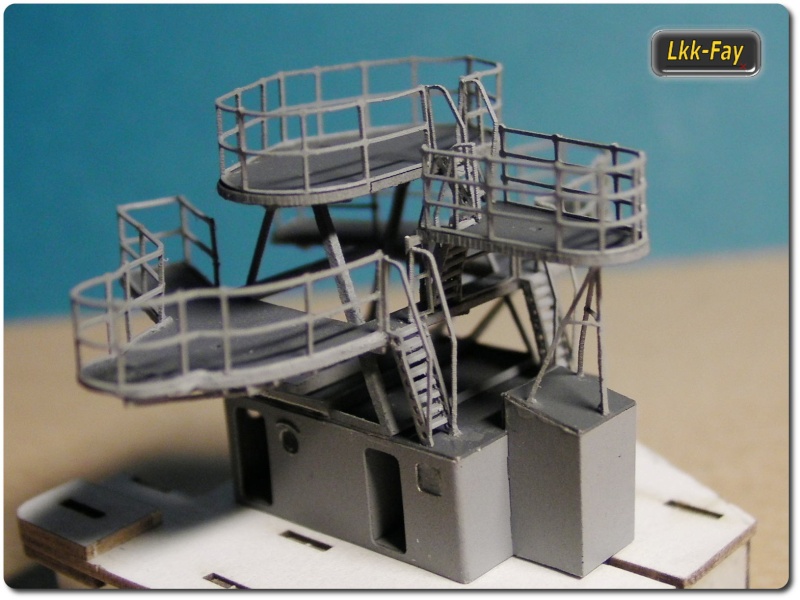 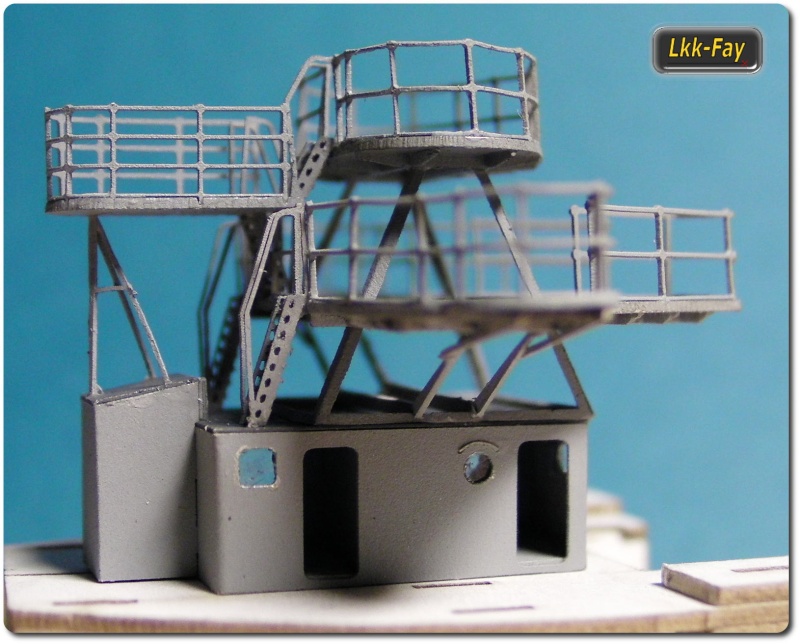 Afterwards, the frame construction for the bridge casemates began. The outer skin is still missing, but for the first reasonable sample on deck it was already good to go. 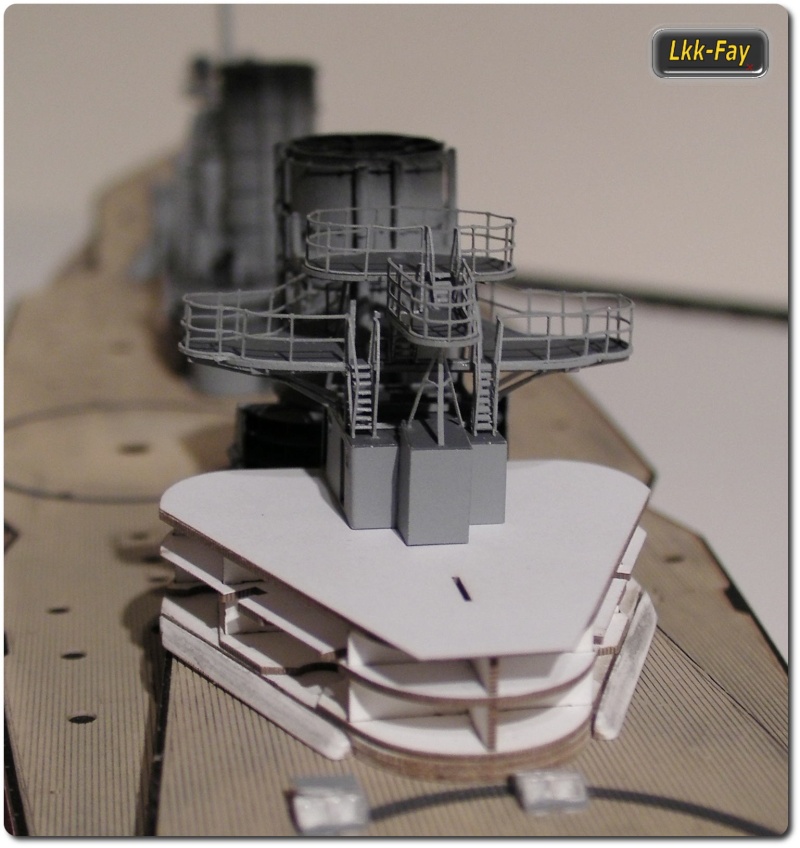 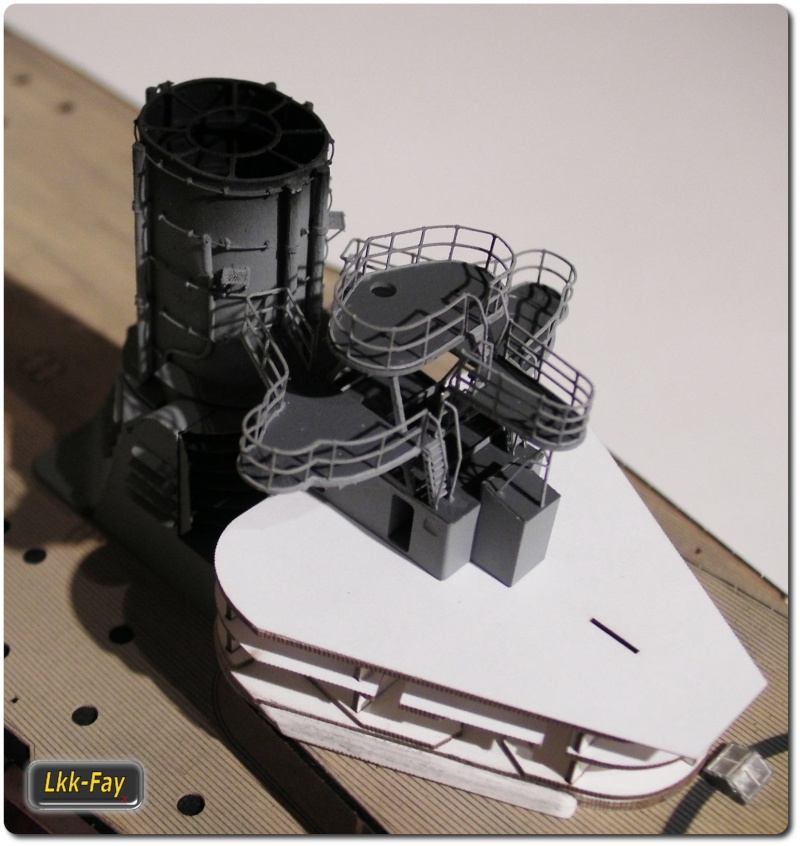 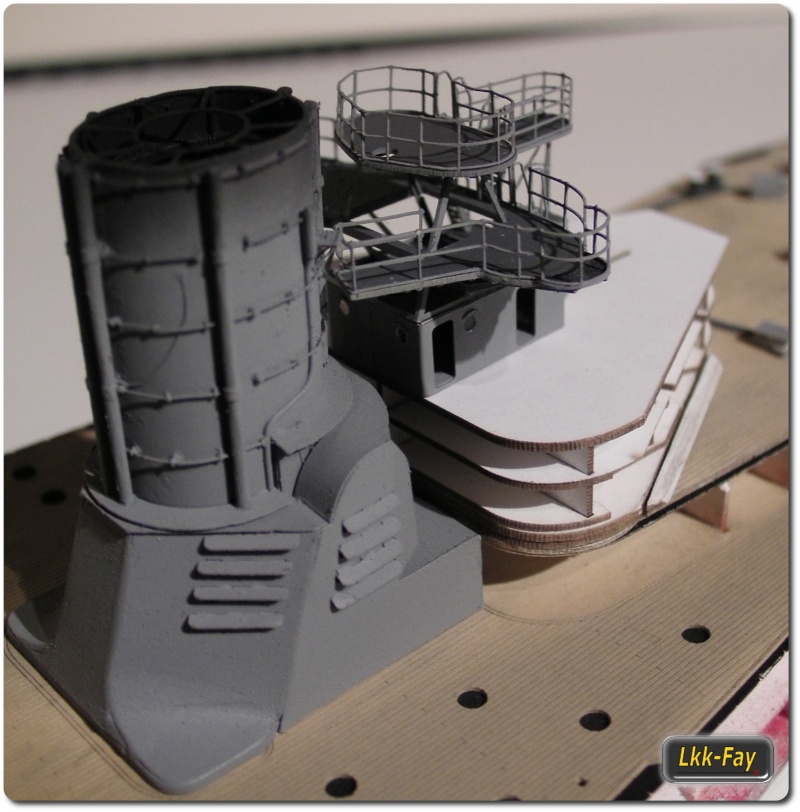 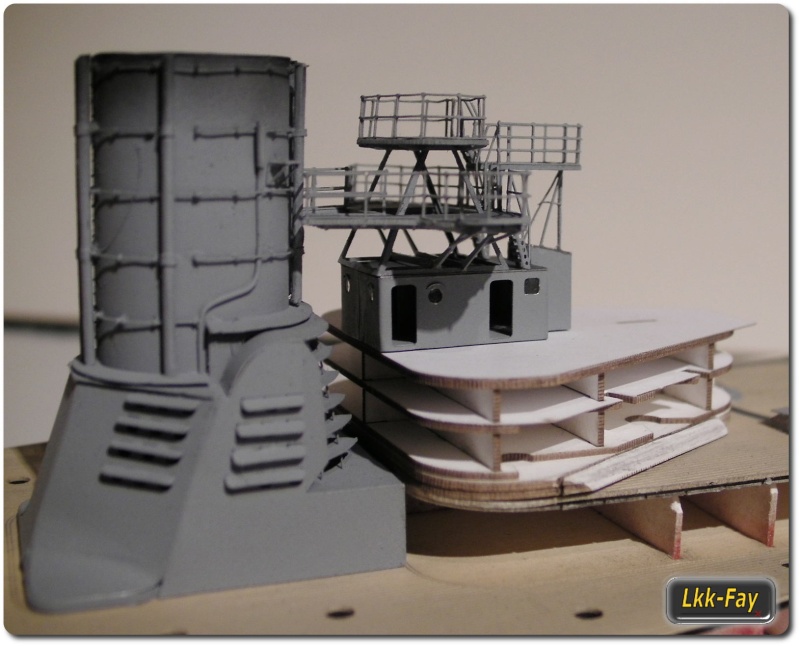 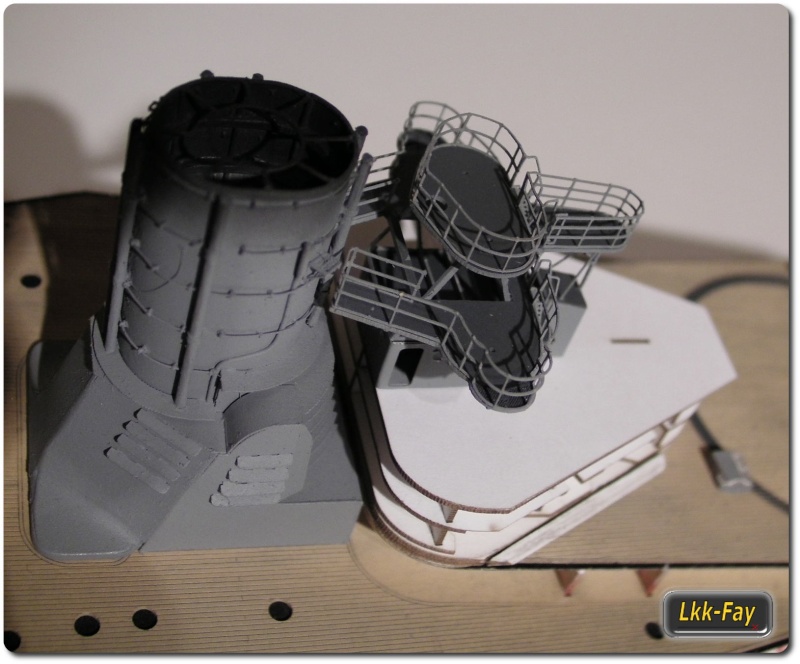 The big air channel between the chimney and the bridge has to be adjusted somewhat, but it fits already.
__________________
and here a quick Link to my Shop http://www.lasermodelle.de Last edited by Lasermodelle; 10-26-2016 at 05:00 AM.
|
|
#48
10-26-2016, 06:21 AM
|
||||
|
||||
|
Hi,
Thx Don! A skin had to be designed and pulled around the frame ... 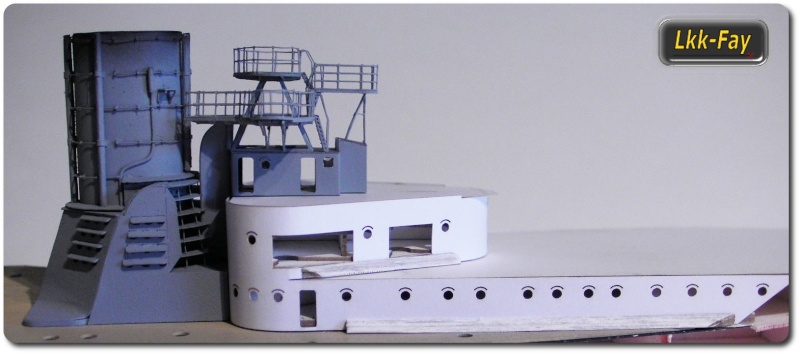 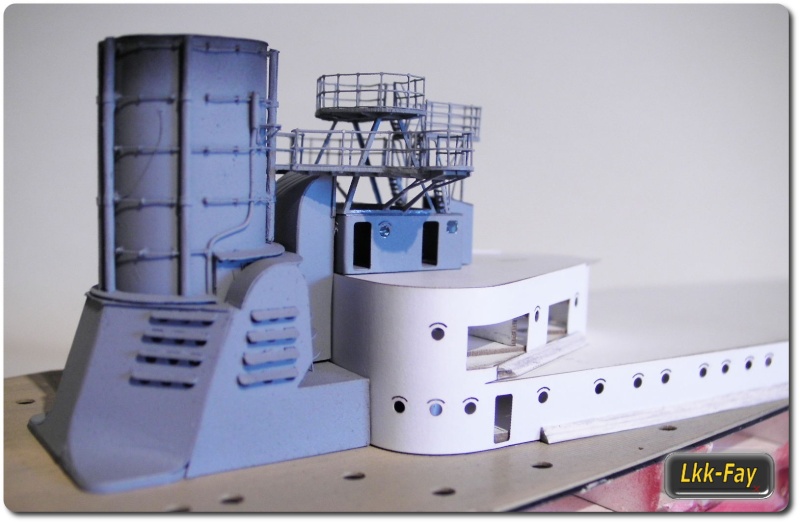 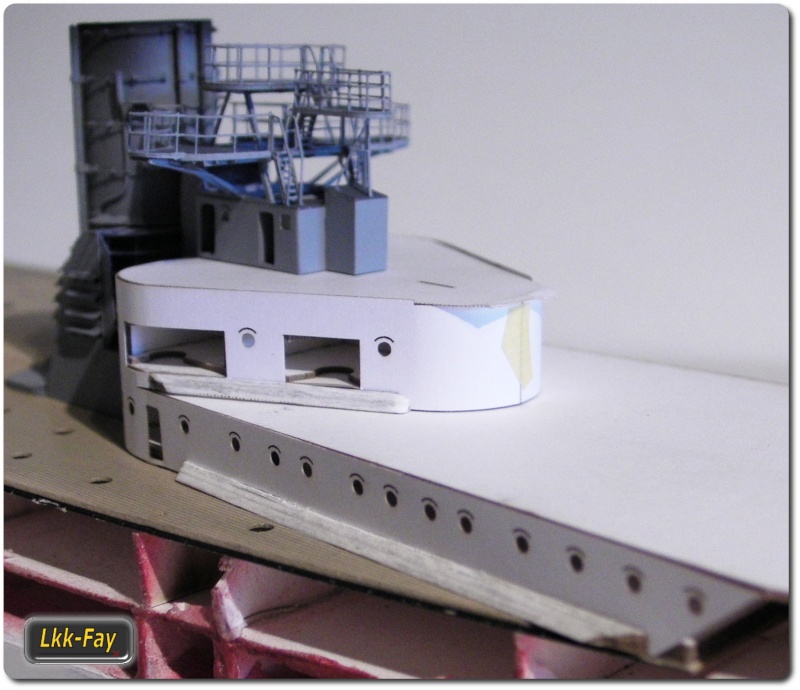 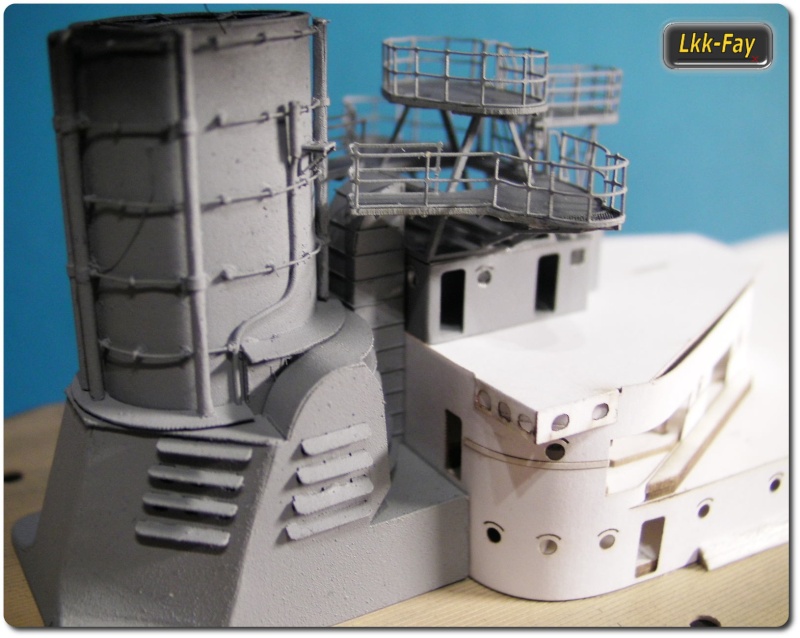 This picture is taken at a distance of about 20 cm .... Since then everything looks much more harmonious. Here the previously mentioned air duct with "ribs" (no i am not talking abut spare ribs ... ).The "ribs" have a thickness of 0.160mm and a depth of 0.180mm ...  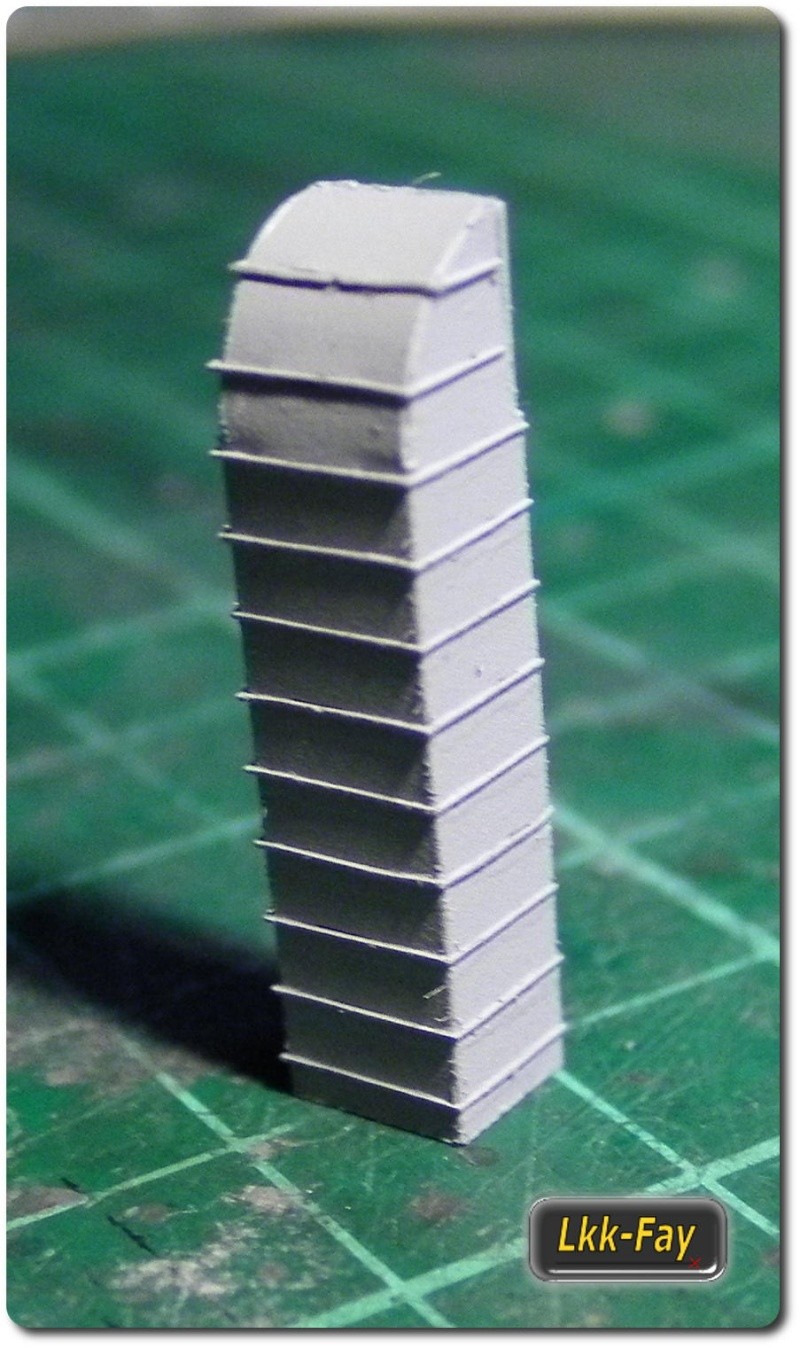 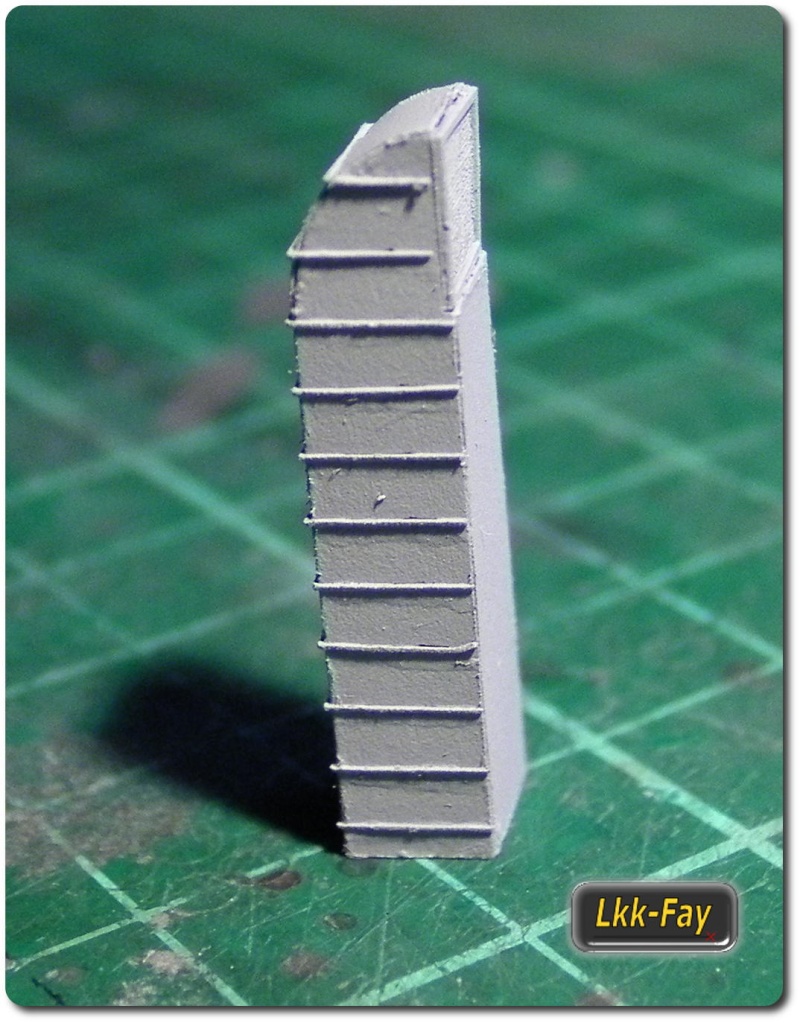 This one is not yet built optimally, but the next one will be turn out better.
__________________
and here a quick Link to my Shop http://www.lasermodelle.de
|
|
#49
10-26-2016, 02:49 PM
|
||||
|
||||
|
Hi,
the port holes were now all provided with "eyelashes". For these in the arches, I created customized eyelashes, so that these fit with the curvature of the side wall. Later, the port holes are still glazed and partly covered with caps. 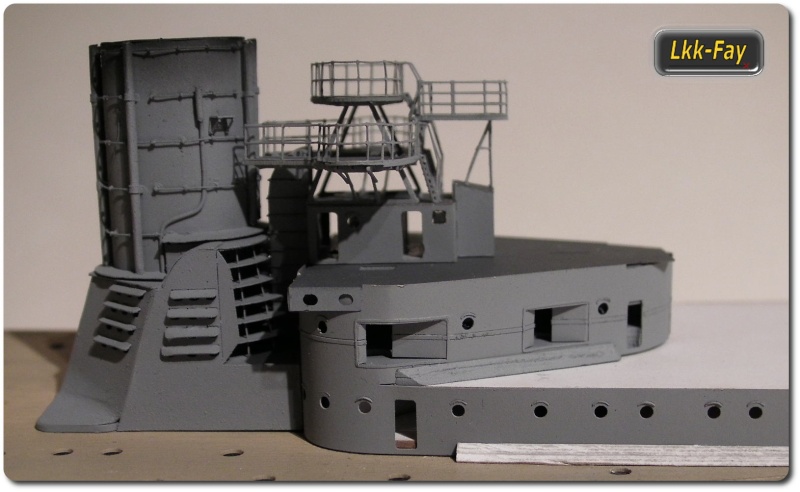 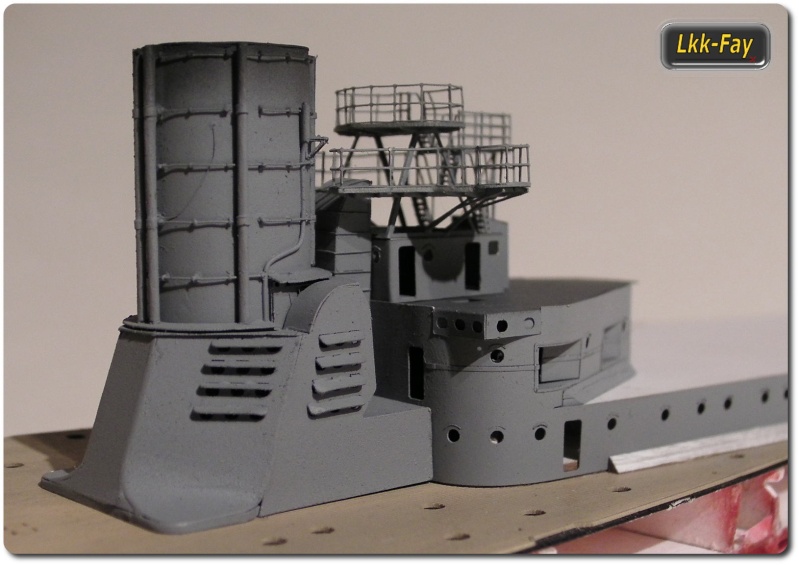 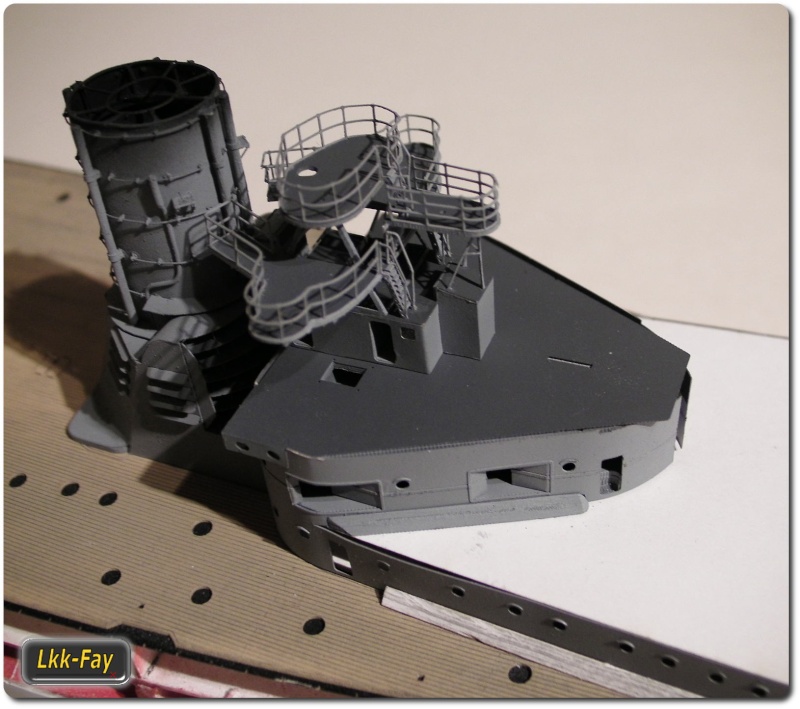 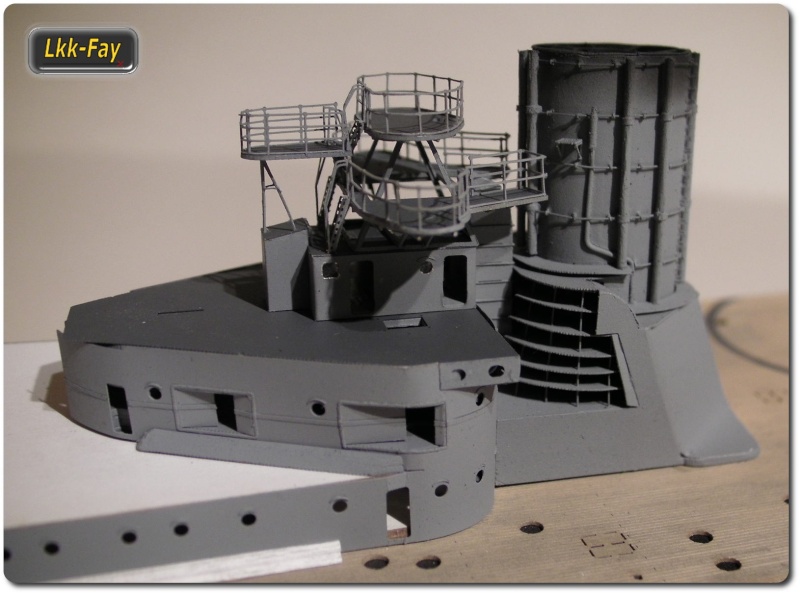 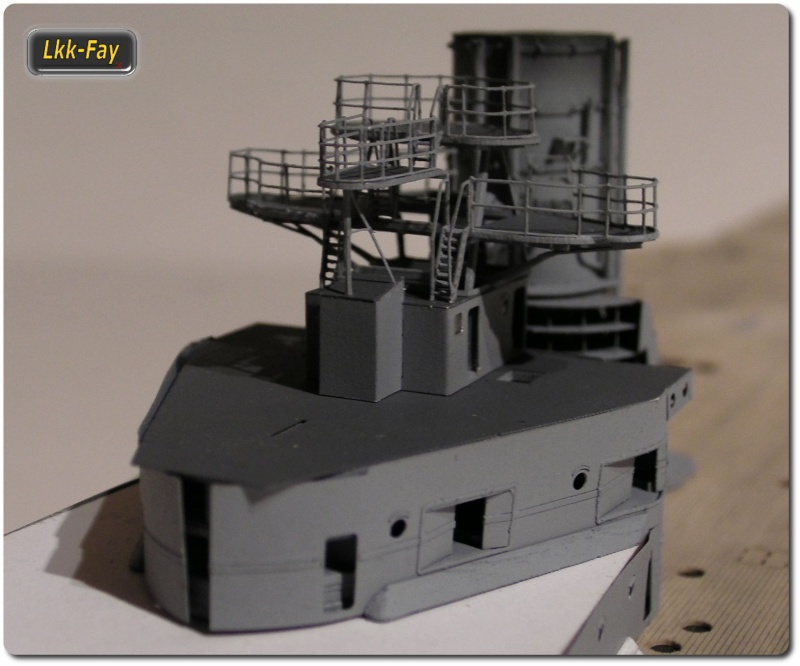 So far, everything has been just stuck together, so therefore this vaults and gaps. As an overview these pictures. The side walls were provided with the armor strips and fixed temporarily to the occasion with double-sided adhesive tape, The hull was almost closed and the decks were completely adapted to the new conditions. I was able to recycle the spinners and bollards of the fore deck. On the bridge the fire control station was built and one of the MA casemate module where inserted. 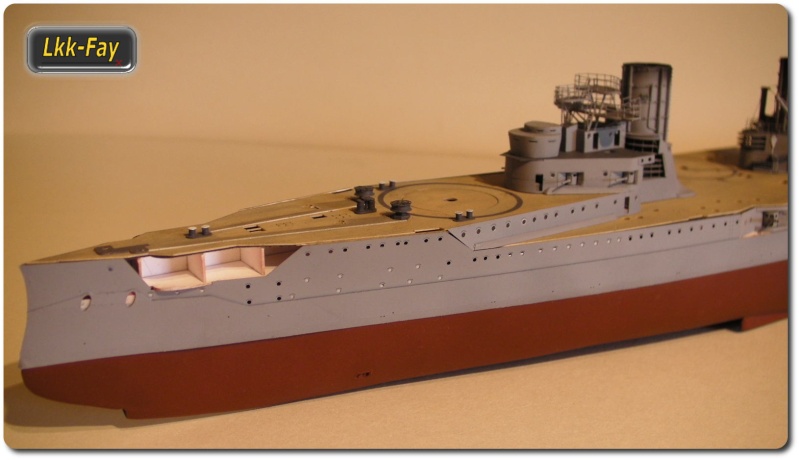 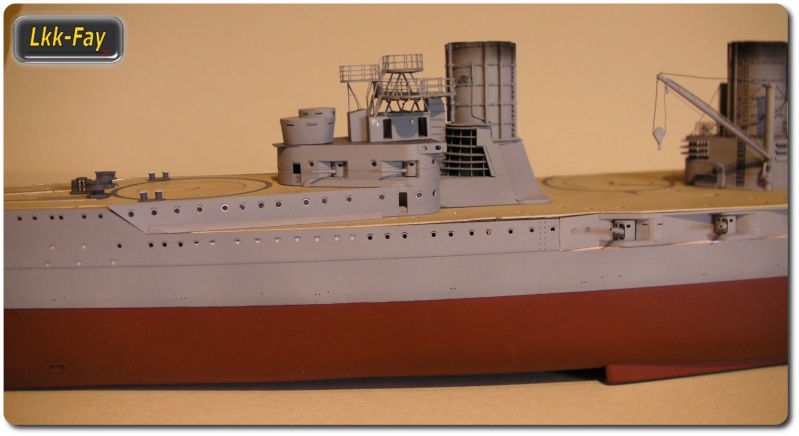  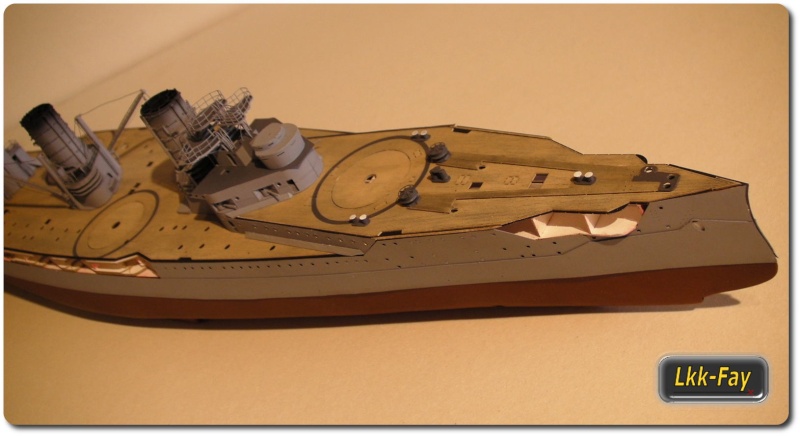 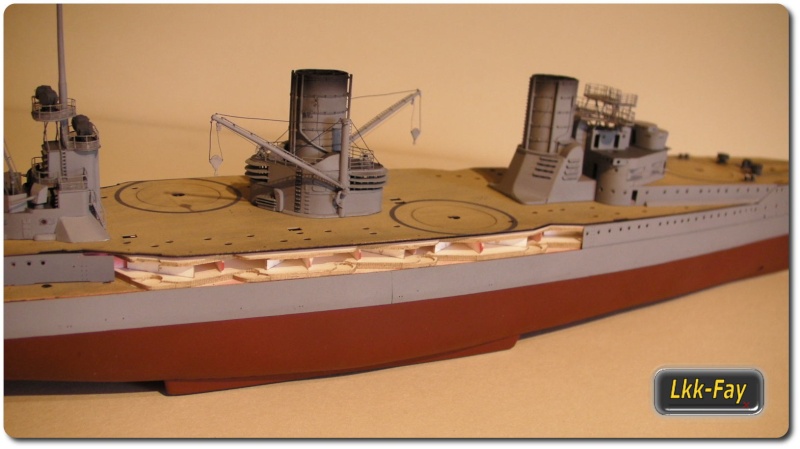 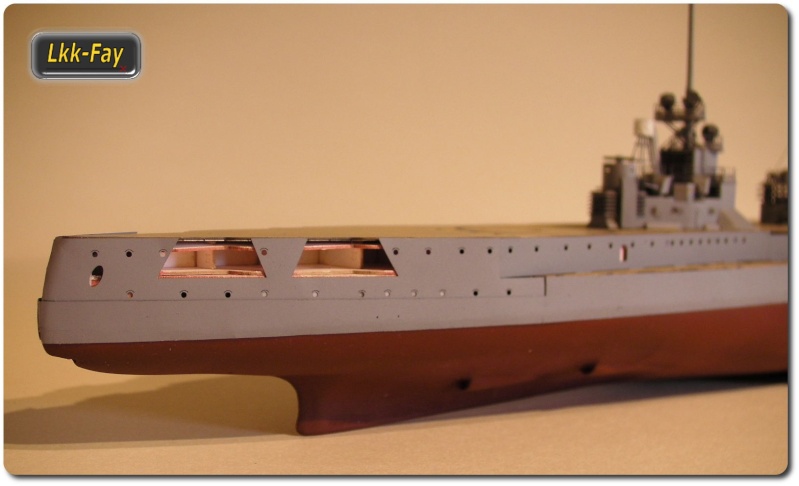 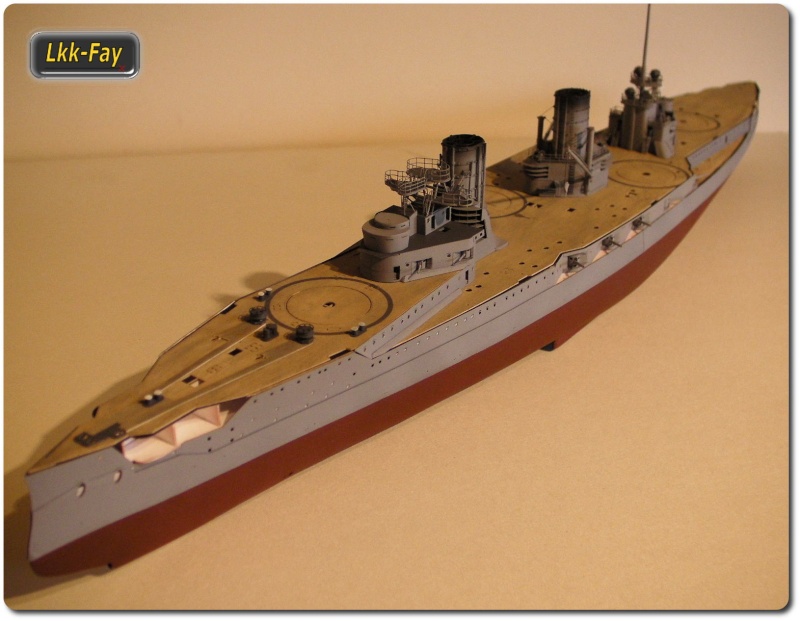 regards Martin
__________________
and here a quick Link to my Shop http://www.lasermodelle.de
|
|
#50
10-27-2016, 11:27 AM
|
||||
|
||||
|
Hi,
It went on with the side platforms. I designed these so that you can fold them out or fold backwards away. (in order for this, the ships's rail and side plates have to be separated / adapted!) 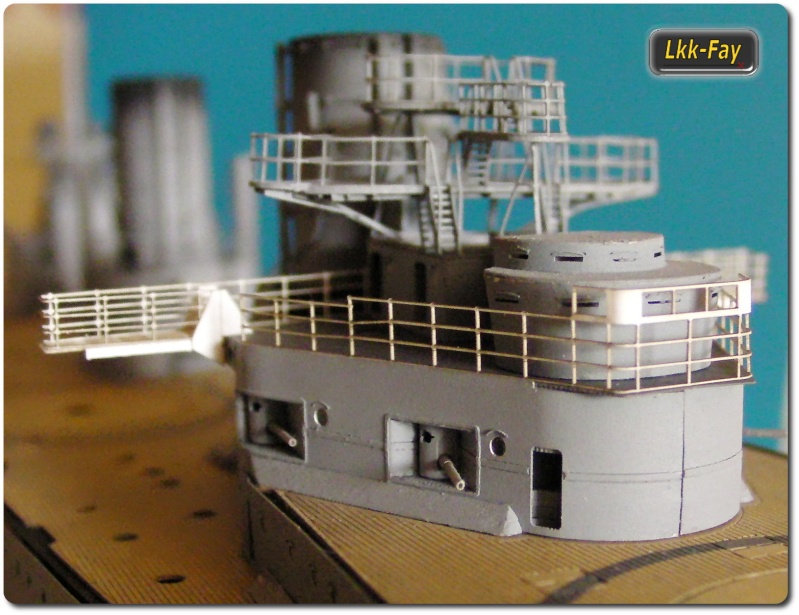 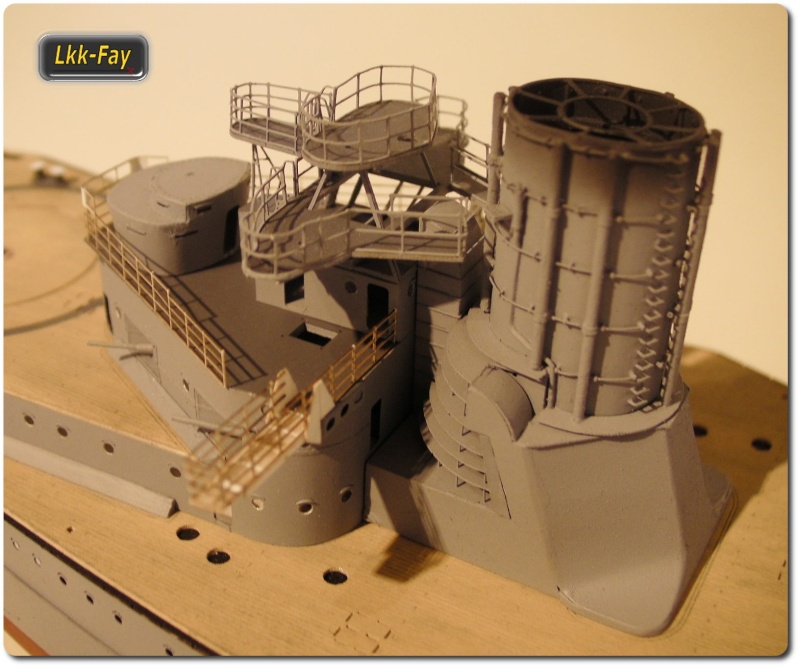 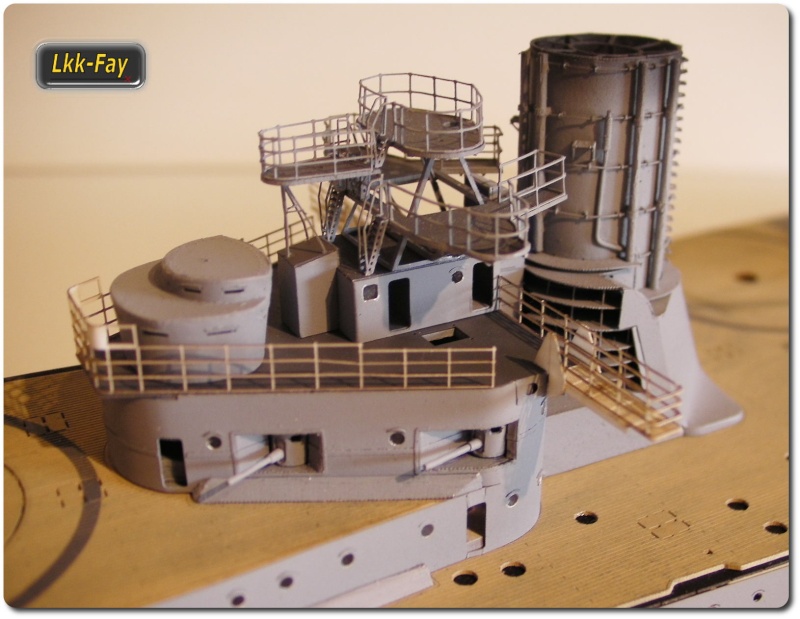 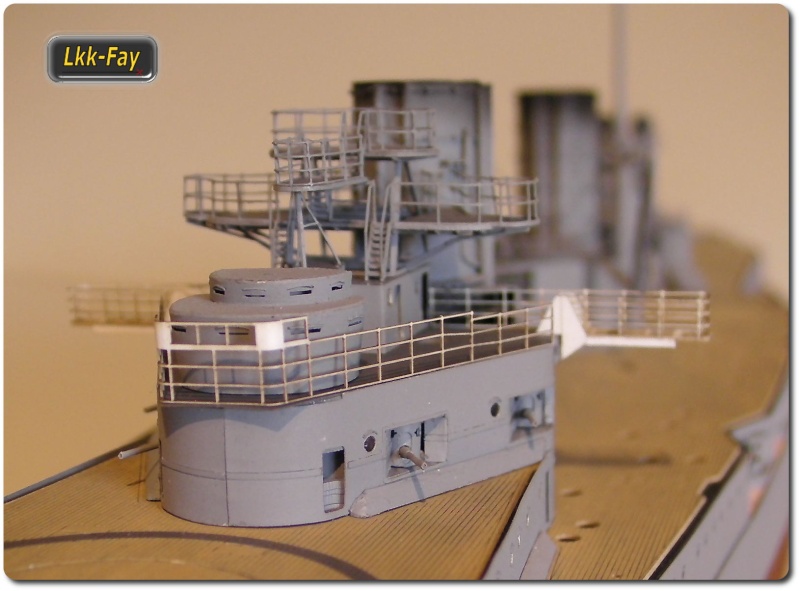 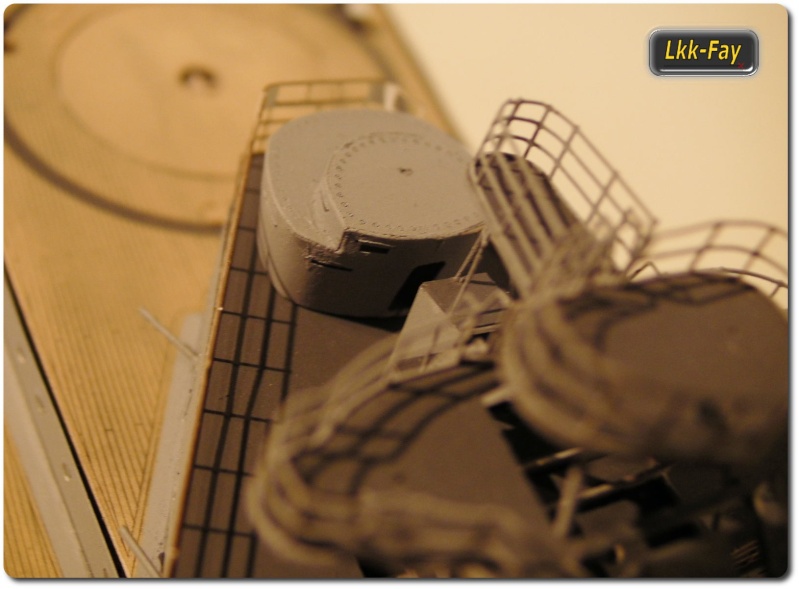 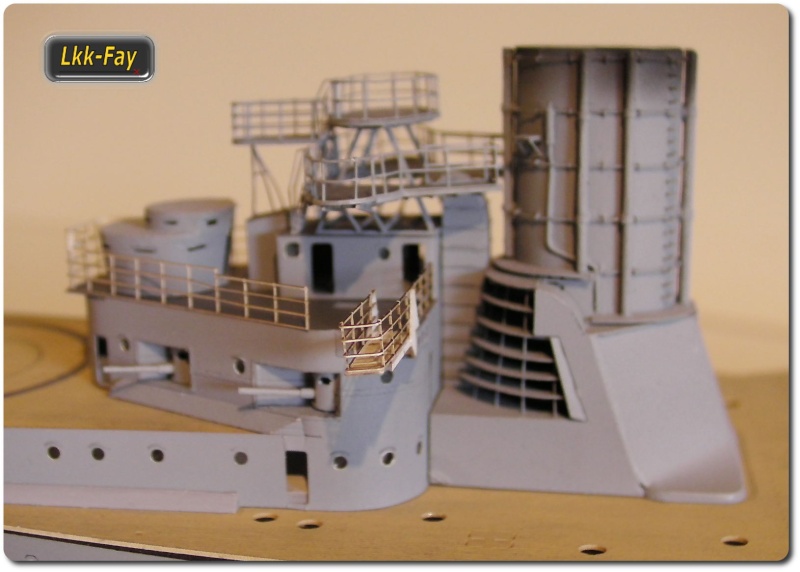 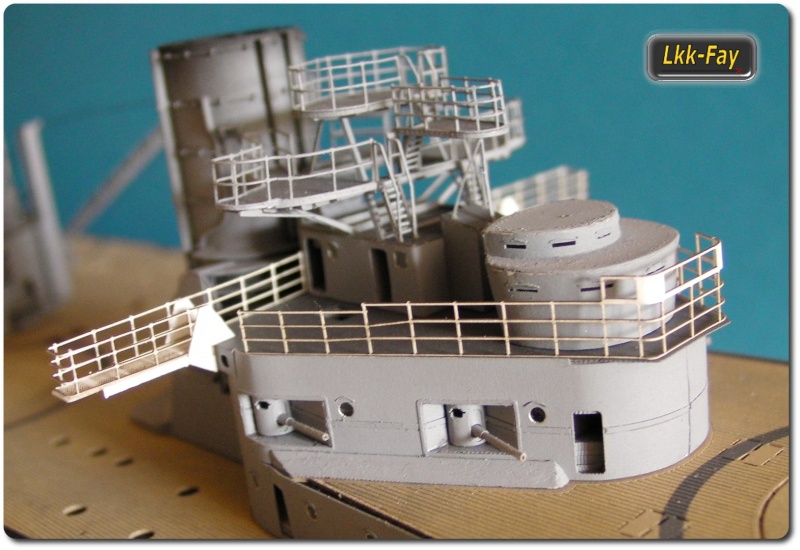 The loosely placed Front reling on the platform gets then their cloth and also the small roof between the railing and the command bunker is still missing here. As announced color was sprayed on it and the cloth had also be glued to the rail ran. (Here too the individual assemblies are only assembled / stapled and sit not perfect yet.) 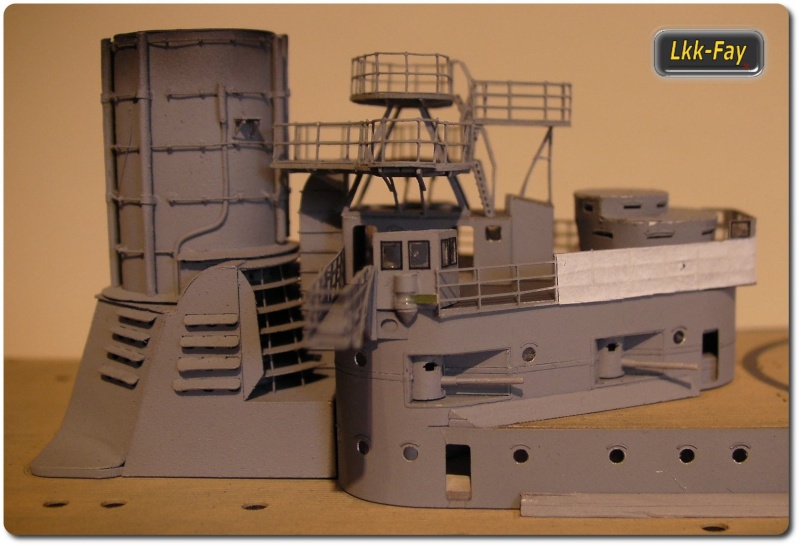 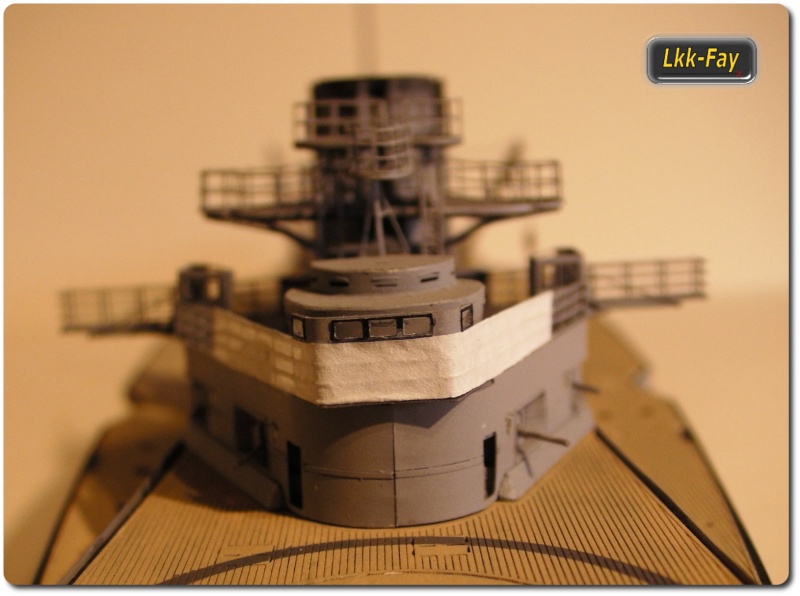 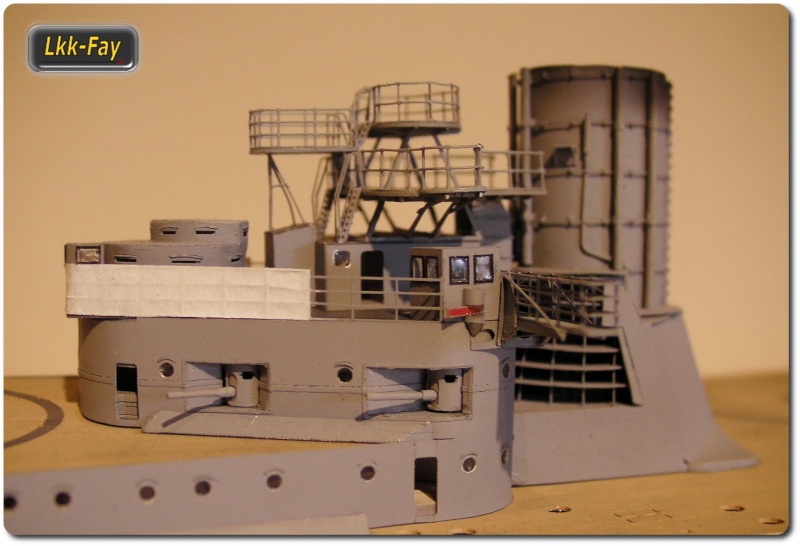 Greetings Martin
__________________
and here a quick Link to my Shop http://www.lasermodelle.de
|
| Google Adsense |
 |
|
|


 Linear Mode

