


|
|
|
#1
 01-01-2011, 09:44 AM
|
||||
|
||||
|
Messerschmitt P.1106 R (luft46)
I start the year with my new project, the ME P.1106R!
 You'll find more information about this model at: Messerschmitt Me P.1106 Luft '46 entry Here's the initial wireframe:  Kinda weird looking eh? Hehehehe...
This reminds me of the starships of the Naboo. (Also the FW TA-283.) Looks like Mr. Lucas was browsing at the Luft46 site.... 
|
| Google Adsense |
|
#2
01-01-2011, 09:53 AM
|
||||
|
||||
|
Super!
I will follow the thread again carefully!
__________________
http://olliskartonmodelle.forumieren.com/
|
|
#3
01-02-2011, 10:08 AM
|
||||
|
||||
|
I too will be following this thread with great interest.
If this is anything close to your previous birds this will be quite the gem. Jeff
|
|
#4
01-04-2011, 07:31 AM
|
||||
|
||||
|
A little update....
After struggling a bit with Metaseq's boolean function, I ended up disliking the way the wing fairings turn out. Hence, I did a little re-design by discarding the old fairings and creating a new one. Before doing the boolean operation, I also did some minor streamlining on the fuselage. Here's how it turned out:  Before calling it a day, I pitched in the landing gears:  Now all that's left are the wheel wells and gear covers!
|
|
#5
01-05-2011, 09:21 PM
|
||||
|
||||
|
Done with the wheel wells.
Surprisingly, Metaseq's Boolean plugin didn't throw a fit at me this time around. In fact, the subtraction and intersection operations I used to carve out the wheel wells produced a very clean output with only minor artifacts. Anyway, here are the results:   Now, all that's left is to create those fuselage and wing formers, then it's off to Pepakura.
|
| Google Adsense |
|
#7
01-08-2011, 02:59 AM
|
||||
|
||||
|
Quote:
I learned how to use Metaseq from a very good tutorial posted by one generous member over at the Z forums some years ago. Anyway some progress. Done with the fuselage formers. I don't know if this is overkill but I'll stick with these for now. 
|
|
#8
01-08-2011, 05:44 AM
|
||||
|
||||
|
This is really coming along well.
I think you've got a good start with those formers jeff
|
|
#9
03-13-2011, 06:41 AM
|
||||
|
||||
|
Oh boy... things have been hectic over at the office. Sigh...
Anyway, I've been able to squeeze some time over a couple of weekends to resume some work. (WARNING: This post has pictures of a cheap, dirty cutting mat with glue stains! If you are affected by this, hit the BACK button on the browser quickly.  ) )In my last post, I left off at making the fuselage formers. As with my BV 212 model, I shrunk those formers by a 4% and manually resize some parts by eye. It worked well for my Heinkel and BV...but for some reason, it didn't turn out good on my P.1106:  Notice how the whole thing looks like fabric stretched on a metal frame?  However, I soldiered on. I made a note to myself to shrink formers 1, 2, 3... Moving on, I put in the wheel wells... DISASTER!!! 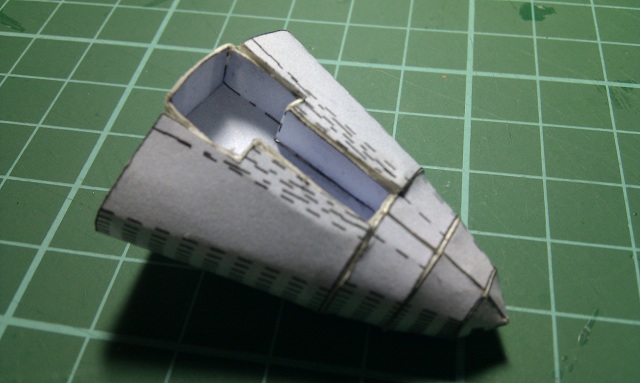 The forward face of the wheel well was pushed back by the former. The rear face of the wheel well is so far back that it will prevent the former for that segment from aligning correctly. At this point, I threw in the towel on this test build and went back to the drawing board. Two problems -- determining formers size and preventing the wheel wells from affecting the formers. Not wanting to resort to trial and error, I decided to see how Metaseq's units relate with the actual scale outputted by Pepakura. I created a cube primitive and set its size to 100x100x100. I then imported the file to Pepakura. I then set the Scale Factor of the model to 1.0 (1:1). To my pleasant surprise, Pepakura reported that the length of the model is 100mm. So I guess that means 1 unit in Metaseq is equivalent to 1mm in Pepakura.  So I created a kind of ruler objet in my P.1106 model and unfolded it in Pepakura: 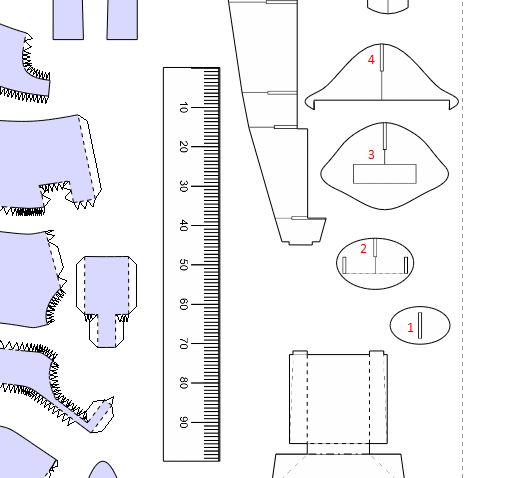 Looks good! Looks right! So now, using my virtual ruler, I shrunk my formers by 1mm around the edges. That should make up for the added bulk caused by the joining strips: 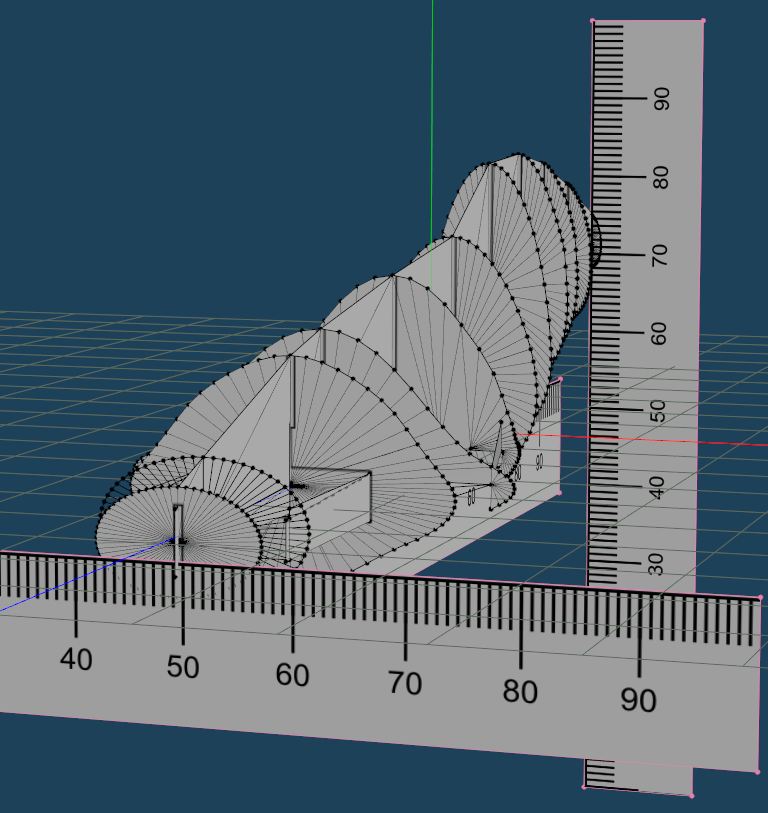 Now, to take care of that wheel well problem. For this I decided to leverage the fuselage formers by getting rid of a wheel well's side/face if that wheel well's face touches a fomer. To simplify the wheel wells even more, I introduced a set of lateral formers that would also double as the top walls of the wheel wells:  Those lateral formers would also serve to align the formers properly. Assuming the formers are .75mm thick, I set the size of the slots to 1mm using my virtual ruler. Here's how the former assembly turned out. Very promising! The slots on the formers fit so well I didn't even have to use glue to hold them together.  I guess that would also require me to change the assembly strategy to wrapping/skinning the formers instead of individually assembling each section and joining them. Gee I hope this measuring thing works! That's all for now. With my crazy work schedule I'm not sure when I can resume work after this. But I'll do my best to steal some time...
|
|
#10
03-13-2011, 01:50 PM
|
||||
|
||||
|
This is coming along quite well. I look forward to seeing more as work allows you time.
|
| Google Adsense |
 |
| Tags |
| luft46, me p.1106r, messerschmitt |
|
|


 Linear Mode

