


|
|
|
#1
 12-13-2015, 06:39 AM
|
||||
|
||||
|
Messerschmitt ME-328 (luft'46), layered cardboard
While I was struggling to resume work on my Bachem Natter, I got distracted by a program I installed a year ago -- Autodesk's 123D Make. 123D Make is a neat application that processes a 3D model by slicing it into many layers of uniform thickness. The resulting pattern is then generated which will allow you to reconstruct the model.
By default, the target medium is corrugated cardboard which is then cut using a laser cutter. Unfortunately, I don't have a laser cutter. This is probably why the program sat on my HDD for such a long time. Then, I realized that it was possible to change the settings of the application to a different target medium. I have a stack of 190GSM card stock which is approximately 1/3mm thick. I decided to give 123D a try. I chose a model that has a good mix of curved and straight surfaces. I picked the ME-328. So I fired up Metaseq and quickly whipped up a low poly model:  I made sure not to go overboard with the details. Once satisfied, I converted the low poly model into the standard mesh:  Fortunately, Metaseq is able to export to OBJ format. This allowed me to import the OBJ model into 123D Make. Here's how it looks like under 123D Make: 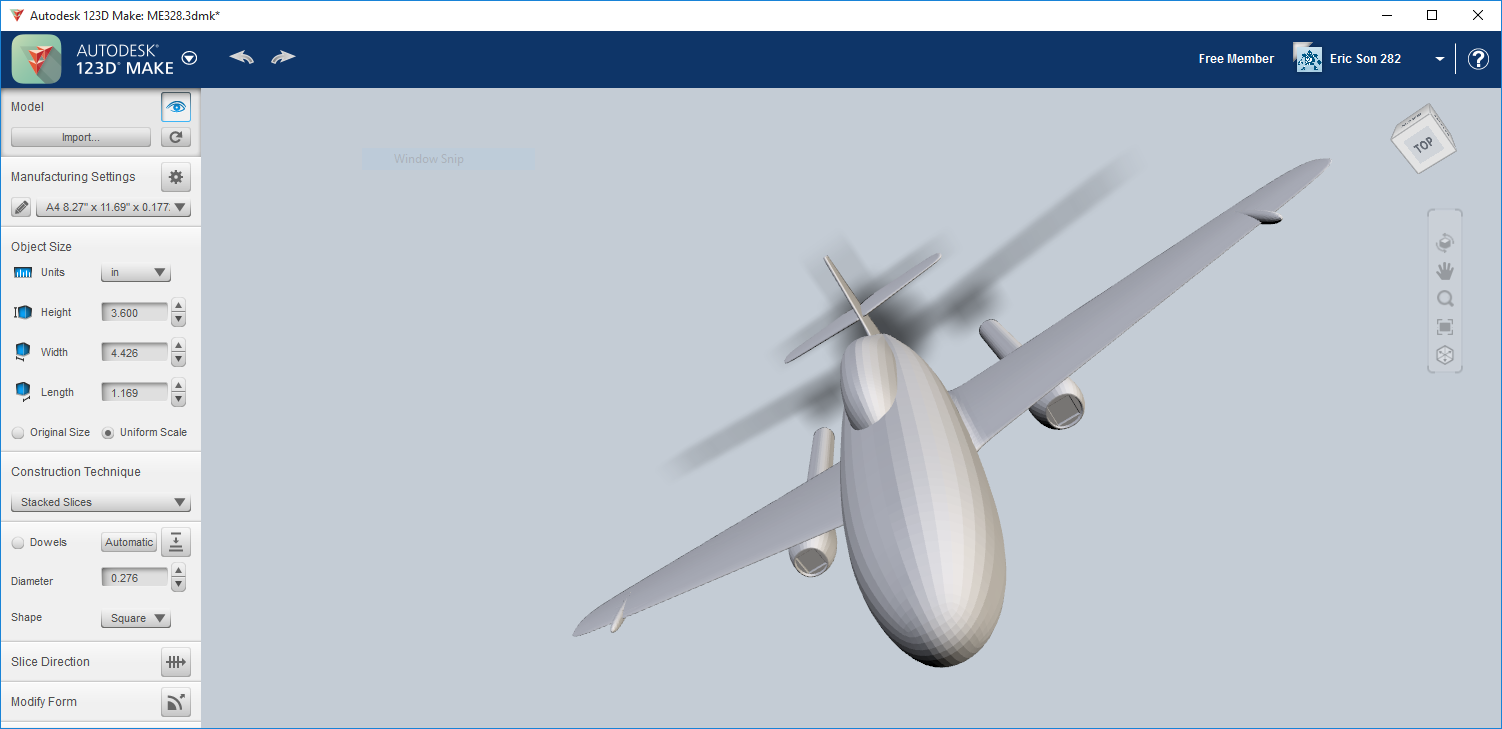 After setting the target medium to 0.33mm thick A4 sheets, 123D Make started to sliced up the model. Here's how it looks like:  Since I didn't want to use a lot of paper, I adjusted the target size of the model just enough to generate parts that would use 2 A4 sheets. I then saved the plans to PDF for printing:  I thought.. I really thought I could finish cutting and building these parts within a day. But I was wrong. :( :( I'll continue my build next weekend.  

|
| Google Adsense |
|
#2
12-13-2015, 08:42 AM
|
||||
|
||||
|
Interesting method and interesting subject. This will wear the heck out of a sander when you get there!
__________________
PAPERENGINEER Designs in progress: -C-2A Greyhound -Br.1050 Alize
|
|
#3
12-13-2015, 08:48 AM
|
||||
|
||||
|
3D printing. The manual way
Isaac
__________________
My gallery [http://www.papermodelers.com/gallery...v-r-6&cat=500] Recent builds  Meteor F1, Meteor F8, Mig-Ye8, NA Sabre, A-4E Skyhawk,Mig-15 red, Mig-17 repaint Meteor F1, Meteor F8, Mig-Ye8, NA Sabre, A-4E Skyhawk,Mig-15 red, Mig-17 repaint
|
|
#4
12-13-2015, 08:52 AM
|
||||
|
||||
|
Nice job on that aircraft. As was stated lots of sandpaper to be used.
Looks like you could use that method for ship hulls. There is a model out there that uses the slices/sanding method to shape the hull. Coastal Freighter Emiliana
__________________
~Doug~ AC010505 EAMUS CATULI! Audere est Facere THFC 19**-20** R.I.P. it up, Tear it up, Have a Ball
|
|
#5
12-13-2015, 09:54 AM
|
||||
|
||||
|
Eric
I really don't think this layering design is suitable for scale models. Too much material needs to be removed and it is up to the person doing the sanding to interpret the transitions. Isaac
__________________
My gallery [http://www.papermodelers.com/gallery...v-r-6&cat=500] Recent builds Meteor F1, Meteor F8, Mig-Ye8, NA Sabre, A-4E Skyhawk,Mig-15 red, Mig-17 repaint
|
| Google Adsense |
|
#6
12-13-2015, 10:15 AM
|
||||
|
||||
|
Quote:
|
|
#7
12-13-2015, 02:55 PM
|
||||
|
||||
|
Quote:
Even regular drywall spackle could work, but IMHO Elmer's Carpenter's Wood Filler would be much better... Later! OL JR
__________________
The X-87B Cruise Basselope-- THE ultimate weapon in the arsenal of Homeland Defence and only $52 million per round!
|
|
#8
12-13-2015, 06:53 PM
|
||||
|
||||
|
Quote:
This should allow you to capture the compound curves of the hull. The only downside is the need to smoothen + paint. Quote:
I do see other uses for this. Perhaps it can be used to create human figures (ground crew + pilot + pilot's dog). One thing bothering me right now is the poor quality of the card stock I'm using. It tends to delaminate into two layers without warning. I'm kinda worried about the rudder part. Maybe I'll need to use a lot of CA to seal the edges to prevent it from delaminating. Another more practical approach would be to model each part of the plane separately. You can then orient the 'slices' in an optimal manner to ensure strength and ease of sanding later on. Then assemble as you would a plastic/resin model. Maybe I'll try that approach some time in the future. But for now, I'm just itching to finish this to see how it will look like. Then I'll resume work on the natter. Quote:
I'm thinking of making a custom smartphone holder for my car. I want it to fit snugly on the side of my head unit as if it were designed specifically for that purpose. Not really happy with the current crop of holders in the market that need to be hung from the rear view mirror, windshield or from the CD-slot. The layered cardboard + filler + sanding would work great on this type of model.
|
|
#9
12-20-2015, 03:40 AM
|
||||
|
||||
|
all done!
After what felt like a zillion layers, I'm finally starting to see a plane to appear:
  And finally, it's done:      Very curvy! The build method is good at capturing curves. But it's very bad at doing straight edges. (But of course, it could also be the builder's fault. )Anyway, as Isaac said, it's not suitable for this kind of model. And I wholeheartedly agree. But it was worth trying. I figured it would be a great modeling method for making landscape. You could use this to make the hill + base + foundation to place a traditional card model castle, for instance.
|
 |
| Tags |
| model, 123d, make, target, medium, parts, application, thought, obj, sheets, thick, laser, low, metaseq, cardboard, poly, me-328, cutter, program, setting, 0.33mm, fortunately, details, satisfied, overboard |
|
|


 Linear Mode

