


|
|
|
#11
 06-20-2010, 03:45 AM
|
||||
|
||||
|
Quote:
I also though about rounding up the cross section of the wheels but I found those really hard to assemble, even on large scales. But I'll keep that in mind should I bump up the scale of this one. I'm currently targetting 1:48. Here's how it looks like so far: 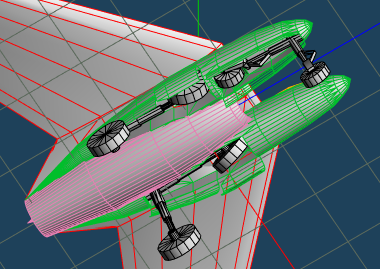 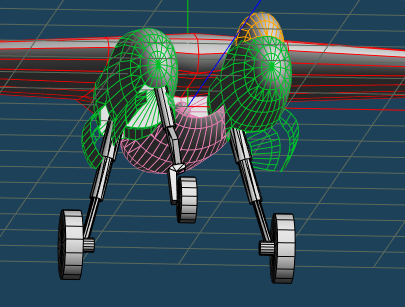 I'll probably stop adding more details for now. I'll need to do that test build to see if this thing actually builds as designed... :D Quote:
Yes, it does stand a bit tall... somewhat like a flamingo. I was also tempted to shorten the struts to make things fit. But then I had a look at the three-view drawings and saw the following lines (red) on the side view: 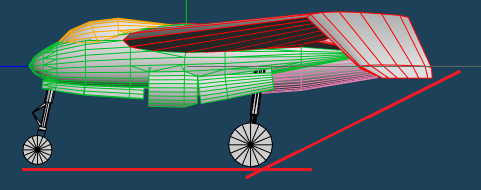 I'm pretty sure what the horizontal line means. But the slanted one, I assume that's what the Heinkel guys figured the angle the plane needed to be in order to take off. So I guess the height was intentional. 
|
|
#12
06-20-2010, 05:09 AM
|
||||
|
||||
|
Eric, this is really coming together. I like your last design for the landing gear. I think you are very close here as it is very similar to what I've seen for the B & V P.212.3 and Heinkel He P. 1079 series aircraft...so it must have been the thought of the time. That is key. You must get into the mind of the designers from 65-70 years ago and not let their vision be clouded by 1990-2010 thoughts on design.
Keep up the great work! I really look forward to seeing more. Jeff
|
|
#13
06-21-2010, 09:51 AM
|
||||
|
||||
|
Done with the unfold/unroll using Pepakura.
Here's a preview of how many pieces I ended up with:  Note, I still have to add the formers... but I think there's just enough extra space to make this fit in 3 sheets cardboard.
|
|
#15
06-23-2010, 08:49 AM
|
||||
|
||||
|
Thanks!
A little update on the test build. --- The wings were ridiculously hard to assemble. The main culprit was the anhedral wing tips. I'll have to revisit the wireframe and maybe add a couple more formers, maybe even have make some kind of rail or slot to ensure both wing tips bend down at the same angle. Time to fire up Metaseq again... Last edited by eric_son; 06-23-2010 at 08:50 AM. Reason: typo
|
| Google Adsense |
|
#16
06-26-2010, 05:08 AM
|
||||
|
||||
|
A little progress...
Here's what I ended up with -- a wing without formers. 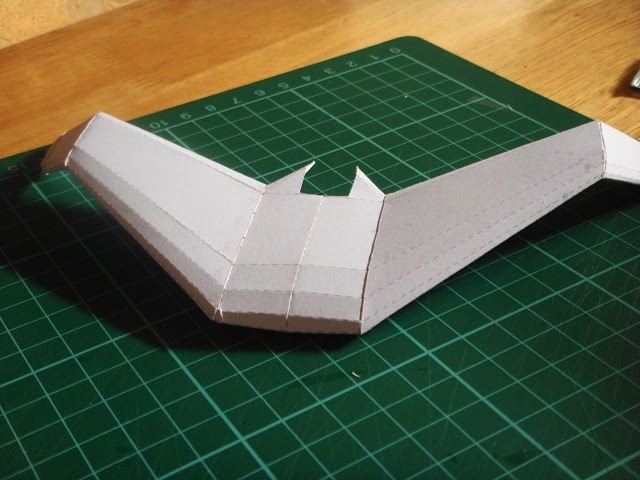 After the debacle of the former-less wing, I went back to metaseq to whip up a set of formers. I wrestled with this for a couple of nights because I wanted the formers to be easy to align and at the same time, have tolerance or provisions to make up for the difficulty of factoring in the paper thickness. Here's what I came up with:  First, I will be applying glue to the flat area on the wing roots. I'll make sure not to apply glue to the lateral formers. I'll then wrap the wings around them. Then, if the formers don't fit (i.e. -- lateral formers too long), I'll push them inwards, hoping that they'll just act as a kind of a spring. I'll then apply glue to the flat area on the wing tip to lock the former into place. But ... I guess I won't need to do that because: 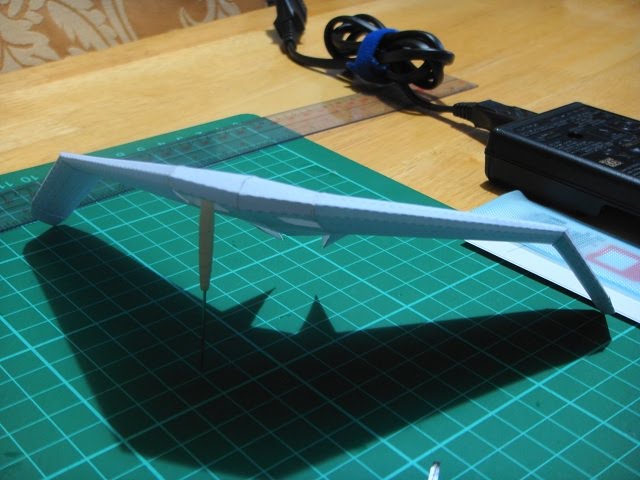 The lateral formers fit very well. Hehehe.... But maybe it was just due to the way I cut them. I was in a bit of a hurry to get the wings done. Anyway, good alignment and 500 times easier to assemble than the original prototype wings. Here's another shot:  That's all for now. I can't feel my fingertips from all that CA adhesive I used to stiffen the formers. 
Last edited by eric_son; 06-26-2010 at 05:10 AM. Reason: typo
|
|
#17
06-26-2010, 10:33 AM
|
||||
|
||||
|
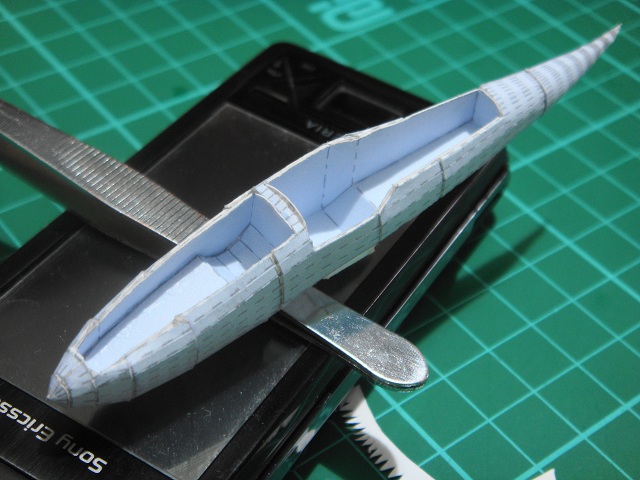
One last update before I call it a day....
I got to finish assembling the center fuselage: 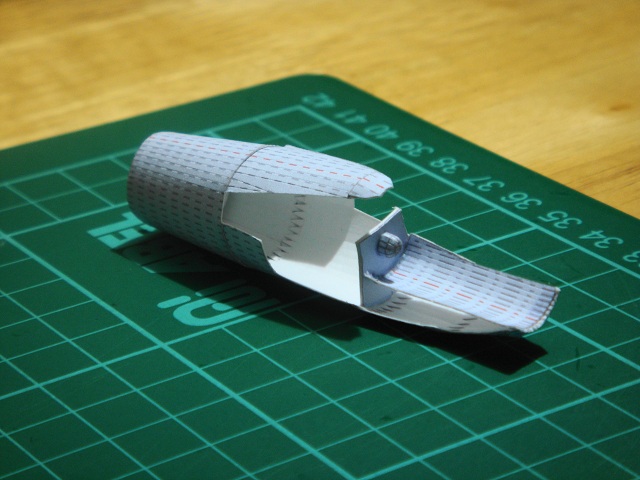 You'd probably notice from the pictures how small the glue tabs are. I kinda went overboard in Metaseq when I created the fuselage. I used a cylinder shape that had 48 segments. I used that many to make the boolean operations produce better, rounder cuts/merges. And sure enough, it did. But the cost is pepakura producing glue tabs as small as the tines on a comb. But it did have a nice side effect. Those small glue tabs absorb glue like crazy. It made joining the fuselage segments very easy. Anyway, I'll probably use joining strips later on...  Here's a view from the exhaust. I hit a slight snag here. You'll notice from the picture that the exhaust is slightly smaller than the segment of the fuselage where it was supposed to attach to. I'm not sure if this was my fault when I was folding in the glue tabs. I sure hope it's not a bug in Pepakura. I'd hat to manually adjust that just to make up for the fit problems.  Dry fitting the wing to the fuselage..... 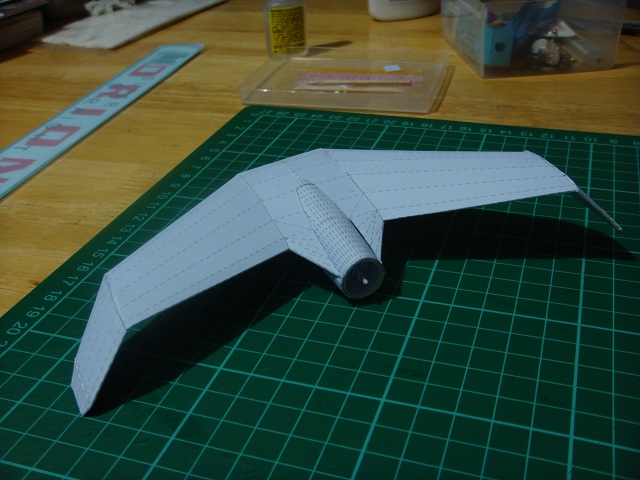 Fits like a glove! :D  Next stop, the pilot and weapon pods.
|
|
#18
06-27-2010, 01:34 AM
|
||||
|
||||
|
Left side (weapons) pod done!
 I started assembly from the rear, moving to the nose. Fitting the rear wheel well was relatively stress free. Fitting in the front wheel well was a different story. Long story short, I eventually had to snip off some glue tabs near the nose to make the wheel well fit. 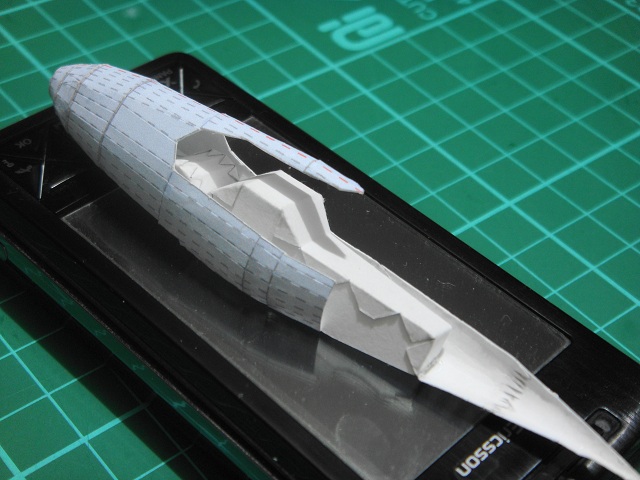 It's pretty crowded inside. Actually, that's the reason why I thought I could get away without using formers. The clutter inside the fuselage would provide enough stiffness.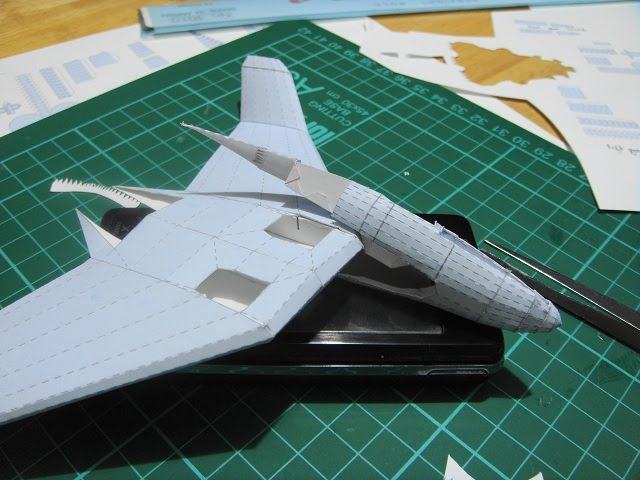 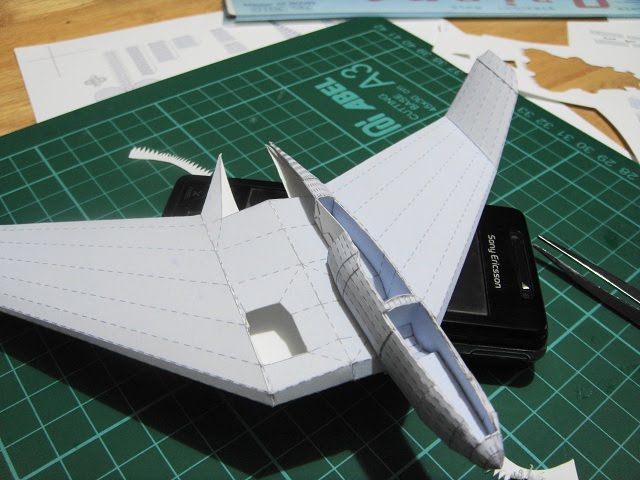 The bulge of the rear wheel well snapped into the hole on the wing locking the pod firmly into place. The bulge of the rear wheel well snapped into the hole on the wing locking the pod firmly into place.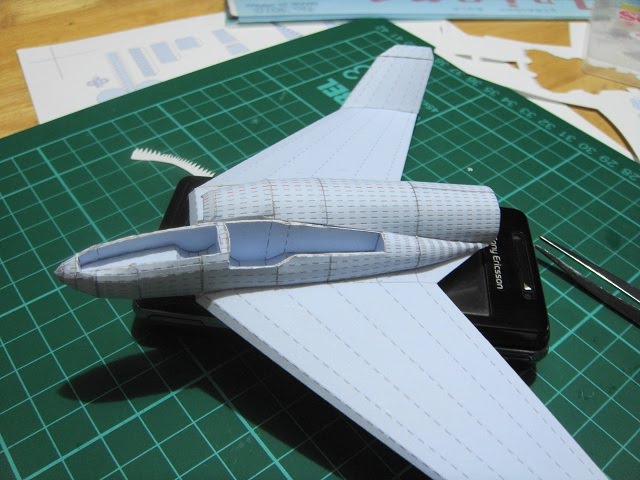  Here's how it looks like with the center fuselage snapped into place too. I'll wait till I finish the pilot pod before gluing them permanently on the wing.
|
|
#19
06-27-2010, 05:32 AM
|
||||
|
||||
|
This is coming along great!!!
I'm looking forward to seeing more!
|
|
#20
06-27-2010, 09:18 PM
|
|||
|
|||
|
I never seen like this before
|
| Google Adsense |
 |
| Tags |
| heinkel, luft46, p.1078b |
| Thread Tools | |
| Display Modes | |
|
|


 Linear Mode

