


|
|
|
#1
 03-12-2011, 02:48 PM
|
||||
|
||||
|
LEGO captain redbeard
I haven't seen this one posted yet. Very cute...must do one for number 3 grandson.
LEGO Kapitein Knoest (Captain Redbeard) Ninjatoes’ papercraft webpage
__________________
It's not good to have too much order. Without some chaos, there is no room for new things to grow. 
|
| Google Adsense |
|
#3
03-12-2011, 04:51 PM
|
|||
|
|||
|
I'm bulding it right now. I've been chuckling about this one for days. I'm going to make up a 50/50 mix of glue water, spray tissue with the solution and use it to loosely stuff the parts. when the tissue dries it makes like a bees nest stiff structure that will stand up to some play.
|
|
#4
03-12-2011, 10:23 PM
|
||||
|
||||
|
Good thought for the internal stiffening....might extend lifetime in hands of a two-year-old from seconds to minutes.
__________________
It's not good to have too much order. Without some chaos, there is no room for new things to grow.
|
|
#5
04-02-2011, 02:27 PM
|
|||
|
|||
|
I'm done with the main build. All that's left is the gun and the sword. This model was a joy to build. Everything fits exactly. My biggest problem was my own experience: I kept forgetting to look at the instructions and would build based on what I knew. With this model, nearly half the pieces are built inside out from normal, aka, with the color side on the inside. I would naturally build them with the color on the outside only to realize afterwards that I was inside out.
I did several new techiques with this model. Firstly I coat the model with dec-o-pouge pva glue. The brand was Mod-Podge, and it needed just a touch of water (dipping the brush was enough) to make a nice clean, even coat on the paper that dried to a pretty hard shiny surface. Additional layers of the stuff just built up to make it harder and harder. I got it on one piece to the point its almost as tough at a thin leather belt. Each coat would take 1-2 days to dry. Next up I dribbled white elmers glue (more watery than alleens) onto bathroom tissue and stuffed lightly the tissue into hollow areas this meant the part needed 24 hours to dry, but the tissue paper dried to a hard crust that really kept the shape and would not allow the hollow parts to crush. I also expanded a section of the hollow part of his leg to allow room so I could store my actual redbeard minifig. Check out the build pics for how I did that. Lastly, I noticed when I bought my minifig it came with feathers for the hat, I'm guessing Ninjatoes didn't even realize that his lego man was missing it. I was going to design a paper one but I found these nice pipe cleaners in the $ store and they stuffed in the hole so nicely,I'm not sure I'm gonna bother. Anyway Ninjatoes, if your reading this, thank you for the model, it is great. I bought a present for you if you give me your snail mail address, an extra lego pirate feather piece, and the rest of my pack of pipe cleaners for the hat. I'll try and email you off line anyway for a more personal thank you. - Jon now for some links: the WIP build pics: http://jleslie48.com/jl/110318_model/acs.html and his current state (the little guy is in the hook  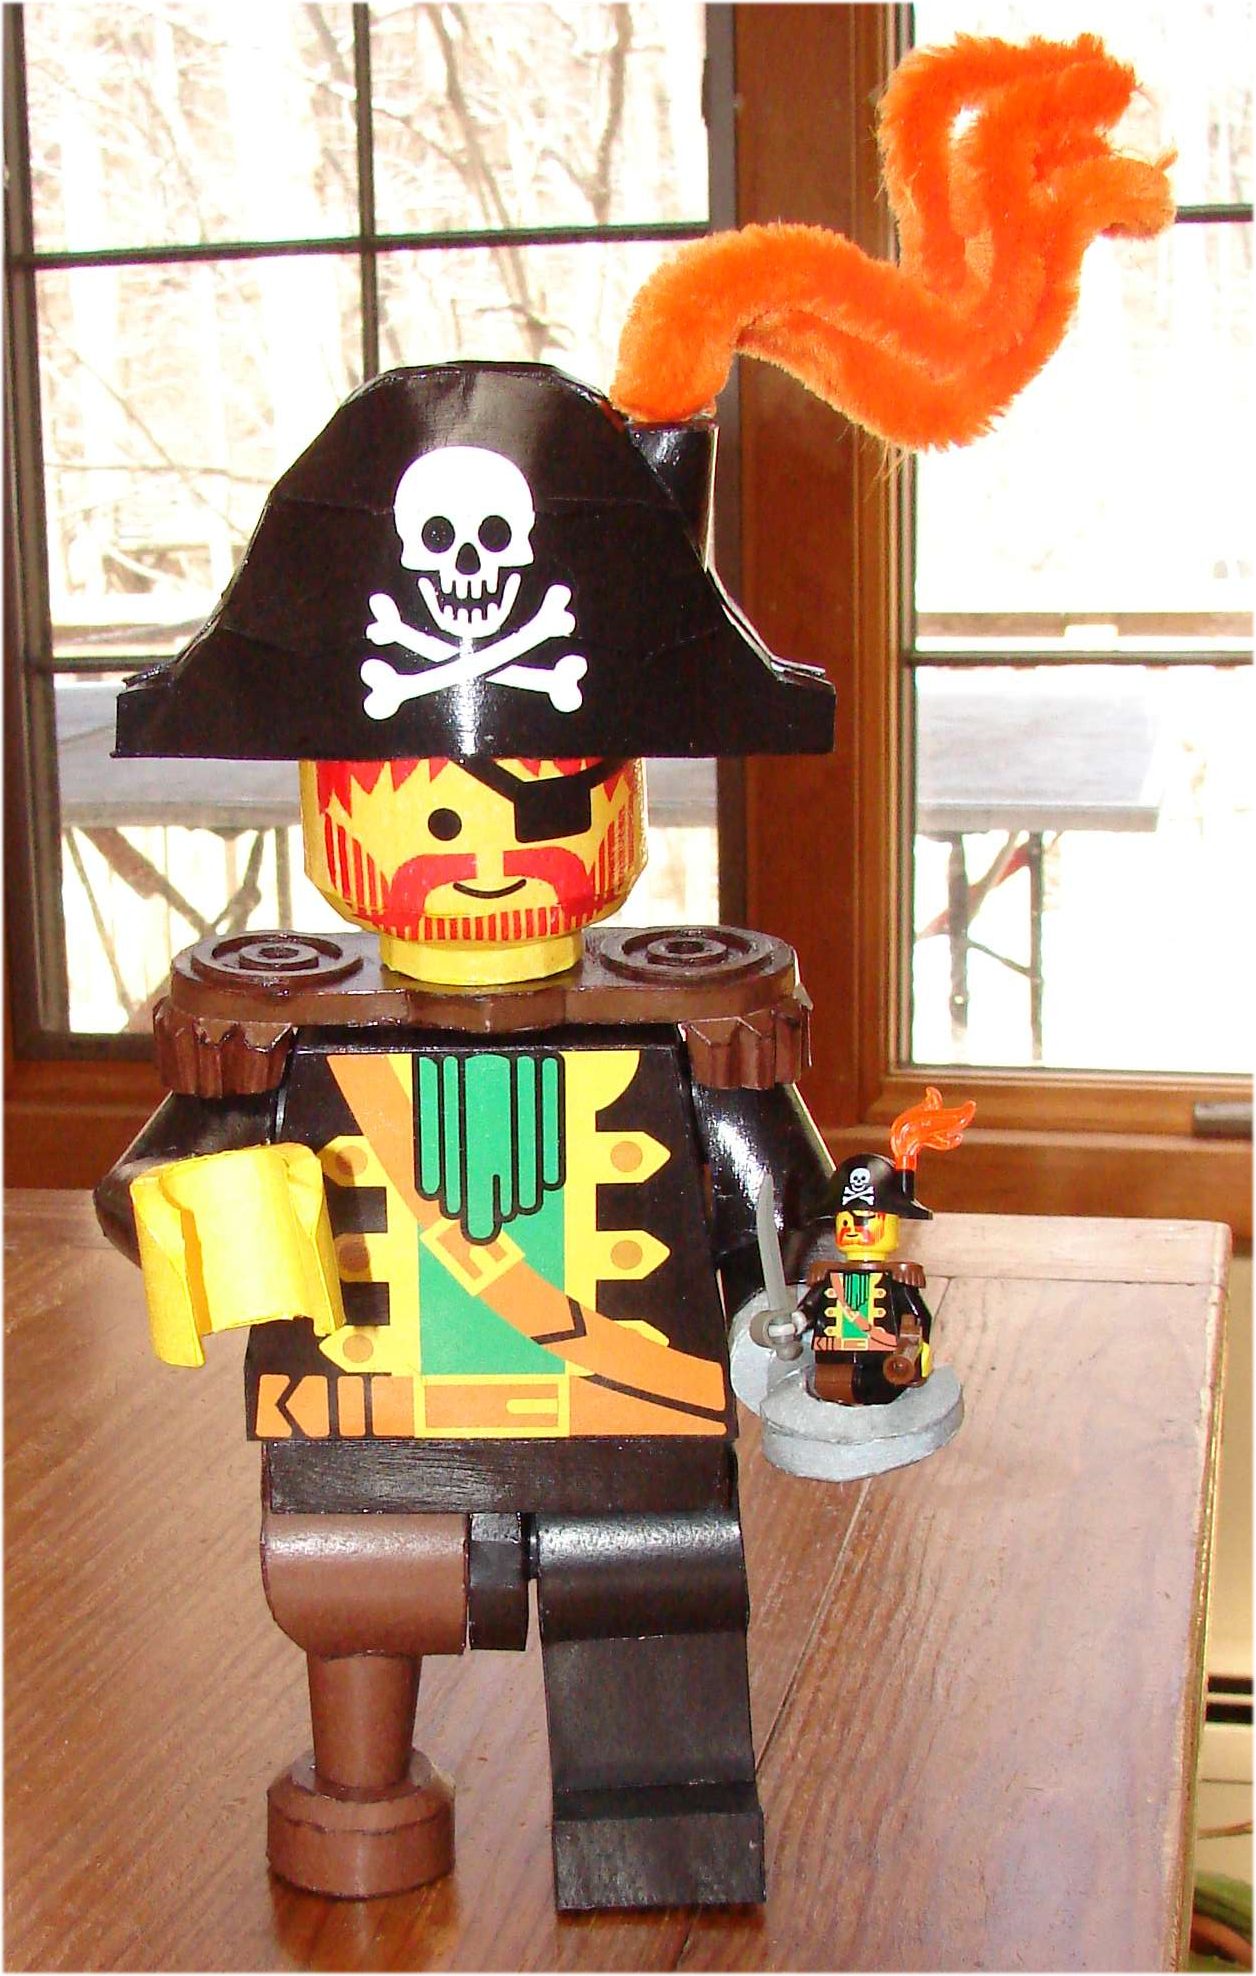
|
| Google Adsense |
|
#6
04-02-2011, 03:44 PM
|
||||
|
||||
|
Jon, looks good. Isn't the world of paper modeling wonderful!!!!
__________________
It's not good to have too much order. Without some chaos, there is no room for new things to grow.
|
 |
|
|


 Linear Mode

