


|
|
|
#1
 09-17-2013, 12:14 PM
|
||||
|
||||
|
Horten IX flying wing glider
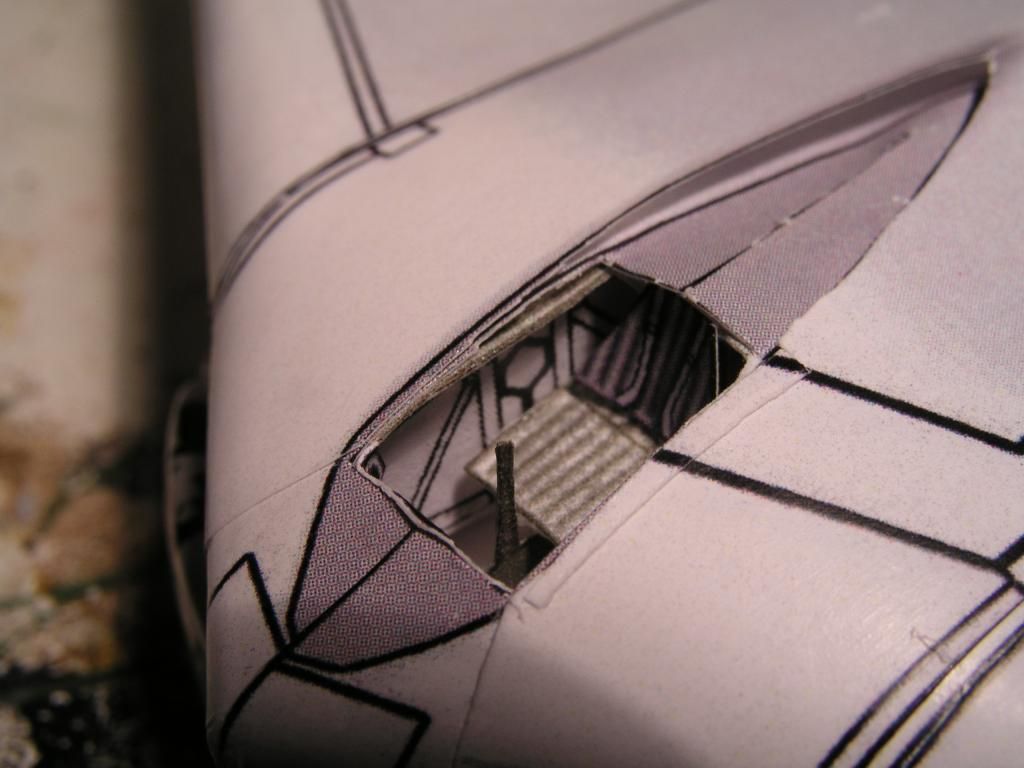
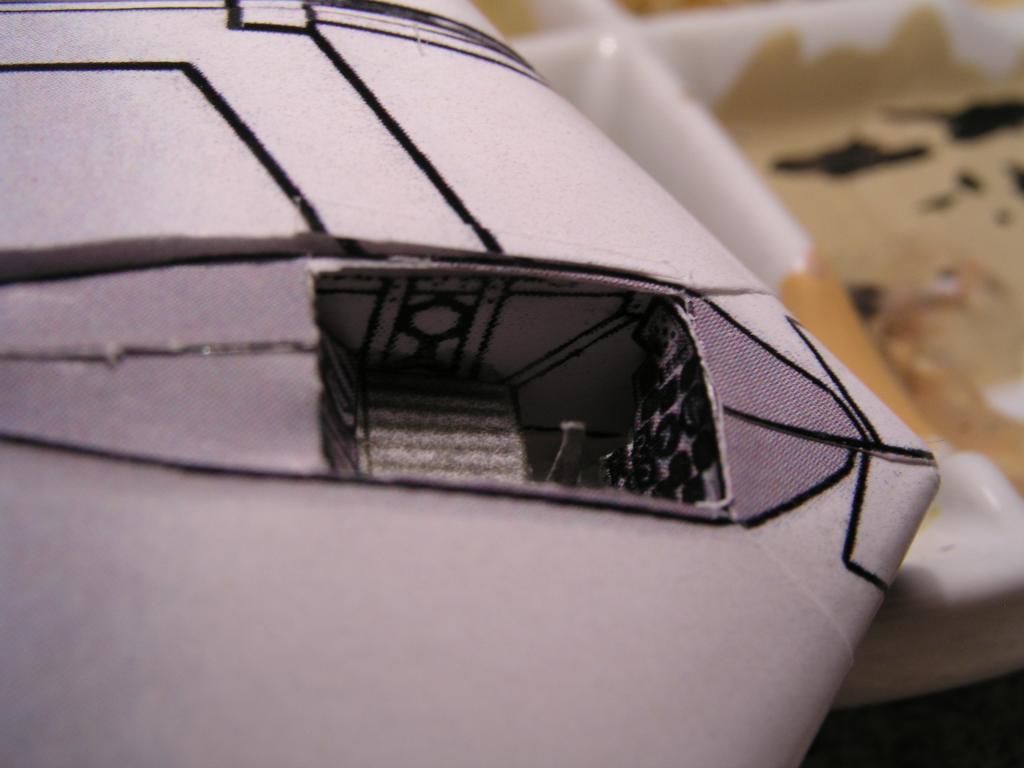
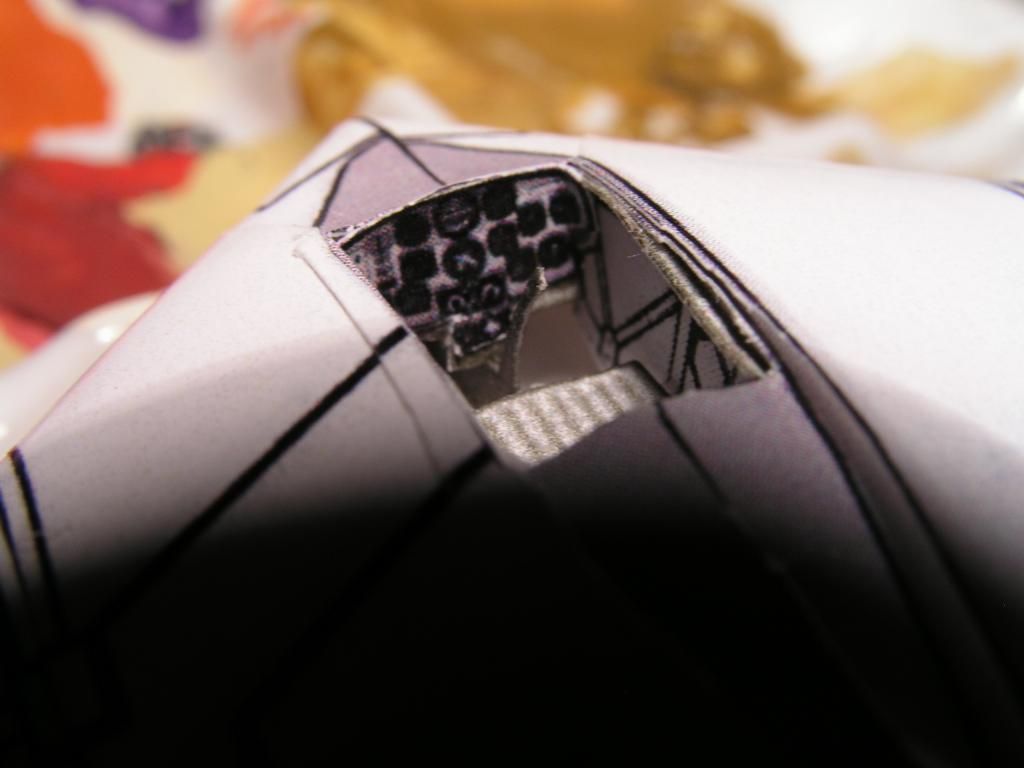
Working on this little beauty - this is the first time I've tried to make the cockpit details. I used 3 copies of the interior frame drawing from the FG plans (the one that says "your wing should have this shape from the side" and mounted it to a piece of cardboard and used them as interior ribs. The sides of these make nice walls for the cockpit.
   Fun little model! 
|
| Google Adsense |
|
#3
09-17-2013, 02:49 PM
|
||||
|
||||
|
Nice kitbash
__________________
A fine is a tax when you do wrong. A tax is a fine when you do well.
|
|
#4
09-17-2013, 02:51 PM
|
||||
|
||||
|
Looking good. Will you be making a bubble canopy to show it off?
__________________
Regards, Don I don't always build models, but when I do... I prefer paper. Keep your scissors sharp, my friends.
|
|
#5
09-18-2013, 06:50 AM
|
||||
|
||||
|
Very nice job. I look forward to seeing this completed, especially how you do the canopy.
Gary
__________________
"Fast is fine, but accuracy is everything" - Wyatt Earp Design Group Alpha https://ecardmodels.com/vendors/design-group-alpha
|
| Google Adsense |
|
#6
09-19-2013, 02:29 PM
|
||||
|
||||
|
Well, I've been especially diligent on this (taking advantage of a little free time) and have finished the job, but I wasn't completely satisfied with the canopy. First the good parts:
I used multiple layers of hammermill Color Gloss Laser Paper, one sheet over another several times on each wing and the central fuselage section until I got a nice smooth finish. This worked out pretty well, although you can sort of see the wing ribs as I pressed down on the wings - I've actually seen the skin of real planes do this, so it doesn't bother me at all. It actually looks more realistic IMO. I cut out the flaps and elevons from the top-most layer, which gives the trailing edge of the wing a lot more realistic look/texture: 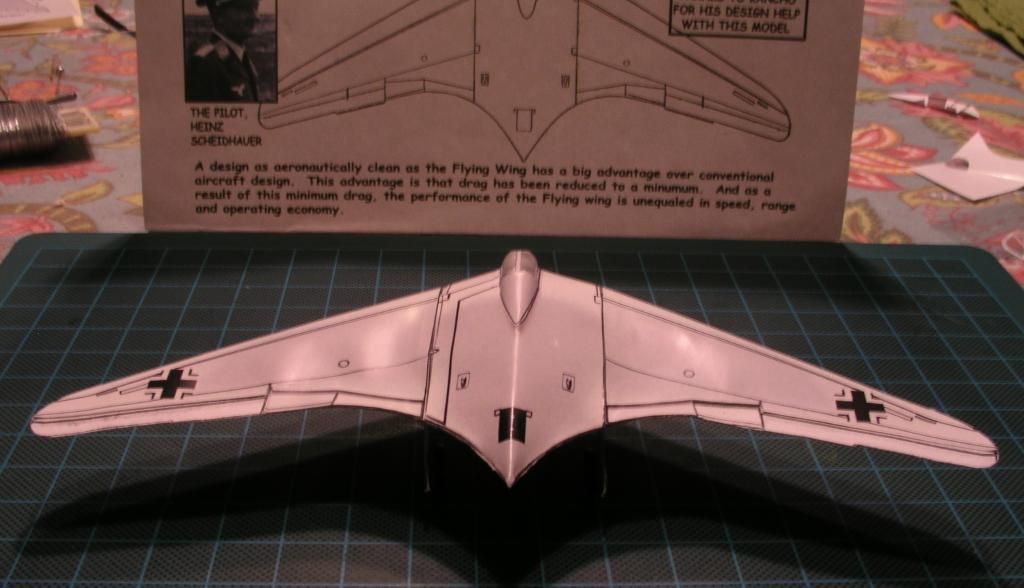 Also, I managed not to get much spare glue on my fingers and smudge the plane, which is an improvement for me  Only one tiny spot of glue went flying through the air at some point and made one little smudge. Murphy's law... Only one tiny spot of glue went flying through the air at some point and made one little smudge. Murphy's law...Here's another view of the "finished" plane: 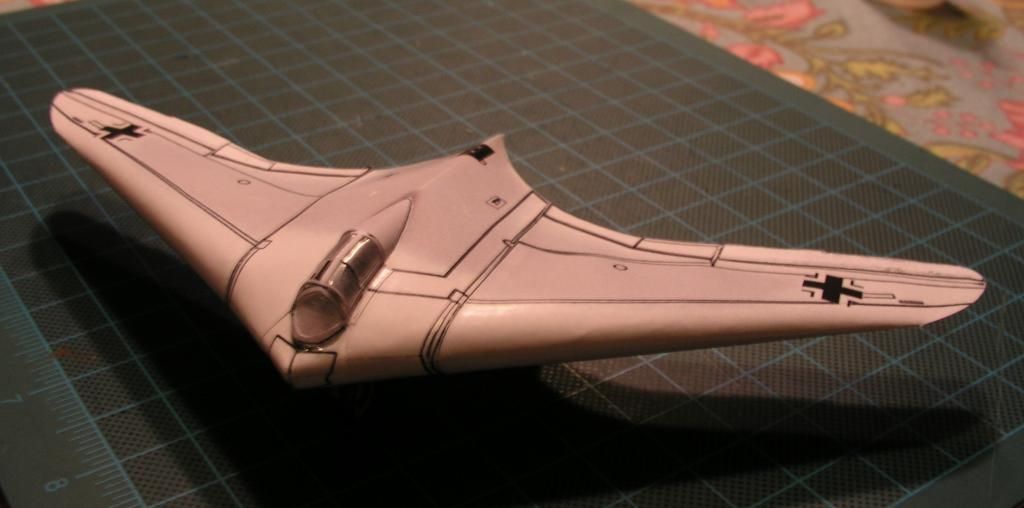 I used some floral wire to stiffen the landing gear which would never have stood up otherwise - this reinforced the hydraulic do-dad on the front landing gear strut, which is about the width of a human hair and never would have looked right in just paper (at least at my skill level). Here's a look at the landing gear: 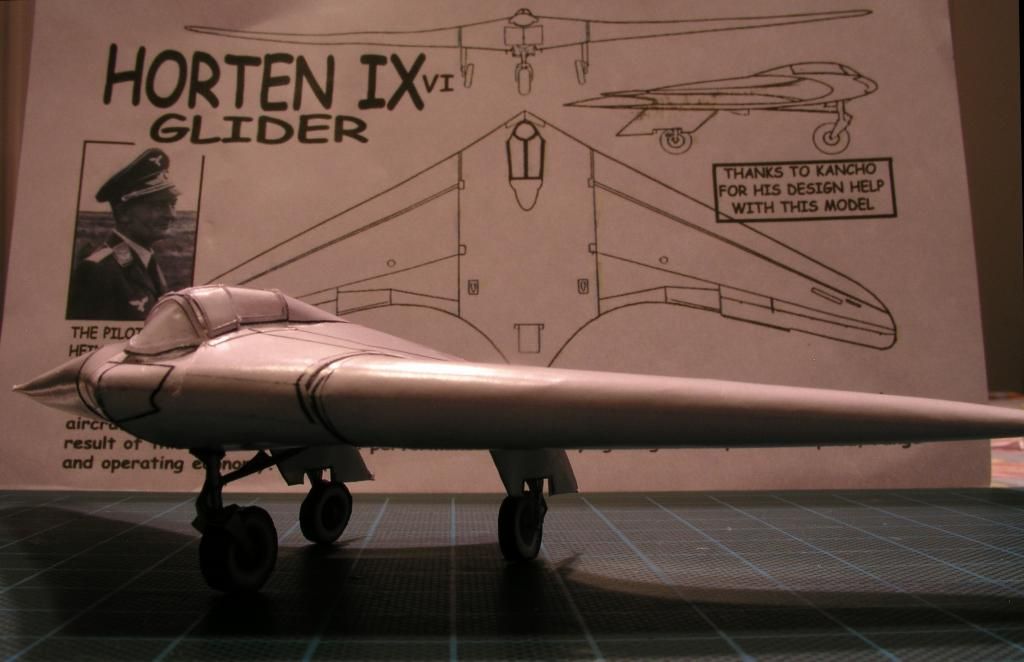 Sorry, now that I post that it looks entirely too dark! Now the part that bummed me out - I used the clear film from one of those return-address envelopes to make a canopy and it didn't really do the rest of the plane justice. While the envelope film is quite transparent when you are reading an address through it, it turns out to have something of a texture on it that makes it a little opaque. This was made worse by the CA glue I used. The fumes seem to have put a haze on the plastic. The end result was not very good, so I cut one of the window panes out entirely so that you can at least see into the cockpit without obstruction from one side. Lo and behold, after I finished I discovered a video by none other than Chip Flynn explaining how to make a clear canopy with packing tape! Damn. Wish I'd seen that before! Debating pulling off the crappy canopy to replace it with one made of packing tape. I am definitely not up to building a vacu-former at this point, as I am about to be moving and am trying to keep my hobby projects to a confined space in my house while all the chaos of packing reigns around me.
|
|
#7
09-19-2013, 05:01 PM
|
|||
|
|||
|
I have had some luck with transparency film, especially if the pane is flat. You can bend it but it is better to have the frame attached to it if you do. Also I found that the rough surface of the transparency (which allows it to take inkjet ink) is water soluble, to can wash it of with straight water and then it is perfectly clear. I also found the best way to attach the window frames is with glue sticks (go figure). I use regular bond paper for the frames.
Beard
|
|
#8
09-19-2013, 10:04 PM
|
||||
|
||||
|
Thanks for the tips. I may redo the canopy at some point and see if it's worth the trouble of replacing this one. Might be the excuse I need to finally learn how to make a simple vacu-former. The tricky part about the horton's side glass is that it is convex in two planes (I think it was actually plexiglass on the real plane), and that can only be done by vacuforming as far as I know.
|
|
#9
09-20-2013, 04:17 AM
|
||||
|
||||
|
The finished product looks great. Very nice build.
I have used that packing tape method on FG models (BF-109, MiG-15 to name a few) and it worked really well for me. Thanks for sharing! Gary
__________________
"Fast is fine, but accuracy is everything" - Wyatt Earp Design Group Alpha https://ecardmodels.com/vendors/design-group-alpha
|
|
#10
09-20-2013, 05:46 AM
|
|||
|
|||
|
try push molding a positive made from plumbers epoxy into a heated clear plastic picnic plate.
|
| Google Adsense |
 |
|
|


 Linear Mode

