


|
|
|
#12
 07-17-2009, 03:29 PM
|
||||
|
||||
|
And the progress of the build:
I've finished the horizontal tail (well, without wires yet)  I've built my last aeroplane more than 20 years ago, so this model is in a way an experiment, where I'm testing new modelling techniques. It started with the scoring, then came the multifaceted ribs, rounded cowl, and now came time for fabric surfaces sunken between ribs of the wing. 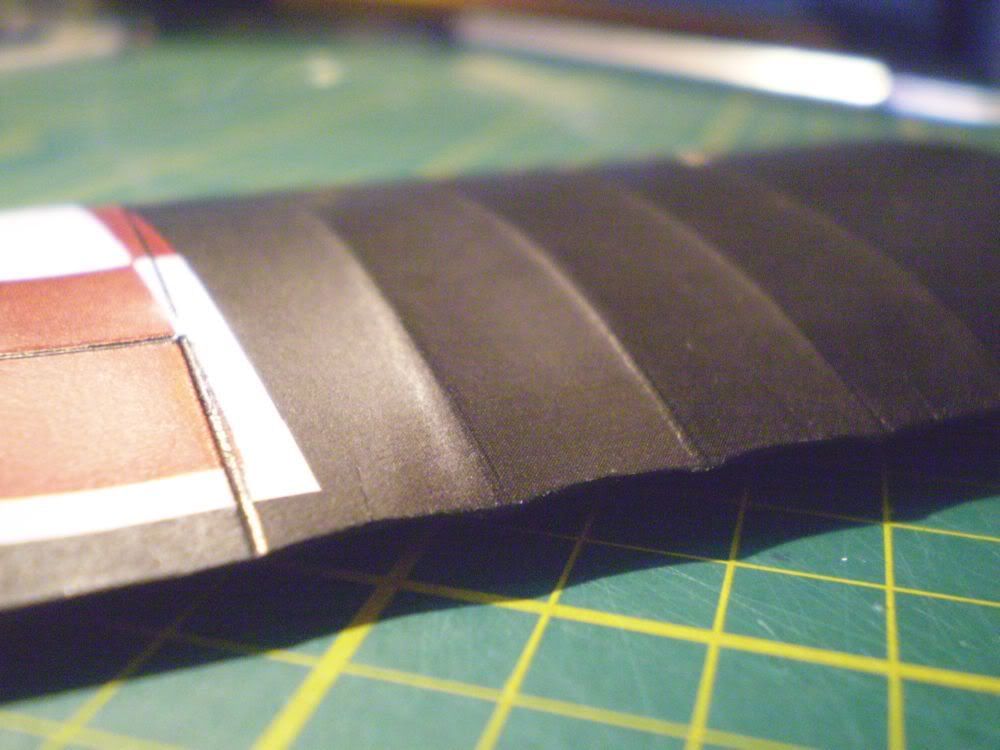 First of course I had to score the ribs themselves. I marked the ends of lines simply by pressing the empty ballpen. Then, on the soft underside of a mouse pad, the places between the markings were pressed in, using a suitable rounded tool (a cigar etui). Afterwards I turned the part around and pressed the lines again, this time using the rounded end of a painting brush - this allowed the wing to take a proper shape. The ends of the wings were rounded with addition of BCG glue which softened the paper and allowed to make deeper impressions - so I didn't have to make the small cuts provided there.    The current state of the model: 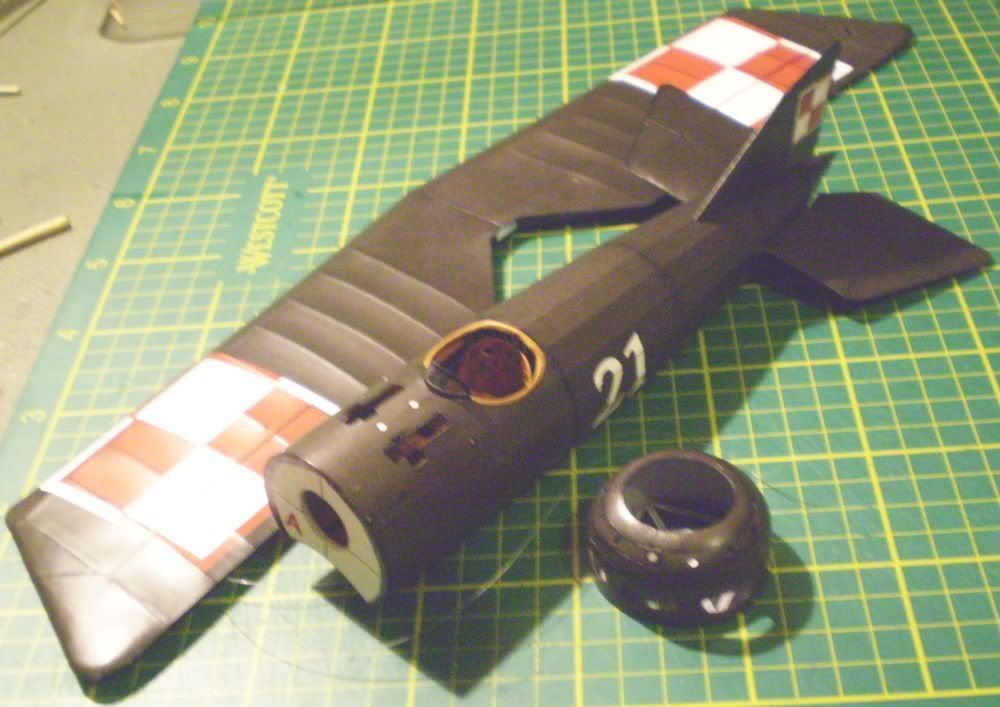

|
|
#16
07-18-2009, 08:05 AM
|
||||
|
||||
|
Wonderful! Thanks for the great inspirational pics :D
Chris
__________________
Want to buy some models from independent designers? http://www.ecardmodels.com and visit the shop!
|
|
#17
07-18-2009, 01:40 PM
|
||||
|
||||
|
Somehow, I missed this thread earlier. I'm sure glad I found it. The airplane is a real beauty and the model is terrific. I appreciate the detailed information on the techniques that you used.
Thanks very much for sharing. I will keep a close eye on further developments. Don
|
|
#18
07-18-2009, 08:17 PM
|
||||
|
||||
|
So this time I put my knife to the engine :-)
I am a bit pressed with time - if possible I'd like to finish one more model in this Marathon, but I'm slowing down, for three reasons - making detailed 'SBS' :-) reports is time consuming; second, I'm doing a detailed job, instead of going straigtforward "by the manual"; third - I'm getting sidetracked - for example now I've done the engine more detailed and moving... I'm sure that usual two or three pictures of progress, without much of an explanation would not make my readers happy. Doing "better" model instead of plain one is fun. And of course what a propeller plane is without the possibility to move the propeller - and in this case the propeller rotates together with the engine, so I have no choice but to accept the slowdown :-P Enough ranting - time for a detailed report. Making a small tubes gives many modelers a lot of troubles. How to make it well? Start (VERY IMPORTANT!) applying some water based glue (I use BCG) on the back of the part that needs to be rolled. The glue will soften the paper, stop it from delaminating itself, and when the part will dry, it will be tougher and will keep its form. Roll the part using thinner and thinner rods on a soft surface - like the other side of a mouse pad. Finally, on a rod with a diameter equal to the inside diameter of the finished tube (here an isolated wire), glue the ends together with a tiny amount of glue. I found that paintbrushes are great for that because of smoothly changing diameter of their handles. You can use fingernail to flatten and smooth the connection line. Finally I always use my little touristic hairdryer to dry the part when I'm happy with the result. I canot now imagine modelling without this tool - it cuts time needed to make a model manifold - in my pessimistic estimate to at least a quarter of normal time.     Next tip to make faster and precise builds is, if possible, to cut the circles using a puncher. I've got one revolver type with several punch diameters. First check if a test circle cut from a spare paper fits the inside diameter of the part, and then punch the small circles at will. - they're perfectly round, and if they get a little convex you can easily flatten them down if it is necessary.    Another trick allows to very fast and easy adjustment of the diameter of a ring glued into a tube (perfect for medium sized inside circles where it is not necessary to be pretty only to fit snugly and strengthen the part. Make a hole in the middle (I use puncher again), and install the part in a dremel attachment for cutting discs. Dremel rotates the part thousands times per minute, and all you need to do is to delicately touch the part with a sanding paper, and from time to time turn the dremel off and check if the part fits. You can use this method to make perfect rounded wheels which will be shown later in this thread.    Cones are made in the same way as tubes, only you need to move the rod always along the radius of the circle.     When I've put the engine together it seemed too overly simplified for me, and so I checked the net in search of pictures of the engine to make it more like a real one. I found something better - a highly precise model of the Le Rhone 7B engine. I didn't make it because it would waste my effort put into making the engine, but instead I attached wires to it making it more realistic. Anyone who wants a perfect engine (for example for a diorama with the airplane in repair) will be delighted to build the perfect replica.  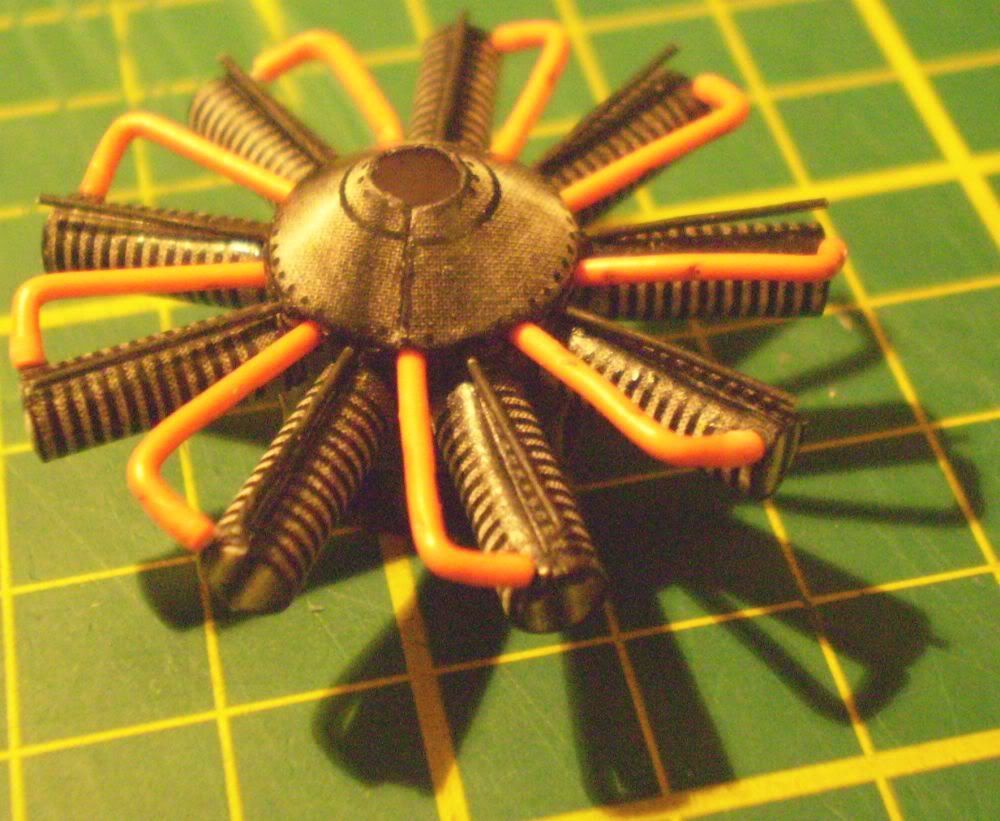 The engine had to be connected with a propeller, so now I had to make it. Into the spindle I've inserted a stick thickened with a masking tape to the inside diameter of the spindle tube. Then I drilled a hole through the part and inserted a piece of wire. I formed the propeller blades and attached them to the spindle, then glued the stick into the engine (I've cut holes for it in all the inside circles while building the engine) inserting the cowl between engine and propeller first. Then I made a hole in the back of the engine compartment, glued some more circles to make a longer bearing, inserted the stick into the bearing and glued another circle to the end of the stick. Between the rotating parts I also inserted circles made of polyethylen foil to lessen the friction. Finally I've glued the back of the engine compartment into the cowl.    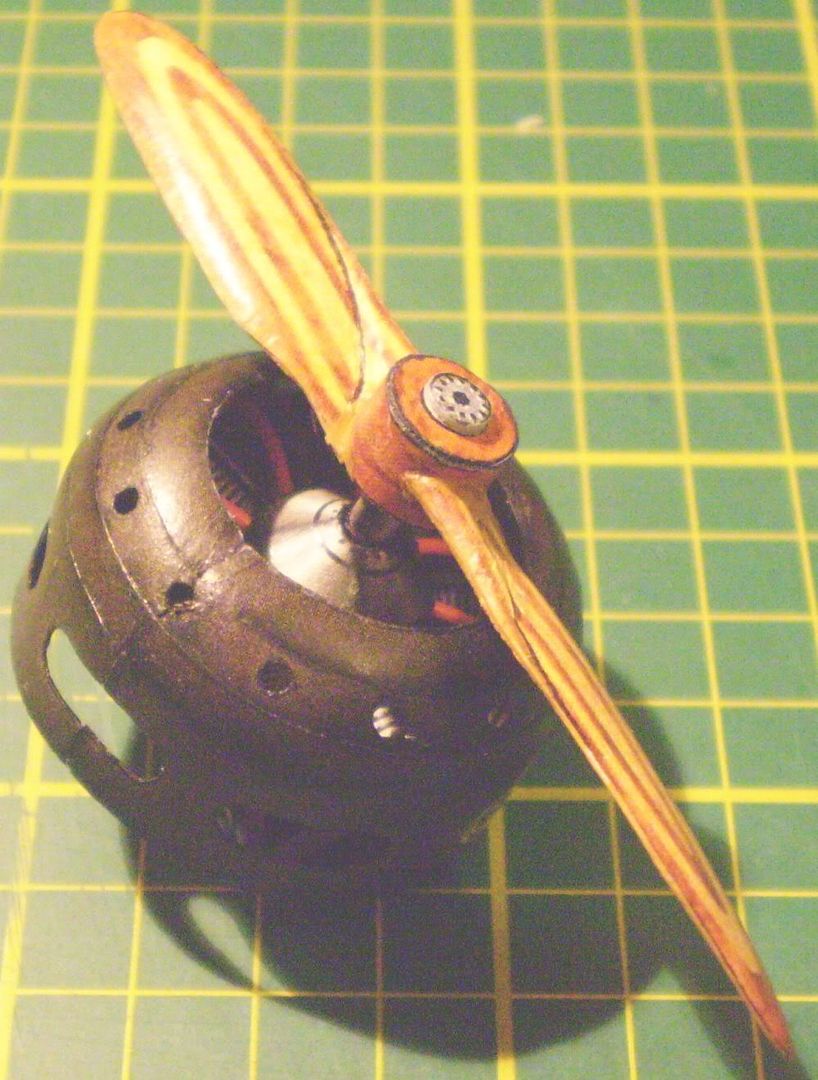 You can see a movie of rotating propeller and rotary engine in the model. It's my first movie on YouTube so please be so kind and make a comment :-D
|
|
#19
07-18-2009, 08:38 PM
|
||||
|
||||
|
Your technique of that cowling awes me to no great end. Magnificent. The ribbed sections on the wings and fuselage are exceptional. I may have some talent but your finger dexterity makes my fingers all thumbs the size of bratwurst. I have this model in my archives someplace but now I am almost afraid to touch it after seeing your work!!!
|
|
#20
07-19-2009, 03:46 AM
|
||||
|
||||
|
This can't be as hard as it looks because it was my first attempt to do it. I've given here a link to my coveted ideal cowl - maybe someday...
Don't be afraid to touch that model. The great thing about printing from a file is that you can always make another printout and do it again, this time better. I've printed mine in two copies for starters. This is partial reason why I'm experimenting so much - I'm not afraid of losing or destroying a part. Dexterity is something you gain through practice. The best way is to print some small boxy model - like a vehicle - and glue it several times until you are delighted how nice it comes together. Then try to make it without any gluing stripes - on touch - and again repeat until you are happy with result. Then make another small model, this time something rounded - like an airplane. This will teach you to make rounded parts. When I say small I mean time necessary to make the model - start with something that takes about an hour to make. Start small, learn great deal about modelling by repetition - then move to a more detailed builds. Here is a model I started with - a small polish tankette TKS by Satoshi Yoshioka. It's in 1:72 scale and there are four of them on the printout A4 page: 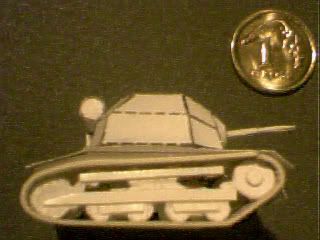 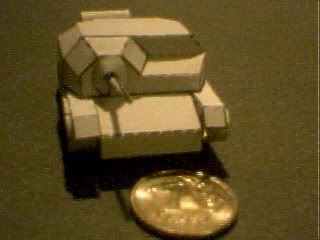 I've butcheret the first one, made second passable, and in the third (on the picture), canibalizing parts from the fourth - I've made the tracks - on the original they are only a drawing on the side Last edited by lehcyfer; 07-19-2009 at 04:01 AM.
|
| Google Adsense |
 |
| Thread Tools | |
| Display Modes | |
|
|


 Linear Mode

