


|
|
|
#1
 02-07-2011, 11:54 AM
|
||||
|
||||
|
Bristol T188
The Bristol T.188
This is a plane that came to my attention just recently and so I set aside my other projects and jumped into this one feet first. It is a very interesting plane and I will attempt to document my design as I go along. So here we go. First here is the link to the plane itself to give you some background.  http://en.wikipedia.org/wiki/Bristol_188 I use Sketchup to design with so I started off with an image of the wings top and bottom from a three view set of drawings.  From here I import this image into Sketchup and then scale it so that it is the proper size. I use ScaleCalc to take the actual dimensions of the plane from the web information and then set it to 1:32 which is what size this model is going to be built. So 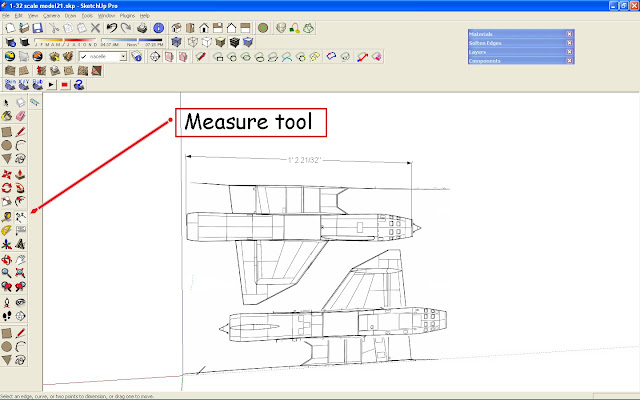 1. Get image to work with 2. Import into Sketchup as Image 3. Use measure tool to determine a know distance in image 4. Scale this distance with the scale tool to dimension of final size as determined by Scale Calc  5.Now you have the starting point. So put this on a separate layer and name it image  6.Make image transparent so that you can see the lines that you are about to draw on it  7. Zoom in and draw single lines for cross sections of engine nacelle  8. Hide image so you can work with the lines you have just drawn  9. Now rotate the image so you can see the lines in perspective  10. Use circle tool to snap to midpoint of line and drag circle to outside of line. Segment count is important when you are drawing in details as this will give you the right number of divisions when you unfold it in Pepkura and export the dxf file for adding details .   11. Now erase lines from circles to arrive at formers of Nacell  12. Now establish center points for each circle and make them each a individual group  13. You now have all formers made and grouped in the proper place for lofting the lines.  14. Starting with one end highlight the group by touching the circles perimeter and then move to the next one 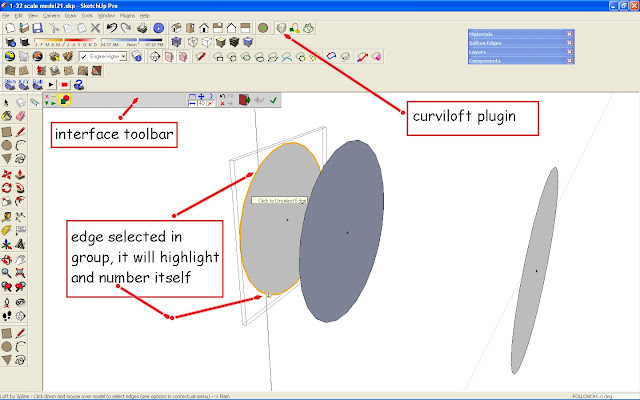 15. You will notice that it numbers them one than two. This is going to make your first skin section  16. Hit the green checkmark and your skin is applied former to former  17. Change the segment to one. This is important step when you go to unfold this in Pepekura. Mutiple segements look nice, but they cause a lot of problems in the unfold  19. Hit the green check again to complete the skin and it will make itself a group and finish  20. Now you have a Engine Nacell completed 
__________________
Mike Dixon Anything in paper is fine with me 
|
| Google Adsense |
|
#2
02-07-2011, 12:18 PM
|
||||
|
||||
|
Part 2
20. Choose the paint bucket and color the parts as you see fit
 21. Now unhide the image and check your work  22. Hide groups behind your working area so you dont get confused with multiple objects. Highlight the front group with the concial cone and draw a line straight forward on the image  23. You now make the lines to establish the plane of the cone itself the use the follow me tool to rotate the plane using the circles perimeter to act as the path    24. Now unhide the other groups 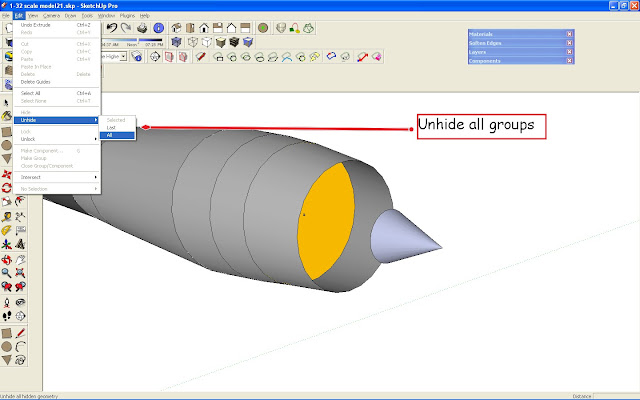 25. Highlight all the groups and export the 3d model for Pepkura  26. Choose a folder and make sure you open options windows and set current selection and other items to suit your need   When completed you will get a success window 
__________________
Mike Dixon Anything in paper is fine with me
|
|
#3
02-07-2011, 12:33 PM
|
||||
|
||||
|
Pepekura Unfolding
1. Open Pepakura and open the 3ds model file or whatever extension you chose to export
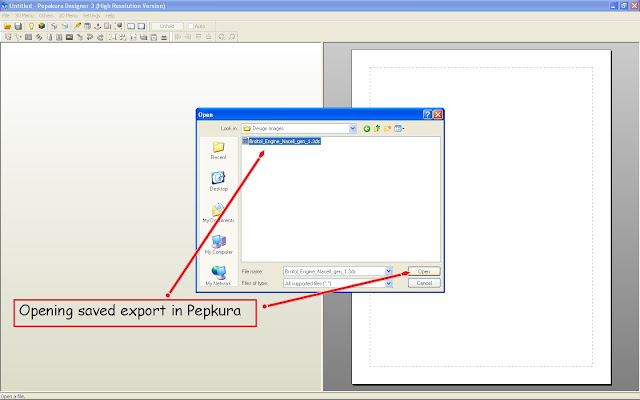 2. And you now have the 3d model for the unfolding  3. I now establish my opening edges for the unfolding of the model . Keep this in line on one edge along the bottom of the nacelle  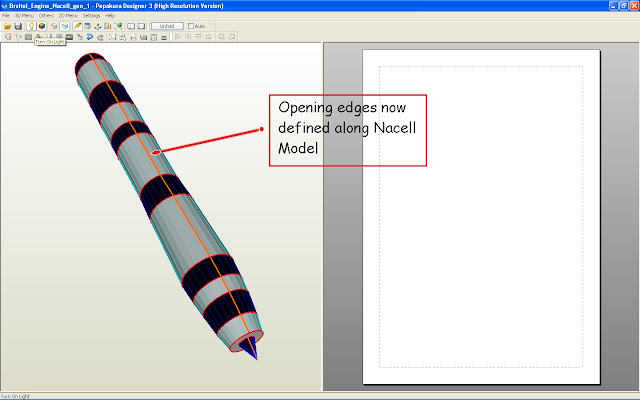 4. I unfold manual and you have to do the math here to make sure you are at the right scale 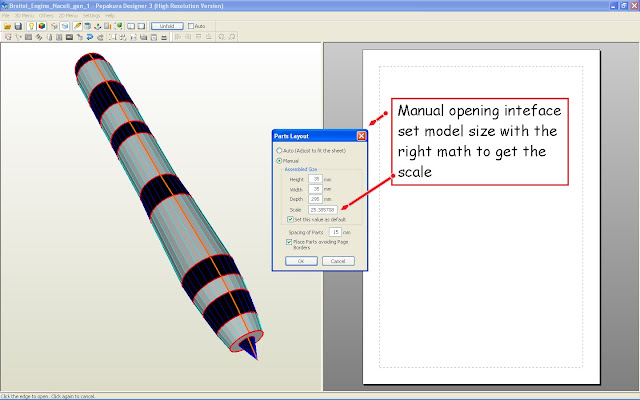 5. Unfolded Nacell with formers ready to print cut and build your white model for check of shape etc. 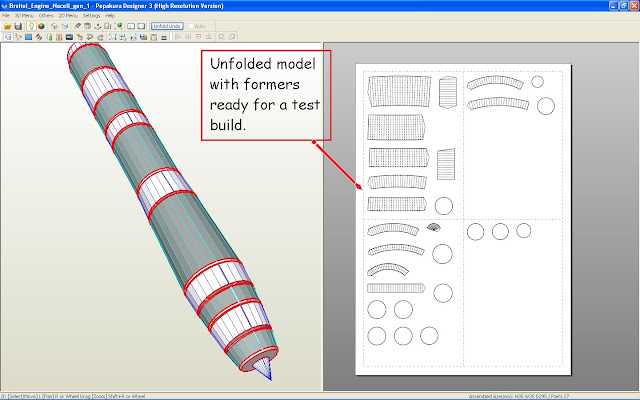 I did not cover the texture of the model here. I will do that later. I just thought this primer on getting a design out for a unfold in Pepkura might help some of you who have dipped your toes into Sketchup.
__________________
Mike Dixon Anything in paper is fine with me
|
|
#5
02-07-2011, 01:33 PM
|
||||
|
||||
|
Quote:
I never heard of this plane before either, but apparently the Brits were ' hard at work in 1953 developing what appears to be a SR 71 type of plane that was for Mach 2 testing.
__________________
Mike Dixon Anything in paper is fine with me
|
| Google Adsense |
|
#6
02-07-2011, 01:49 PM
|
|||
|
|||
|
Wow, First, never heard of that plane before, Thanks, 2nd, very good tutorial on Sketchup! Maybe I can even figure out how to turn it on now!! I am O.K. with Rhino, but Sketchup and Pepakura, nope. Very interesting thread.
|
|
#7
02-07-2011, 02:22 PM
|
||||
|
||||
|
I appreciate this tutorial as well. Would it be alright to unfold the model with e.g. Flattery?
And do you have a list of recommended plug-ins one ought to get? Leif
|
|
#8
02-07-2011, 02:25 PM
|
||||
|
||||
|
Modeling the Engine in Paper or was that Foil?
So I did a little more work on the Sketchup Model
   Just making sure it all worked together Then I proceeded to cut the formers Then the Sections 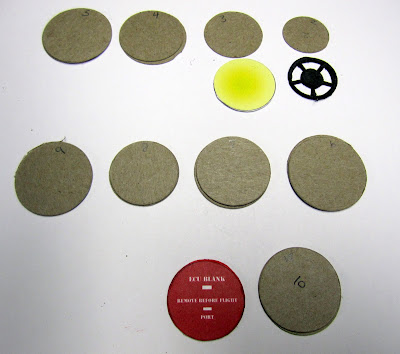   But this plane was all Stainless Steel. So I decided to work in foil just to see how impossible this could get. Front Half , Back Half, and Induction Flaps    Back side of Induction flaps with cuts showing Assembled Induction flap ring  
__________________
Mike Dixon Anything in paper is fine with me Last edited by mldixon; 02-07-2011 at 02:57 PM. Reason: Fix photo
|
|
#10
02-07-2011, 02:59 PM
|
||||
|
||||
|
Quote:
__________________
Mike Dixon Anything in paper is fine with me
|
| Google Adsense |
 |
|
|


 Linear Mode

