


|
|
|
#12
 02-06-2008, 10:55 AM
|
||||
|
||||
|
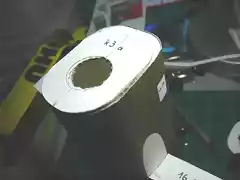
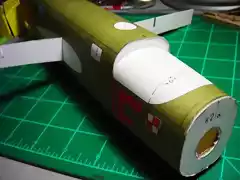
Now, for the butt-butt construction, I try to use Golden Bear and CmdrTed methods on joining the formers together, sand them so both follow the same shape, and put on joining pieces. Picture 1 shows both formers before sanding, glued them lightly. Picture 2 shows them sanded. Picture 3 shows the two pieces with the formers, and about to be joined. No strips whatsoever.
1. 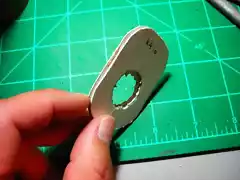 2. 2. 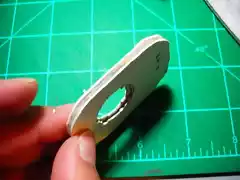 3. 3. 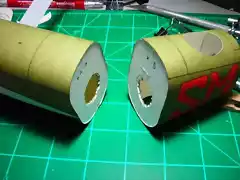 Let's find out if they fit. 
|
|
#13
02-06-2008, 11:01 AM
|
||||
|
||||
|
Quote:
@ LEX - It is better to make the cylinder before putting the former. I skipped (and I apologize) mentioning that a strip is drawn in the kit for each piece to make it a cylinder, but you have to separate it from the piece. After the cylinder is made, you can put the formers.
|
|
#14
02-06-2008, 11:20 AM
|
||||
|
||||
|
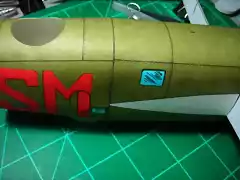
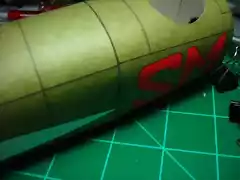
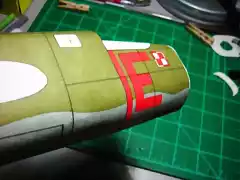
It seems that the fuselage is well designed! It fit just fine.
The only little tiny thingy is that the lines... either align on the marker at the top of the fuselage, or they align on the panel lines. I decided half and half, not to make much noise about it.
|
|
#15
02-06-2008, 11:43 AM
|
||||
|
||||
|
Next, is the front fuselage.
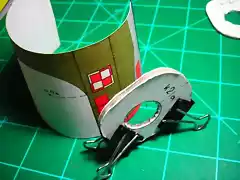
A note here: this model does not have a detailed cockpit. So I won't mess around with windows and stuff. But I have to take care of the drawn cockpit just the same. So, for this part, I decided to glue the two formers instead of doing the GB-Ted method. Picture 1 shows the former on the center piece, and the former on the "cockpit" part. Picture 2 shows the same thing from other angle. Picture 3 shows the piece that goes here, before making the cylinder, and with the formers together. And picture 4 and 5 show the piece attached to the central fuselage, with no problems at all!!  Last edited by milenio3; 02-06-2008 at 11:45 AM. Reason: One more pic
|
| Google Adsense |
|
#16
02-06-2008, 11:14 PM
|
||||
|
||||
|
Great start on this model Gerardo! Looks like the much maligned Bogdan might regain some cedibility with your build. Keep the pics coming!
Cecil
|
|
#17
02-07-2008, 07:53 AM
|
||||
|
||||
|
Gerardo -- I am totally impressed with your ability to bring this most interesting airplane to life. You make it look easy, but I fully understand the skill, experience, and patience you bring to this build. "No problems at all" is a nice touch! Don
|
|
#18
02-07-2008, 10:14 AM
|
||||
|
||||
|
Thanks Cecil, Don, for the praises. I hope this can go on flawless.
No pics today, it was family night last night. But tonight, B-25 is gonna materialize more fuselage, and maybe other stuff.
|
|
#19
02-12-2008, 04:27 PM
|
||||
|
||||
|
After a rough weekend at work, I can continue giving the status report... errr... build thread for this Maly Model.
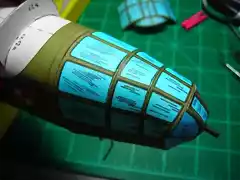
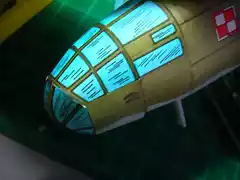
This is the front of the fuselage, and above it, the cockpit part. Photo 3 gives a view of the window set in front of the airplane. Photo 4 is the tip of the fuselage where a gun should be in place, which is not in the model. I had to make one from a rolled piece of paper painted in black, as shows photo 5, on which you can also see the former of the piece. And photo 6 shows the complete set. 1. 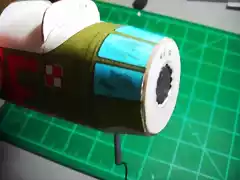 2 2  3 3 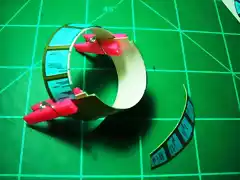 4 4 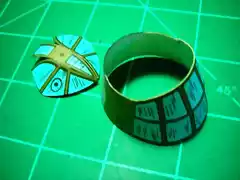 5 5 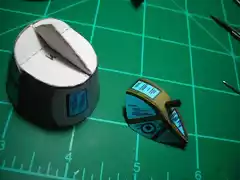 6 6 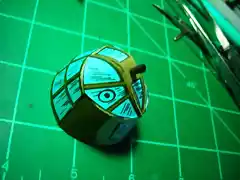
|
|
#20
02-12-2008, 04:34 PM
|
||||
|
||||
|
The front of the plane is almost complete.
  BUT... another but... the underside of this part of the fuselage.. a HUGE GAP!! 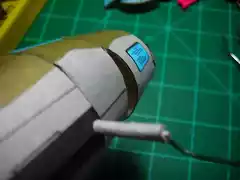 What to do?? Well, do whatever fine paper modeler like the ones reading this thread would do... cut and paste. So I cut the part (the one with the window on the underside), and try to make it decent. The little gap at the end of this process was covered with a piece of the same part cut out. 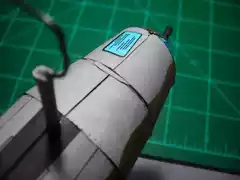
|
| Google Adsense |
 |
|
|


 2.
2. 
 2.
2. 
 5.
5. 
 Linear Mode

