


|
|
|
#1
 05-19-2010, 10:36 PM
|
||||
|
||||
|
I'm doing a build thread on on Large Scale Planes of this behemoth but I thought it might be of interest here as well...
I bought this a couple of years ago as my gift to me when my wife sold one of her houses...if I'd known that it was only just the basic shapes I probably wouldn't have bothered due to the price and the price of postage on top as it had to be freighted down under as it was too large for Royal Mail. What's in the box? 2-3 acres of thick white vacformed plastic. 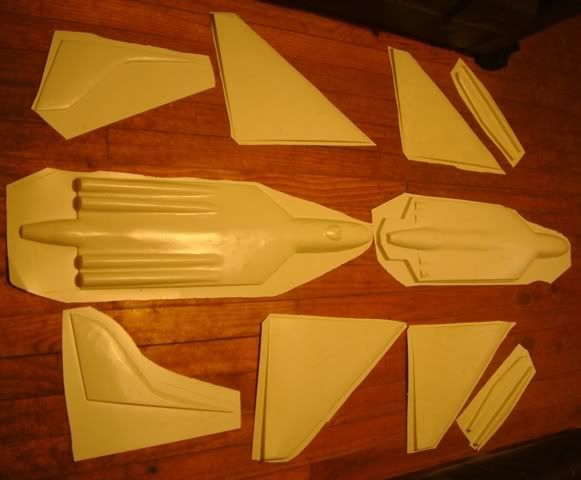 Resin and white metal parts for cockpit, landing gear and other bits'n'pieces. One (only one) clear cavopy in vacformed plastic.  A large decal sheet for XH588 and the 16 of 25 Certificate of Authenticity 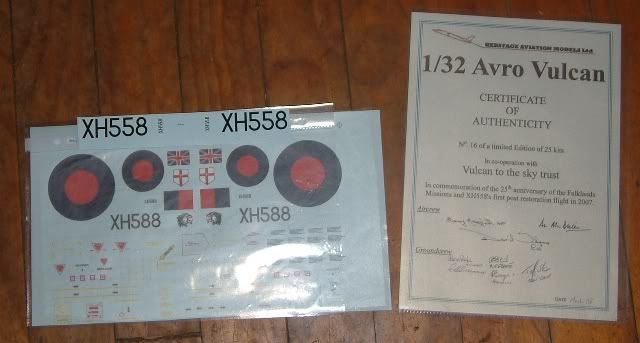 Instructions are on a number of A4 sheets and these make it quite clear that this is not a shake'n'bake kit and the builder will need to do their own research on detail which is cool until such time as Trumpeter release a 1/32 V Bomber set.
__________________
Please critique my posts honestly i.e. say what you think so I can learn and improve... The World According to Me Last edited by SJPONeill; 05-19-2010 at 10:38 PM. Reason: fixed link errors 
|
| Google Adsense |
|
#2
05-19-2010, 10:47 PM
|
||||
|
||||
|
Starting to do the research made things a little complex...
My initial plan references are from Scale Models August 1975 (1/96) and Scale Models International December 1984 (1/144) and yesterday afternoon I had the plans in these blown up respectively by factors of 3 and 4.5 to 1/32. Large scale plans of Cold War strategic bombers are not something you see everyday in your average Central Plateau ski town photocopy shop and the various A0 sheets attracted quite a bit of attention as we laid them out on the floor. My main concern is the shape of the wing which is close to that of a B.1 but even with the leading edge extension pieces in the kit, a long way from close to the massive wing of the B.2. 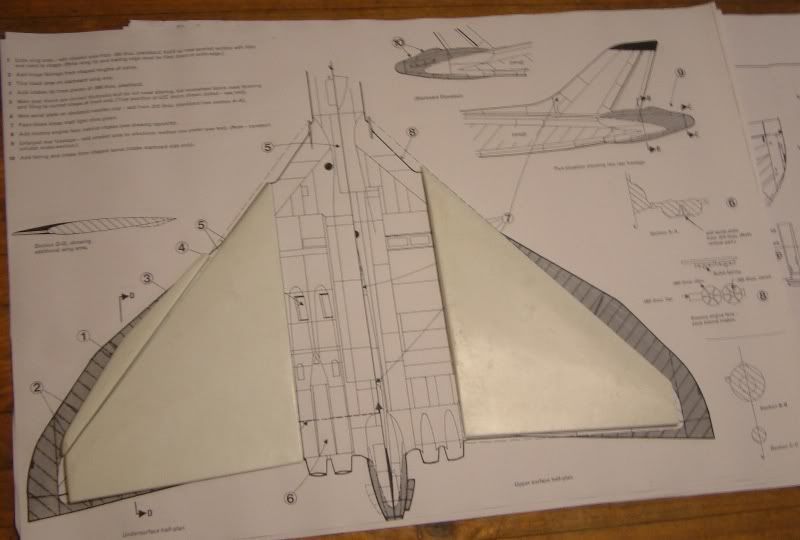 First impression from laying the fuselage halves on the plans are that the nose forwards of the intakes is somewhat bulbous but nothing that can't be dealt with using care, filler and sandpaper (still have stacks of the last two left over from drywalling/Gib-ing a house this year); the fuselage section with the engines maybe lightly narrow but the tailcone seems spot on. 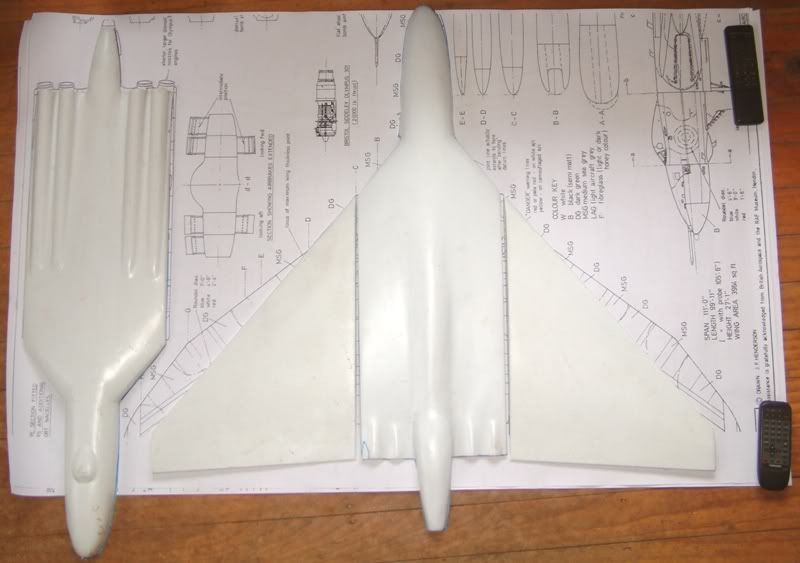 I originally opted to build one of the BLACK BUCK Vulcans, exactly which one was a decision for further down the track and began to make a full set of formers around which to build a skin (sound familiar) to correct the shape issues... 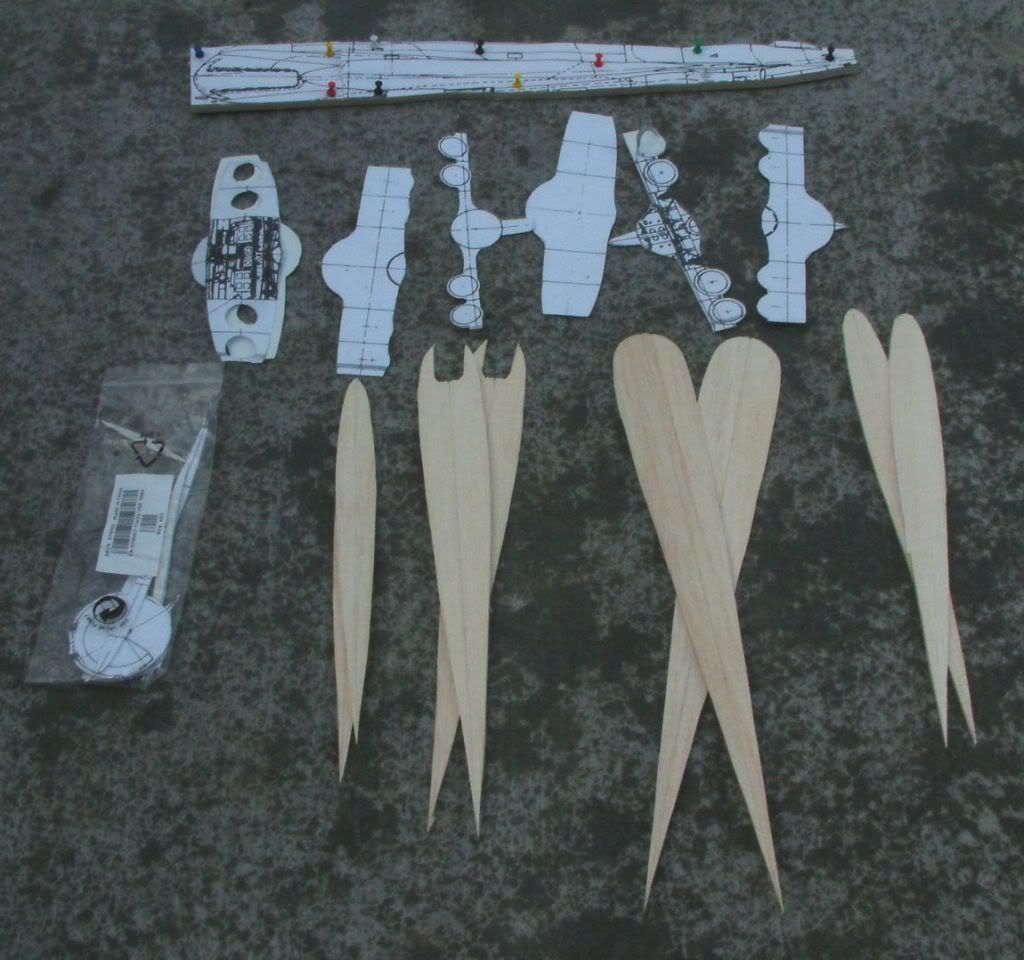 This was in November 2008 and the penny dropped that I was essentially scratchbuilding the whole thing and would only be using the detail parts from the original kit. At that point the whole thing when into one of the darker recesses of the garage where it remained until earlier this year when I decided to sell it off on Trademe (no Evilbay down here). I had tons of watchers but no serious bidders so after a few months of relisting and relisting, I decided I might as well build the damn thing...
__________________
Please critique my posts honestly i.e. say what you think so I can learn and improve... The World According to Me
|
|
#3
05-19-2010, 10:49 PM
|
||||
|
||||
|
It will be as an early Vulcan with the non-RWR tailcone and either:
This will be quite a long build as I expect to be travelling quite a bit with work but I aim to have her done by next year's Scale Model Expo in Wellington (NZ).
__________________
Please critique my posts honestly i.e. say what you think so I can learn and improve... The World According to Me
|
|
#4
05-19-2010, 10:52 PM
|
||||
|
||||
|
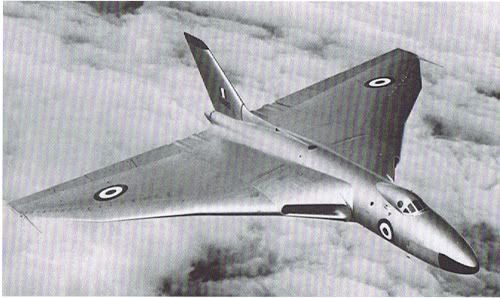
to be one of the first Vulcans with the straight wing, most likely XA892...much like this shot of XA899 after it has been retrofitted with the kinked wing...
 The first surgeries will be to a. correct the shoulder join where the wing meets the fuselage just aft of the intakes which is too blended; and b. to remove this ugly growth on the tail in favour of the far more aesthetic non-ECM tail cone. The shaded areas indicate what needs to go... 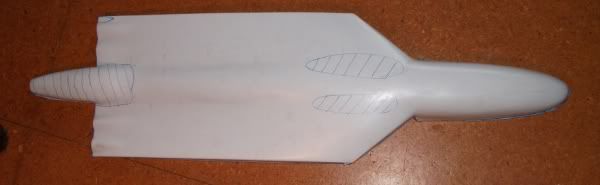
__________________
Please critique my posts honestly i.e. say what you think so I can learn and improve... The World According to Me
|
|
#5
05-19-2010, 10:55 PM
|
||||
|
||||
|
Plastic has been cut!!
I made up a couple of mirror image templates based on Lee White's pictures of his work in this area and removed the errant shoulder where the wing fuses into the fuselage above the intakes. I used the same templates to make two plates (about 5mm broader in all directions) to back the resulting hole and provide a backing for the filler. I opted to used proper plastic filler as the epoxy filler I normally use for larger filling jobs does not stick very well to plastic and I am very aware of just how flexible the fuselage is at the moment - don't want the new shoulder cracking or popping out further along in the build. This sucked up a tube of Tamiya putty just like that: the scale of this thing is quite incredible and I had to use my DIY plastering spatula as I had nothing in my modelling tool box big enough for the size of the gap. I'd also forgotten - being used to filling only small gaps for a few years - just how much this solvent based filler shrinks while curing so will be off to the hardware store on my next trip into civilisation to find some Bondo or equivalent for the rest of it... 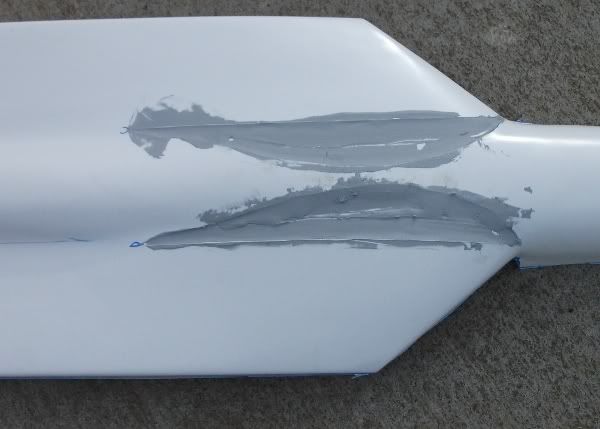 I'll need to add at least a couple more layers of filler before the remodelled area is even close to what it should be and I can start sanding it to the final shape...
__________________
Please critique my posts honestly i.e. say what you think so I can learn and improve... The World According to Me
|
| Google Adsense |
|
#6
05-20-2010, 07:21 AM
|
||||
|
||||
|
This is great Simon! I was watching this one over at LSP. I've no doubt it will look stellar once you're done whipping it into shape!
Mike
__________________
"I learned long ago, never to wrestle with a pig. You get dirty, and besides, the pig likes it." - George Bernard Shaw
|
|
#8
05-20-2010, 08:10 AM
|
||||
|
||||
|
What a terrific -- and formidable -- project! Many thanks for sharing this vac-form project with us. I suspect that a lot of us have some vac-form modeling in our background and some (or many) kits waiting to be built some day.
Don
|
|
#9
05-20-2010, 02:59 PM
|
||||
|
||||
|
Quote:
I use a permanent marker to mark around the edge of each part so that the sheet ends up looking something like this... 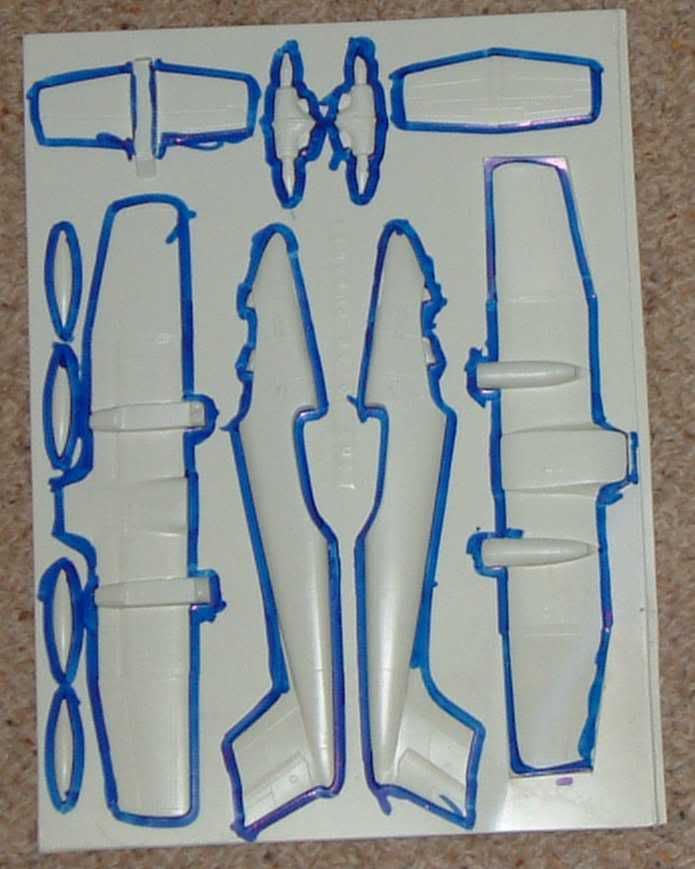 Then I take a sharp knife and trace around each edge, each time taking it a little deeper. I like to leave a little (no more than 1mm) lip around the edge of each part. Usually you can crease the cut and the part will pop free of the sheet but for thin vacforms or complex shapes, I think it is best to keep GENTLY at it until the part has been cut free... NOTE BEFORE CUTTING: if you are going to foam reinforce the interior of any parts or take traces for internal formers, then do this BEFORE you start cutting as the shape will be more rigid in the sheet... Once the parts are free, you will see a thin strip/layer of plastic below the permanent marker...this is the excess that needs to be removed. Some people mount sandpaper on a flat surface e.g. a sheet of glass and rub the part over that to get an even sand. I find that, except for small parts, this approach results in an uneven sand. I prefer to use a sanding block and work my way around the part, checking every minute or so that I am NOT sanding into the permanent marker mark. This is also why I like to leave a small lip around the edge of each part - when this comes free, you have sanded enough and the part is as it should be for assembly. For vac kits like the Vulcan with very thick plastic, I use quite a coarse grade or paper to chew away the mass of excess plastic and finish off with a finer grade. On Small models I start and finish with a fine grade to prevent damage. This approach works for most vac kit parts but you will have to think a bit more with wings with molded in anhedral/dihedral or very thin trailing edges, both of which require careful measurement with the eye-o-meter to get right, especially in cases like the Vulcan where there are no guides to the exact contours of the leading edge...watch for future cursing on this topic in this thread... Hope this helps some...
__________________
Please critique my posts honestly i.e. say what you think so I can learn and improve... The World According to Me
|
 |
|
|


 Linear Mode

