


|
|
|
#1
 02-24-2010, 06:04 AM
|
||||
|
||||
|
Voyager Spacecraft 1/24
I decided to undertake Ton Noteboom's Voyager for the second time, hopefully with a few improvements. I am running another thread concurrently at Zealot, as I started the build during the outage. I'm still trying to plan the build out, but a few things are certain so far. I'm attempting to make the science boom and RTG boom movable, if only to combat the effects of gravity on them over a long period.
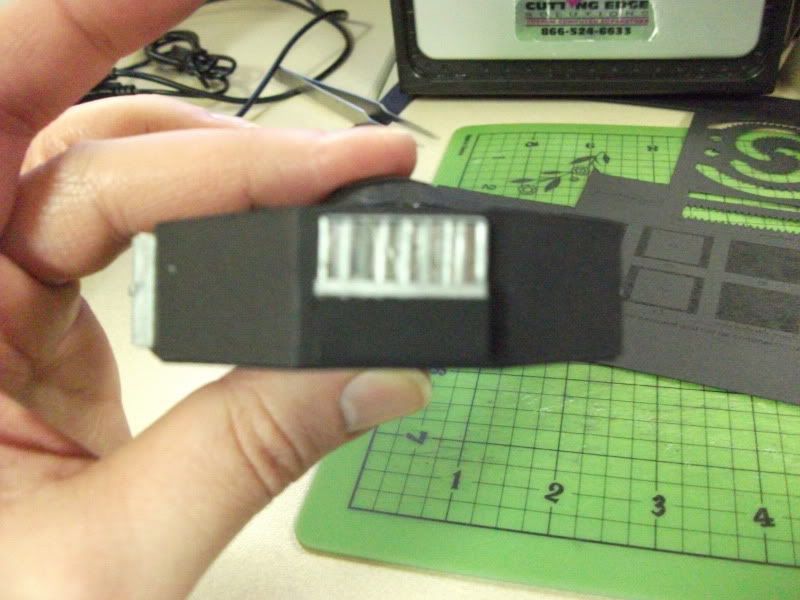
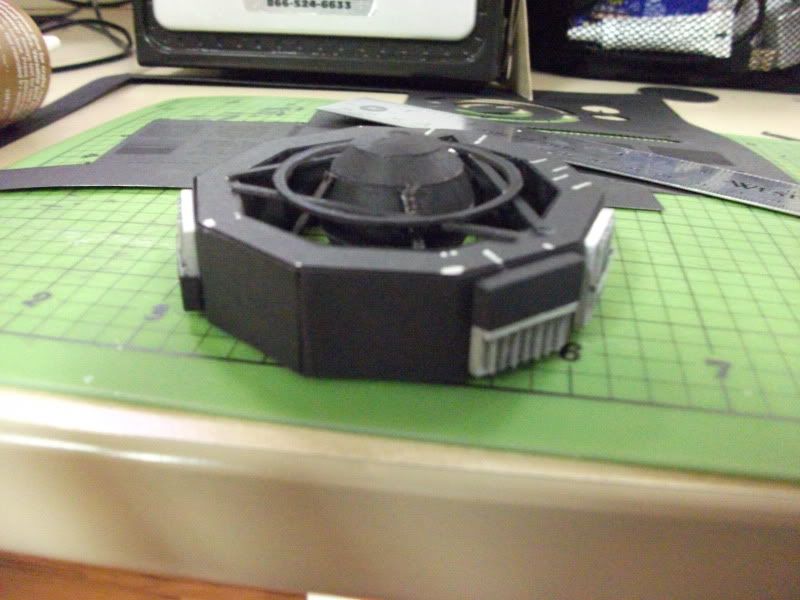
I started with the basic bus, which I covered in matte black cardstock, in order to better represent the thermal blanketing on the spacecraft. I also added more structure inside the bus with 1 mm card, to keep the bus from warping (a problem I noticed on my first build of this model). 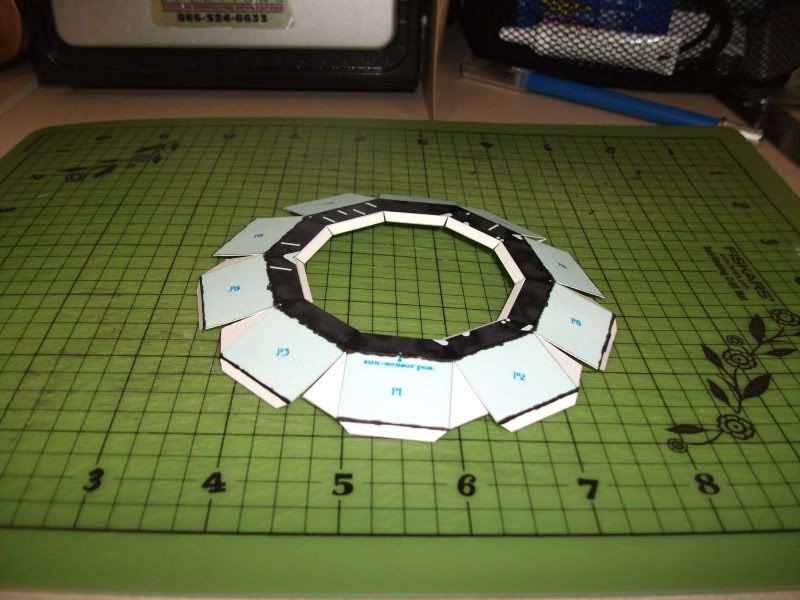 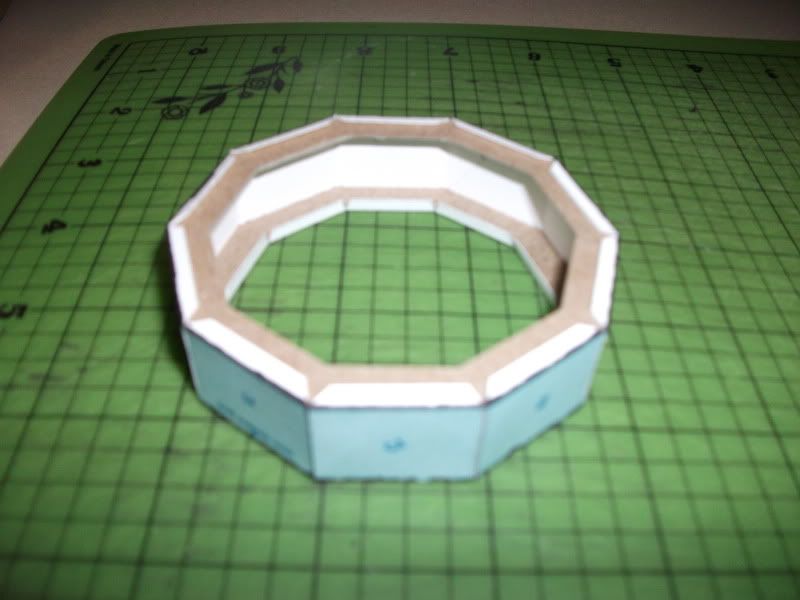 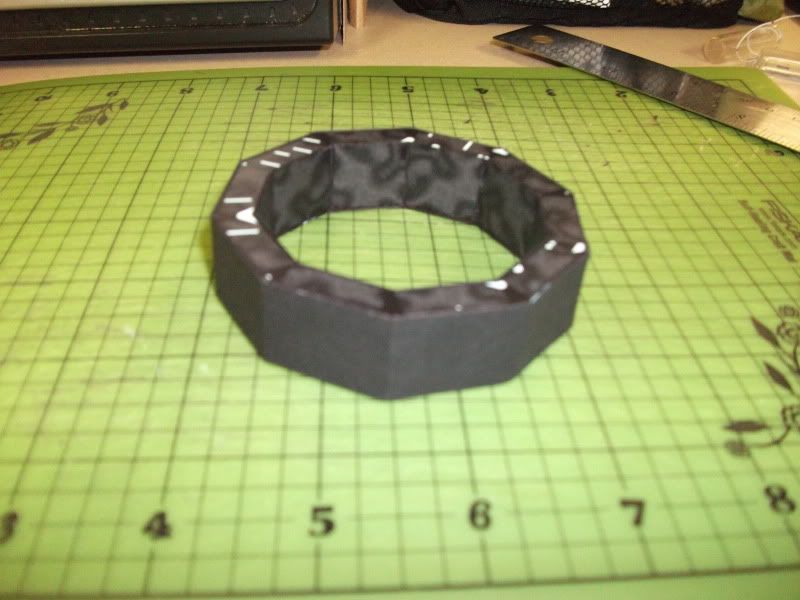 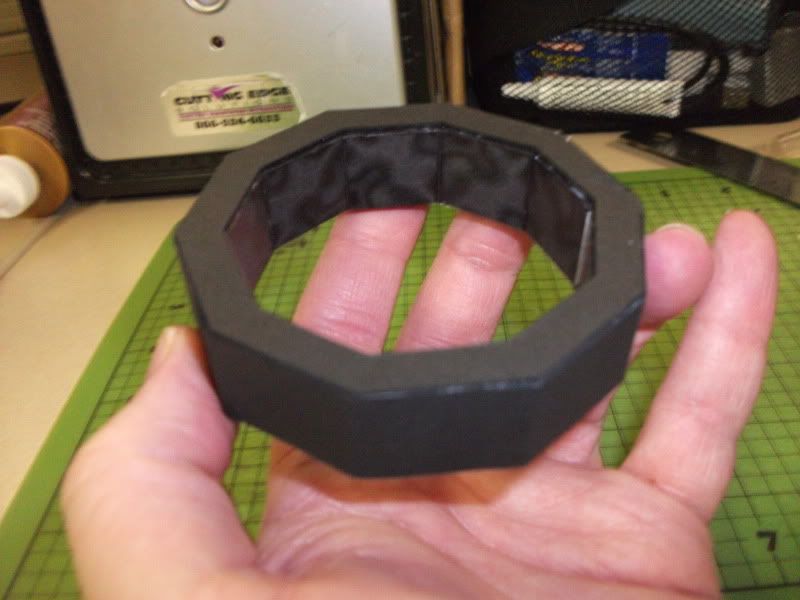 The markings covering the top and bottom indicating instrument placing are covered up by this. I made a mask from another copy of the page and used it to mark the bus where the instruments will go. 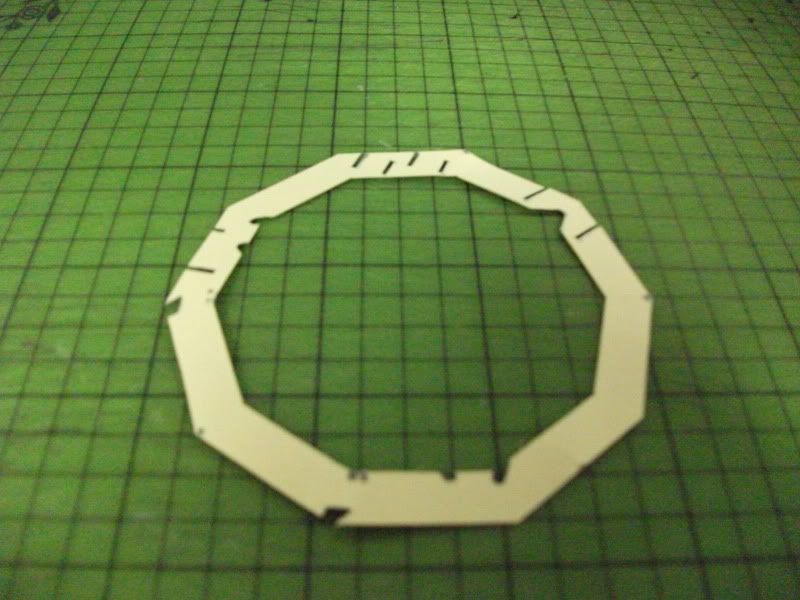 The next project was the thermal control louvers, which are represented in the kit with flat printed parts. I wanted a more three-dimensional look, so I built the louver's base box from aluminum foil laminated to 1 mm card and regular stock colored with a metallic Sharpie. 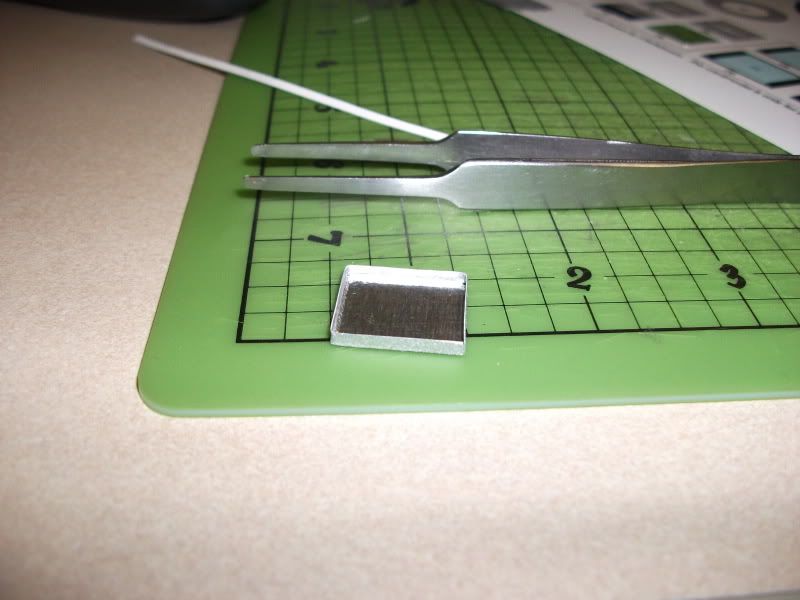 And add the fins, also colored card: 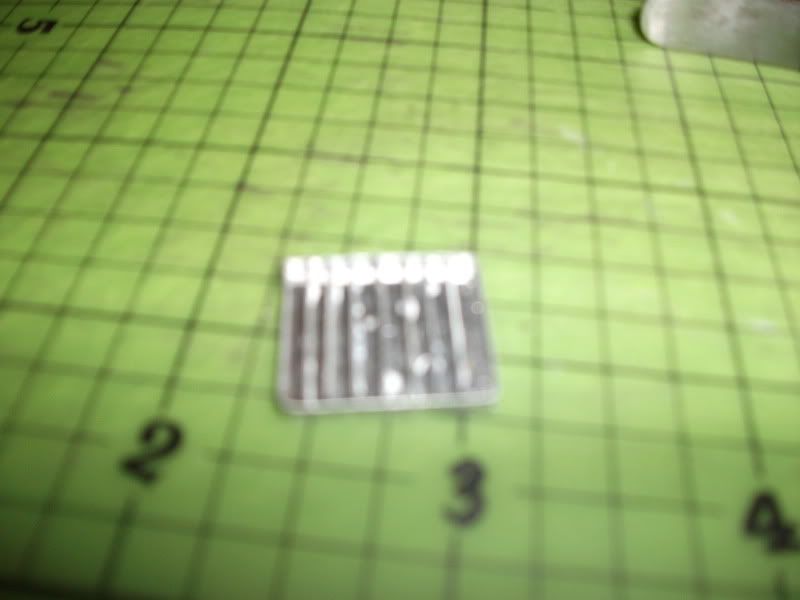 The finished louver, not as crooked as it looks in the picture BTW: 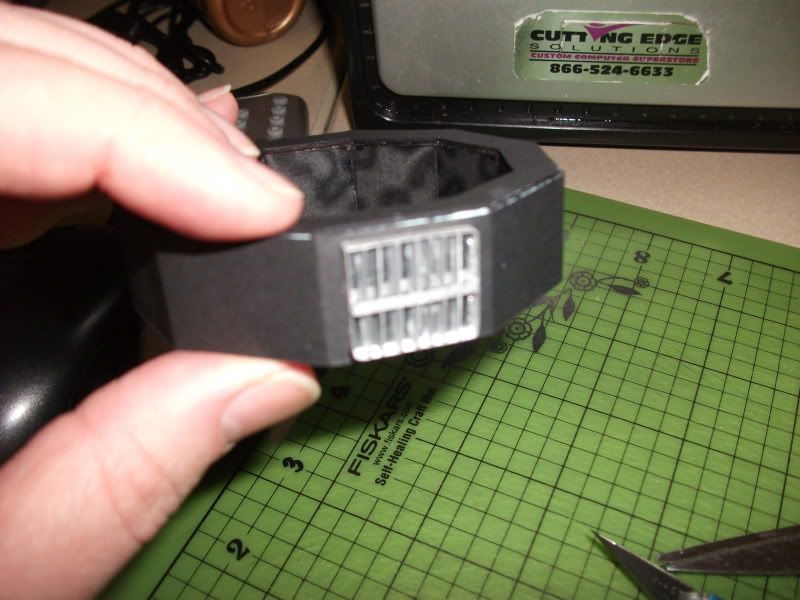 Rinse and repeat, three more times: 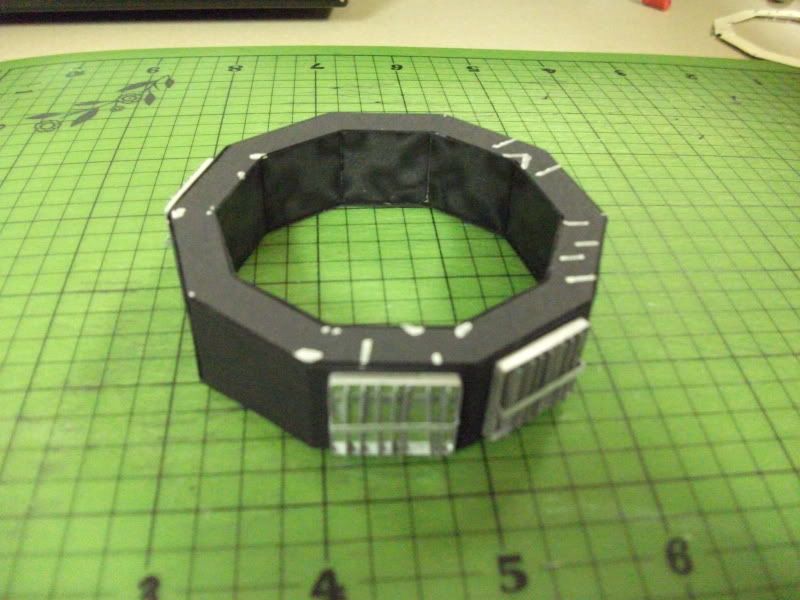 The tank was next. To appear even more deeply colored (and hide edges), I printed the parts on black card. 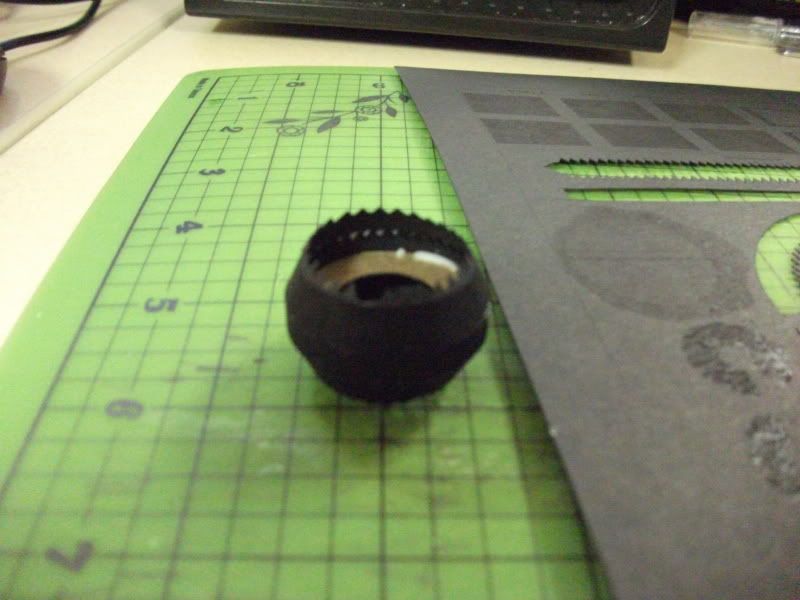 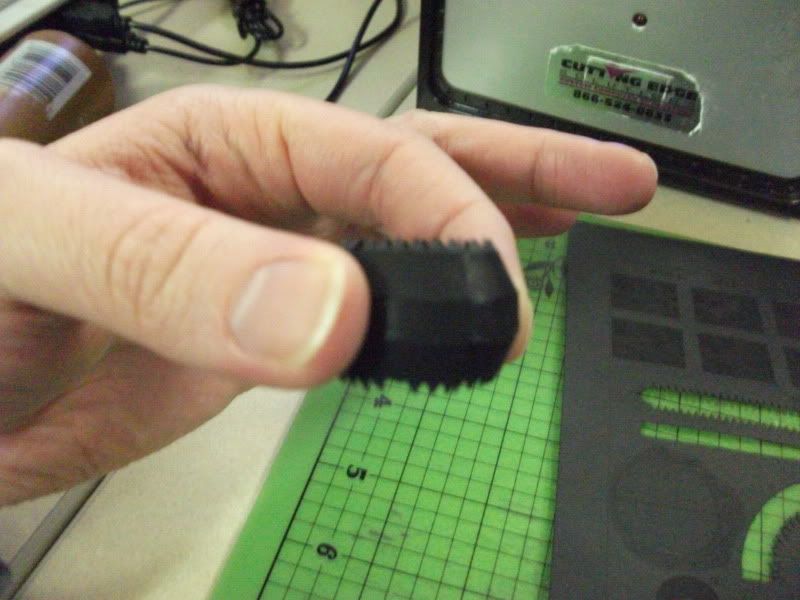 And mounted in the bus with its framing elements: 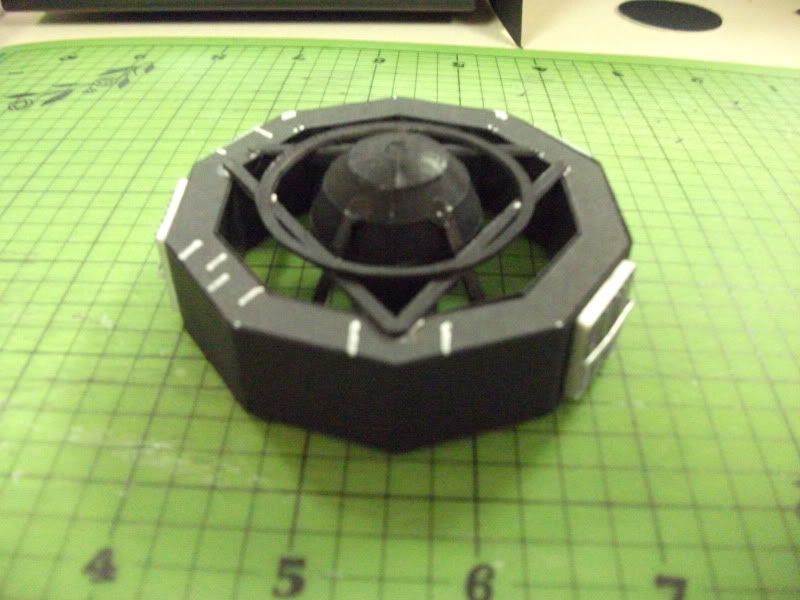

|
| Google Adsense |
|
#2
02-24-2010, 06:19 AM
|
||||
|
||||
|
Two of the louvers are covered halfway with black thermal blankets. I built both from black card and mounted them over the lovers.
  My next project is the struts. I want to eventually build them from paper, but for most of the build, there will be a stand-in prototype made from 2 mm brass tubing and wire. The bottom of the struts is mounted to a ring, which is not part of the actual spacecraft. I did this to keep the struts positioned while the glue dried, and to keep them straight while I build the rest of the model. I will eventually cut the ring away leaving only the four small "feet" attached to the bottom of the struts. The ring will also help while building the injection stage, as far as figuring out diameter and fit. 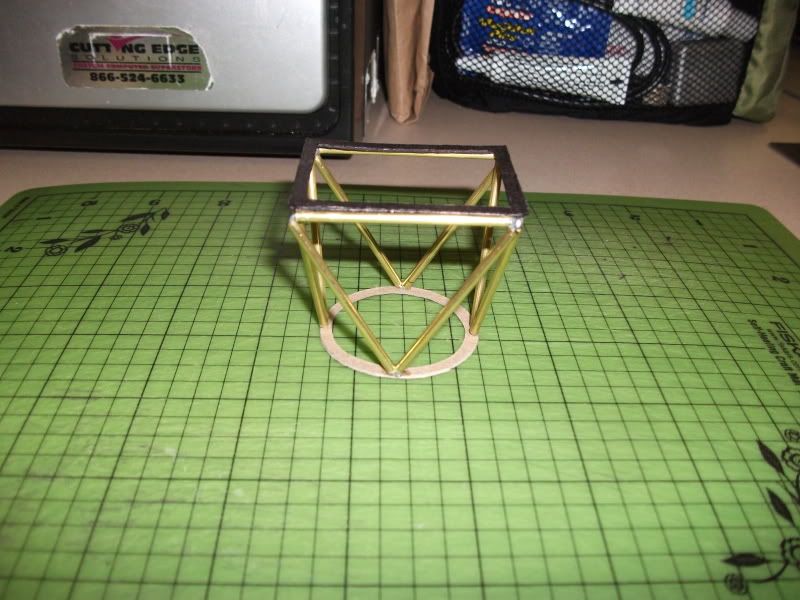 With the bus sitting on top, unattached: 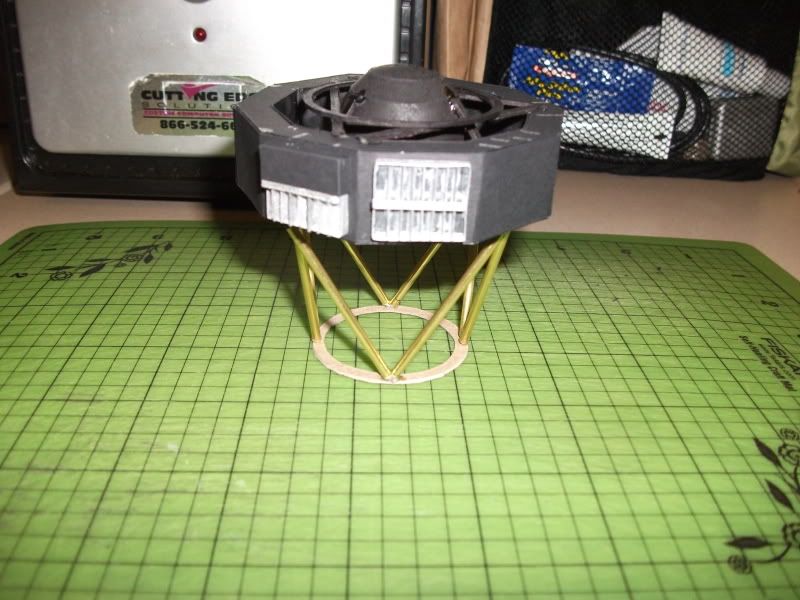 I am still attempting to roll tubes to my liking, at which point I will probably build the struts again. I will admit that I'm tempted to paint the thing black and glue it on, since it's so sturdy and will likely hold up throughout the life of the model. Alas, I am slightly uncomfortable leaving a significant amount of metal in a paper model. What do you guys think? This is very much a work in progress. There are still parts that I may scratchbuild along the way, depending on my mood. The record cover, the high gain antenna dish, and the RTGs, to name a few. My design for the articulated booms seems to be working so far, and I am pretty sure I know what to do to build the injection stage. I'm hoping to complete the entire model sometime before the inevitable heat death of the universe, which is less time than it usually takes me to finish anything (according to my friends and family). :D
|
|
#3
02-24-2010, 09:17 AM
|
||||
|
||||
|
J. - paper, metal, or whatever it takes to get-er-done is fine by me. I suspect you'll get more satisfaction from the challenge of rolling paper tubes - which means if you build it up with the metal struts you'll only cut it apart later to rebuild with paper.
Looking very good, BTW! Yogi
|
|
#4
03-02-2010, 03:39 PM
|
||||
|
||||
|
A very special proyect indeed, J!!
Keeping an eye on this one.
|
|
#5
03-02-2010, 03:57 PM
|
|||
|
|||
|
Nice detailing on one of the best-looking sats. Voyager just had a 20-year anniversary on Valentine's Day commemorating when it passed the outermost planet (Pluto was still a planet then) in our solar system and took some pictures looking inward.
|
| Google Adsense |
|
#6
11-07-2010, 02:15 AM
|
||||
|
||||
|
Yes, yes -- it's been eight months. :o Sometimes I abandon projects and go back to them much later when the mood strikes me.
Also, some of the designing I have been doing has honed my skills enough to attempt redrawing some of the parts. There's nothing wrong with Ton's parts at all, of course. I just wanted to change things a little. The RTG assembly was first. Went from eight fins to six, added the pressure relief device (at least I think that's what the cylinder at the end is for), and added the approximation of the "rivets" between the fins. Also made an attempt at the end caps, which are domed on the real thing, and here have been represented as cones crushed and massaged into an approximation of domes. 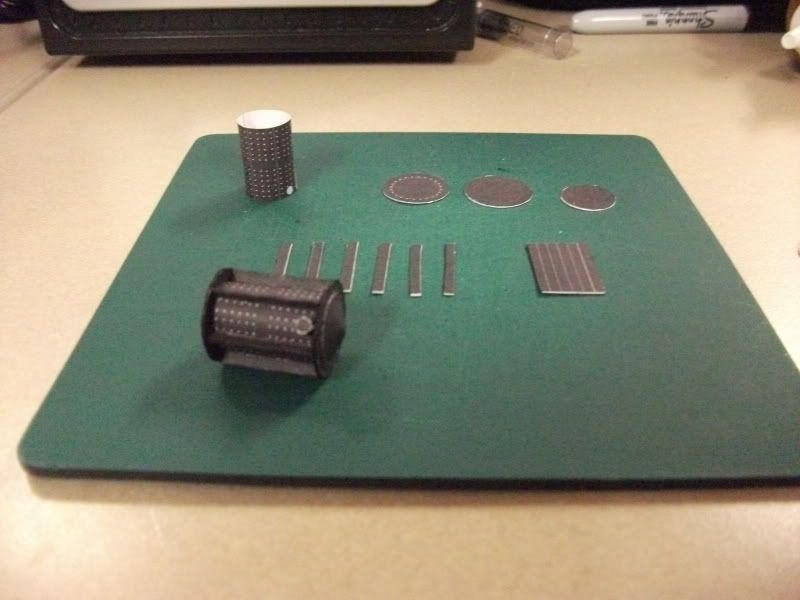 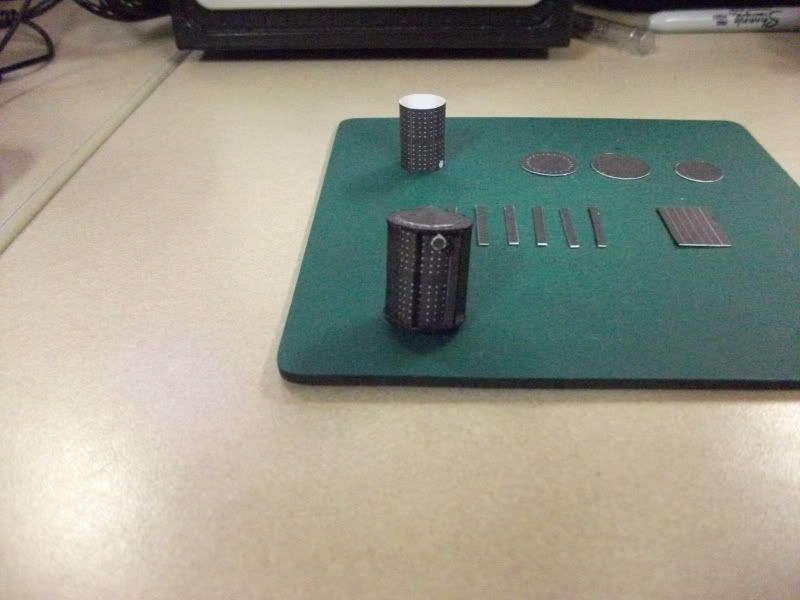 I'd like to figure out a better idea for mounting them as well. Wasn't happy with the first design, so I am going to try something else. Also, the dimensions of the individual RTGs may need to be adjusted a little. I also have changed the shunt radiator/calibration target to include the detail on the backside and the very thin black border on the front -- better pics later, as I had to use my Blackberry for these:   The backside with the radiator detail has some depth to it. I cut the white bars out and mounted it to the other side of the panel, giving some texture (which is impossible to see in this terrible picture). I'm using pictures of the real thing, the Voyager at von Karmen Auditorium at JPL, and the one at the NASM. There are subtle differences between all three. The one at NASM takes precedence, since (I think?) it's the closest to the real thing. This may actually be something I end up finishing eventually. :D
|
 |
| Thread Tools | |
| Display Modes | |
|
|


 Linear Mode

