


|
|
|
#631
 06-18-2011, 04:58 PM
|
||||
|
||||
|
P3 complete!
I would have been very surprised Paul. It wasn't a risk putting that weight on it. Double would also have been fine I think.
 As promised here's the finished truss: 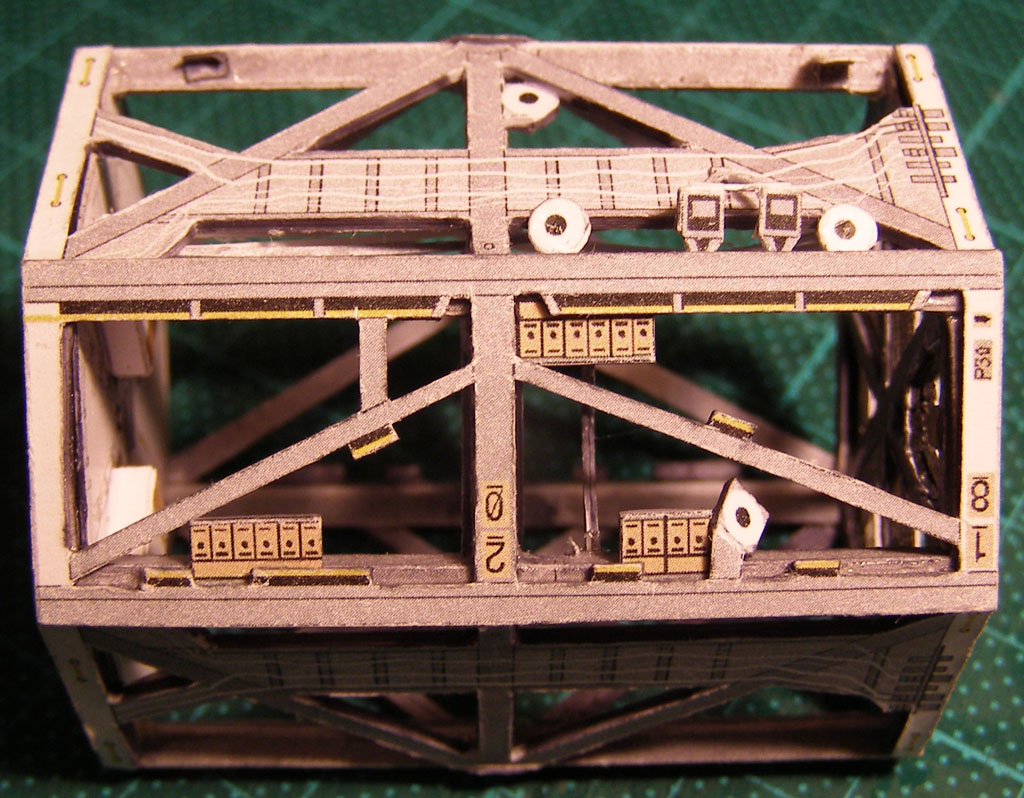 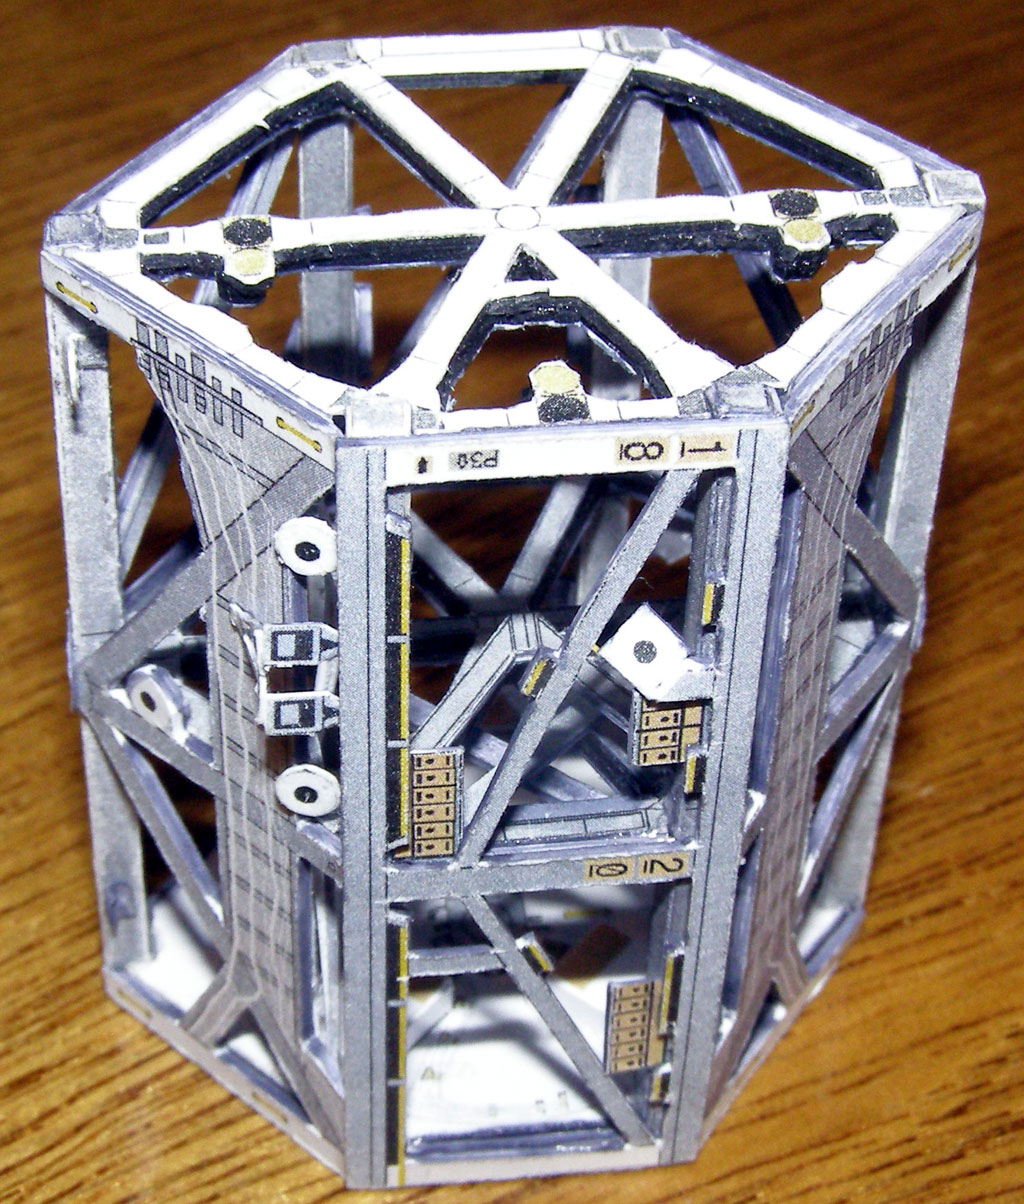 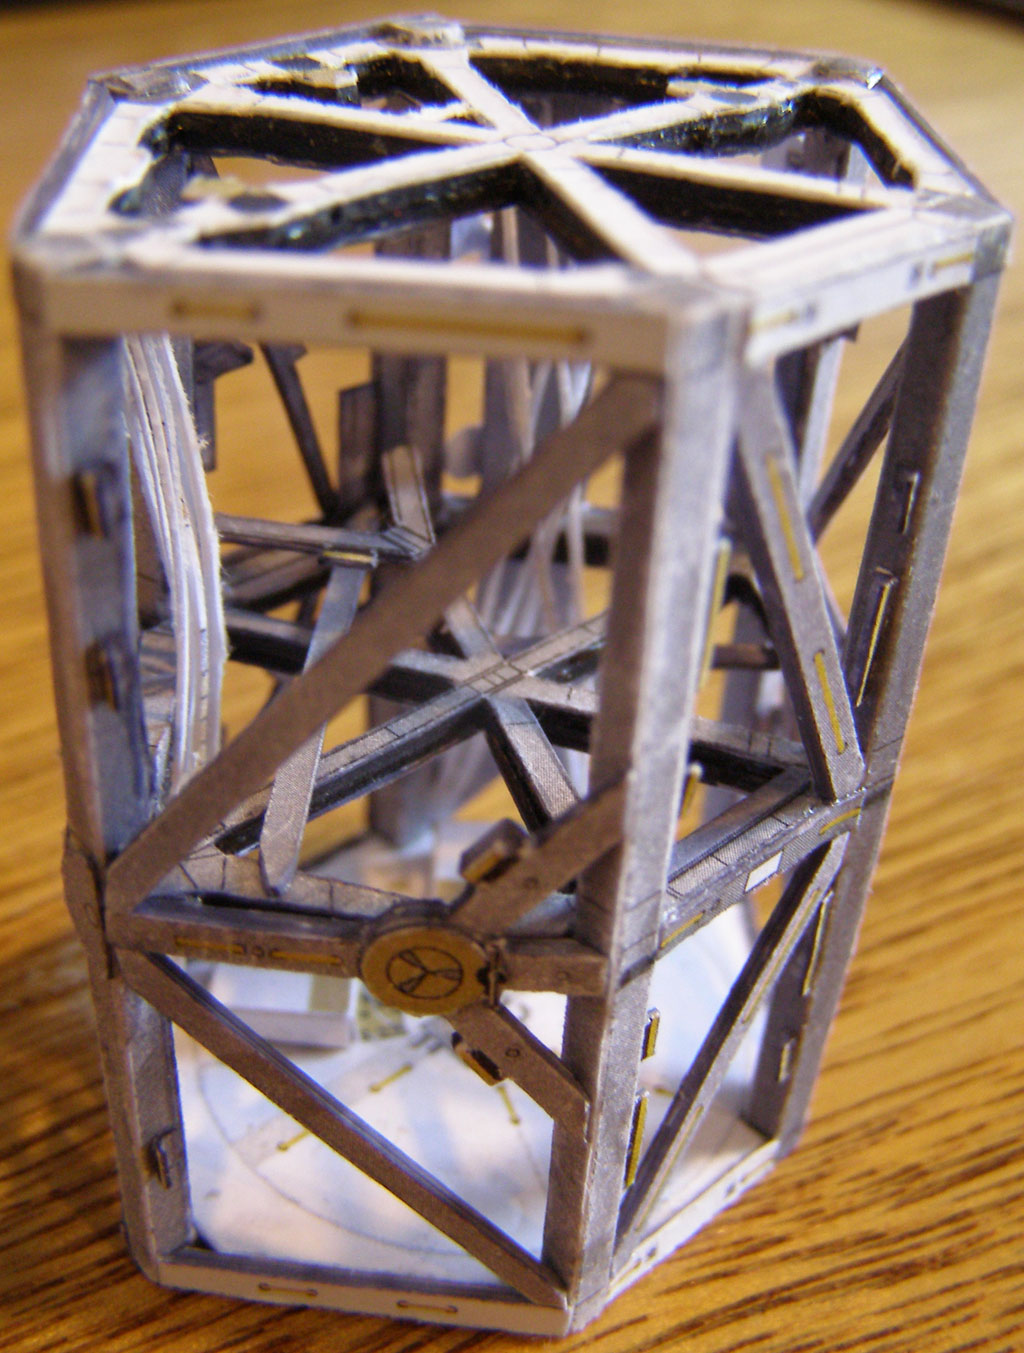
__________________
How many escape pods are there? NONE, SIR! You counted them? TWICE, SIR! 
|
|
#633
06-18-2011, 07:01 PM
|
||||
|
||||
|
YouTube video
As Promised: YouTube - ISS fly around - 1:100 scale paper model
__________________
How many escape pods are there? NONE, SIR! You counted them? TWICE, SIR!
|
|
#634
06-18-2011, 08:26 PM
|
||||
|
||||
|
Great video, Chris. Thanks for sharing.
The model looks beautiful. I think I'll do a video too once is finished.
|
|
#636
06-19-2011, 05:45 PM
|
||||
|
||||
|
All your base are belong to Node 3
Thank you Alfonso and Paul. It's a shame my phone takes hi-resolution movies with poor colour and focus, while my camera makes videos with excellent colour, and focus, but super low resolution.
Paul, my camera is nothing special: it is an Olympus SP-500UZ, which I bought second hand from a photographer buddy about 4 years ago for $200. Here it is I just set it to "Auto" and shoot. I used my phone to make the movie, and that is an HTC desire, set to 420p. The 720p option is a bit jumpy. I photoshop every photo before resampling and saving for the web. Usually the only tweak I'll make to a picture is in the light levels, mostly adjusting them manually. On to the next module! After bursting my brain and breaking my index finger, I feel like a Tweetle Beetle that battled in a puddle with my paddle in a bottle on a noodle eating poodle -so I feel the need something with less blibber blubber and more noodle poodle, if you know what I mean. Hence my choice to do Node 3 and the Cupola. I remembered that it was very hard to even attempt to keep the forward section of Node 2 perfectly round, so I hatched a cunning plan to fool the CBM docking ports into gluing into a circle, rather than making the cylinder fit the CMB ports and turn the front into a squarish circle. I began by gluing a good 400gram circle into the cylinder just aft of the CBM ports: with enough clearance for their gluing tabs to work. Then I cut out circles until I had an outer ring which perfectly fit over the cylinder, and I slide it down to the very front of Node three, so that it forced the forward section to be perfectly circular. (Also show here is the hardwood plug I turned up and the bearing I'm using for the SARJ units - thought you might like to see them. I have yet to sand down the plug to the right length: about 0.5mm proud of the bearing.) 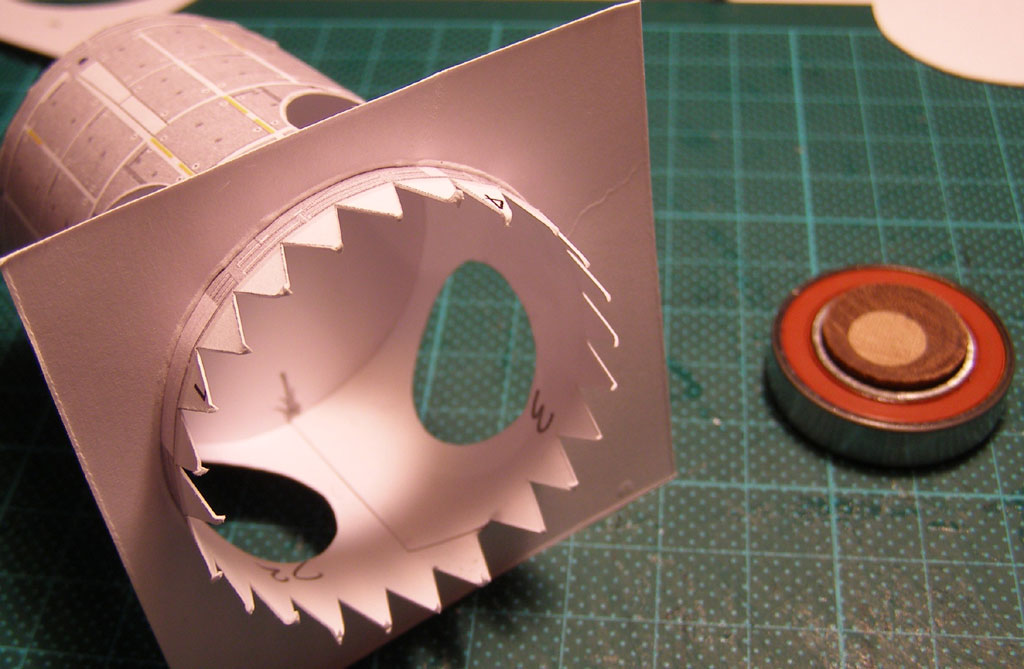 Then I flipped it over and glued a 2.5cm section of toilet roll inner to the circle I inserted - not the cylinder itself. 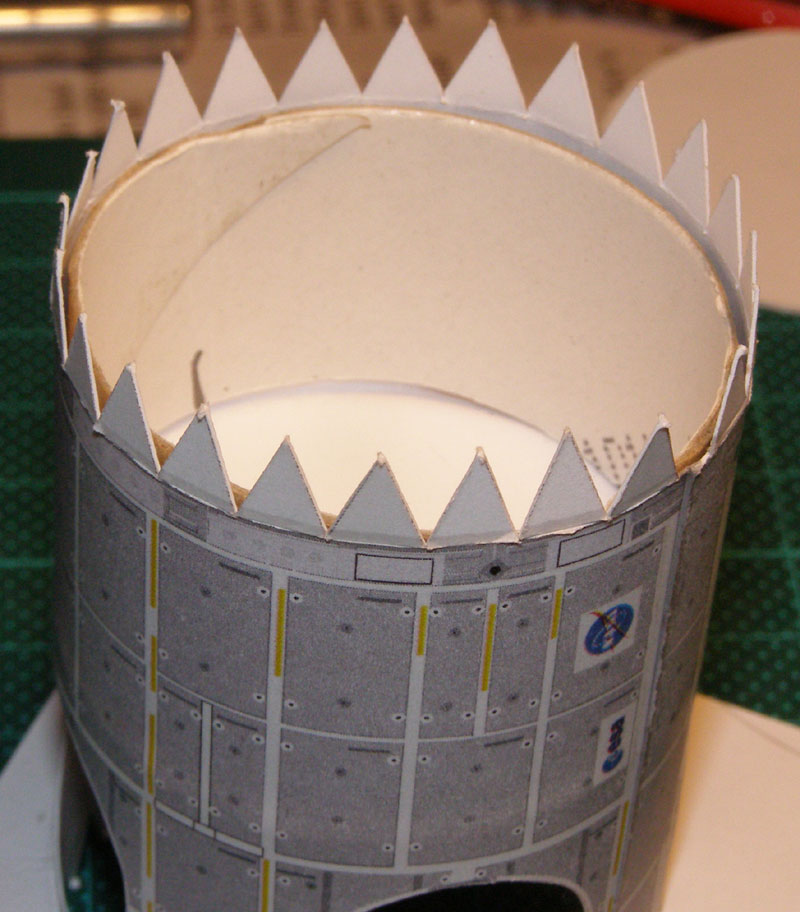 On top of that, I glue a 400 gram circle - but I glue that to the toilet roll cardboard tube and just a couple of spots on the cylinder. Adding a 2mm smaller circle of 400 gram. This completes the solid base for the docking port to anchor onto. I remembered that the CBM ports were tricky to get right also, so I use a 10 cent coin (the lowest denomination coin in NZ by the way), when I glue them together, and then press 'em flat and then glue one of the circles I cut from the cylinder for the CBMs, on to the back of the CBM, like so: 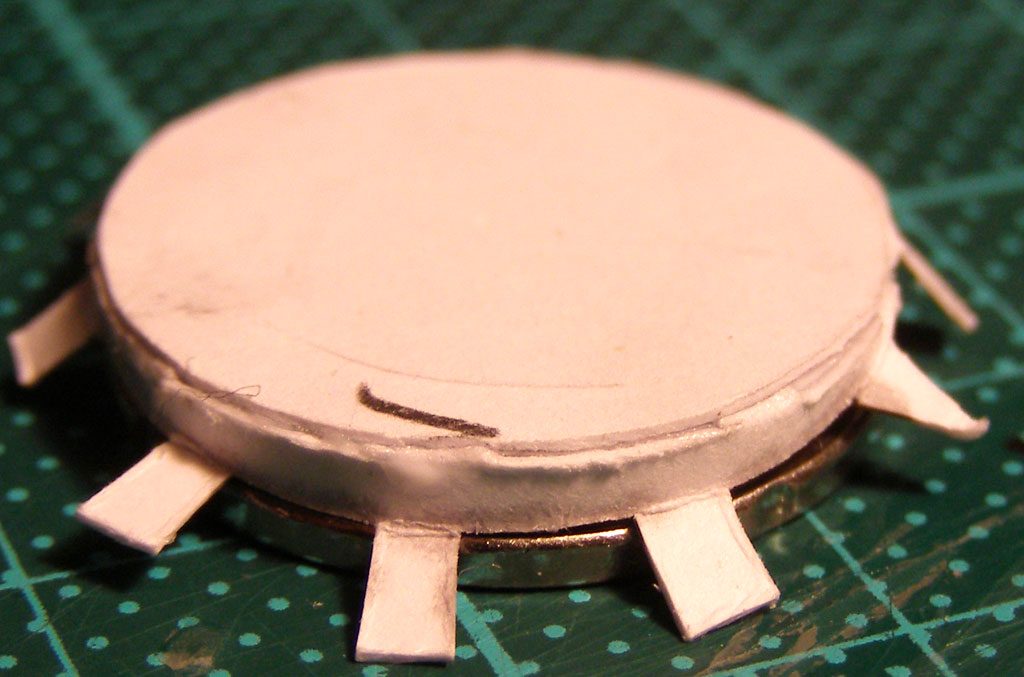 That makes the base of each CBM nice and solid for gluing. When I insert the CBM into the cylinder, I just try to close the gaps and then apply a small pressure to let the small initial amount of glue set (below), then I follow it up with a liberal application to secure it and strengthen it after it dries. 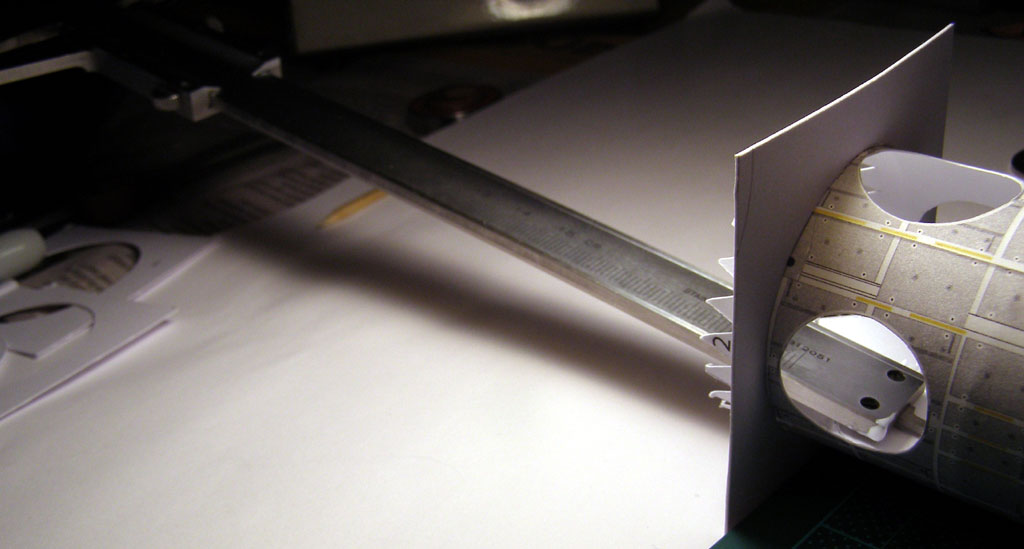 The 10 cent coin fits inside nicely, and I run it around inside the port before the glue completely dried to ensure it's circular. 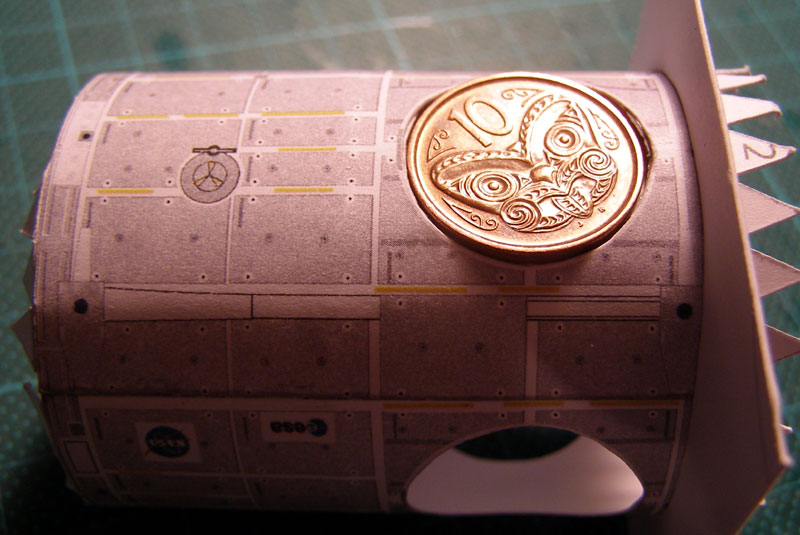 Then I Build the PDGF using a tiny brass tube. The SSRMS and DEXTRE will plug in here - the Zenith port. 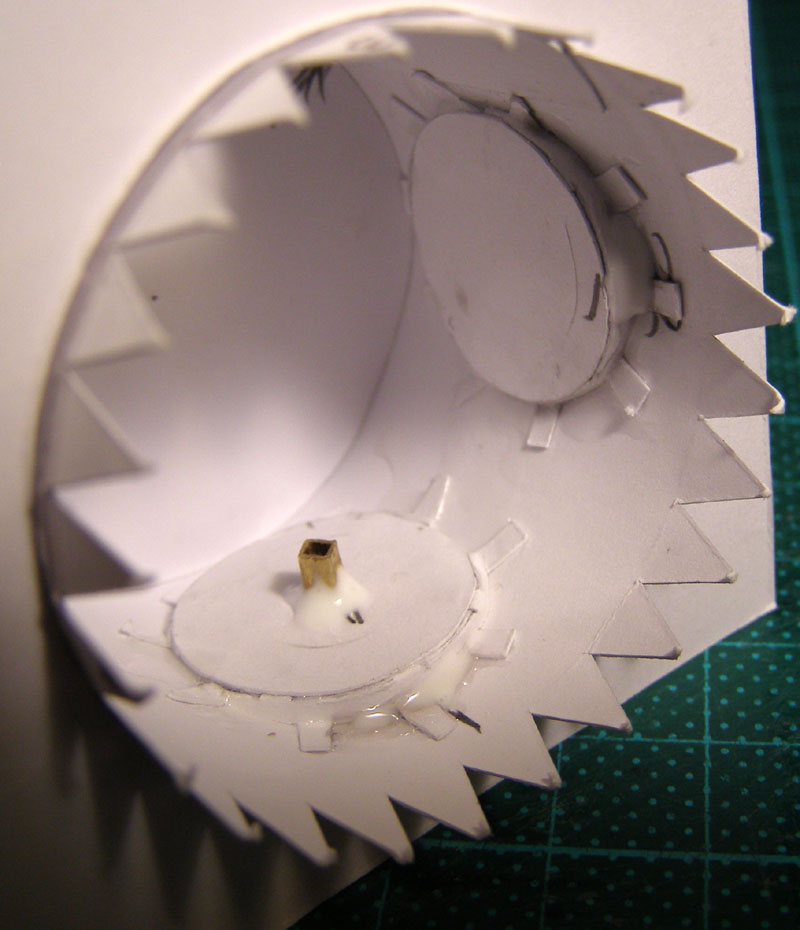 And that's where I am today. I'm starting a week of annual leave, and I'll post again tomorrow when I should have finished Node 3. Take care and happy modelling / Chris.
__________________
How many escape pods are there? NONE, SIR! You counted them? TWICE, SIR!
|
|
#638
06-20-2011, 01:18 AM
|
|||
|
|||
|
I learned something new, Thanks Mobius
John
|
|
#639
06-20-2011, 04:25 PM
|
||||
|
||||
|
Node 3: achievement unlocked
So I polished off Node 3 yesterday, and am working on the Cupola this morning.
First a nice arty shot of my standard glue-drying technique: swing my task light down onto the work and let the infra red work. Shown here is also the PDGF for DEXTRE to dock into. 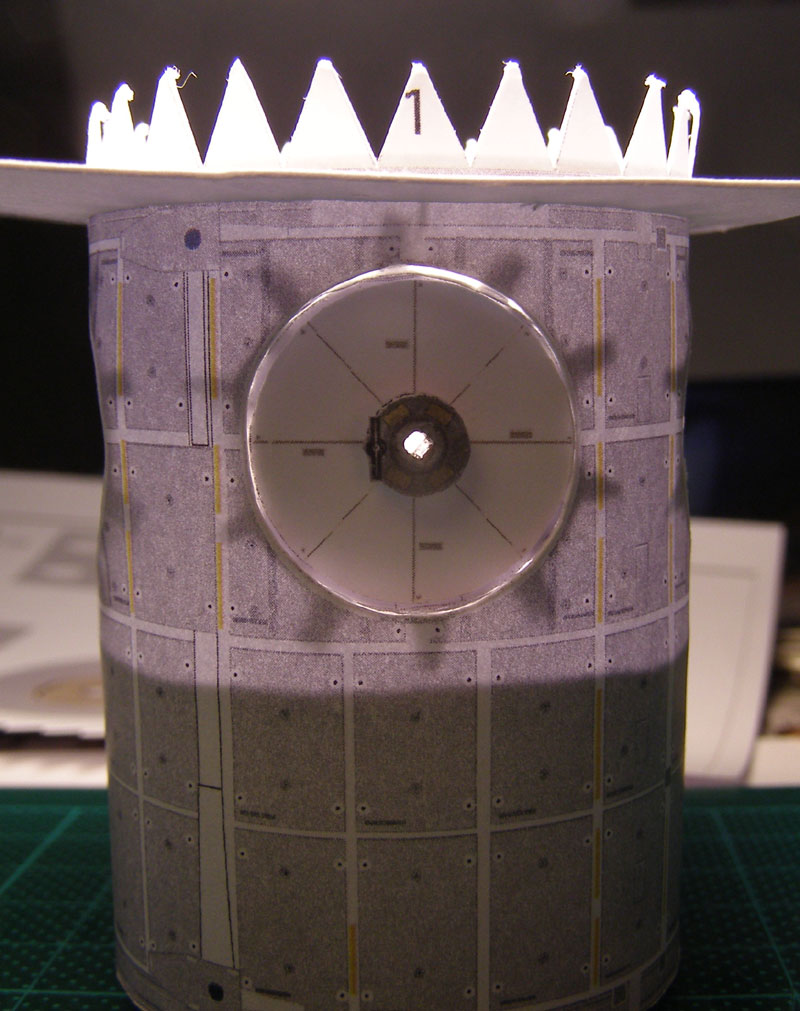 Before putting on the ends cones, I want to make Node 3 capable of supporting other modules docked to the port and starboard CBMs, so I include an offcut of laminated paper and glue the base of these CBMs together. I made VERY sure that this part did not change the shape of the cylinder or the forward end of the node. This offcut is cut very precisely. 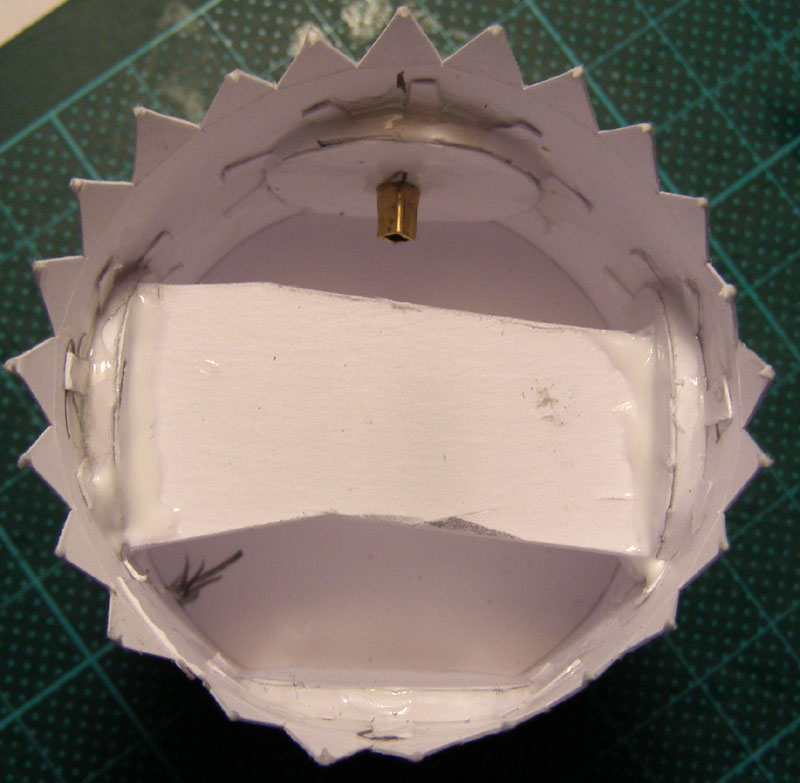 Then I glue the forward end plate on. Firstly, this is a 400 gram circle, with another slightly smaller 400 gram circle glued to it. Finally, I glue the official part on top to raise the height of it to be flush with the end of the cylinder. When I glue the end plat on, I want it to be as circular as possible, so I leave the outer ring in place until the glue dries. 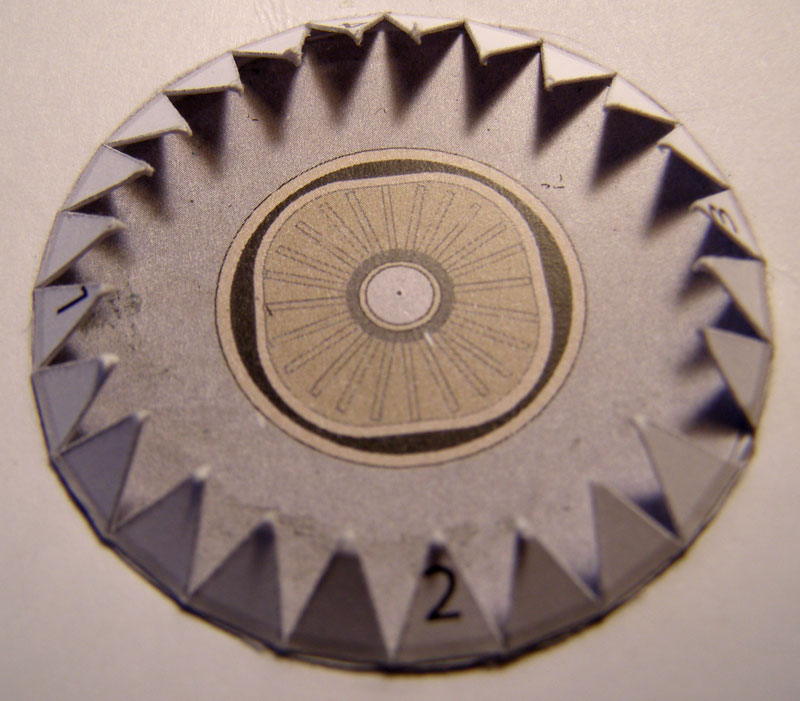 Then I circularise the docking parts with an internal circle in each.  Once the glue dries I insert another two internal rings inside the rearward CBM to ensure it is strong enough. I have to make sure the docking ring of Node 3 fits into the CBM on Unity node, and that means the external diameter is slightly smaller than the internal hole in the back of Node 3. So, I wrap a strip of paper around the base of the docking port so that no gap is present. The flat base of the docking port glues directly to the 4 layers of card circles below the end cone. I do not want anything other than the main cylinder to take any weight at all. 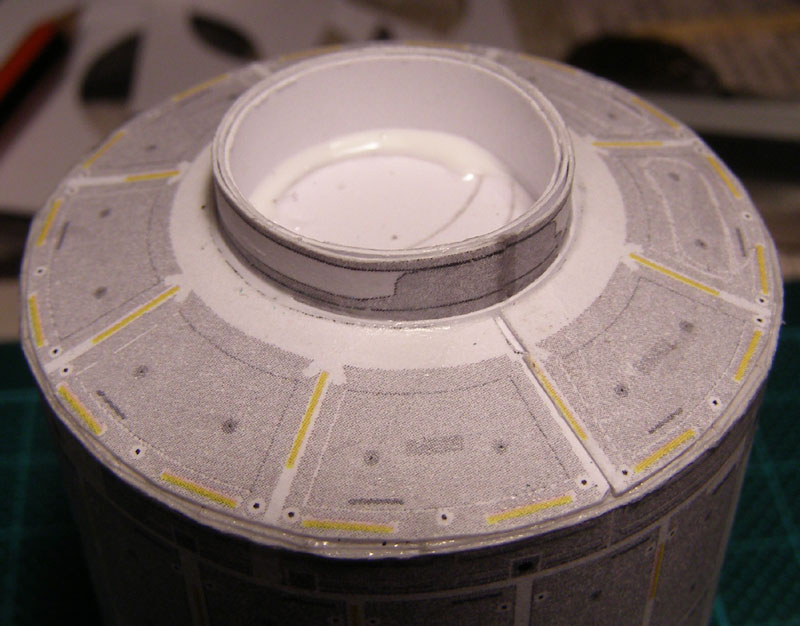 Here you can just make out the "padding" strip so there's no gap between the docking ring and the end cone. Also, you can see that the end-cone is very slightly too small for the part, so I have left about 1mm of extra space at the joining of the cone, to try to work around the very slight diameter difference. (For the forward cone, I cut about 0.5mm away from the edge to create a very slightly larger diameter cone - see the final image.) This module will glue directly to Node 1, as I have no intention of it being moveable. Moving around to the front of Node 3, you can see what I have done to prevent the end cone from bearing any weight at all. Two layers of very heavy card are used to raise the height of the base, so that the circle within the larger of the two end cones glues down onto the stacked card layer. (I actually needed to add another circle of 400 gram paper to get the height right. 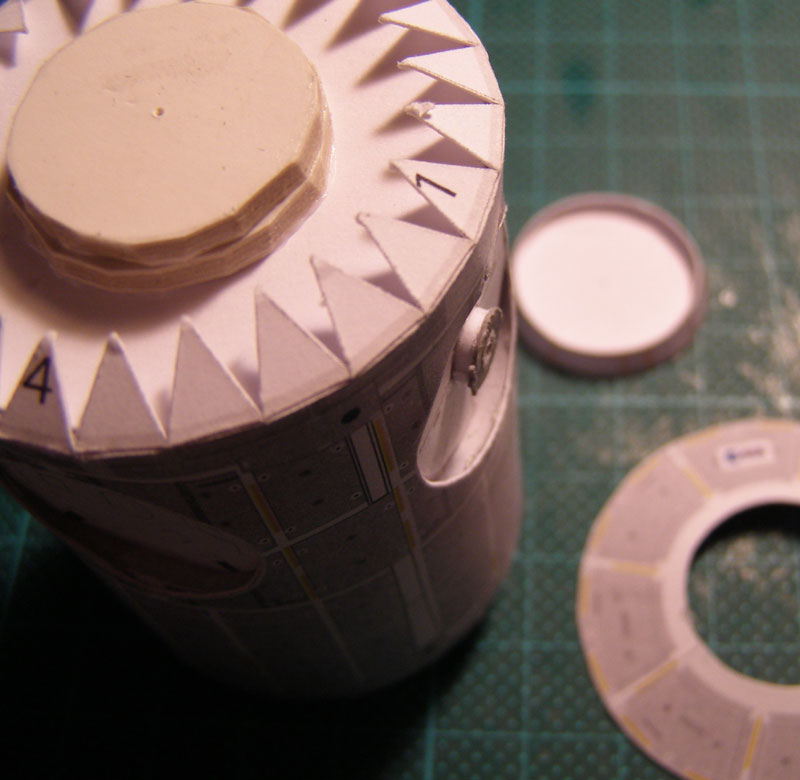 Gluing the CBM directly to the stack makes for a very strong bond to the module. I then insert another card circle and another paper circle inside the large CBM so that the PMA base will glue directly onto it. There's no glue holding the docking ring to the end cone - it's just sitting there.  And there we have it. This is the best node I have managed to make - and with three nodes now built, I think I now know how to make one correctly! By the time I finish making the station, I will be well qualified to build a good one... More pics later today, or tomorrow.
__________________
How many escape pods are there? NONE, SIR! You counted them? TWICE, SIR! Last edited by Mobius; 06-20-2011 at 04:44 PM.
|
|
#640
06-21-2011, 03:00 AM
|
||||
|
||||
|
Cupola complete
I managed to squeeze in enough time to make the cupola. I knew I just had to be patient and work precisely and slowly. I figured it'd be best to glue the hatch covers half way each time, and allow them to dry before completing the curve and gluing.
 I didn't even try to use the gluing tabs on the black faces, and just cut them off, carefully gluing the trapezoid shape onto the top of the box. It's slow work, but it gets some covers to look reasonably similar. 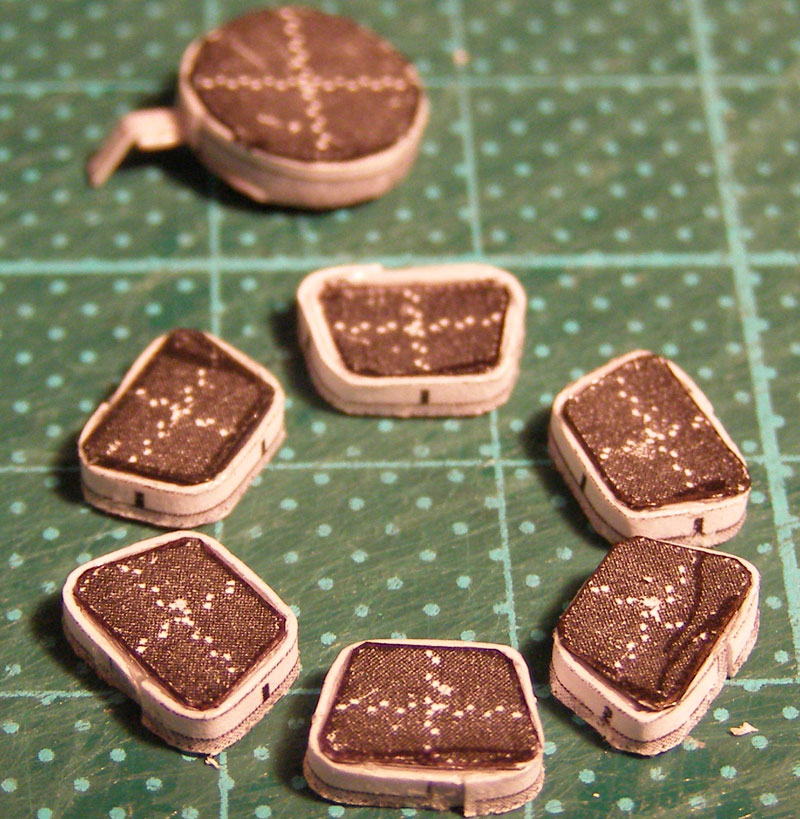 And when it all goes together, it looks something like this.  and  How incredible it must be, to float in the middle of the cupola, watching the earth shoot over your head, while the station maintains it's heading and changes the solar arrays. Would it even be possible to take too many photos? I am very jealous of the ISS crew. So that was a nice little diversion. Now back to the Truss structure.
__________________
How many escape pods are there? NONE, SIR! You counted them? TWICE, SIR!
|
 |
|
|


 Linear Mode

