


|
|
|
#1211
 11-28-2016, 05:15 PM
|
||||
|
||||
|
Hello together,
I have chosen the last version and the SRB-Supports carefully removed and then attached with double-sided tape as a placeholder for the assembly of the outlets again.  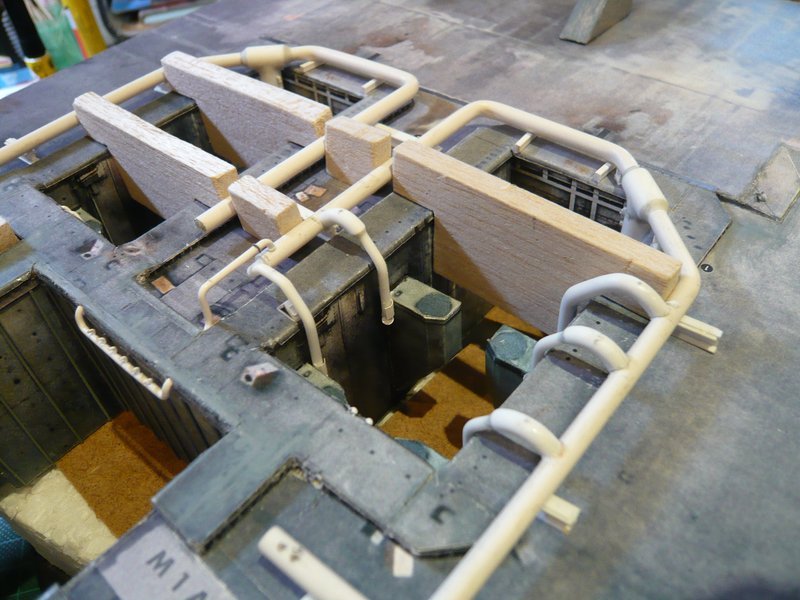 The 9'' outlet I have not yet glued, because it would otherwise disturb during the modeling of the underlying transition from the ring line to the 12'' outlet.  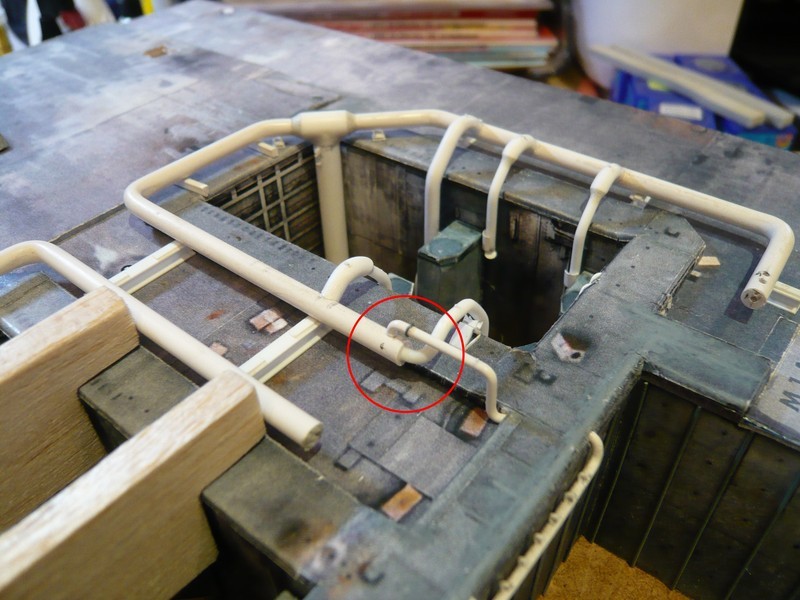 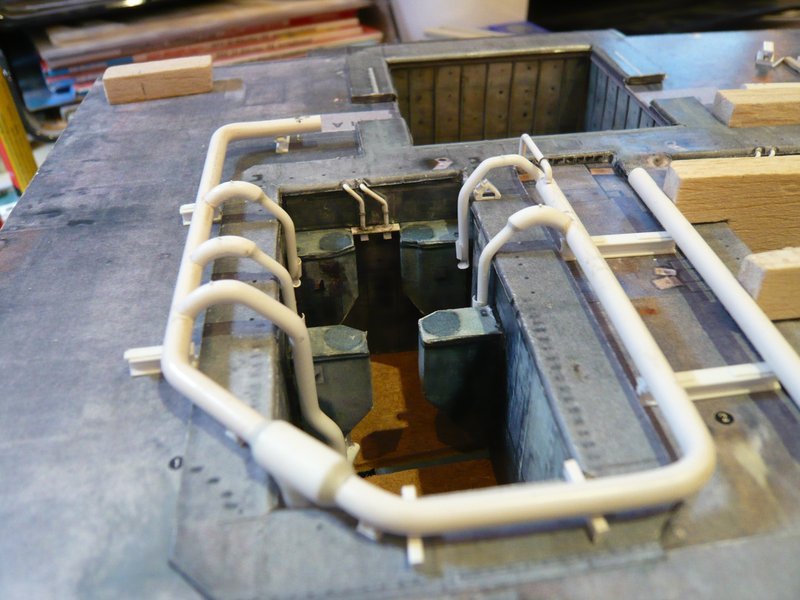 Up to now it fits all together quite well.  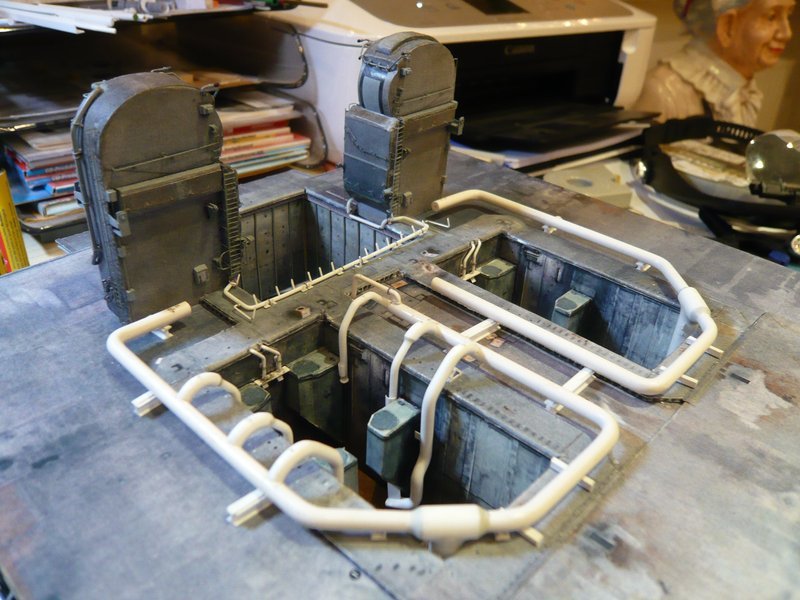 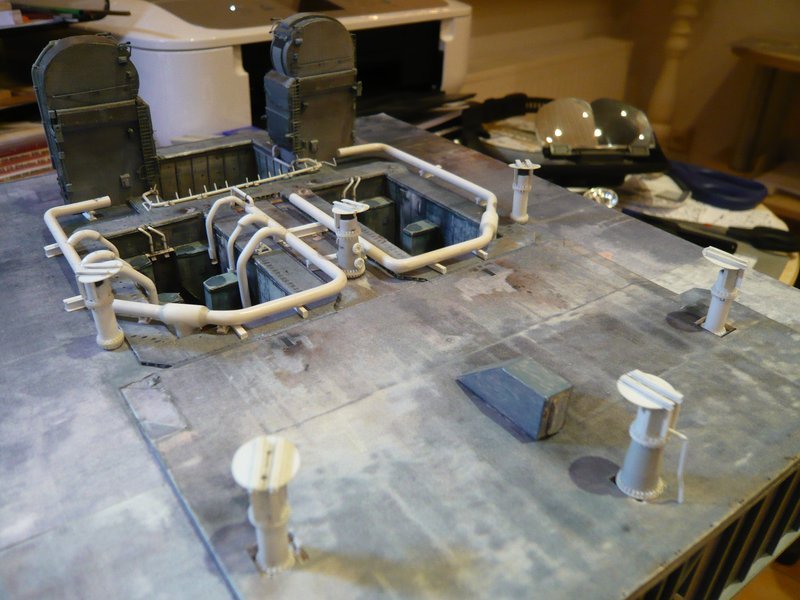 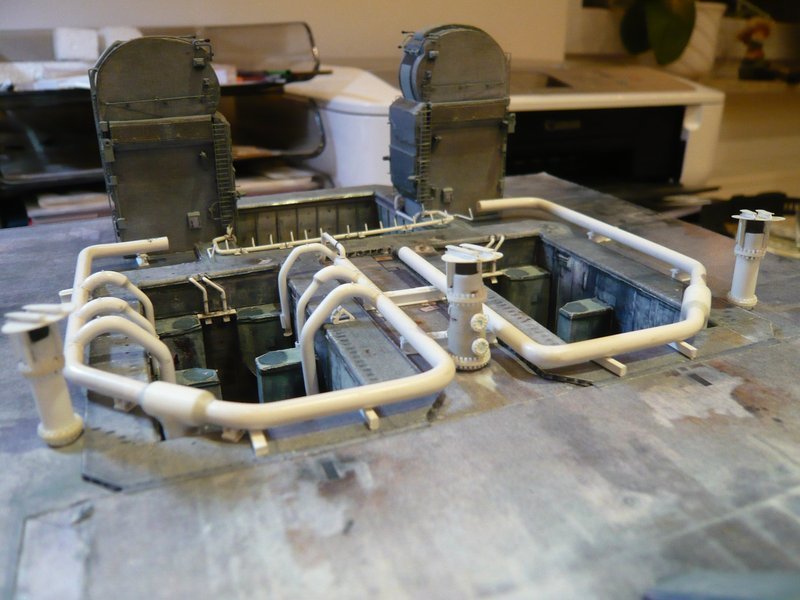 And next, it can now go on behind the LOX-TSM with the transition from the ring line to the 16'' extension with the 12'' nozzle tube.  
__________________
Greetings from Germany Manfred Under construction: Launch Pad 39A with Challenger STS-6 (1:144) 
|
|
#1212
11-28-2016, 08:12 PM
|
|||
|
|||
|
It all fits very well indeed, and when I pause and think on all the tiny details you have added that aren't always visible in the pictures, I think again that you are a true artiste at work.
__________________
This is a great hobby for the retiree - interesting, time-consuming, rewarding - and about as inexpensive a hobby as you can find. Shamelessly stolen from a post by rockpaperscissor 
|
|
#1213
11-29-2016, 01:42 AM
|
||||
|
||||
|
Thanks for your nice compliment.
 You are right, many details are no longer visible to the naked eye, but I know they are there, and that is a soothing feeling.
__________________
Greetings from Germany Manfred Under construction: Launch Pad 39A with Challenger STS-6 (1:144)
|
|
#1214
11-29-2016, 05:32 PM
|
||||
|
||||
|
Hello everybody,
today there is only a short update from the growing pipe skeleton around the left SRB shaft. As already announced, the ring line behind the LOX-TSM was extended by the 16'' tapering with the subsequent transition to the 12'' nozzle tube. Again, the precise and, above all, stable position of the ring line is important, for which purpose the line was again weighed down in a proven way with a weight. After the alignment of the nozzle pipe under the TSM the extended pipe was glued to the end of the ring line with MEK. 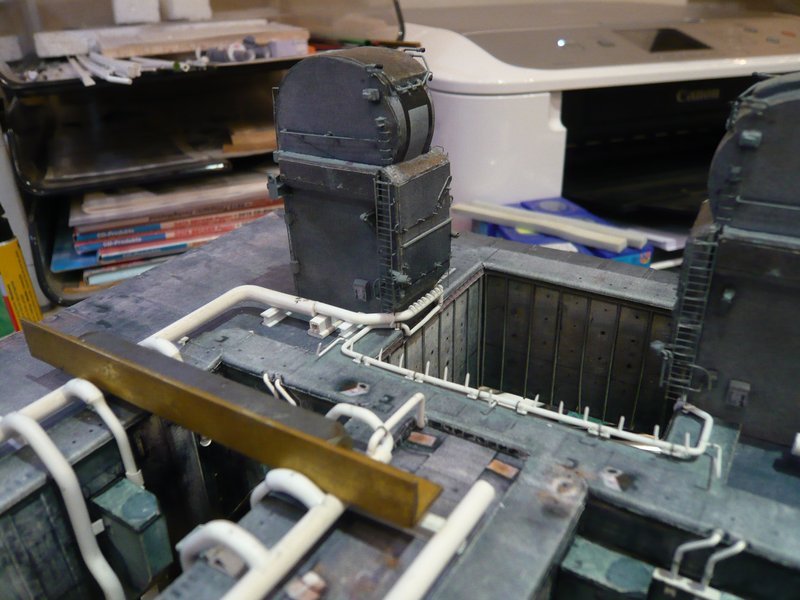 And even after removal of the weight, everything was still stable. 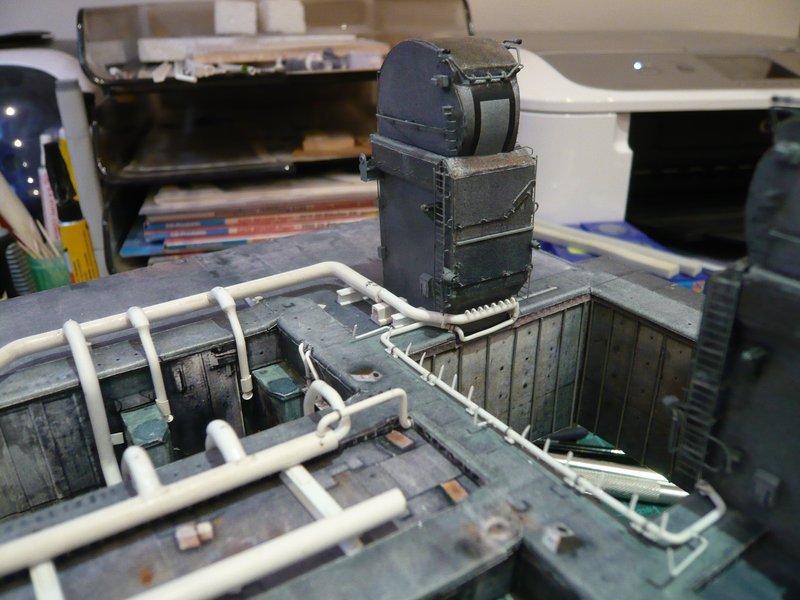 Now only the already prepared two small 6'' outlets still have to be glued on the ring line, which lead into the SRB chamber, then the first ring line would be complete. 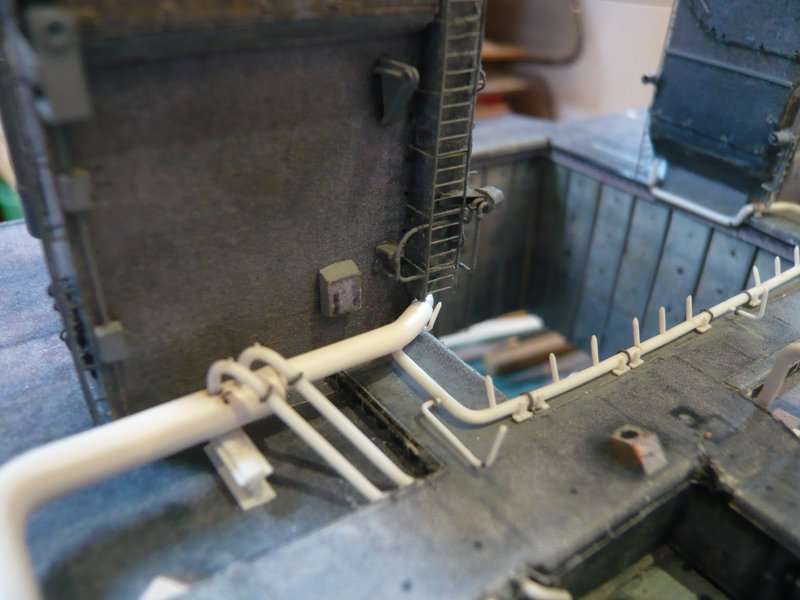 That's it for today.
__________________
Greetings from Germany Manfred Under construction: Launch Pad 39A with Challenger STS-6 (1:144)
|
|
#1215
12-02-2016, 01:41 AM
|
||||
|
||||
|
Hello everybody,
 this was unfortunately too briefly thought. this was unfortunately too briefly thought. The two small 6'' outlets can not yet be glued as long as I still need the space behind the TSMs for the Balsa spacers in the corners to fix the position of the ring lines, in order to also to be able to mount the outlets on the other ring line in a stable position.  At first, the rear 18'' outlet was glued with the two support plates. However, at that I was not aware that this time I had begun on the inside, and with that on the wrong side, but what was to become apparent only later.  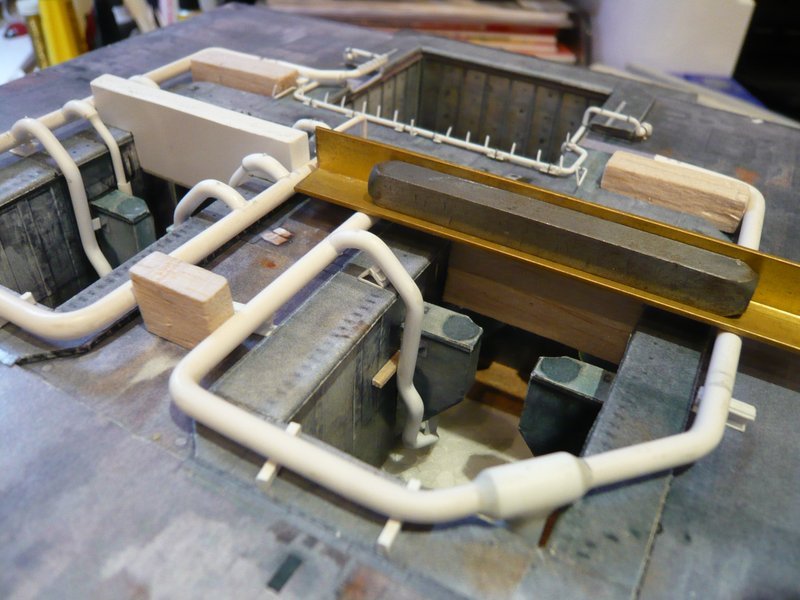 So it went on with the two outlets between the SRB-Supports. 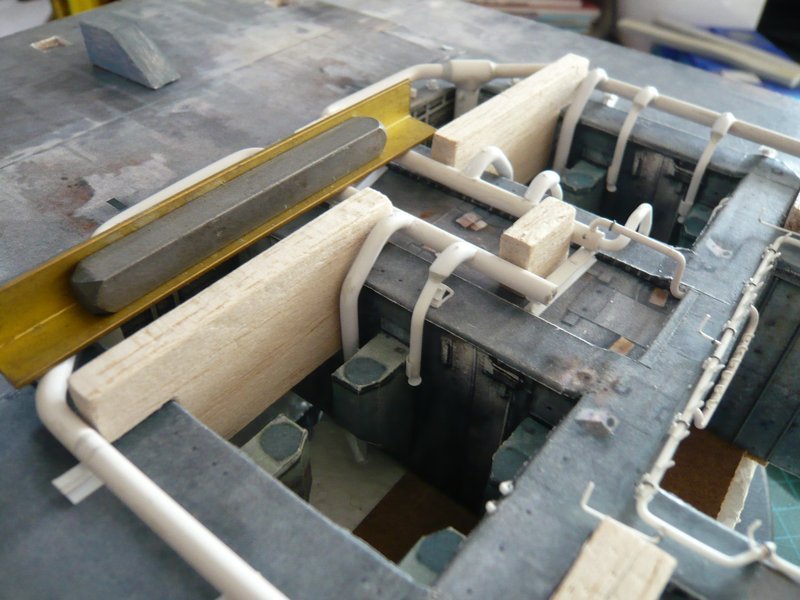 The two 9'' transitions are again only placed on and the small supports are only supported underneath.  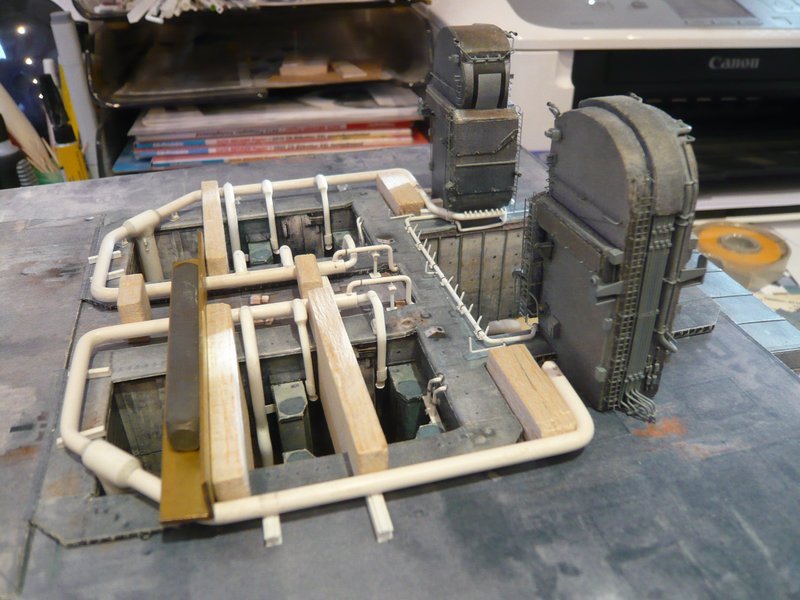 And as one can see, even after taking away the spacers and weights, everything still fits together well and looks quite well. 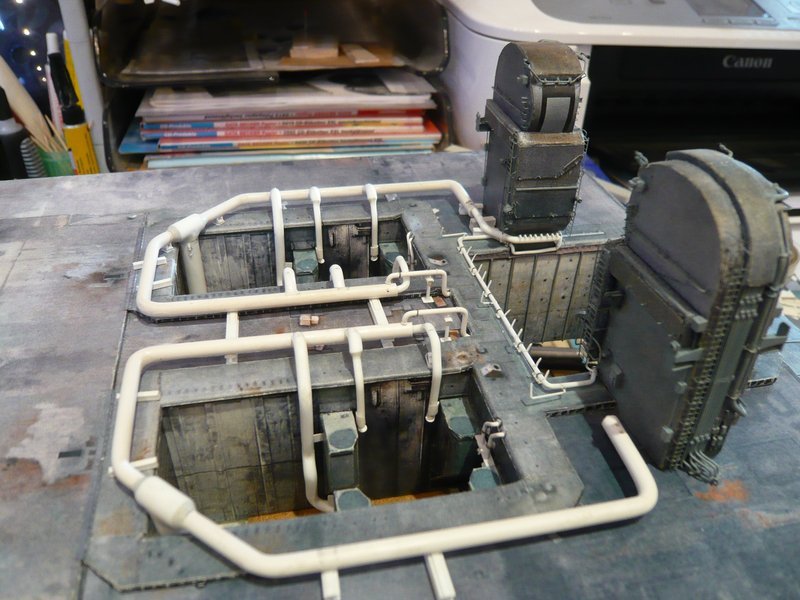 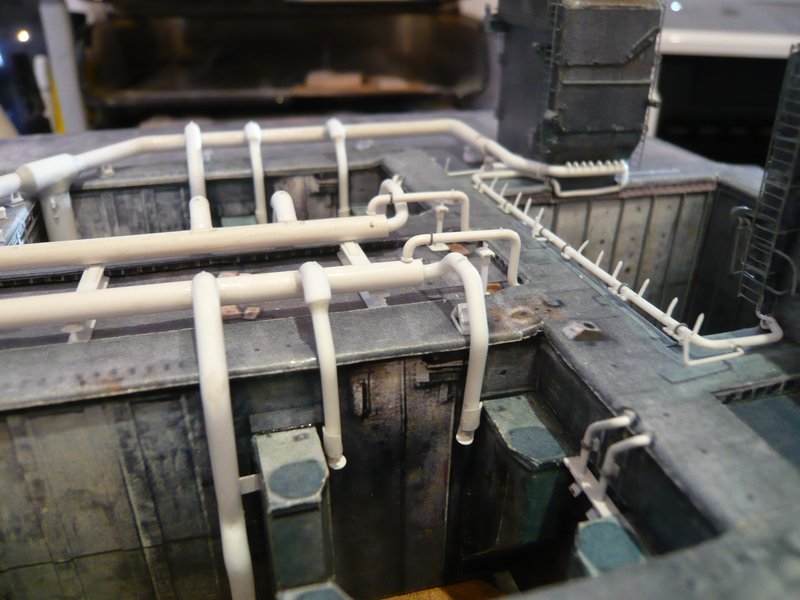 And the total view with the flock of birds also looks like cool.  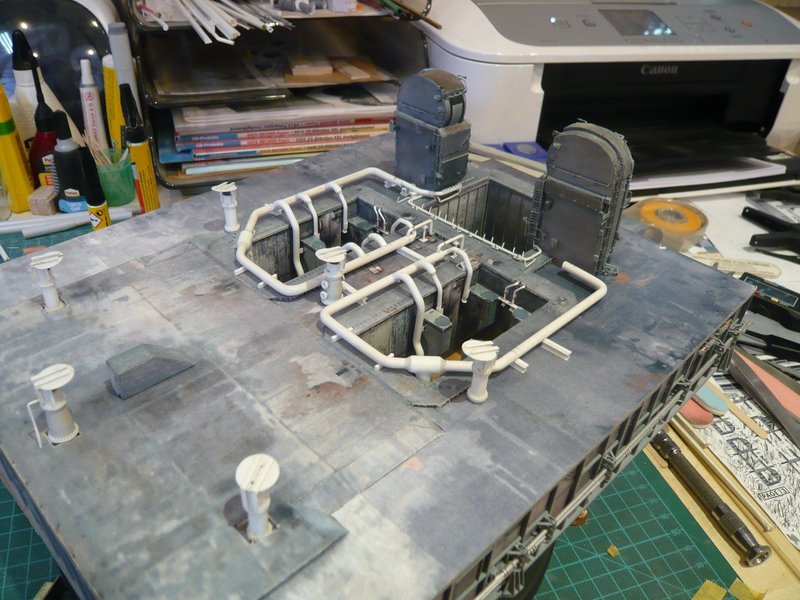 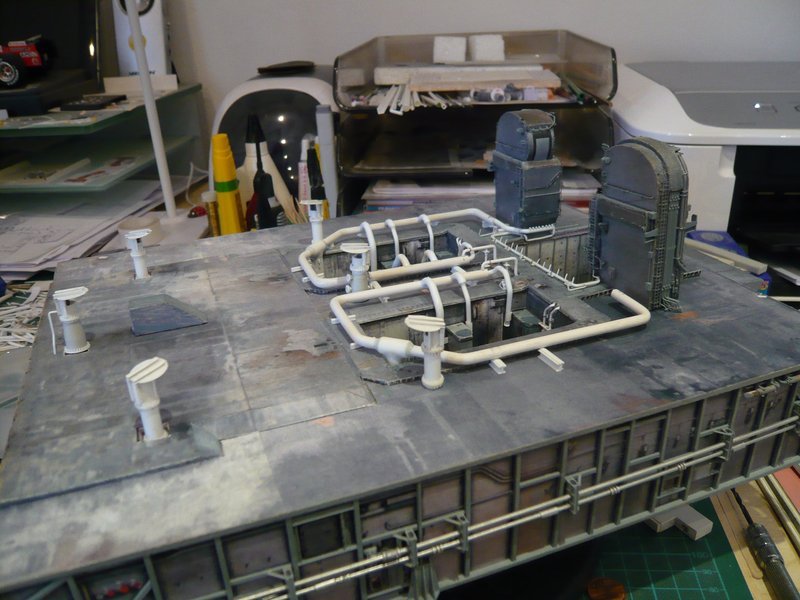 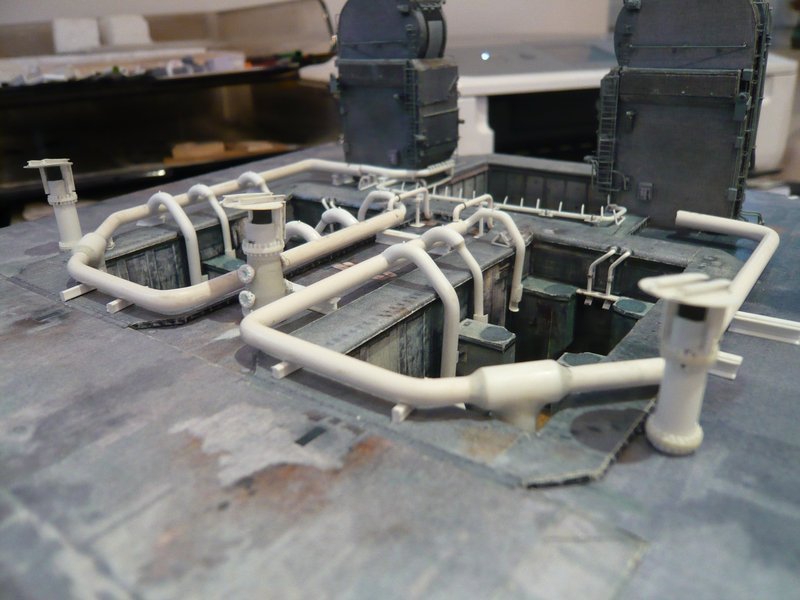 But when I wanted to extract the pipe skeleton, the shocking realization came that I had begun on the wrong side.  Now the skeleton was blocked inwards by the three outlets and outwards through theinlet pipe in the shaft corner. Now the skeleton was blocked inwards by the three outlets and outwards through theinlet pipe in the shaft corner.  But with the utmost caution and the necessary sensitivity, I then managed to move the rear outlet with the support plate around the SRB support.  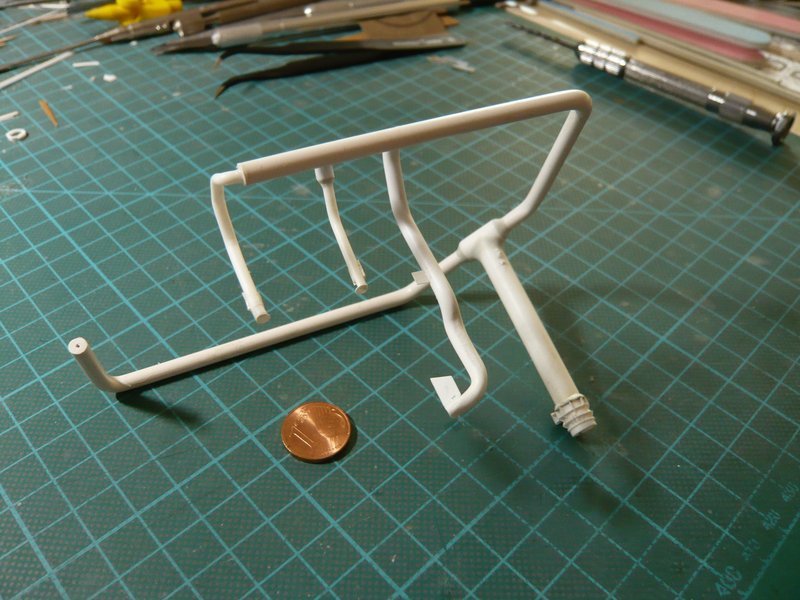 Now I can now again carefully remove the two SRB-Supports, in order to be able to mount the three external outlets on the inserted skeleton.
__________________
Greetings from Germany Manfred Under construction: Launch Pad 39A with Challenger STS-6 (1:144)
|
|
#1216
12-02-2016, 07:46 AM
|
|||
|
|||
|
So close, Manfred......

__________________
This is a great hobby for the retiree - interesting, time-consuming, rewarding - and about as inexpensive a hobby as you can find. Shamelessly stolen from a post by rockpaperscissor
|
|
#1217
12-03-2016, 01:32 AM
|
||||
|
||||
|
Thanks for watching elliott.
Hello everybody, before I mount the remaining three outer outlets on the ring line behind the LH2-TSM, I've ever thought about the further procedure. There is also the assembly of the many Pipe Supports to consider, on which the two ring lines as well as the twelve exits sit. At that one has to distinguish between the supports of the ring lines, of which there are supports with and without a clamping ring, and those under the outlets, which have no clamping rings. And since that all is difficult to distinguish between them, and the last-mentioned numbers are not quite correct, I have once again counted thoroughly and all supports marked in a new picture. But just do not be frightened please, I want to explain it immediately at one ring line. It is unfortunately rather a plan view, but on this image all supports are to see, or maybe only to guess, sorry.  Source: NASA There are first the six small triangular supports (blue) at the outlets, of which I have to make five more, so overall still 11. 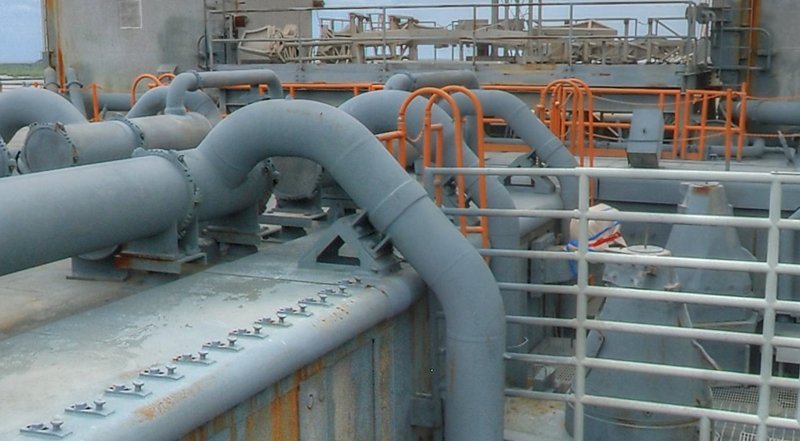 Source: NASA And then there are a total of 20 outlets on each ring line, when I also keep count the high slender support under the 9'' outlet. While the ring line have clamping rings at the 14 red-marked supports, they are missing from the remaining six green-marked supports. Accordingly there are respectively 26 supports on both ring lines, in total therefore 52.  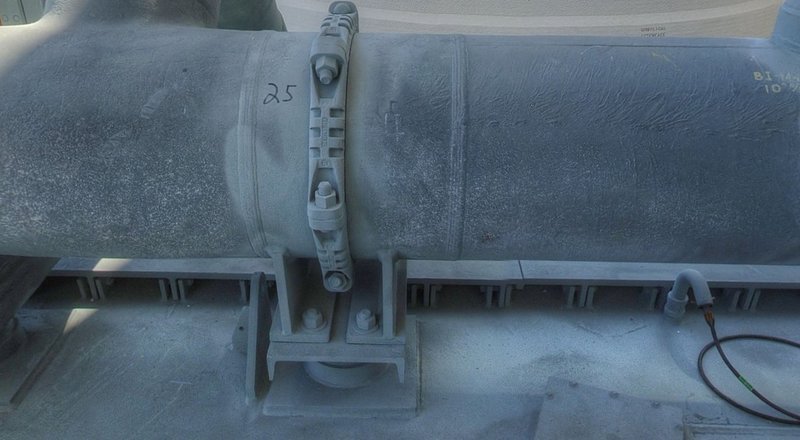 Source: NASA For the further assembly, I must now note that I must first attach the clamping rings at the places of the ring line, where the supports are sitting, and only after that, the supports can be glued with the ring line and finally all painted together. In order to demonstrate this already at the model, at first I have marked the support positions at the ring line and then arranged all my previous support, whereby I have now unfortunately forgotten the support under the 9'' outlet. 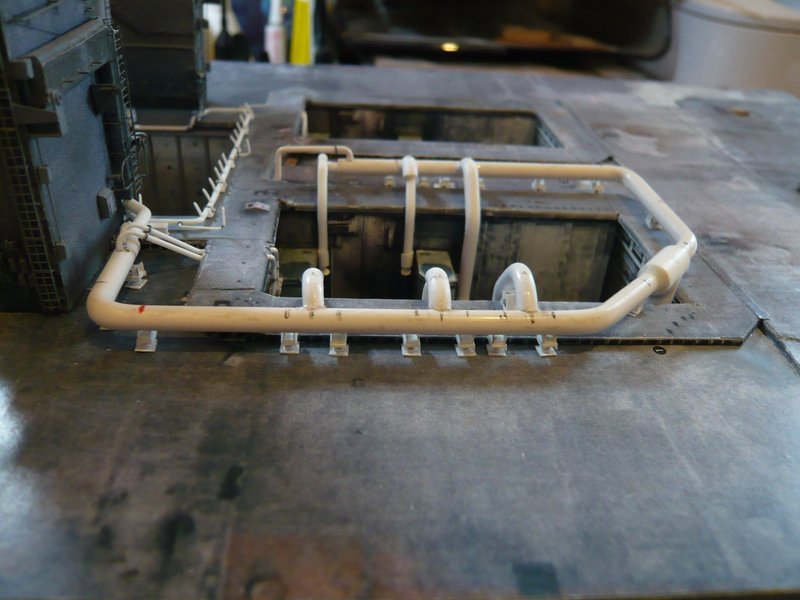 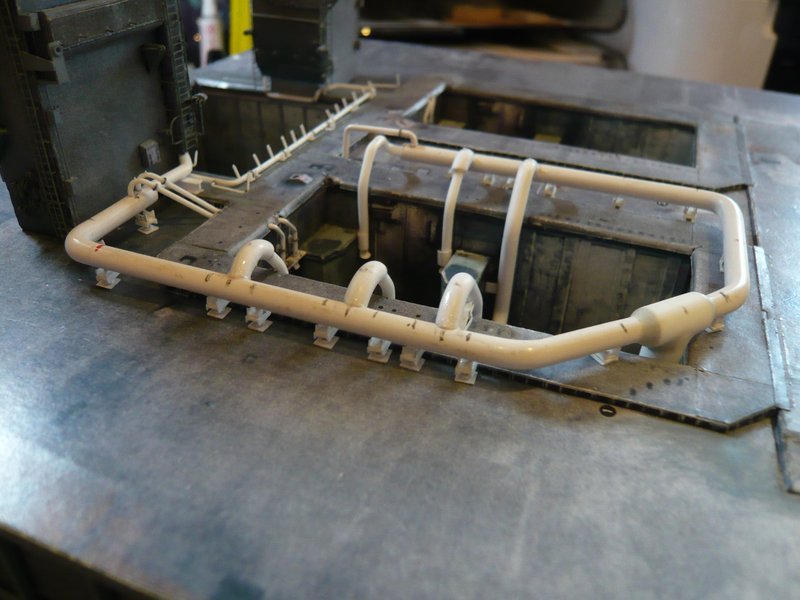 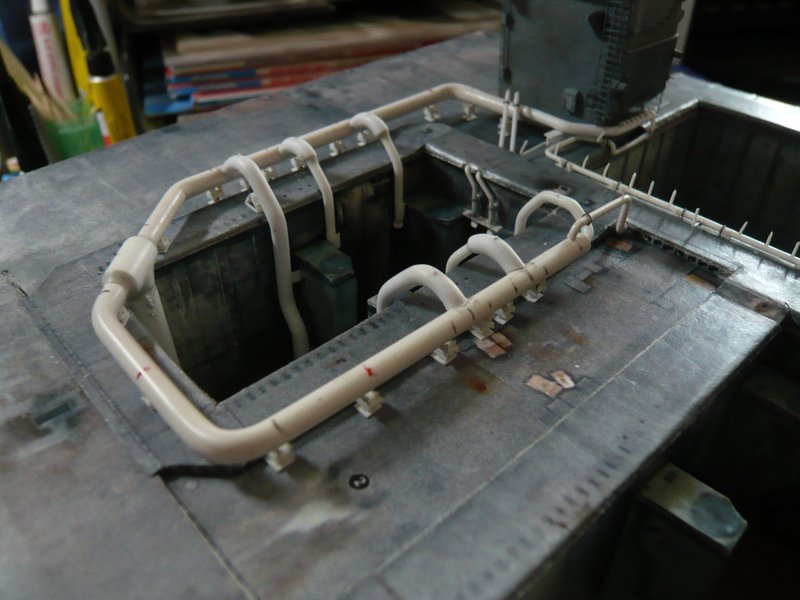 In addition to the still missing 11 triangular supports under the outlets, I also still need two of these simple support here, which are standing behind the TSMs on the SRB Blast Shields. 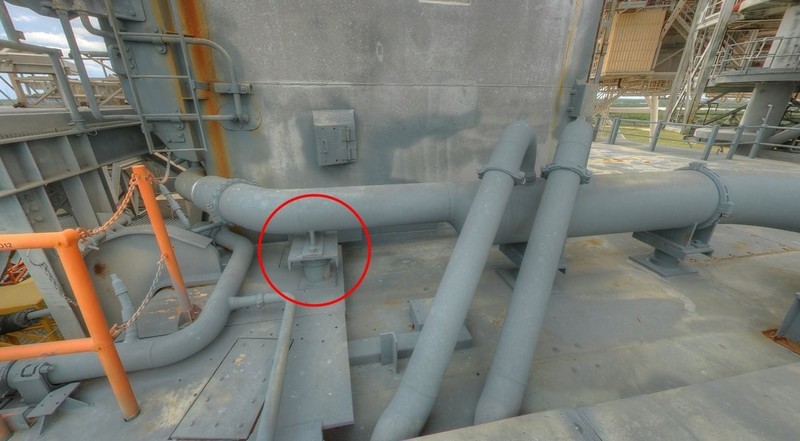 Source: NASA And in the case of the clamping rings we were previous year already so far, 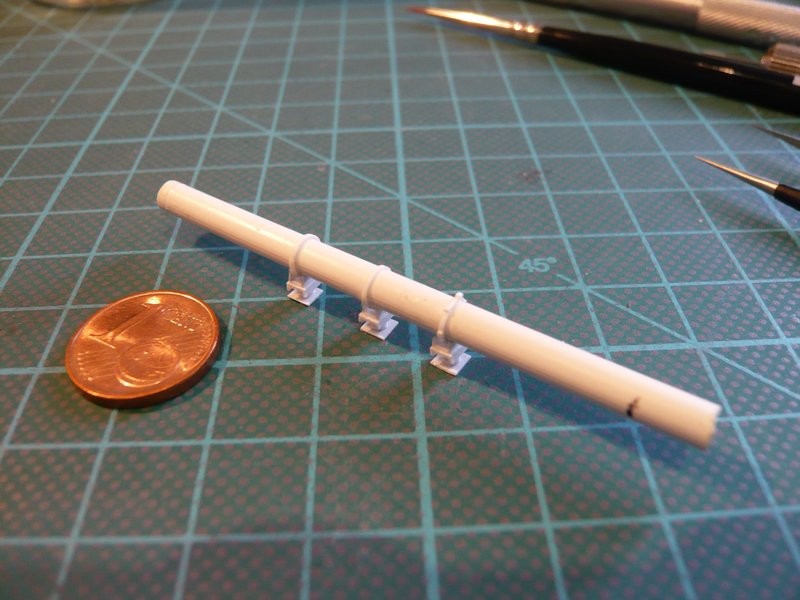 whereby for the favored right tensioning ring only the manufacturing method would have to be optimized, but I already have an idea.  That's what it should have been for today and thanks for watching.
Last edited by spacerunner; 12-03-2016 at 02:56 AM.
|
|
#1218
12-06-2016, 05:26 AM
|
||||
|
||||
|
Hello everybody,
but always nice in sequence. Today, I got to work on the last two remaining Pipe Supports below the 16'' extensions (Ø 2.5 mm) of the ring lines in front of (respectively behind) the TSMs. As can be seen from the photo already shown, the supports are similar in construction to the 24'' ring line (Ø 4.0 mm), but they are somewhat smaller and have only one sickle for holding the tube (Ø 2, 5 mm). In the dimensioning of the support and its individual parts, the clear height under the tube of 2.5 mm was decisive. Since for this smaller support the Evergreen U-profile (2.5 mm) appeared for me too clunky, I have it this time scratched from 0.25 x 2 mm and 0.25 x 0.75 mm strips. The tiny sickles are punched (Ø 2 mm) and have a web height of approx. 0.5 mm. Since the initially provided foot parts resulted in a somewhat too high construction,  I went back again to smaller beads and discs. 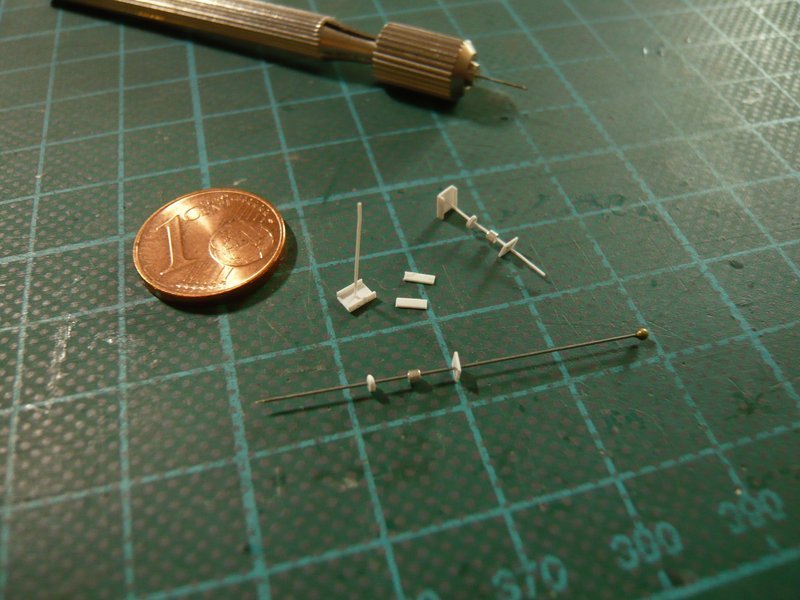 After the substructure was glued, 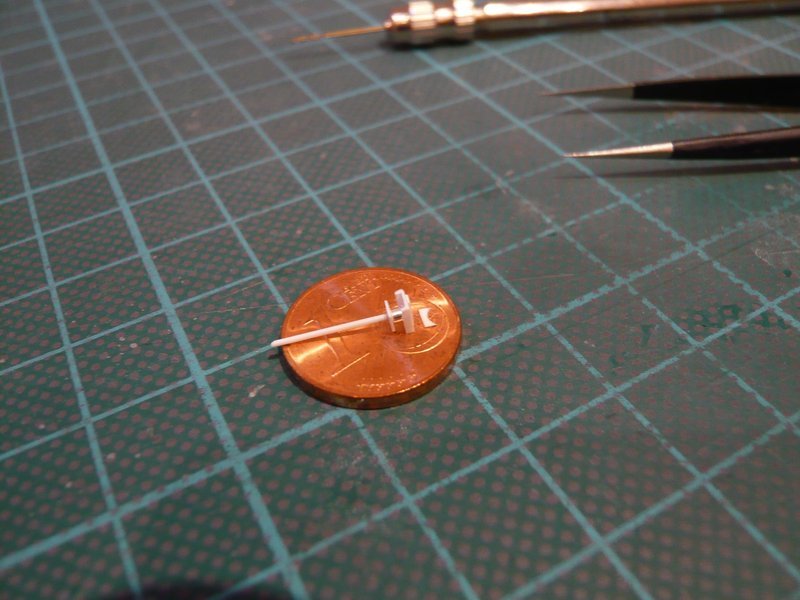 the tiny sickle was glued, 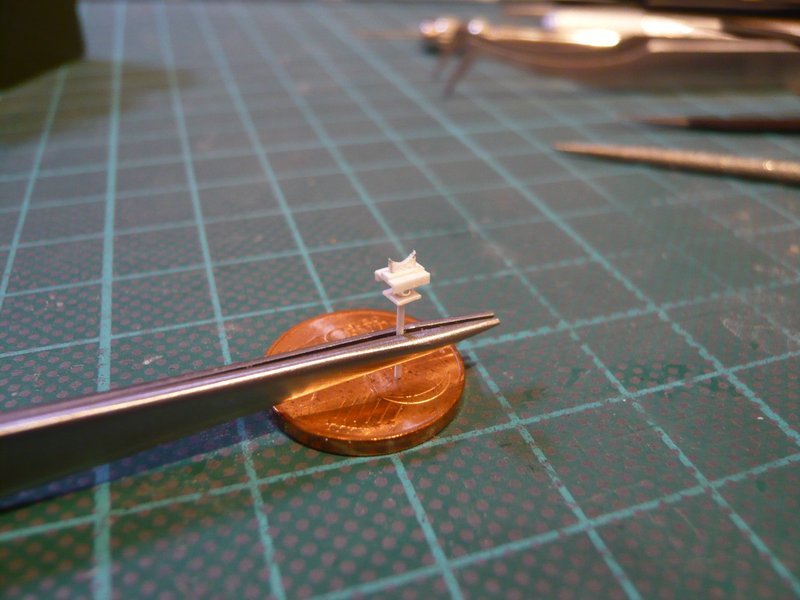 and the first of the two supports was finished. 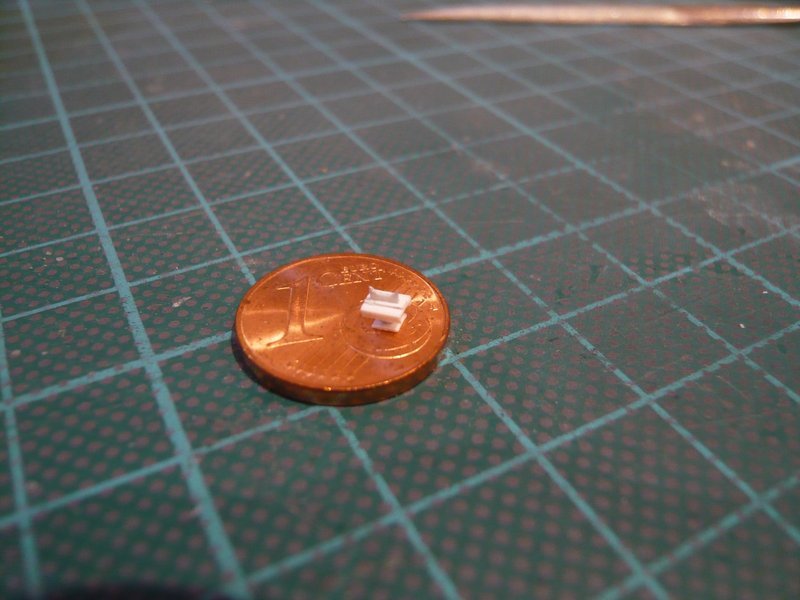 And then I finally could exchange the previous dummy and replace with the new support, which fits well with its height under the tube.  Now I have still to clone this support only.
__________________
Greetings from Germany Manfred Under construction: Launch Pad 39A with Challenger STS-6 (1:144)
|
|
#1219
12-06-2016, 05:34 AM
|
|||
|
|||
|
Looks good Manfred. Neat, clean and to scale. Great job!
__________________
This is a great hobby for the retiree - interesting, time-consuming, rewarding - and about as inexpensive a hobby as you can find. Shamelessly stolen from a post by rockpaperscissor
|
|
#1220
12-06-2016, 09:26 AM
|
||||
|
||||
|
Thanks elliott,
yep small and tricky, but nice.
__________________
Greetings from Germany Manfred Under construction: Launch Pad 39A with Challenger STS-6 (1:144)
|
 |
|
|


 Linear Mode

