


|
|
|
#1631
 04-13-2018, 01:32 AM
|
||||
|
||||
|
Hello everybody,
but one do not have to break a butterfly on a wheel,  and following a hint in our German Raumcon Forum, I looked in my Dremel accessories and also found a Nylon Rotor Brush and a Nylon Brush, which I have immediately tested at medium speed.  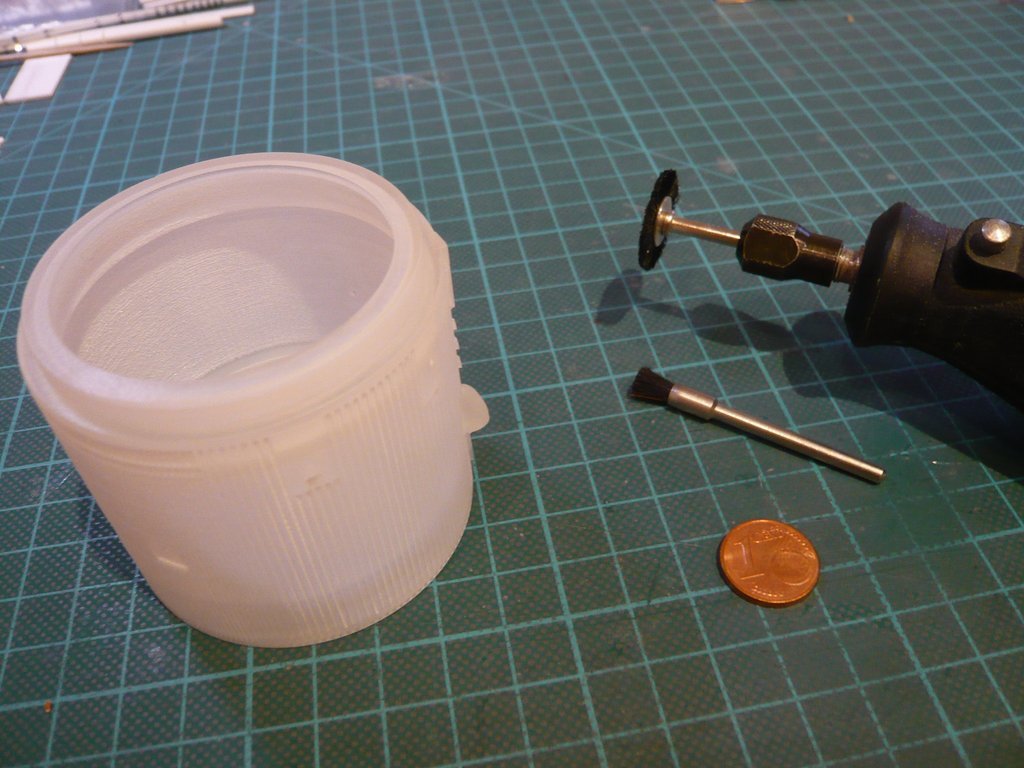 In addition to the disadvantage of the many fine grooves, the Intertank has the advantage that it has no protruding small details that can easily break off when brushing, and also it is quite robust. 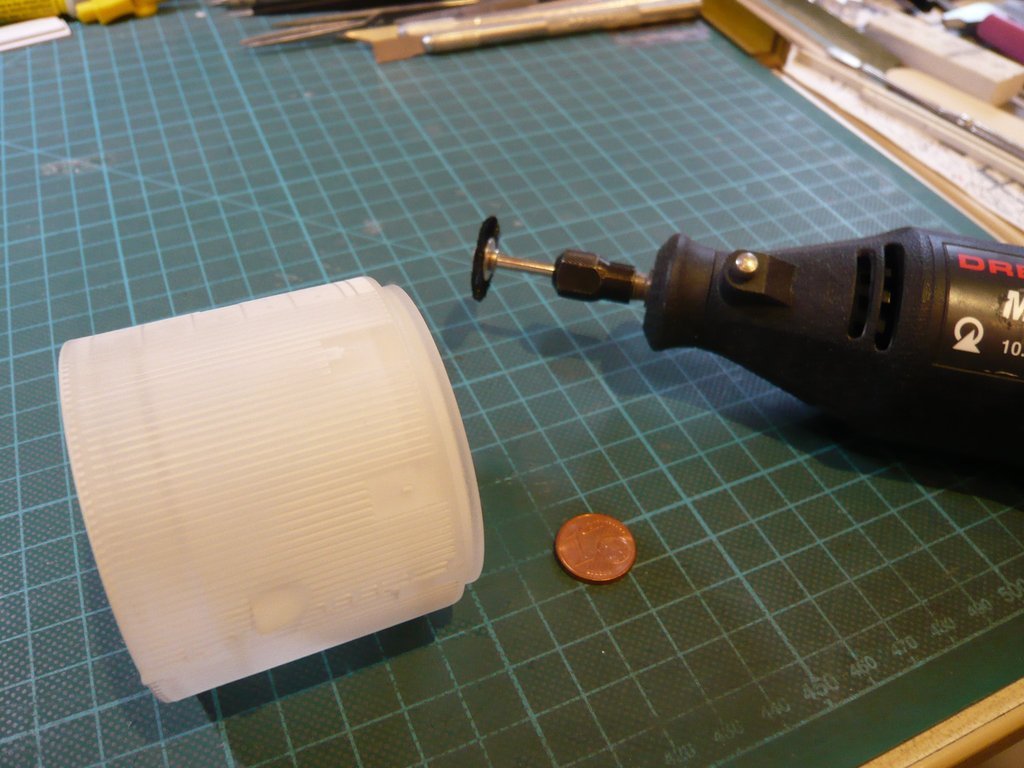 That's why I was able to ride across the grooves relatively easily and smoothly with the rotor brush, whereby it was already visible to the naked eye how the white wax residues gradually disappeared and the grooves slowly became clean, which pleasantly surprised me.  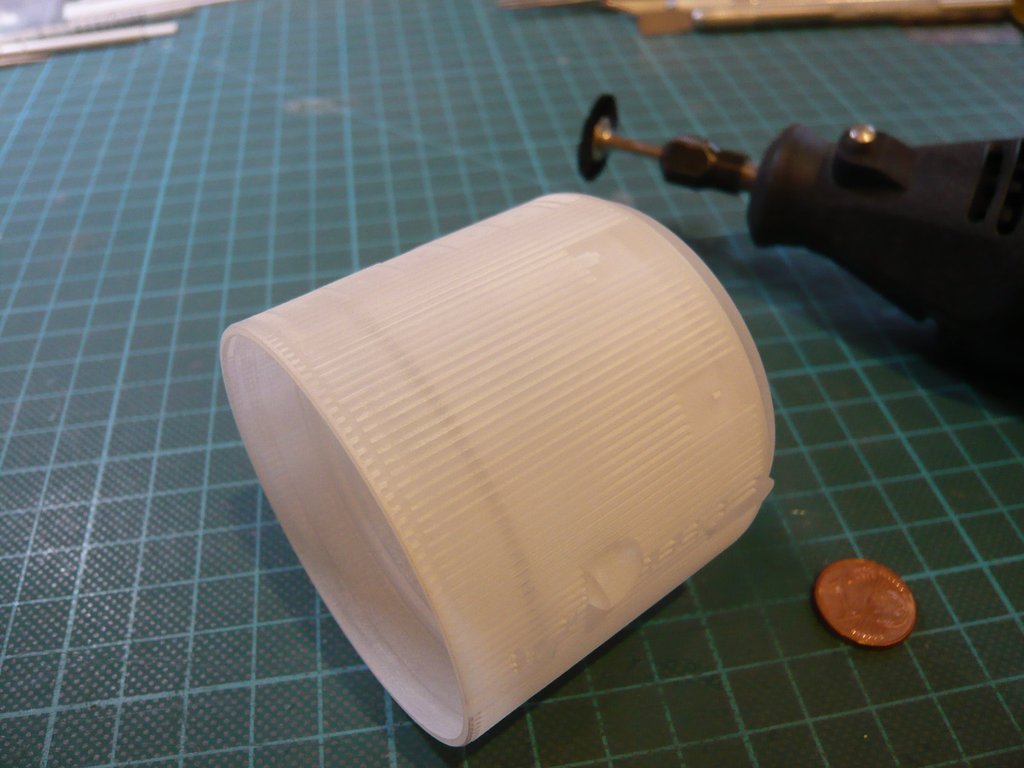 While cleaning in the area of the Stringer Panel is relatively easy due to the continuous grooves, 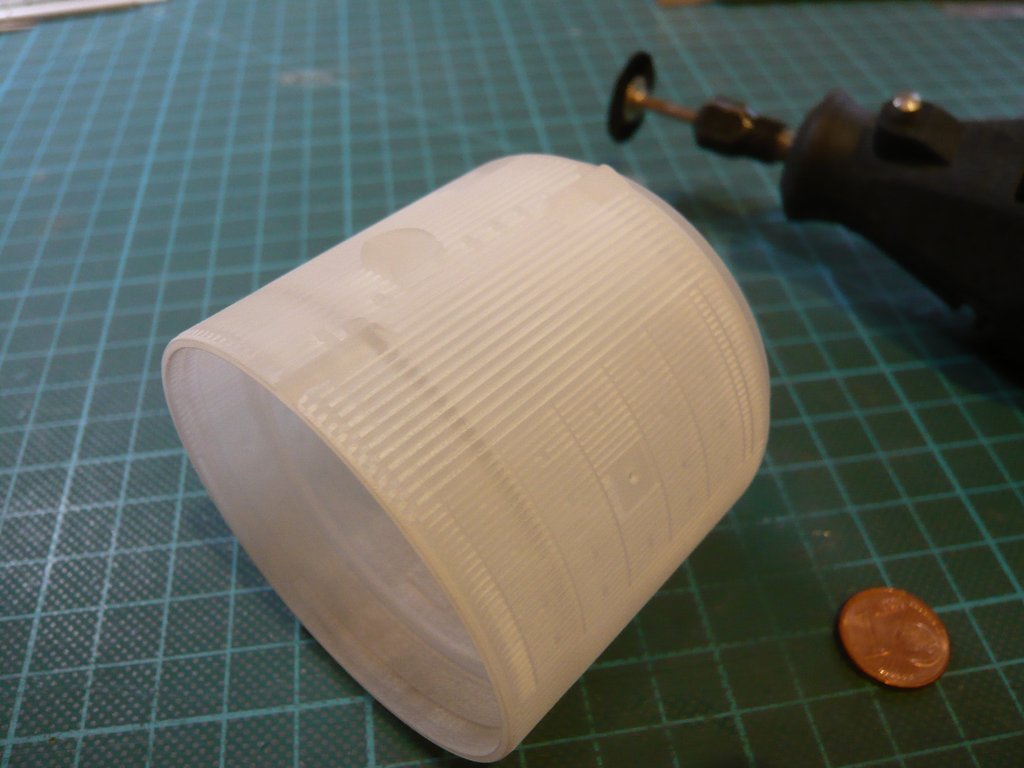 one has to do one's best in the subdivided areas of the Thrust Panel. 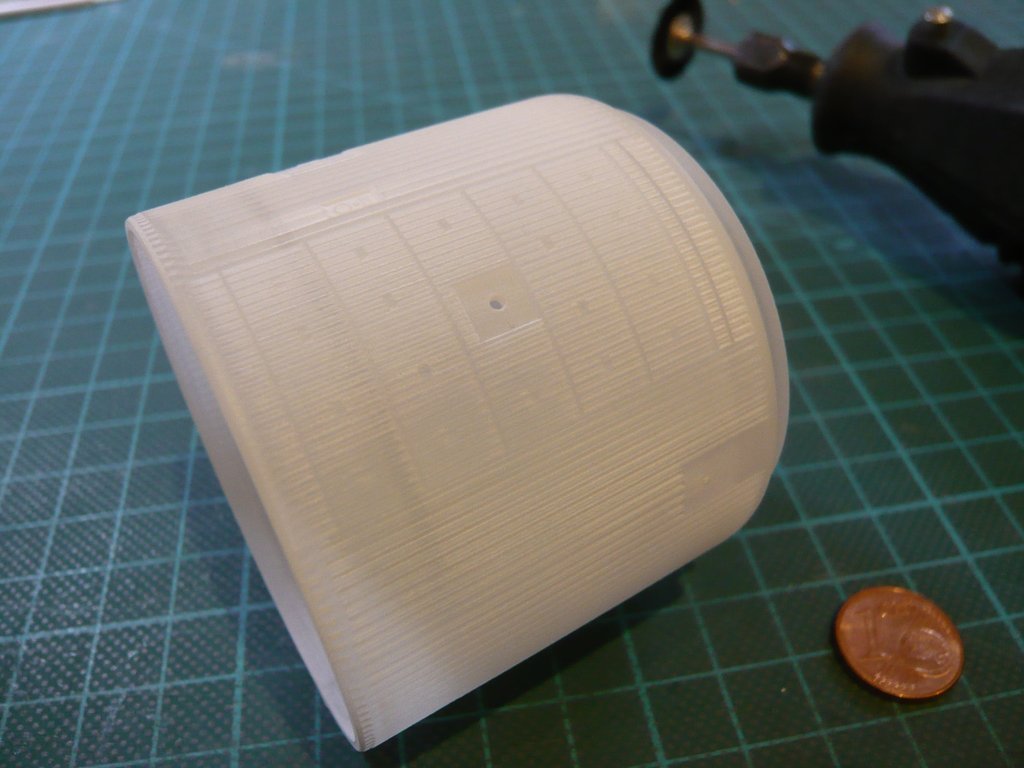 Under the big magnifying glass, one can see more clearly the differences between areas with wax residue and already cleaned areas.  And furthermore one can still see that in the two outer areas of the Thrust Panel on the right edge with the little "pockets" still sits a lot of wax, because they are worse reachable with the Rotor brush, which is why I there will try the Nylon brush that will probably get in better there.  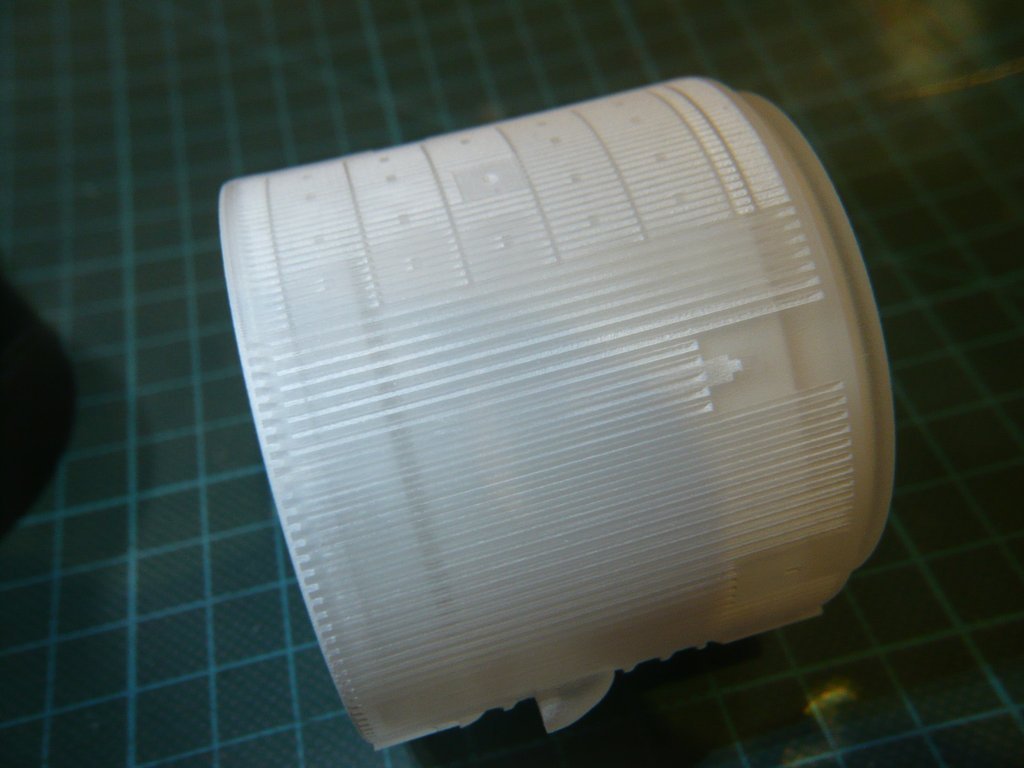 To be able to see such differences in detail even better,  I always apply the following trick. I always apply the following trick.To do this, I paste the photo into a Word document, then I increase the magnification, as shown here e.g. up to 300%, and take a screenshot, which I then upload.  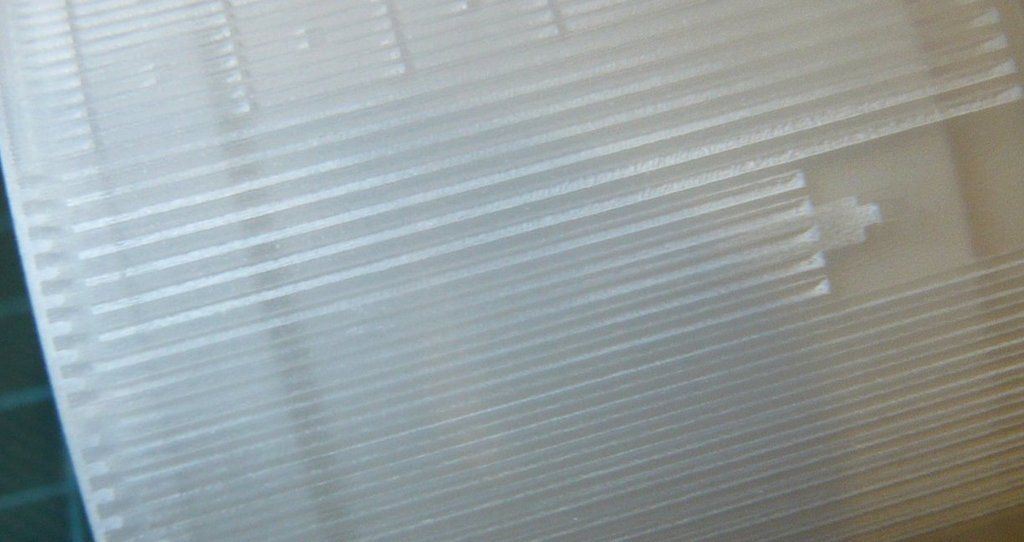 This closeness can no longer be captured by the autofocus of my digicam.  This is the maximum possible closeness, if the image is still to become halfway sharp. This is the maximum possible closeness, if the image is still to become halfway sharp. 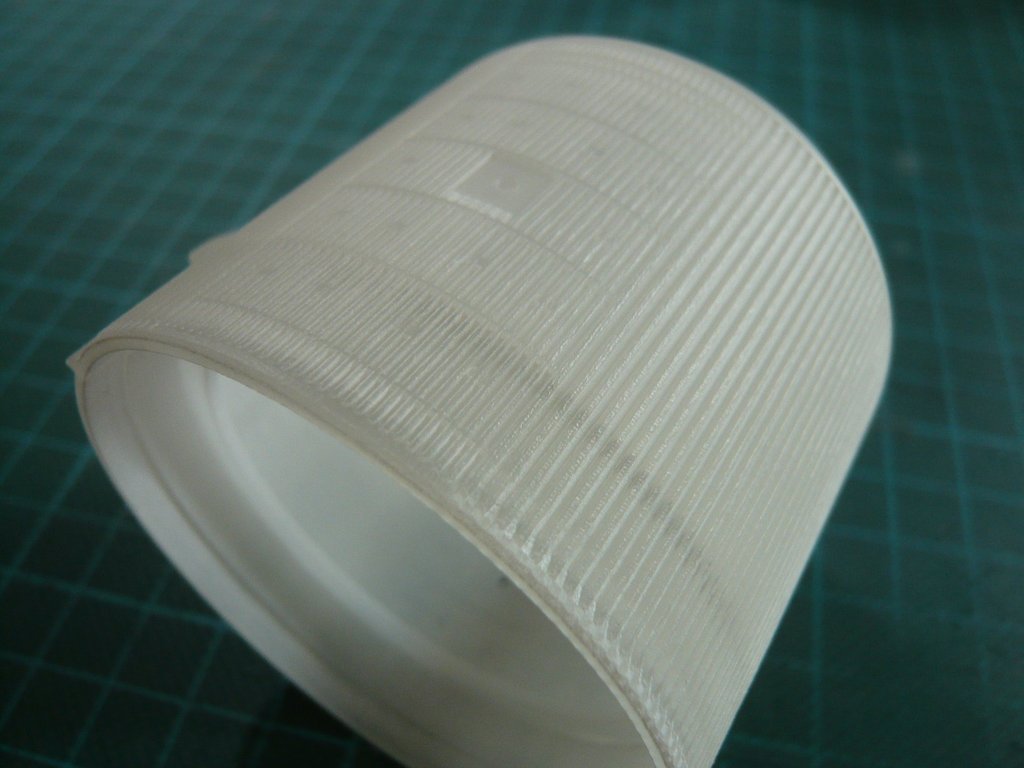 And here I've tested the Nylon brush, and I have to say that does not look too bad.  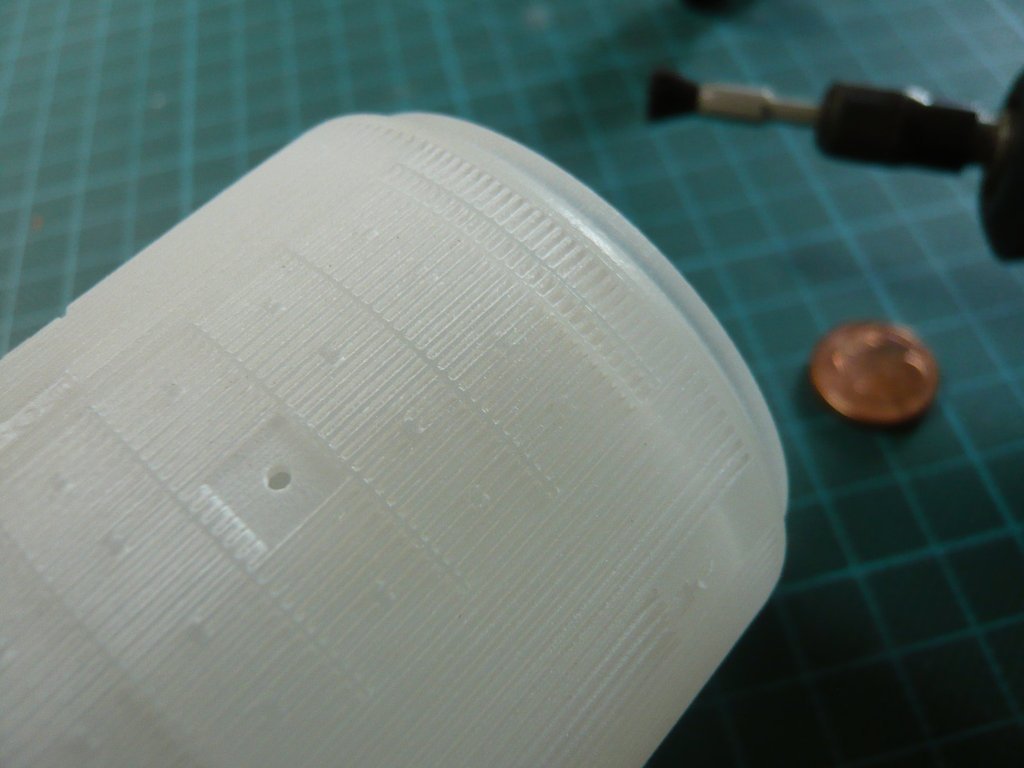 The cleaned area stands out clearly from the rest of the area, whereby one must consider that this IT was already 1 h in the ultrasonic bath.  
__________________
Greetings from Germany Manfred Under construction: Launch Pad 39A with Challenger STS-6 (1:144) 
|
|
#1632
04-13-2018, 10:03 AM
|
|||
|
|||
|
Wonderful Manfred! So glad that you have hit upon a way to clean the excess wax off of the tank. That's great. I know you must be pleased.
__________________
This is a great hobby for the retiree - interesting, time-consuming, rewarding - and about as inexpensive a hobby as you can find. Shamelessly stolen from a post by rockpaperscissor 
|
|
#1633
04-14-2018, 01:15 AM
|
||||
|
||||
|
Thanks elliott,
yep, this Intertank with its many fine grooves seems to be a prime example of a "wax catcher"  and therefore obviously needs a combined special cleaning treatment. and therefore obviously needs a combined special cleaning treatment. But I will not let up until I have found a way out, rely on it.  Therefore I'm going to try the Pre-soak method (maybe a day or two) with my 1st IT, whereby it actually seems logical that soaked "dirt" can be removed better, as in grandmother's time ...  And maybe the brushing out of the grooves with the Dremel brush can also be done under water.
__________________
Greetings from Germany Manfred Under construction: Launch Pad 39A with Challenger STS-6 (1:144)
|
|
#1634
04-14-2018, 02:09 PM
|
|||
|
|||
|
Hi Manfred
Just another thought on the wax removal problem. Perhaps you might need to up not only the time but also the strength of the chemical process. With this in mind, I have noticed that if you leave a dishwasher tablet in a sink full of water overnight then everything, including the sink, comes out spotless. So if you still find you are not getting the IT free of wax, perhaps trying a "test" IT in a solution of water and a dishwasher tablet overnight may be powerful enough to get into all the wax so it can then be dislodged and hopefully without affecting the FUD material of the IT. Regards Kevin
__________________
Normally the most advanced tech I use is a pencil.
|
|
#1635
04-14-2018, 04:57 PM
|
||||
|
||||
|
Thanks Kevin for your tip, maybe I'll try this.
__________________
Greetings from Germany Manfred Under construction: Launch Pad 39A with Challenger STS-6 (1:144)
|
|
#1636
04-15-2018, 10:10 AM
|
|||
|
|||
|
Hi Mani,
this is some great progress! It's good to see you working on the shuttle components. AFAIK there is STILL no accurate shuttle plastic model kit available, which is a shame if you consider how successful and famed the whole shuttle program has been. I'd love getting an accurate kit but, as you know, we are still stuck with the same decade old and faulty products. :/ However, I guess with the creation of the new IT piece you and your friend have done an incredible step in the right direction. Moreover, othe fans are able to benefit from it. AWESOME!  BTW, somehow watching your progress on the IT brings me less headache than watching your launch pad build. BTW, somehow watching your progress on the IT brings me less headache than watching your launch pad build.
|
|
#1637
04-15-2018, 01:52 PM
|
||||
|
||||
|
Thanks Marcell for looking in on me,
 yep, on the one hand, the detailled Intertank with all its tiny stringers and ribs is an impressive new part for the Airfix External Tank, but on the other hand, it's no pleasure seeing the damn wax residuals in the felt 1.000 grooves, which have to be removed ...  BTW, sorry, what do you have against my Launch pad build?
__________________
Greetings from Germany Manfred Under construction: Launch Pad 39A with Challenger STS-6 (1:144)
|
|
#1638
04-16-2018, 05:58 AM
|
|||
|
|||
|
Quote:
I love it; what I wanted to say was, I probably would have gotten scared by the sheer amount of detail and the tremendous workload it required. The shuttle however is a bit smaller and therefore not as intimidating. So in essence, the launchpad has blown my small mind apart completely and the shuttle part gives those pieces a chance to come together again. 
|
|
#1639
04-17-2018, 09:18 AM
|
||||
|
||||
|
Okay my friend,
then I can understand you, but take care of you.
__________________
Greetings from Germany Manfred Under construction: Launch Pad 39A with Challenger STS-6 (1:144) Last edited by spacerunner; 04-17-2018 at 10:35 AM.
|
|
#1640
04-17-2018, 11:00 AM
|
|||
|
|||
|
I will!
|
 |
|
|


 Linear Mode

