


|
|
|
#1651
 04-28-2018, 09:07 AM
|
||||
|
||||
|
How about a cocktail toothpick? That might help.
__________________
Non Sufficit Orbis-The world is not enough. 
|
|
#1652
04-28-2018, 10:07 AM
|
||||
|
||||
|
Forget it,
 if you knew how tight the stuff sits in the fine grooves ... if you knew how tight the stuff sits in the fine grooves ...  For this job you need hard tools.  The most effective is the steel ruler, and for the corners one can take the tooth probe or the cutter tip.  With the toothbrush and the brush then only the residuals are eliminated.  
__________________
Greetings from Germany Manfred Under construction: Launch Pad 39A with Challenger STS-6 (1:144)
|
|
#1653
04-28-2018, 12:00 PM
|
|||
|
|||
|
Hi Manfred
A tough time indeed for you with your build. I am sure you will get there though. Perhaps temperature is a way to try. Maybe the "wax" liquefies or at least softens enough at a temperature that will not affect the IT that makes detergent and the ultrasonic cleaner work. Or at that temperature makes using the steel rule etc much easier to strip all the wax off the IT. This should be possible since the wax is applied in soft/malleable form (which is obtained by heating it) during the 3D printing process so IN THEORY that temperature is less than that which affects the material used to form the IT. Regards Kevin
__________________
Normally the most advanced tech I use is a pencil.
|
|
#1654
04-28-2018, 05:15 PM
|
||||
|
||||
|
Quote:

|
|
#1655
04-28-2018, 05:49 PM
|
||||
|
||||
|
Quote:
 In the Dental lab the IT was cleaned in soapy water at approx. 50-60°C for approx. 15 minutes in an ultrasonic bath, but the time was probably too short.  Therefore we will clean the final IT for a longer time.
__________________
Greetings from Germany Manfred Under construction: Launch Pad 39A with Challenger STS-6 (1:144)
|
|
#1656
04-28-2018, 05:51 PM
|
||||
|
||||
|
Quote:

__________________
Greetings from Germany Manfred Under construction: Launch Pad 39A with Challenger STS-6 (1:144)
|
|
#1657
04-29-2018, 09:16 AM
|
||||
|
||||
|
Since ive never worked with this type of material before, it was just a suggestion I pulled out of the air. You would know better. But im sure a solution will render itself soon. I myself consider this a learning experience.
__________________
Non Sufficit Orbis-The world is not enough.
|
|
#1658
04-29-2018, 09:44 AM
|
||||
|
||||
|
No problem, eagleclaw.
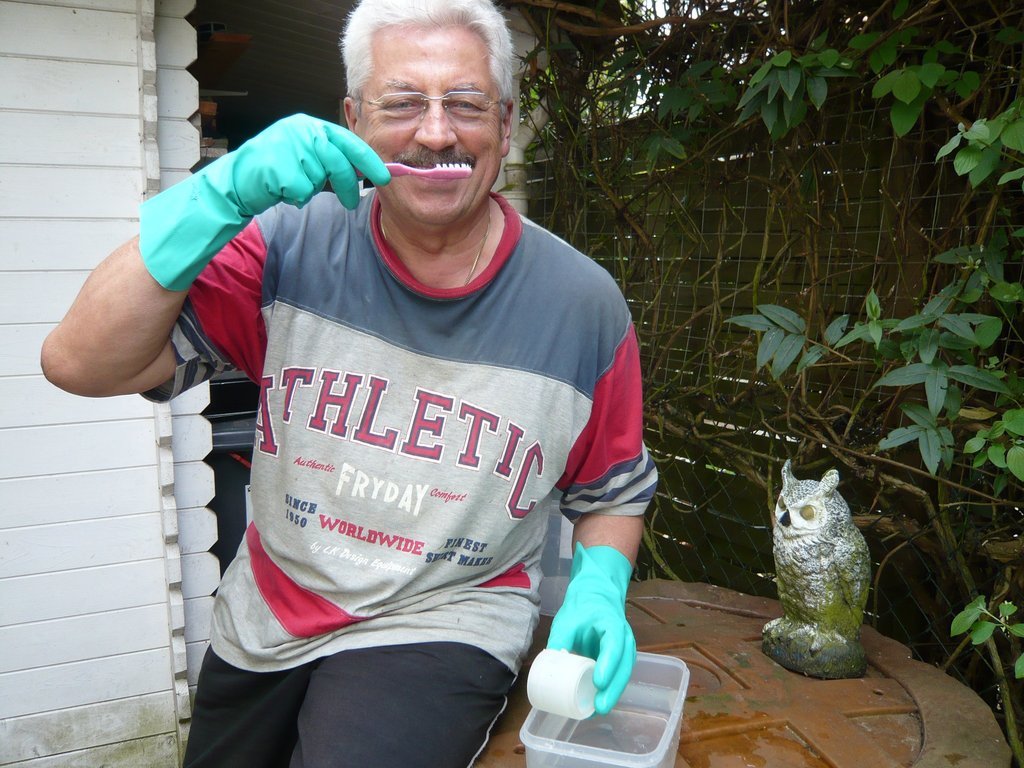
 Hello everyone, as you can see on my outfit, I wanted to try sharper things today to finally cope with those annoying wax residuals. 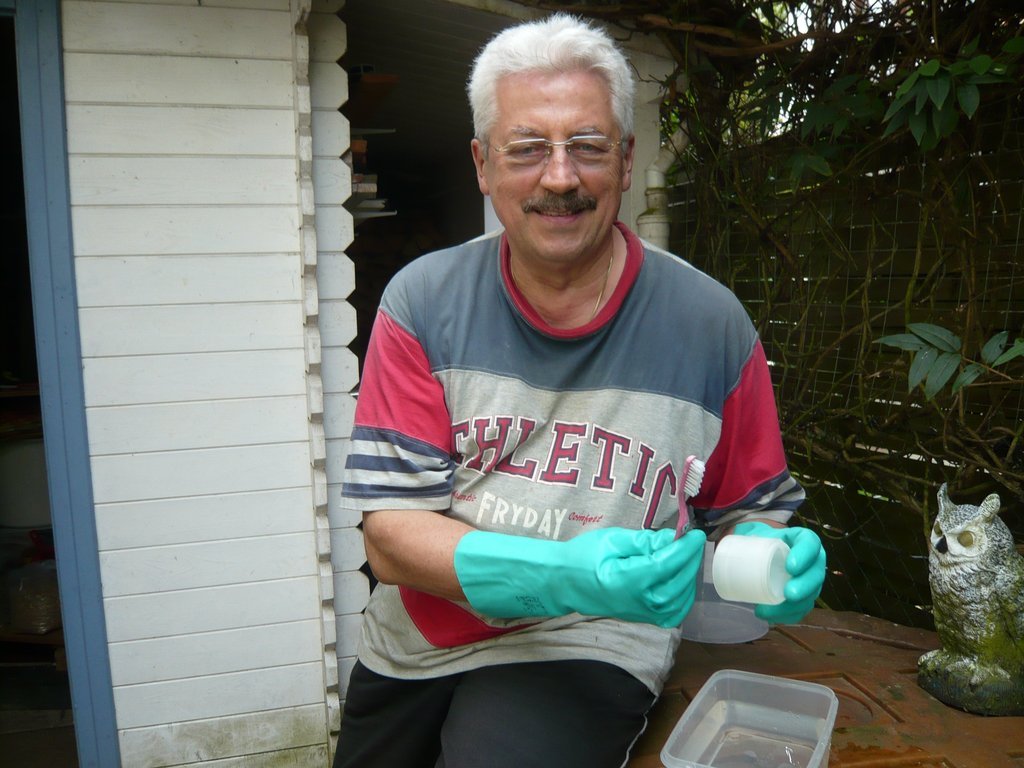 In the already mentioned PDF of Volkmar Meier for the cleaning of FUD/FXD-Prints he had i.a. even presented Stove cleaning spray as an effective remedy and seemingly successfully applied, which has made me curious.  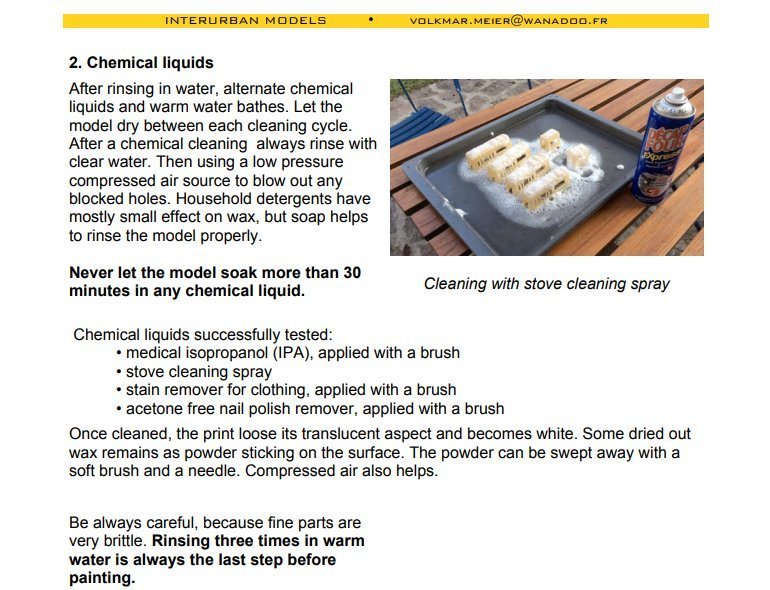 In order to test this initially rather unusual method on an IT, I contacted him by e-mail in France,  to find out more about his procedure, to which he has surprisingly answered in German, which I almost suspected according to his name. to find out more about his procedure, to which he has surprisingly answered in German, which I almost suspected according to his name. The spray in his image is the DecapFour from Henkel available in France in the blue box containing caustic soda lye,  and therefore is to be used with caution, which is why one absolutely should wear rubber gloves! and therefore is to be used with caution, which is why one absolutely should wear rubber gloves!He sprayed the models outdoors on a baking sheet from all sides with the oven spray and waited until the foam has dissipated, about 30-60 minutes. Then followed by one, two lukewarm water baths, where he scrubbed the models with an old toothbrush. In Germany there is a comparable spray under the name Sidol, which I got in the supermarket, 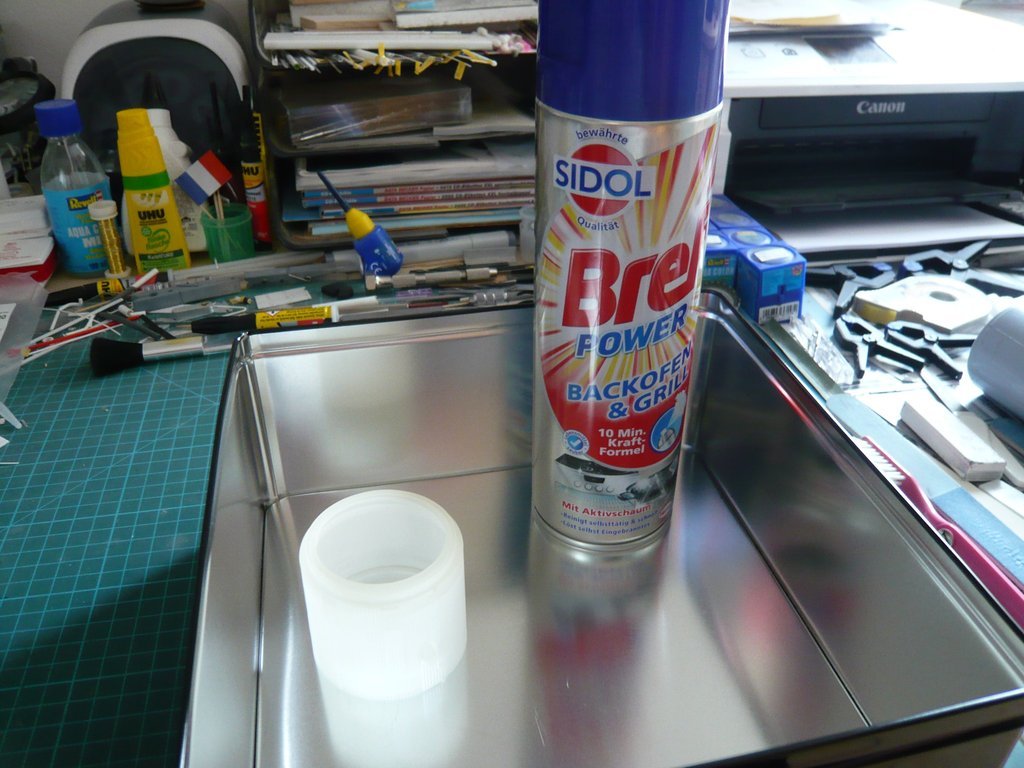 and had to test it immediately in the garden, let's go!  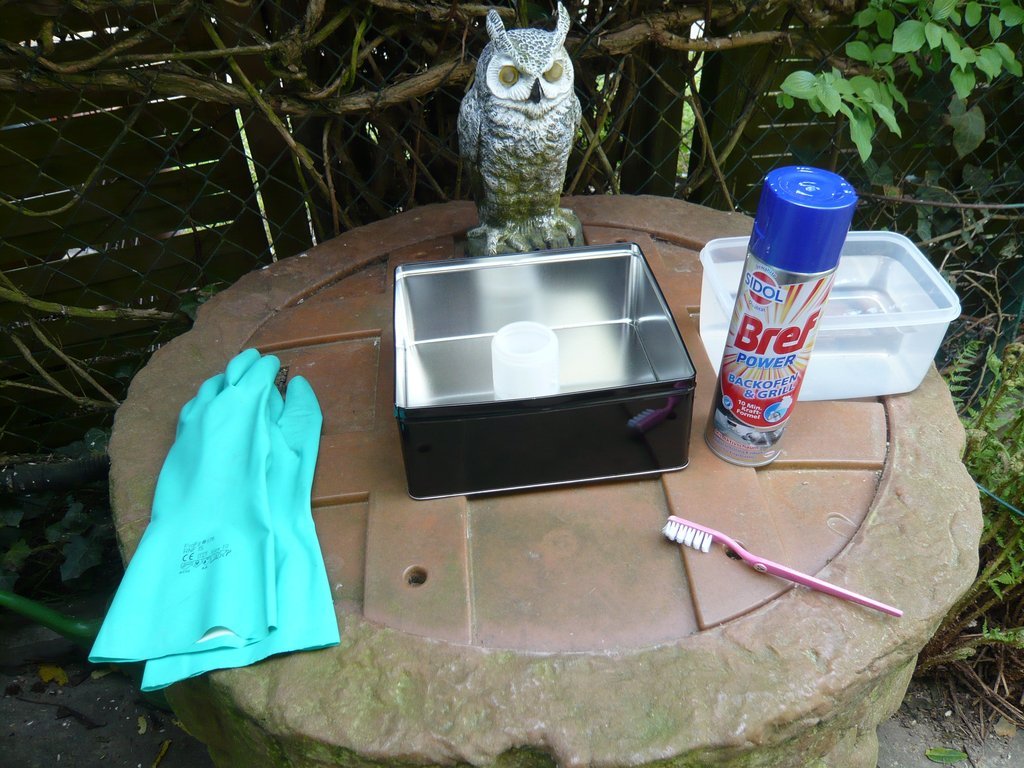 First of all, the IT in the box was vigorously foamed from all sides until it was no longer visible.  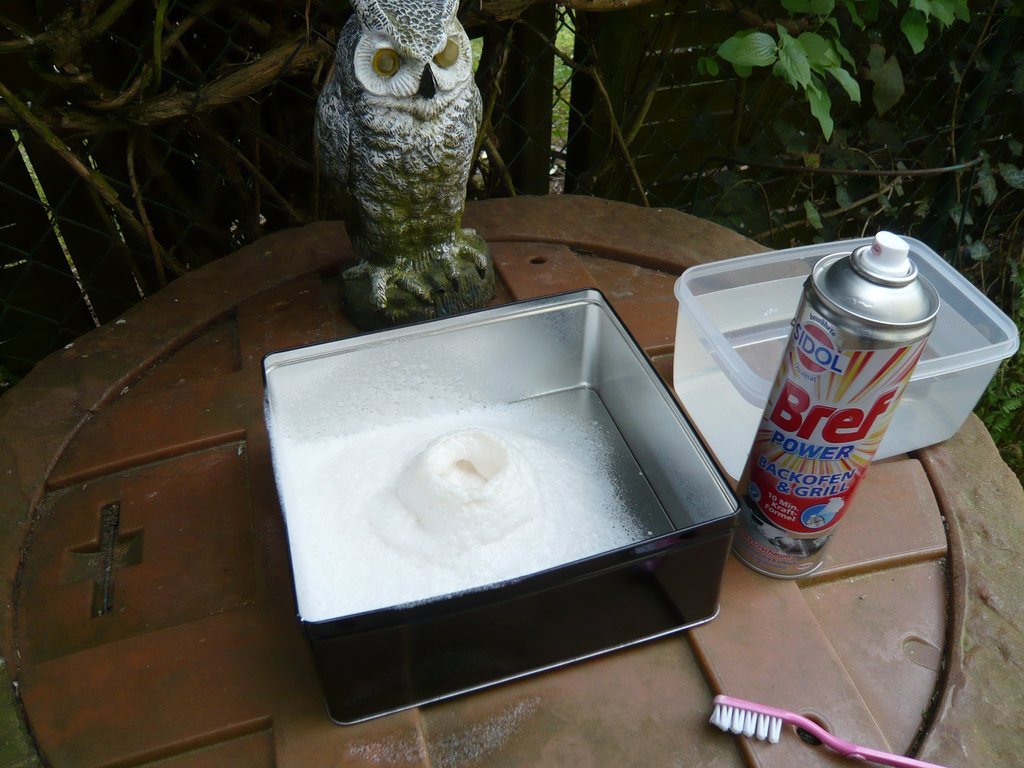 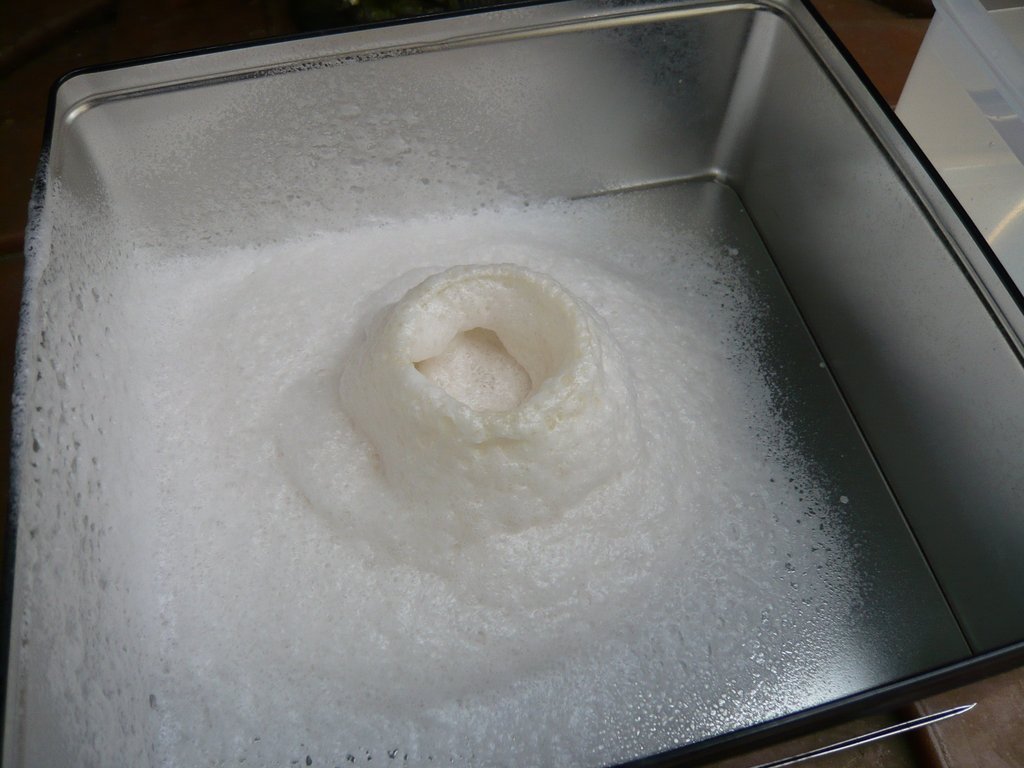 And then I waited eagerly for the foam to finally dissolve ...  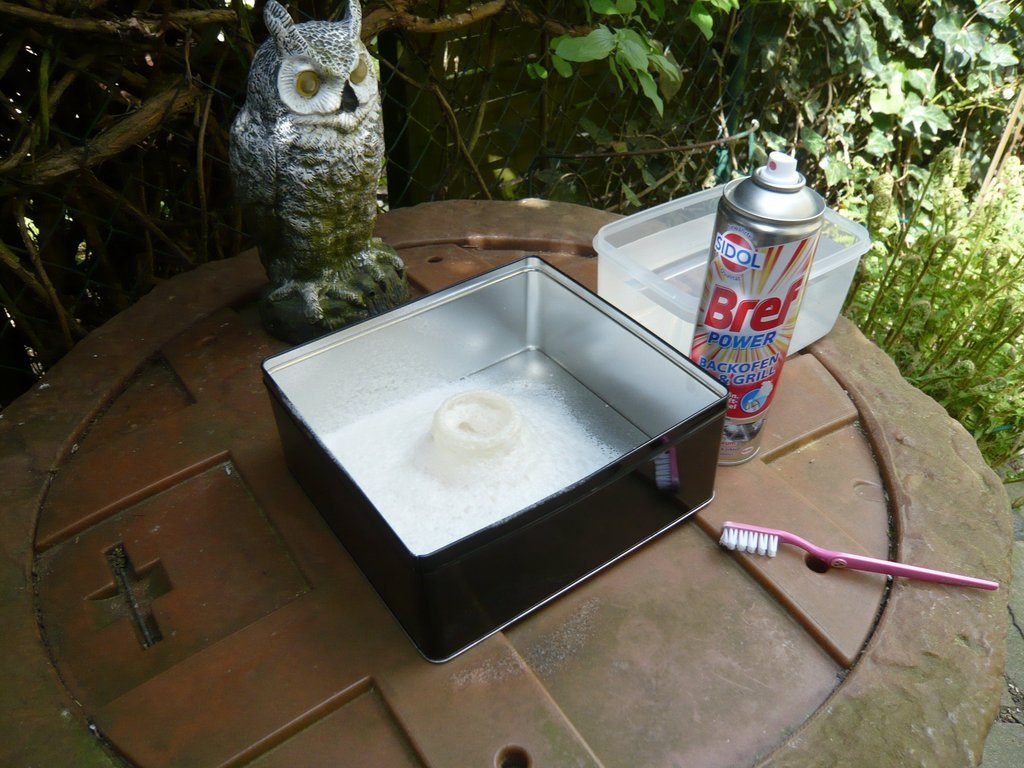 But when nothing had happened after an hour, 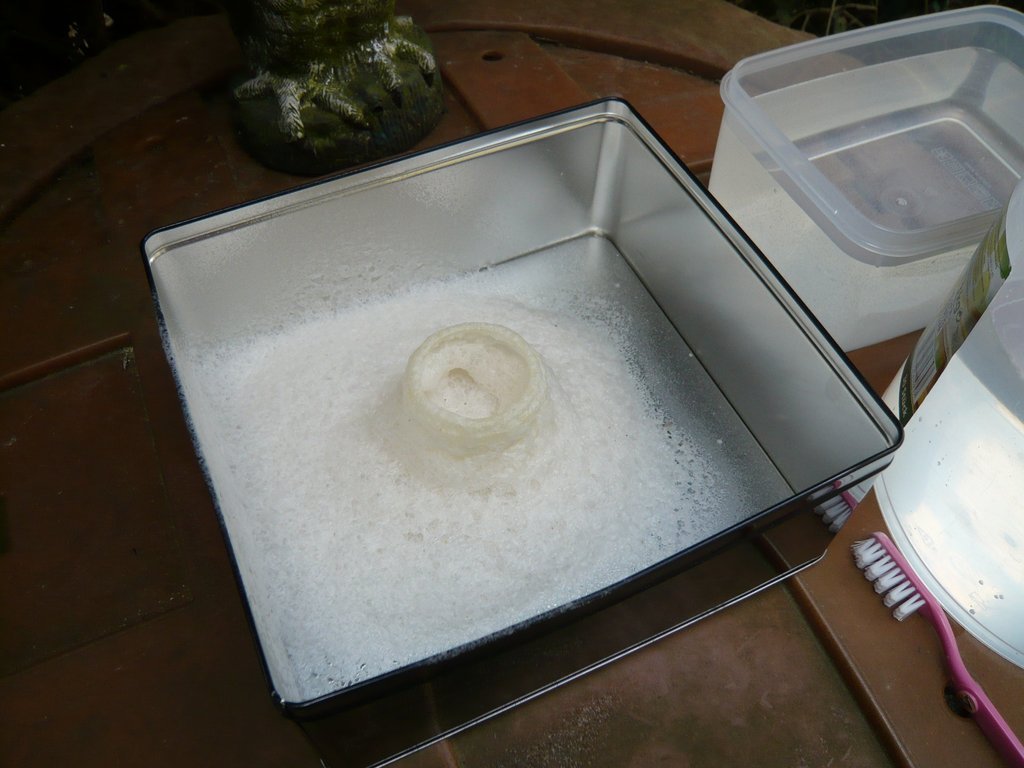 I got the tank out of the box and scrubbed it in the water bath around with the toothbrush for a few minutes. 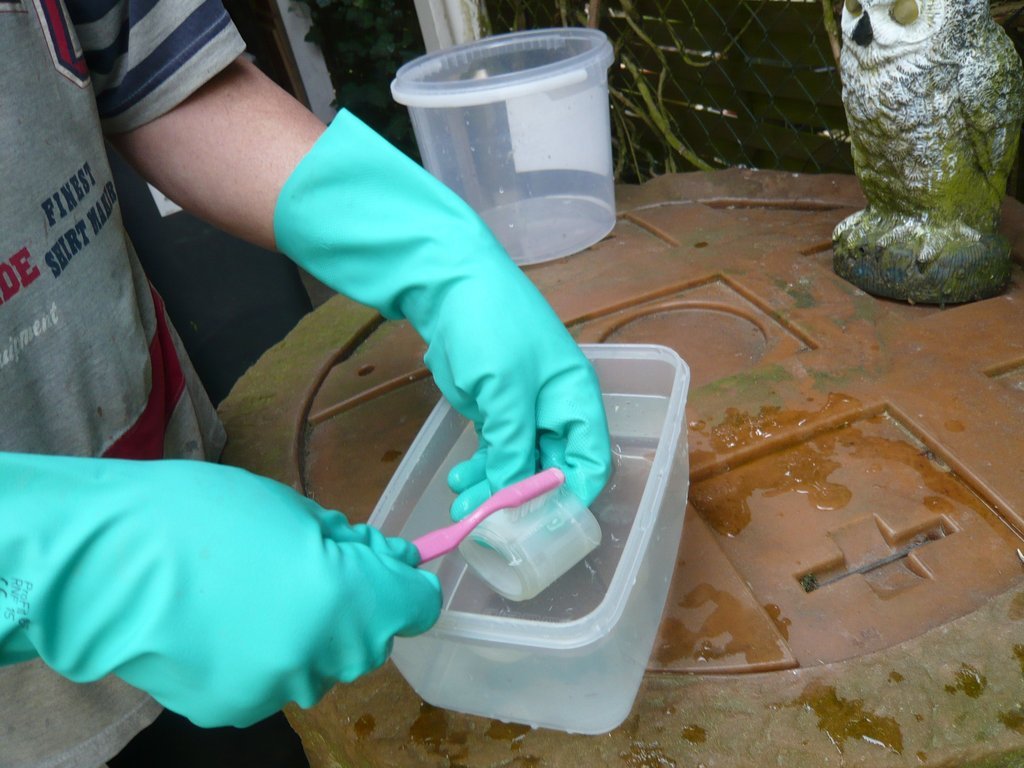
__________________
Greetings from Germany Manfred Under construction: Launch Pad 39A with Challenger STS-6 (1:144)
|
|
#1659
04-29-2018, 09:44 AM
|
||||
|
||||
|
And because it was just so beautiful, I almost continued with myself, but I was just now able to hold myself back!!!
  Fun aside, because after the tank was dried, the disillusionment came promptly.  As you can clearly see, there are in addition to clean areas still with wax residuals,  both between the stringers, as well as in the fine grooves of the Thrust Panel, and especially under raised details such as the Access Door and the two Fairings. both between the stringers, as well as in the fine grooves of the Thrust Panel, and especially under raised details such as the Access Door and the two Fairings. 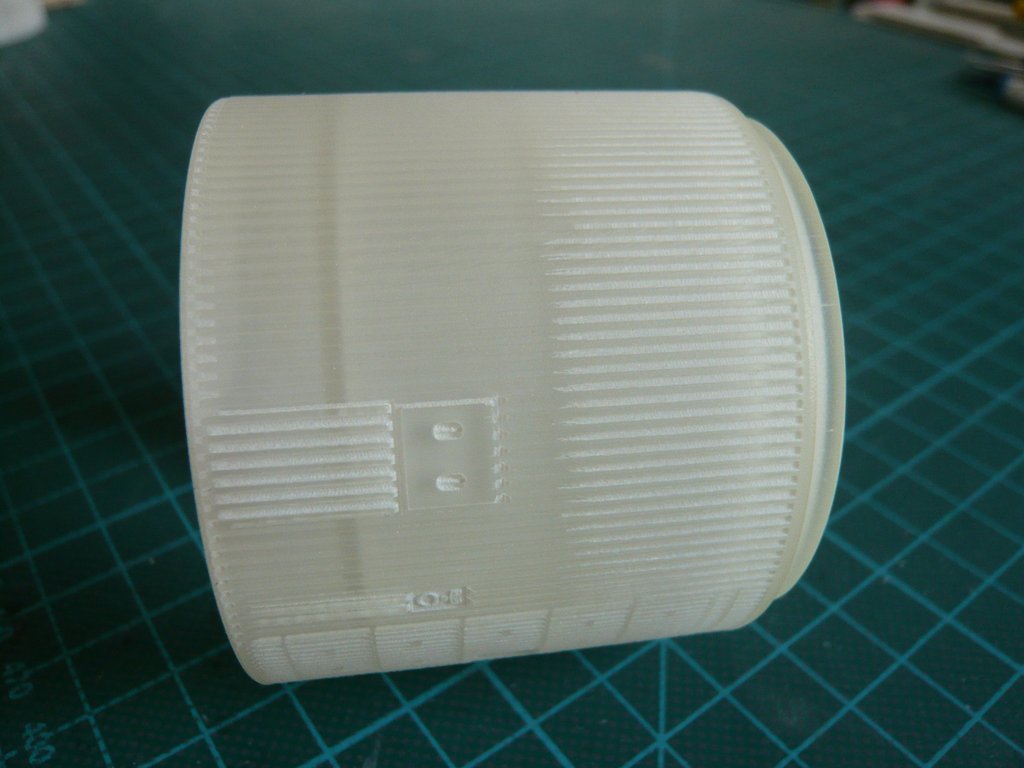 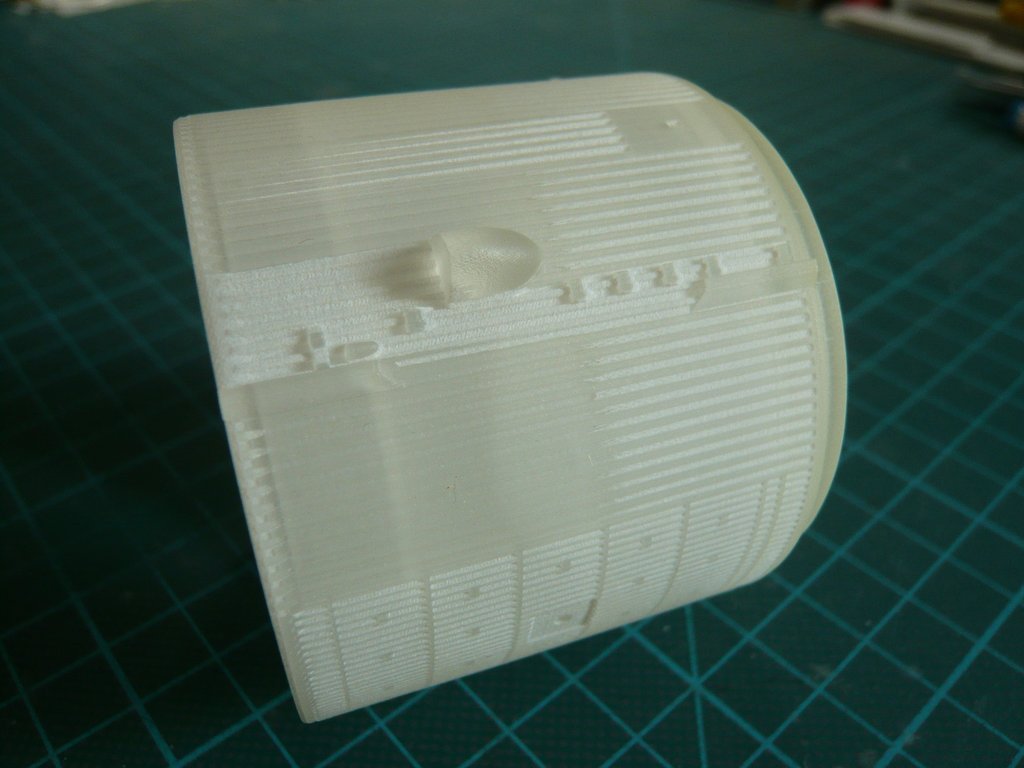 Furthermore, it is noticeable that the stringer grooves of the rear half of the tank are clean, whereas those in the front half still contain wax, which I can not explain.  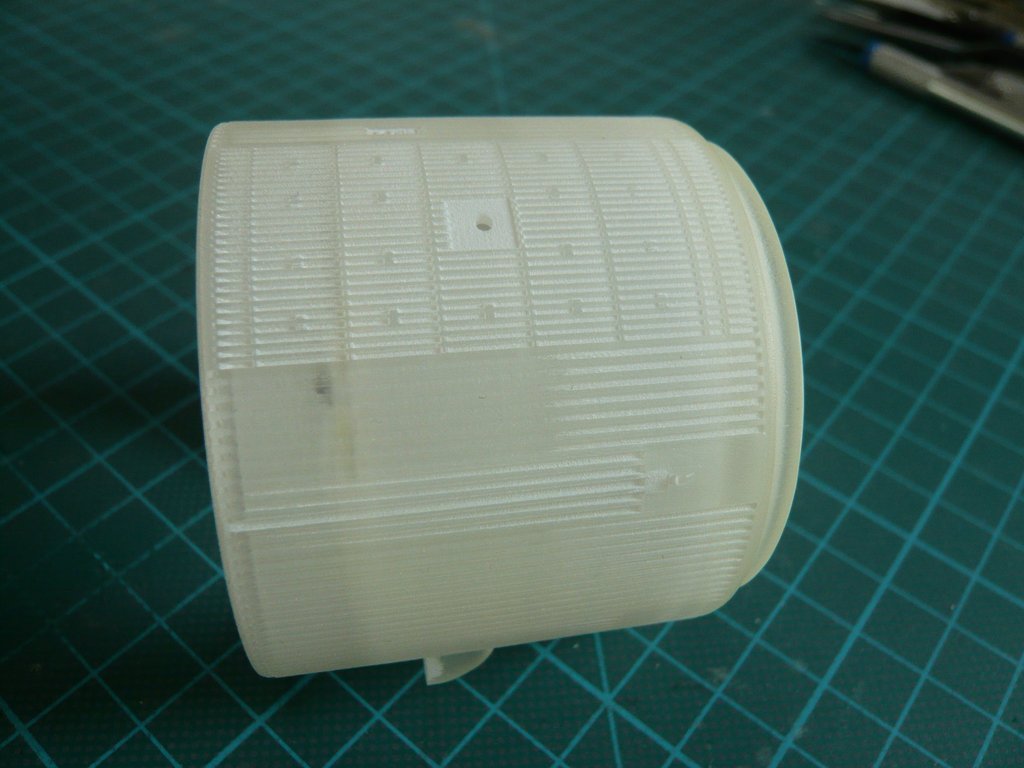 That's why I grabbed the steel ruler to remove the residuals, which is possible, but very tedious and therefore not the yellow of the egg.  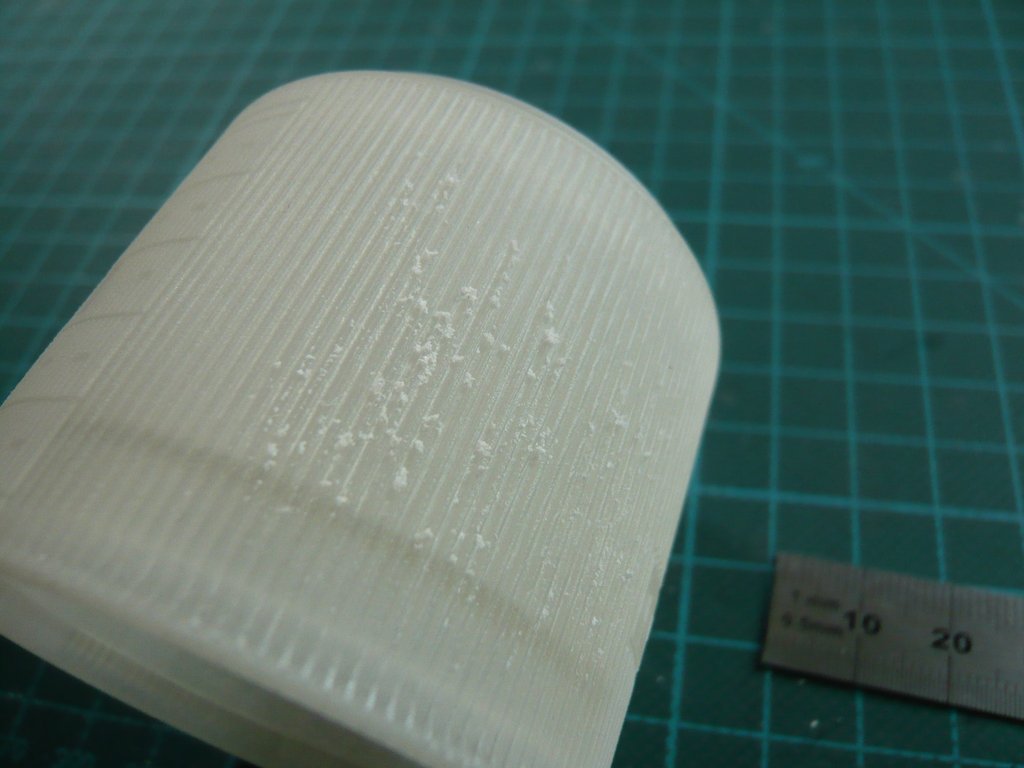 But maybe someone of you has an explanation for that.
__________________
Greetings from Germany Manfred Under construction: Launch Pad 39A with Challenger STS-6 (1:144)
|
|
#1660
04-29-2018, 05:31 PM
|
||||
|
||||
|
I was just thinking, we have a similar issue in the antique toy train collecting community. A lot of early plastics from say 1946 through about 1960 can develop a white, almost moldy appearance as they age. What somebody discovered is that it was a mold-release compound leeching out of the plastic (usually a styrene). To get rid of it, all you have to do is hit it with a hairdryer on low for a few seconds.
Might be worth a try The printable plastics industry is about as new today as the injection molded industry was back then. Still a lot to learn.
|
 |
|
|


 Linear Mode

