


|
|
|
#1671
 05-13-2018, 11:39 AM
|
||||
|
||||
|
BTW, I think that the TICKOPUR comes next week, then I will make a date with the Dental Lab.
 
__________________
Greetings from Germany Manfred Under construction: Launch Pad 39A with Challenger STS-6 (1:144) 
|
|
#1672
05-20-2018, 05:20 AM
|
||||
|
||||
|
Hello friends,
due to some short vacation in the Dental lab the Ultrasonic cleaning of the FUD-Intertank will take some time, I've thought again about the further building process and came to the following decision.  Since I've been working intensively on the External Tank/Intertank lately, it actually makes sense to keep going and completing it as the basic building block for the Shuttle Stack, i.e. including the related details such as LO2 Feedline, GO2/GH2 Press. Lines, the Ice/Frost Ramps and PAL Ramps, as well as the Orbiter Attachments. This includes then also the imitation of the Instafoam insulation structure of the front and rear ET parts by the special "Flour technique" as well as the final priming and paintwork. Then it will continue with the SRBs and the Orbiter, which finally complete the Shuttle stack.  Only then will I proceed to the construction of the Launch Tower (FSS/RSS), whereby the complete stack MLP will be available for control, in particular when it will depend on every millimeter for increasing the tower to the needed height.  Furthermore I decided for not to let be modeled the Ice/Frost Ramps as a 3D set, but rather to use the filigree ramps from the already presented Newware Kit (NW131),  which one can not do better actually, which is why I have now bought myself this kit, which I would like to introduce here again briefly in some images. which one can not do better actually, which is why I have now bought myself this kit, which I would like to introduce here again briefly in some images.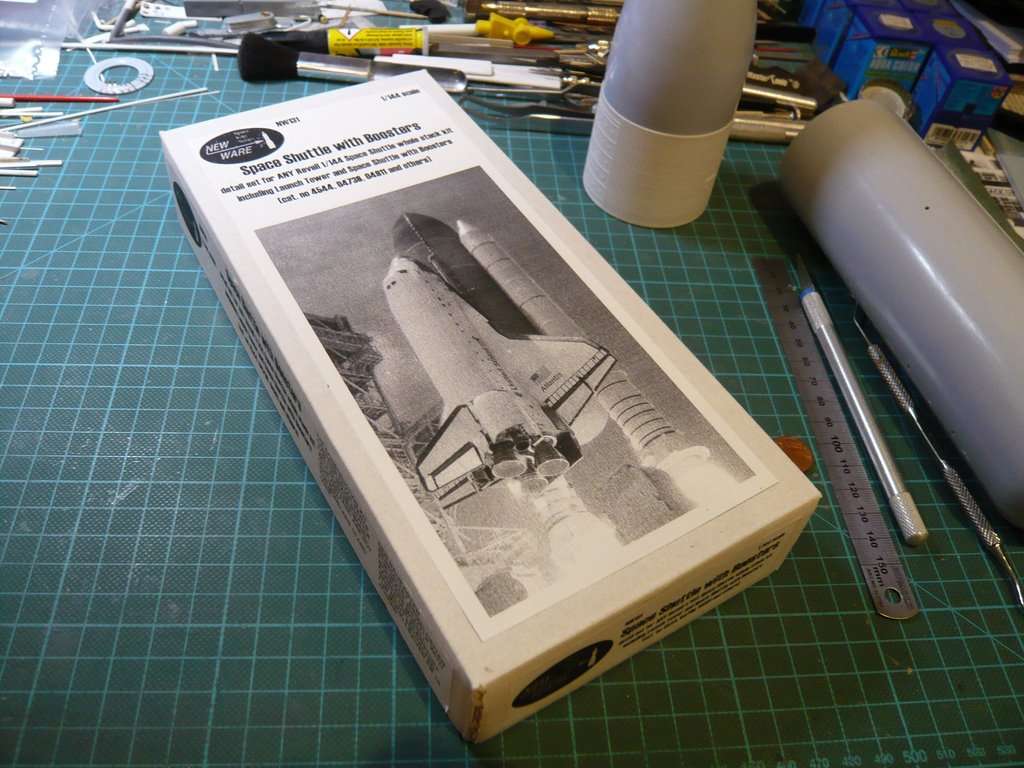 These are predominantly resin parts, 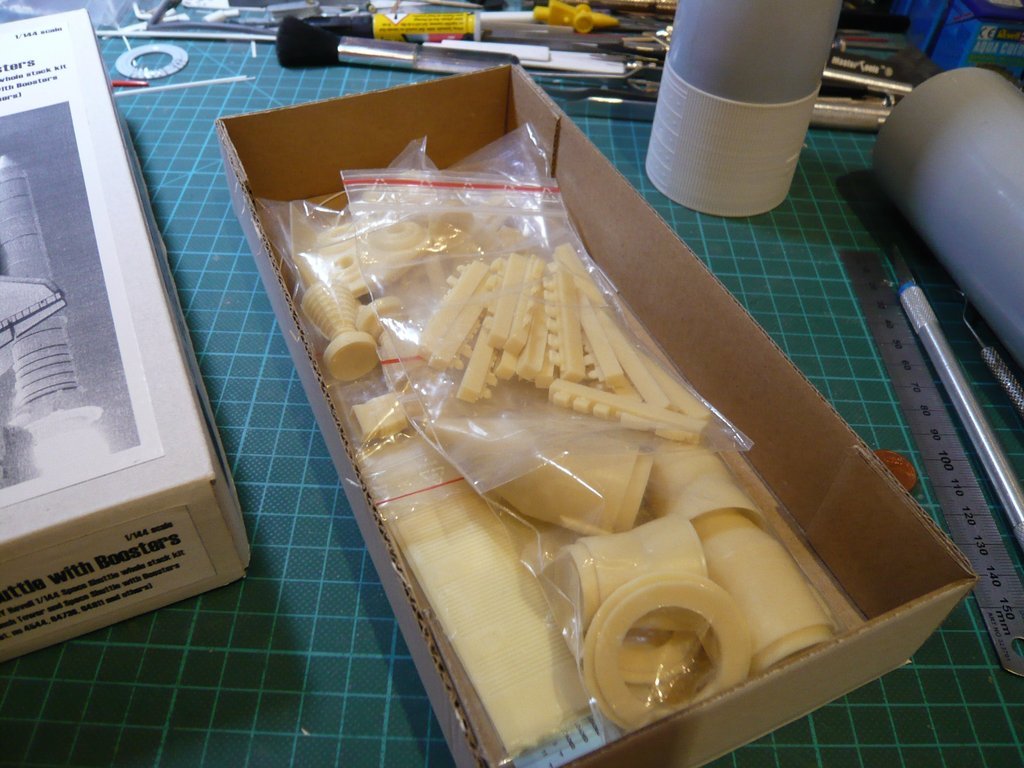 as well as a PE sheet with finest details for the ET and the SRBs as well as for the orbiter, incl. some Decals.  Although the kit is designed specifically for the Revell Shuttle Stack (1/144), some parts can also be used for the Airfix Stack, so such as here among others the fine structured SRB Forward Frustum & Nose Cone, if I measured correctly. Below are some of the tiny Ice/Frost Ramps and one of the filigree SSME engine nozzles. 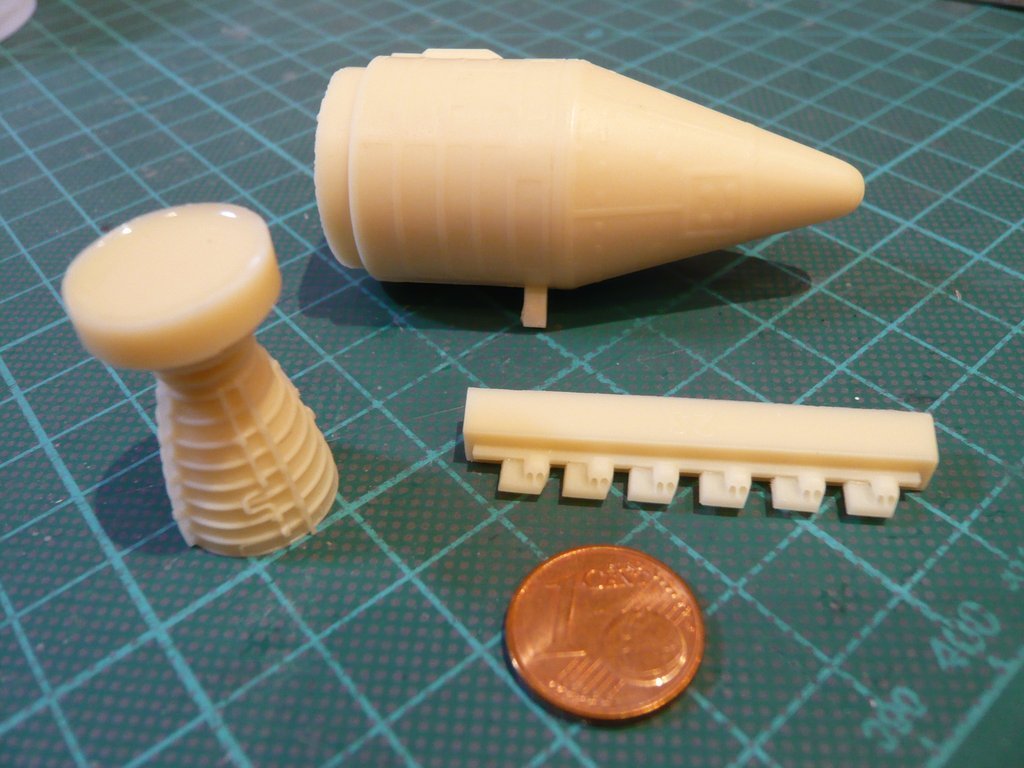 Here is the PE sheet once again.  For the engine nozzles, I actually wanted to use the kit from RealSpace Models, which I had set aside already long time ago and now could compare to the Newware nozzles. 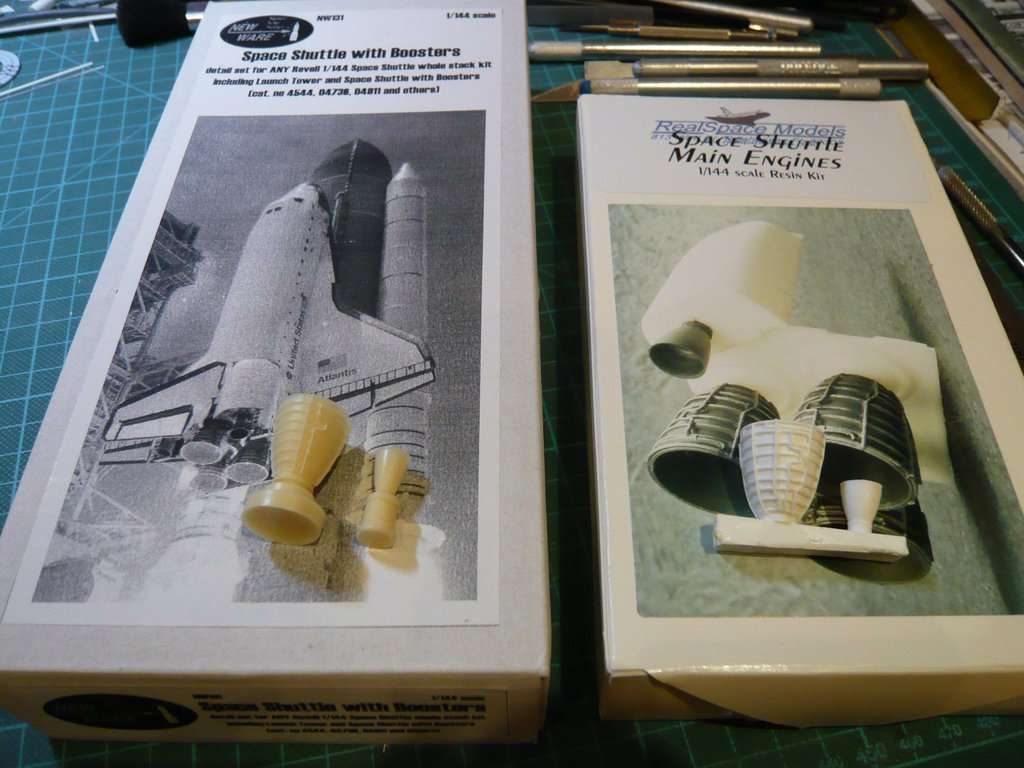 It immediately stands out that the RealSpace SSMEs look more squat and seem to be slightly larger than those of Newware. 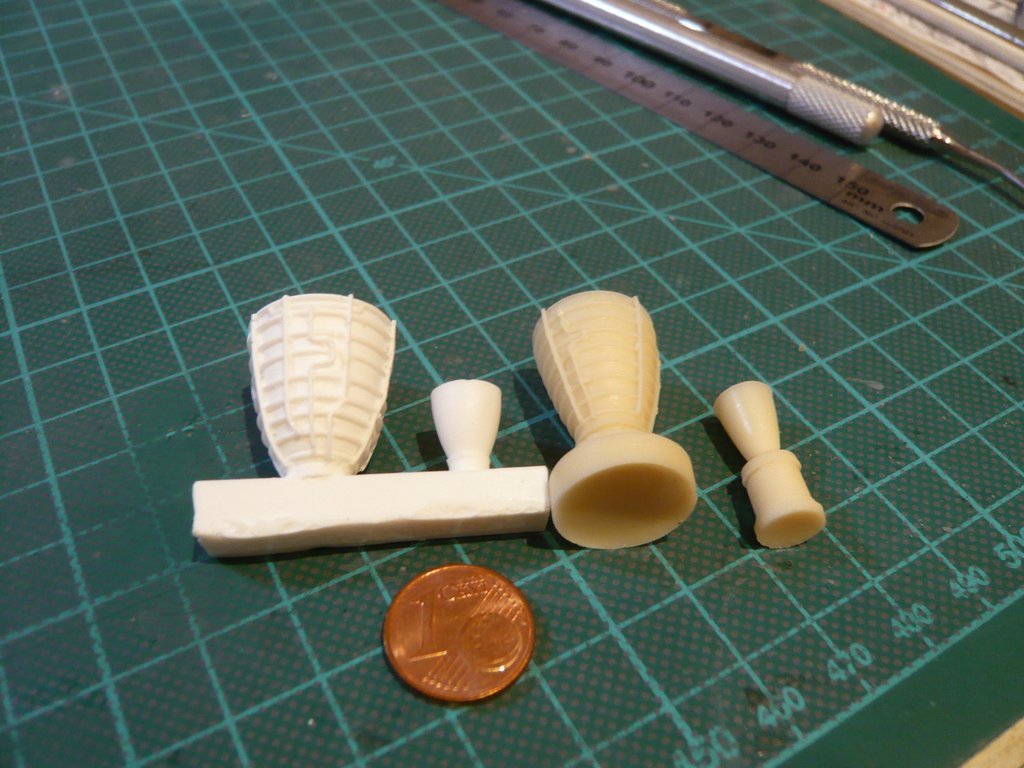 And once we're comparing already, I also added the nozzles of Revell (left) and those of Airfix (grey), from which you can now choose what you like better ...  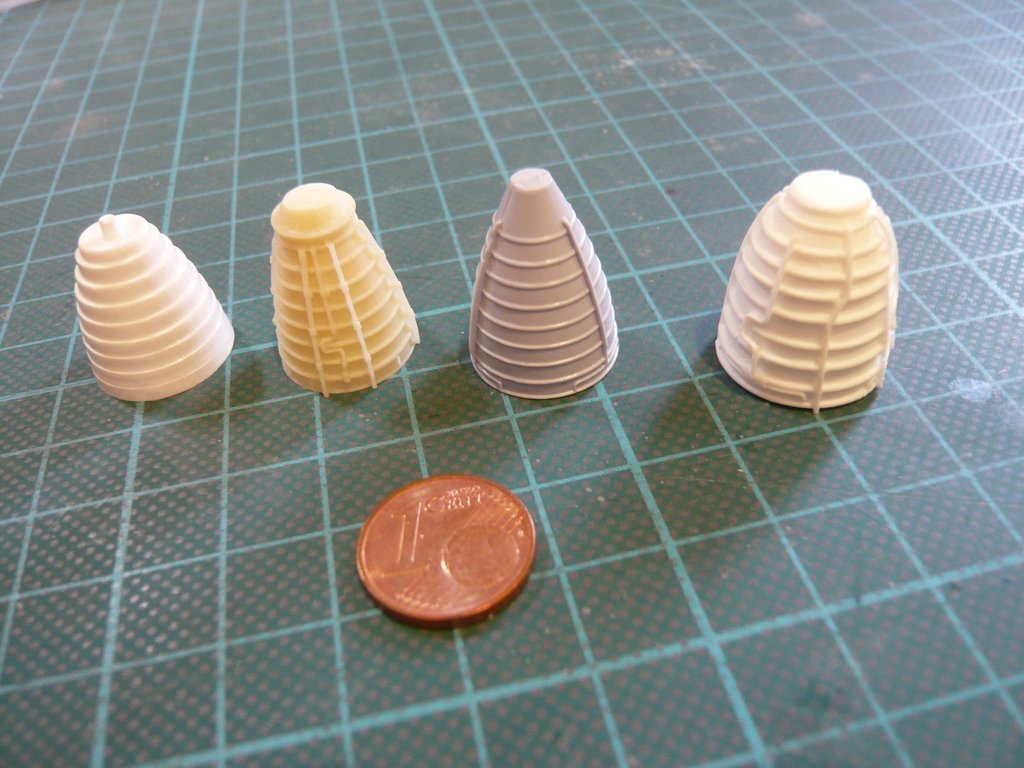 For my taste, then the SSMEs of Revell and Airfix quickly discards, whereby this begs immediately the question of the dimensions in comparison to the original.  I have only found these SSME dimensions by Pratt & Whitney: Lenght: 168 in. = 4,30 m = 29,9 mm (1/144) Diameter: 96 in. = Ø 2,40 m = Ø 16,7 mm (1/144) Unfortunately this is only the total length of the SSME, but not the length of the engine nozzle.  Maybe someone can help. 
__________________
Greetings from Germany Manfred Under construction: Launch Pad 39A with Challenger STS-6 (1:144) Last edited by spacerunner; 05-20-2018 at 05:43 PM.
|
|
#1673
05-20-2018, 05:50 AM
|
||||
|
||||
|
I always thought the Real Space Models SSMEs looked "right" and those are the ones I used when I built in plastic -- except for a couple of models where I scratchbuilt the SSMEs.
I seem to recall the later SSMEs had more plumbing than the earlier models. What is the "flour technique" you mentioned? I'm unfamiliar with it....
|
|
#1674
05-20-2018, 12:40 PM
|
||||
|
||||
|
Manfred. Boeing company has a document you could download called Space Shuttle Main Engine Orientation, document number BC98-04. Im in the hopes this will give you the info your looking for. Best regards. Ed
__________________
Non Sufficit Orbis-The world is not enough.
|
|
#1675
05-21-2018, 11:01 AM
|
||||
|
||||
|
Quote:
a friend of mine in the Raumcon Forum had this cool idea with the "flour technique".  To do this, the ET is sprayed with spray adhesive, then flour is spooned onto it and dabbed with the finger. After shaking off the loose flour it looks like this. 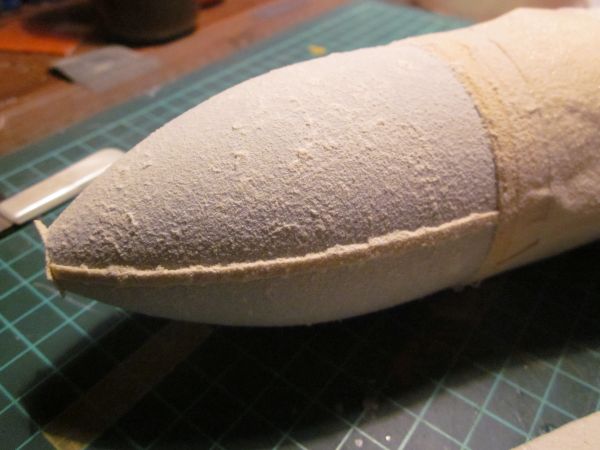 This has to dry properly now for approx. two days, not until then the excess flour can be removed with a fine brush. Afterwards follows a primer coating on it for protection and fixing. 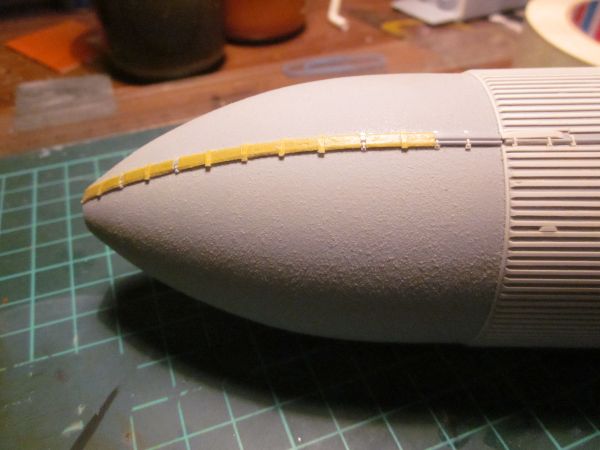 Then the same procedure with the rear ET part. 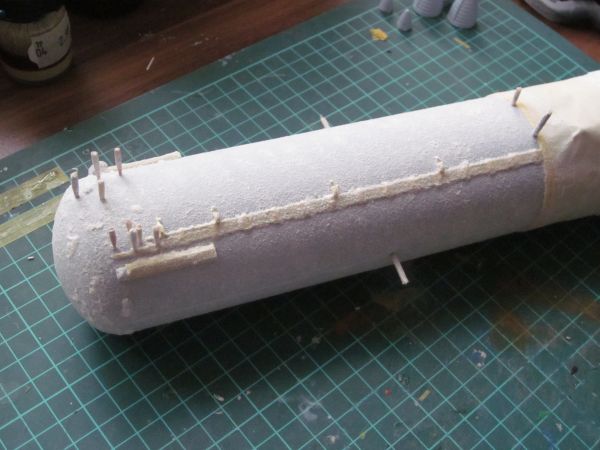 And this is the amazing result, a great looking instafoam structure. 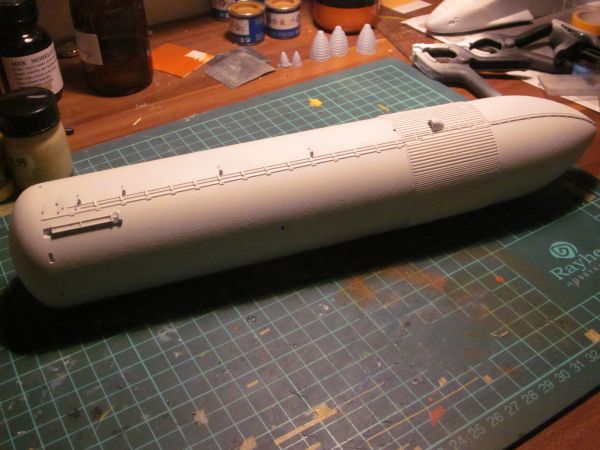 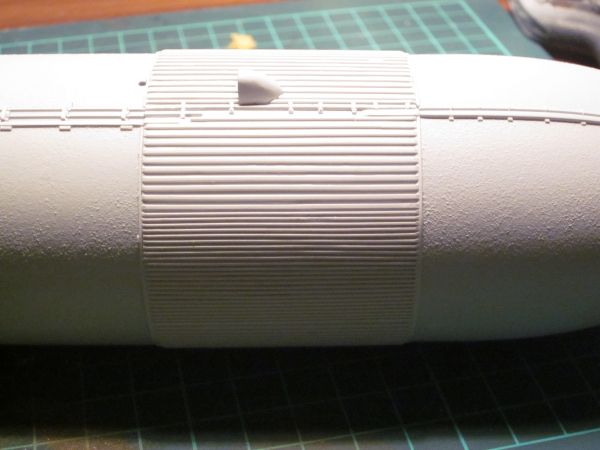
__________________
Greetings from Germany Manfred Under construction: Launch Pad 39A with Challenger STS-6 (1:144) Last edited by spacerunner; 05-21-2018 at 11:14 AM.
|
|
#1676
05-21-2018, 11:10 AM
|
||||
|
||||
|
Well i'll be. I never would have thought of that one. Thats a killer idea.
__________________
Non Sufficit Orbis-The world is not enough.
|
|
#1677
05-21-2018, 11:26 AM
|
||||
|
||||
|
Interesting technique. I, too, would not have thought of it.
My only concern -- particularly for a modeler going to great lengths/expense for accuracy, as you are -- is that it fails to replicate the lateral bands that are fairly prominent; it's the way the insulation is sprayed on. You can see it in the photos. When I built a Shuttle Stack ages ago (and wrote it up for Mike Mackowski's "Space in Miniature" book on the Shuttle) I coated bands of the ET with liquid cement to soften the plastic, then scuffed the surface with heavy-grit sandpaper, turning the ET as I sanded. I worked in sections. When done, I softened it up with medium sandpaper, but I wound up with the lateral bands. Sadly, I no longer have photos of the model. Last edited by dhanners; 05-21-2018 at 12:04 PM.
|
|
#1678
05-21-2018, 11:31 AM
|
||||
|
||||
|
Quote:
 In it I found this indication for the Nozzle Length which is 121''. 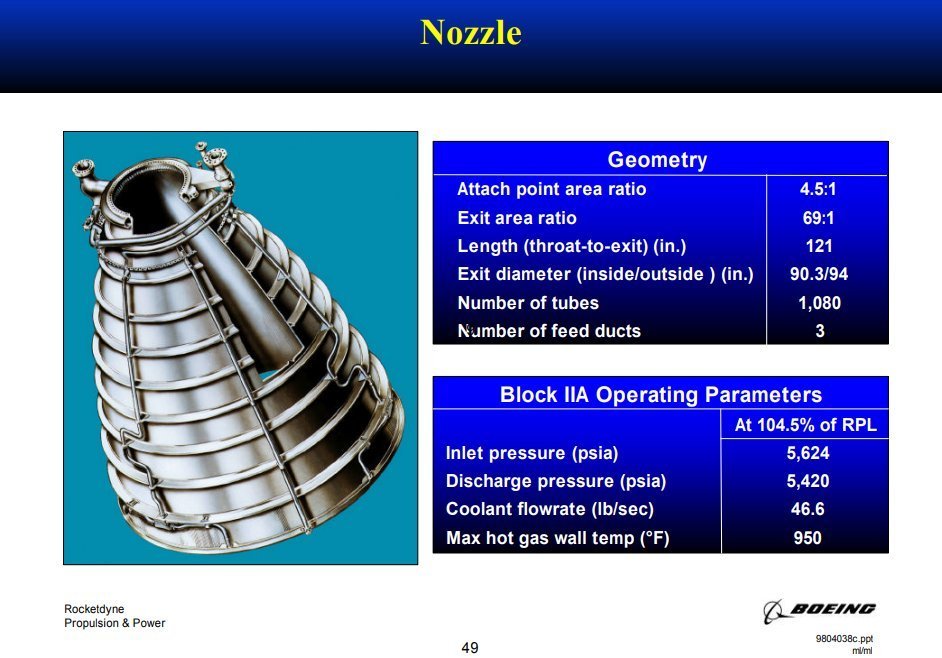 Source: Boeing BC98-04
__________________
Greetings from Germany Manfred Under construction: Launch Pad 39A with Challenger STS-6 (1:144)
|
|
#1679
05-21-2018, 01:49 PM
|
|||
|
|||
|
Using flour
Hi Manfred
Glad things are progressing. The flour idea looks fantastic. There is the possibility that over time (like a couple of years) "unprotected" flour can become a home to micro organisms and you could get mould etc. problems. Once this happens there is basically no way to get rid of the (usually) black spot stains even after the mould etc. is killed. I am sure the people who have used this have thought about it and but it might be worth checking out with them what they did. Regards Kevin
__________________
Normally the most advanced tech I use is a pencil.
|
|
#1680
05-21-2018, 05:34 PM
|
||||
|
||||
|
Quote:
I know this annular band structure of the insatfoam insulation, although I have not thought about it yet to realize it somehow, but would be satisfied with the roughened surface by the "flour technique". BTW, I have read your very helpful contribution Detailing the Space Shuttle in Michael Mackowski's "Space in Miniature" book even once more, after your posting and after I've discovered your name. It's all a question of scaling and effort, so I'd like to know what scale you've built your stack then? Too bad that you have no photos left. But in thinking about it I come up with an idea,  maybe it would be conceivable that 3D printing of the ET front part in WSF would create a similar roughened band structure ... maybe it would be conceivable that 3D printing of the ET front part in WSF would create a similar roughened band structure ... That's why I'll ask Michael Key about it.
__________________
Greetings from Germany Manfred Under construction: Launch Pad 39A with Challenger STS-6 (1:144)
|
 |
|
|


 Linear Mode

