


|
|
|
#1901
 02-27-2019, 04:01 PM
|
||||
|
||||
|
Quote:
 I fully agree with you about the need of keeping the small scale in mind, but you can be sure, that I have saved the SOFI Pattern Texture in my mind, as often as I've looked already at the original photos of the ET-8 at the STS-6 like this one of the Rollout.   Source: forum.nasaspaceflight.com (Jester) But I think I'm getting closer to the goal step by step ...  
__________________
Greetings from Germany Manfred Under construction: Launch Pad 39A with Challenger STS-6 (1:144) 
|
|
#1902
02-27-2019, 04:08 PM
|
||||
|
||||
|
Hey, that photo is a useful detail reference, especially for tank bottom.
__________________
Screw the rivets, I'm building for atmosphere, not detail. later, F Scott W
|
|
#1903
02-27-2019, 04:14 PM
|
||||
|
||||
|
Quote:

__________________
Greetings from Germany Manfred Under construction: Launch Pad 39A with Challenger STS-6 (1:144)
|
|
#1904
02-27-2019, 05:00 PM
|
||||
|
||||
|
Thanks David,
you are right that the SOFI Texture gets its final surface structure only through the priming and painting. But even after priming will show already, to what extent the valleys of the patterns are levelled. With every layer of Primer/Paint, this effect will become intensified, whereby it will be important, that the entire SOFI layer should not become too thick, and this is the true sticking point of the matter.
__________________
Greetings from Germany Manfred Under construction: Launch Pad 39A with Challenger STS-6 (1:144)
|
|
#1905
02-27-2019, 05:12 PM
|
||||
|
||||
|
Quote:
The SOFI Texture of the Aft Dome of the LH2 Tank can be seen very clearly in this photo, especially in the Hi-Res Zoom.  Source: nasaspaceflight.com (woods170)
__________________
Greetings from Germany Manfred Under construction: Launch Pad 39A with Challenger STS-6 (1:144)
|
|
#1906
02-28-2019, 04:59 PM
|
||||
|
||||
|
Hello everybody,
here's the result of the "double" Flour test after I've brushed off the loose flour.  As one can easily see, the flour layer has become denser after the more intensive application of spray glue, which was to be expected. Consequently, one has to develop a certain sense of time for the duration of the spraying, which is why it is called not for nothing: The proof of the pudding is in the eating!  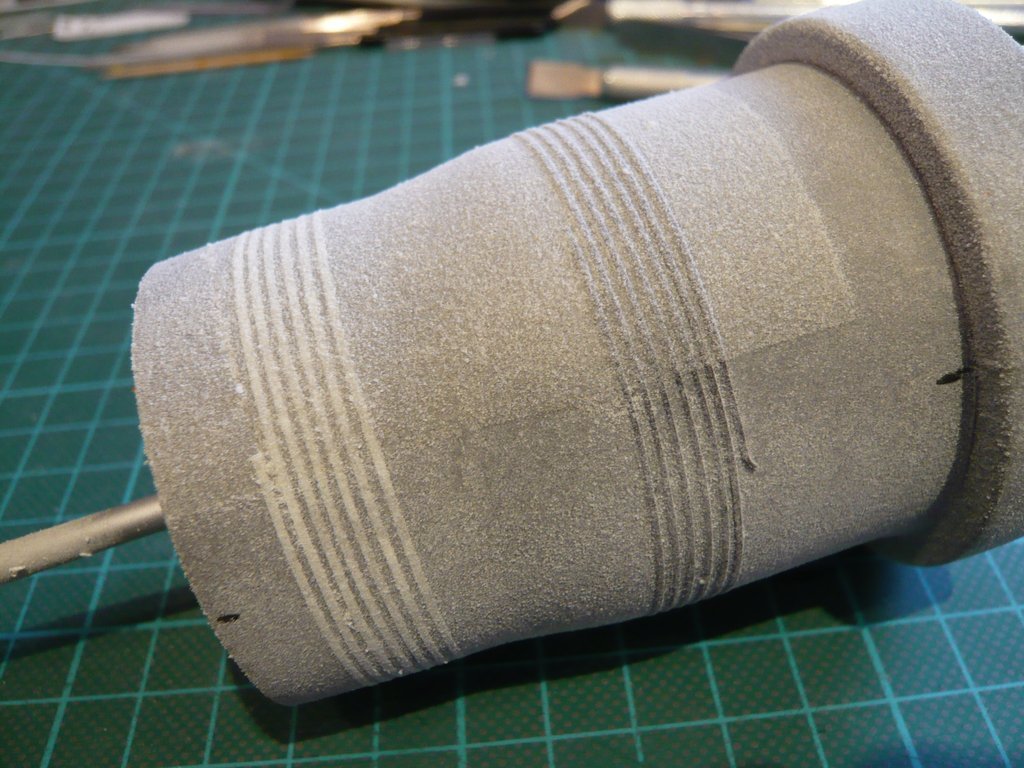 This is the view of the "double" floured half of the Dummy. 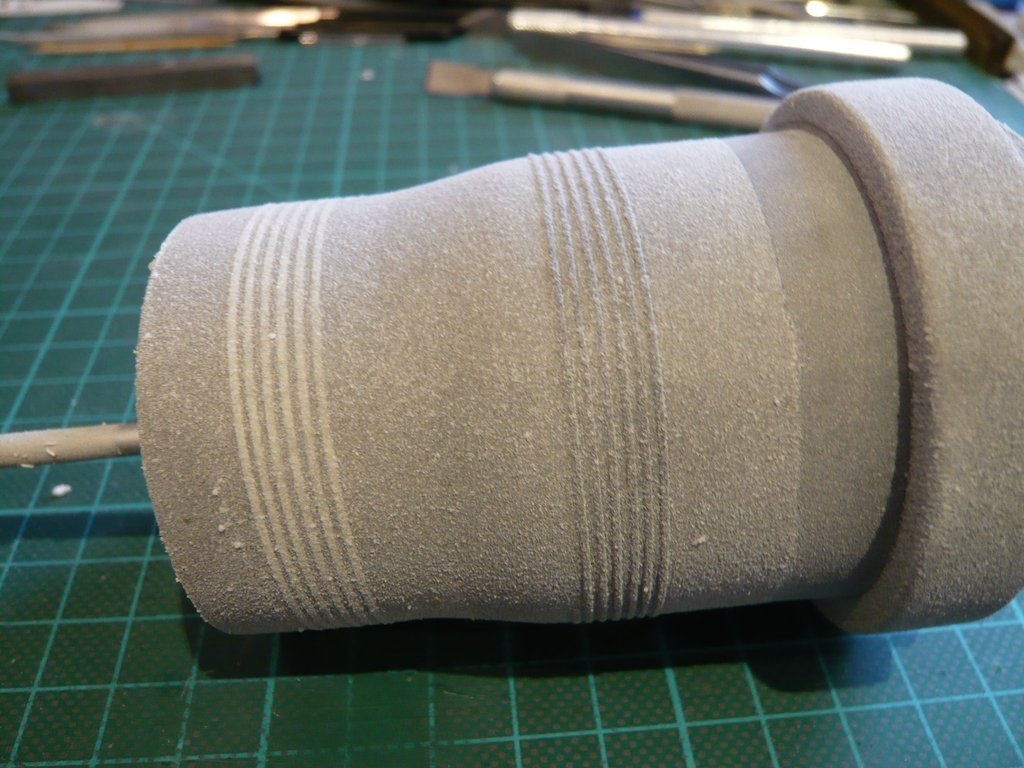 And here is the comparison of the two Flour tests, on the left the flour layer after the first test (in fact it was the second test) after a relatively short spray adhesive application and on the right the flour layer after the more intensive spraying. 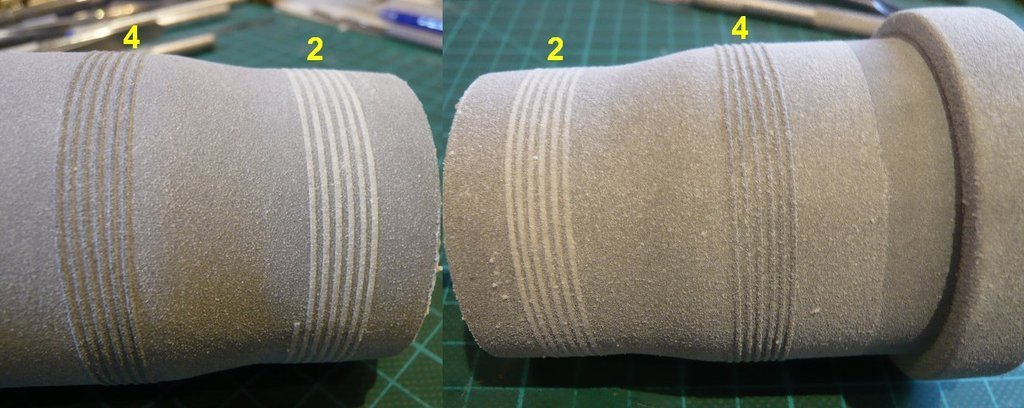 And tomorrow I will then prime both Dummies in the hope that one can then recognize more and better evaluate the patterns.
__________________
Greetings from Germany Manfred Under construction: Launch Pad 39A with Challenger STS-6 (1:144)
|
|
#1907
03-03-2019, 06:58 PM
|
||||
|
||||
|
Hello everybody,
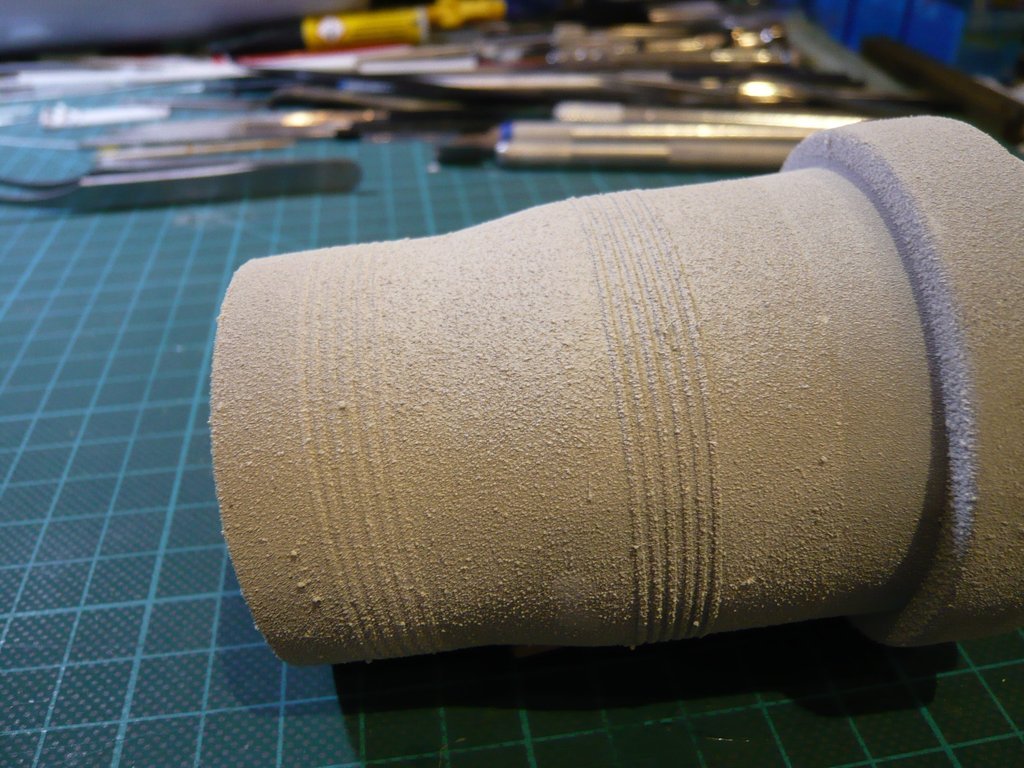
now it was time to try the white Vallejo primer out of the can. By the way, it's been a felt eternity, since the last time I primed/painted something about which I can barely still remember ...  In addition, these are my first attempts with Vallejo colors/primers, which I want to use shortly. In addition, these are my first attempts with Vallejo colors/primers, which I want to use shortly.  Each can of Vallejo primer contains two spray heads, namely a Pocket Cap for larger flow rates and medium line widths, ideal for larger surfaces, as well as a Skinny Cap for low flow rates, recommended for fine lines and small details, as one can read in the manufacturer's flyer. Since these caps are unfortunately not marked and their nozzle openings appear almost the same size, one has a problem or spoiled for choice.  After a long search, I then still found pictures of both types, of which I then haave used the Pocket Cap (left). On this occasion, I then subjected my Suction device (Wiltec) to a first practical test, whereby I started with the small Dummy on the rotary spit.  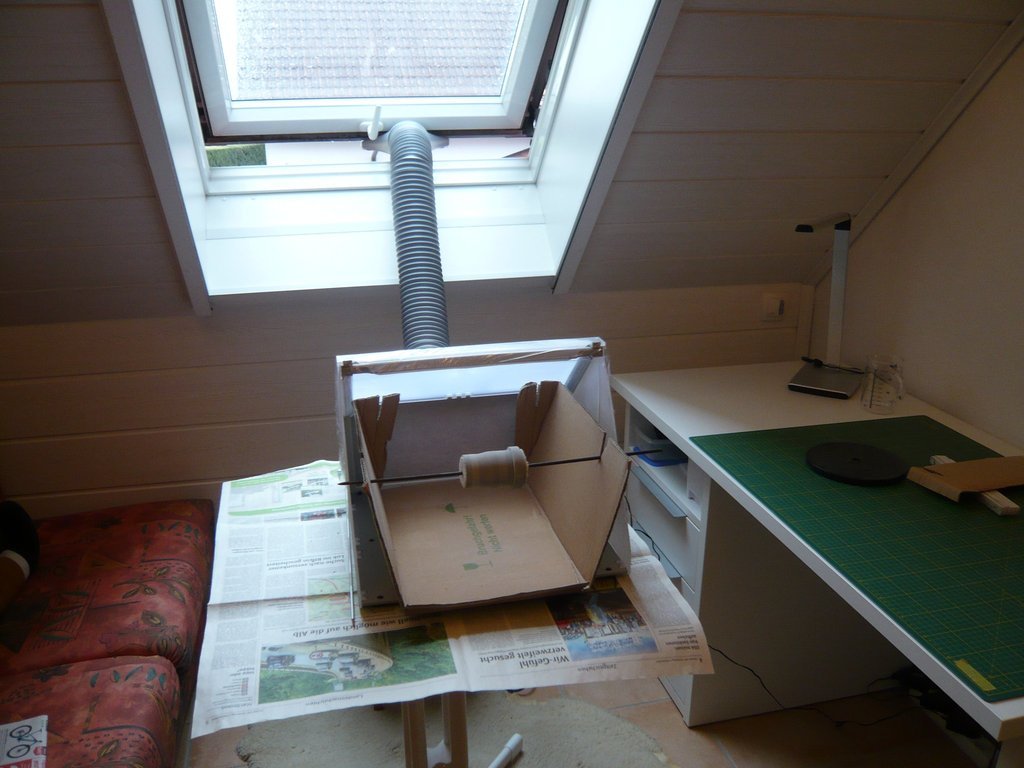 After switching on, the LED lighting comes on first, and then the fan comes slowly up, which is unmistakeable.  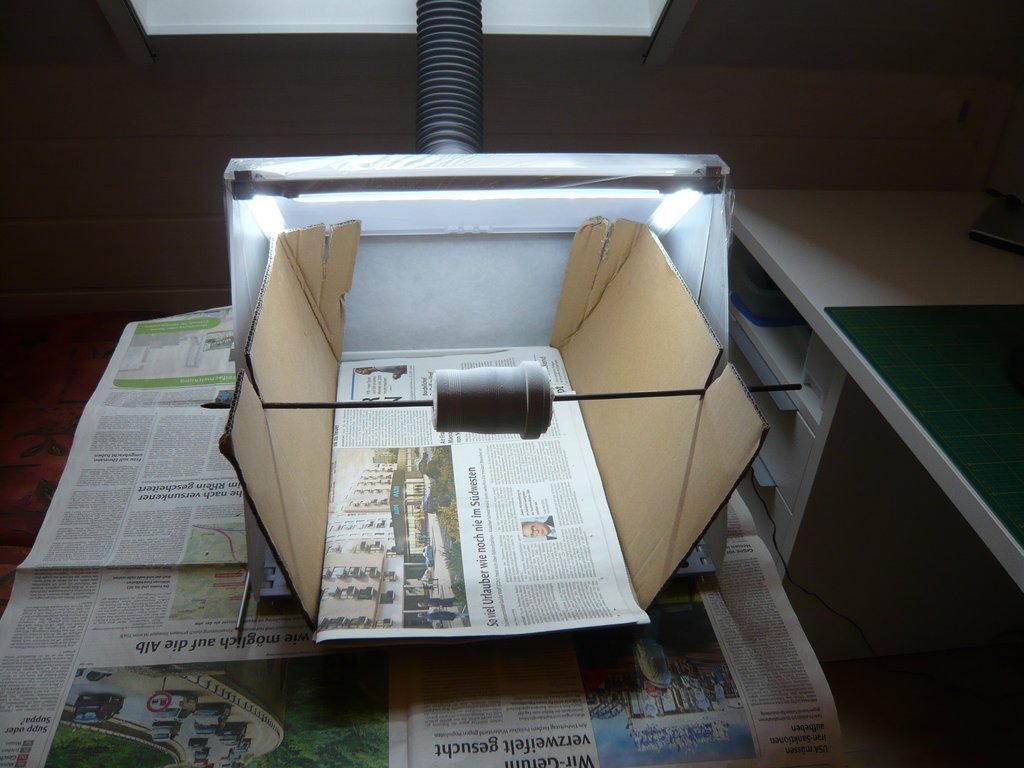 After shaking the spray can for about 1 minute, I started spinning the spit and spraying, but it began quite fogging in because the Dummy was a bit outside the roofing.  Maybe I should have used the Skinny Cap with the finer nozzle. Maybe I should have used the Skinny Cap with the finer nozzle.  Since I did not want to spray too much primer, I preferred to stop after a few turns, especially as light splashs of primer occurred, which may also have been due to the fact that I had not previously warmed the spray can, which I should rather have done ...  And this is now the result of the priming based on the Patterns 2 and 4. 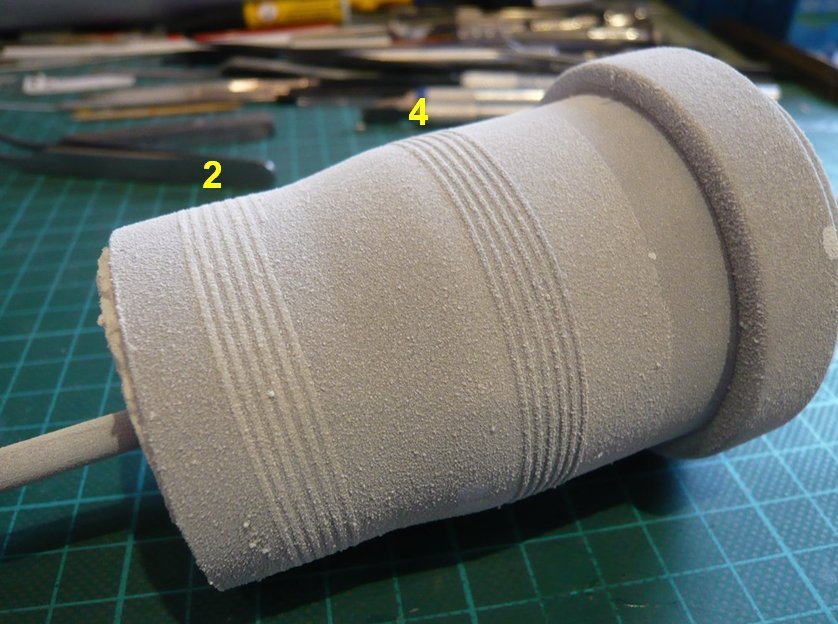 While I can make friends with the Pattern 2 already, 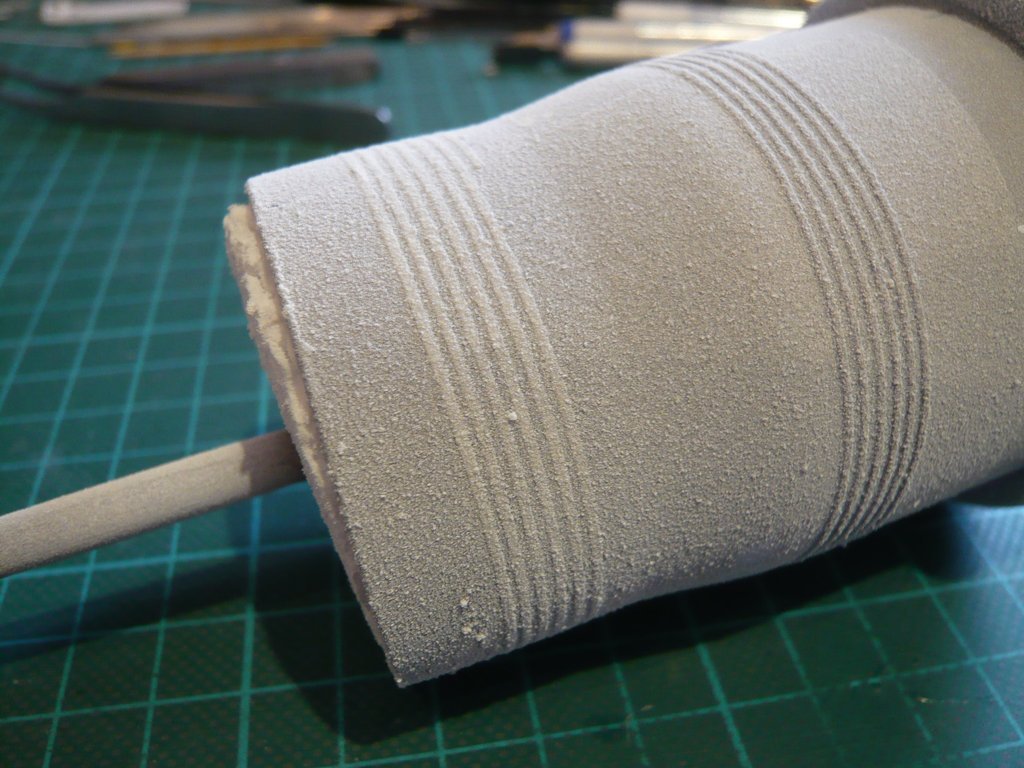 I think that the Pattern 4 with the double tape layer (0,5 mm onto 0,75 mm) seems to be a bit too raised, even though the surface profile will even further be leveled by means of the following airbrushing.  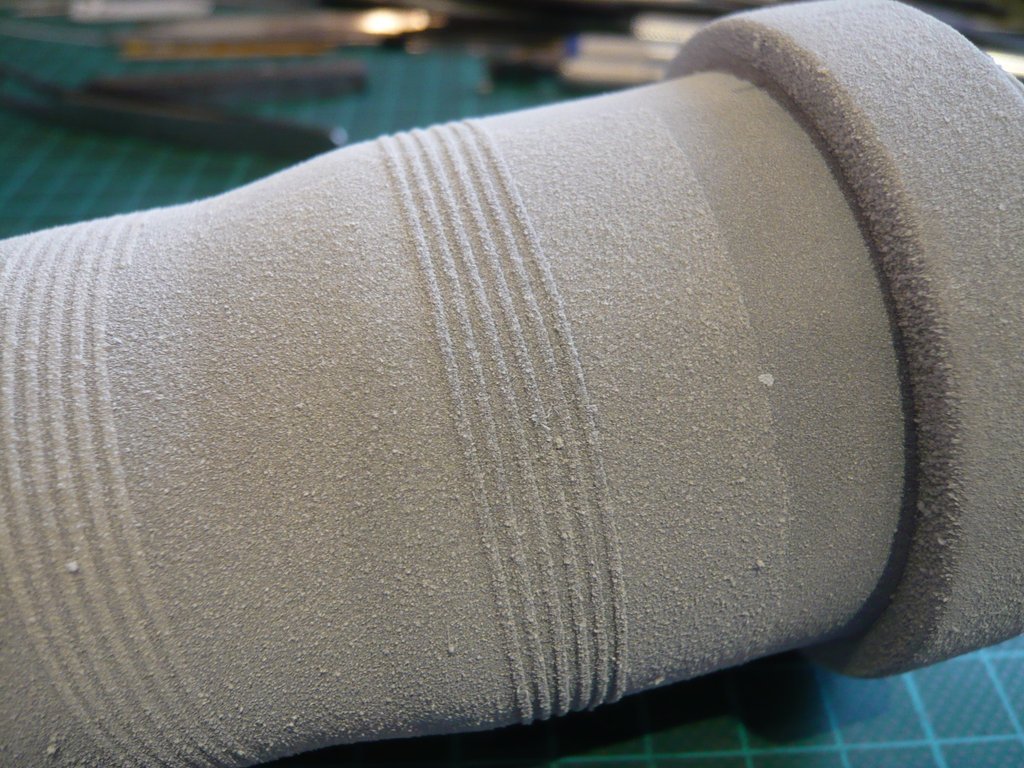 Since the primer layer seemed a bit too thin for me, I also sprayed a second primer to achieve better coverage, whereby I heated the can in the water bath before and shaken it for about 2 minutes.
__________________
Greetings from Germany Manfred Under construction: Launch Pad 39A with Challenger STS-6 (1:144)
|
|
#1908
03-03-2019, 06:59 PM
|
||||
|
||||
|
As one can see in this picture, the layer has also become noticeably denser, which means that the stripes of my favorite Pattern 2 are not so clear visible anymore.
 If I now still imagine a multi-layered airbrush finish above, then the surface profile could already go in the right direction, which comes closer to the original images of the SOFI pattern. On this picture you can see the area in the lower part, which I had twice floured. 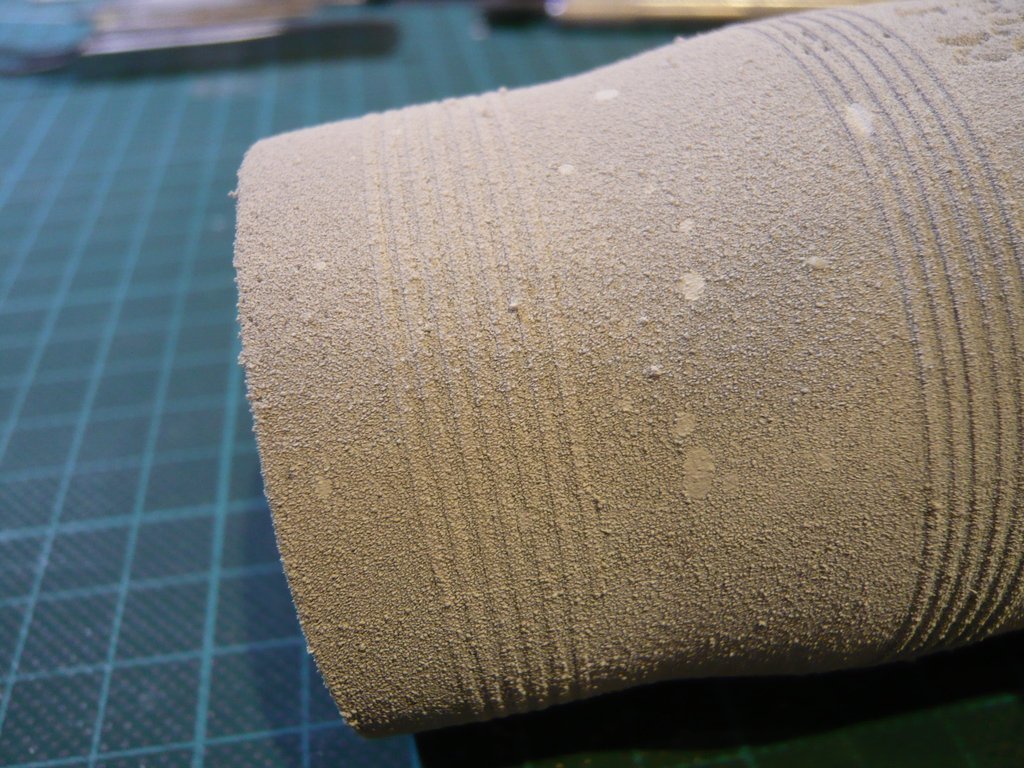 And this is now the larger Dummy with the five patterns after comparable (short) priming time, for which I had used the Pattex Spray Adhesive, which might not have had the optimal adhesive power, what led to a slighty too thin flour layer. 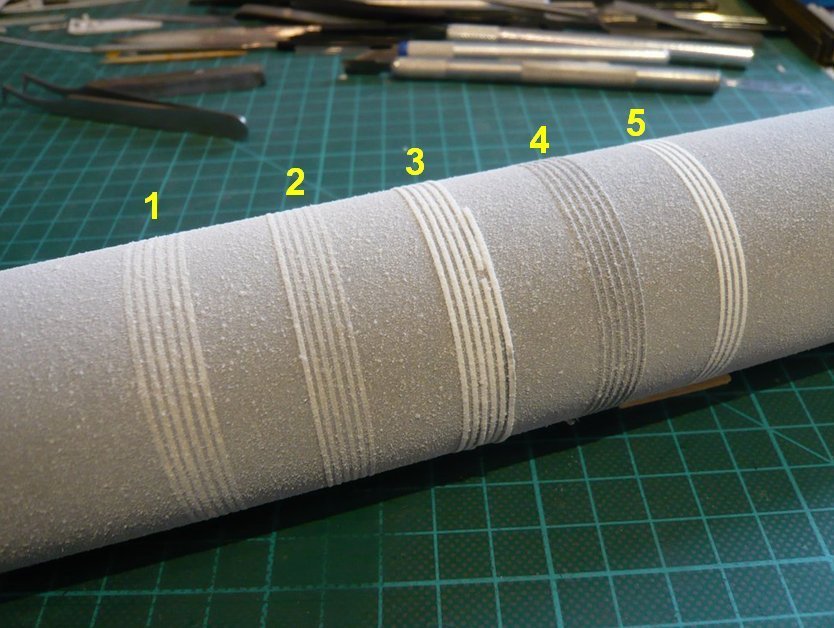 On this picture one can see, that at the Pattern 3 the MEK-gluing of the Evergreen Strips has partially resolved. 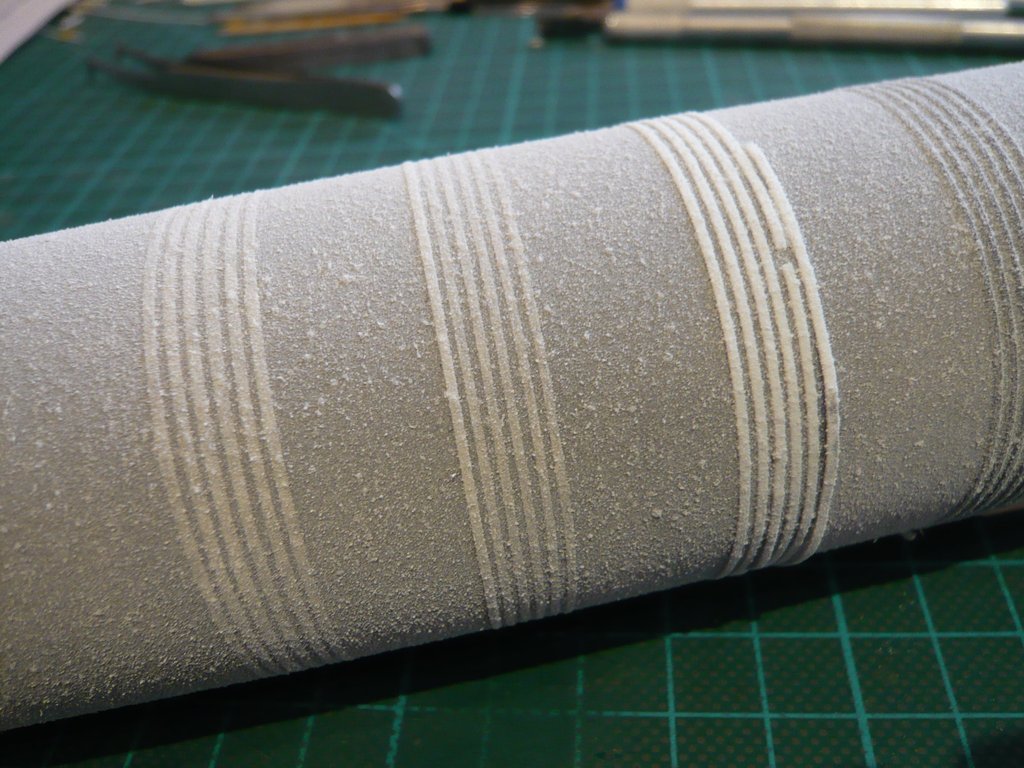 And so it looks after the two-time priming. 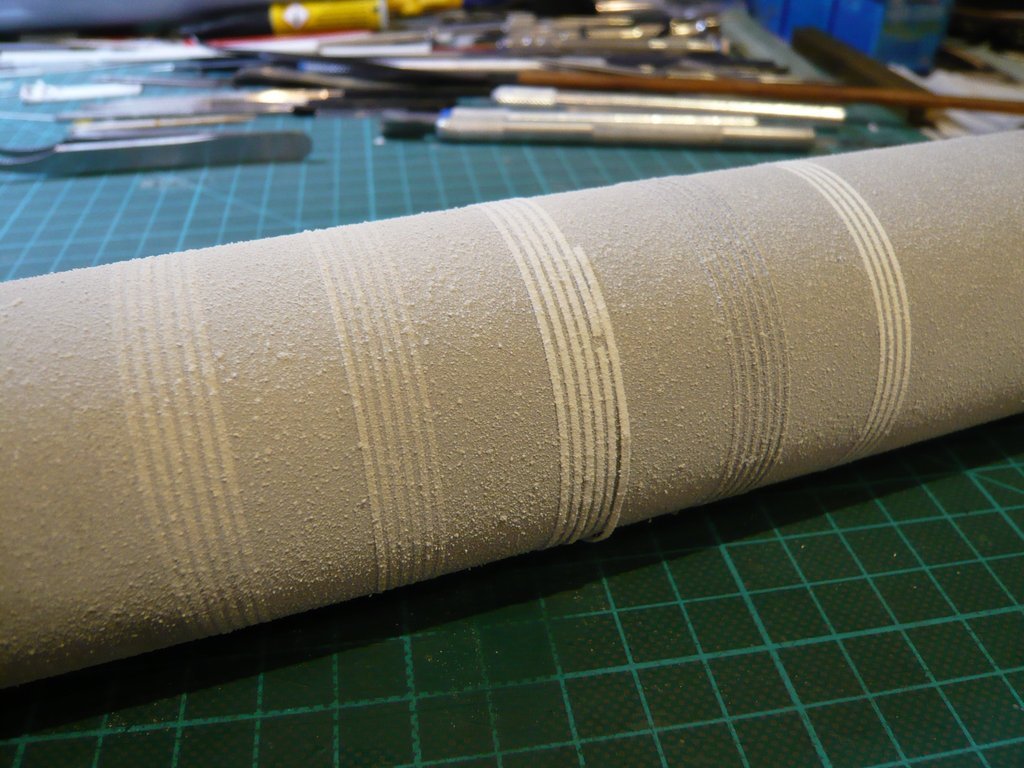 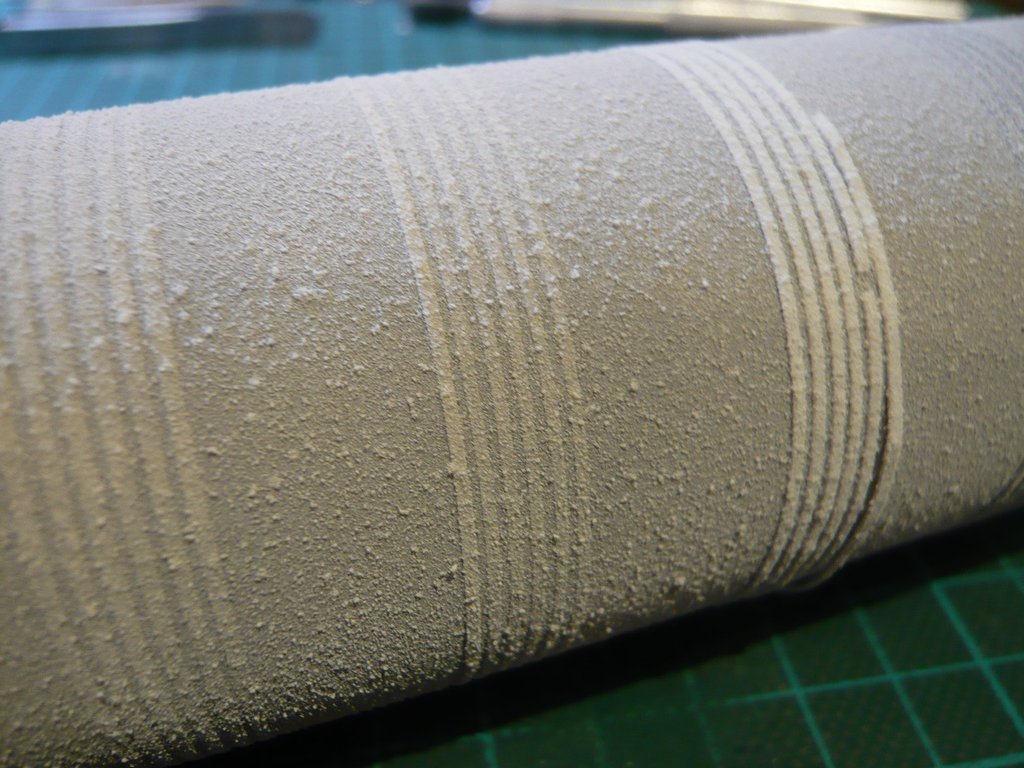 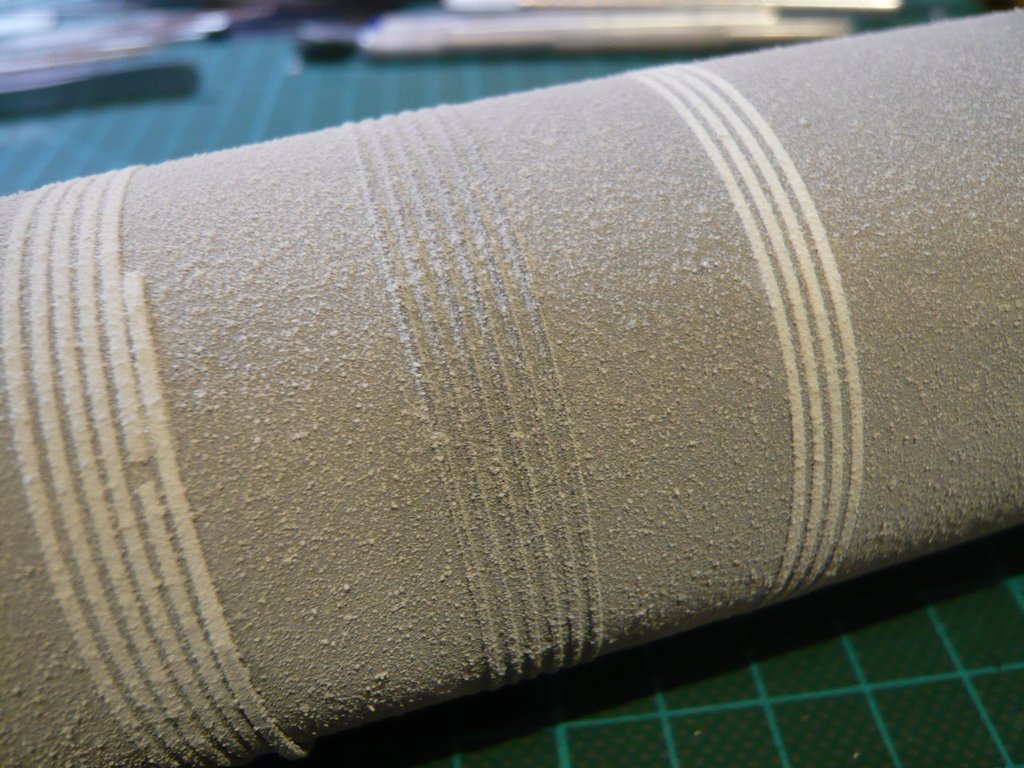 The result is: After all, what I have seen so far, I would prefer the Pattern 2. Now it remains to wait for the effect of the airbrushing, whereby I slowly have to think about the orange-brown color mixture, although for the test-painting initially a simple color is sufficient.
__________________
Greetings from Germany Manfred Under construction: Launch Pad 39A with Challenger STS-6 (1:144)
|
|
#1909
03-09-2019, 06:44 PM
|
||||
|
||||
|
Hello everybody,
with the orange-colored shades of the External Tank (ET) we have been engaged oftener already, and it is known that the increasing discoloration of the ET towards darker shades is related to solar radiation, the Shuttle stack is exposed to, while he is standing on the launch pad waiting for the launch. Consequently, one will not be able to get along with one hue alone, because the Intertank is darker anyway, but rather one needs some more or less intense orange-brown color blends, depending on which Countdown situation one wants to display on the launch pad, which is a matter of opinion. Originally, I had thought of the Countdown phase right before the launch for my Diorama and so far I had oriented myself by my often shown STS-6 Reference photo, on which the shades of the ET appear relatively bright, but without knowing which phase this photo comes from exactly. But since the Payload canister can be seen, the photo should be from the beginning of January 1983.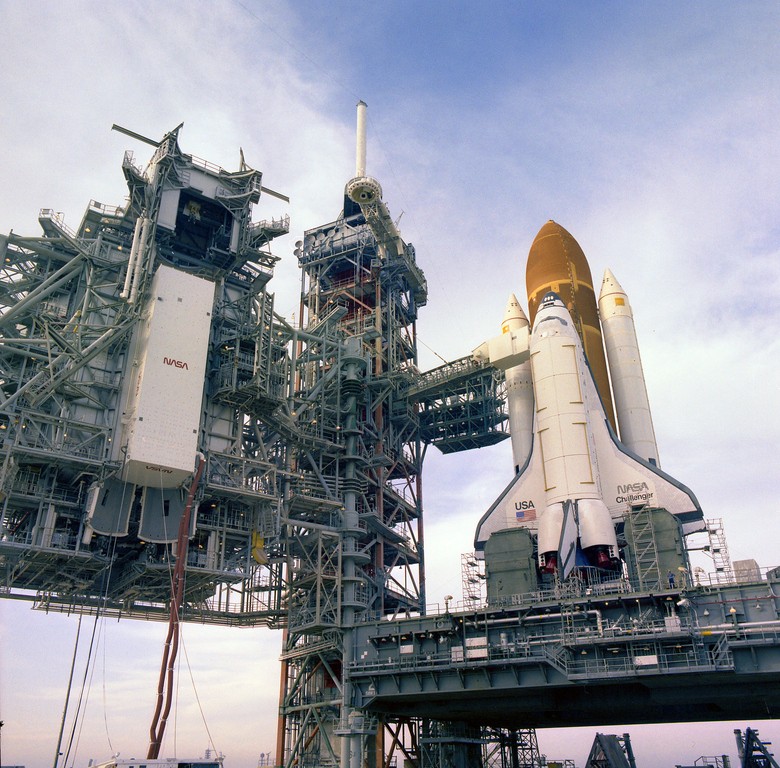 Source: retrospaceimages.com (STS-6) Similarly bright shades can be seen on the pictures at the Roll-out of the ET-8 (10.09.1982),  Source: forum.nasaspaceflight.com (Jester) as well as during the Roll-out of the Challenger (30.11.1982), here in the fog shortly in front of the pad 39A.  Source: NASA On this photo from the Lift-off (04.04.1983) the ET shades appear much darker, a detail that I did not attach much importance to for a long time, because the whole mood of the photo appears somehow darker, which might have been due to the weather or to the photo itself.  Source: NASA However, this strong discoloration of the ET becomes plausible given the unusually long resting time of the Shuttle stack on the pad, which at STS-6 in contrast to other missions with 4 months lasted much longer than originally foreseen, which would have been the main reason. The reason for the delay in the launch, which was originally scheduled for the end of January 1983, was a hydrogen leak in the area of the main engine SSME No. 1 of the orbiter that occurred during a test run, Flight Readiness Firing (FRF, 18.12.1982), but which could not be localized exactly at first.  In this Flight readiness test, which every orbiter has to complete before his maiden flight or after major technical overhauls, i.a. the three main engines are tested to prove their full functionality for approx. 20 seconds and then shut down. Here is an image of this FRF, which I initially thought was a launch image, but with its brighter color shades of the ET it does not fit to the Lift-off image with the dark hues, what has been pretty confusing me at the beginning.  Source: NASA Luckily, in the NSF forum there is a special, very detailed and highly interesting thread Challenger STS-6 – A Walk into History with a lot of photos and information over the entire course of this first Challenger mission, which was a great support for me for understanding all the operations. This leak and its exact locating has kept NASA busy for quite a long time and led to a delay in the launch date, as major maintenance work had to be done on the orbiter's main engines. Therefore, it was necessary to perform another FRF test (25.01.1983), where it can be seen on this photo that the colors of the ET had darkened further. 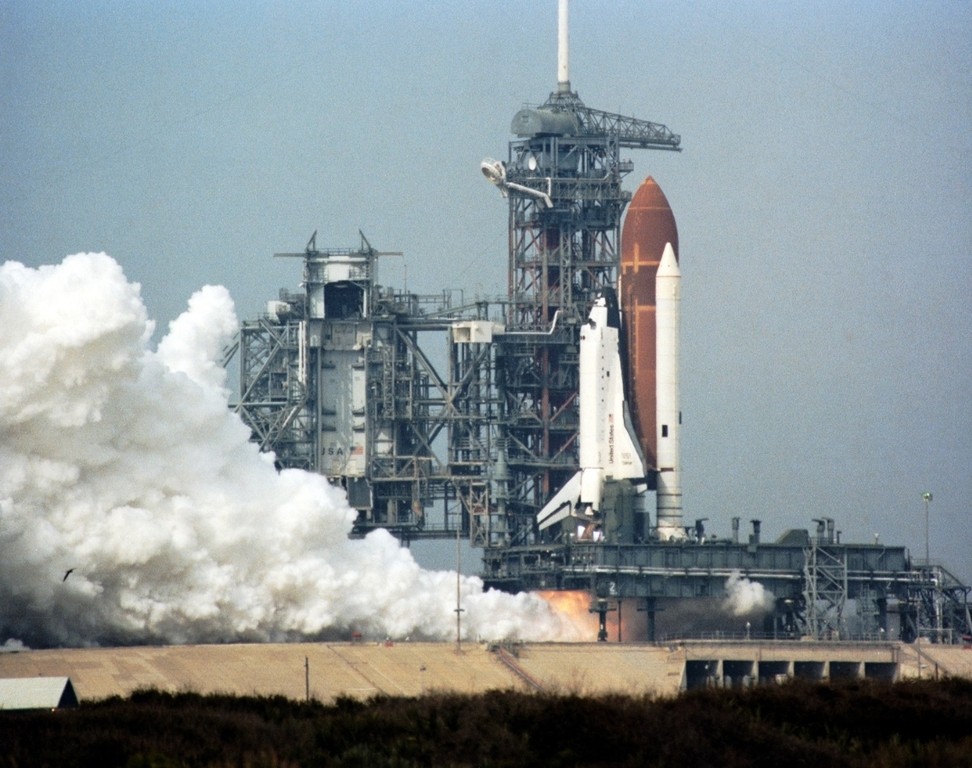 Source: forum.nasaspaceflight.com (Ares67) But even during this FRF, a hydrogen leak occurred, which was caused by a 3/4 inch long hairline crack in the combustion chamber manifold of the engine SSME No. 1. Since in the other engines further leaks occurred too, which were obviously a problem of the welds of these new engines, then at the beginning of March 1983, all three main engines were dismantled on the launch pad. 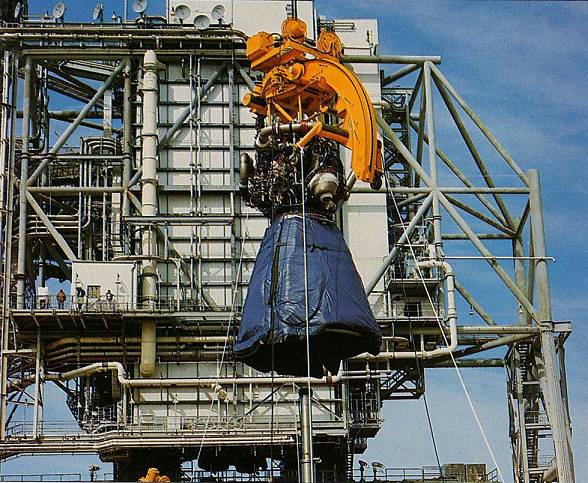 Source: mainengine.de While the welds at the two engines SSME No. 2 and No. 3 were reinforced, engine SSME No. 1 was replaced by a new engine whose welds were also reinforced for safety's sake. After detailed error analysis and a problem-free test of the last 16 hours of a normal countdown, the engines were reinstalled on 10.03.1983, after which the Challenger finally could start for her maiden flight on 04.04.1983. So I know now, when the ET-8 had which kind of shades, and I can decide accordingly, whereby today I tend but rather to the lighter shades.
__________________
Greetings from Germany Manfred Under construction: Launch Pad 39A with Challenger STS-6 (1:144)
|
 |
|
|


 Linear Mode

