


|
|
|
#1931
 04-30-2019, 12:19 AM
|
||||
|
||||
|
Thanks for your nice comment and a good start with your Hasegawa.
 
__________________
Greetings from Germany Manfred Under construction: Launch Pad 39A with Challenger STS-6 (1:144) 
|
|
#1932
05-05-2019, 06:08 AM
|
||||
|
||||
|
Hello friends,
here are the first pictures of the Mix color shades on the both floured and partly twice primed dummies with the five different Stripe patterns, cf. Reply #1892, whereby I have applied the colors not by airbrush, but with the brush.  In the foreground of the following color-tone comparisons stands my favored Pattern 2, consisting of single turns of 0,75 mm Tape (distance 0,5 mm), glued as a continuous spiral (Barber pole). 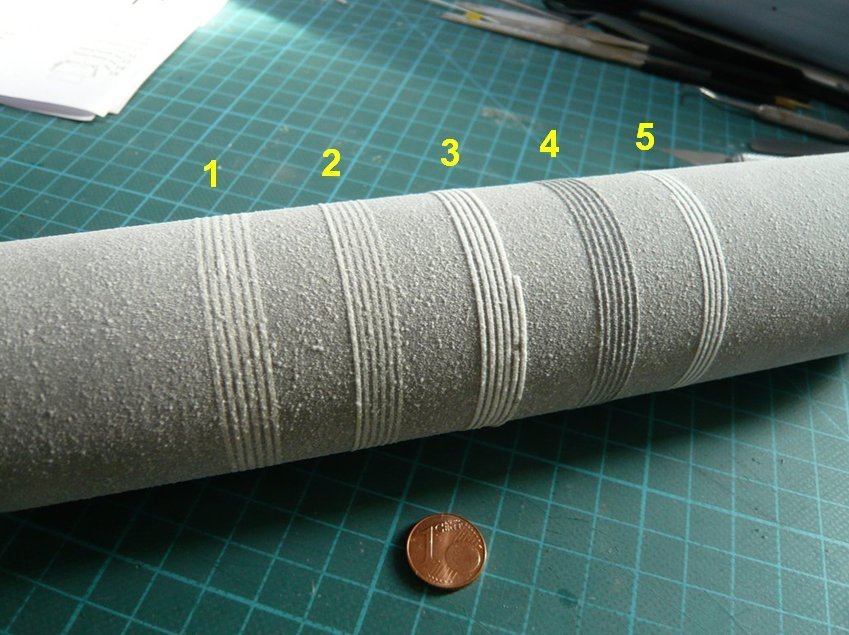 The three Mix color shades in the following picture correspond to the last preferred MA Mixtures, Mix-1 - MA 71.076 (Skin Tone) : MA 71.077 (Wood) - 1:1 Mix-2 - MA 71.033 (Ochre) : MA 71.034 (Sand Brown) - 4:1 Mix-3 - MA 71.077 (Wood) : MA 71.034 (Sand Brown) - 3:1 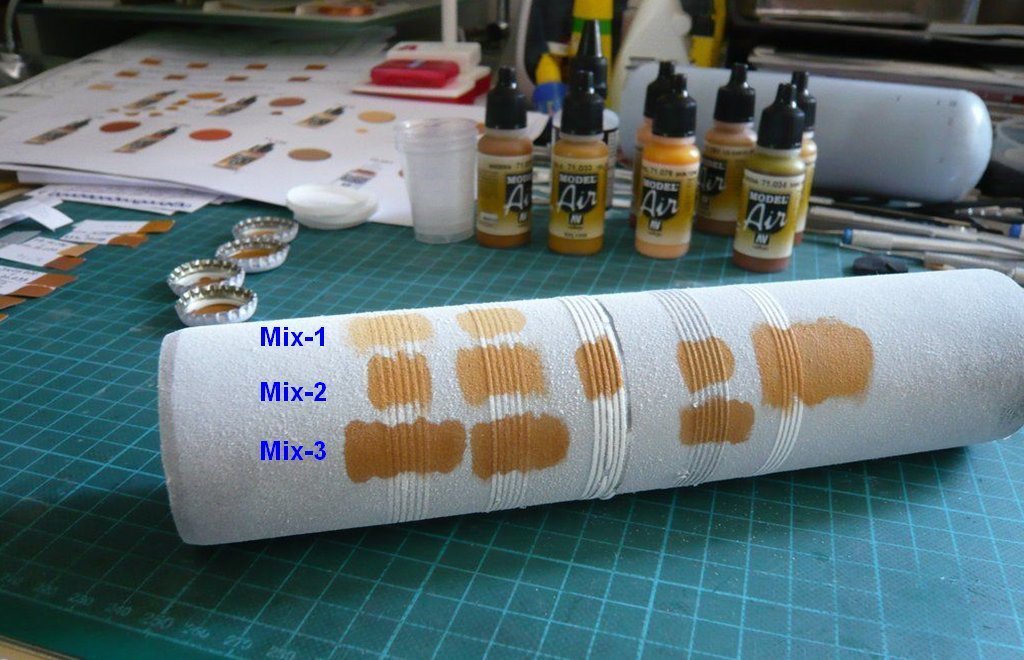 here again from a slant position. 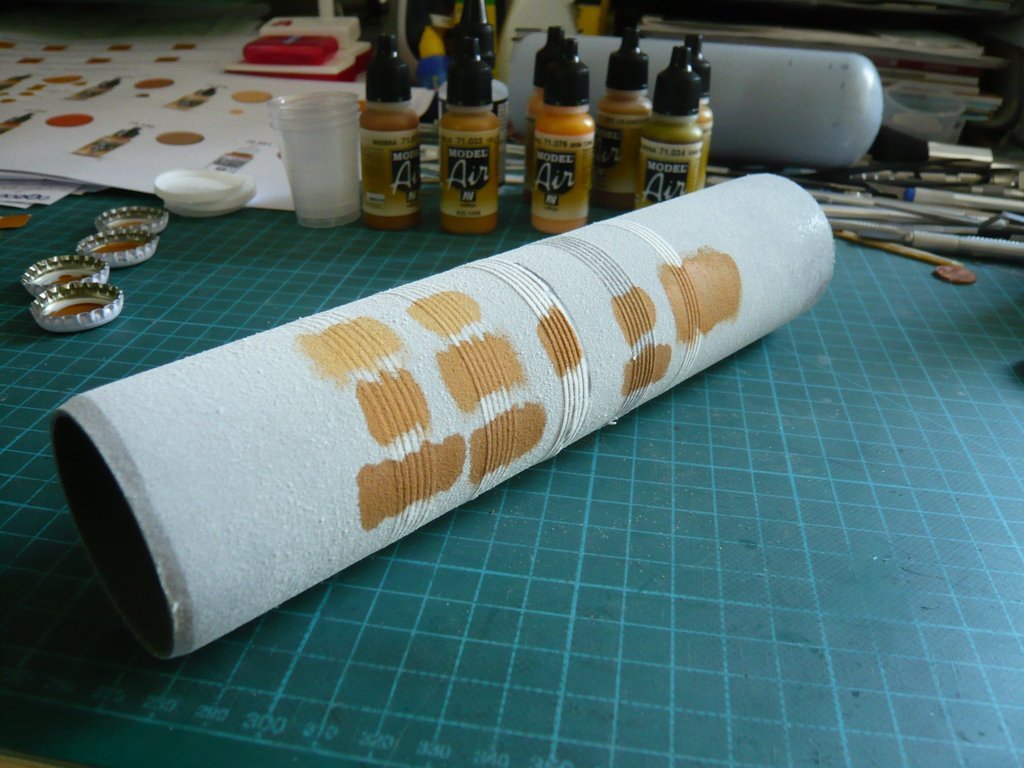 And this is the comparison on the short dummy, which was both once and double floured, cf. Reply #1636,  which can be seen even more clearly here at the border between the two areas once again.  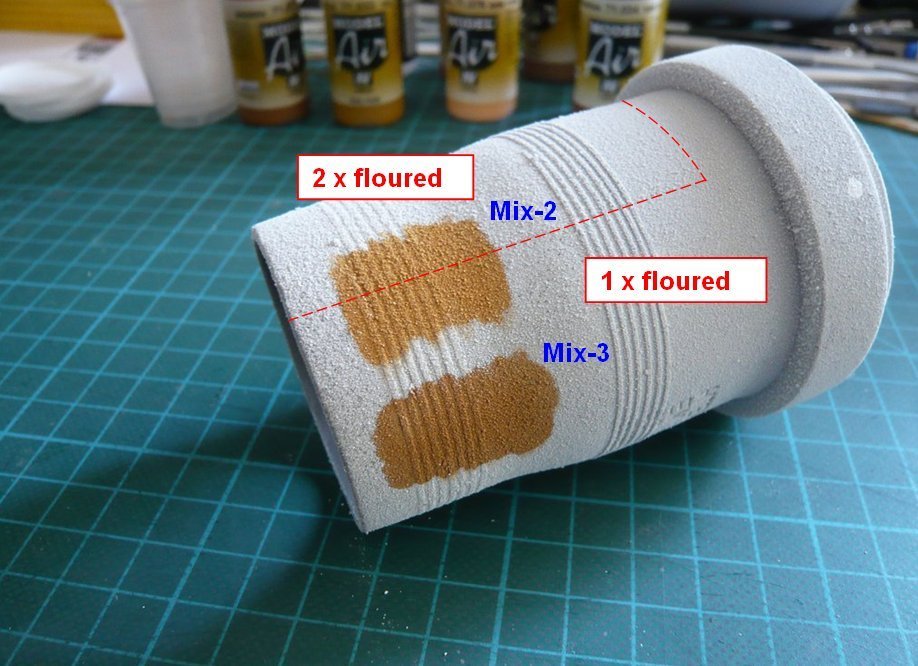 And this is the Mix-1 on the once-floured area. 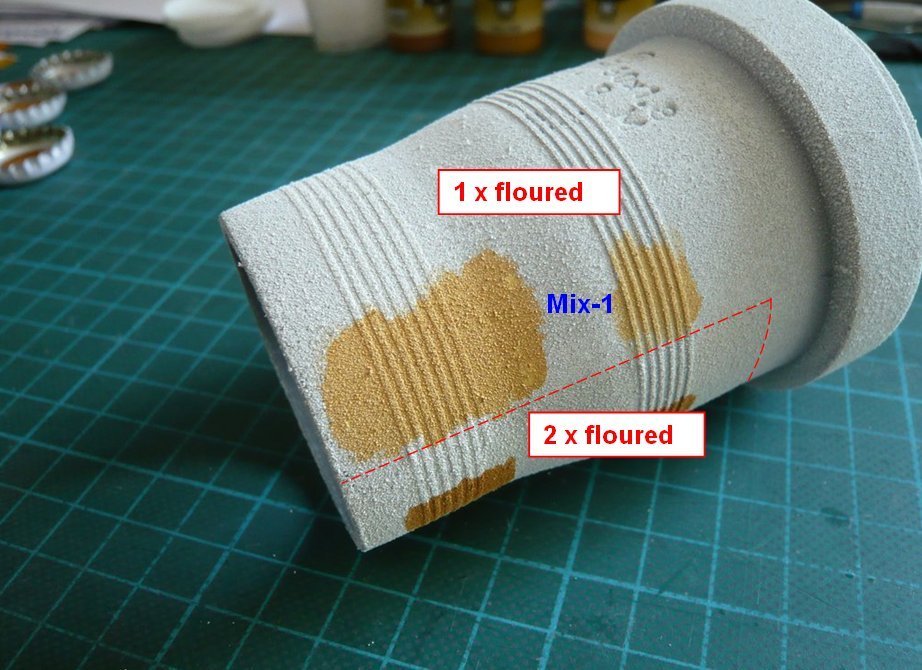 These are the Mix color shades on the two dummies in a vertical arrangement, first on the big dummy, 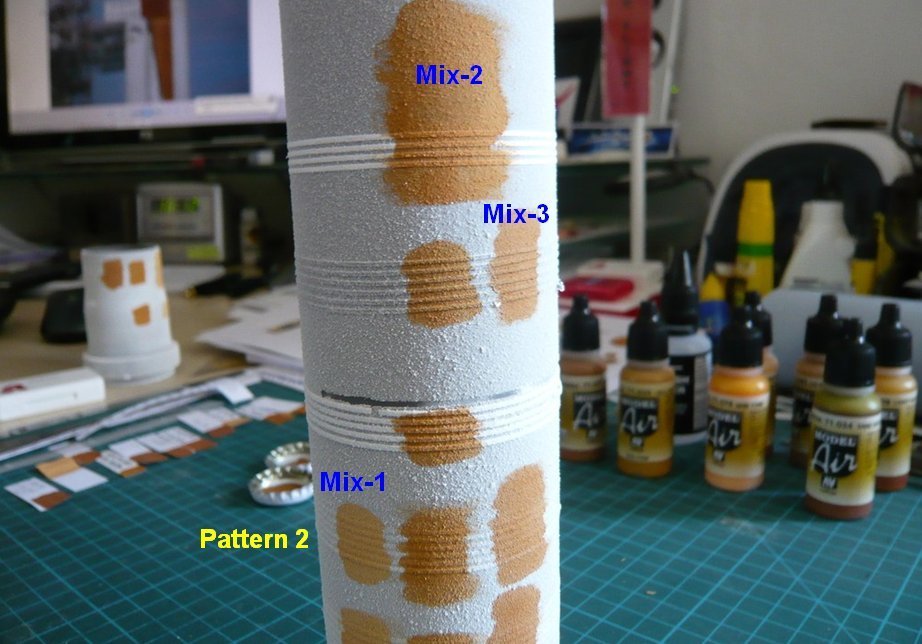 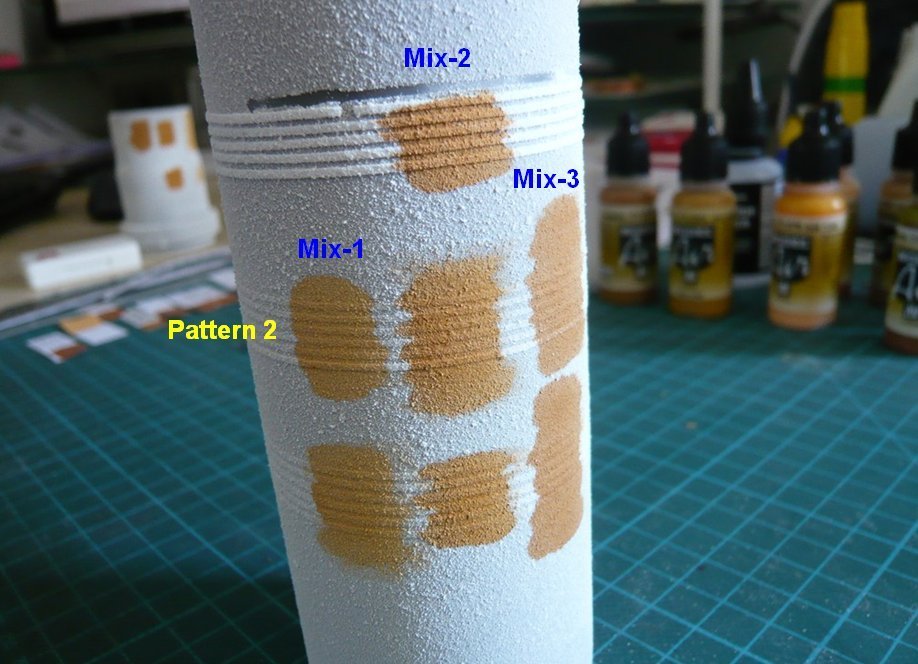 and here on the short dummy, where the simple flour state seems to me almost as sufficient. 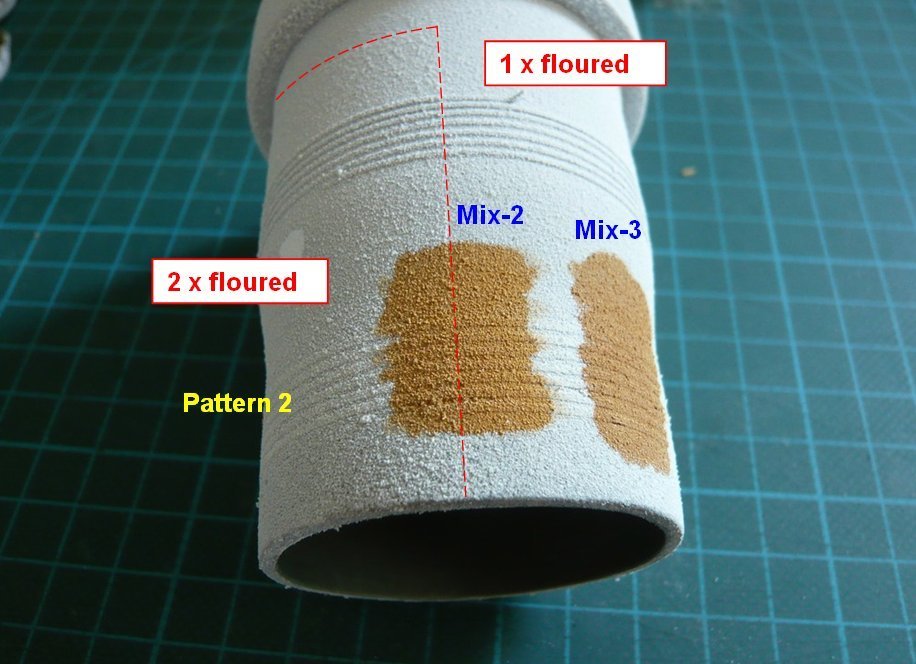 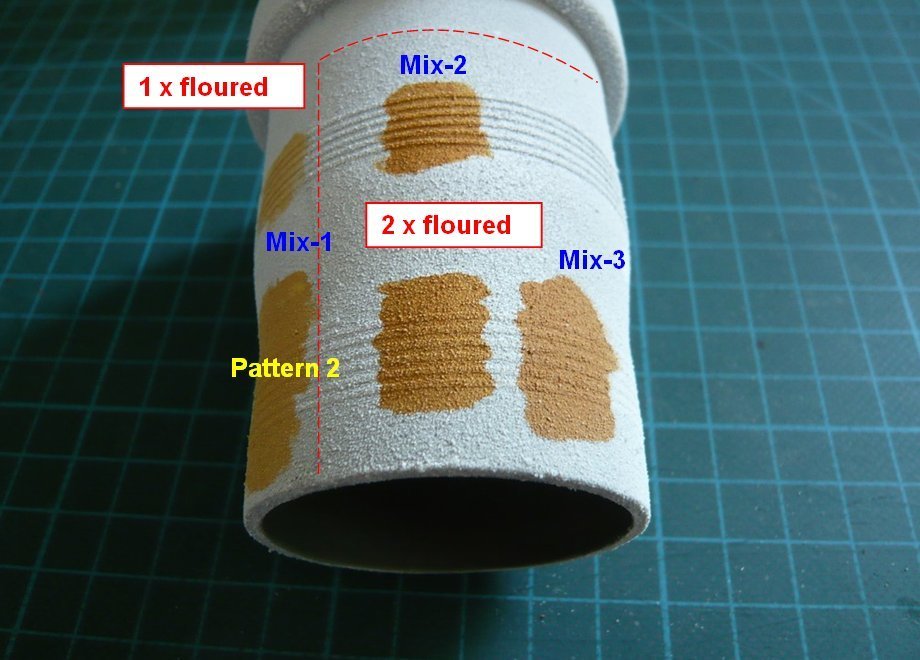 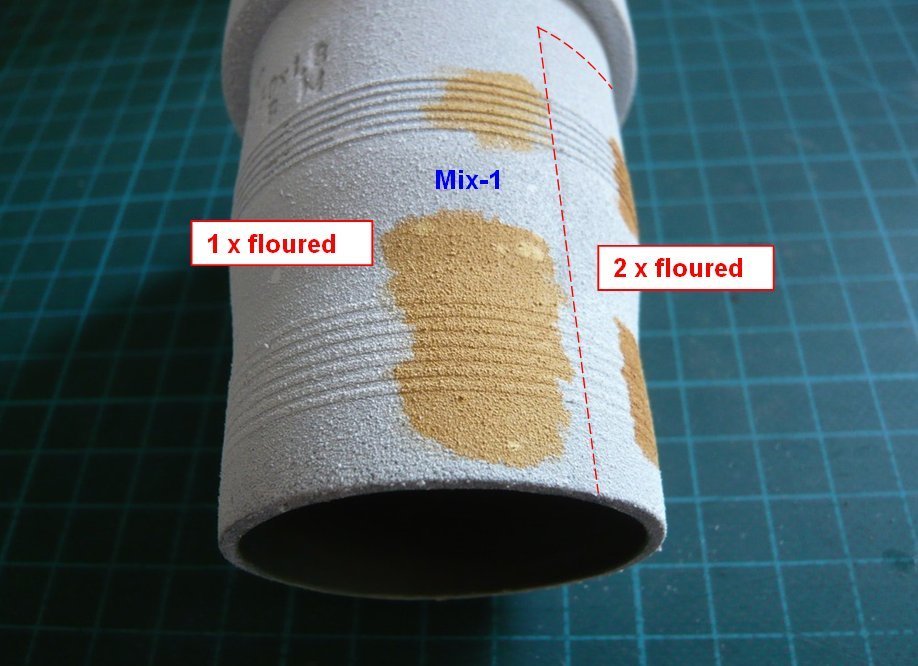 And finally still the comparison of the three Mix color shades with the reference photo, whereby the Mix-1 fits best to the brighter areas of the Closeouts.  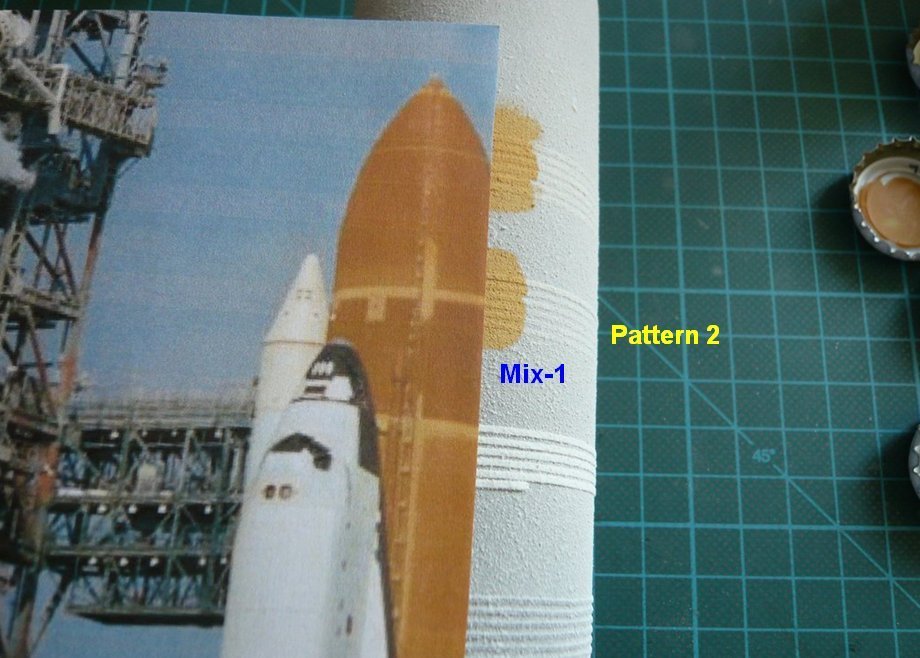 In contrast, in my opinion at the Mix-2 for the LH[sub]2[/sub] tank, 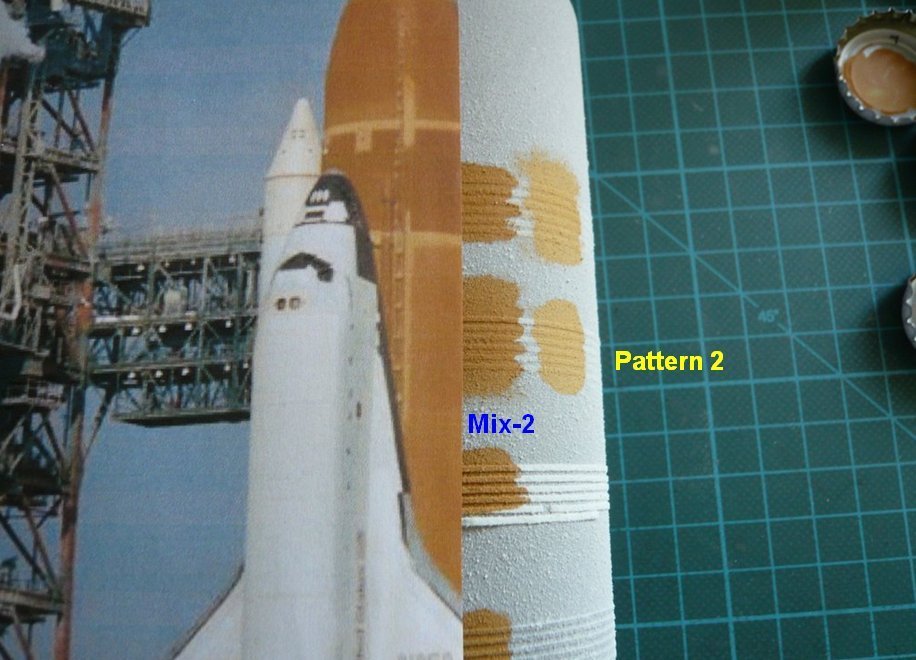 and even more so at the Mix-3 for the Intertank is missing a little bit of Orange. 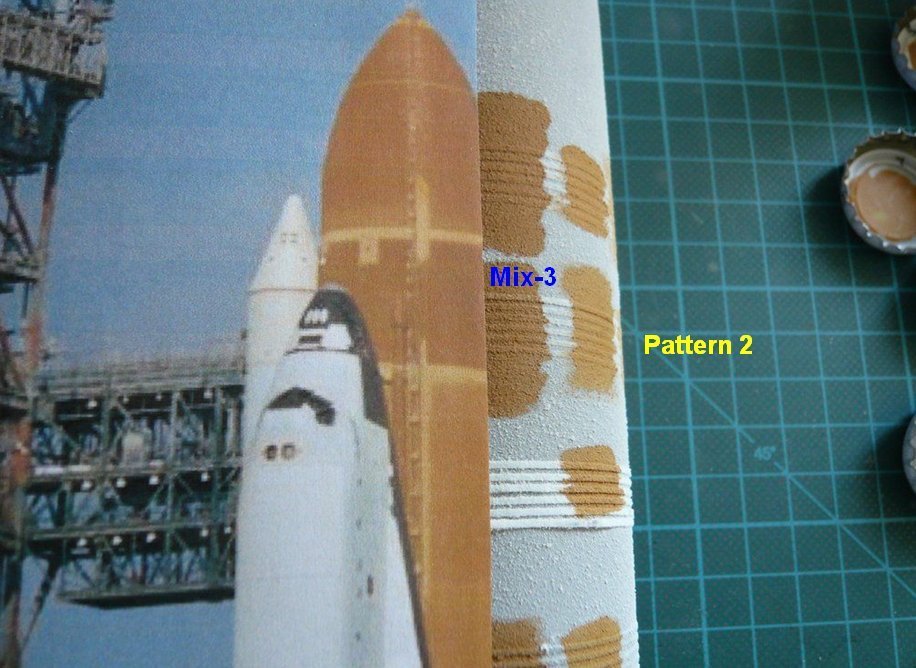 These two color shades came out much better on paper, 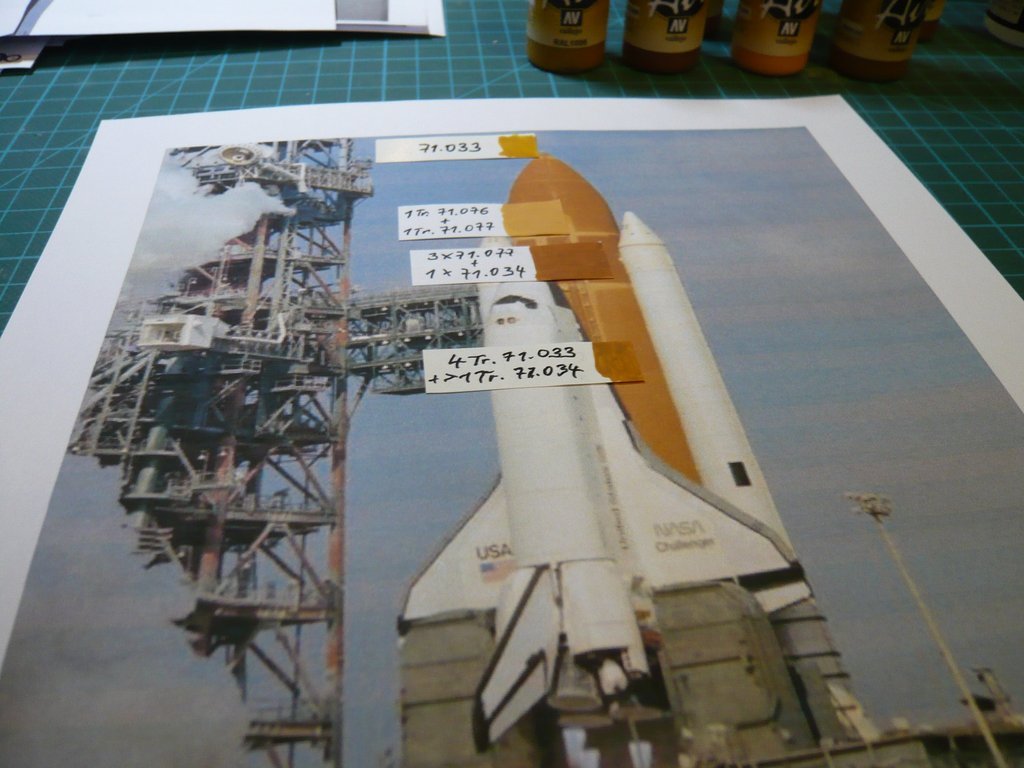 wherefore I have still to modify their mixture by adding a bit more Orange.
__________________
Greetings from Germany Manfred Under construction: Launch Pad 39A with Challenger STS-6 (1:144)
|
|
#1933
05-15-2019, 03:58 PM
|
||||
|
||||
|
Hello friends,
it must go on, and that's why Get to work!  For a change, I've went back again to the ET, on which still some things are to be removed, before it becomes serious with the final Flour coating.  But first I had to fill some places on the glued seams of the two tank parts, for what I have used the white Quick-Putty of Simprop, which can be quite well processed and after about 30 minutes be sanded both dry and wet. While I first used coarse and finer grinding sticks after drying the filler, the final sanding step was done wet with Tamiya Abrasive Sponge (2000), which therefor is suited outstandingly.  Then I have begun to remove the Press. Line and the Cable Tray on the LO2 Tank, which I did bit by bit with the Chisel cutter, which was quite tedious.   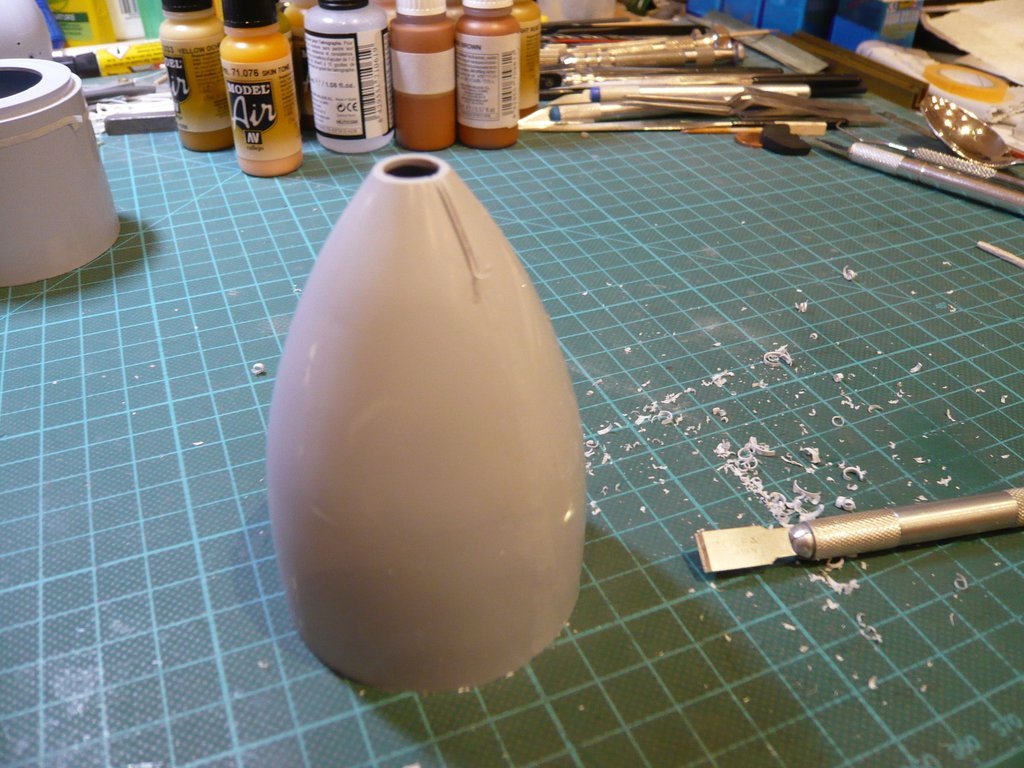 Then the Press. Lines and the Cable tray on the LH2 Tank came under the chisel knife, whereby I've first cut off the Cable tray piece by piece and then the two Press. lines. 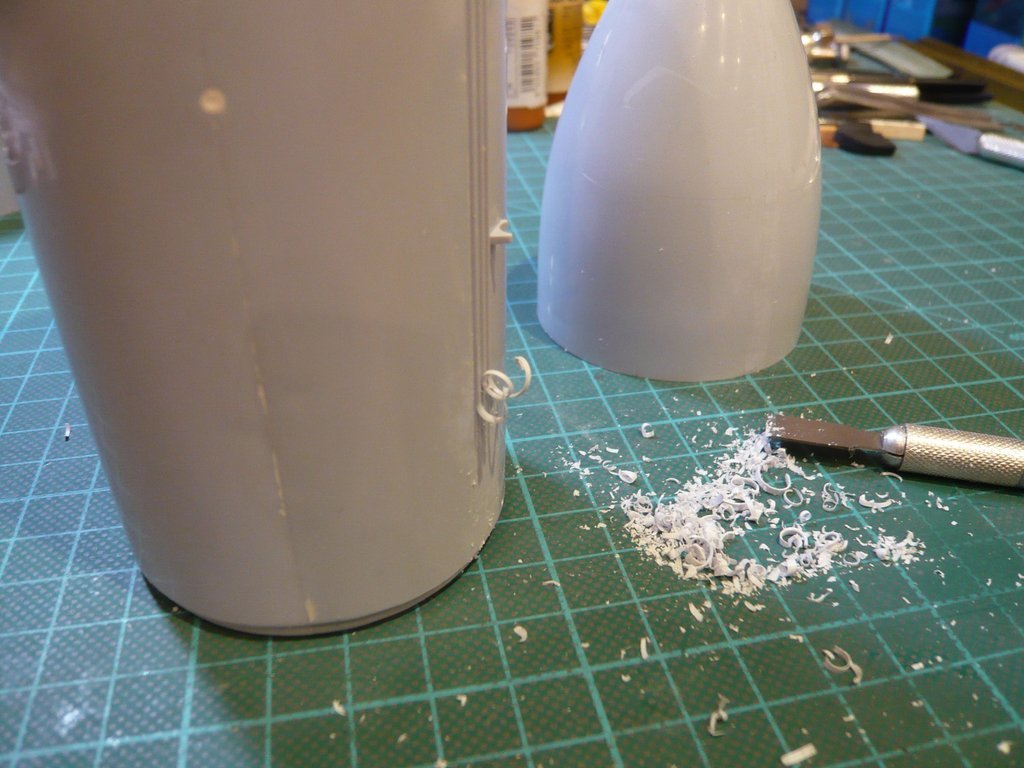 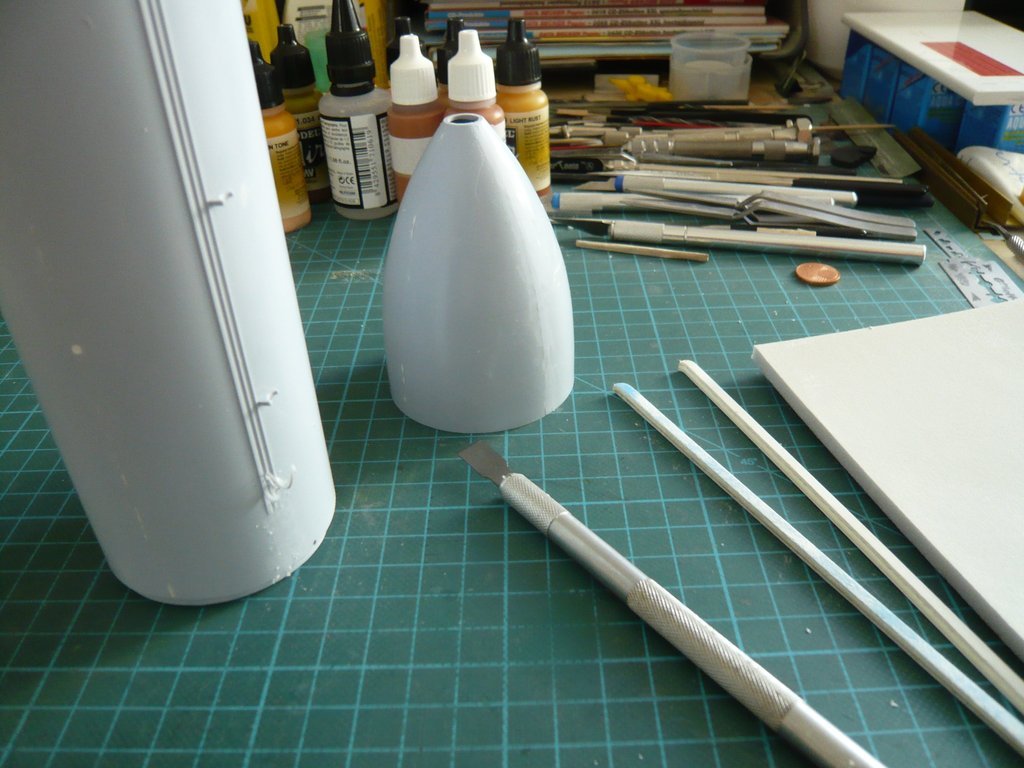 While remaining remnants can easily be scraped off with vertical standing chisel blade,   the fine sanding followed again wet with the sanding sponge, after which nothing remains of remnants to see.  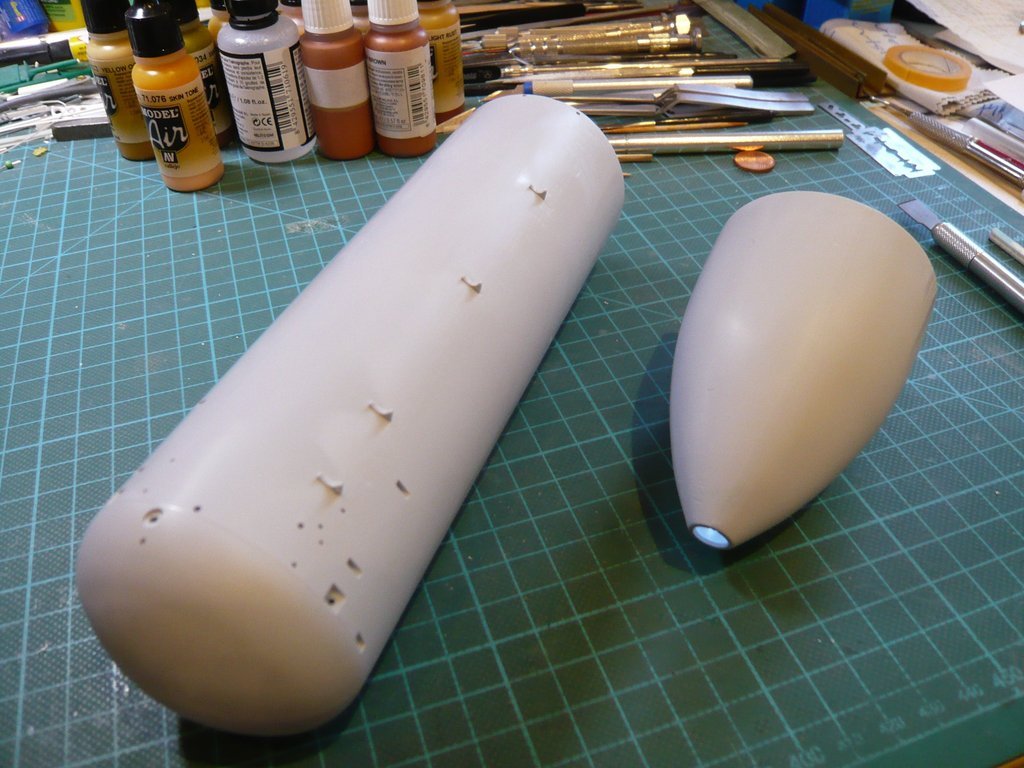 The four Supports of the LO2 Feedline can remain in place because they are sitting in exactly the right place. It just lacks the front Support immediately behind the Intertank, which will be scratched.
__________________
Greetings from Germany Manfred Under construction: Launch Pad 39A with Challenger STS-6 (1:144)
|
|
#1934
05-16-2019, 05:10 PM
|
||||
|
||||
|
Hello everybody,
so everything would actually be prepared so far that I could start with the gluing of the continuous spiral (Barber pole) from the 0,75 mm wide tape strip, with which I wanted to simulate the SOFI Pattern, which is followed by the Flour coating as well as priming and airbrushing. But since I'm still not completely satisfied with the quality of the Flour Coating, I wanted to try a few things before yet. Therefore, I will do another Flour coating attempt, for what I have first looked at the local flour varieties in the supermarket. And as I stood in front of the shelf with the many flour bags and was spoiled for choice, stood next to me an elderly woman, who somehow looked competent in terms of baking. And then I asked her briefly if she knew which flour would be especially fine-grained.  And her tip was Rice flour or Cornflour, whereupon I then searched for. Bur since faced with so many bags I haven't seen any Rice flour but only found the cornflour, a coworker could show me the rice flour.At home I then made the comparison to my so far used wheat flour by Heimatsmühle (Type 405), 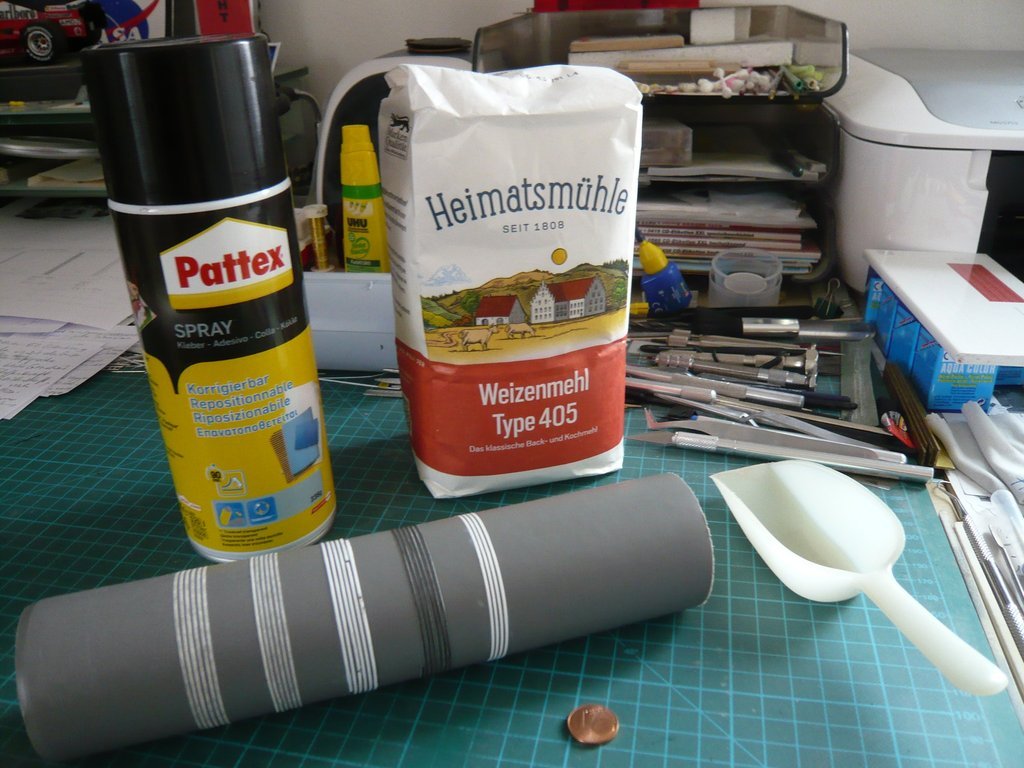 the sample of which can be seen on the right in the next picture, whose loose bulk is similar to the cornflour, with both varieties lumping a bit.  In contrast, the Rice flour actually seems to be more fine-grained and trickles rather than lumping, which gives me hope for a better result in the Flour coating. In contrast, the Rice flour actually seems to be more fine-grained and trickles rather than lumping, which gives me hope for a better result in the Flour coating. 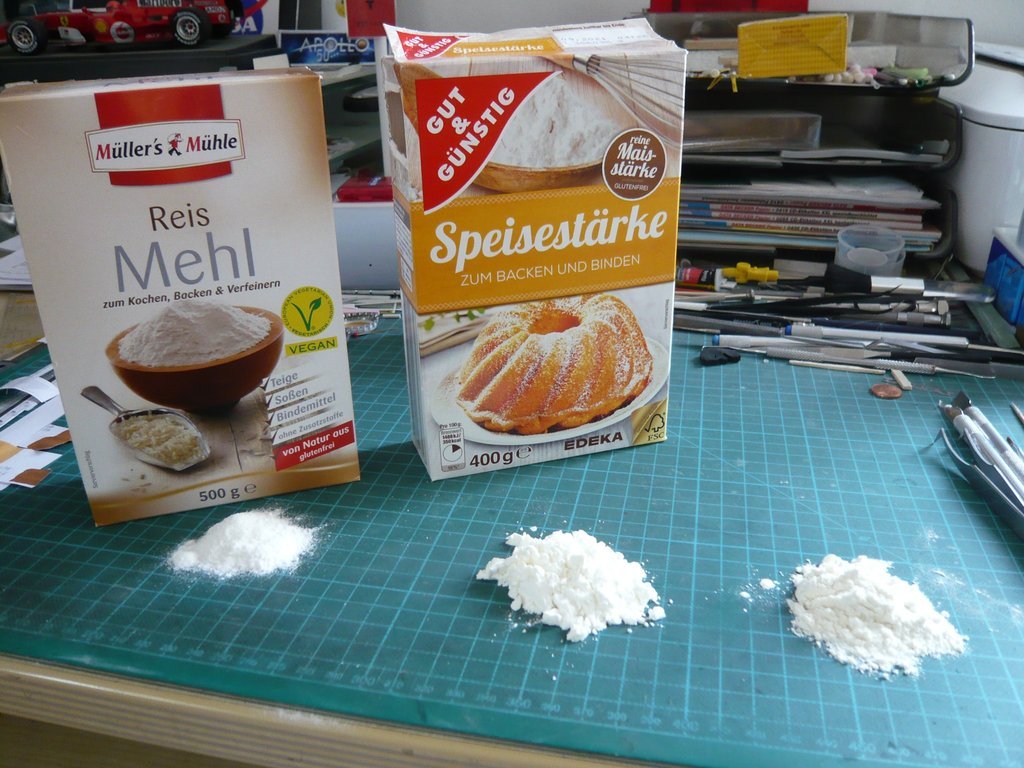 Then there was the unanswered question as to whether I should glue the Ice Ramps for the two Press. Lines before or after the Flour coating, whereby I meanwhile tend to the first variant. But then it is necessary to mask the glued Ramps before Flour coating, which is why I tried the Maskol by Humbrol, whereby I was amazed and frustrated that the stuff in the jar was almost completely lumped, because it was probably already too old.  Here one can see a few drops of the residual liquid on a Styrene plate and on a glued small piece of Evergreen profile. 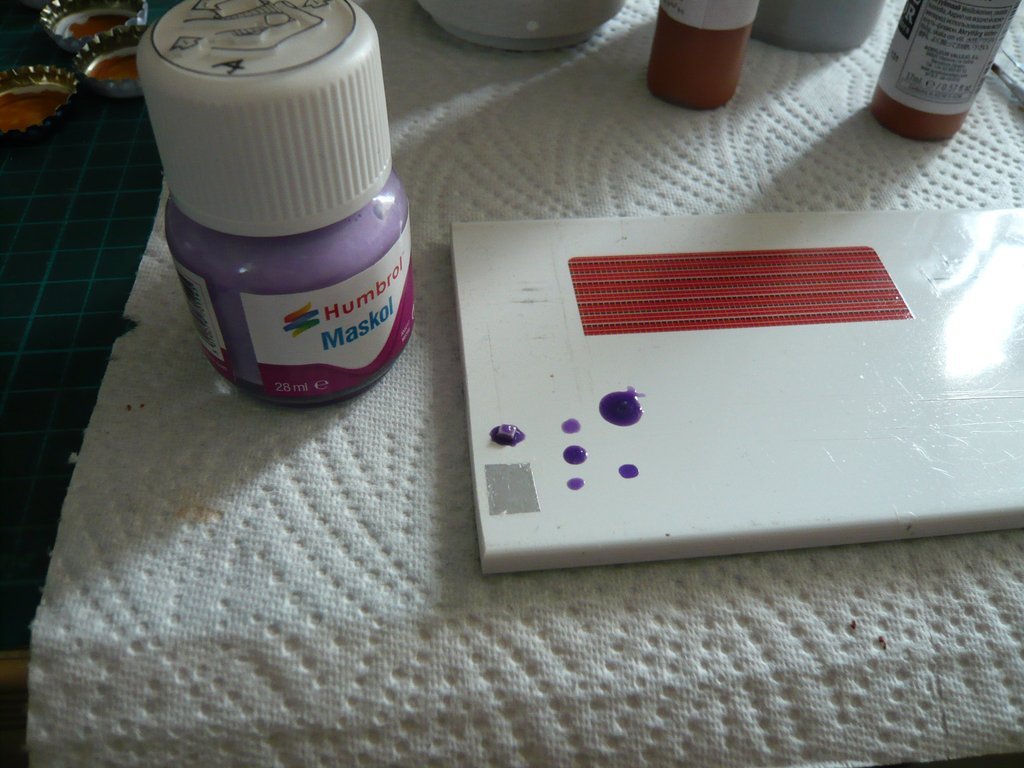 After drying, one can easily peel off the rubbery skin.  Then it was time for the preparation of the new Flour coating test, for which I've used the now no longer needed Airfix Intertank, on which I've glued the 0,75 mm wide tape strip as a continuous spiral (Barber pole). 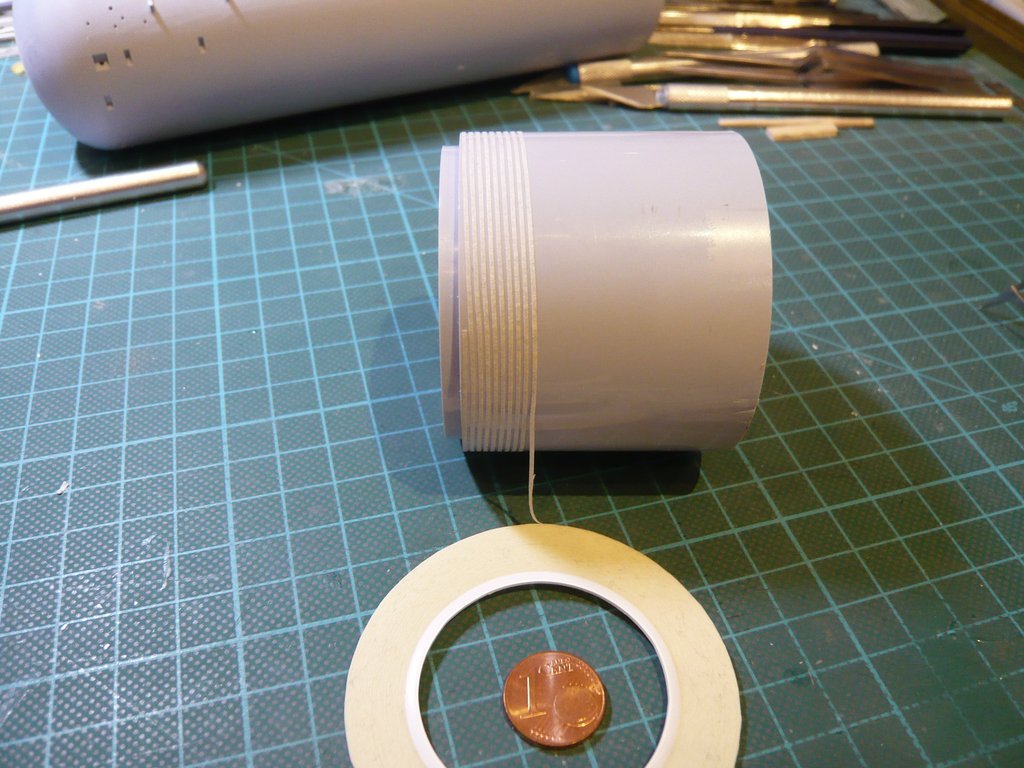 This time, I have dispensed with the 0,5 mm wide spacer strip and glued the strip by eye and pressed on each winding immediately a bit stronger, whereby I have even reduced the distance even slightly. 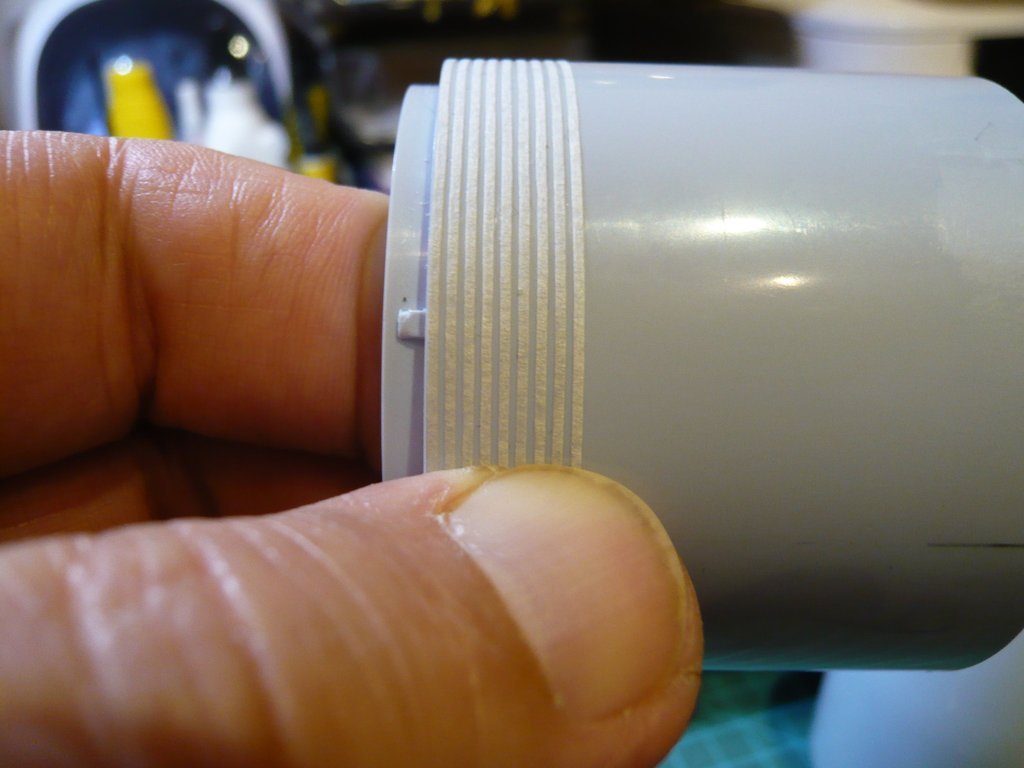 This brought the strips even closer to the estimated Valley-to-Valley distance of approx. 1,3 mm. For this complete gluing of the IT I needed about 1 h , which was certainly pure stress for my still sharp eagle eyes, whereby I'm amazed at how evenly I have managed this. 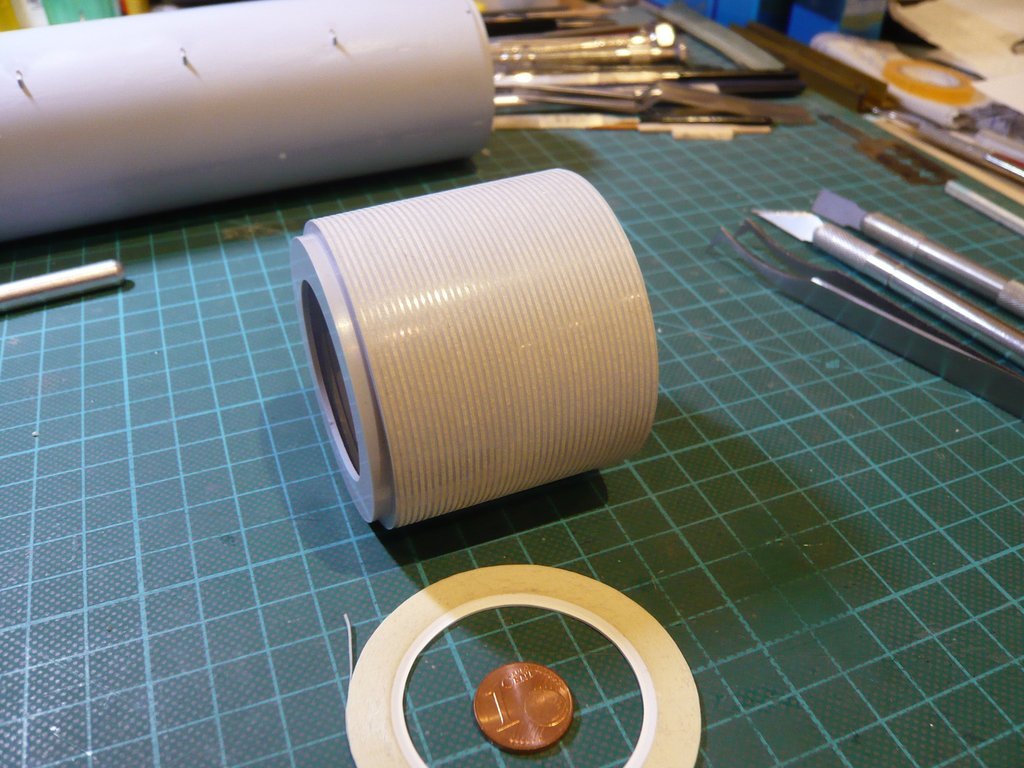 Here are two more shots in daylight. 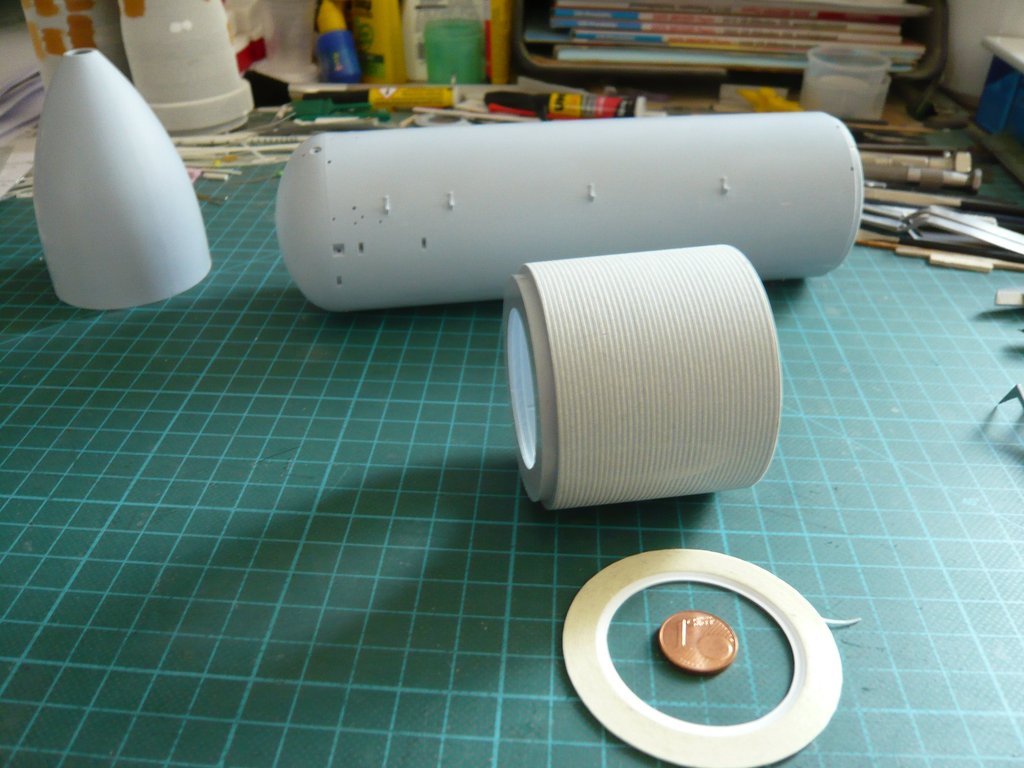 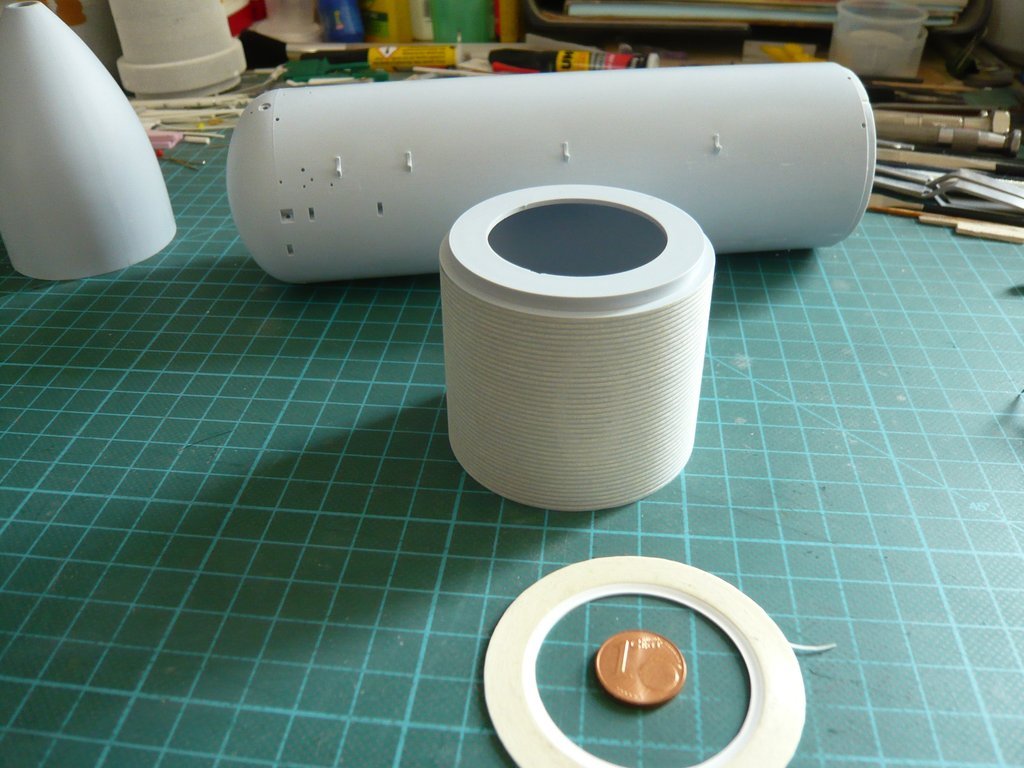 Next to come are the 'masked' Ice Ramps.
__________________
Greetings from Germany Manfred Under construction: Launch Pad 39A with Challenger STS-6 (1:144)
|
|
#1935
05-17-2019, 10:59 AM
|
||||
|
||||
|
Hello everybody,
and now to the announced Ice Ramps from the Newware-Enhancement Kit (NW131), which I wanted to glue on before Flour coating and therefore had to mask, in order to protect them, for what I used Maskol. These are two of the Ramps (R23), 14 of which sit on the LH2 Tank. I've glued the left ramp directly onto the tapes with Pattex-CA, the right one directly onto the uncovered place, to see how far the ramps and their openings for the two GH2/GO2 Press. Lines will be covered by the flour coating. 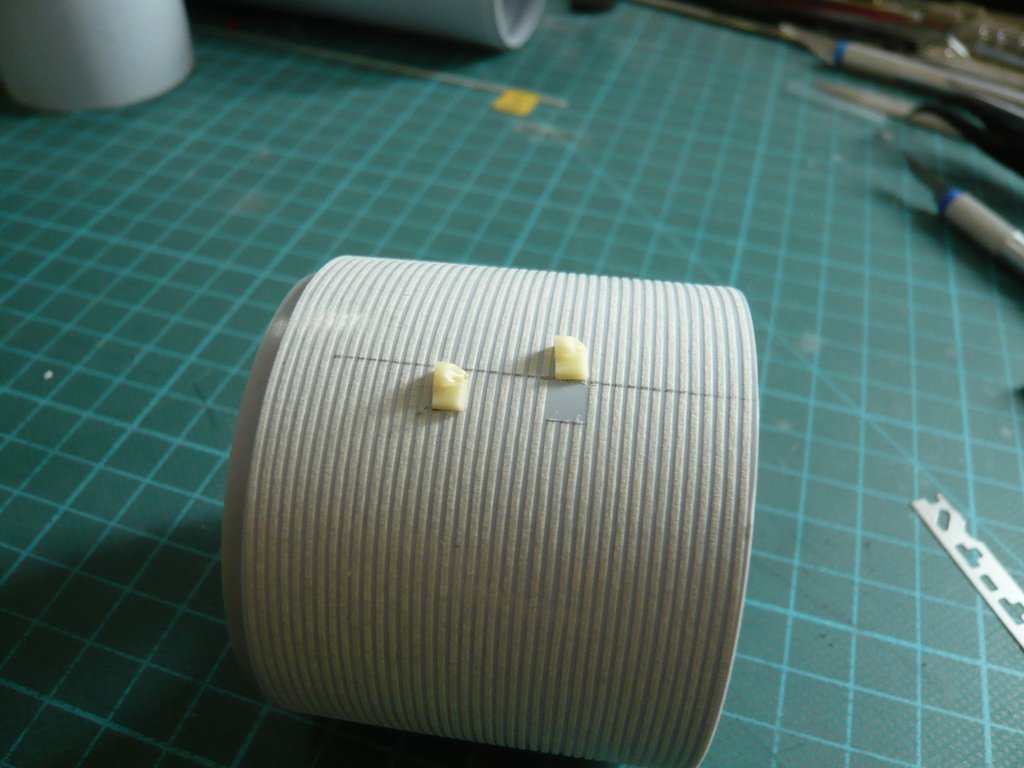 Here are the two Press. Lines (2'' in reality), for which I'll use Nickel silver (Ø 0,35 mm). 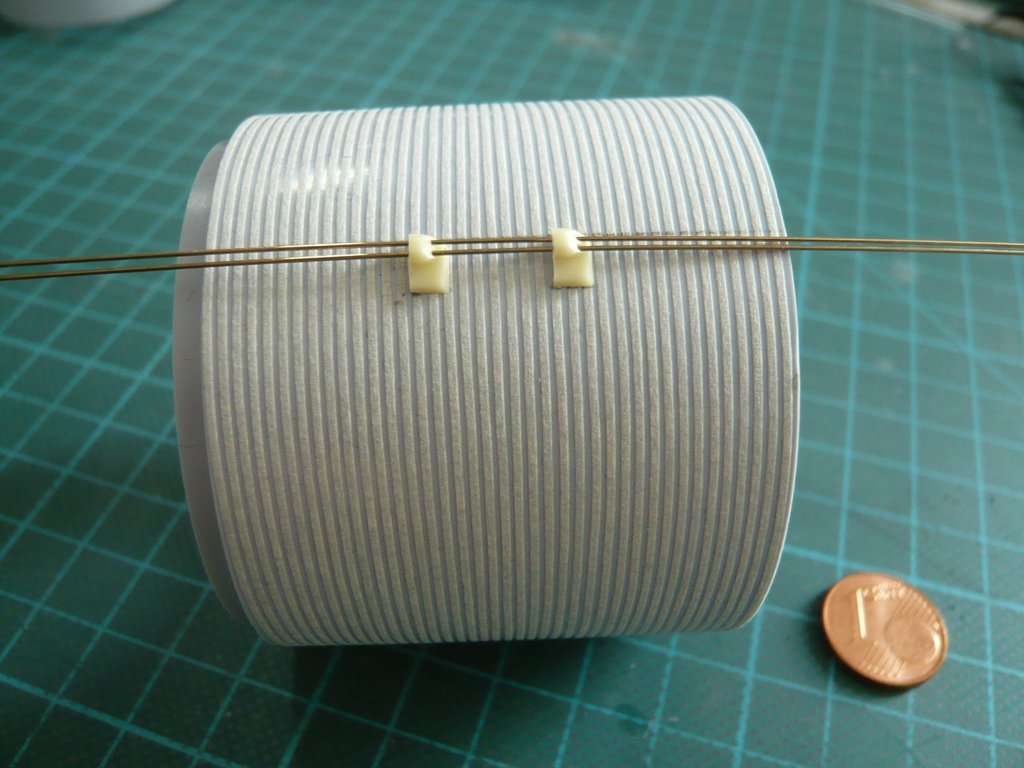 Afterwards, the ramps were masked with Maskol, whereby I hope that the masks can still be removed well after the Flour coating. 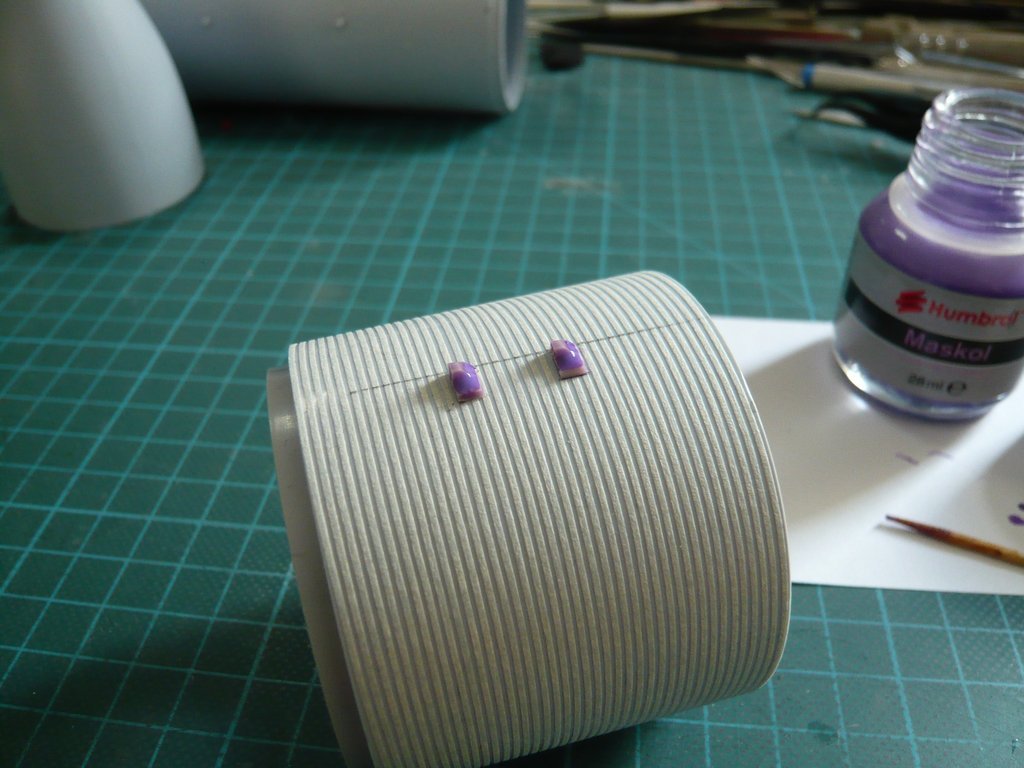 And so nothing stands in the way of Flour coating with Rice flour, on the result of which I am already curious.
__________________
Greetings from Germany Manfred Under construction: Launch Pad 39A with Challenger STS-6 (1:144)
|
|
#1936
05-18-2019, 05:03 PM
|
||||
|
||||
|
Hello friends,
after the Flour coating with the Rice flour, I can now show the images too. Here the Intertank Dummy already hangs in my tried and tested Flour chamber, 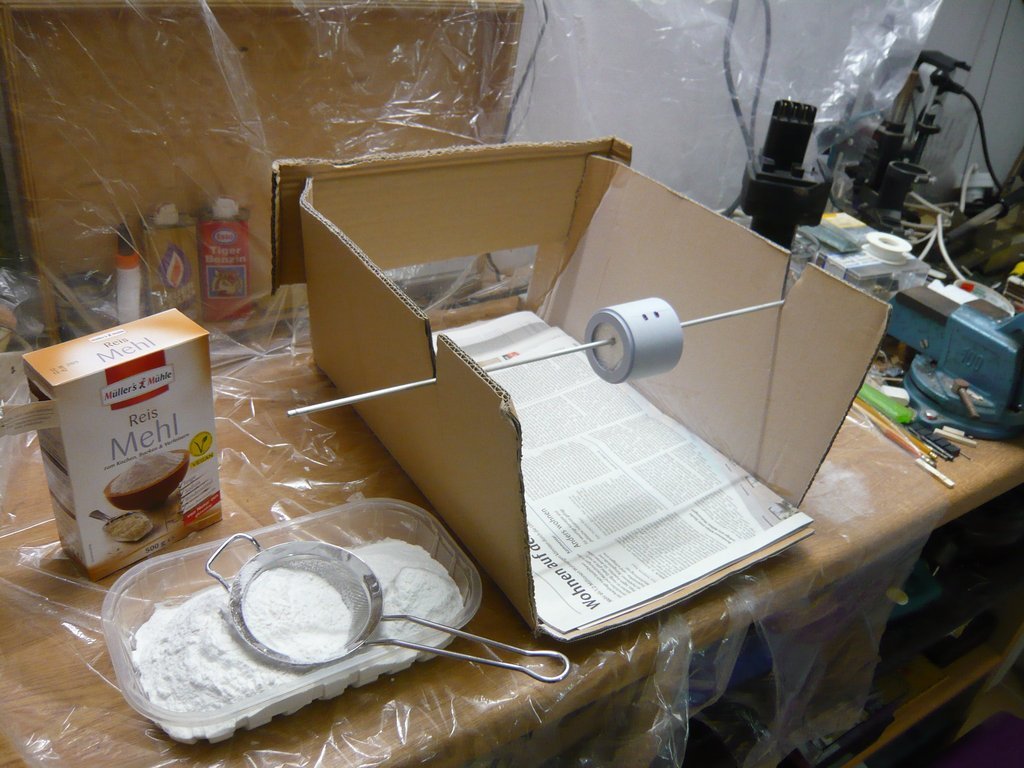 and is waiting for the UHU glue spray mist, 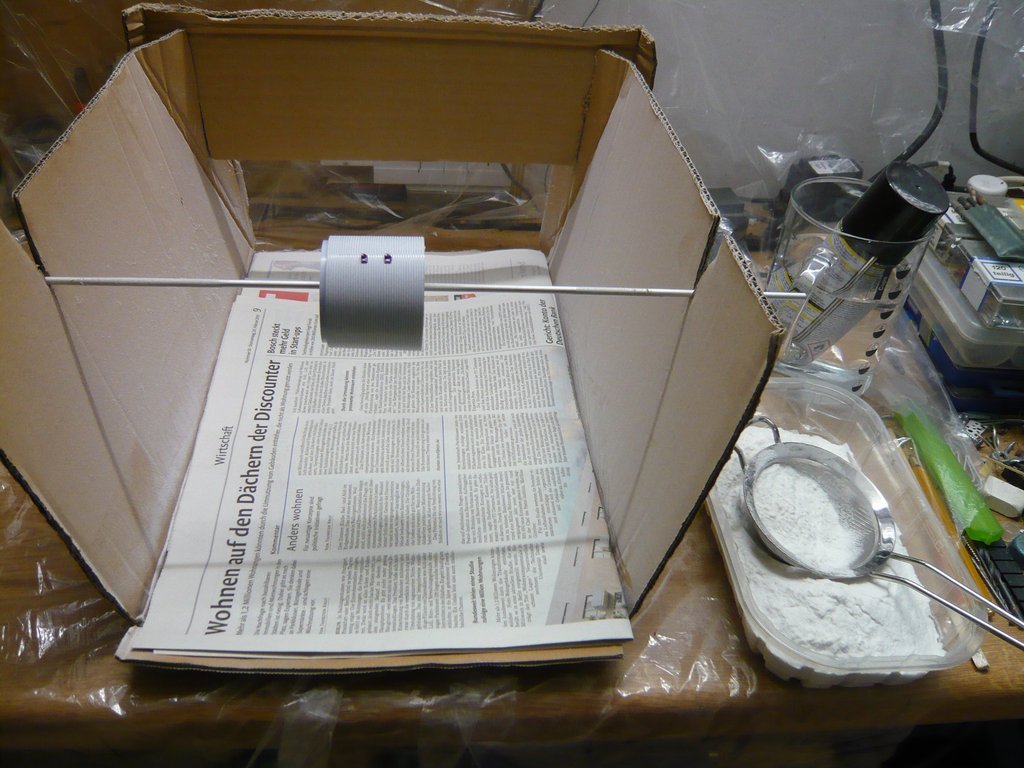 which has covered it here after some turns from all sides. 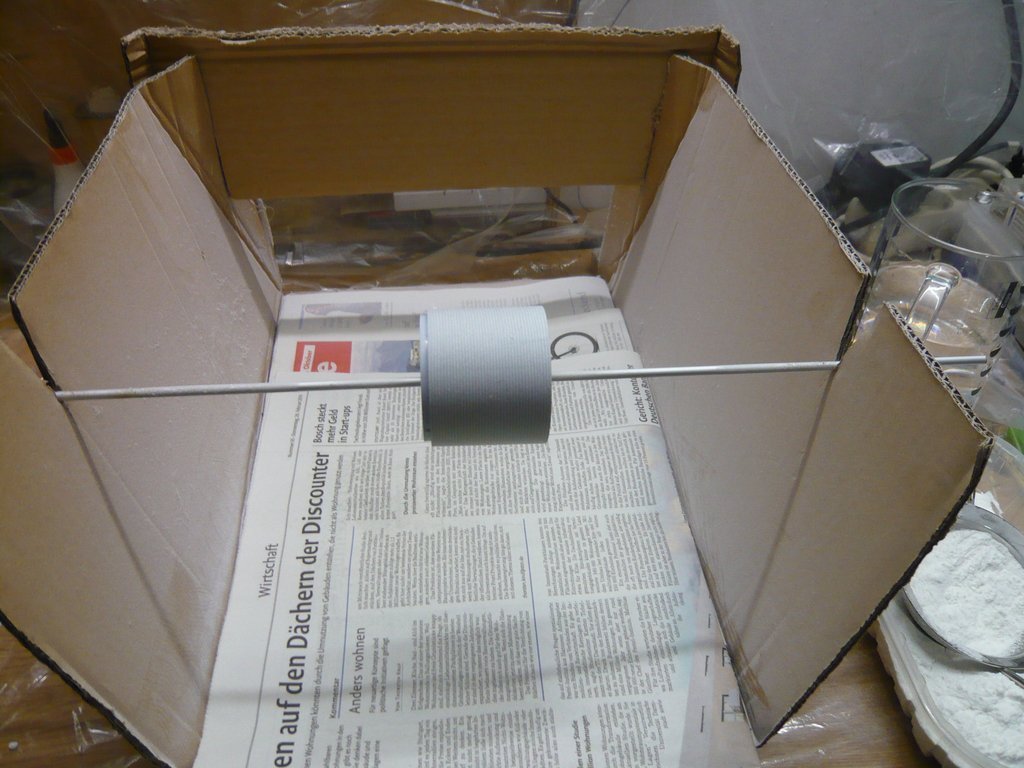 And then followed the generous Flour coating with the rice flour by using a sieve, 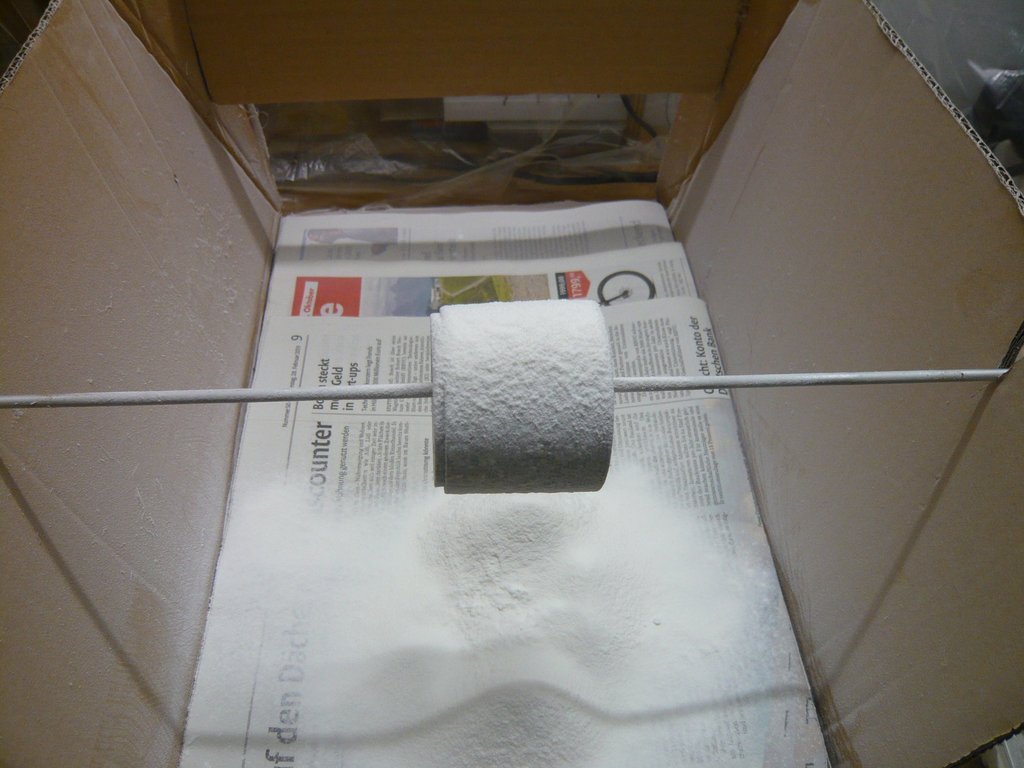 whereby the flour was pressed smoothly between several times with the finger, which this time everything went much looser from the hand. 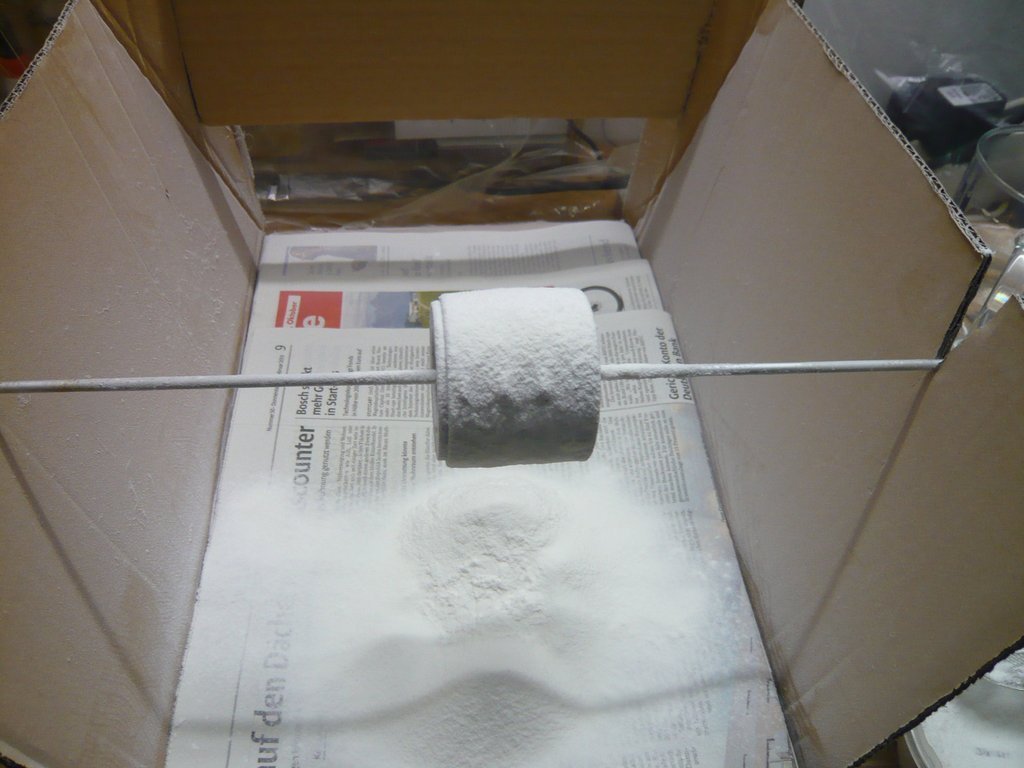 Finally, the loose flour was removed by tapping at the rotating rod, 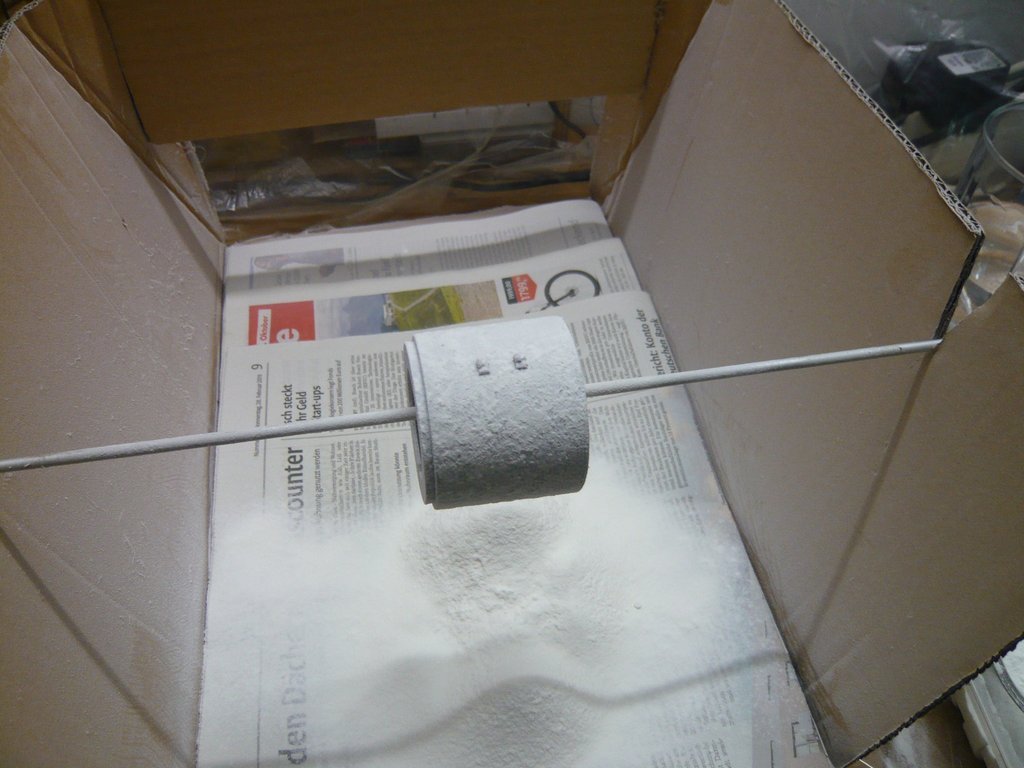 so that everything can dry thoroughly first, and then tomorrow the excess flour will be brushed off.
__________________
Greetings from Germany Manfred Under construction: Launch Pad 39A with Challenger STS-6 (1:144)
|
|
#1937
05-19-2019, 01:40 AM
|
||||
|
||||
|
Hello everybody,
now I can also present the pictures after brushing off the surplus flour, which have pleasantly surprised me, 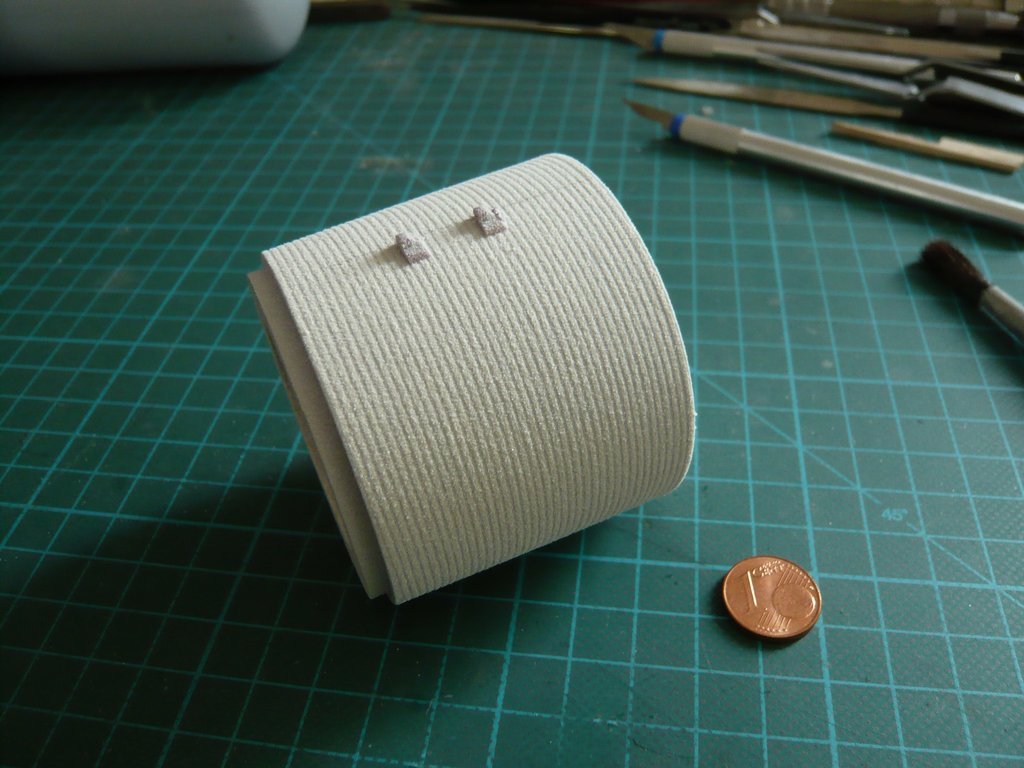 because now the proportions of the SOFI-Patterns fit much better to the diameter of the Intertank, which results in a completely different and more realistic look of the texture,  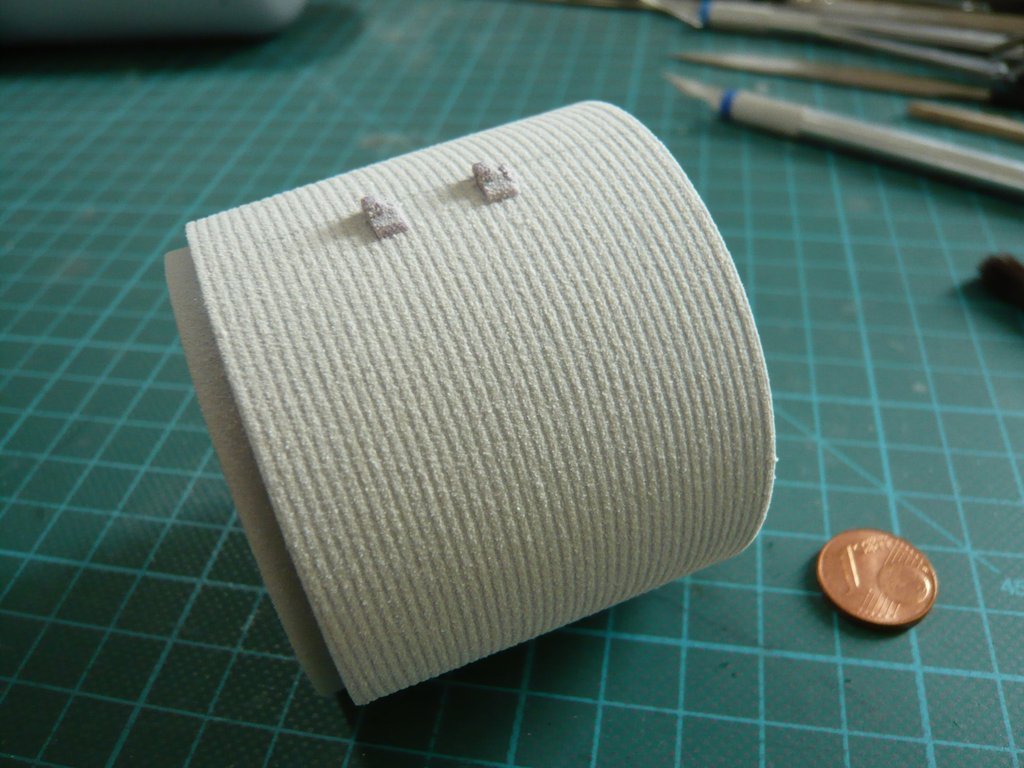 especially since the floured surface looks much finer and smoother this time, which is certainly due to the finer Rice flour. And if I now imagine this structure with primer and painting, then this should presumably give a quite acceptable overall picture.  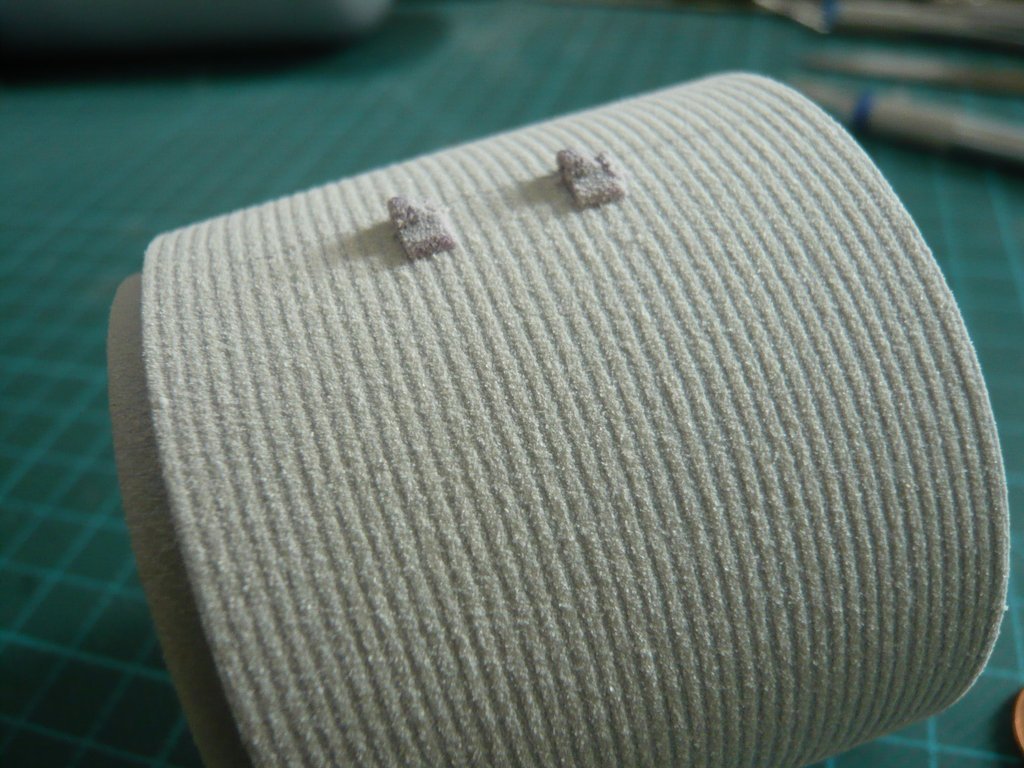 And then I carefully subtracted the Maskol bonnets from the Ramps, 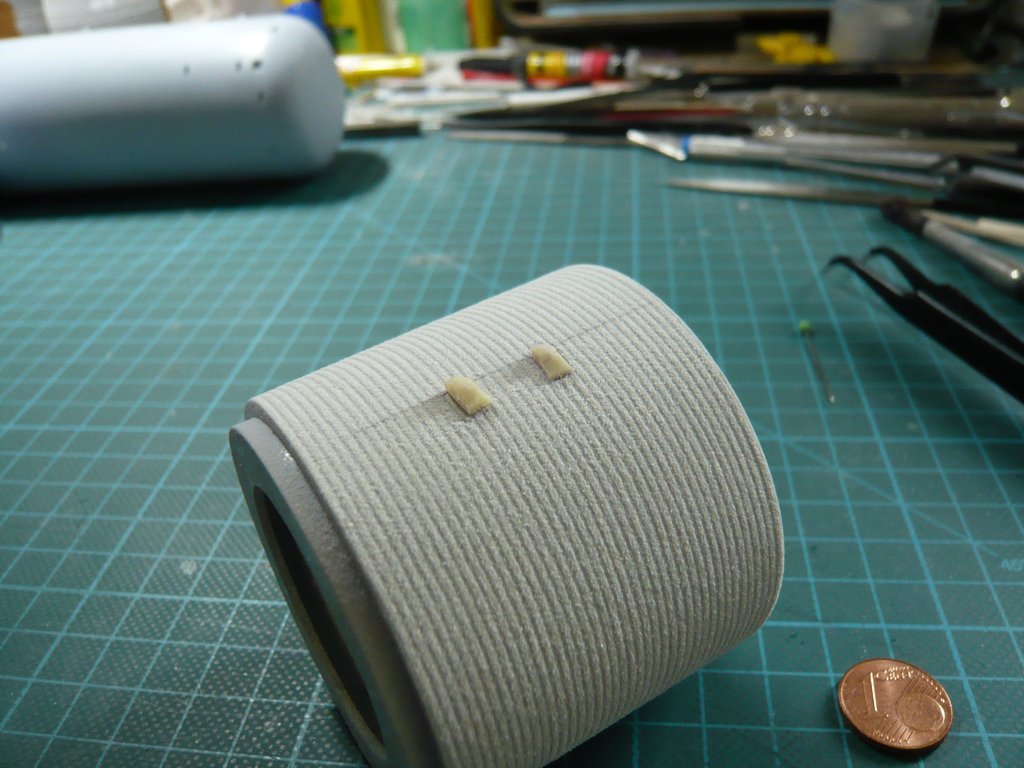 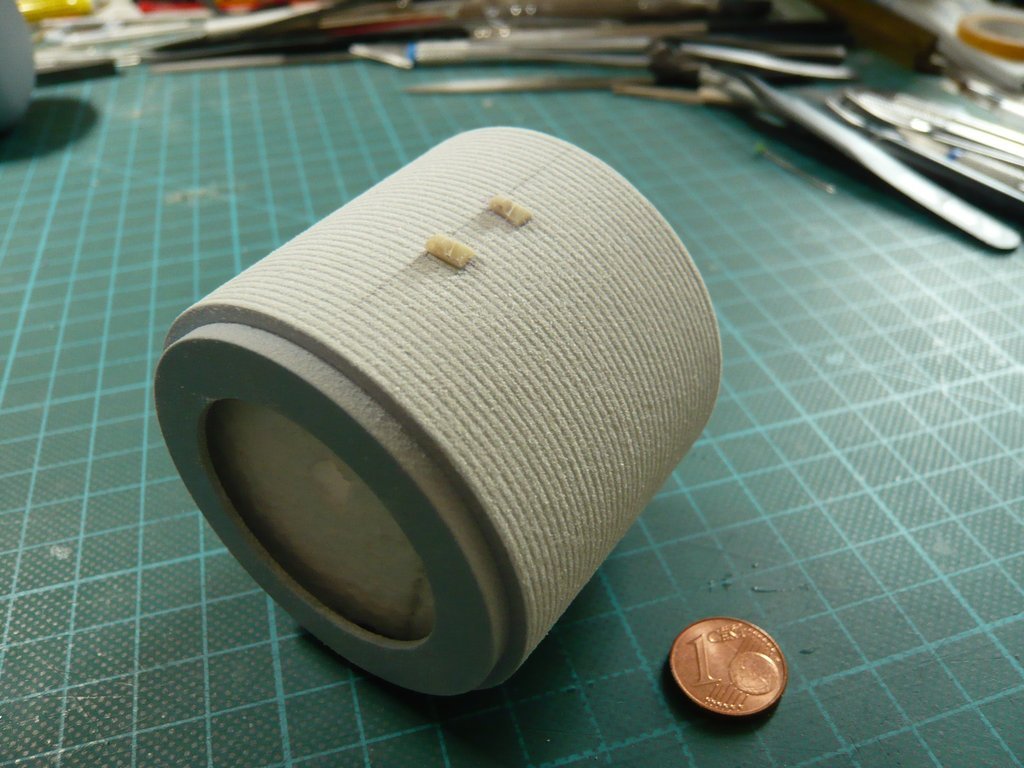 whereby I had to realize that the ramp, glued onto the tape strips (left) had no proper hold and has gradually peeled off during unmasking. 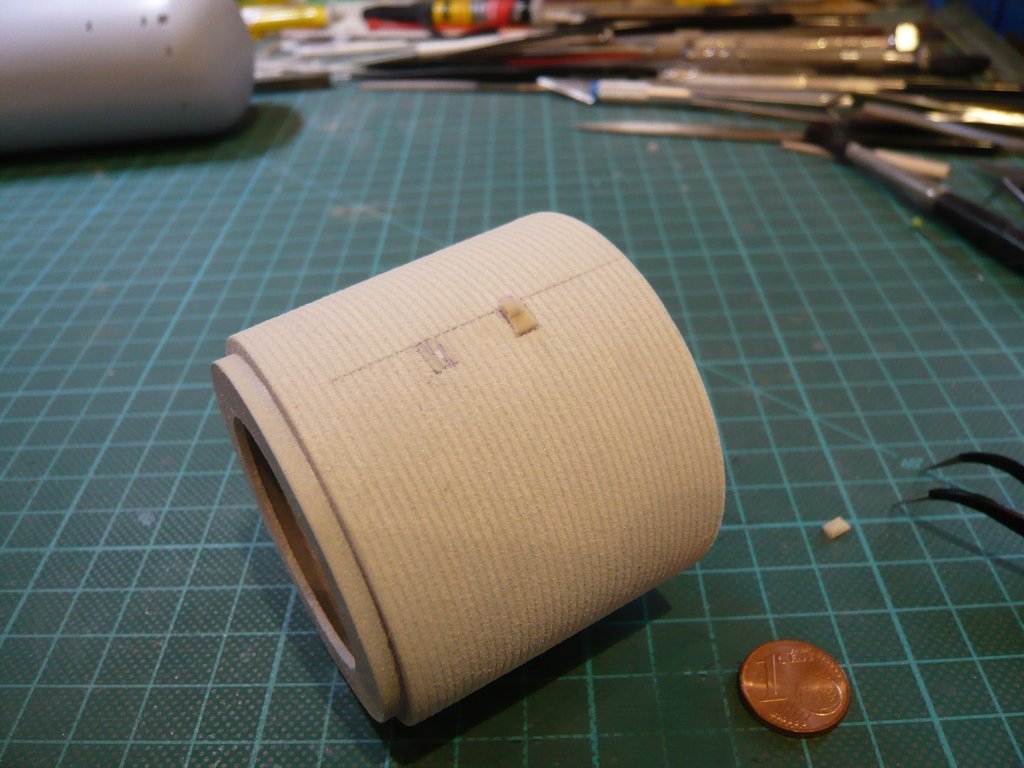 Consequently, the splices for the Ramps should be exposed before the Flour coating and covered separately either with a piece of masking tape or with Maskol and then the Ramps to glue only after Flour coating. And with these positive impressions, I can now continue with a clear conscience.
__________________
Greetings from Germany Manfred Under construction: Launch Pad 39A with Challenger STS-6 (1:144)
|
|
#1939
05-19-2019, 04:50 PM
|
||||
|
||||
|
Thanks David for your compliment.
 I was surprised myself - how good that I asked the Lady in the supermarket. I was surprised myself - how good that I asked the Lady in the supermarket. Hello everybody, here for comparison a small photomontage of the new SOFI Pattern structure in the original image of the ET-8 during the Roll-out, which shows that it looks not so bad, right? 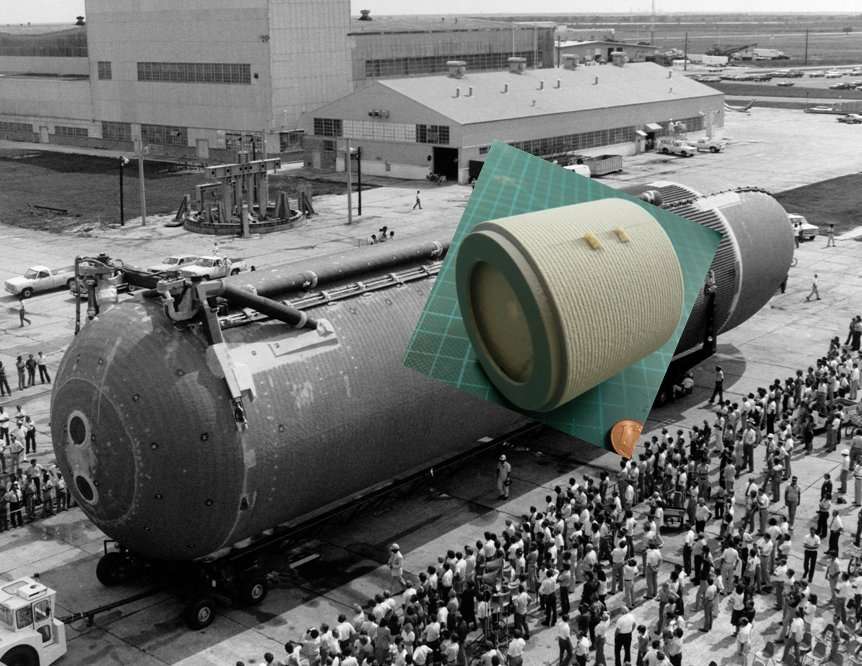 Source: forum.nasaspaceflight.com (Jester)
__________________
Greetings from Germany Manfred Under construction: Launch Pad 39A with Challenger STS-6 (1:144)
|
|
#1940
05-19-2019, 07:00 PM
|
||||
|
||||
|
All those experiments are really paying off!

|
 |
|
|


 Linear Mode

