


|
|
|
#2551
 01-04-2022, 04:04 PM
|
||||
|
||||
|
With that you can't draw me out of reserve, Marcell.
 Since all of this would be invisible, it's not worth the effort.  
__________________
Greetings from Germany Manfred Under construction: Launch Pad 39A with Challenger STS-6 (1:144) 
|
|
#2552
01-05-2022, 08:42 AM
|
||||
|
||||
|
Than you have to make glass windows....
|
|
#2553
01-05-2022, 02:16 PM
|
||||
|
||||
|
Right, Michael, but what a challenge!
 Maybe I should try that on a second model ...  One should never say never - Nothing is impossible! One should never say never - Nothing is impossible!  But then an interior equipment must still be added too.
__________________
Greetings from Germany Manfred Under construction: Launch Pad 39A with Challenger STS-6 (1:144)
|
|
#2554
01-12-2022, 05:59 AM
|
||||
|
||||
|
Hello everybody,
just good that the message in my fortune cookie has bolstered me up appropriate courage.  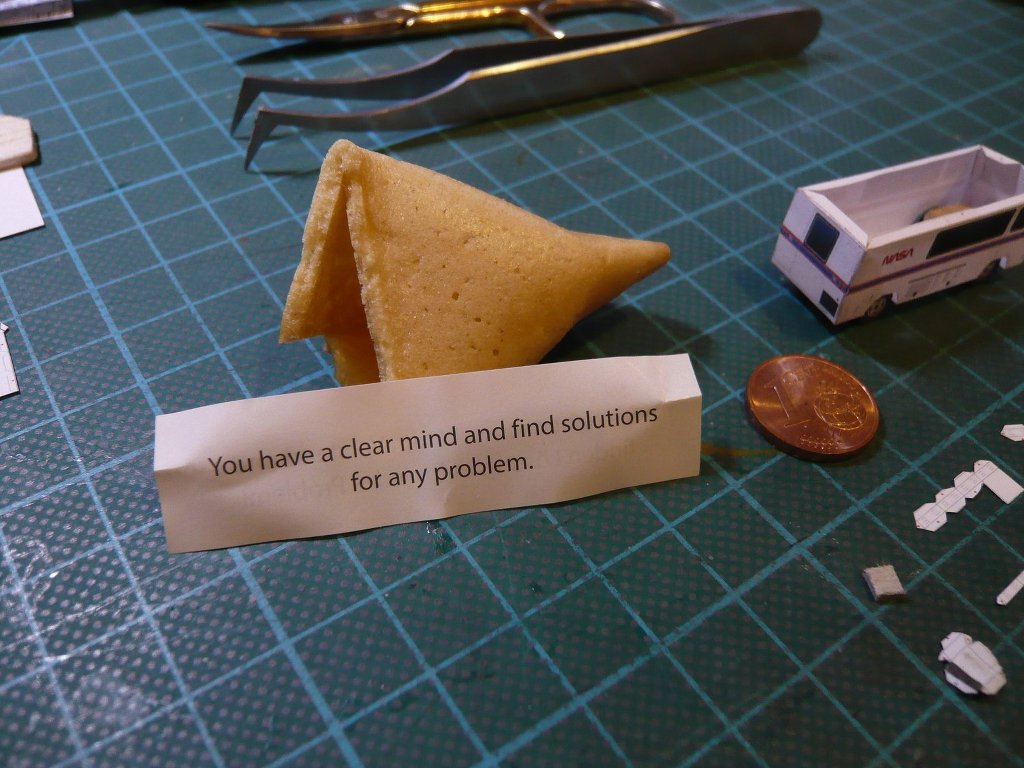 The small fans on the roof were a stressful undertaking already,  whose gluing around the cardboard cores I still succeeded after a few unsuccessful attempts, after having removed all glue folds. I first glued the cardboard cores to the underside of the roof and let it dry briefly. whose gluing around the cardboard cores I still succeeded after a few unsuccessful attempts, after having removed all glue folds. I first glued the cardboard cores to the underside of the roof and let it dry briefly. Then I've laid each fan on the roof, held it from above with the tweezers, and then dabbed the side walls one after the other with a mini droplet of glue at the acupuncture needle and and glued,  which was quite cumbersome and also sweaty under the Headset magnifying glass ... which was quite cumbersome and also sweaty under the Headset magnifying glass ... Then I worked on the front bumper, for which I used Styrene (0,25 mm), which could have been a bit thinner, but this goes through now!  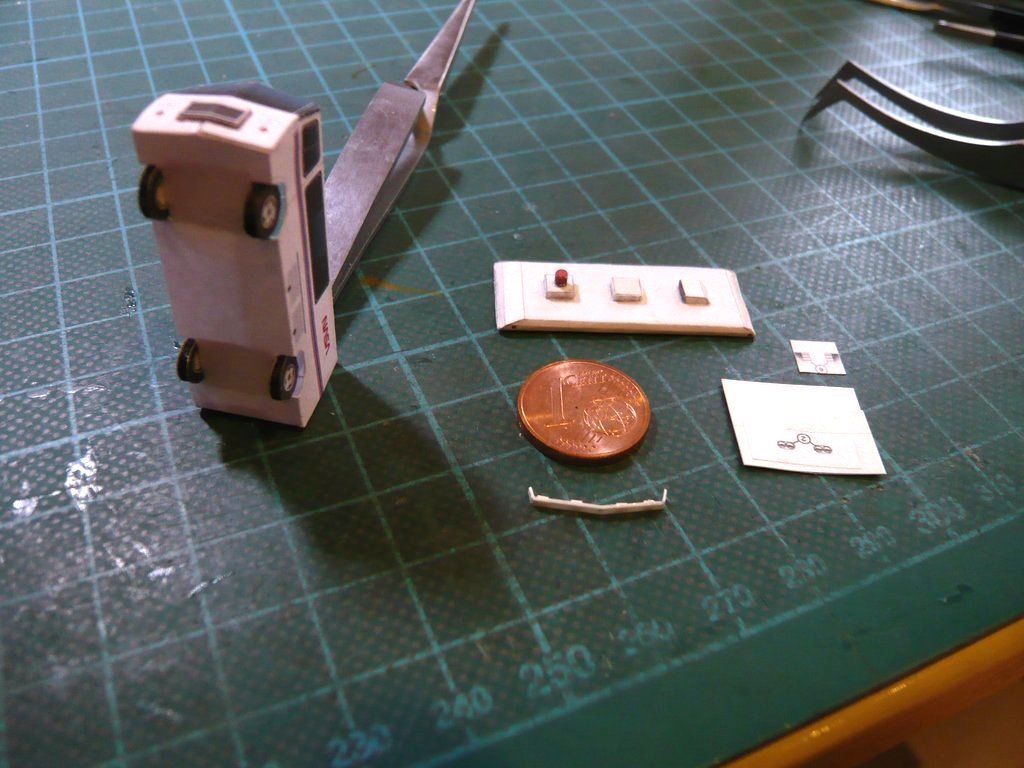 Before gluing the roof on, I glued a Balsa strip at the upper edge of the bodywork to stabilize the walls. And nevertheless I had to treat this fragile paper structure like a raw egg when gluing the roof on.  After the glue had dried, the small rear bumper stubs were glued, which of course could not be missing.  And after the front headlights and the side mirrors had also been glued, the final inspection could finally take place, which was actually positive and can be seen. And after the front headlights and the side mirrors had also been glued, the final inspection could finally take place, which was actually positive and can be seen.  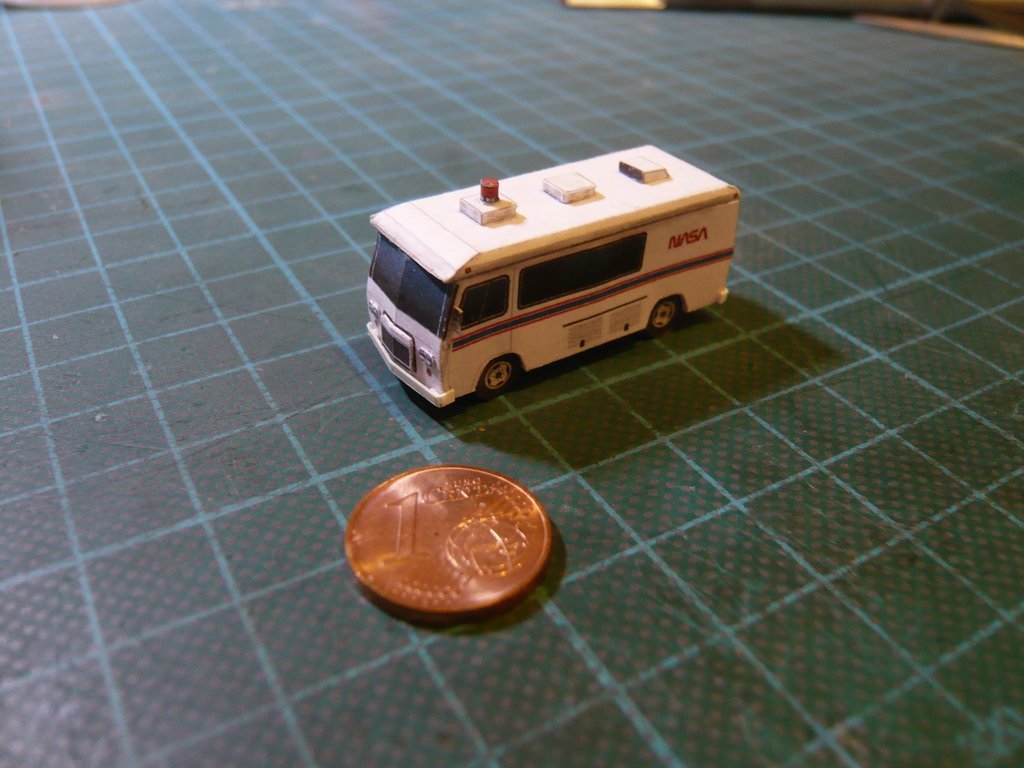 And the comparison with the large Van model (1:48) shows in an impressive way how small this Mini Astrovan (1:160) really is, which now also fits with its NASA Worm logo with my STS-6 Diorama.  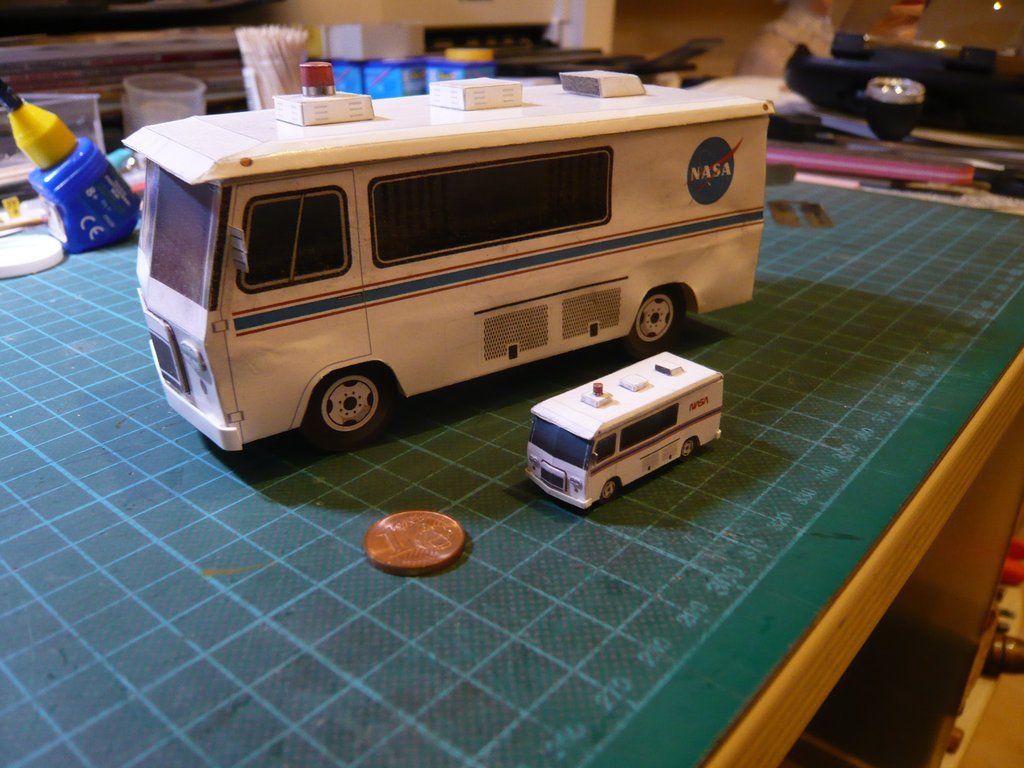 All in all, the construction was an attractive, but at the same time demanding task, a real Challenge, so to speak! And since I've meanwhile found pleasure in the Pad vehicles, I also still got the idea  to include the Payload Canister Transporter into my fleet, which can at least partially be seen on this STS-6 reference photo when loading the RSS Payload Bay, a thought that has been going through my head for some time, cause this transporter is an extremely interesting and extraordinary special vehicle ... to include the Payload Canister Transporter into my fleet, which can at least partially be seen on this STS-6 reference photo when loading the RSS Payload Bay, a thought that has been going through my head for some time, cause this transporter is an extremely interesting and extraordinary special vehicle ...  Source: retrospaceimages.com (STS-6) And on this picture one can see the transporter leaving the Vertical Processing Facility, in which the respective payload is installed into the upright standing Payload Canister.  Source: retrospaceimages.com (STS-6) For this sub-project, however, I still have to do some research in order to gain more clarity about the construction and nature of both components.
__________________
Greetings from Germany Manfred Under construction: Launch Pad 39A with Challenger STS-6 (1:144)
|
|
#2555
01-12-2022, 02:01 PM
|
|||
|
|||
|
Absolutely AMAZING! This is just too cool!

|
|
#2556
01-13-2022, 02:46 AM
|
||||
|
||||
|
Thanks Marcell for your nice compliment.
 Then stay tuned, my friend, I hope I can keep you entertained further in the new year too so that you will have fun. My passion for this project is unbroken as before and I am firmly determined to stay the course.  ... ... 
__________________
Greetings from Germany Manfred Under construction: Launch Pad 39A with Challenger STS-6 (1:144)
|
|
#2557
01-15-2022, 11:39 AM
|
|||
|
|||
|
The mini astrovan looks great Manfred. A lot of work but I think a real "highlight" touch. Now you have drawn our attention to the payload canister transporter how could you possibly leave it out of this masterpiece. If anyone can make it, you can!
Regards Kevin
__________________
Normally the most advanced tech I use is a pencil.
|
|
#2558
01-15-2022, 12:34 PM
|
||||
|
||||
|
Thanks Kevin for your nice words which keep spurring me on to do my best what I will try.
__________________
Greetings from Germany Manfred Under construction: Launch Pad 39A with Challenger STS-6 (1:144)
|
|
#2559
01-15-2022, 12:37 PM
|
||||
|
||||
|
Hello everybody,
unfortunately I've remembered these two original photos from the STS-6 on my Reference CD (J. L. Pickering - retrospaceimages.com) far too late, after chasing other photos for a long time,  which one can definitely find on the web, like this very nice photo here from the NASA Media Archive, on which you can also study the details of the transporter very well in the XXL zoom, which you need for scratching, as long as one takes it a little more exactly, like me. which one can definitely find on the web, like this very nice photo here from the NASA Media Archive, on which you can also study the details of the transporter very well in the XXL zoom, which you need for scratching, as long as one takes it a little more exactly, like me.  Source: mediaarchive.ksc.nasa.gov However, with this you still don't have the main dimensions (LxWxH), which you absolutely need to be able to estimate the size of the transporter and of interesting details, at least as long as you don't have drawings ... But then you also still have to know that this is a picture of the two transporters from the manufacturer, the KAMAG Transporttechnik GmbH in Ulm, which were delivered to NASA in early 2000 as the successors to the 20-year-old Payload Canister Transporter System. Here are two photos of the arrival of the transporters, on which one can already see many important details,  Source: mediaarchive.ksc.nasa.gov  Source: mediaarchive.ksc.nasa.gov so inter alia, that the transporter has 24 wheels, which makes it clear that I will have something to do when scratching, which, as is well known, excites me all the more. However, one must not be dazzled by these great photos, since it is not yet clear how small or tiny some details in 1:160 might be again, see Astrovan. But since I'm only interested in the 1983 transporter, used at the STS-6, I had to keep looking first and then have found at my friend James MacLaren, what I was looking for, who describes the Payload Canister Transporter of the time on his Website in words and pictures, when he worked from 1980 to 1985 during building the second pad, Launch Pad 39-B.  Source: 16streets.com/MacLaren And as you can see, the transporter at that time looked a bit different, 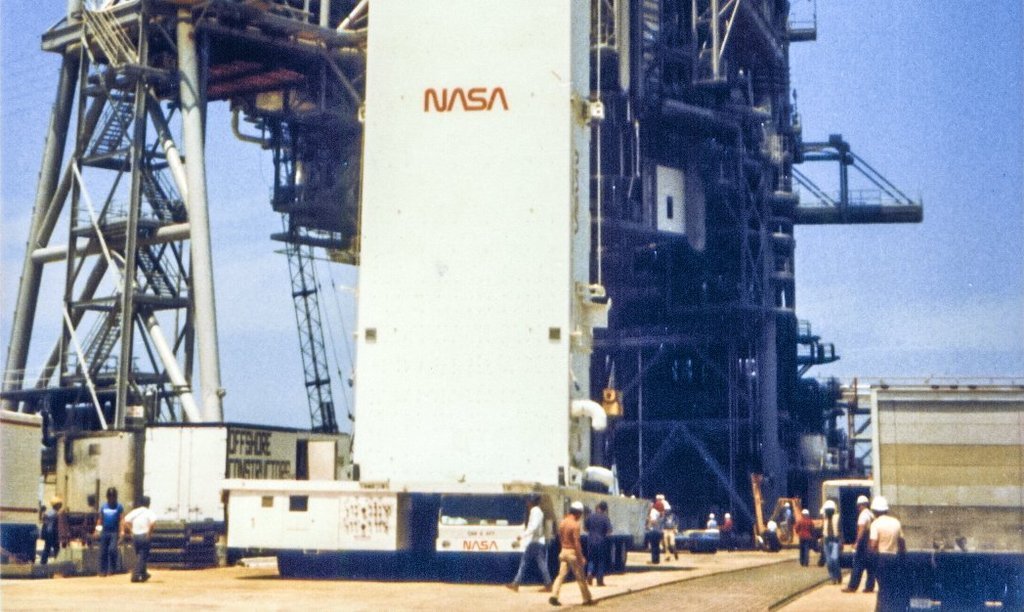 Source: 16streets.com/MacLaren so I had to do some more research first.
__________________
Greetings from Germany Manfred Under construction: Launch Pad 39A with Challenger STS-6 (1:144)
|
|
#2560
01-17-2022, 07:22 PM
|
||||
|
||||
|
Hello everybody,
in order to get usable dimensions for the scratch-building of the Payload Canister Transporter, I had to open up other sources, which took some time. For this I researched the Proceedings of various NASA conferences in which I actually found what I was looking for. Among other things, I came across this old photo of the transporter, which initially caused quite a bit of confusion for me,  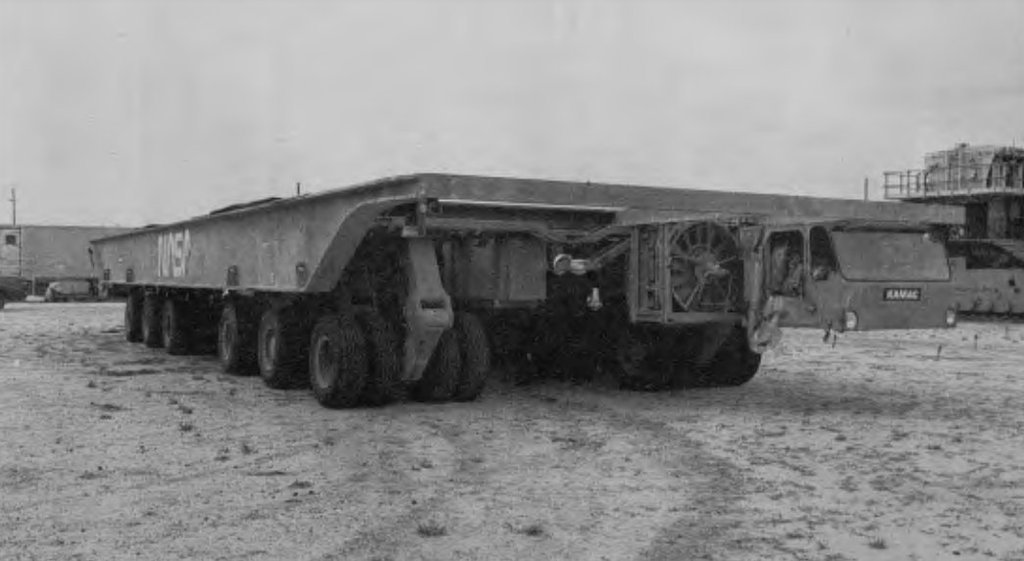 Source: Space Congress Proceedings 2. - 1980 (17th) A New Era In Technology (W. H. Rock) because one can see that the transporter has 24 twin wheel sets and therefore had not only 24 but a total of 48 wheels.  Of course I had to get to the bottom of this and asked my friend James MacLaren about it, who also confirmed it to me, especially since he also wondered about it when he first saw this vehicle. Another open question was whether the transporter only had a driver's cabin on one side, as initially shown in the pictures, or perhaps on both sides, as is also was the case with the Crawler. And he also answered this question right away by saying that the transporter of the time had a cabin both on the front and on the back, although he was actually of the opinion (original sound): In truth, the thing did not have a front side or a back side. Didn't matter which way it was pointed. Driver gets in and "go". Real simple that way.  Wherewith this detail was clarified too. Wherewith this detail was clarified too. The confirmation for this I finally got in a contribution by M. E. Donahue: Payload Transportation at KSC, held at the Space Shuttle Technical Conference (1983). 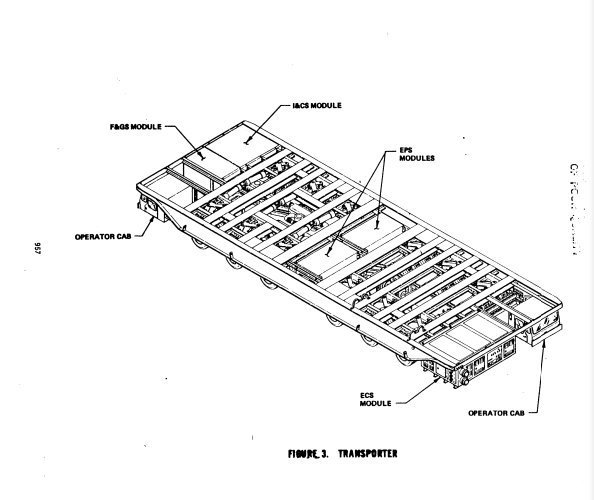 Source: NASA Conference Publication 2342 Part 2 (M. E. Donahue) On it one can also read that the electrical, environmental, fluid and gas, and instrumentation services required by the payload during transportation are supplied by separate Subsystems, which one can see in the drawing above (Figure 3), - the Electrical Power Subsystem (EPS Modules), - the Environmental Control System (ECS Module), - the Instrumentation and Communication Subsystem (I&CS Module) and - the Fluid and Gas Subsystem (F&GS) (F&GS Module). This transporter is a true masterpiece of transport technology. Its elevating flat bed has a height of 1,8 m (6') but can be lowered to 1,6 m (5'-3'') depending on the terrain or raised to 2,1 m (7'±3''). Its 24 twin wheel sets can be steered independently of one another and enable the transporter to move forwards, backwards and sideways or diagonally, or to rotate around its own axis like a merry-go-round. All each have separate brake and stabilization lifting systems, if you will a Jack of all trades device.  Because payload handling will require precise movements, the transporter has a "creep mode" that permits it to move as slowly as 0,64 cm/s (0,25 in/s) or 0,023 km/h (0,014 mph). From this drawing I determined the dimensions of the Payload Canister for my scale (1:160), 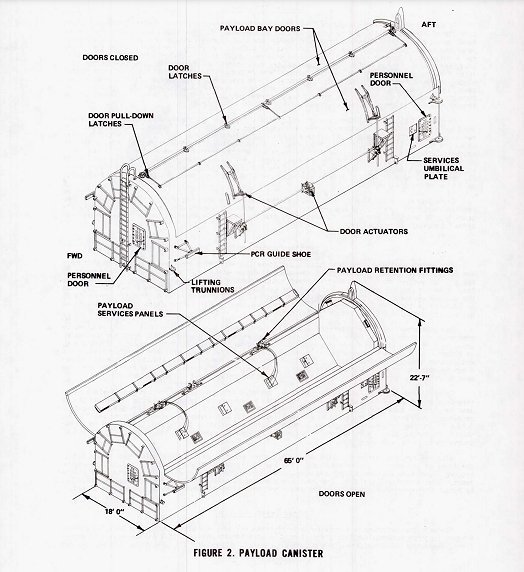 Source: NASA Conference Publication 2342 Part 2 (M. E. Donahue) L = 65' = 124 mm (1:160) x B = 18' = 34 mm (1:160) x H = 18'-7'' = 35 mm (1:160), and in the text one can also find the dimensions of the Transporter, so now I know what's in store for me. L = 65' = 124 mm (1:160) x B = 23' = 44 mm (1:160) x H = 6' = 11,5 mm (1:160) And that's enough for me to scratch-building, since I now know what the side view looked like, as well as the 'front/back side', as in this photo from the STS-6 CD-ROM can be seen here.  Source: retrospaceimages.com (STS-6) Now I can think about whether I should start building the Transporter right away or postpone it for the time being ... The wheel sets remind me a lot of the 14 wheel sets of the main landing gears of my Antonov An-225, which is also waiting for me in my cupboard ...   Source: flugzeug-lexikon.de (ILA_2010) In terms of structure, they should look similar to these one, only that the Transporter has twin wheel sets.  Source: wikimedia.org That's just in order to get attuned a bit. 
__________________
Greetings from Germany Manfred Under construction: Launch Pad 39A with Challenger STS-6 (1:144)
|
 |
| Thread Tools | |
| Display Modes | |
|
|


 Linear Mode

