


|
|
|
#711
 02-24-2015, 01:30 PM
|
||||
|
||||
|
Thanks Manfred for mentioning secret techniques
 Thread of Yours is always interesting to read.
__________________
Finished projects: RMS Mauretania 1/250; SS Canberra 1/250; Toyota Hilux Overdrive; Current projects: SS Michelangelo 1/250 
|
|
#712
02-24-2015, 04:02 PM
|
||||
|
||||
|
The model looks so good I knew you have to have some sort of secret

__________________
PAPERENGINEER Designs in progress: -C-2A Greyhound -Br.1050 Alize
|
|
#713
02-25-2015, 11:48 AM
|
||||
|
||||
|
Thanks guys for your nice compliments.
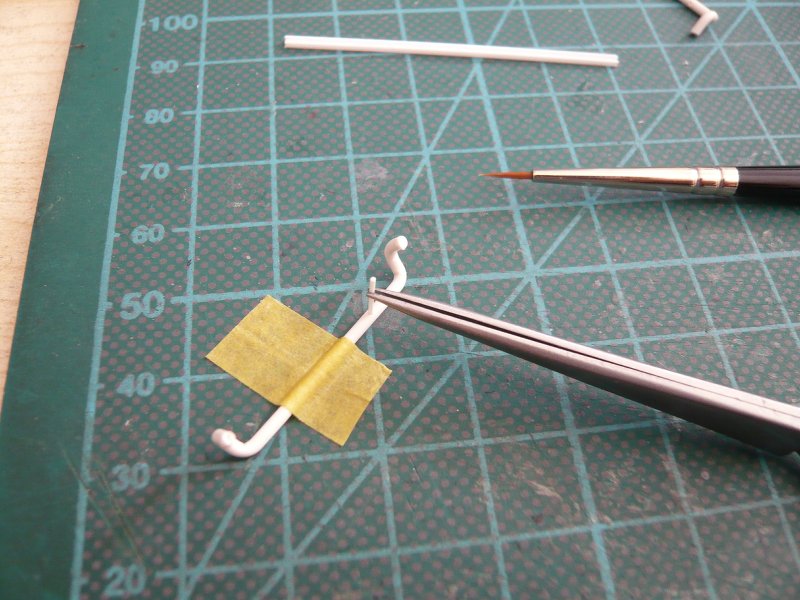
 As you know, I share everything with you, and I'm not a mystery-monger.  Hello everybody, today I carried out a few experiments to test the feasibility of the following detailed solution.  As shown already, there are on the back wall of the SSME hole this SSWS piping with the six vent nozzles. 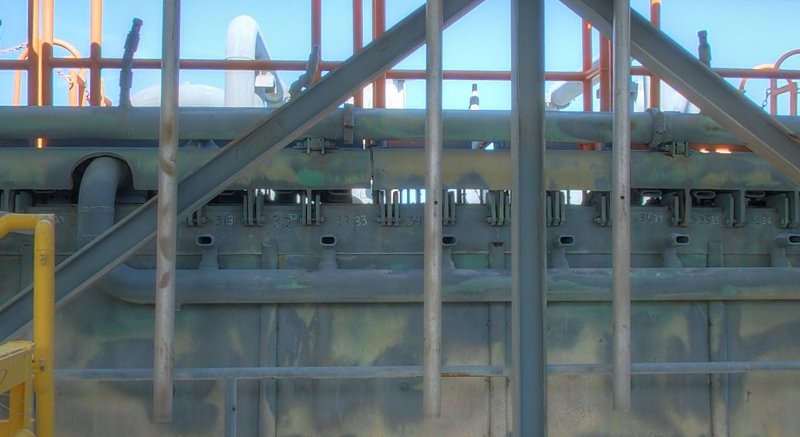 Source: NASA The dimensions for this I had already estimated, after which the pipe should have about 1.3 mm in diameter and the nozzles then about 0.5 mm in diameter, which I instinctively just appeared to be feasible. And I wanted to check today.  And as always with such things a scale drawing is very helpful, and how you can already see that this part but is relatively small.  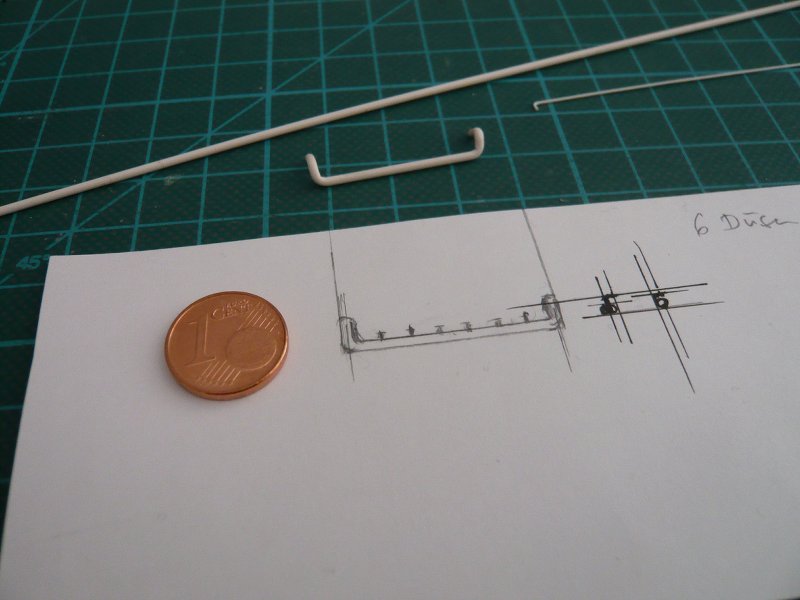 And these are my first two prototypes of the pipe (Ø 1.4 mm), which should be about 30 mm long. Since the first pattern has unfortunately yet become slightly shorter and did not fit into the openings, the second experiment was (front) then more successful.  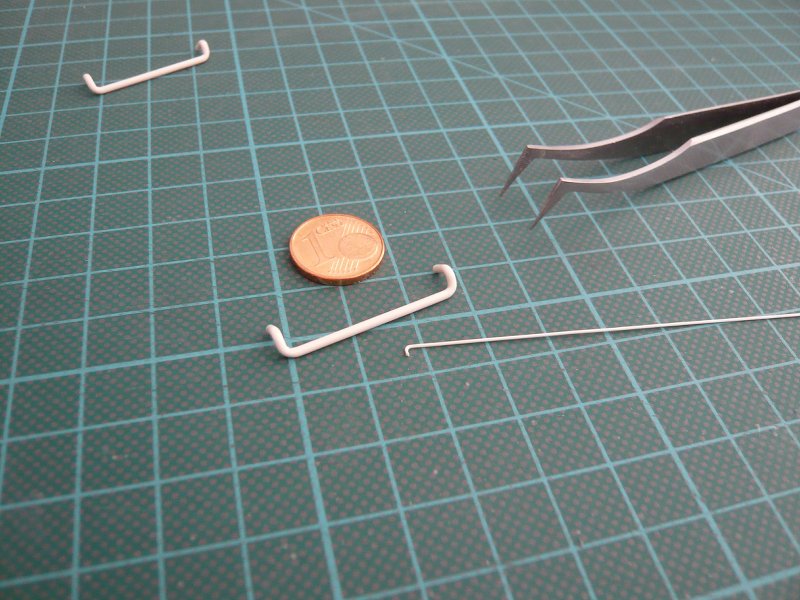 And as you can see here, the pipe fits quite well into the openings of the Blast Shield. 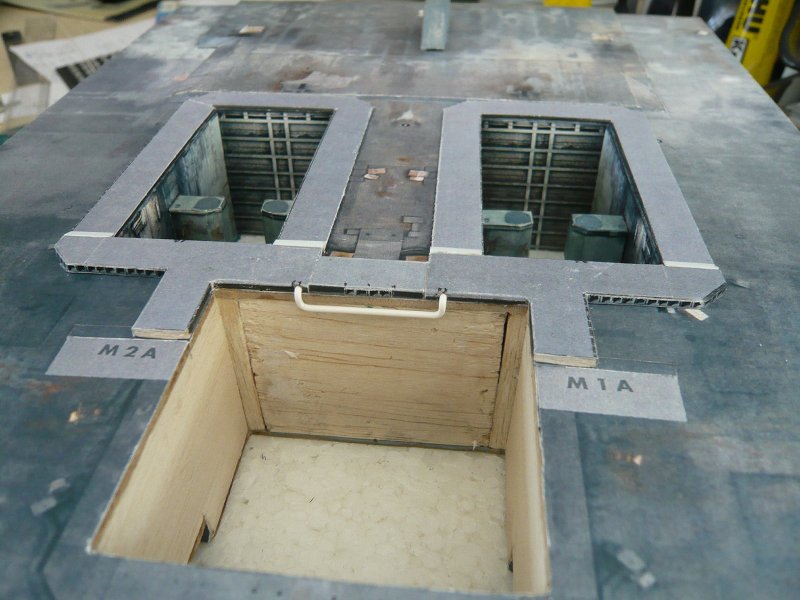 And so now to the nozzles of 0.5 mm rod that truly are, however, some small check marks which should be only about 1.5 mm long.  Can bend itself yet, but the separation and handling is then even more marginal. Can bend itself yet, but the separation and handling is then even more marginal.That reminds me sticking the nozzle is problematic in terms of durability of the contact point due to the tiny cross-section, I first experimented with my dummy and carefully drilled a hole with a diameter of 0.5 mm and the nozzle being only inserted. Now this is indeed a bit difficult, but doable.  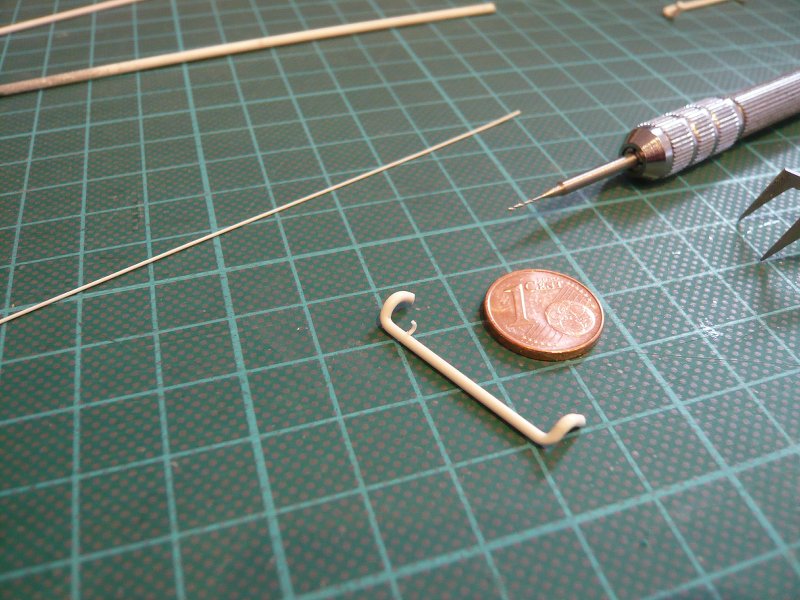 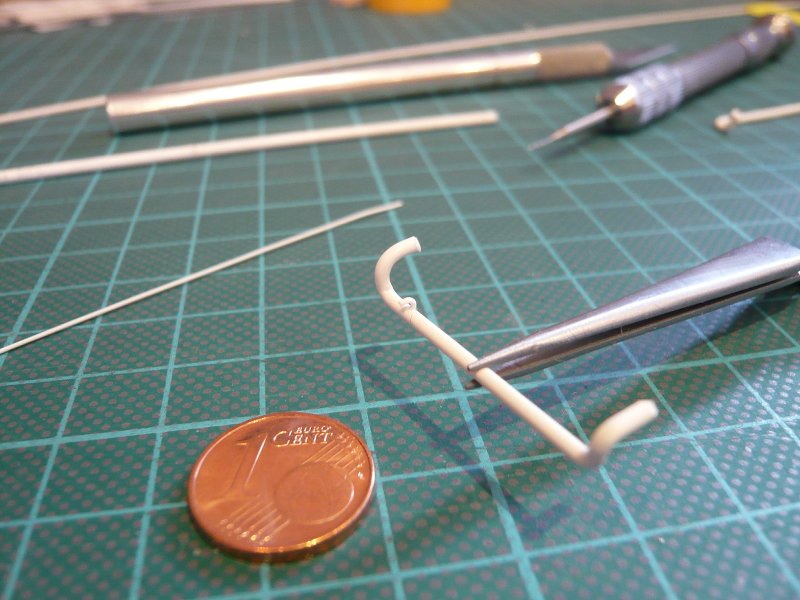 And this exercise should work just as well in the remaining five nozzles, I hope so.  For comparison, I will now try another gluing with MEK and am curious as to whether or how well that will hold.  
__________________
Greetings from Germany Manfred Under construction: Launch Pad 39A with Challenger STS-6 (1:144) Last edited by spacerunner; 09-27-2016 at 10:21 PM.
|
|
#714
02-28-2015, 06:21 PM
|
||||
|
||||
|
Hi guys,
so, today I wanted to finish the reconstruction of the Blast Shields finally, for it the top covers were now still to glue to the substructures.  Unfortunately I could not glue them in this form, because I had modified the geometry of all three holes. So that's why just had to split as the covers for the substructures. 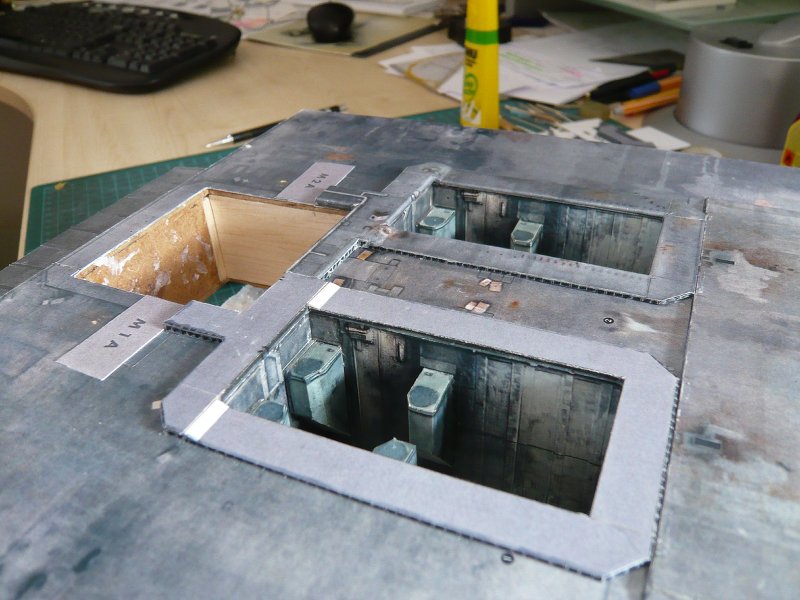 But this was not a major problem and done by the cutter, and then the SRB Blast Shields with their inclined transitions and the beginning of the Orbiter Blast Shield were covered up to the TSM's. 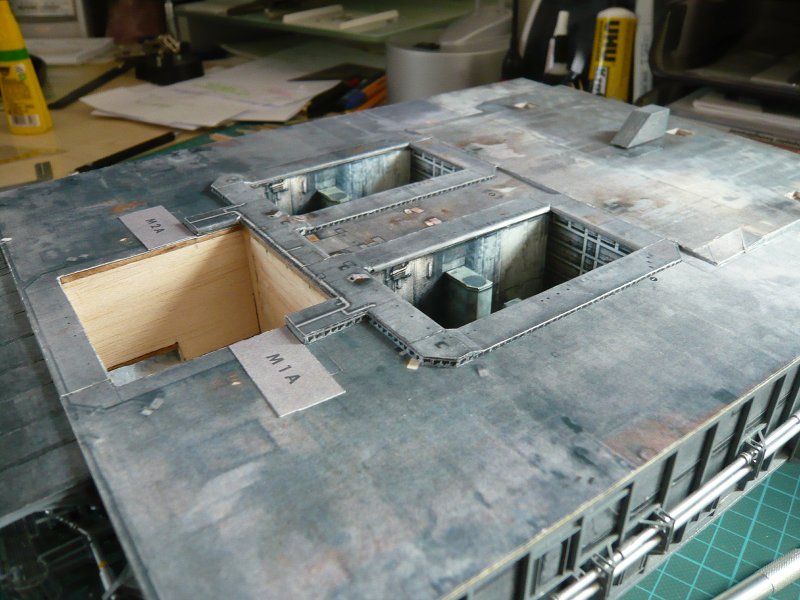 The front part of the Orbiter Blast Shield was relatively easy and just needed something be cut in front of the TSM's because the width so now is corresponding with the 1:144 dimension.  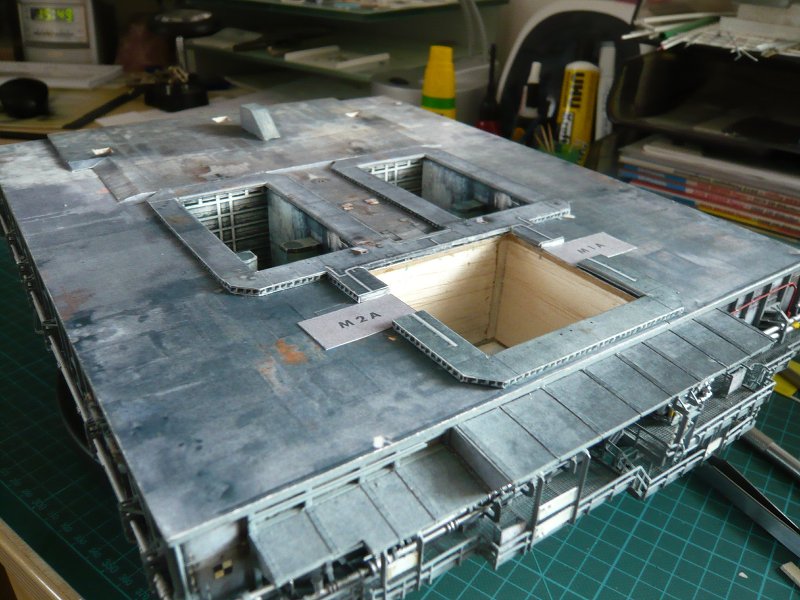 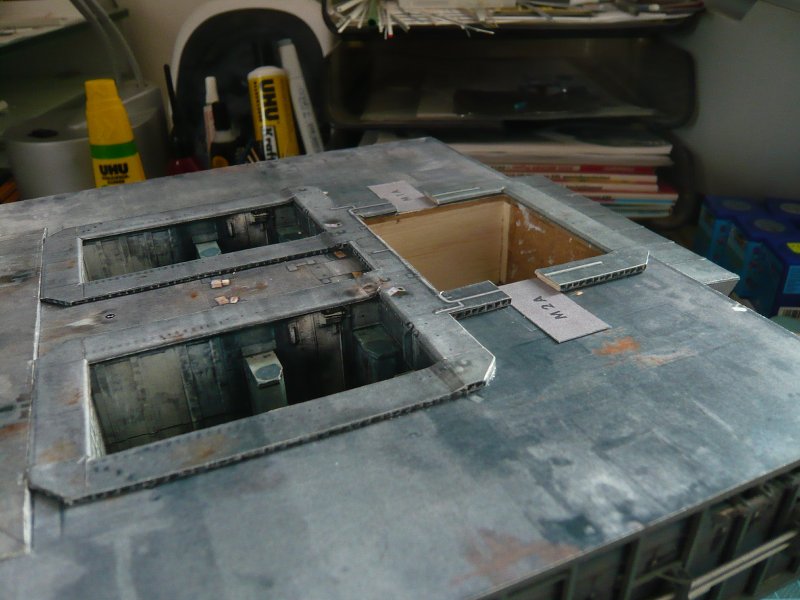 And finally, the TSM's were still tentatively put. 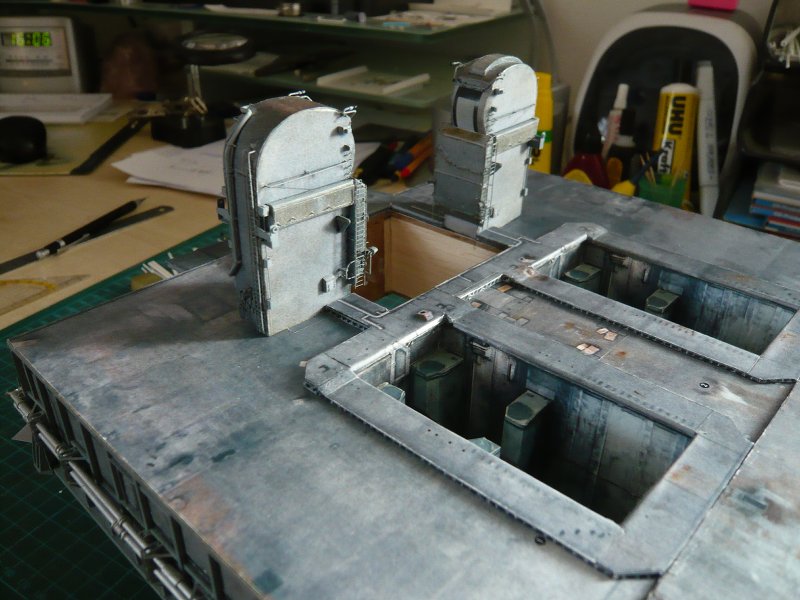 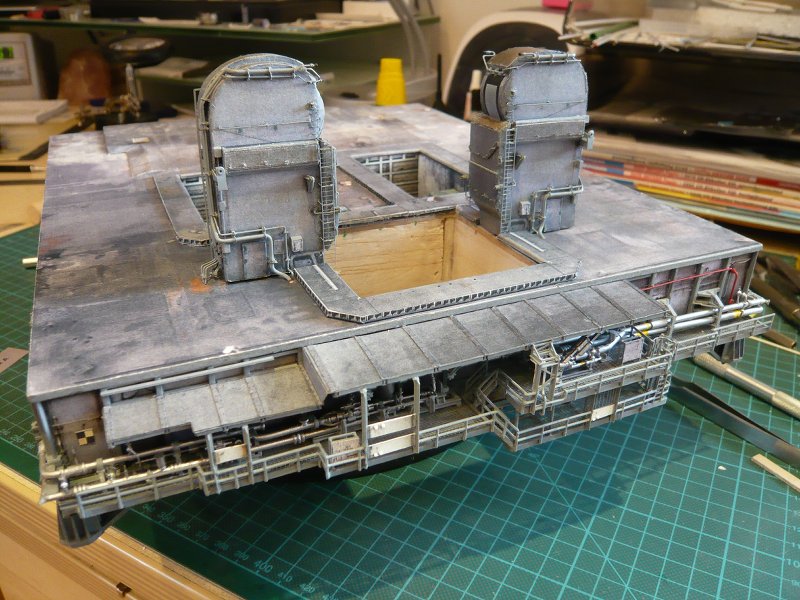 And so I can now continue the lining of the SSME hole, what's next turn.
__________________
Greetings from Germany Manfred Under construction: Launch Pad 39A with Challenger STS-6 (1:144)
|
|
#715
03-01-2015, 09:03 AM
|
||||
|
||||
|
Such stuff would perfectly fit as a prop in sci-fi movie some 30 years ago
__________________
Finished projects: RMS Mauretania 1/250; SS Canberra 1/250; Toyota Hilux Overdrive; Current projects: SS Michelangelo 1/250
|
|
#716
03-01-2015, 04:16 PM
|
||||
|
||||
|
Thanks for your nice words, but 30 years ago all this was already a reality, thank God, and we were able to experience it all.
__________________
Greetings from Germany Manfred Under construction: Launch Pad 39A with Challenger STS-6 (1:144)
|
|
#717
03-02-2015, 04:17 AM
|
||||
|
||||
|
Quote:
However I was thinking about similar to Godzilla movie :DD Original Japanese Godzilla movies are allays remembered for their "practical" (not CGI) effects.
__________________
Finished projects: RMS Mauretania 1/250; SS Canberra 1/250; Toyota Hilux Overdrive; Current projects: SS Michelangelo 1/250
|
|
#718
03-02-2015, 10:24 AM
|
||||
|
||||
|
Hello folks,
today is now to follow the lining of the SSME hole, and here we go to the back wall. First I glued at the top the strip with the indicated water nozzles, which I have reinforced something so that it matches as flush as possible with the lower edge of the Blast Shield coverage.  Then the round profiles (0.6 mm) were glued, first time only at the top, because the dabbing of CA with the acupuncture needle over the full length can not be done. 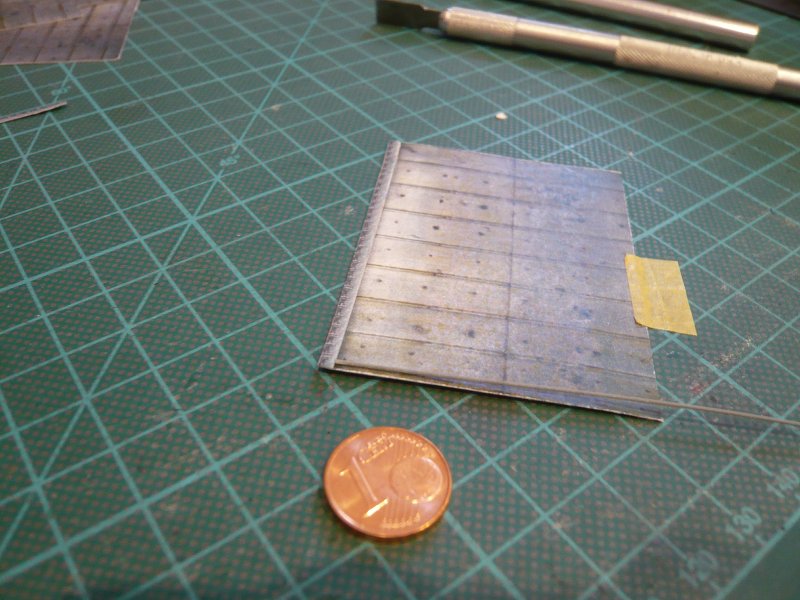 And then it went step by step to down, which took some time because I had to aim accurately. 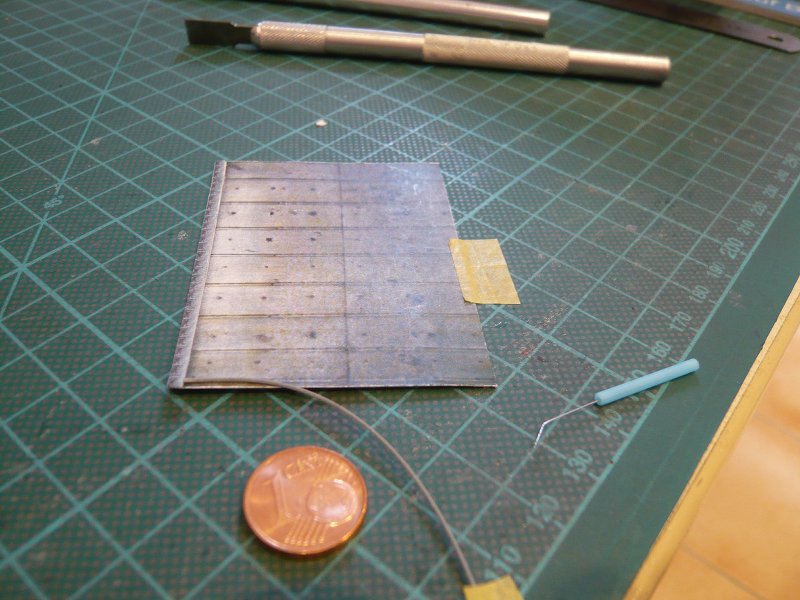 But by and by I had the hang of it, and it went forward. 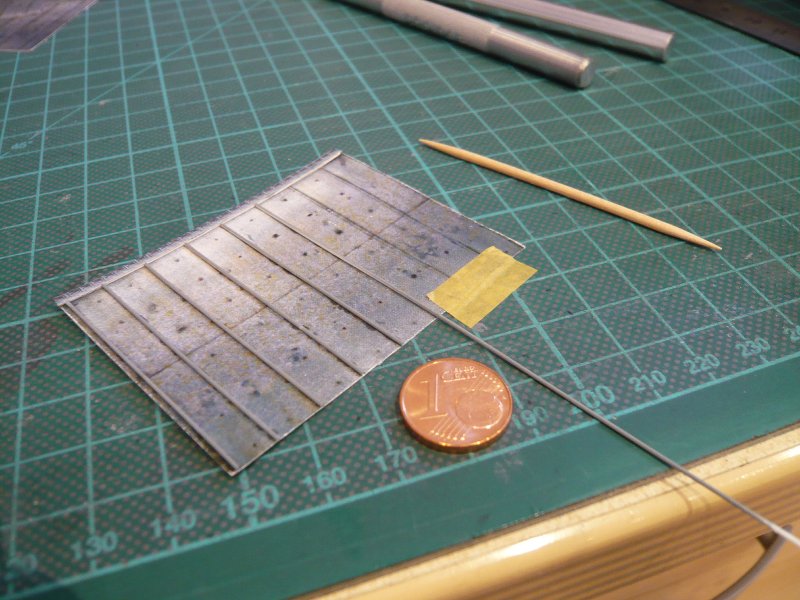 And so the back wall was then done ever, 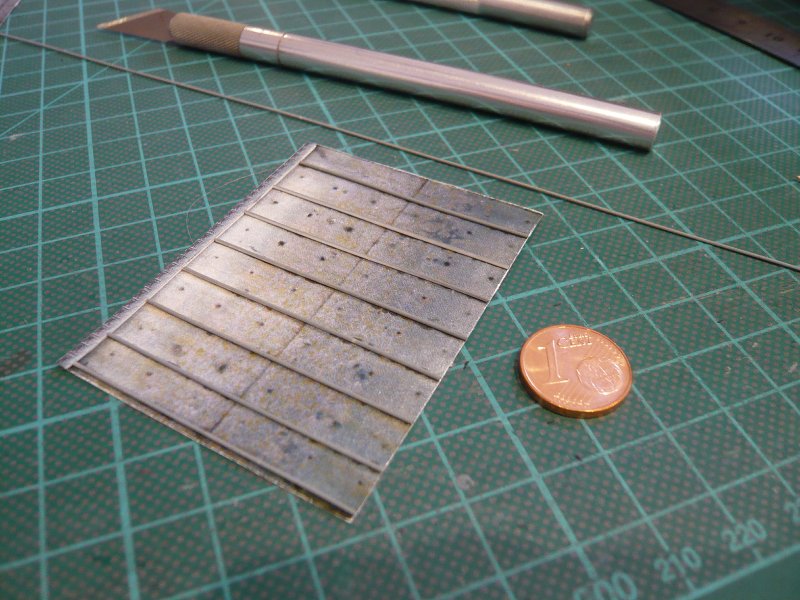 and could be glued after a few tests into the hole. This has worked quite well so far, and also the small pipe fits perfectly into the holes provided. Only missing the six nozzles. 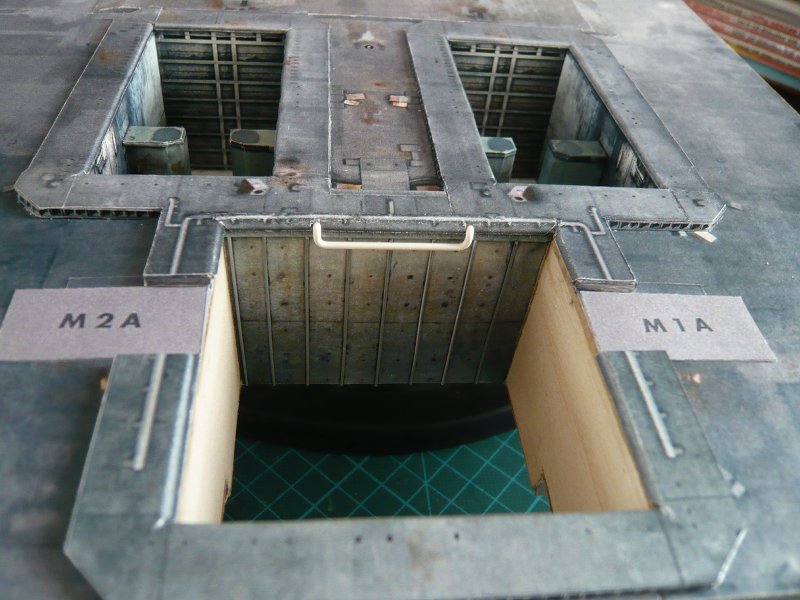 And thus, it can now proceed with the side wall on.
__________________
Greetings from Germany Manfred Under construction: Launch Pad 39A with Challenger STS-6 (1:144)
|
|
#719
03-05-2015, 07:40 AM
|
||||
|
||||
|
And with these nozzles I've done more today. First, I've still tried the blunt bonding of a thin profile (0.5 mm in diameter) with MEK, so this time without pre-drilling, but only once placed a stick and then painted with MEK.
 Well, that part is first stuck and also holds a light touch from. 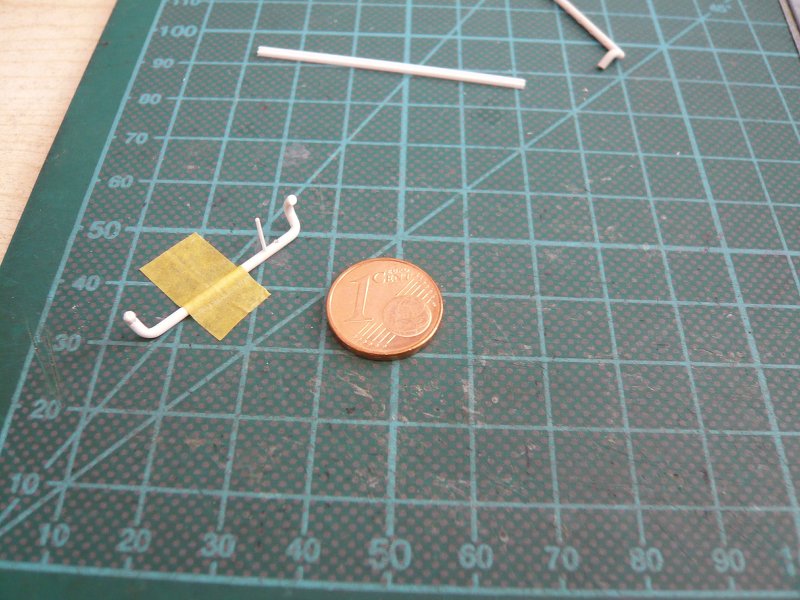 But due to the minimal cross-section the contact of course does not hold of a burden and broke off with the first bending.  Accordingly, that's no usable solution for these nozzle row, and so I will have to continue to pre drill. Accordingly, that's no usable solution for these nozzle row, and so I will have to continue to pre drill.  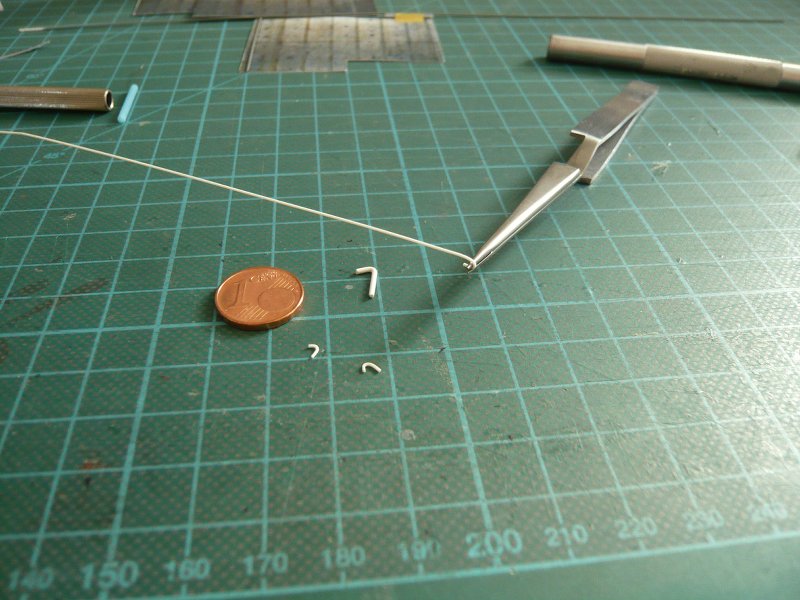 Well, but now I need the rest of the nozzle, and for that I have ever tried some bending variants. This is possible both in the tweezers, although it is not so easy to get added at the first attempt the short arc, because there are some broken. That's why I afterwards used a thin brass tube as bending aid and then cut the nozzle to the required size. In this variant, there is a bit more waste, but the bending is endured over the greater length but obviously better and there have been no breakthroughs. 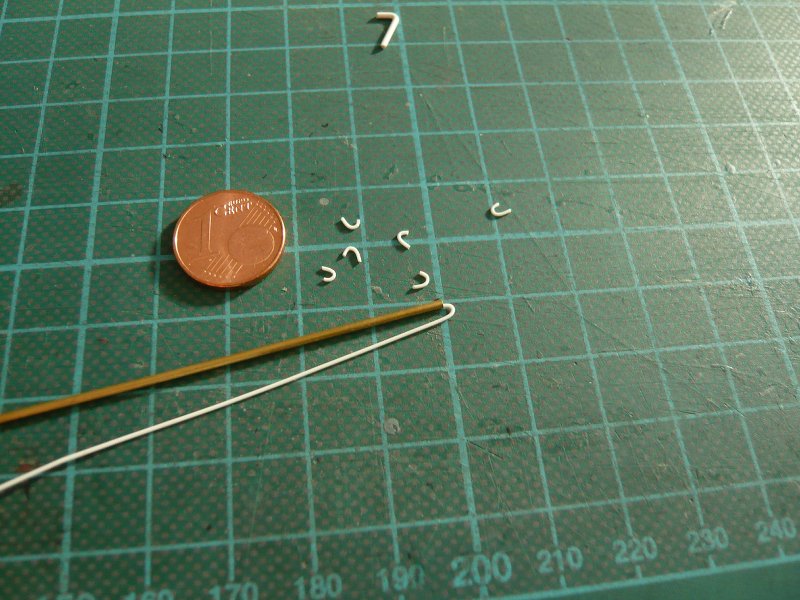 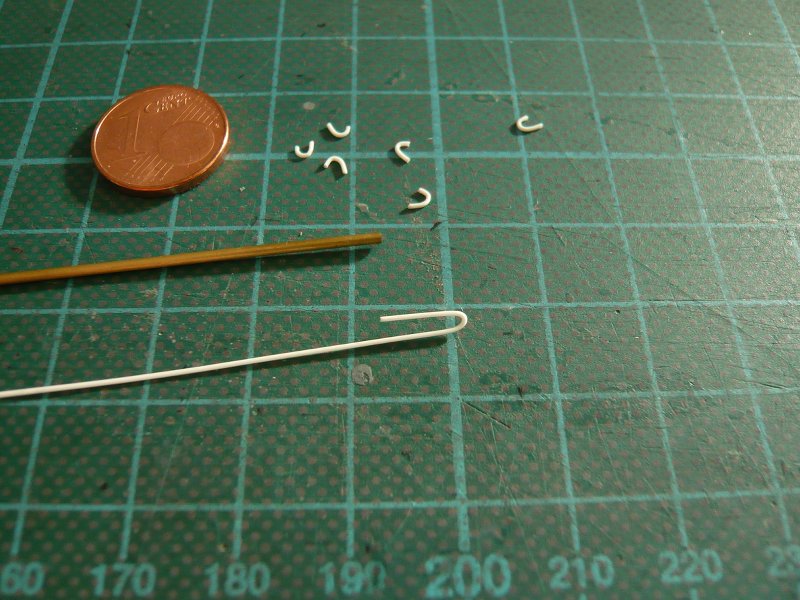 And here are provisionally inserted into the bores of the six nozzles. Although this already looks not bad, but is still not optimal. Firstly, the holes are not in a row and the last right distance is too great, and the other, the nozzles are still standing out a little too far, so what is correct yet. 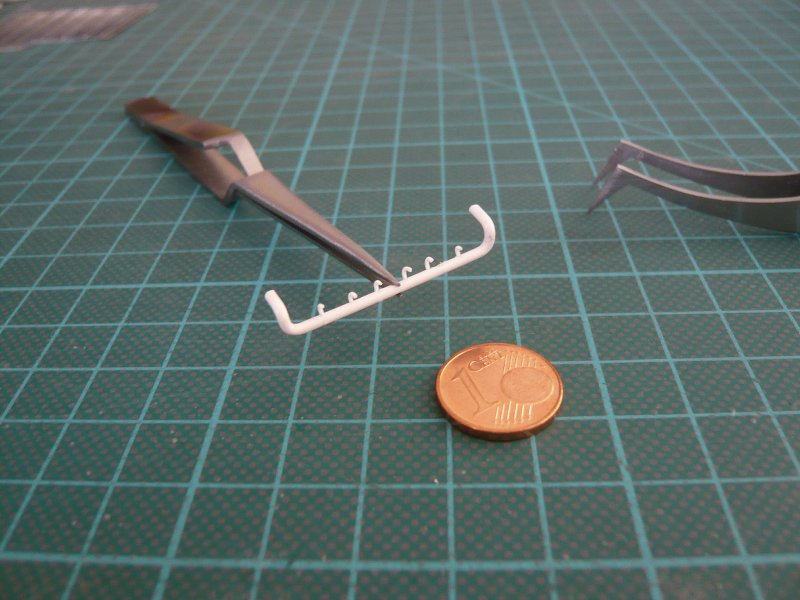 That's why I put the piece aside and went on with the left side wall of the lining. For the gluing of the rods I've also been thinking a different solution, since my CA dabbing with the acupuncture needle in the long run but was too stressful. That's why I used this time a Pattex-Special glue PXSM1. It is suitable for plastics, e.g. Polystyrene, ABS, Acrylic, Polycarbonate, hard PVC, etc., such as for wood and textiles and has a long dosing needle for precise dosage.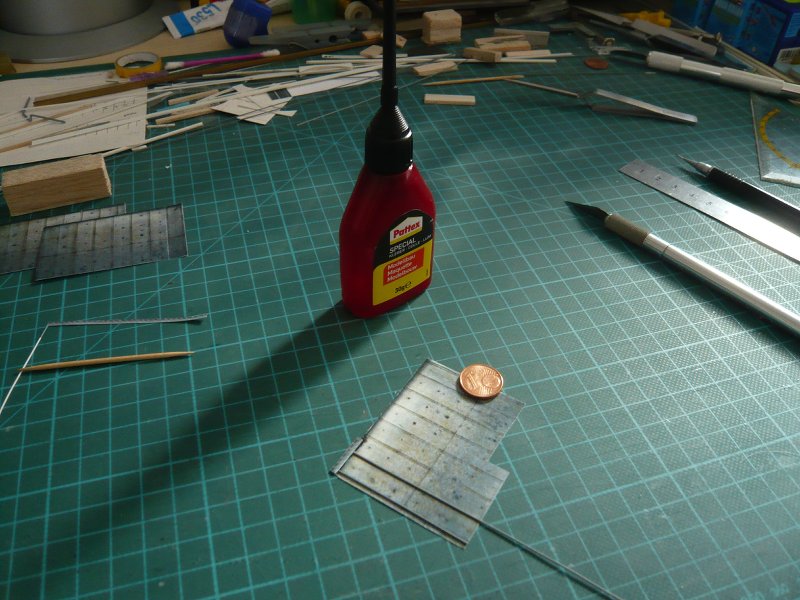 With this dosing needle (diameter 0.8 mm) I have placed each on a separate sheet of paper a thin line of glue, dipped the profile lengthwise and then glued to the lining, and the process is much easier and especially faster than before.  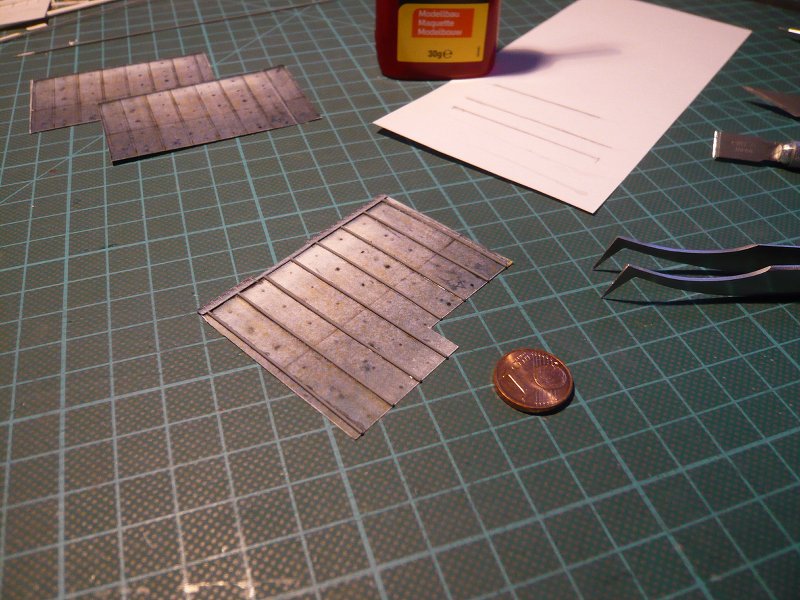 And so now was the left side of the hole also be covered, 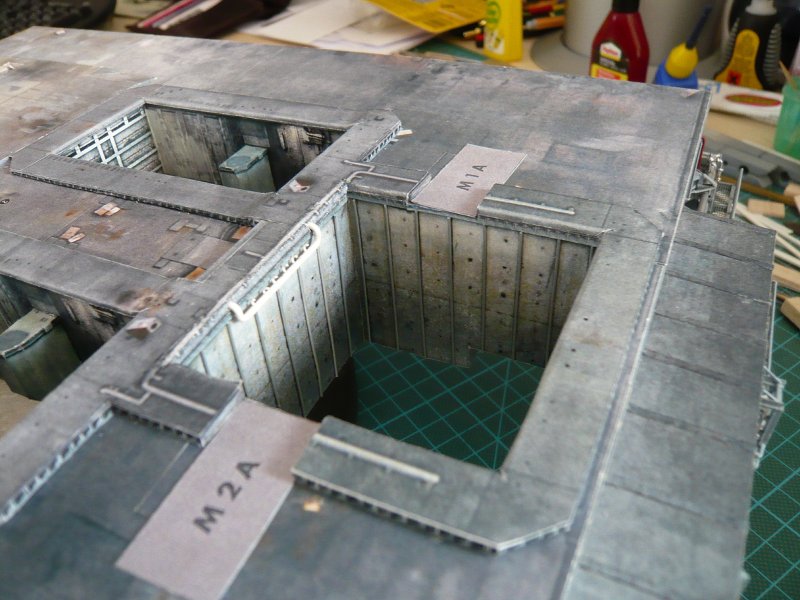 and the remaining two sides can follow.
__________________
Greetings from Germany Manfred Under construction: Launch Pad 39A with Challenger STS-6 (1:144) Last edited by spacerunner; 09-27-2016 at 03:47 PM.
|
 |
|
|


 Linear Mode

