


|
|
|
#1
 04-01-2024, 12:24 PM
|
||||
|
||||
|
Construction of the Space probe for NASA's Psyche Mission
Hello everybody,
first of all, I still wish everyone a Happy Easter.  During my trip to Florida, I witnessed the launch of a Falcon 9 Heavy for NASA's Psyche mission from Launch Pad 39A live from the Viewing point of the Apollo Saturn V Center on October 13, 2023, which was an unforgettable experience that I reported on in my German Travel report.  This Official NASA Trailer gives a very good overview of the Psyche spacecraft and its mission.  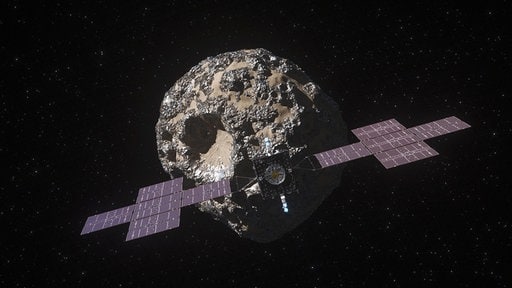 Source: NASA, JPL-Caltech, ASU As I mentioned at the end of the post, one could take along a simple paper kit of the Psyche spacecraft in the KSC Visitor Complex, which even contains short illustrated instructions, so putting it together shouldn't be rocket science.  But when I took a closer look at the kit and the instructions, 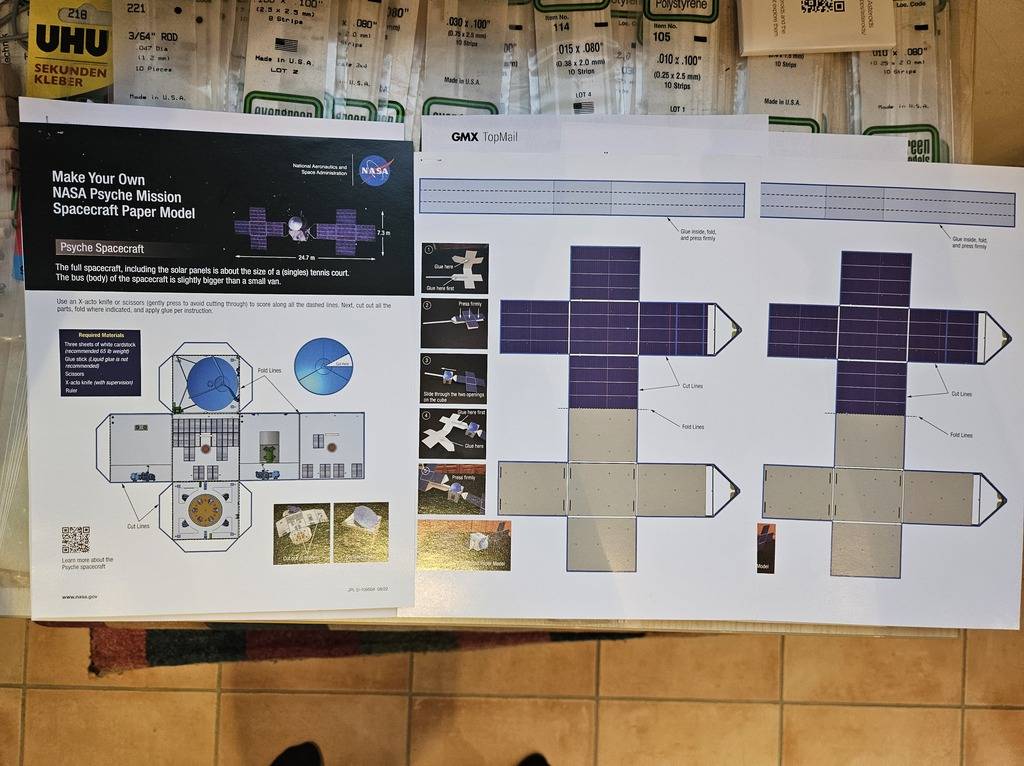 I immediately had some concerns about the 15 cm long Solar arrays and their point-like attachment to the space probe.  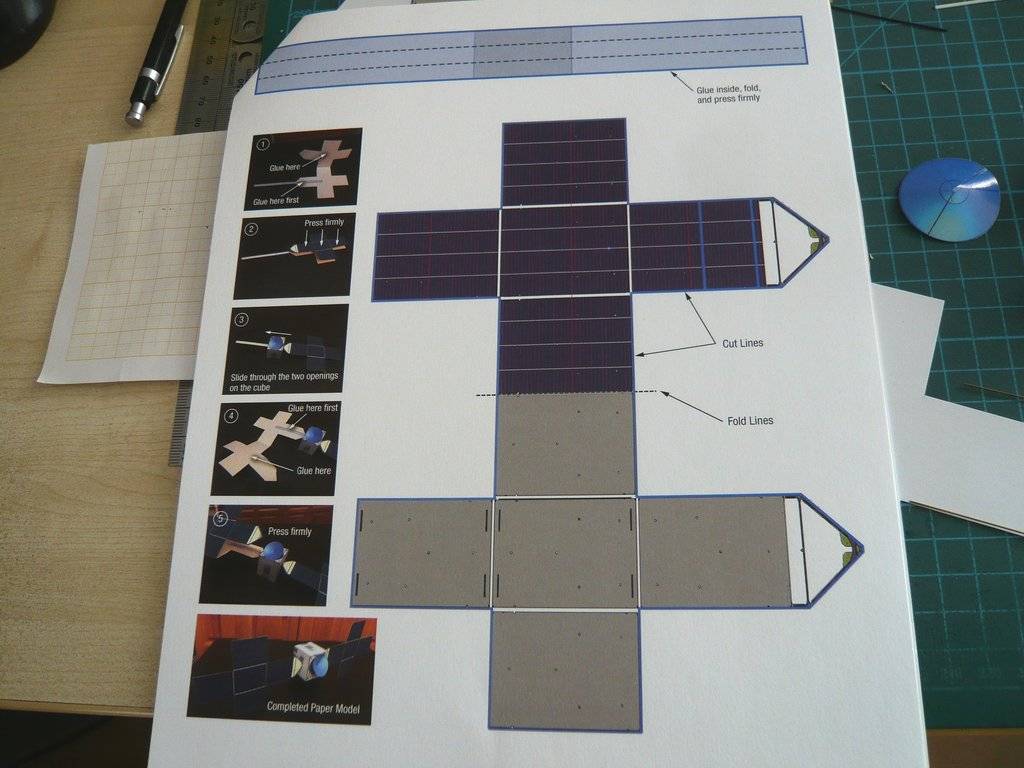 To do this, a folded and glued carrier strip (5 mm x 200 mm) should be glued in the middle of a folded panel and pushed through side slits through the space probe body, onto which then at the other side the other panel should be glued.  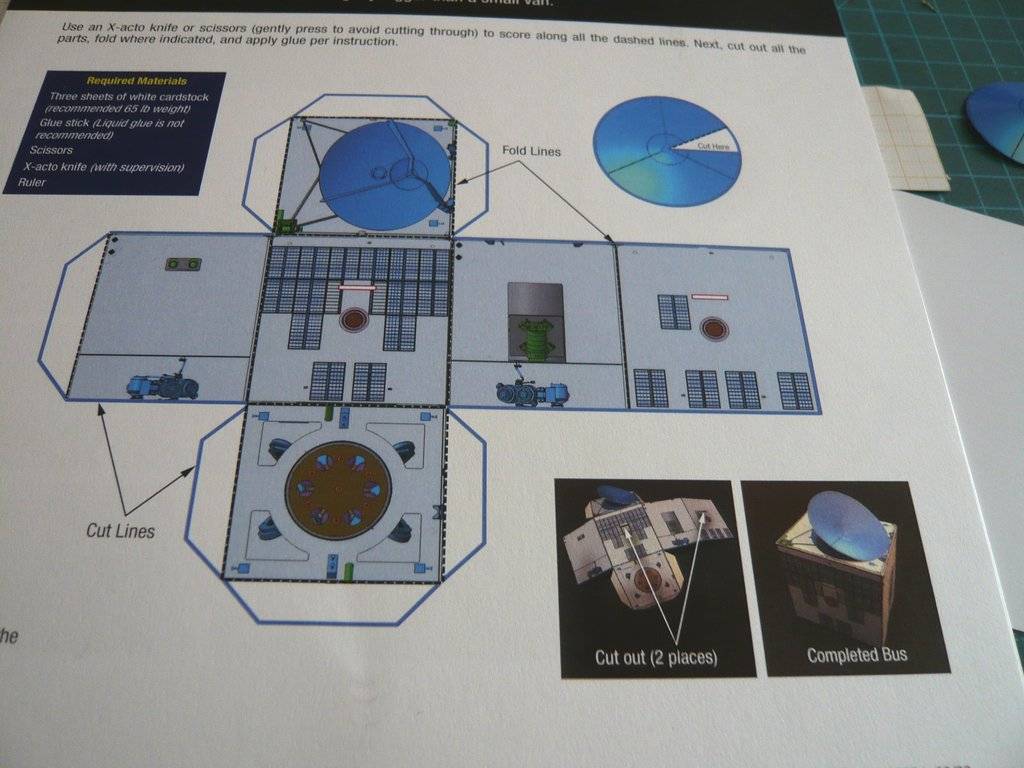 As you can see, the space probe only consists of six parts, which I first cut out of the slightly thicker cardboard. Then one can clearly see that for the intended assembly of the panels with the help of the carrier strip, the inner areas of the filigree struts must not be cut out in order to provide the whole thing with sufficient support,  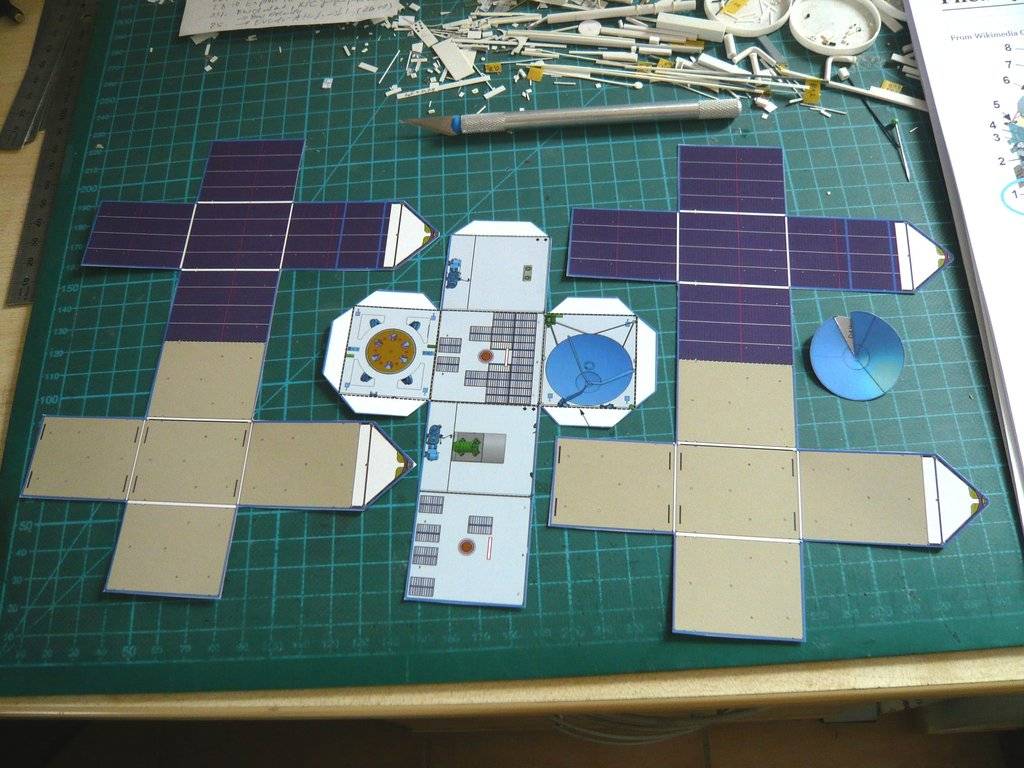 which of course doesn't correspond to the original and would be totally resist me, as one can see in the Trailer (2:00).  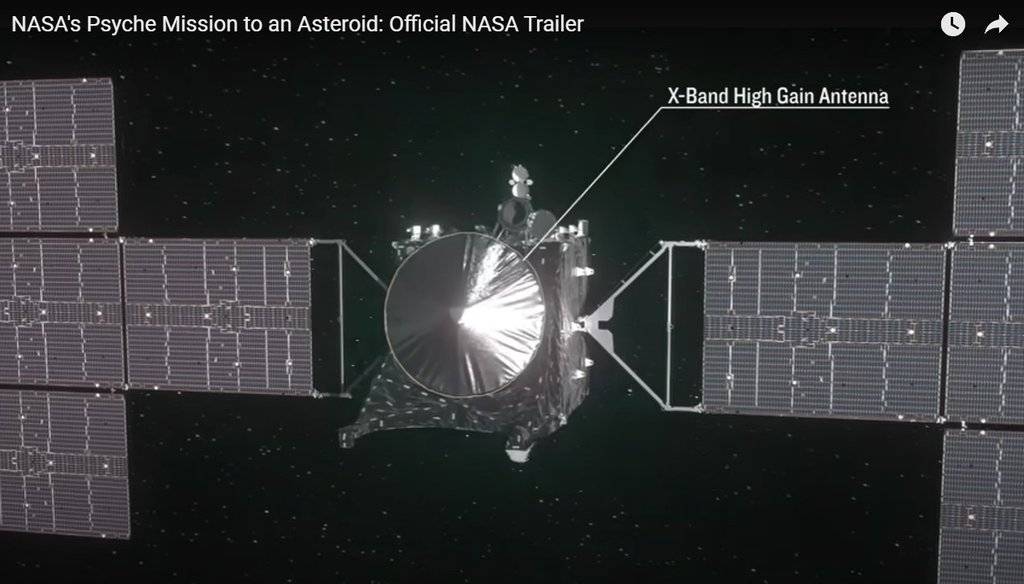 That's why I came up with a different, even though adventurous solution,  that should come closer to the original. The only problem is the virtually point-like, stable attachment of the widely overhanging panels to the space probe walls. that should come closer to the original. The only problem is the virtually point-like, stable attachment of the widely overhanging panels to the space probe walls.  Of course, it would be ideal if I made the struts out of thin wire, which is why I first cut out the spaces,  but what was quite tricky. but what was quite tricky.  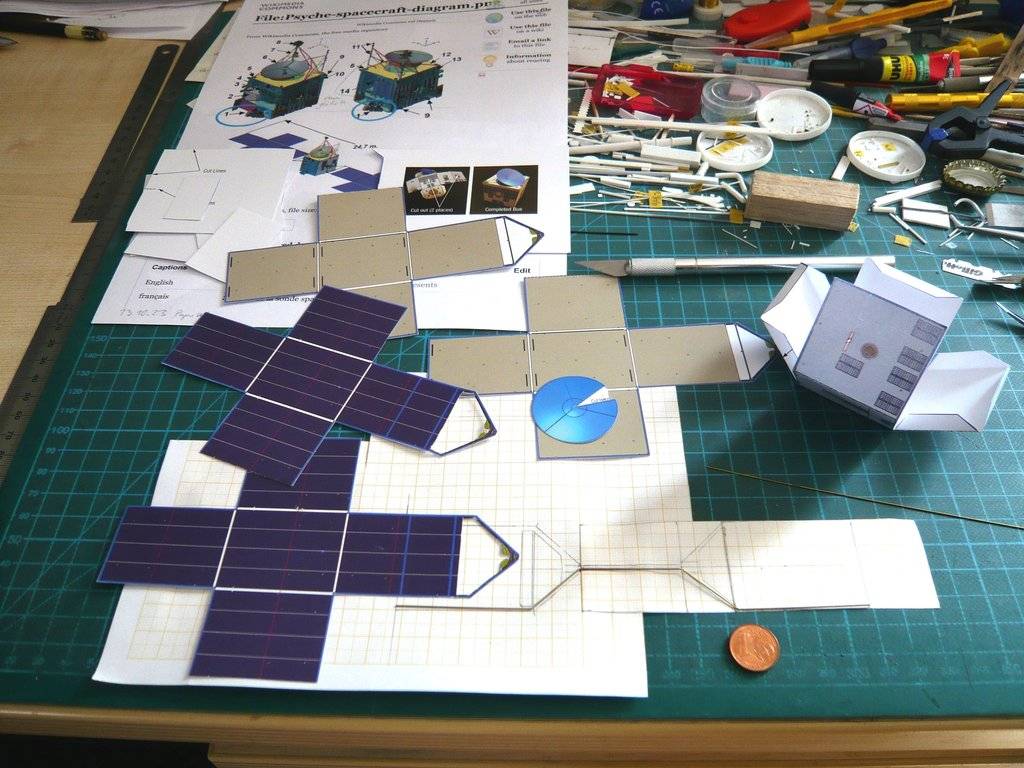
__________________
Greetings from Germany Manfred Under construction: Launch Pad 39A with Challenger STS-6 (1:144) 
|
| Google Adsense |
|
#2
04-01-2024, 12:25 PM
|
||||
|
||||
|
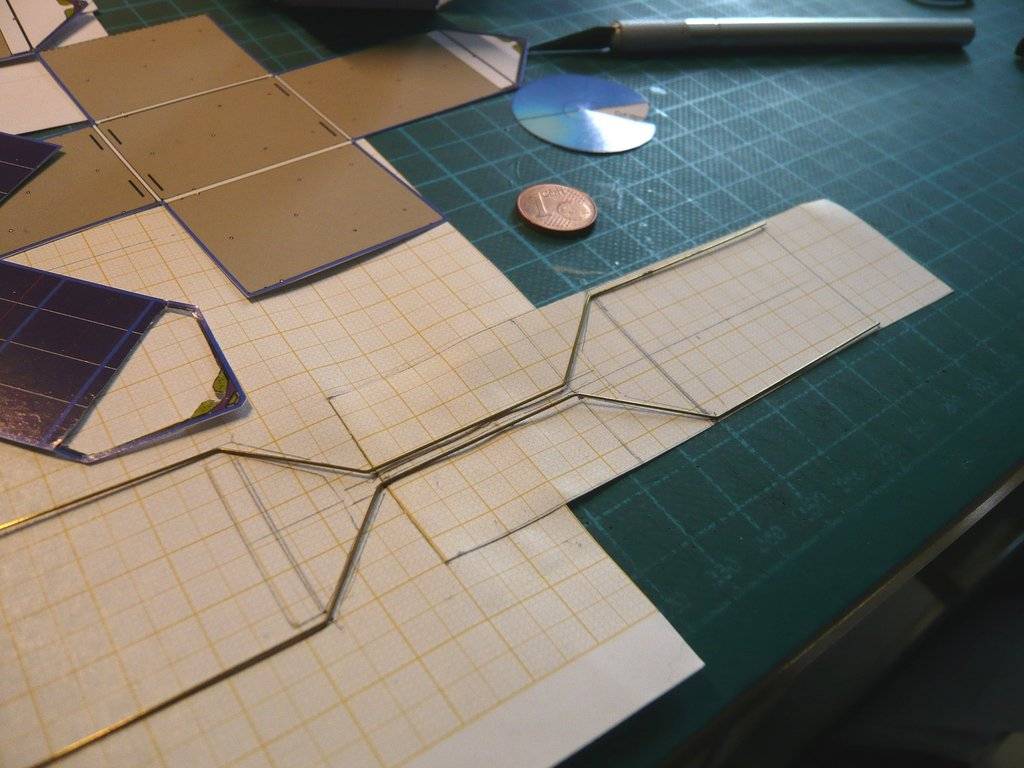
To bend the struts, I first had to make a sketch, which I then used to bend brass wire (Ø 0,5 mm) into a double Z shape. I could then first glue these struts on one side of each of the separate panels and push them through the side slots through the probe cube. Separate panels because the relatively stiff cardboard would probably be difficult to glue with inserted struts.
  Then I've still thought about a Balsa support that is glued to the interior of the space probe, onto the top of which the middle parts of the struts are glued to ensure that they are held in place adequately. 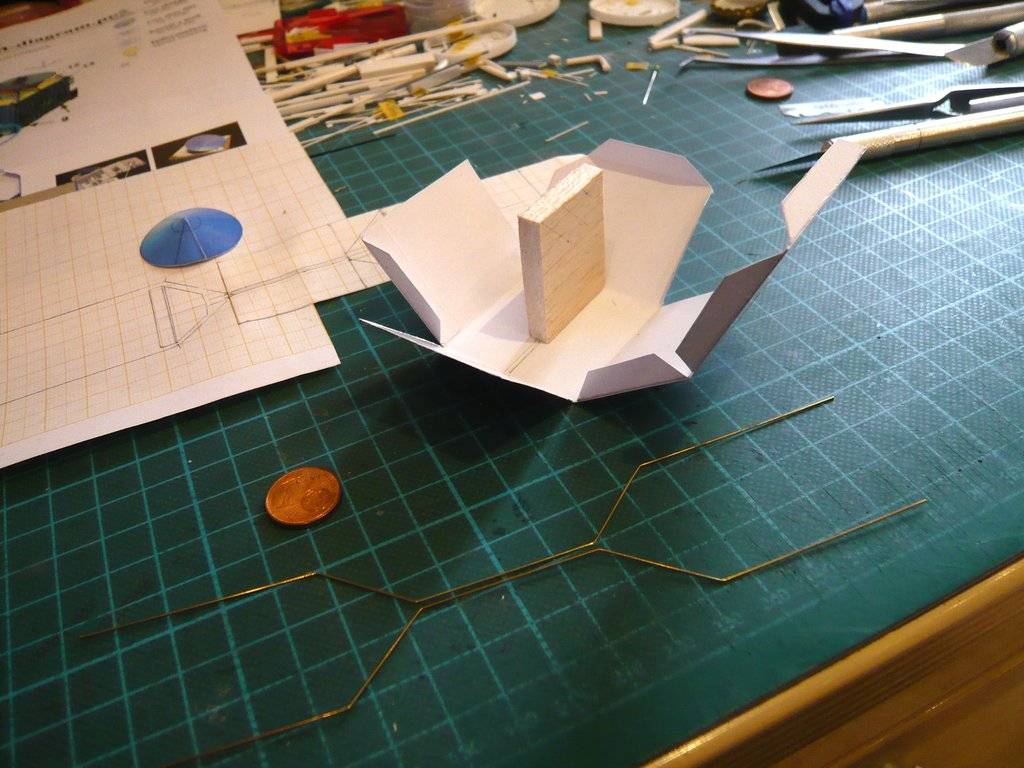 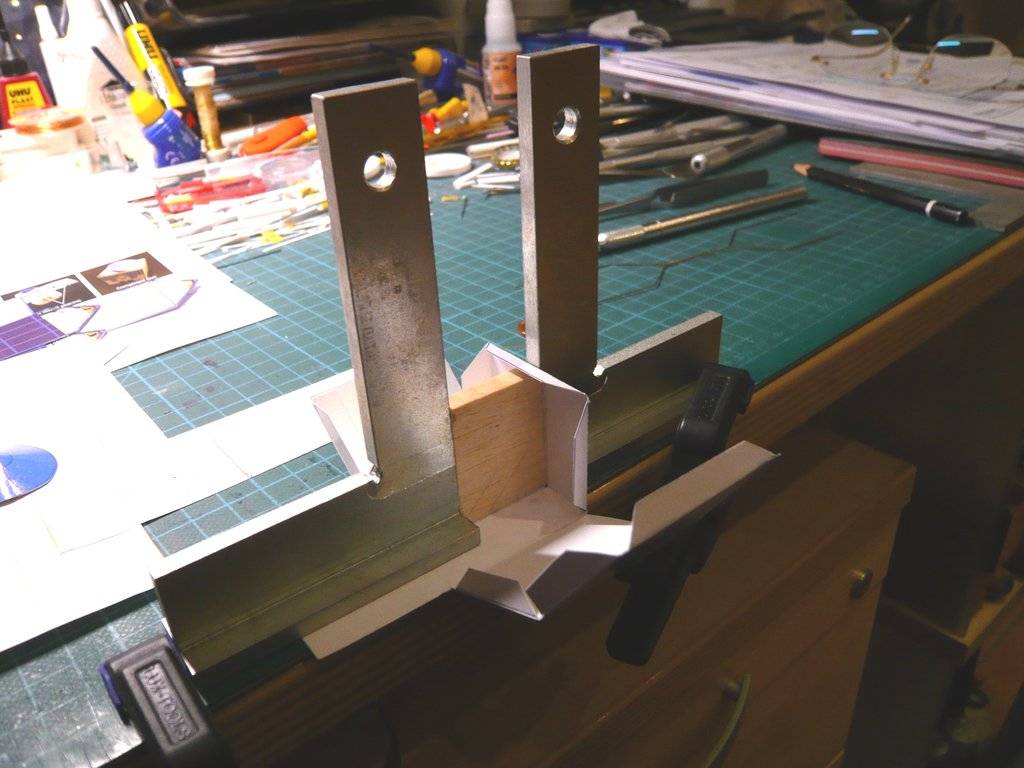 Now I just have to think of a clever sequence of assembly steps,  whereby I can thread the struts of the panels glued on one side individually and one after the other and only then can glue them to the panel parts on the other side, before I can finally glue the space probe cube. whereby I can thread the struts of the panels glued on one side individually and one after the other and only then can glue them to the panel parts on the other side, before I can finally glue the space probe cube.  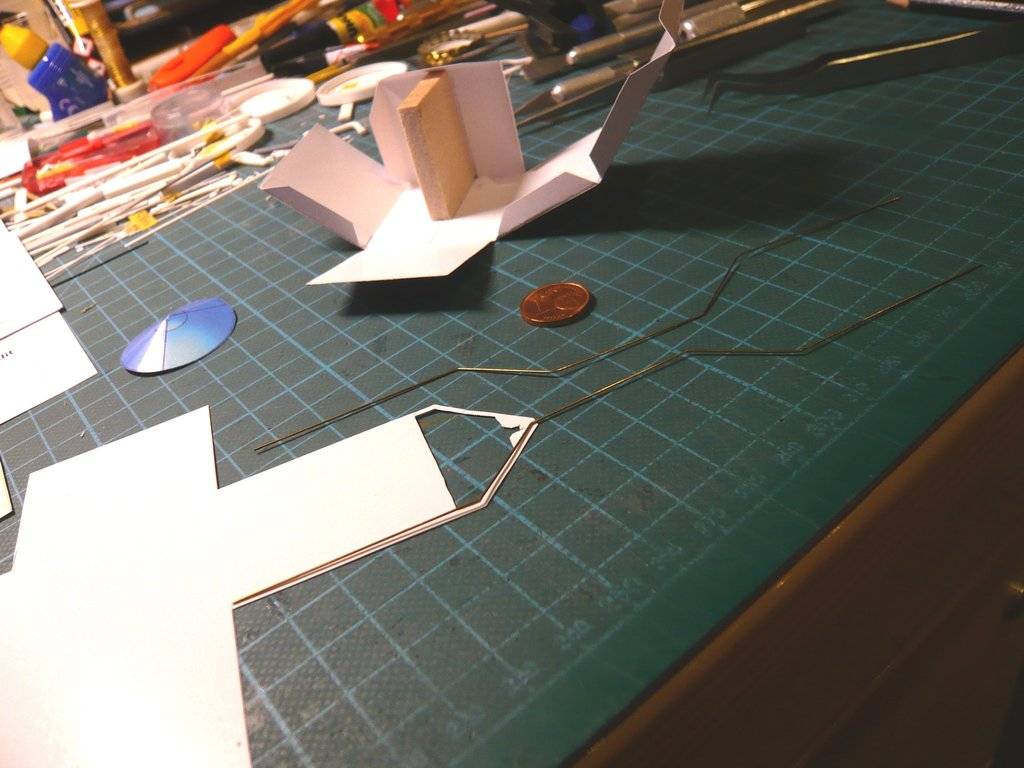 If the whole bizarre structure had sufficient stability and rigidity, I could perhaps even leave out the paper strips of the rod systems that are actually too wide, which would then be even closer to the original.  As one can see, a lot of things are still formulated in the subjunctive, therefore Trial & Error, let's see what can be done.  
__________________
Greetings from Germany Manfred Under construction: Launch Pad 39A with Challenger STS-6 (1:144)
|
|
#3
04-01-2024, 12:46 PM
|
||||
|
||||
|
Way too cool!
__________________
Replicating Excellence-> https://ecardmodels.com/vendors/replicating-excellence
|
|
#4
04-01-2024, 01:58 PM
|
||||
|
||||
|
Thanks for looking in on me.
 Nothing is impossible.
__________________
Greetings from Germany Manfred Under construction: Launch Pad 39A with Challenger STS-6 (1:144)
|
|
#5
04-02-2024, 08:19 PM
|
||||
|
||||
|
Great subject for the build!
My compliments on the detail of your thread when it comes to construction steps...
__________________
"One does not plow a field by turning it over in his mind..."
|
| Google Adsense |
|
#6
04-03-2024, 07:24 AM
|
||||
|
||||
|
Thanks DC for your nice words
and simply stay tuned.
__________________
Greetings from Germany Manfred Under construction: Launch Pad 39A with Challenger STS-6 (1:144)
|
|
#7
04-04-2024, 04:27 PM
|
||||
|
||||
|
Hello everybody,
let's continue with the Solar panel on the other side, whereby I changed the assembly sequence a little bit. First I glued the longer leg of the brass strut up to the bend onto the underside of the panel.  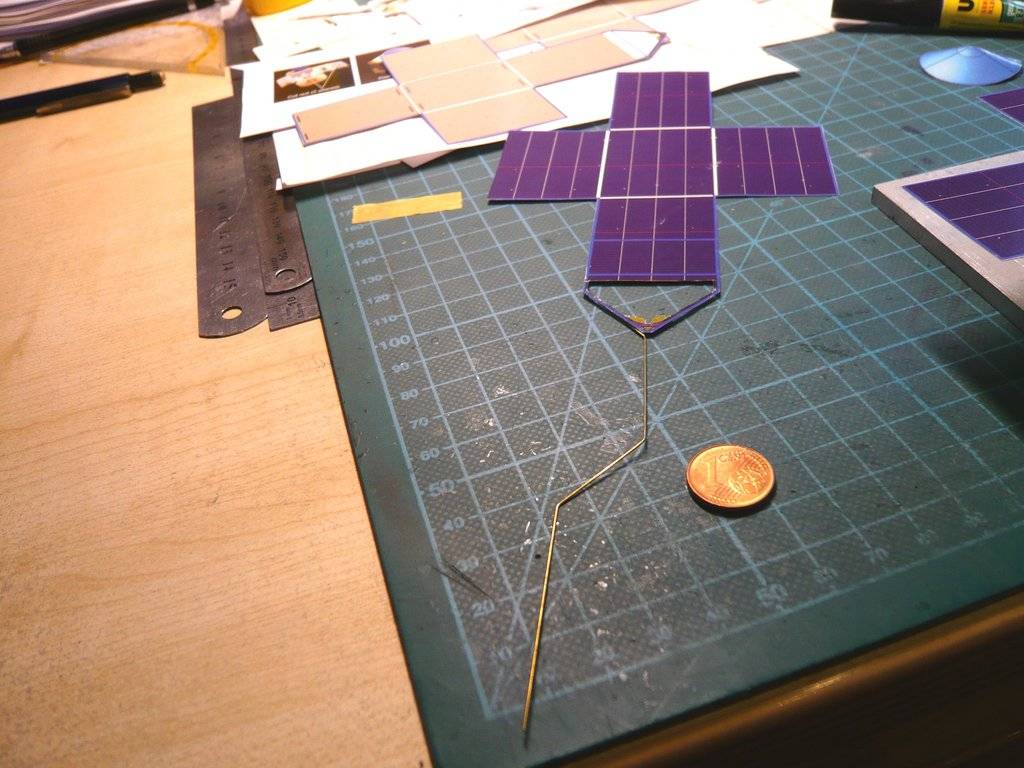 And then it went to the Styrofoam platform, in order to thread the strut, hoping that everything would work.  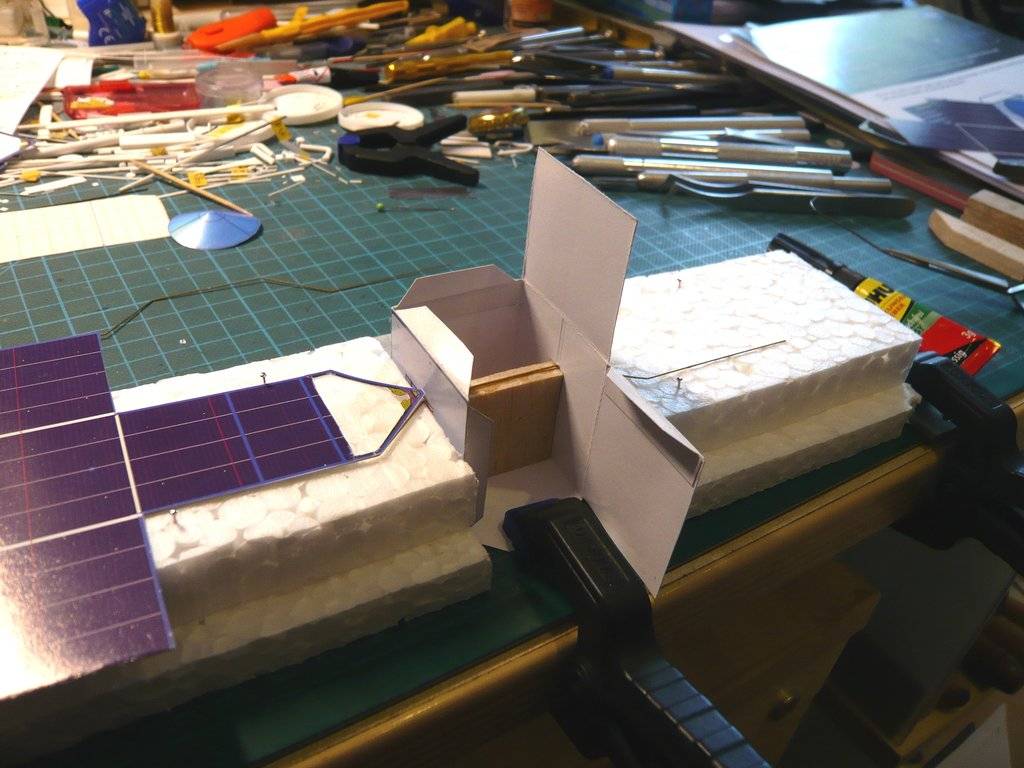 To ensure the panel had a sure laying, I had to put another block of Styrofoam underneath. I then carefully threaded the front end of the brass strut with tweezers a few millimeters into the tiny opening on the side wall,  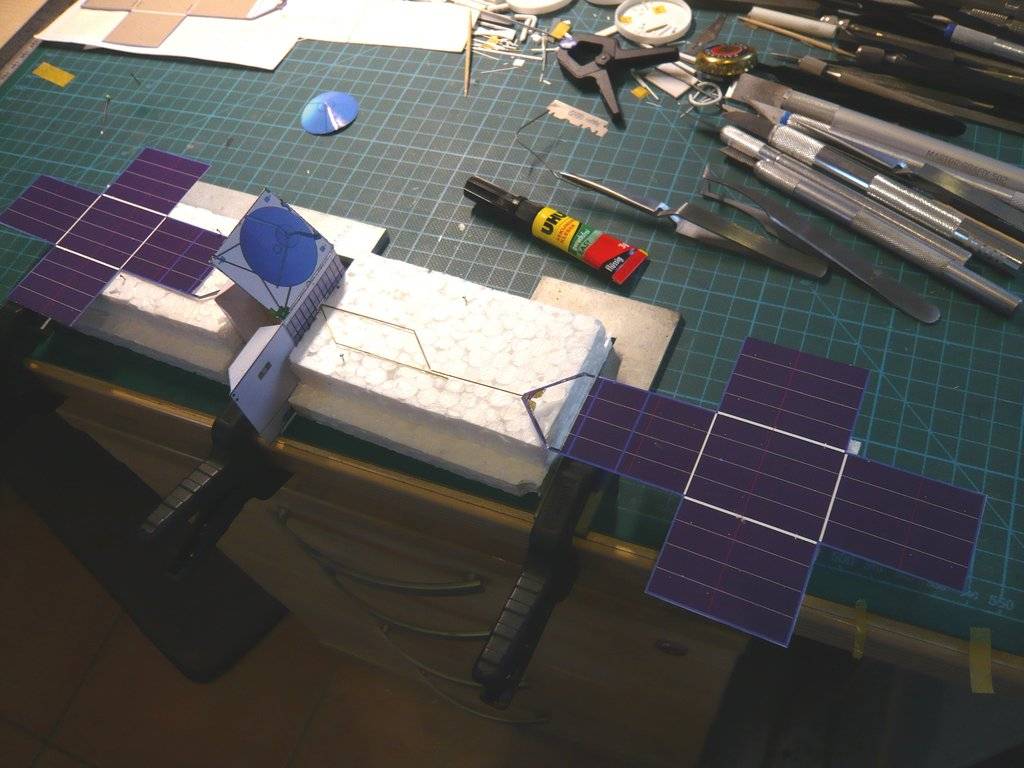 then slowly pulled across the Balsa support to the other side wall and carefully pushed through the opening there until it could be seen on the other side. So far so good! 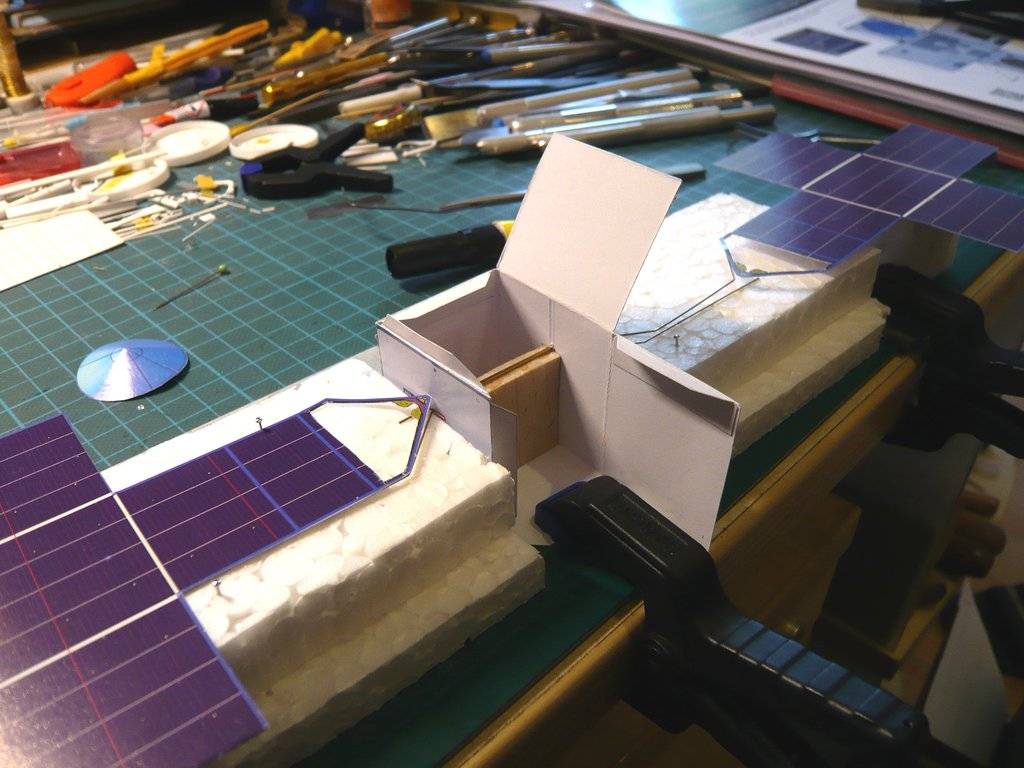 After that, however, it became increasingly difficult as the bend in the brass support had to go through the wall and I had to be extremely careful not to bend everything,  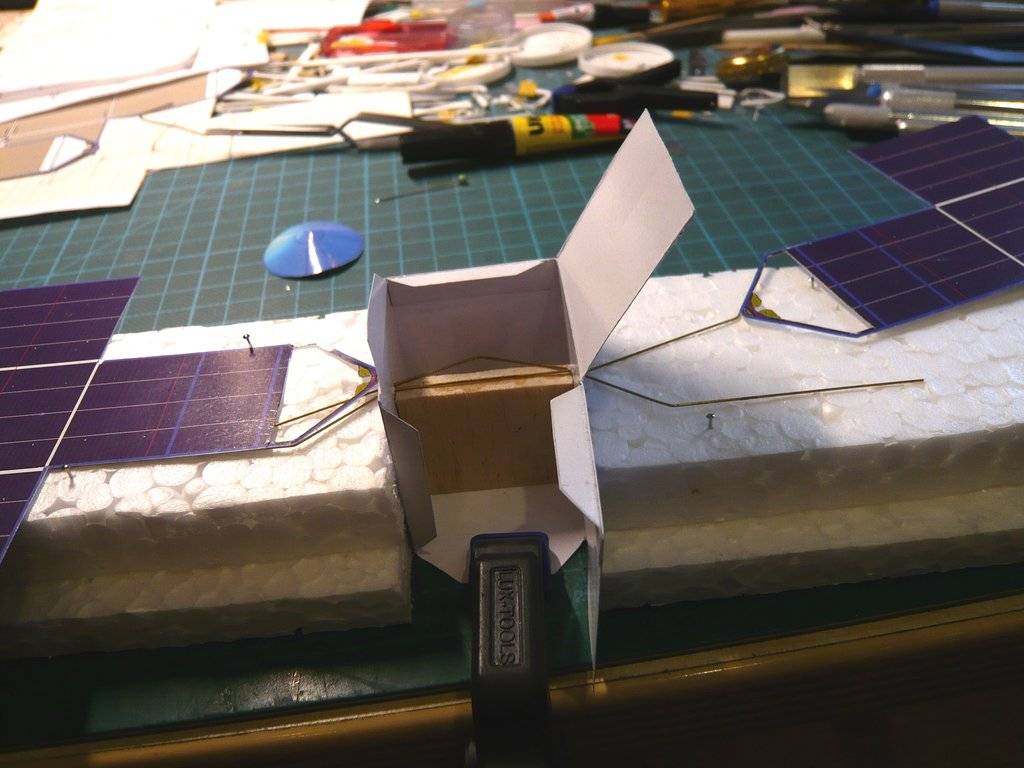 especially since the front end behind the other wall had also to be pulled at the same time, which was quite tricky. 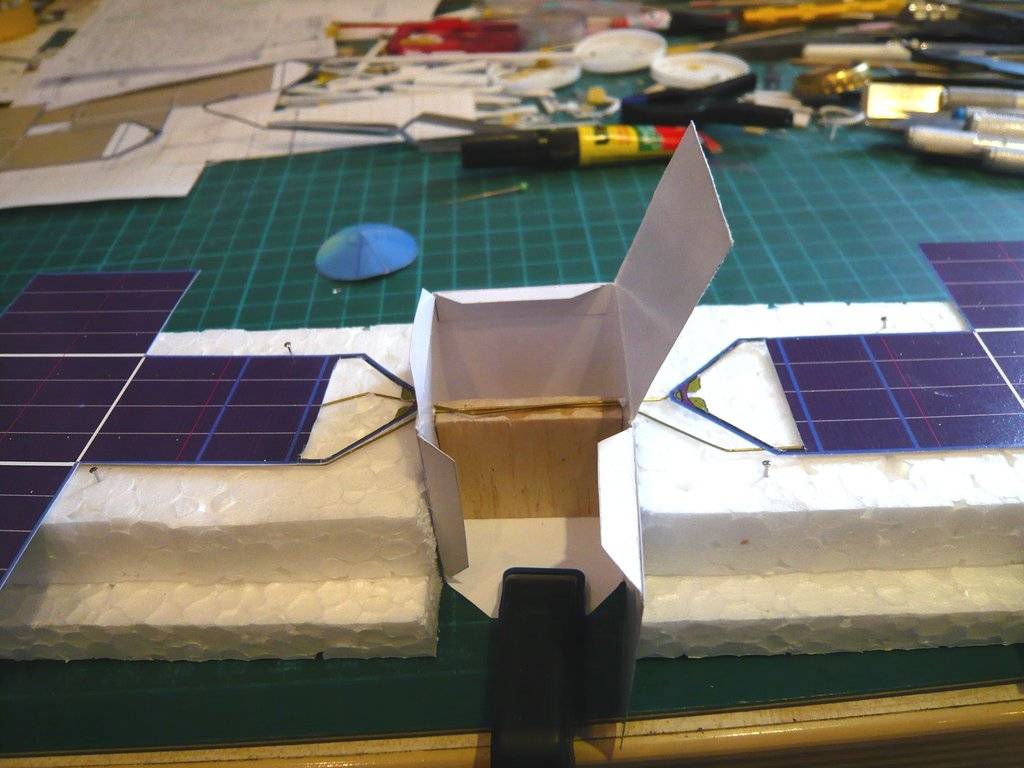 But finally I have succeed in doing it, 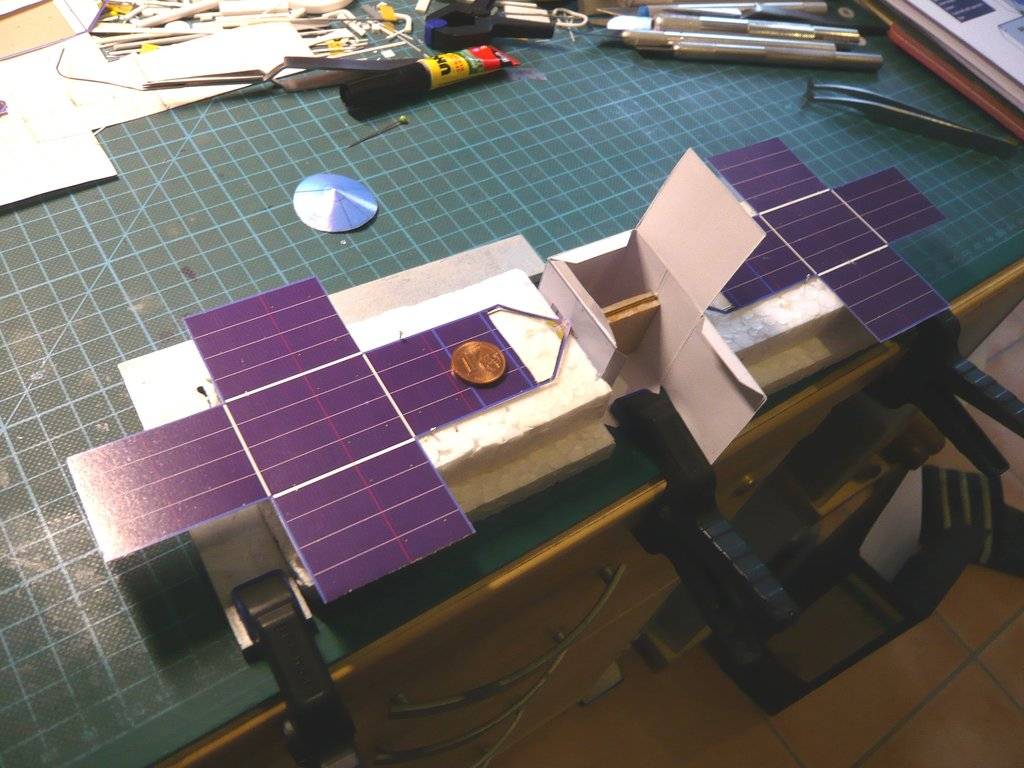 and was able to take a little breather. 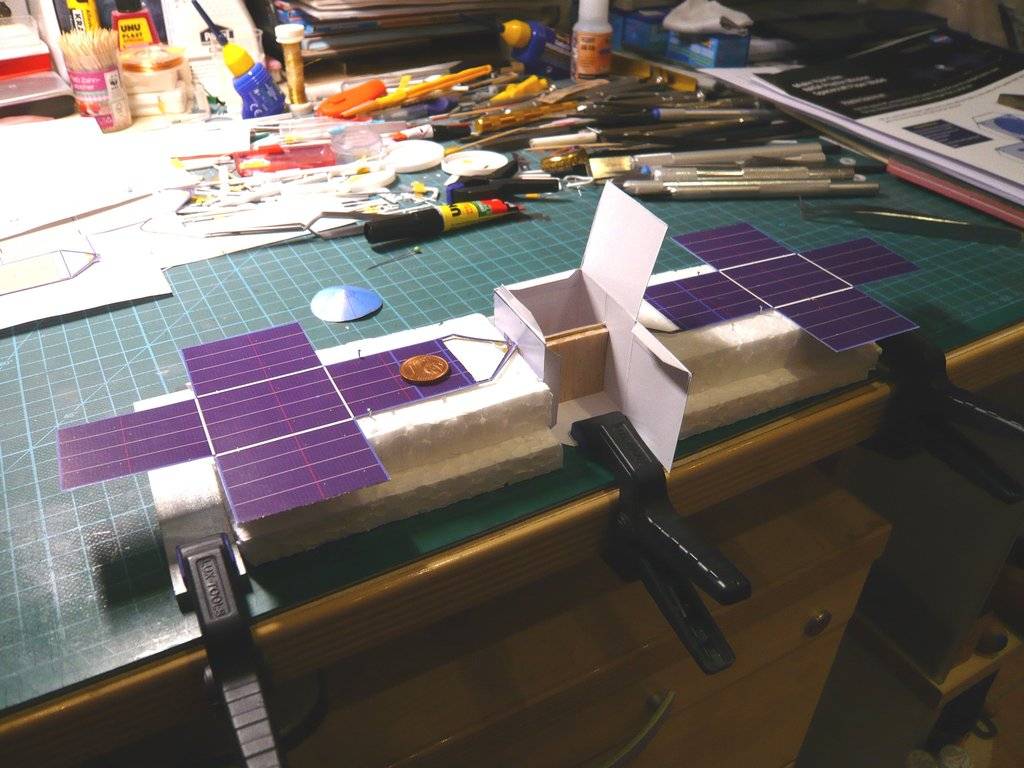 Then I still glued the wires to the Balsa support on both sides with UHU CA. I then still glued a Channel profile (1,5 mm x 3 mm) onto it to make sure that the glued wires would not get loose if I would have to bent the finally glued panels a little for position correction. 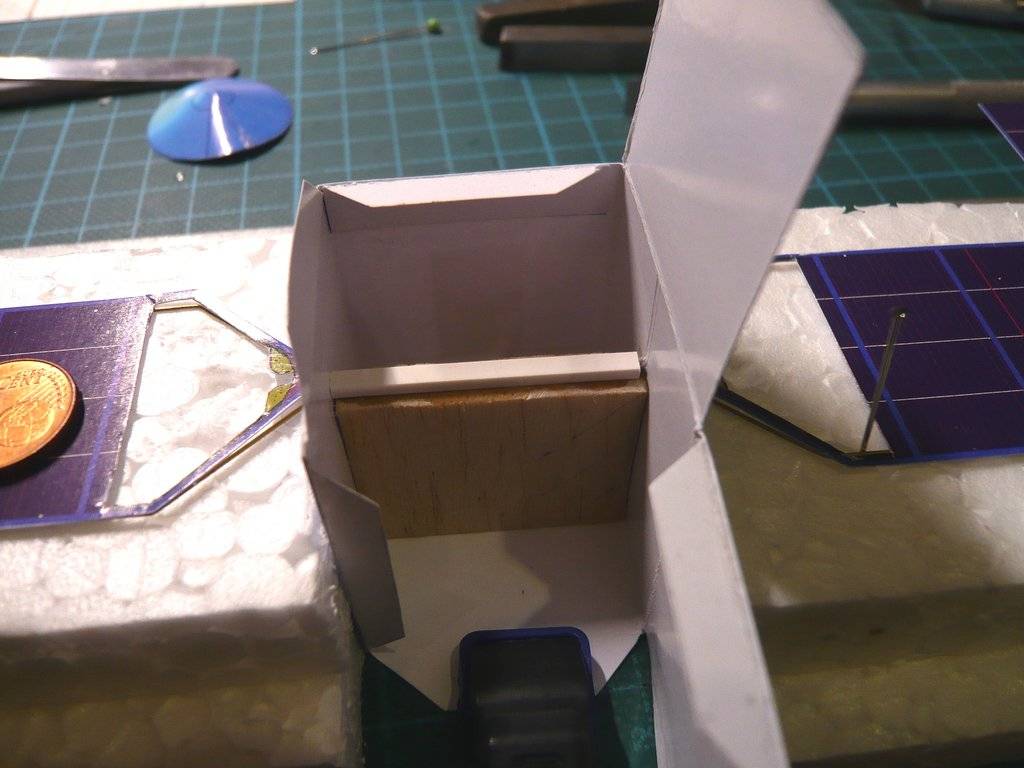 Tomorrow the steps 6 and 7 can also follow now, whereby the last side wall and the ceiling will be glued. And then I'm already excited to see what everything will look like when I turn the space probe over to glue the struts onto the undersides of the panels too.
__________________
Greetings from Germany Manfred Under construction: Launch Pad 39A with Challenger STS-6 (1:144)
|
|
#9
04-05-2024, 01:49 AM
|
||||
|
||||
|
Thanks Dave Pete,
seeing a Falcon 9 Heavy launch live was a spectacular experience.
__________________
Greetings from Germany Manfred Under construction: Launch Pad 39A with Challenger STS-6 (1:144)
|
|
#10
04-05-2024, 05:10 PM
|
||||
|
||||
|
Hello everybody,
sorry, but my original second post with my tricky assembly order somehow wasn't saved,  which is why I wanted to add it at the second place, what is unfortunately impossible in the PM Forum, don't know why? which is why I wanted to add it at the second place, what is unfortunately impossible in the PM Forum, don't know why?  Therefore I can only add it here, after my original 3rd post. So please read again.
__________________
Greetings from Germany Manfred Under construction: Launch Pad 39A with Challenger STS-6 (1:144)
|
| Google Adsense |
 |
| Thread Tools | |
| Display Modes | |
|
|


 Linear Mode

