


|
|
|
#2321
 01-22-2021, 03:56 AM
|
||||
|
||||
|
I fully agree with you, Becky, sad but unfortunately true ...
 But life, and my project still goe on!  
__________________
Greetings from Germany Manfred Under construction: Launch Pad 39A with Challenger STS-6 (1:144) 
|
|
#2322
01-22-2021, 05:42 PM
|
||||
|
||||
|
Hello everybody,
so, now I have to slowly pull myself out of my holiday hole by force to get going again.  At that I first had to think myself about wherewith to start or what I had been doing on the side in the meantime and had not yet shown it. At that I first had to think myself about wherewith to start or what I had been doing on the side in the meantime and had not yet shown it.  And that concerned once again the production of the little lamps for the Crawler-Lighting,  for which we had thought of a suitable thin transparent Shrinking tube as a lamp body in a small ferrule in the old year.  And with the three patterns (Ø 2 mm) that my friend Arno (McPhönix) had sent me immediately, I started experimenting right away, 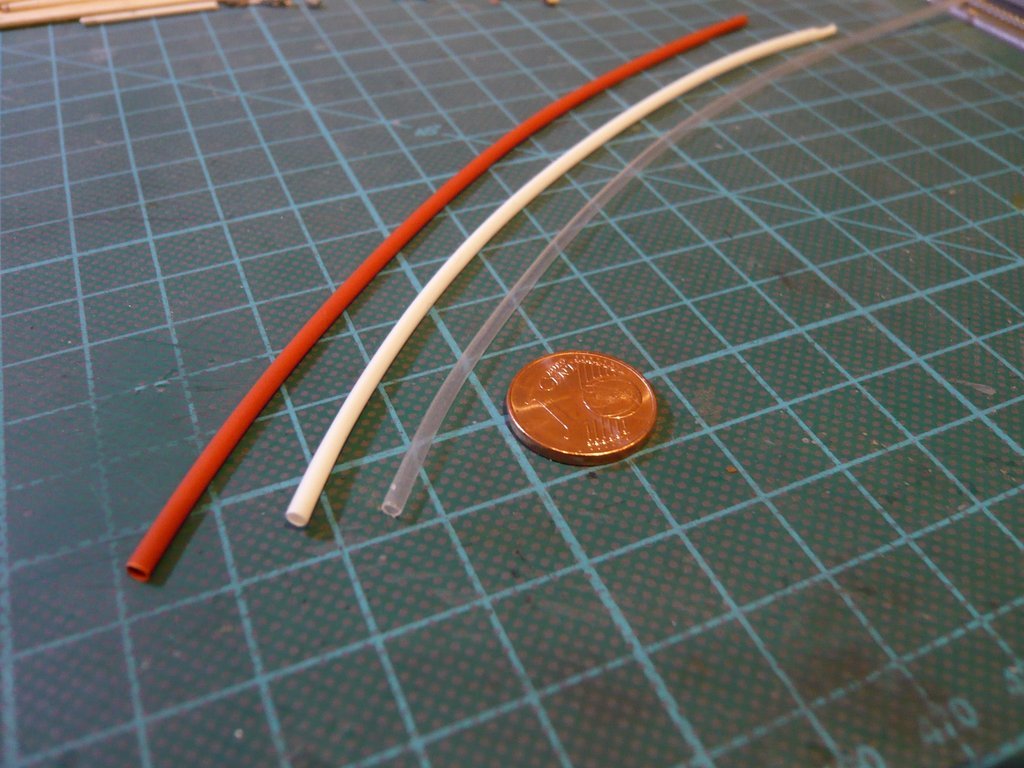 by inserting two Pure White LEDs (0401) into the transparent and the white tube, whereat the overexposure in the photo again appears much stronger than one can actually see. However, at these first images, the current regulator of the current bank was fully turned up (8 mA), which is much too high, as we had already recognized at that time.  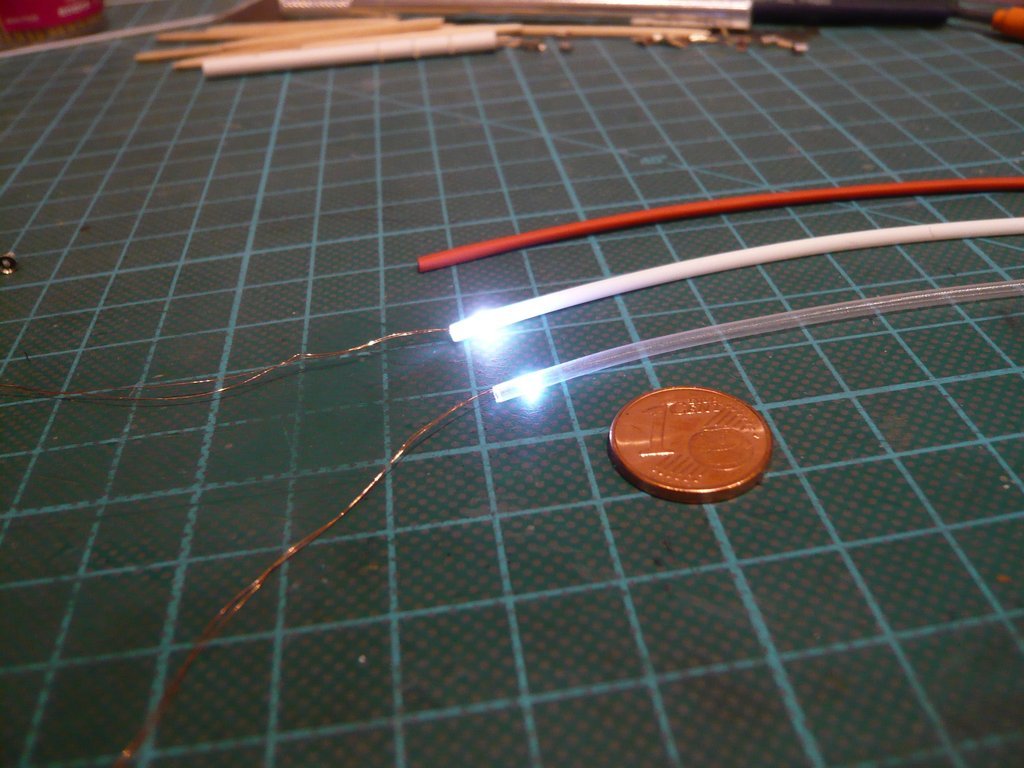 The red shrinking tube, on the other hand, is less translucent, which can be seen in these two images. 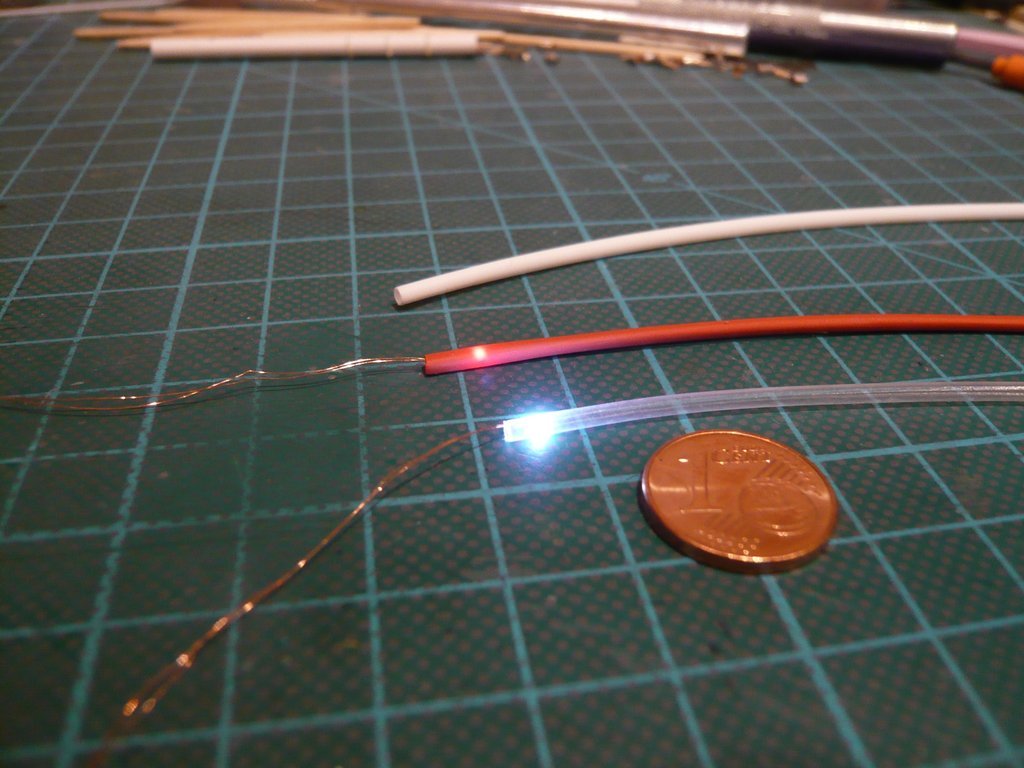 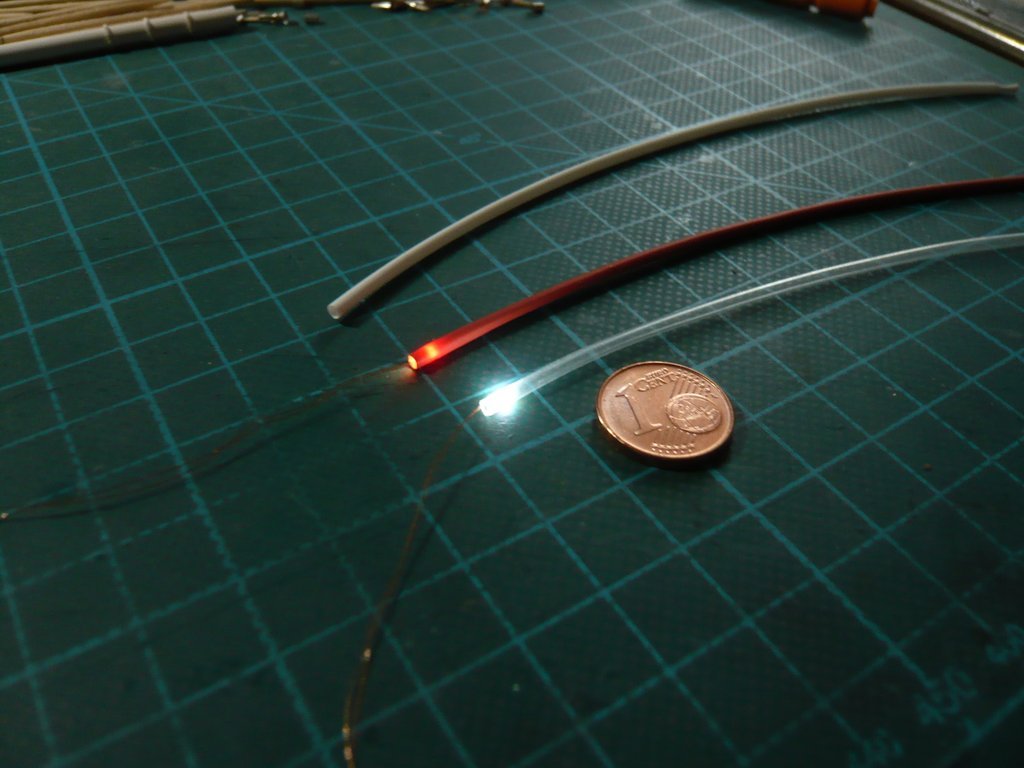 Then I've tried to shrink an LED into a piece of the transparent tube, whereby the handling turned out to be quite complicated when one considers that the actual lamp body at 1:160 should only be about 0,7 mm long.  To hold both parts was only just possible by using two tweezers, which were stably clamped onto a sheet metal sheet with two magnets, in order to then shrink the tube with the heat gun.  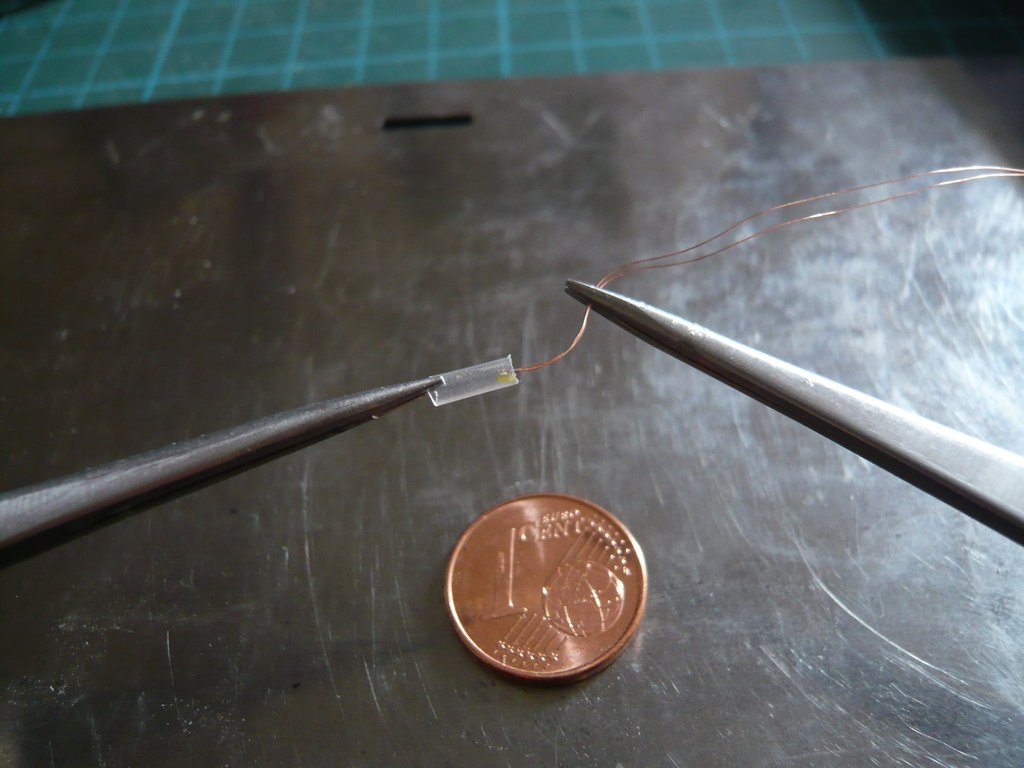 However, the result was rather underwhelming, as the LED was not shrunk tight enough and fell out again.  Since that would have been a rather hopeless fiddling with the fidgety tiny LEDs 0401, I have discarded this variant as not reproducible and will now focus on encasing the LEDs in small ferrules and sealing with UV Glue.
__________________
Greetings from Germany Manfred Under construction: Launch Pad 39A with Challenger STS-6 (1:144)
|
|
#2323
01-23-2021, 12:11 PM
|
||||
|
||||
|
Hello everybody,
in order to get as close as possible to the dimensions of these Mini crawler lamps, I've then experimented with the small Ferrules 0,25 mm[sup]2[/sup] x 5 that I had gotten myself in the meantime. 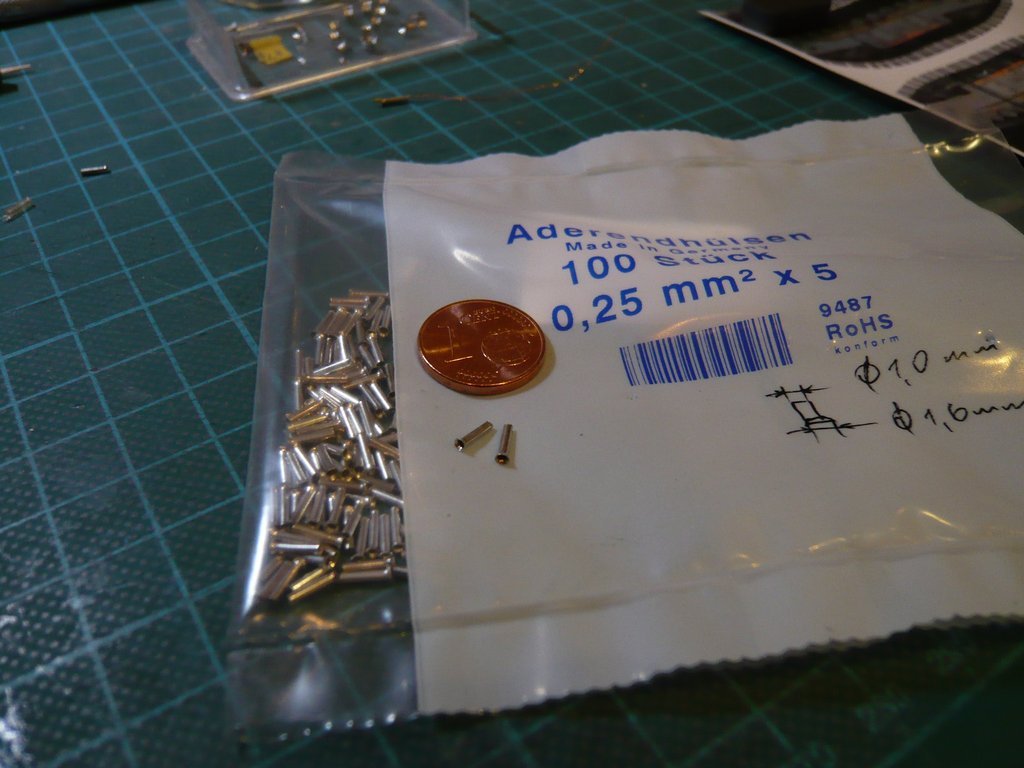 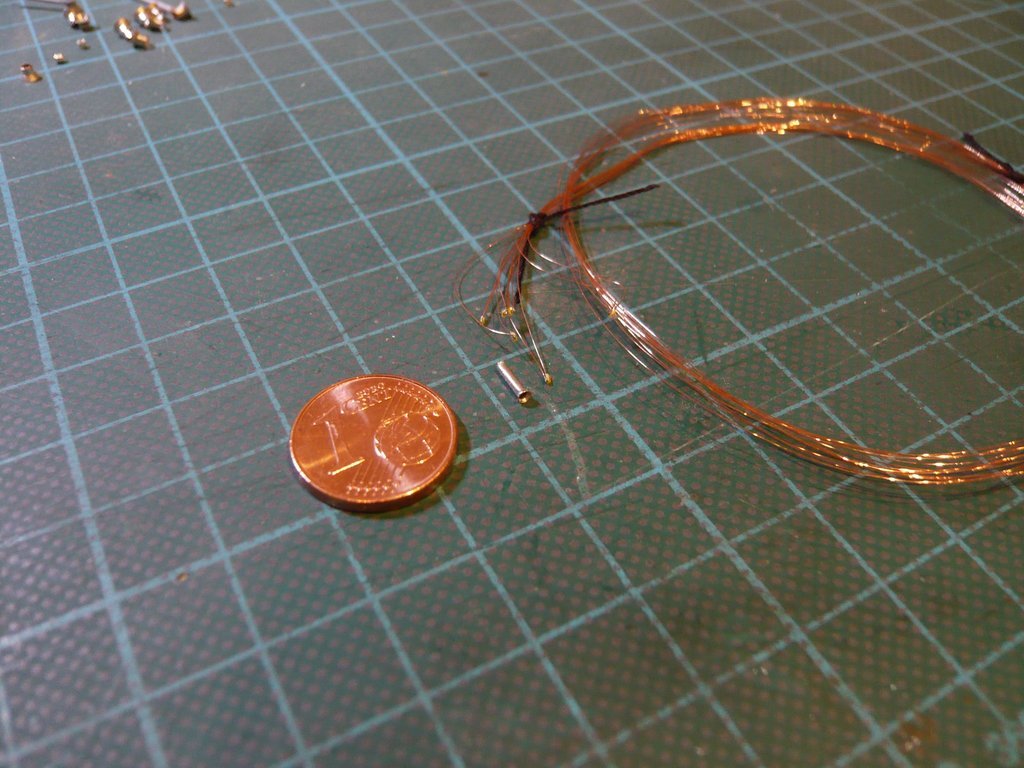 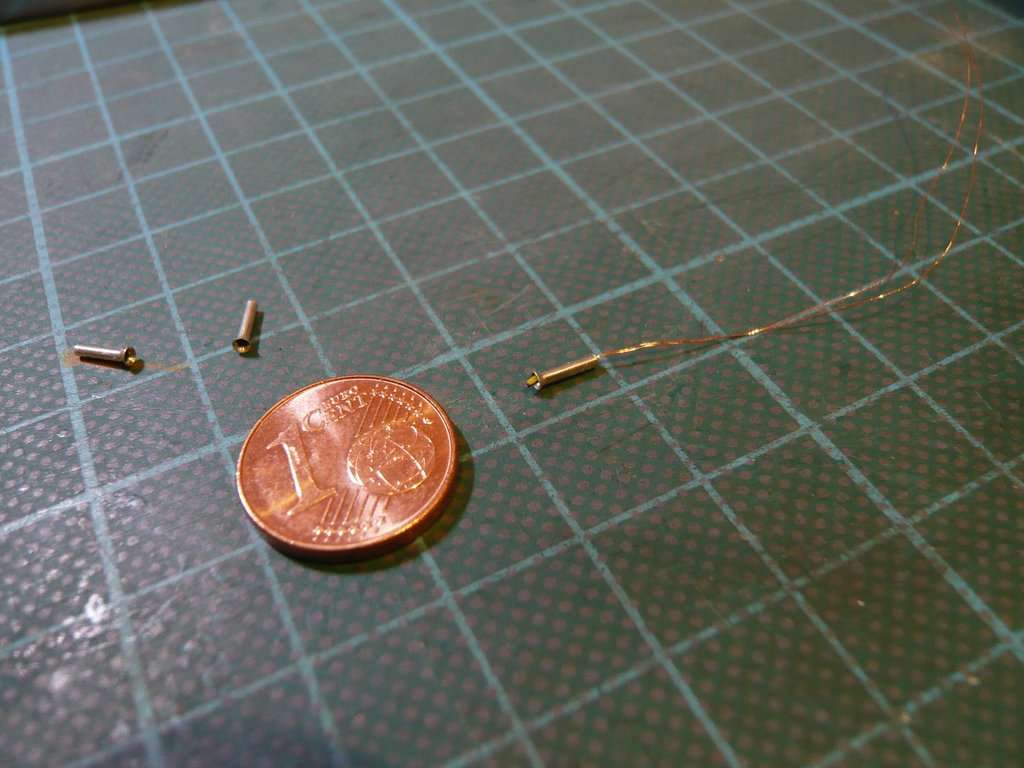 After I had cut off the small screen (Ø 1,5 mm) with the micro saw, 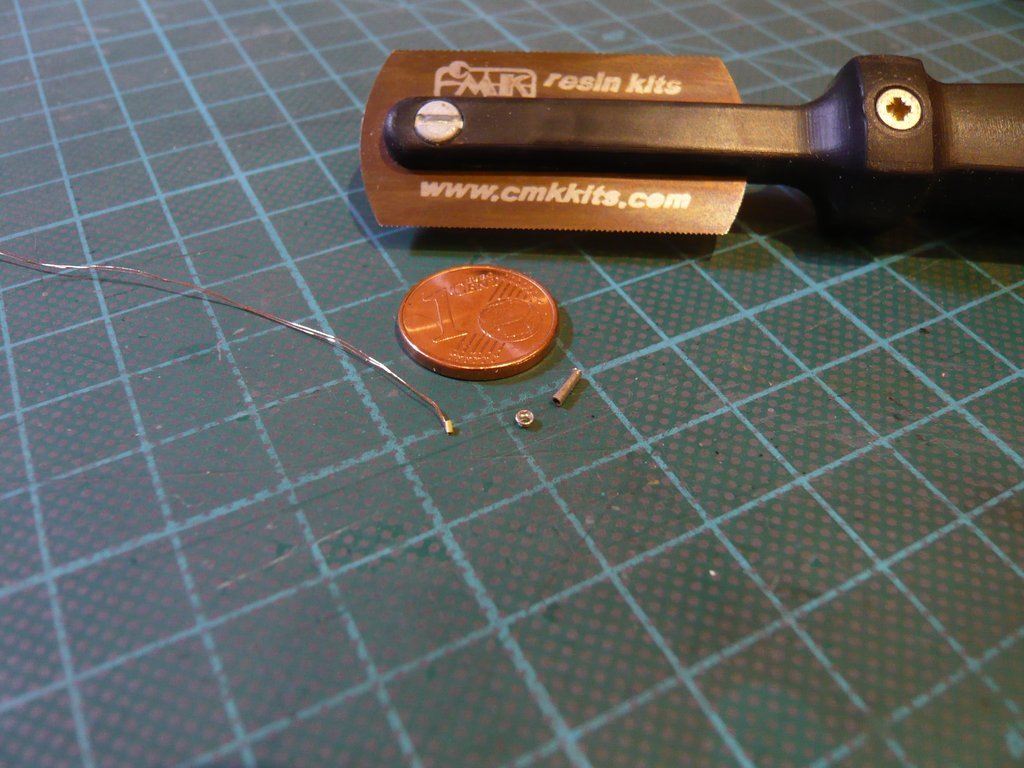 I've threaded a Pure White LED (0401) and initially fixed its wires from above with a drop of UV glue. 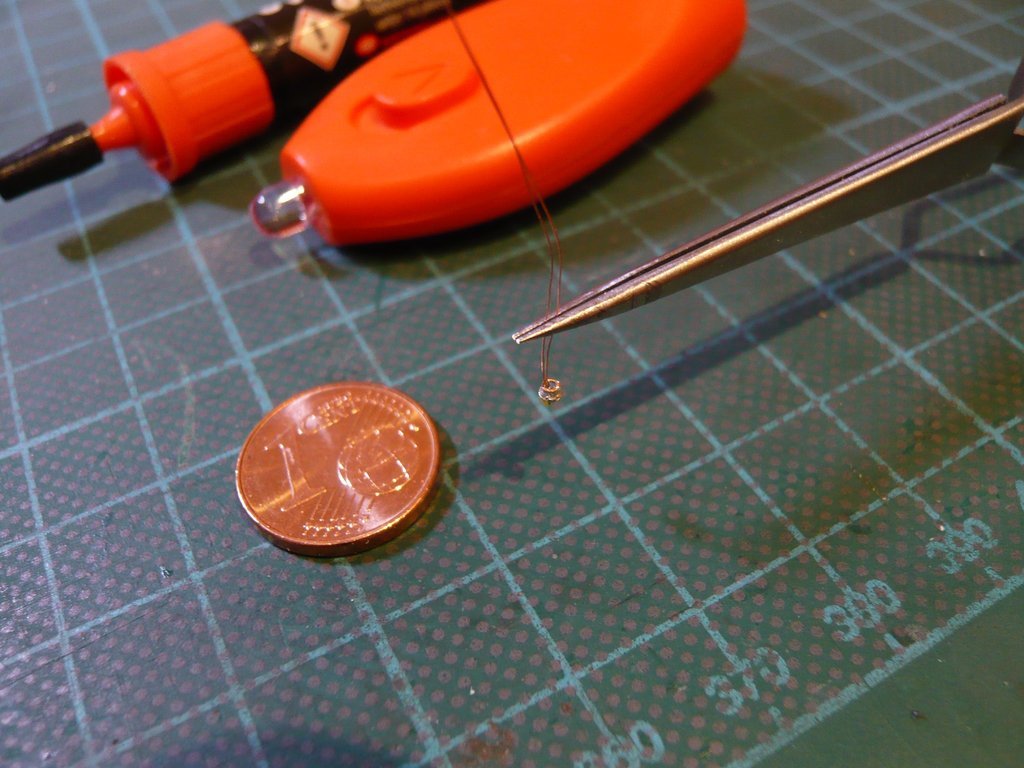 Then in the lamp shade across the LED a small drop of glue was then UV-cured, but that was still slightly spherical. 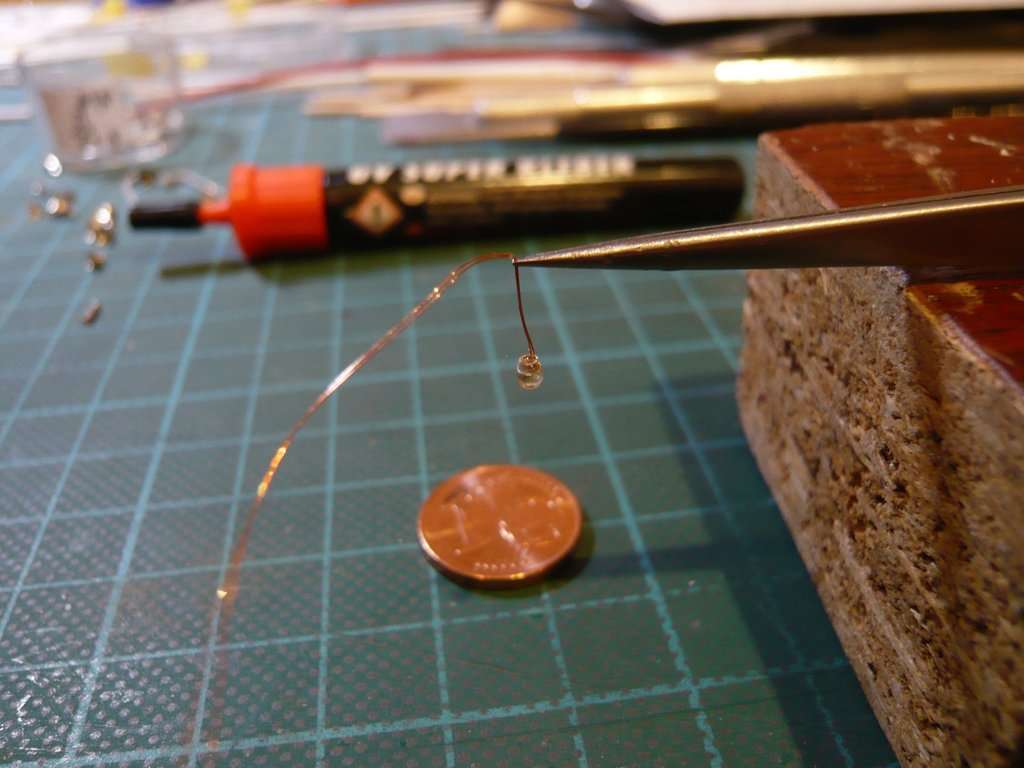 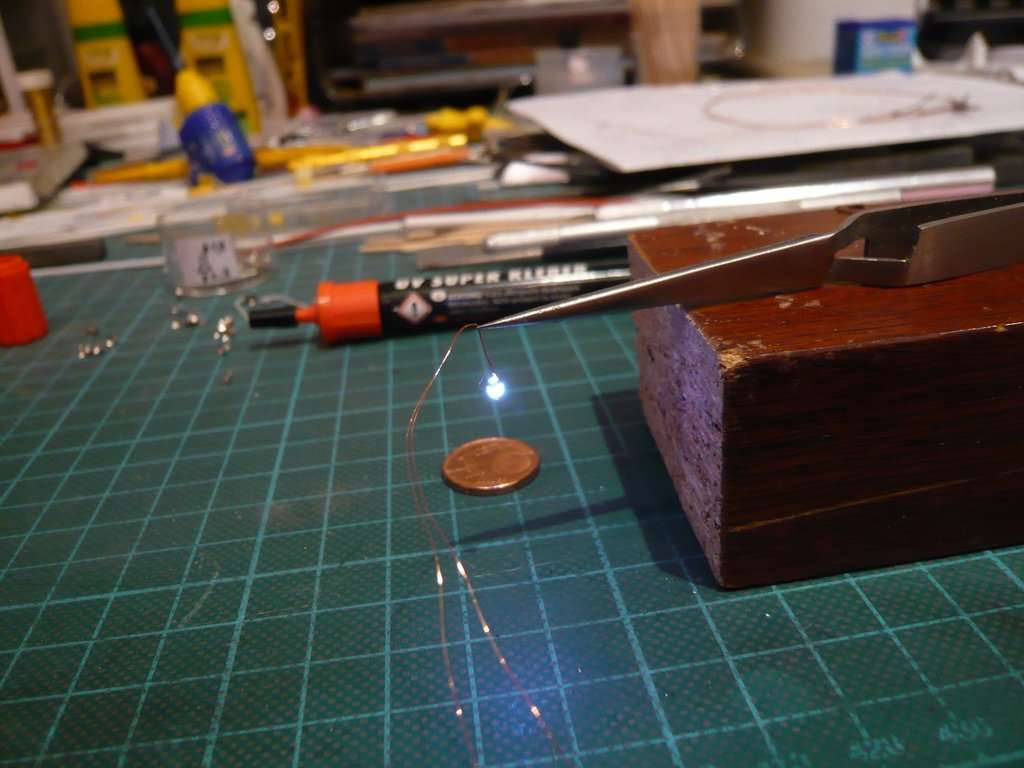 For a better size comparison, the lamp was glued onto the side wall of the truck from the paper kit, 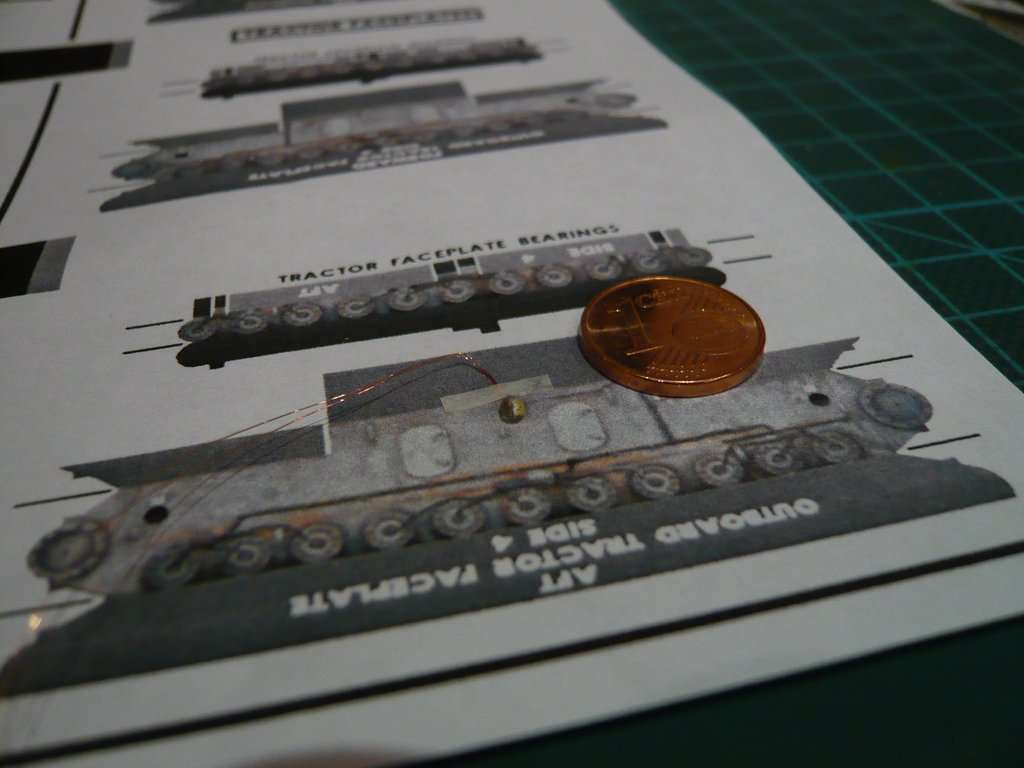 which is shining here quite strongly with full current of 8 mA. 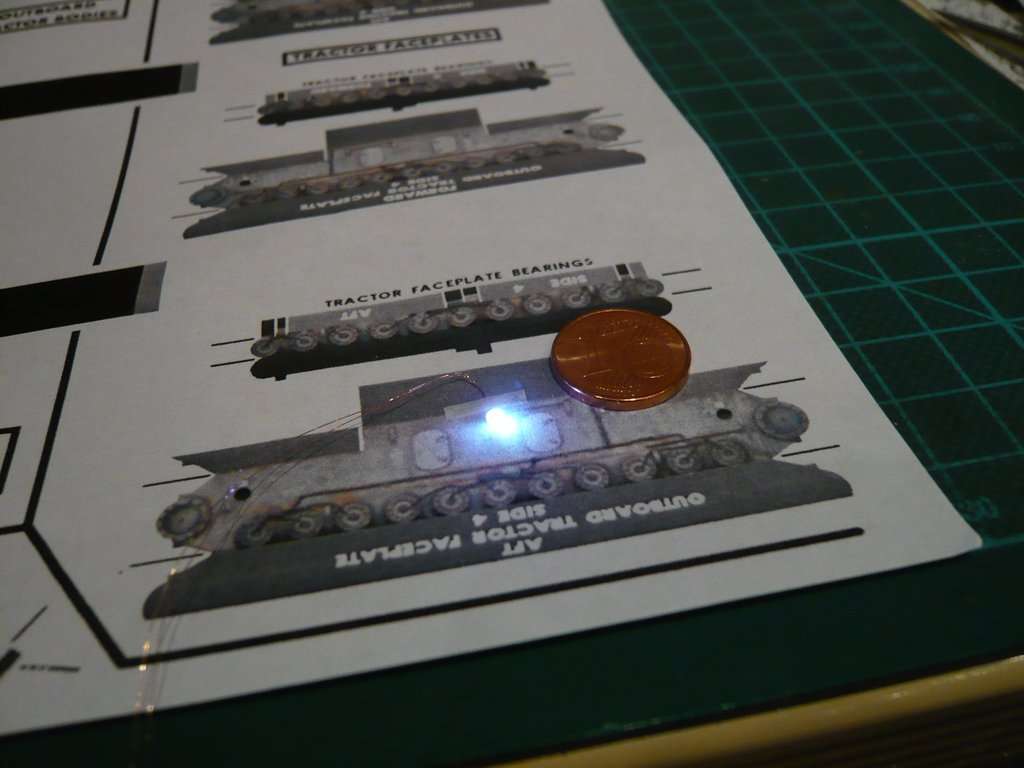 Dimmed down to 1,5 mA it doesn't look so bright anymore.  After that, I just carefully dipped a new LED into a drop of UV glue and cured it in order to get a finer lamp body, what worked better in this way than with the first method.   The LED encased and sealed in this way can then be threaded into the (later) separated lampshade and finally attached to the top with UV adhesive, 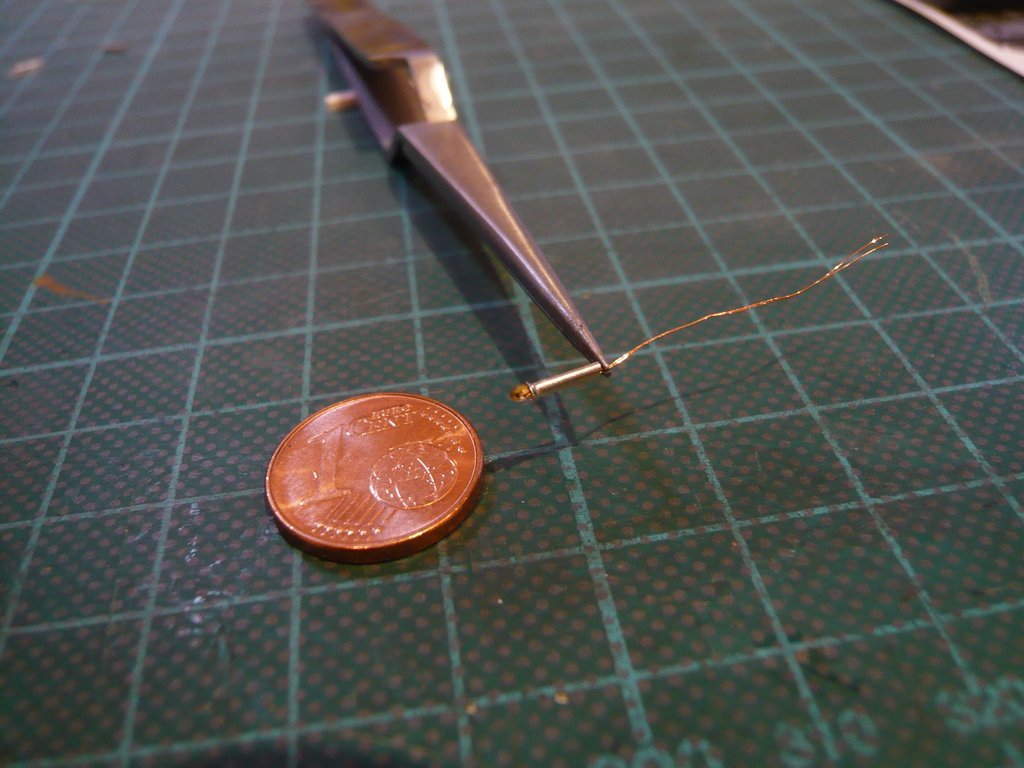 what should then result in a very well fitting Crawler lamp.   With this result and the improved handling, I can now look forward to the crawler lighting with a clear conscience.
__________________
Greetings from Germany Manfred Under construction: Launch Pad 39A with Challenger STS-6 (1:144)
|
|
#2324
01-24-2021, 07:33 AM
|
|||
|
|||
|
WOW! That is awesome!

|
|
#2325
01-24-2021, 06:20 PM
|
||||
|
||||
|
Thanks Marcell for your nice compliment,
 yeah, totally awesome, but for an easy handling nearly too tiny,  but I need only 42 of them. but I need only 42 of them.
__________________
Greetings from Germany Manfred Under construction: Launch Pad 39A with Challenger STS-6 (1:144)
|
|
#2326
01-25-2021, 05:46 AM
|
|||
|
|||
|
42 - the magic hitchhiker's number! If that is NOT a good omen, I don't know what it is.
|
|
#2327
01-25-2021, 06:53 PM
|
||||
|
||||
|
Yeah, yeah, yeah!
 Maybe you're right!
__________________
Greetings from Germany Manfred Under construction: Launch Pad 39A with Challenger STS-6 (1:144)
|
|
#2328
01-27-2021, 06:45 PM
|
||||
|
||||
|
Hello everybody,
somehow I still can't really get away from the Crawler without having got an idea of it, how a Truck chain looks like consisting of my composited 3D-printed Track shoes (1:160), 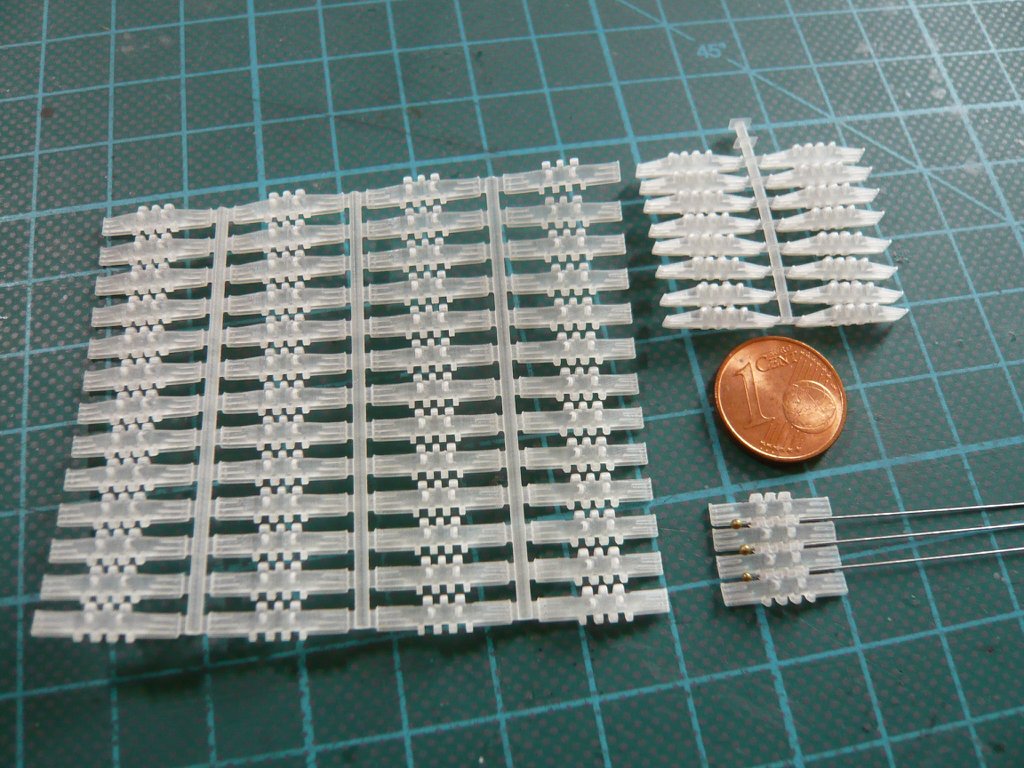 which as is generally known to consist of 57 Track shoes.  Source: NASA Much more important, in addition to the handling of its assembly, was the question of whether and how well the chain would fit the paper kit templates of the truck body at all, especially since I have to adapt some of the truck parts anyway, what will probably should not become so easy ... 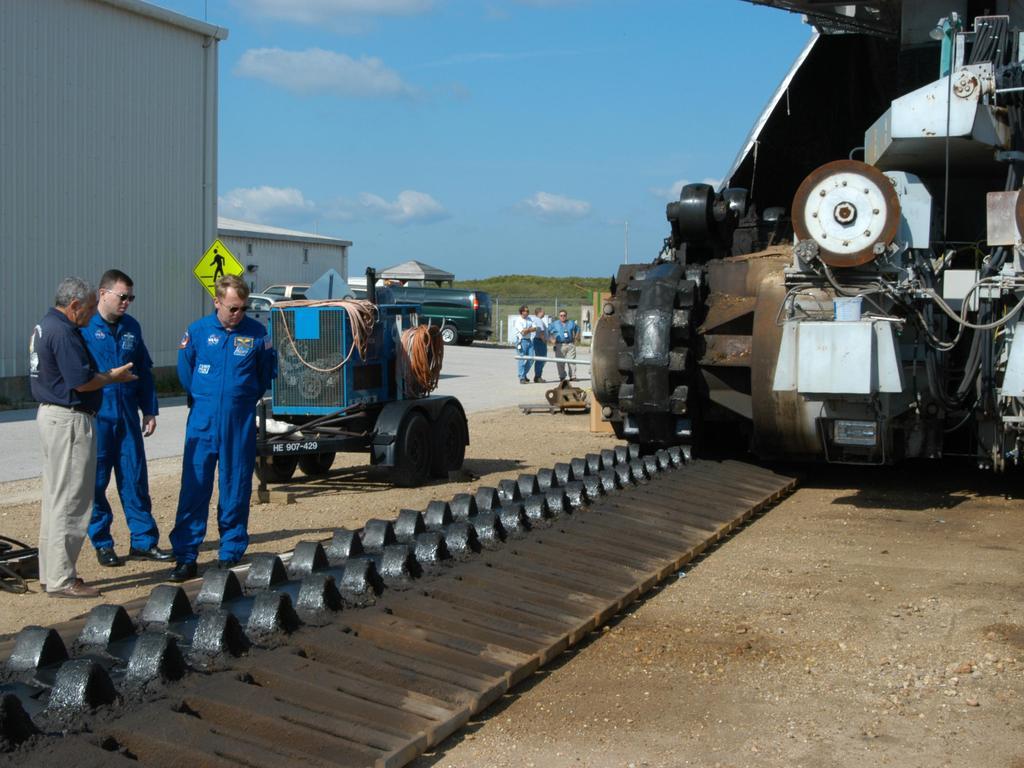 Source: NASA For the provisional connection of the chain links, I first had to cut short pins from steel wire (Ø 0,4 mm x 7 mm), which was not that easy to do because one cannot cut them with the side cutter simply off the wire, because otherwise they would fly away wherever else. To prevent that, I had a good idea once again.  To do this, I've made a corresponding mark on a small Neodymium super magnet, let the side cutter be gravitated to it together with the wire, and then simply pinched off the wire regardless of consequences, To do this, I've made a corresponding mark on a small Neodymium super magnet, let the side cutter be gravitated to it together with the wire, and then simply pinched off the wire regardless of consequences,  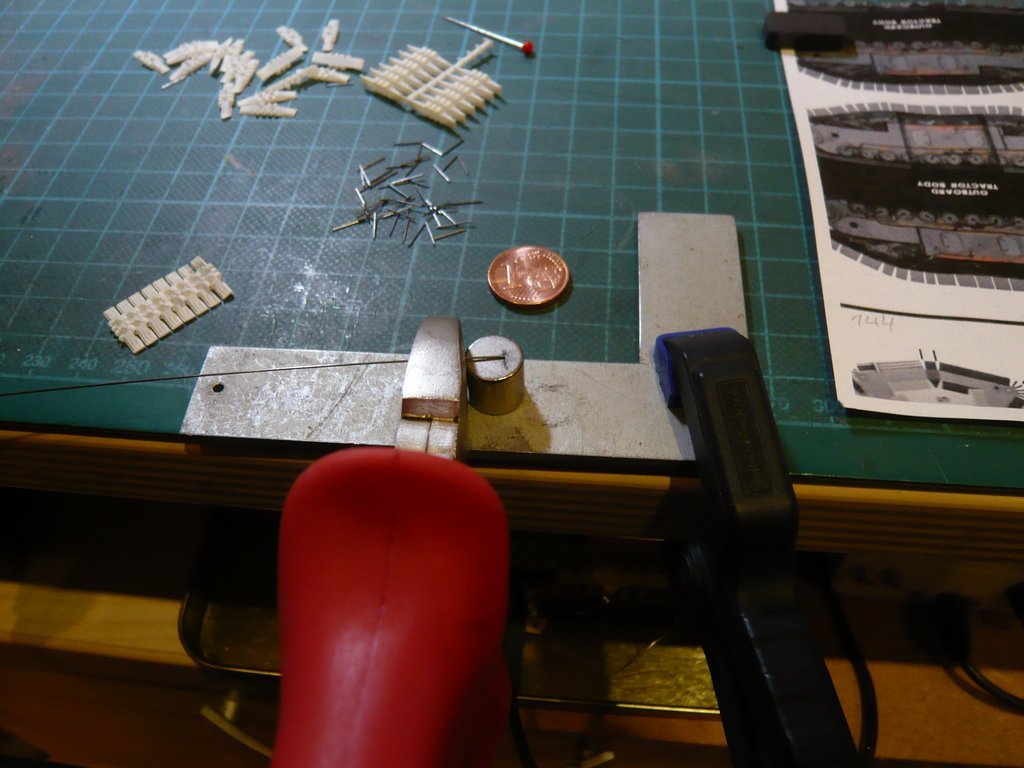 so that the pin was held tight securely by the magnet's enormous force. 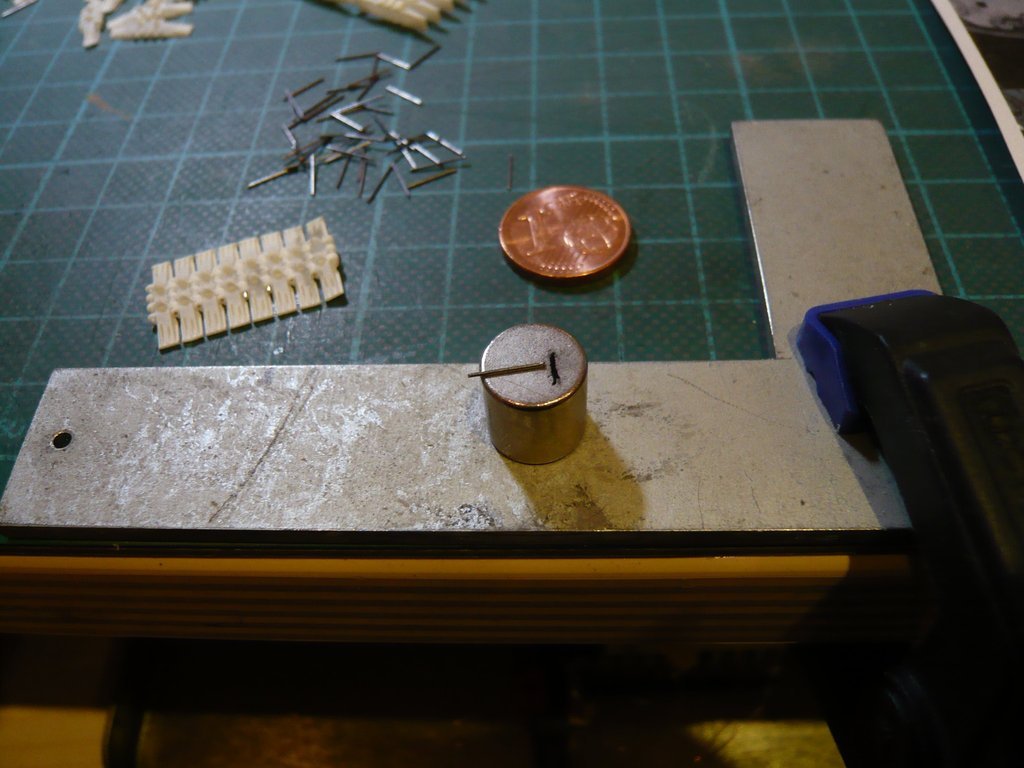 Before inserting the pins into the connected chain links, it was advisable to align the Pin Lugs with a drill (Ø 0,4 mm) and to make them smooth-running, which facilitated the insertion.  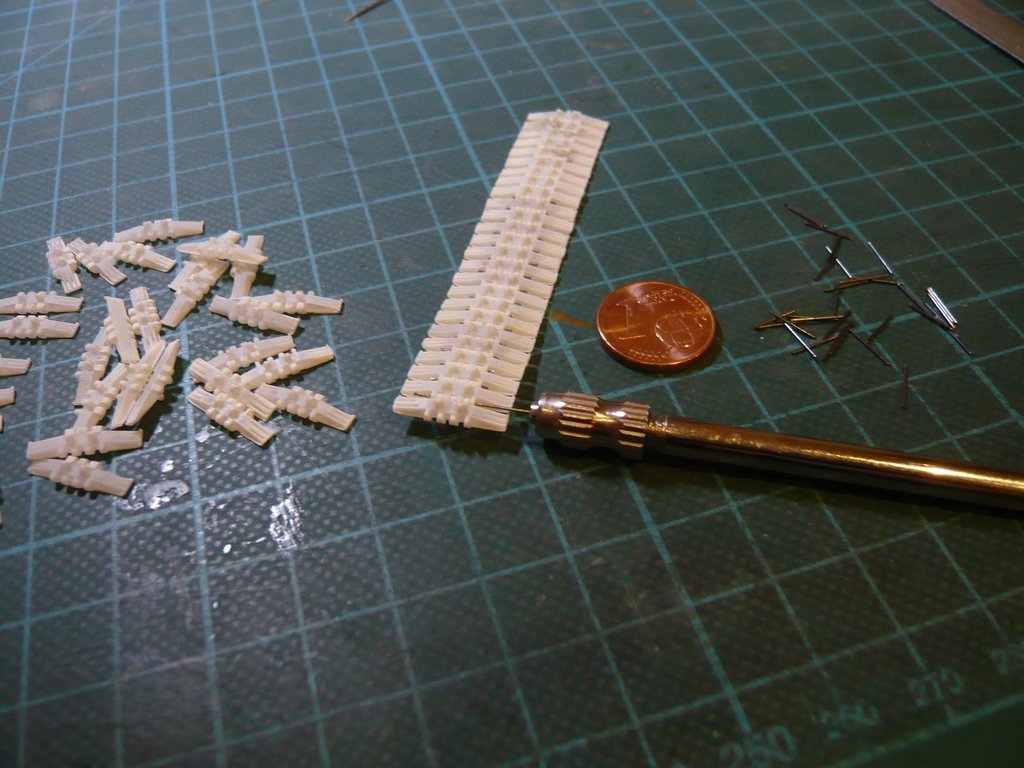 Since I had to deburr the pins on one side beforehand, it was quite a stressful fiddling until all 57 Track shoes were connected to one another.  Next to it lie the two Main sprockets already. Next to it lie the two Main sprockets already.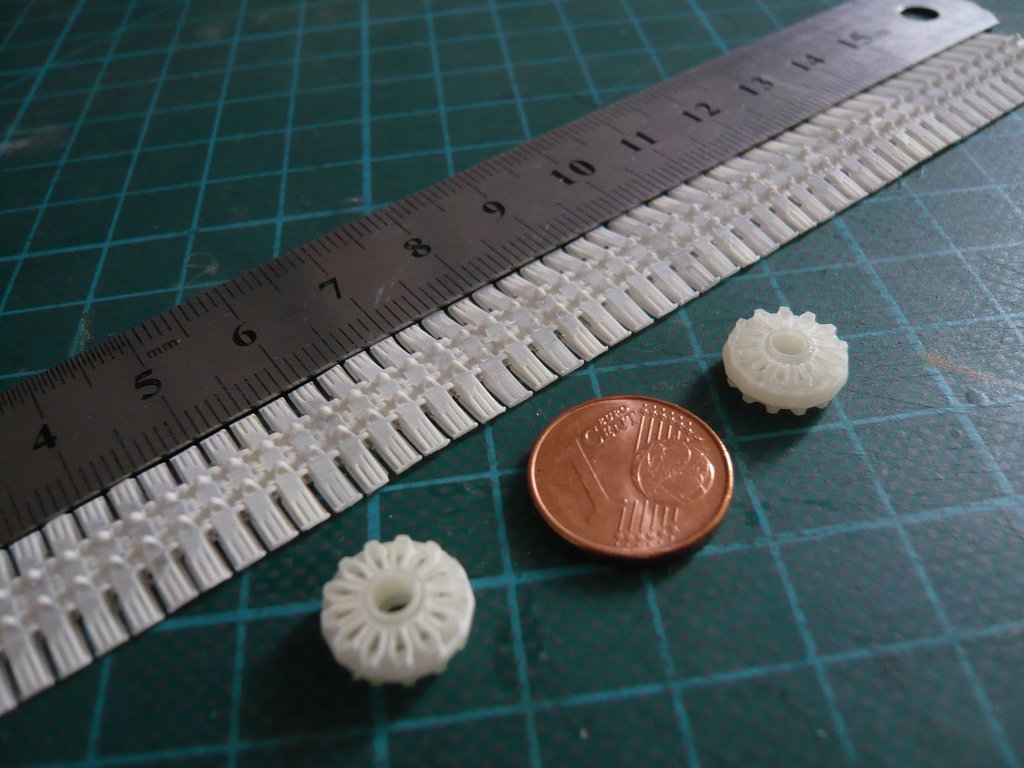 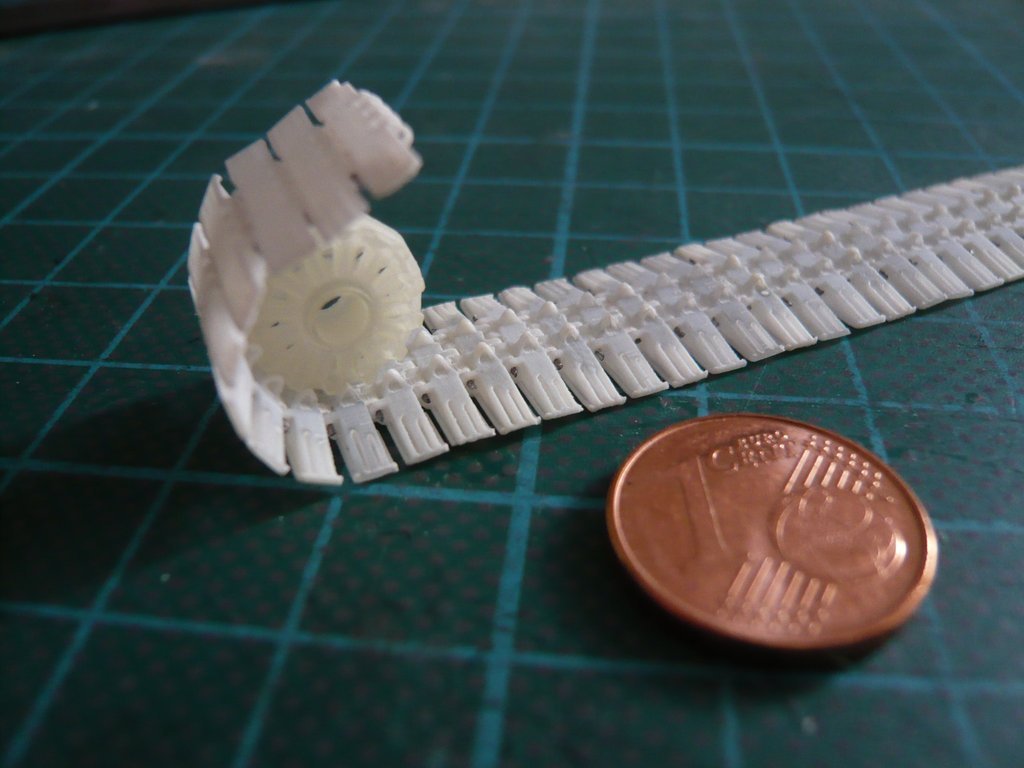 Here one can see the connected chain with the inserted Main sprockets, which is still tensioned on the truck after assembly by the so-called Crawler belt tighteners. 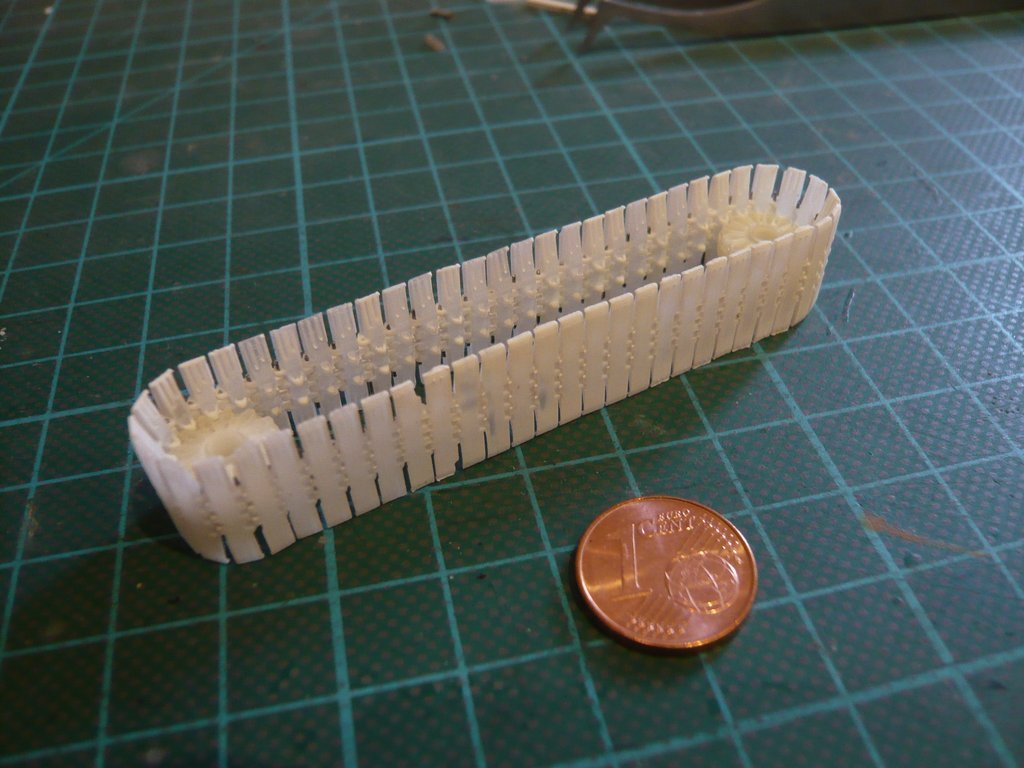 Then I just wanted to make sure whether or how well the 3D chain would match the 2D chain from the Paper Kit, which unfortunately, to my surprise, was not the case however. 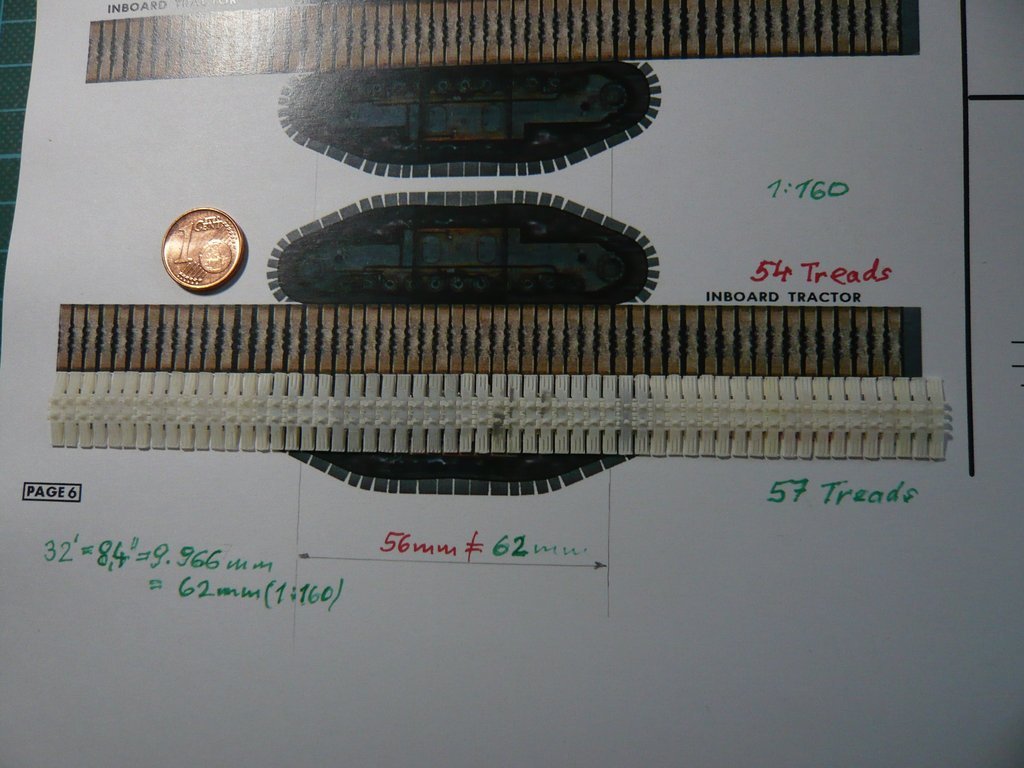
__________________
Greetings from Germany Manfred Under construction: Launch Pad 39A with Challenger STS-6 (1:144)
|
|
#2329
01-27-2021, 06:47 PM
|
||||
|
||||
|
There the good David Maier has actually only considered 54 Track shoes per truck chain in his Paper kit,
what I should actually ask him. Once have become skeptical, I've then remeasured a few more places on his truck and came across further discrepancies that now make me very insecure about the dimensional accuracy of his Crawler kit. My disenchantment was still increased after I had checked the dimensions of his truck body and compared the center-to-center distance of the Main sprockets with the one in the drawing, which in the kit is 6 mm too short and is only 56 mm instead of 62 mm, for whatever reason, 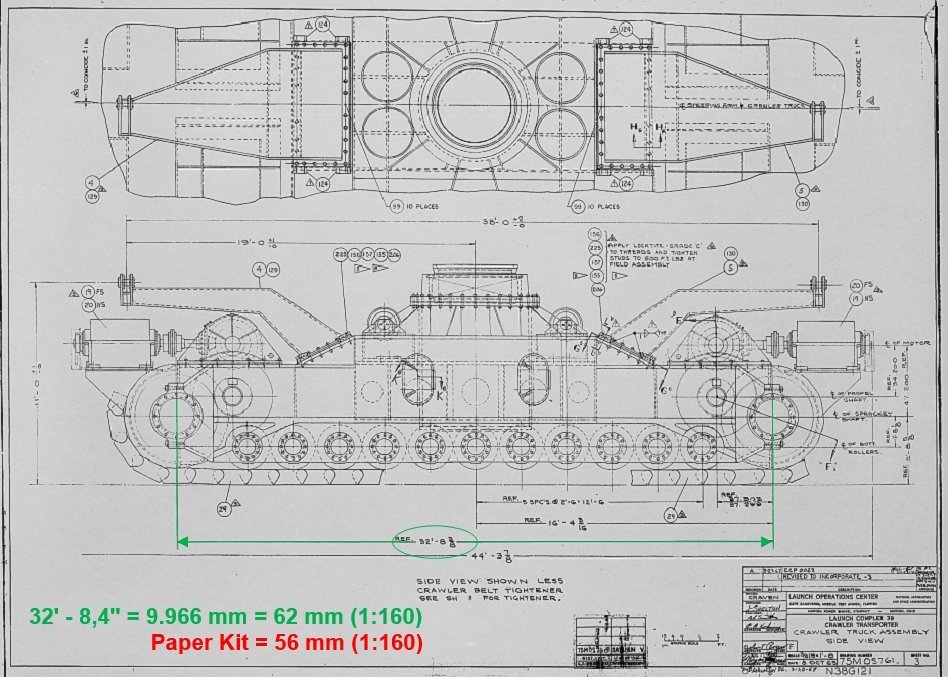 Source: Library of Congress (HAER FL-8-11-C-32) which can be clearly seen in this image through the paper truck body (1:160) laid on top, wherewith I now have a real problem and first have to put on the Crawler glasses once again. 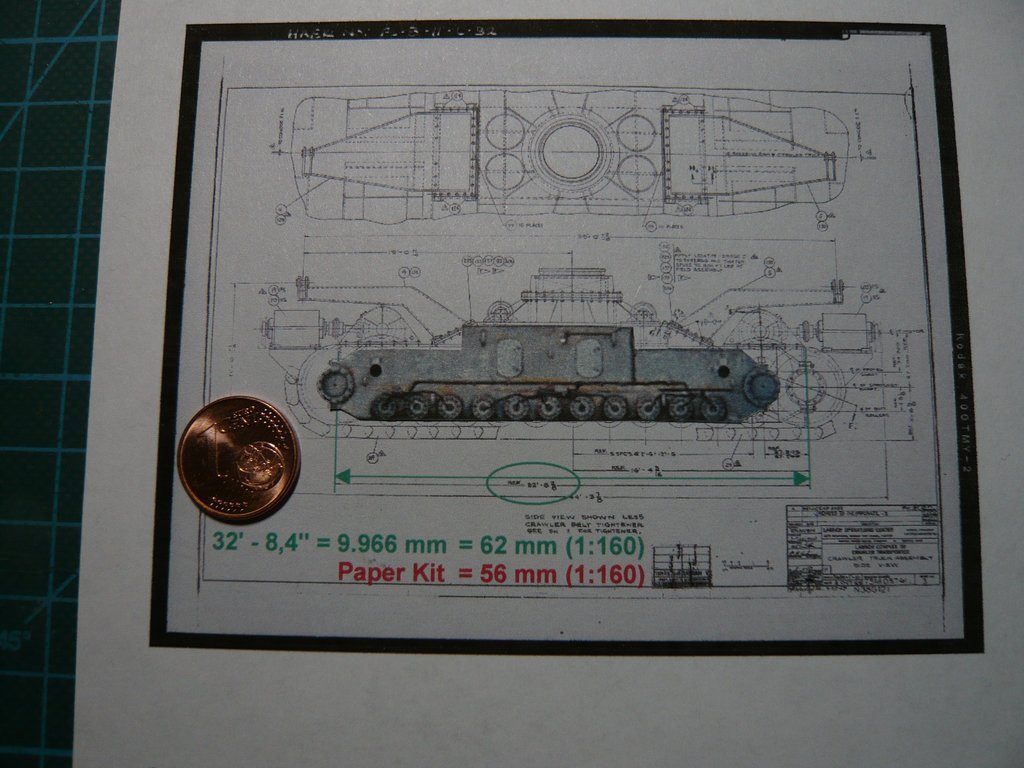 What calms me down a bit, on the other hand, is the fact that my truck chain with 57 Track shoes matches the drawing (1:160) pretty well, whereupon can be built up.  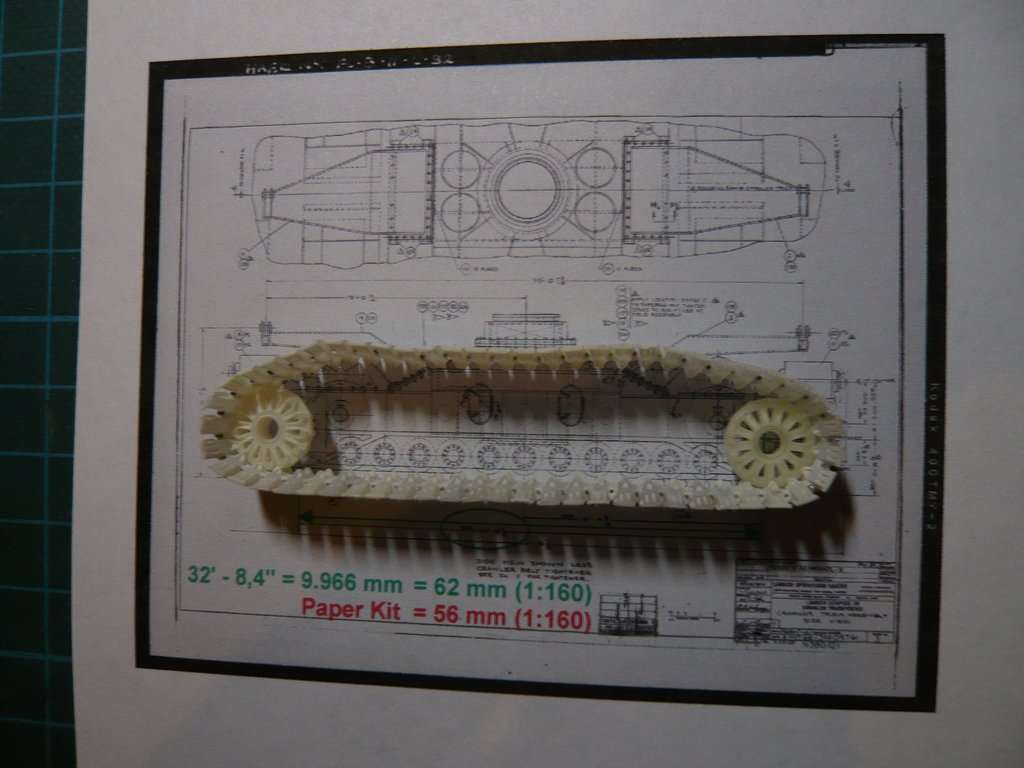 But that wasn't still the last rotten egg in David Maier's Paper kit, because the dimensions of the Crawler chassis structure with 227 mm x 93 mm instead of 246 mm x 102 mm are also not correct, which would actually be a reason for complaint in normal life, but that doesn't help me too.  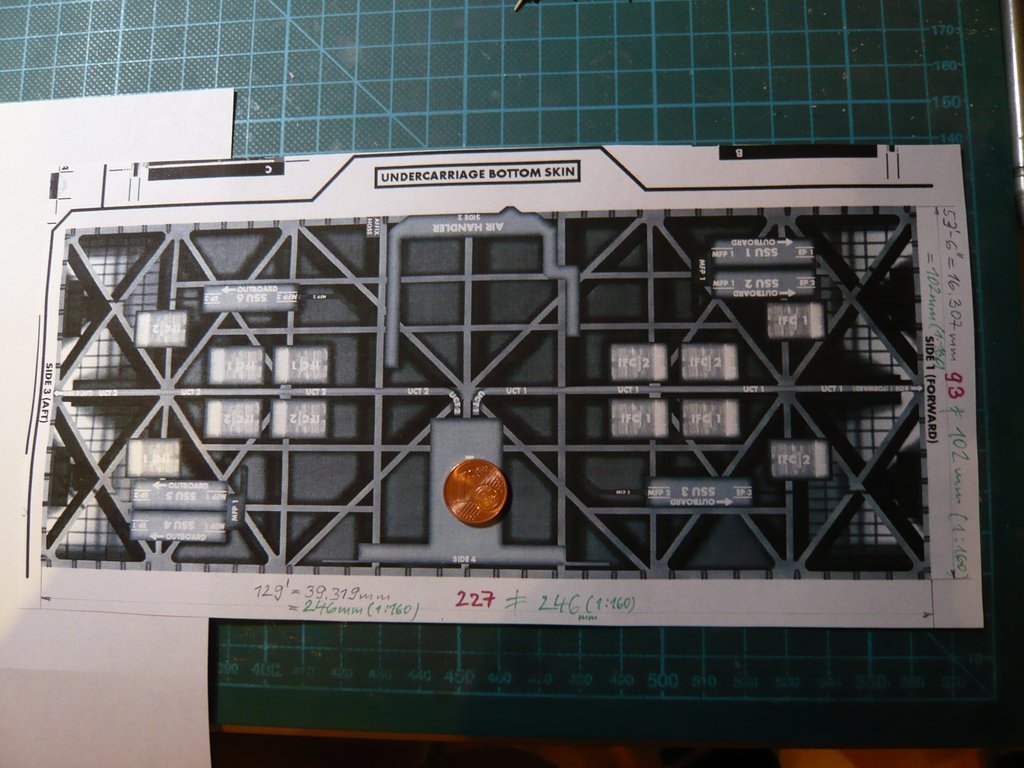 Now I need some good advice, which is why I have to come up with something else,  and why I would be very grateful for any suggestions. and why I would be very grateful for any suggestions.
__________________
Greetings from Germany Manfred Under construction: Launch Pad 39A with Challenger STS-6 (1:144)
|
|
#2330
01-31-2021, 07:35 PM
|
||||
|
||||
|
Hello my friend,
indeed the situation is quite difficult and reminds me of the scale dilemma of the Revell Launch Tower kit, which was even more complex and had aleady forced me to make some compromises. But the problem is not D. Maier's Paper kit per se, but the fact that my true-to-scale Track shoes & Main sprockets (1/160) do not quite fit Maier's scaled-down Kit (1/160), especially because the kit's Tractor assemblies & Track shoes are not-true-to-scale but rather a bit too small, that is my problem. Regardless of this, one can build the crawler exactly as it is described in the assembly instructions, if one doesn't mind that not all parts are exactly 1/144. My German friend Michael Knobloch (mk310149) had built all three paper kits by David Maier and had no major problems with them, as everything fits together when one uses the Paper kits completely, as if one is building a kit Out Of Box (OOB). 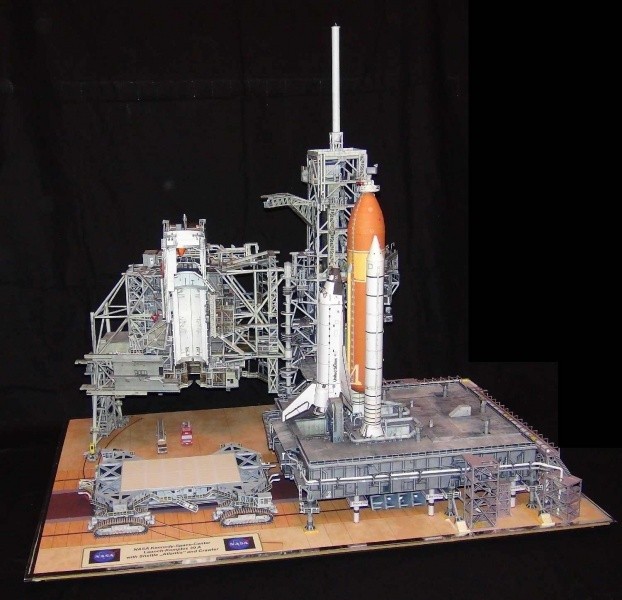 One can follow his Crawler construction report here. Maybe the simplest solution would be to leave out around five track shoes per chain, as I've hinted it here above the too small truck front panel (1/160), above that lies the larger panel from the "144" kit. 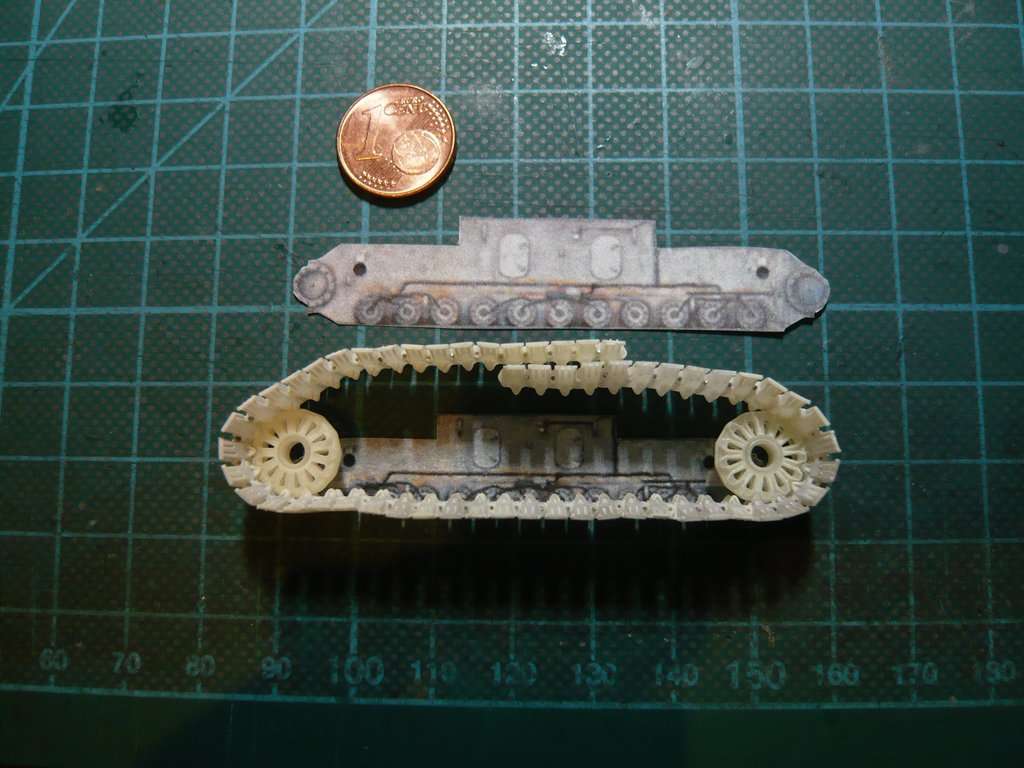 But I'm not amused with this stopgap,  especially as my 1/160 Main sprockets & Track shoes are too big for this too small Kit tractor, especially as my true-to-scale chain with 57 Track shoes matches the drawing (1/160) pretty well, as was already shown in the last post. especially as my 1/160 Main sprockets & Track shoes are too big for this too small Kit tractor, especially as my true-to-scale chain with 57 Track shoes matches the drawing (1/160) pretty well, as was already shown in the last post. 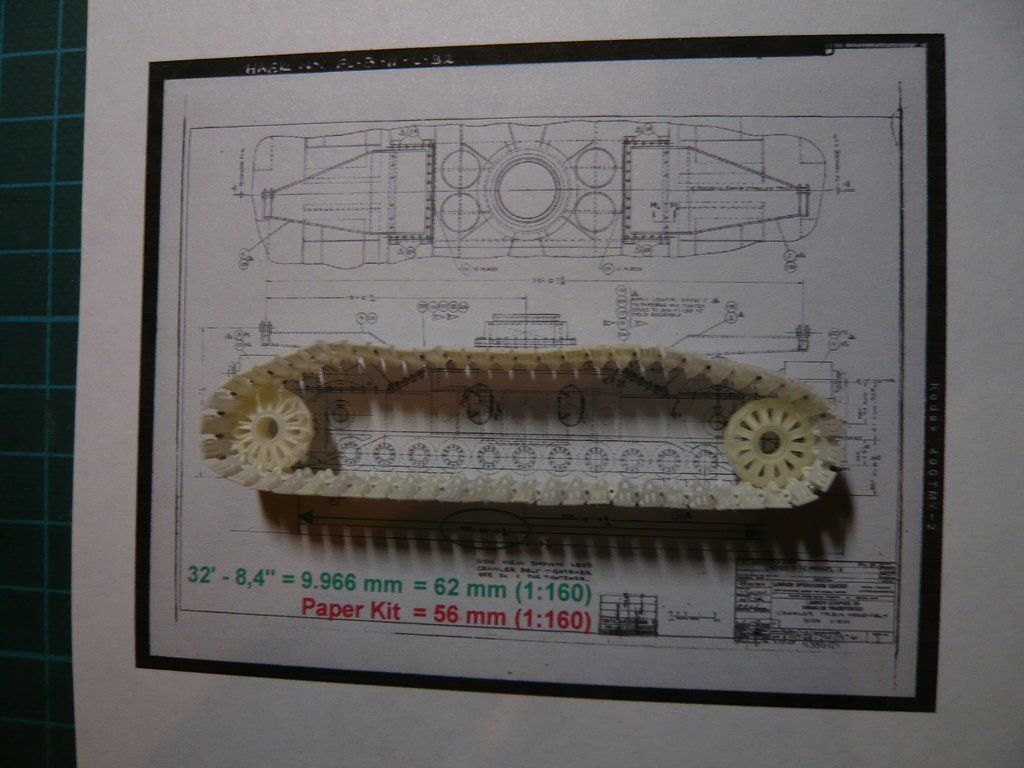 In order to get a more precise overview of the dimensions of the crawler from D. Maier's kit (1/144) and to be able to compare details better, I've asked my friend Michael to determine the main dimensions of its crawler and communicate to me, which he also has done. All he had to do was take off his glass case, which is above the Launch pad diorama in his "house museum", what wasn't to be done in a jiffy.  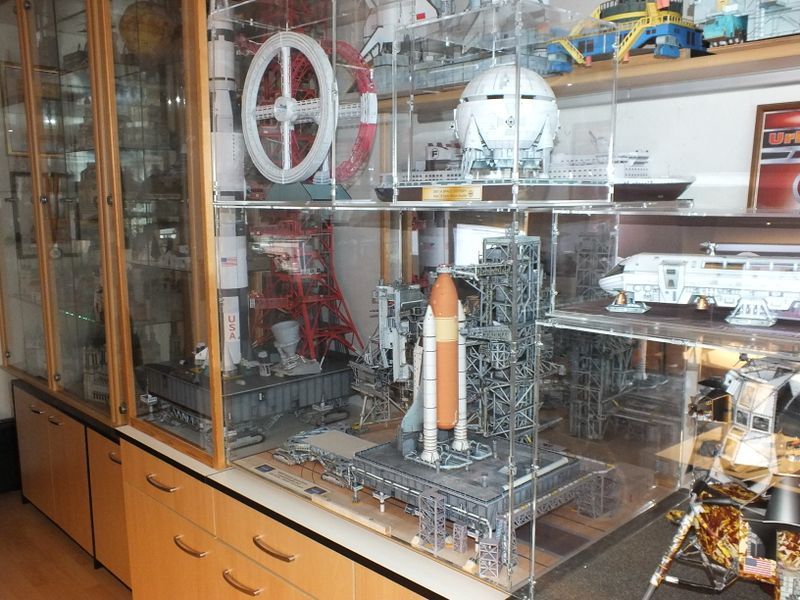 And this is the result, whereby the measurements of his Crawler ("1/144") are marked in red. 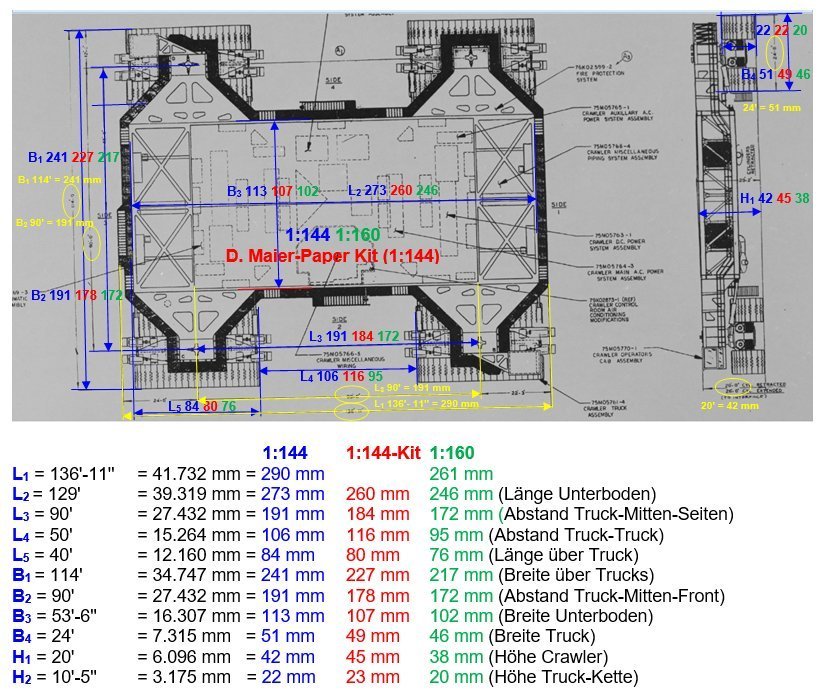 And as one can see from this, many dimensions are smaller and correspond to a scale of approx. 1/150, instead of 1/144, what I had almost suspected by now. Therefore the following compromise would be imaginable, that for my crawler I could not use my scaled-down 1/160 Kit, but Maier's Paper Kit "1/144" , which then would be a little bit larger, but which I think would be still acceptable, especially since that shouldn't be particularly noticeable under the MLP (1/160). 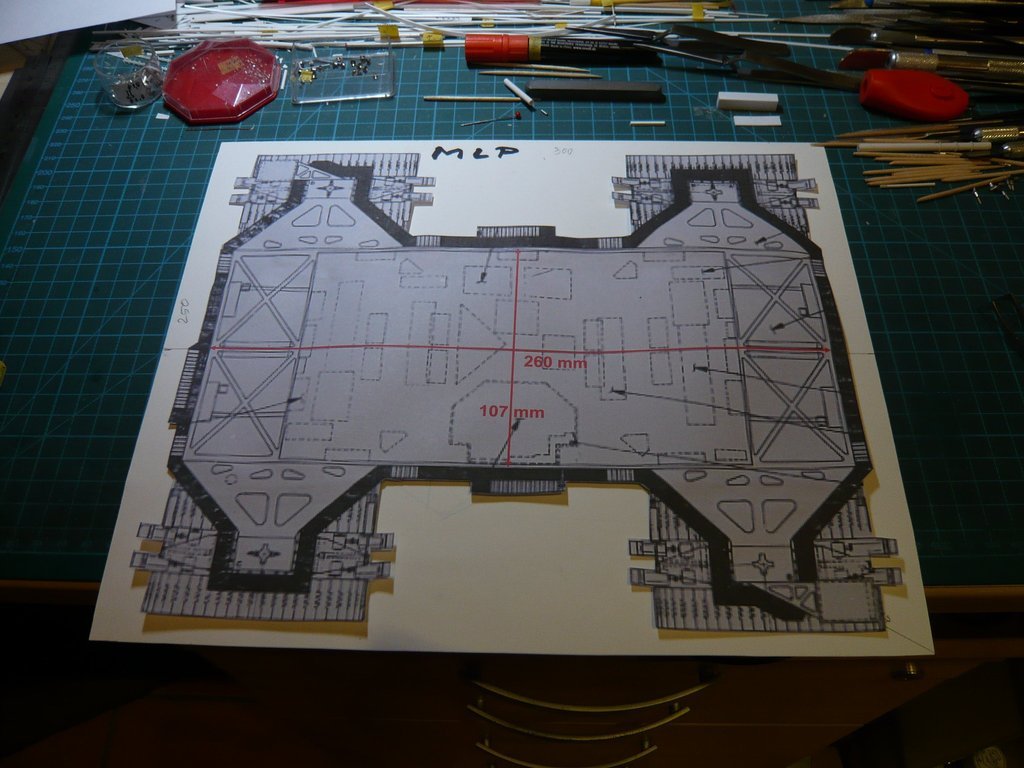 So I could imagine a way out of this misery.
__________________
Greetings from Germany Manfred Under construction: Launch Pad 39A with Challenger STS-6 (1:144)
|
 |
|
|


 Linear Mode

