


|
|
|
#1261
 02-05-2017, 01:53 PM
|
|||
|
|||
|
Manfred, I don't know how you keep on going in the face of such frustration but I'm sure glad you do. Keep up the great work!
__________________
This is a great hobby for the retiree - interesting, time-consuming, rewarding - and about as inexpensive a hobby as you can find. Shamelessly stolen from a post by rockpaperscissor 

|
|
#1262
02-05-2017, 03:49 PM
|
||||
|
||||
|
Thanks elliott for staying tuned,
 but as you know, I have already digested some larger low blows  and have not yet went k.o., and that's how it should stay too. and have not yet went k.o., and that's how it should stay too.  And therefore my motto is to bite the teeth together  and to laugh when it is not quite enough for crying. and to laugh when it is not quite enough for crying.  
__________________
Greetings from Germany Manfred Under construction: Launch Pad 39A with Challenger STS-6 (1:144) Last edited by spacerunner; 02-05-2017 at 04:35 PM.
|
|
#1263
02-11-2017, 02:55 AM
|
||||
|
||||
|
Hello everybody,
now the flu has still caught me yet,  wherefore this week is not much happened, but nevertheless, I would like to give a short update. wherefore this week is not much happened, but nevertheless, I would like to give a short update.  But in any case, I have now come up with a new and relatively flexible mounting technique.  In doing so, the ring line is received in the rear small opening of a clothespin, which is then clamped into the vice. In this opening, the ring is easy to turn, which makes the step-by-step CA gluing of the clamping rings enormously easier, since the rings can be reached optimally from all sides, without instantly to risk the breaking off of fragile parts somewhere.  At first the last four-part clamping ring still followed, 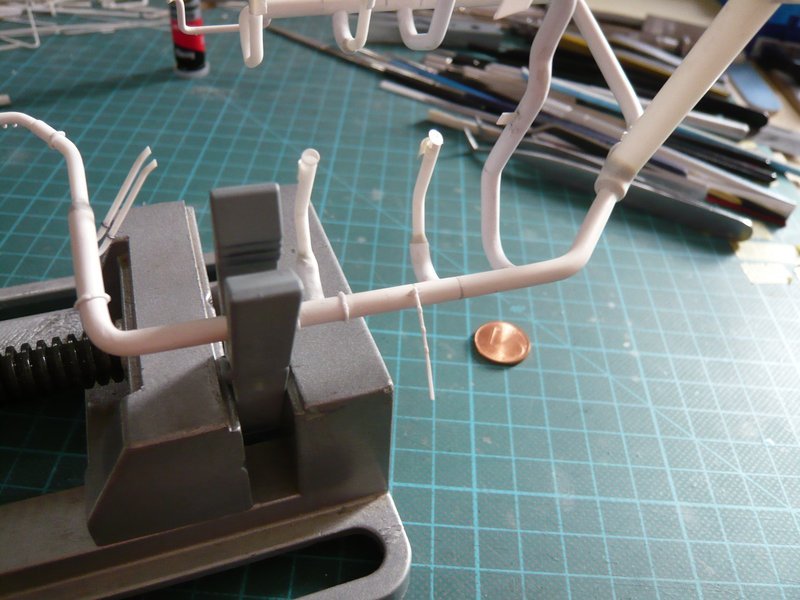 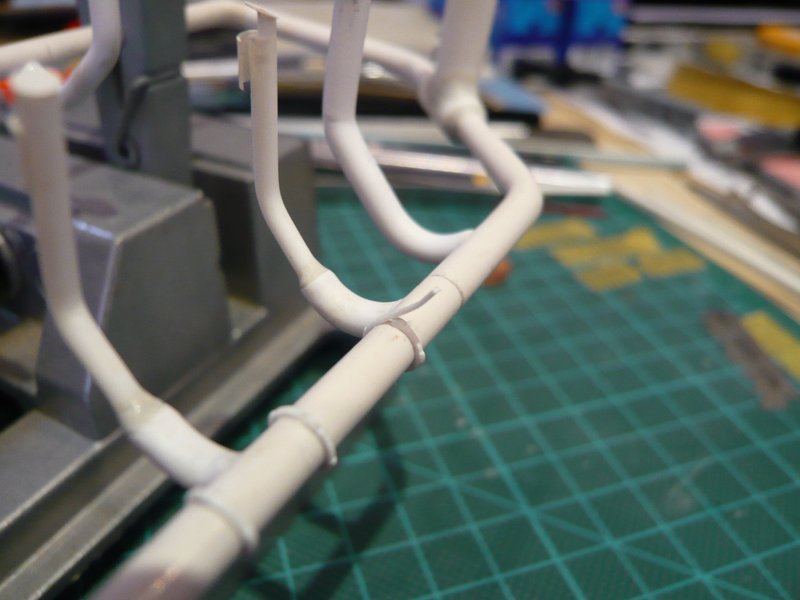 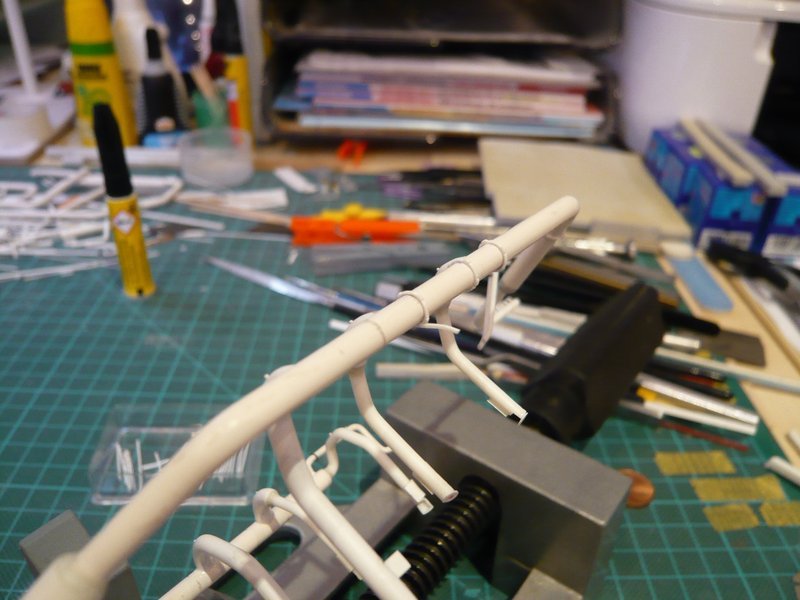 before it went on with the six-part clamping rings.  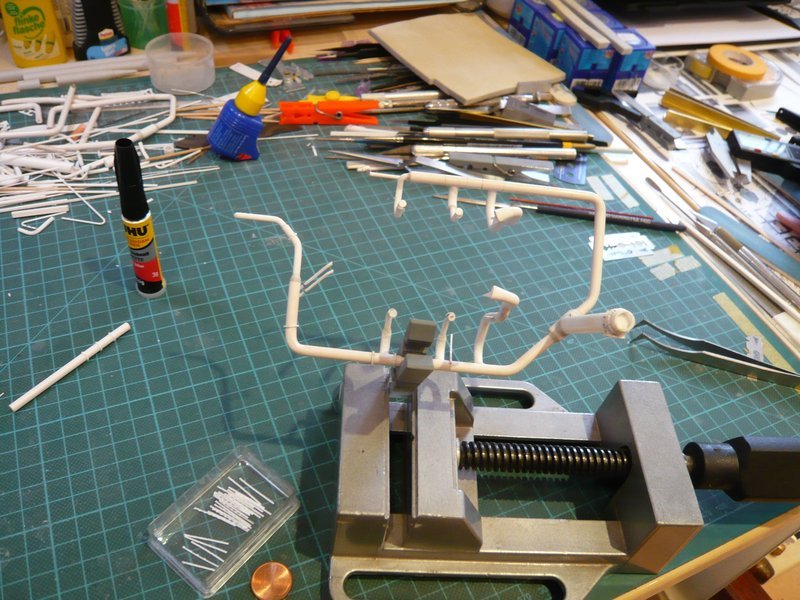 And the procedure becomes even more flexible, when the clothespin is clamped into my smaller Proxxon vice, 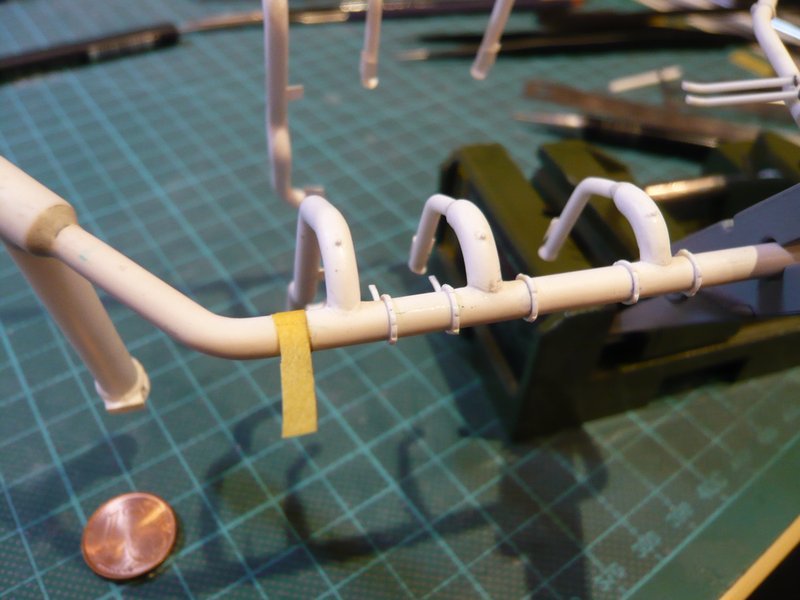 which I can also put on the side or place upright as required. 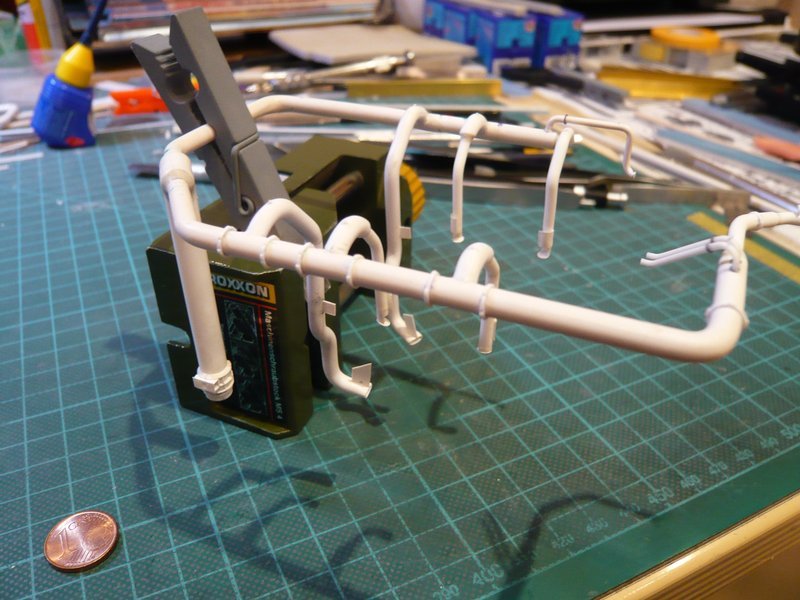 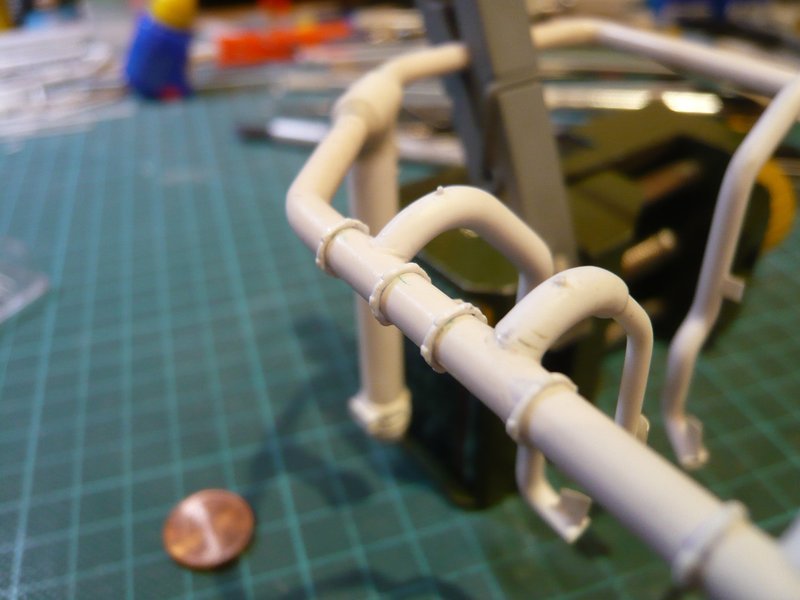 Although all this looks almost like a children's game, the whole handling needs getting used to and is not completely harmless, as one quasi always juggles with raw eggs.  But gradually these sequences become more and more familiar too, and in my little box there are still a lot of clamping rings, whereby I almost have the impression that it would become no less but rather more.  But fortunately, this impression deceives and it goes slowly but surely forward, because all takes a lot of time.
__________________
Greetings from Germany Manfred Under construction: Launch Pad 39A with Challenger STS-6 (1:144)
|
|
#1264
02-11-2017, 08:54 AM
|
|||
|
|||
|
Great way to solve the clamping issue. Sorry you're ill; hope you recover quickly and fully Manfred. Take good care of yourself.
__________________
This is a great hobby for the retiree - interesting, time-consuming, rewarding - and about as inexpensive a hobby as you can find. Shamelessly stolen from a post by rockpaperscissor
|
|
#1265
02-11-2017, 06:58 PM
|
||||
|
||||
|
Thanks elliott for your nice words,
I also hope that I'ill be back fit soon for the clamping ring Final. Yeah, finally, I have found the right solution, a small vice with a clothespin. Sometimes the simplest solutions are the best.
__________________
Greetings from Germany Manfred Under construction: Launch Pad 39A with Challenger STS-6 (1:144) Last edited by spacerunner; 02-11-2017 at 07:09 PM.
|
|
#1266
02-12-2017, 06:06 AM
|
|||
|
|||
|
Quote:
 Your progress is still amazing, Mani! Get better soon!  Marcell
|
|
#1267
02-12-2017, 05:46 PM
|
||||
|
||||
|
Thanks Marcell,
it is getting better again slowly, only the sneezing was dangerous for the tiny parts on my table.
__________________
Greetings from Germany Manfred Under construction: Launch Pad 39A with Challenger STS-6 (1:144)
|
|
#1268
02-14-2017, 04:46 AM
|
||||
|
||||
|
Hello everybody,
after the first side has been completed, follows now the oblique on which there are two six-part clamping rings on either side of the 36" inlet pipe, as can be seen here,  Source: NASA of which the former is already glued. 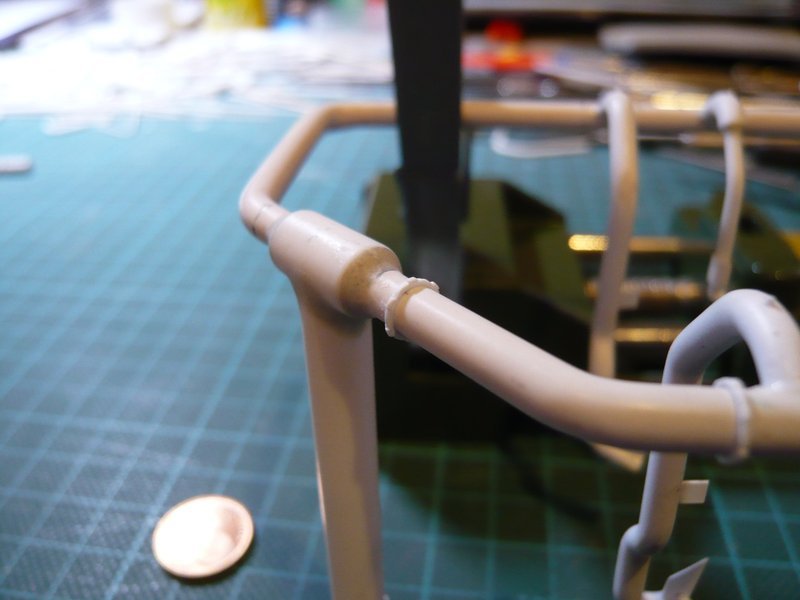 When searching for the most favorable clamping position for the stepwise gluing of the clamping rings, the line must be re-clamped several times. 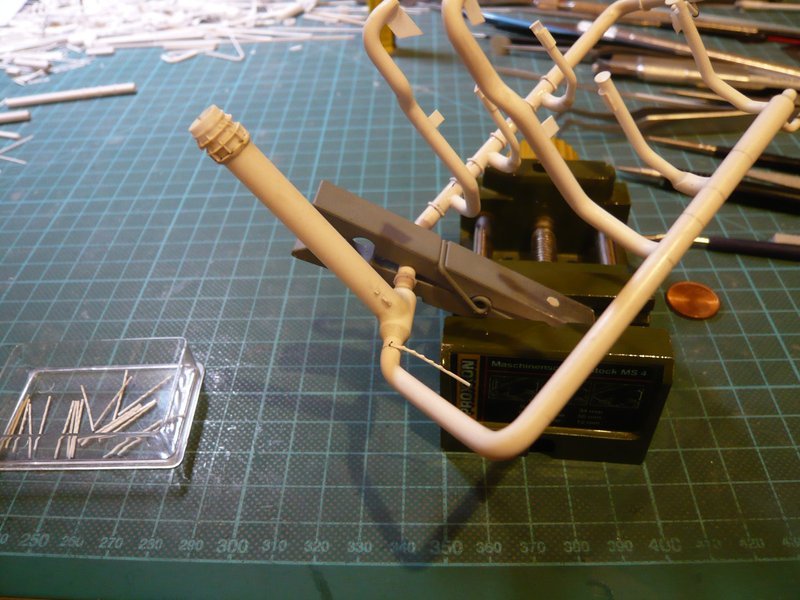 ... 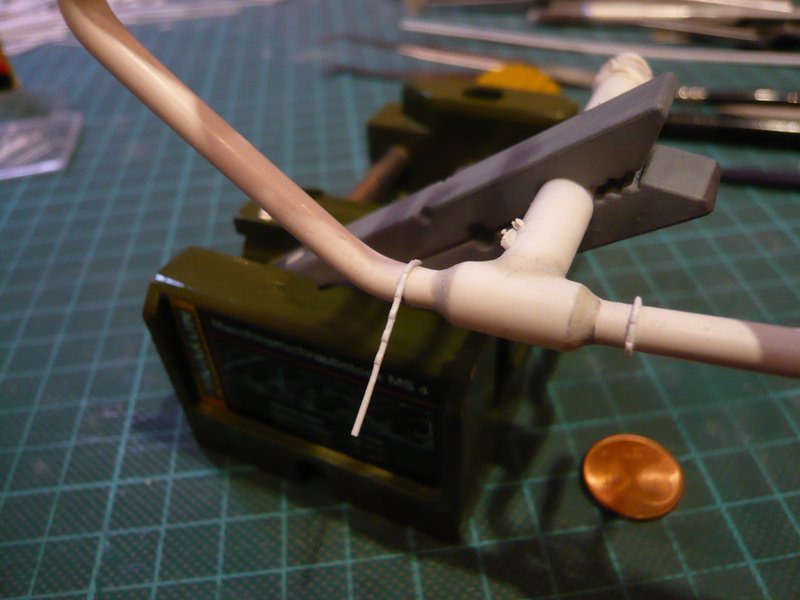 ... 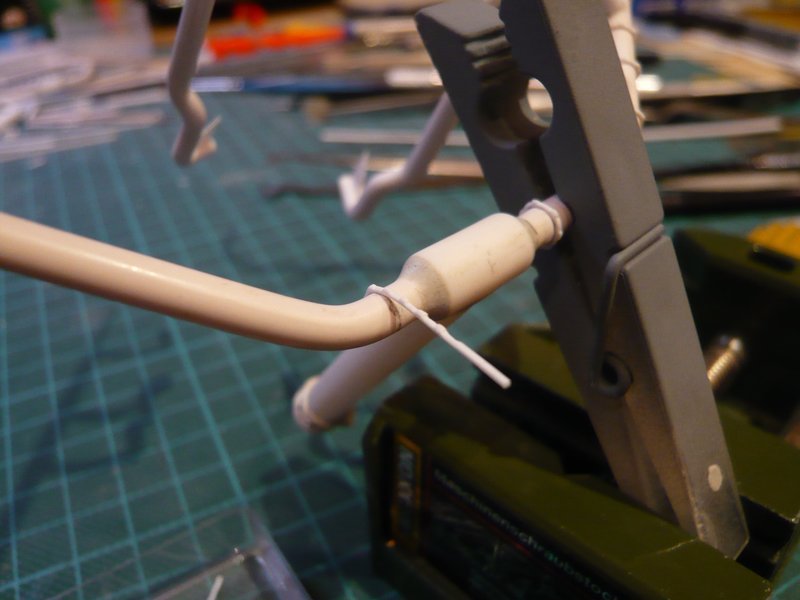 On the following straight piece also sits a pipe support, but which has no clamping ring, as one can see in the first picture. 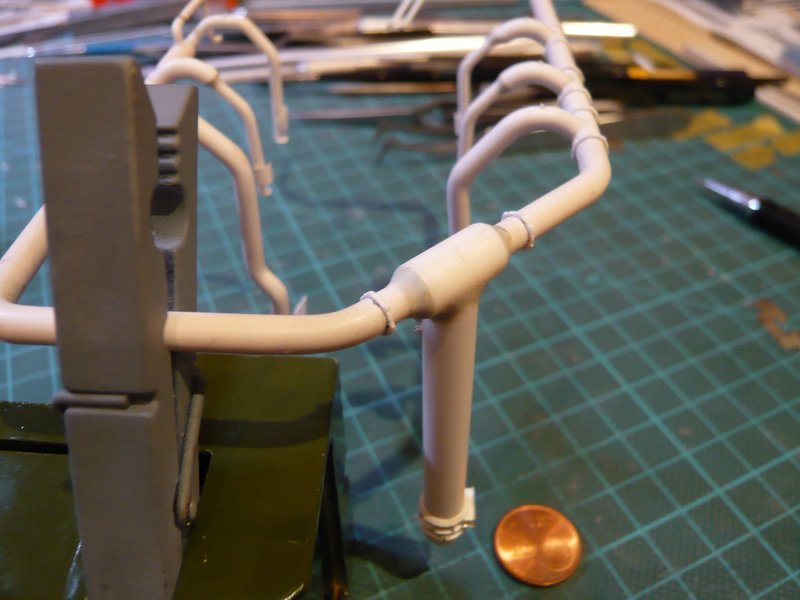 And so it goes around the corner to the inner part of this ring line, where on the front and rear each a four-part clamping ring sits and in between them three six-part rings. 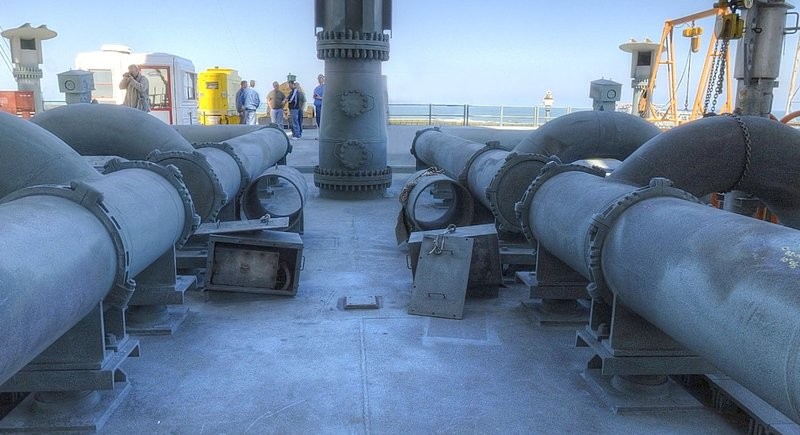 Source: NASA 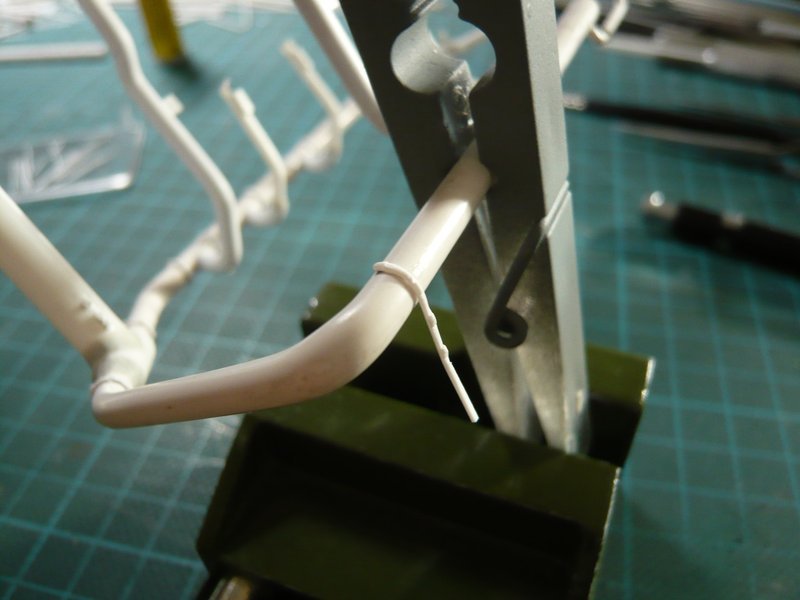 The faded markings had to be re-drawn several times. 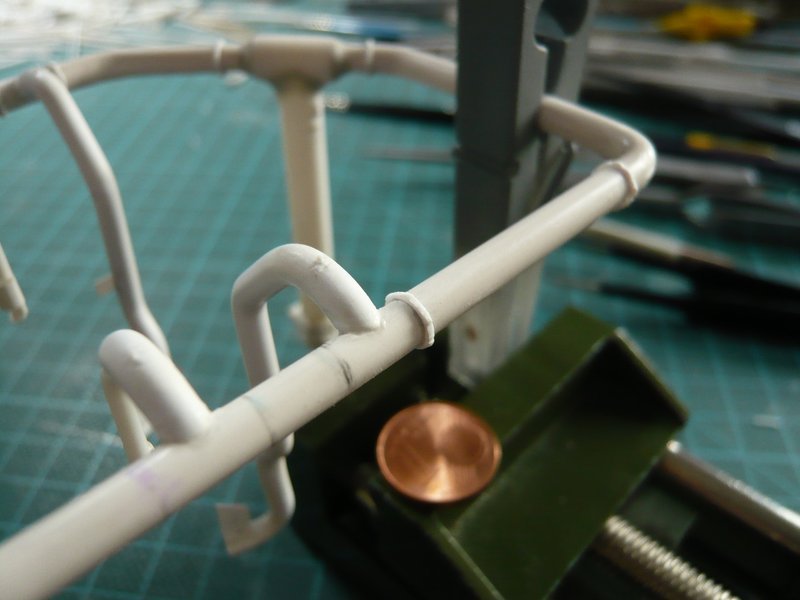 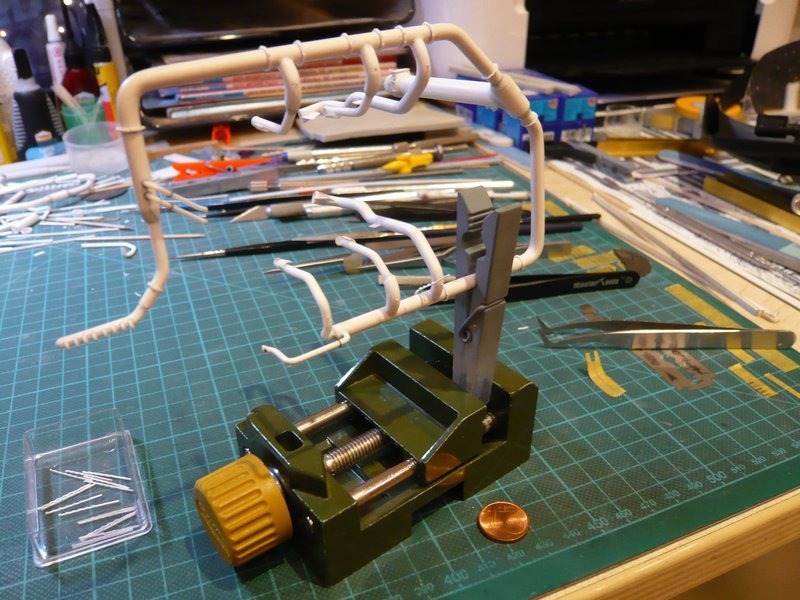 And then finally the last mark was reached, 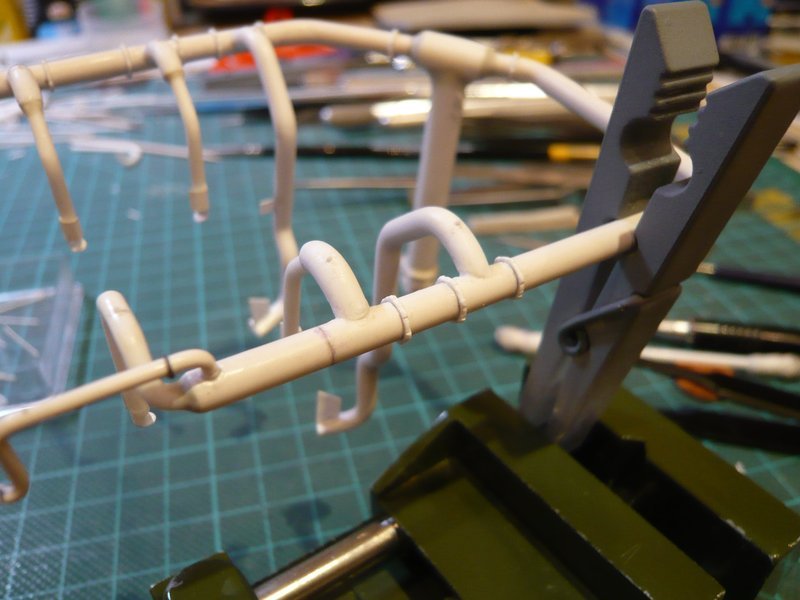 and this clamping ring also glued.  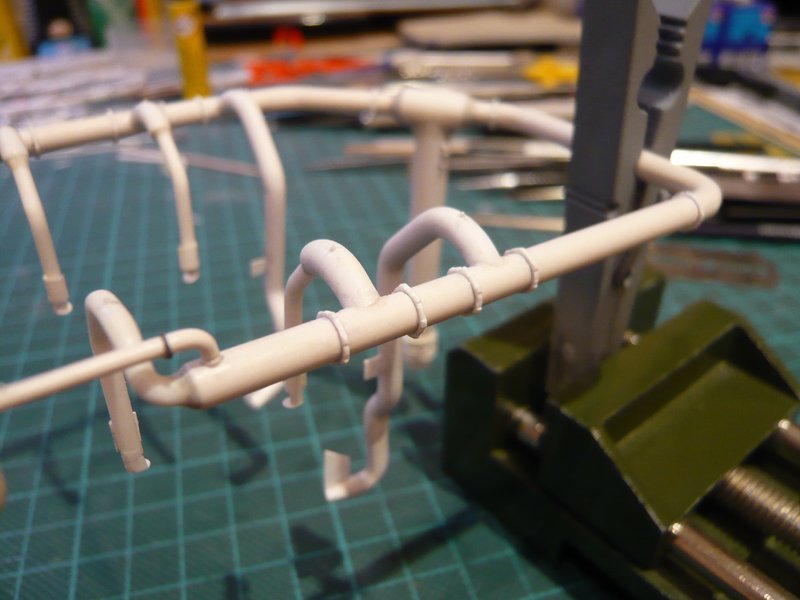 But then followed the total disillusion like a bolt from the blue, because that was nevertheless also a six-part clamping ring and no four-part ring ...  and I felt me in the wrong movie. and I felt me in the wrong movie.  But this can happen to you, when the concentration slows down in the evening and one should rather stop building and better go to sleep ... what I then also repentantly done.  Today I had to strip off the clamping ring heavy-heartedly which was replaced by a four-part ring. 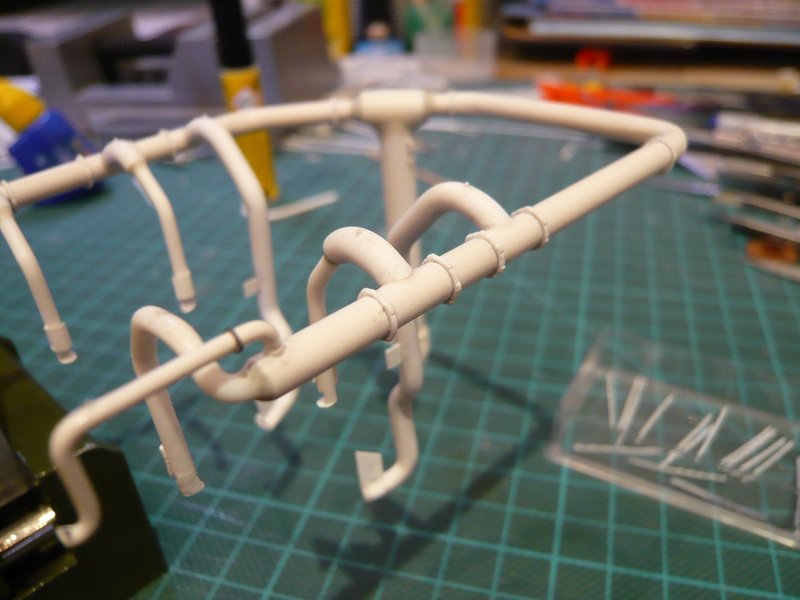 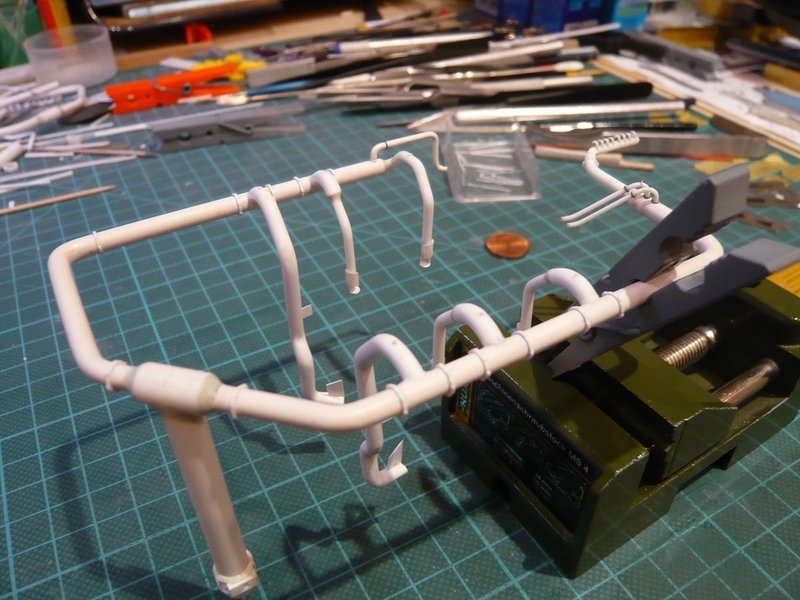 Thereby the one ring line now is finally complete, and so tomorrow I can leap with fresh courage on the clamping rings at the ring line behind the LOX-TSM.
__________________
Greetings from Germany Manfred Under construction: Launch Pad 39A with Challenger STS-6 (1:144)
|
|
#1269
02-18-2017, 02:02 AM
|
||||
|
||||
|
Hello together,
even though my flu still has me down pat persistently, I would nevertheless like to show some pictures of the progress of the last days. But it does not help, and therefore keep smiling and bite teeth together. Now for the gluing of the first clamping rings on the ring line behind the LOX-TSM, and here is the overview of the arrangement of the 14 clamping rings with three four-part and 11 six-part rings. 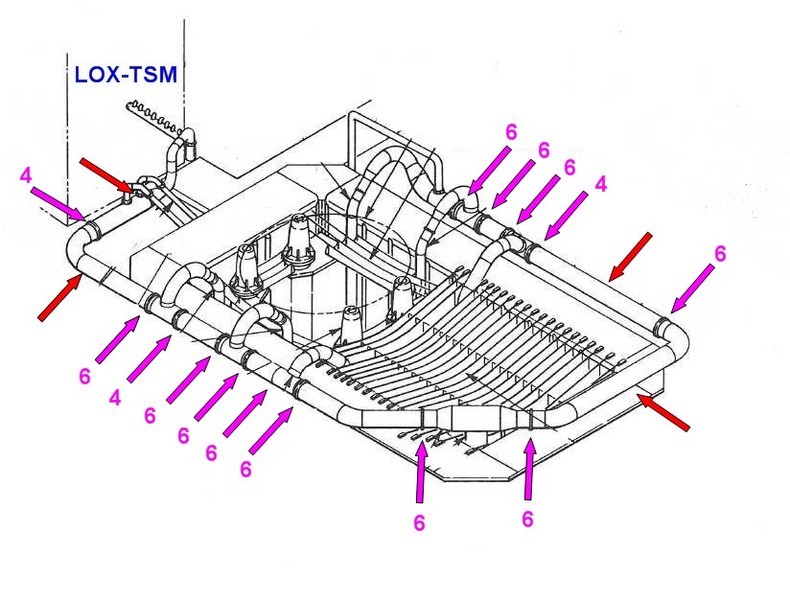 As can be seen in the picture, it first started again with a four-part clamping ring behind the TSM, followed by a six-part and a four-part ring. 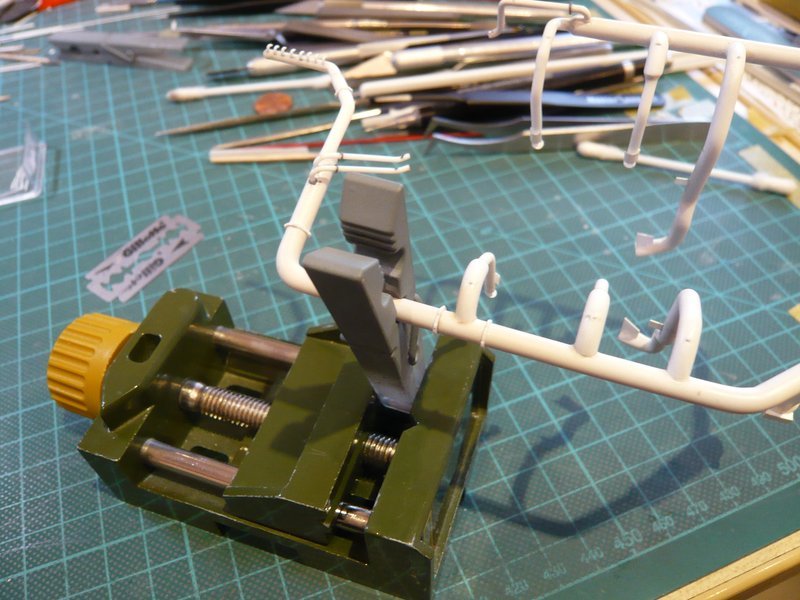  And then there are four six-part clamping rings on this strand. 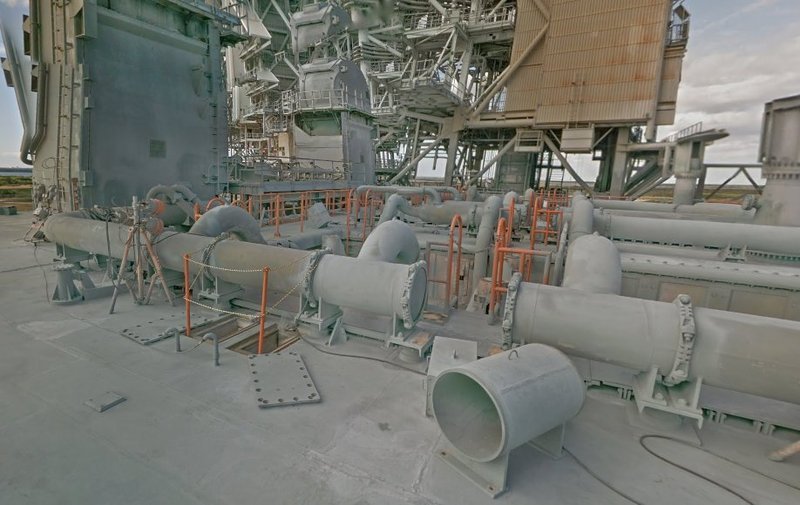 Source: NASA (Google Street View) Now half of the clamping rings on this ring line has been made, and my little box has now emptied quite nicely.  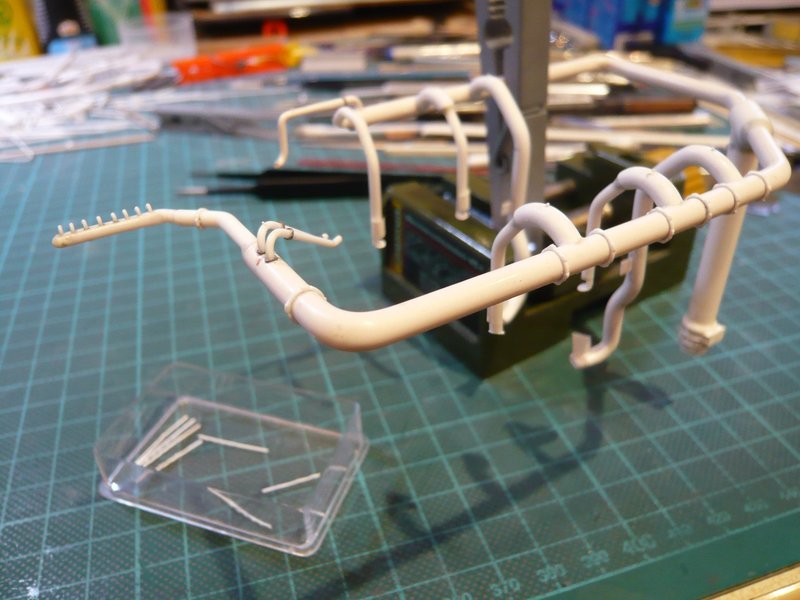 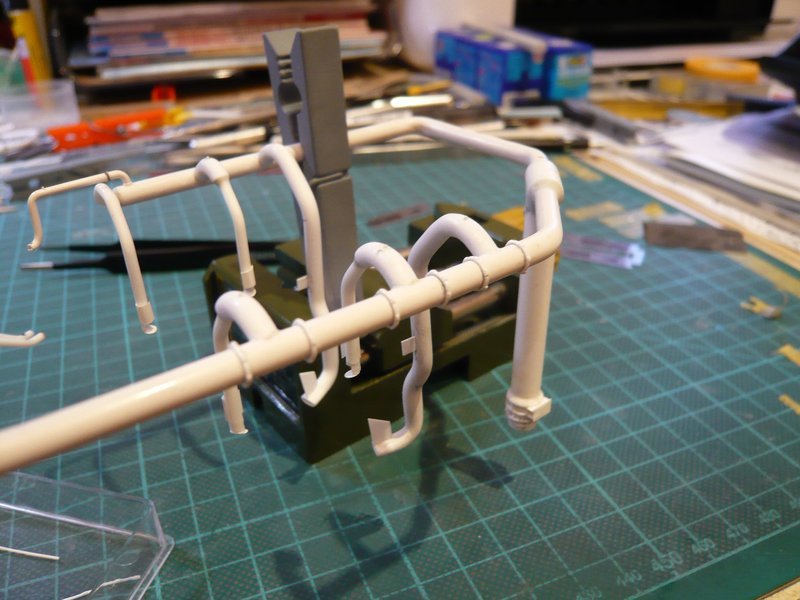 And now there remain only seven clamping rings on the other half of the line, which I also will still create. That's it for now.
__________________
Greetings from Germany Manfred Under construction: Launch Pad 39A with Challenger STS-6 (1:144)
|
 |
|
|


 Linear Mode

