


|
|
|
#1291
 03-24-2017, 11:29 AM
|
||||
|
||||
|
Hello folks,
as hoped for, the gluing of the first three triangular supports went smoothly, as can be seen in the following pictures.  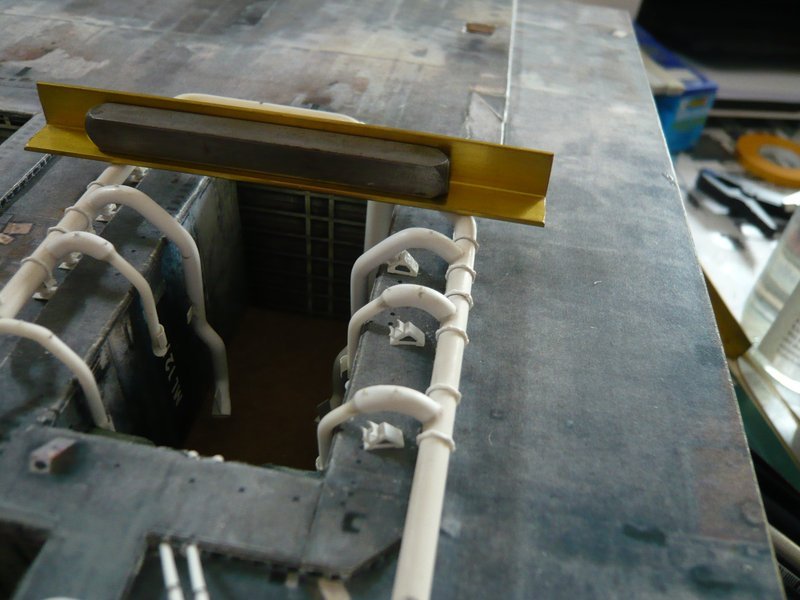 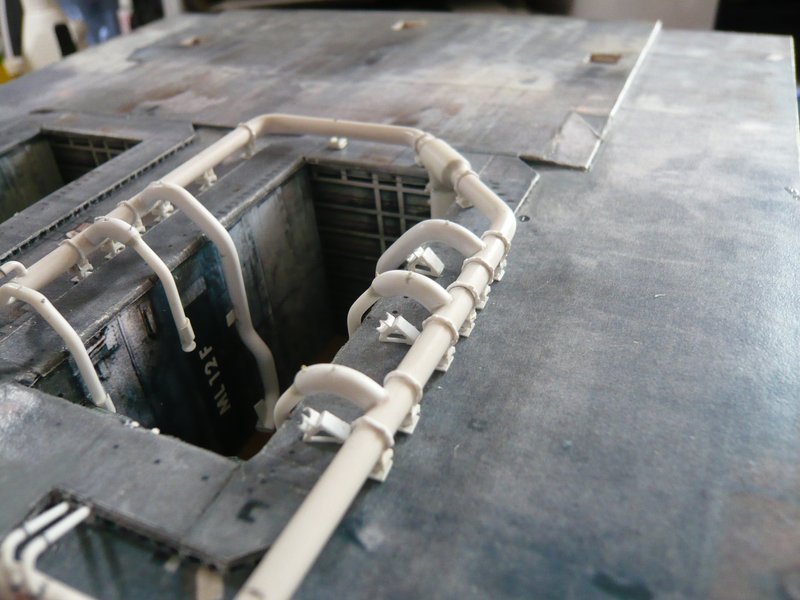 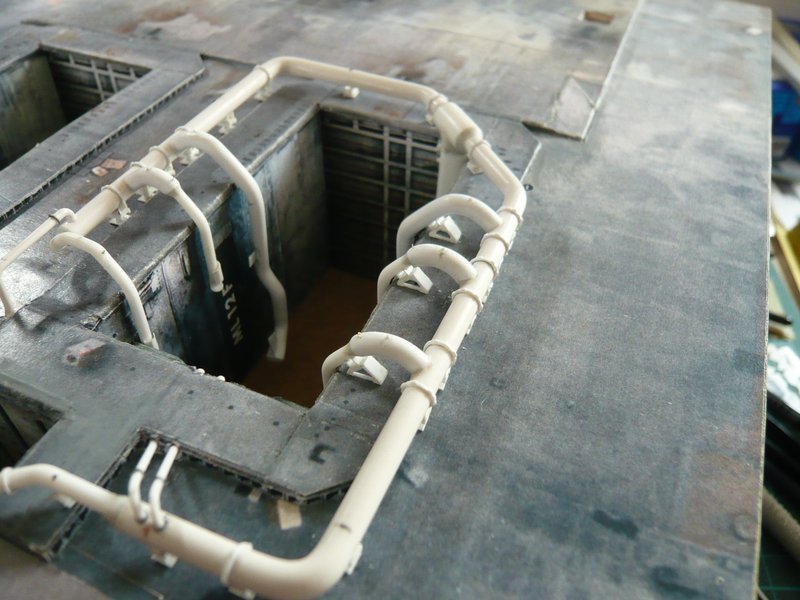 And then the three supports at the outlets on the inside of the ring line had their turn.  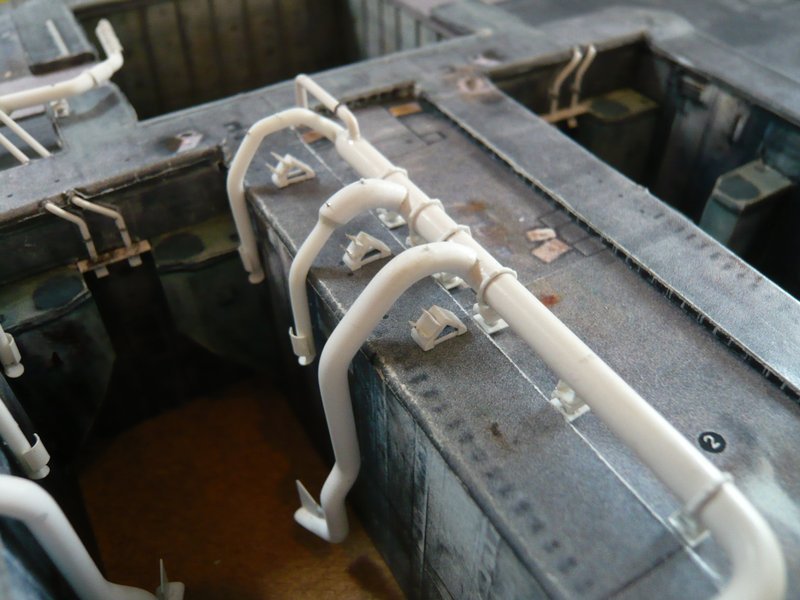  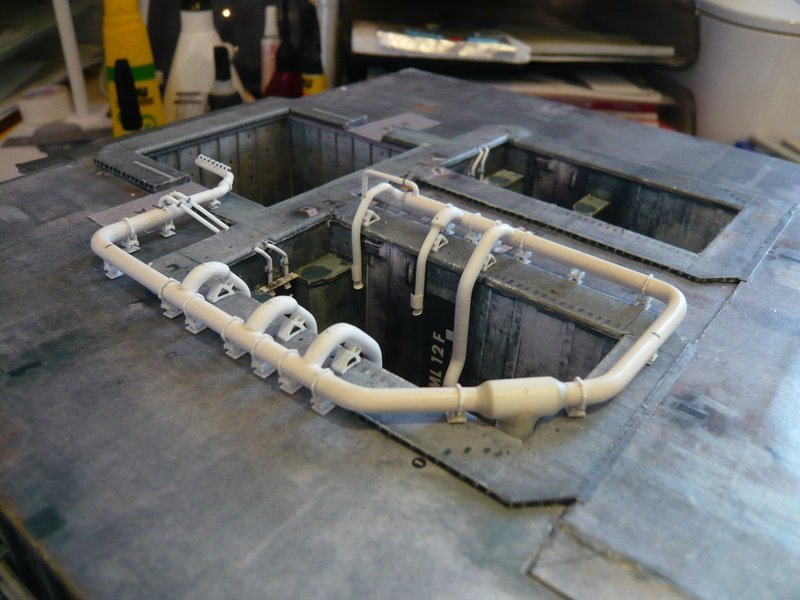 So far so good, now I need to repeat the same procedure only still on the other ring line behind the LH2-TSM.  
__________________
Greetings from Germany Manfred Under construction: Launch Pad 39A with Challenger STS-6 (1:144) 
|
|
#1292
03-28-2017, 03:37 PM
|
||||
|
||||
|
Hello everybody,
but before I go on with the gluing of the supports on the other ring line, I want to start (again) with the preparation of the Water Bags, which I had already begun a long time ago, until the reconstruction of the SRB exhaust holes up to 1:144 has stopped me.  Since I now intend to present the MLP both with and without Water Bags, I first had to think about how best to solve this constructively.  These elongated foil water bags, which are suspended into the SRB shafts, are filled with water only to a height of 12" (approx. 30 cm), as can be seen here again.  Source: NASA With a width of the (most) bags of also 12'' and a length of 20' (6,10 m shaft width), the result is about 550 liters of water per bag, which corresponds exactly to the volume of my aquarium. First, I want to start with the bags in the back of the chamber (Secondary SRB Hole), with the first part reaching from the shaft back wall to the 18'' outlets (Ø 46 cm) which contains 18 of these red bags. This will inevitably become a few less for my MLP because of the modification of the SRB holes ...  As can be seen in this picture, the first water bag is hanging between the chamber back wall and the 36'' feed pipe (Ø 91 cm) and is therefore somewhat narrower than the other bags in front of the pipe. The next two bags are somewhat wider than the remaining ones and also shortened in front ot the feed pipe, which should be taken into account in the following design.  Source: flickr.com (Andrew Sheer) So I first took measurements and made a new template for the partition walls, 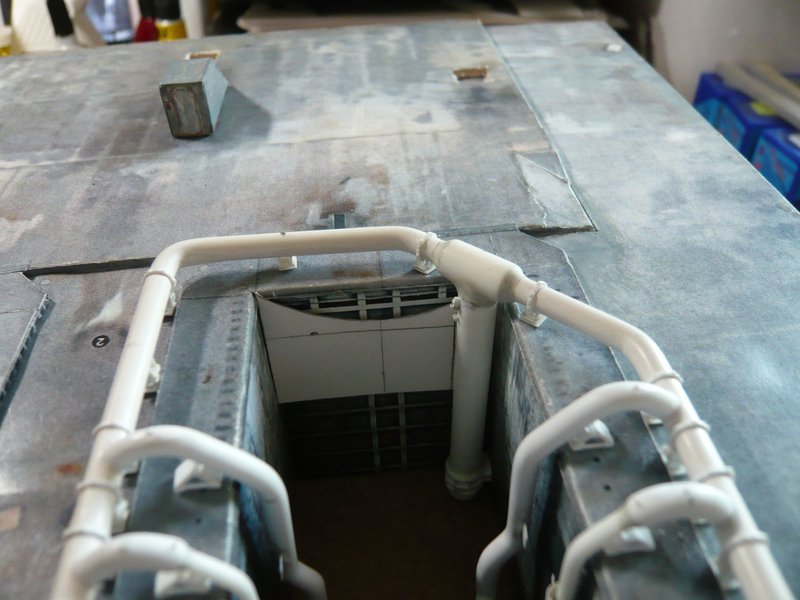 and therefore get to work!  Since the distance between the back wall and the feed pipe is rather small, the first bag can be only 1,5 mm wide. 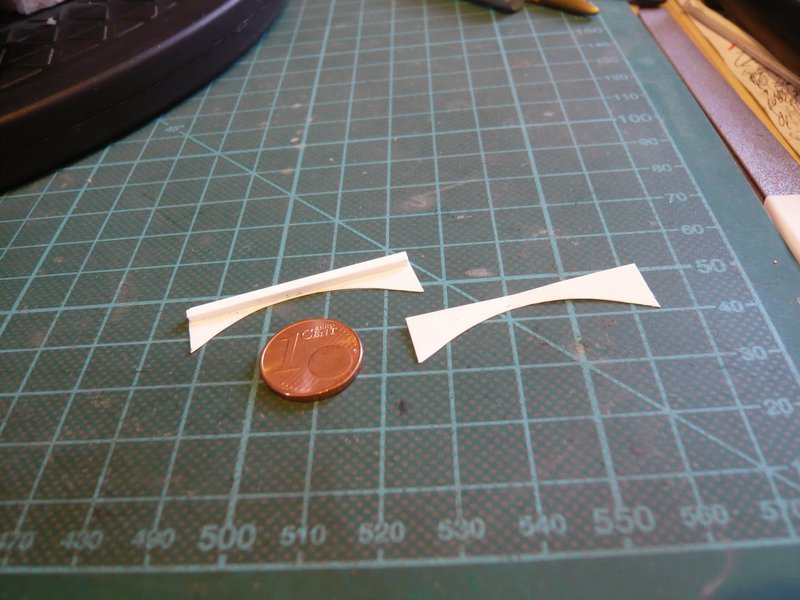 For the gluing of the parts with MEK, I have carefully placed Teflon foil underneath. 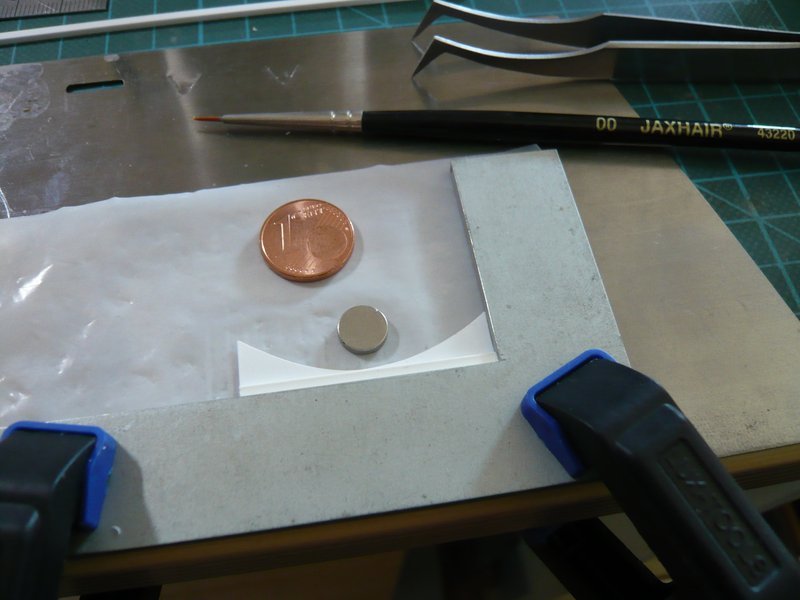 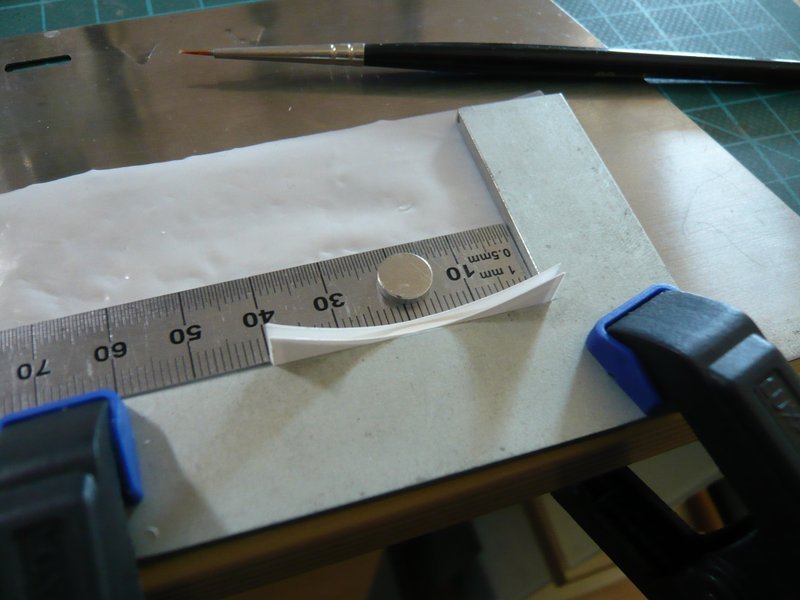 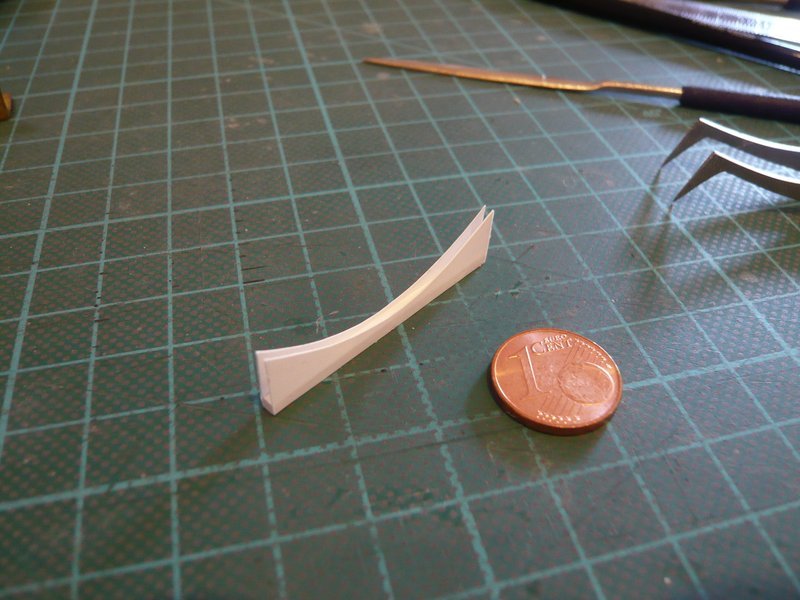 Since the bag has a bit jammed during insertion, the length had to be adjusted slightly. 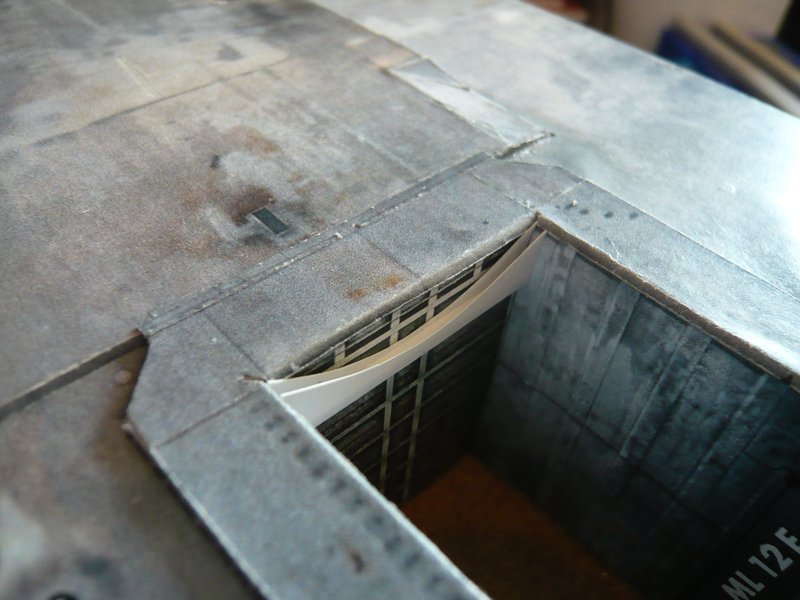 Therefore the question for insertion came up, so it is probably more favorable to insert the bags later from the bottom into the shaft with installed ring line, because the SRB Blast Shield slightly protrudes at the top edge and therefore would disturb.  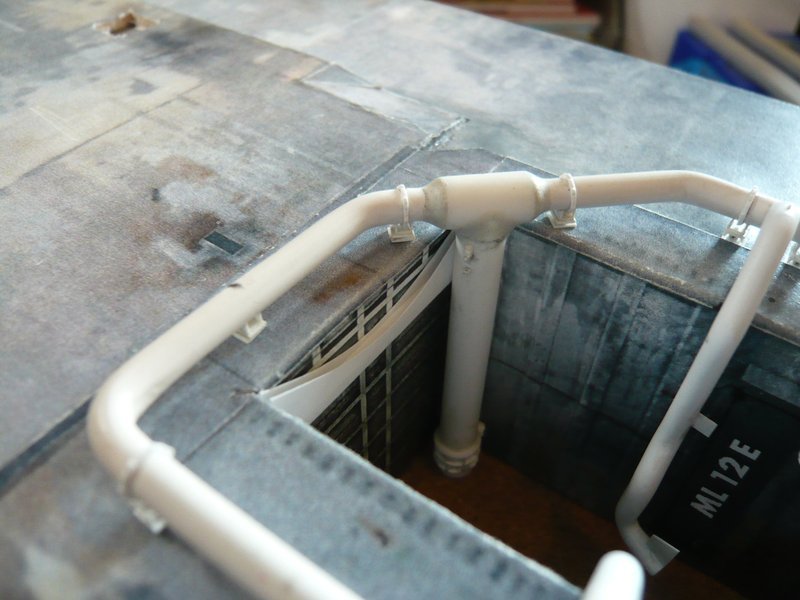 And now to the small-scale production of the individual parts. For the "normal" bags I will use a square profile (2 mm x 2 mm) for the lower webs, and for the partition walls 0,2 mm Styrene Sheet by Evergreen.  The next time, however, it will go on with the two wider bags next to the feed pipe (Ø 6,2 mm), for which I will use a rectangular profile (3 mm x 2 mm), after which the normal bags will then follow.
__________________
Greetings from Germany Manfred Under construction: Launch Pad 39A with Challenger STS-6 (1:144)
|
|
#1293
03-30-2017, 05:50 AM
|
||||
|
||||
|
Hello everybody,
here is the next step on the way to the Water Bags, which are going to be composed of several parts, but beautifully in sequence, just like during the later assembly. The first part is the slightly narrower bag (1.5 mm web width) behind the feed pipe, which is already finished and could already be seen in the last post.  The next part extends up to the two 18'' outlets to which these individual parts belong, 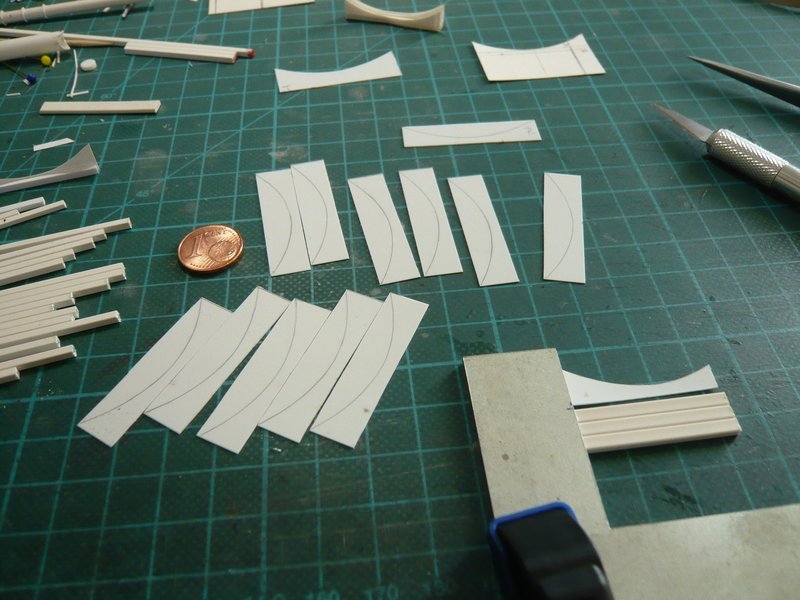 which must be carefully cut out so that the bag package becomes uniform. Below the scissors lie the wider webs (3 mm x 2 mm) and the shortened partition wall for the two bags next to the feed pipe, 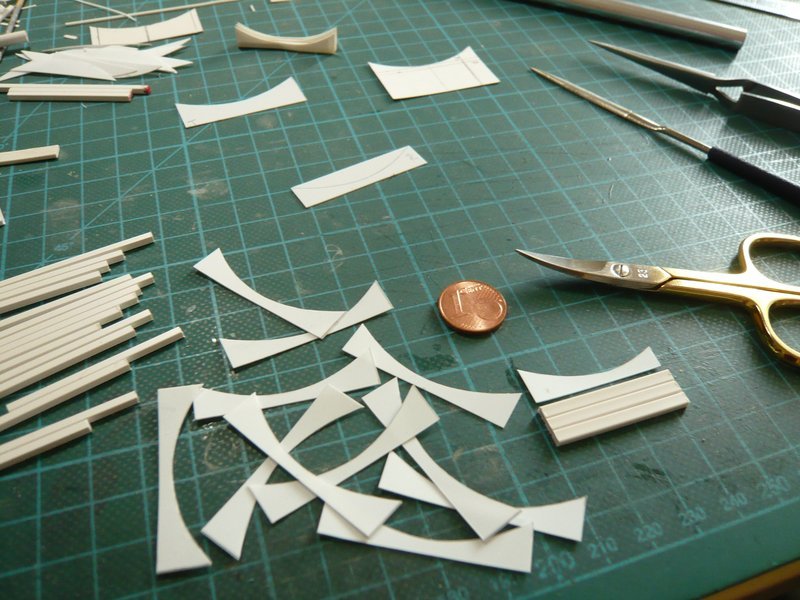 which were next glued. 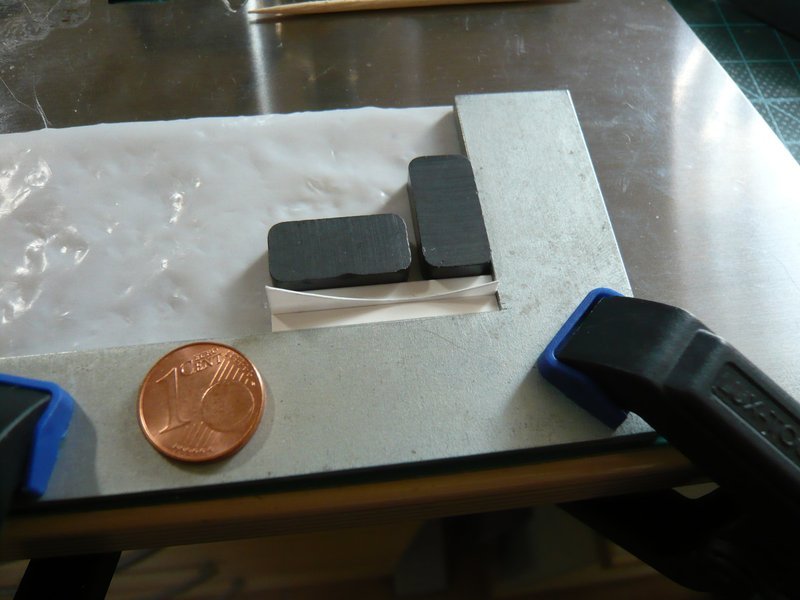 Then the longer partitions with the "normal" webs (2 mm x 2 mm) follow. 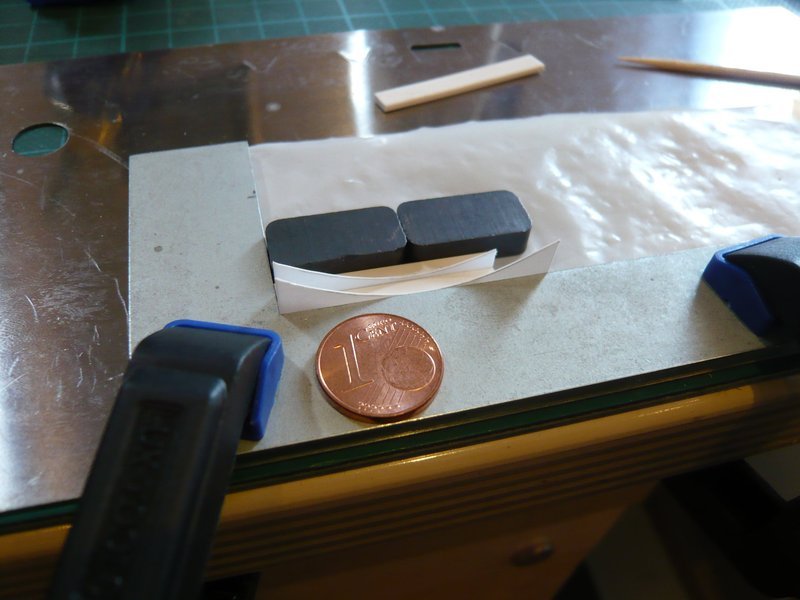 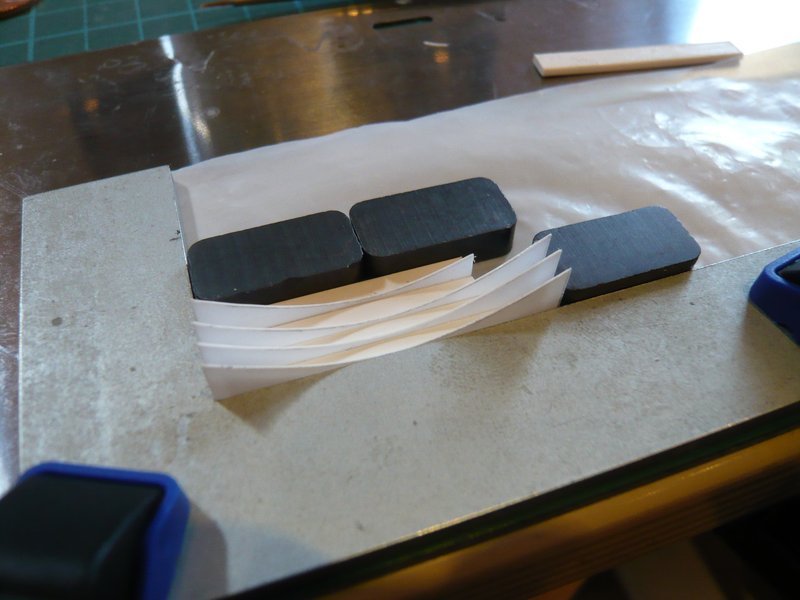 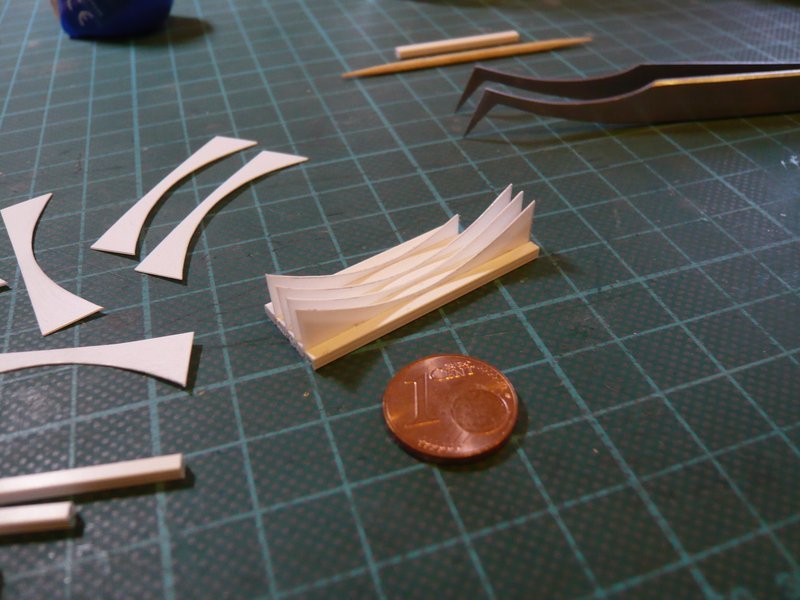 And so the first assembly test looks, which shows that the bags fit quite well and it can equally go on up to the 18'' outlets.   Then the third part follows, starting with the bag between the two outlets and the following two "normal" bags, followed by the two short bags between the two rear MLP Support Posts, which unfortunately are covered by the guy in the bluey.  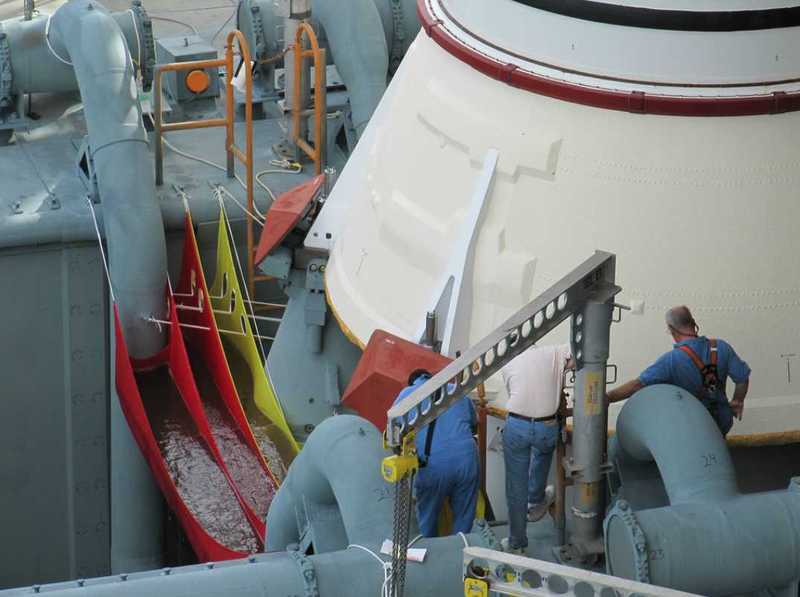 Source: flickr.com (Jen Scheer) I hope I can insert this connected third part from above, as well as the remaining three short bag parts on the side walls and the front shaft wall. 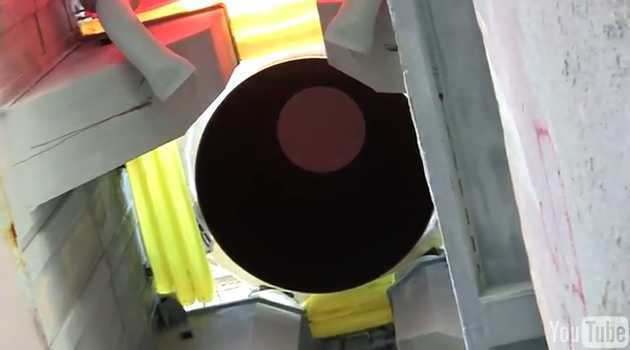 Source: youtube.com (Michel Mephit) So much for the moment.
__________________
Greetings from Germany Manfred Under construction: Launch Pad 39A with Challenger STS-6 (1:144) Last edited by spacerunner; 03-30-2017 at 06:48 AM.
|
|
#1294
03-30-2017, 08:57 AM
|
|||
|
|||
|
I never knew of the water bags Manfred. You are a never-ending fount of information.
__________________
This is a great hobby for the retiree - interesting, time-consuming, rewarding - and about as inexpensive a hobby as you can find. Shamelessly stolen from a post by rockpaperscissor 
|
|
#1295
03-30-2017, 12:13 PM
|
||||
|
||||
|
Hi elliott,
nice that you are looking in on me again and thanks for your kind words.  Yep, after the external damage to the orbiter Columbia during the first launch (STS-1), the NASA engineers had to learn the hard way and to improve the sound suppression drastically,  and they came up with a fantastic technical solution. and they came up with a fantastic technical solution.  Here is an amazing and very impressive video with a great demonstration of the principle of operation of the SSWS : Noise Reduction Technology in Space Shuttle's Lift off Using WATER MIST You'll be amazed, enjoy it.
__________________
Greetings from Germany Manfred Under construction: Launch Pad 39A with Challenger STS-6 (1:144)
|
|
#1296
03-31-2017, 12:36 AM
|
||||
|
||||
|
Hello everybody,
here are a few pictures of the continuation of the gluing of the Water Bags in the SRB shaft behind the LOX-TSM. 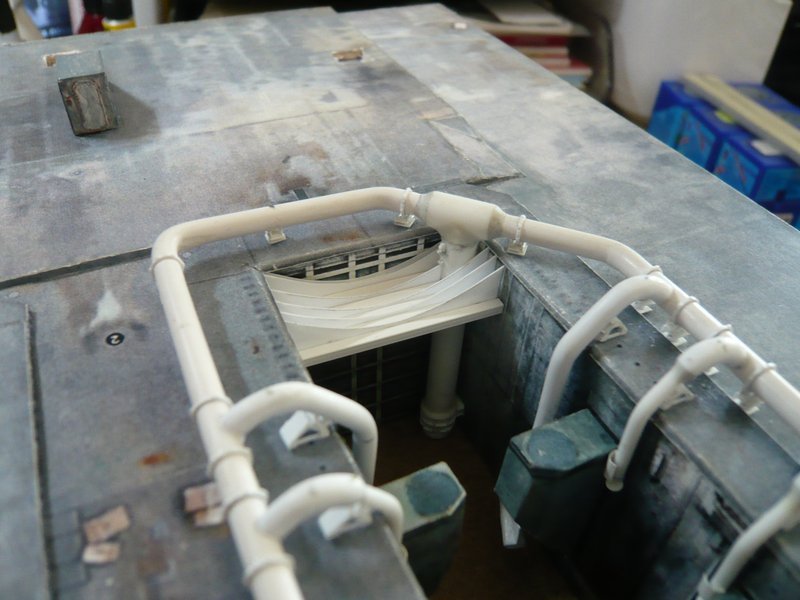 And so it went on. 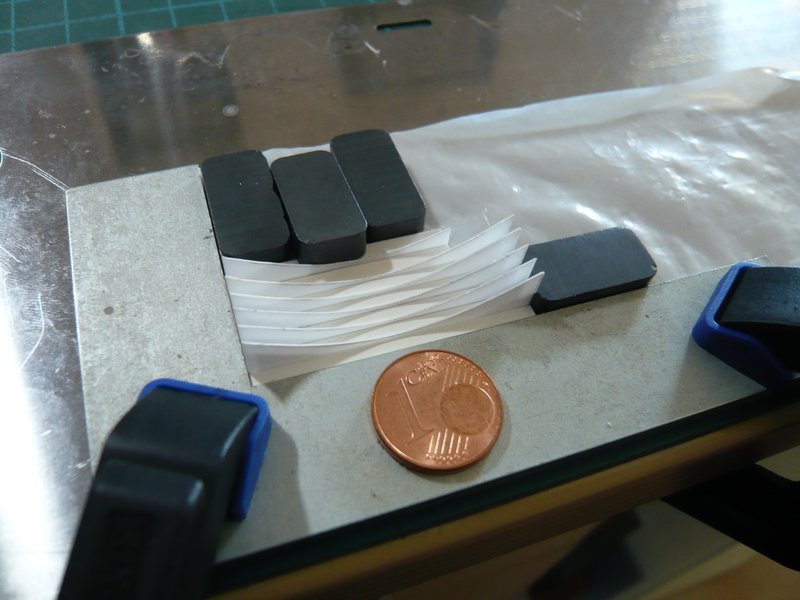 I had to pay attention to the fact that the package could not move upwards, for which I clamped it between magnets and pressed the central webs gently down onto the pad each time and held it tight for a moment. 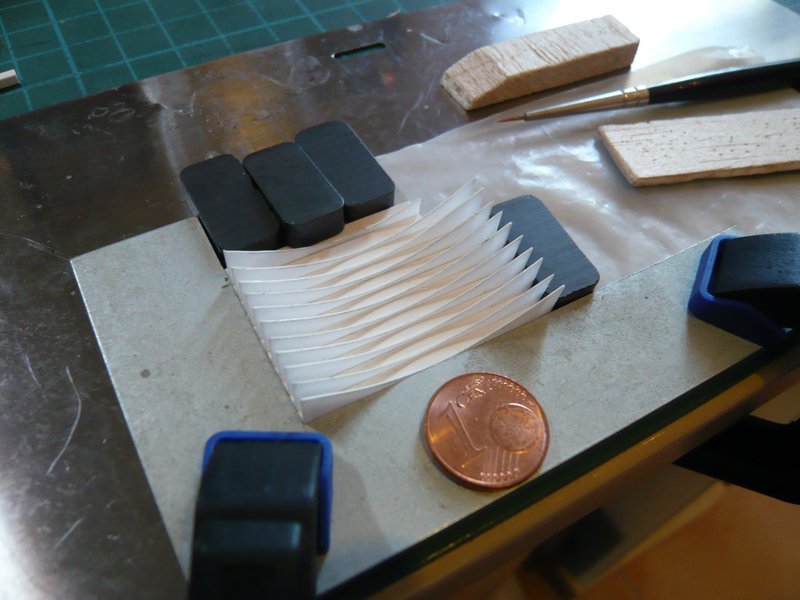 In this way, I have glued ten bags behind the inlet pipe, 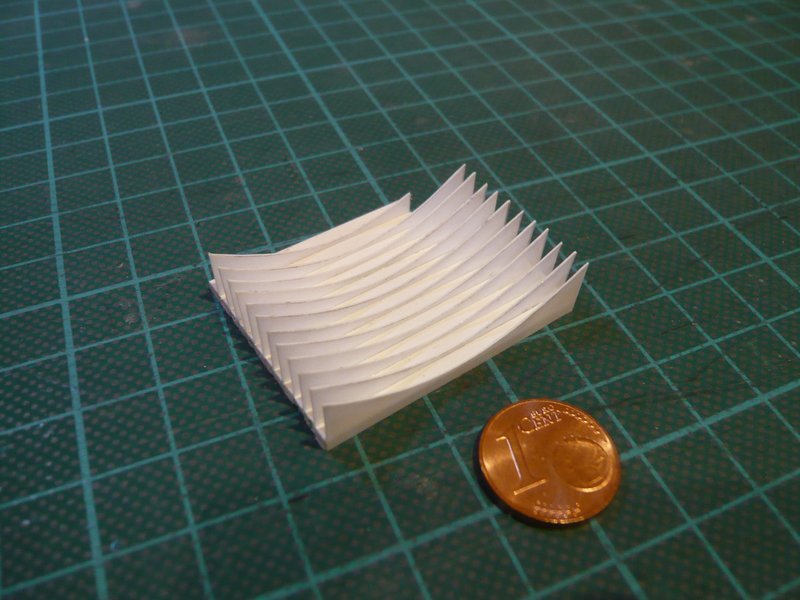 which extend to the two 18'' outlets. 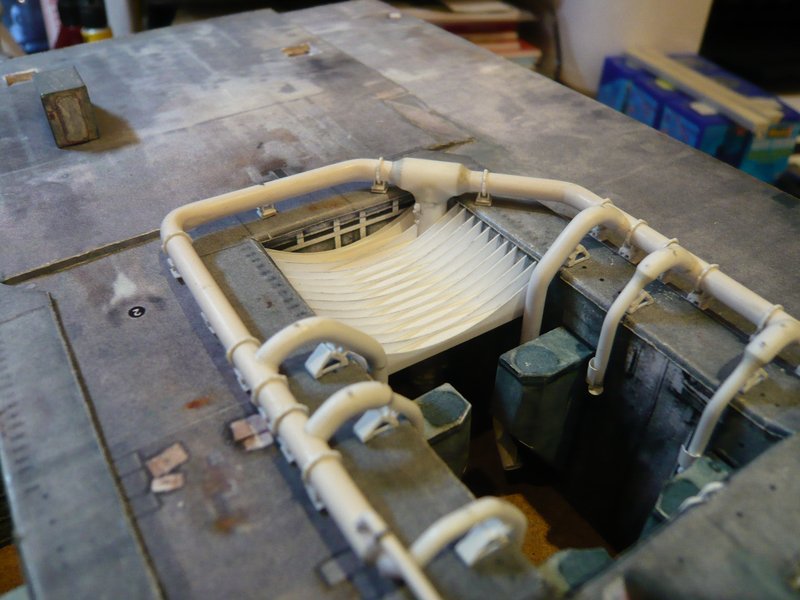 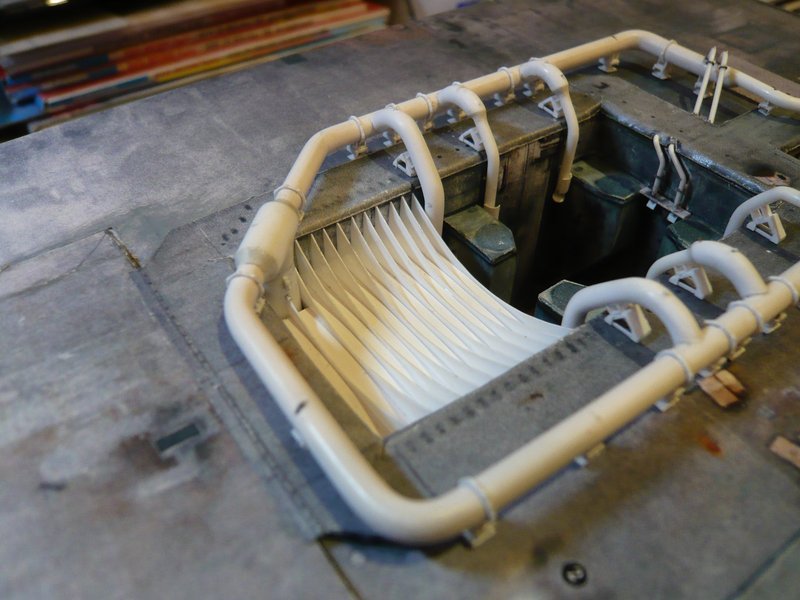 Then it goes on with the third part, which begins with the wider bag between the outlets.
__________________
Greetings from Germany Manfred Under construction: Launch Pad 39A with Challenger STS-6 (1:144)
|
|
#1297
03-31-2017, 05:42 PM
|
||||
|
||||
|
So, what do you guys think? 50? 75? 100 thousand Euros? That's what I'd expect to pay for craftsmanship like this!
|
|
#1298
04-01-2017, 06:07 AM
|
||||
|
||||
|
Hey Becky,
stay cool, yourself have impressive skill and again and again new fantastic ideas.
__________________
Greetings from Germany Manfred Under construction: Launch Pad 39A with Challenger STS-6 (1:144)
|
|
#1299
04-01-2017, 09:36 AM
|
||||
|
||||
|
I'm so happy that you don't live overseas... well... not too far anyway (just 8 hours from here by car...) so, someday, I can hope to have the chance to see this wonder with my eyes...

|
|
#1300
04-02-2017, 08:25 AM
|
||||
|
||||
|
Thanks Tonino for your visiting in on me.
When time has come, you're welcome. 
__________________
Greetings from Germany Manfred Under construction: Launch Pad 39A with Challenger STS-6 (1:144)
|
 |
| Thread Tools | |
| Display Modes | |
|
|


 Linear Mode

