


|
|
|
#421
 02-28-2014, 04:43 PM
|
||||
|
||||
|
I am planning on building the 1:144 scale MLP, Fss and RSS, and the the LUT and MLP but I haven't decided on a scale yet.

|
|
#422
02-28-2014, 04:45 PM
|
||||
|
||||
|
Oh, and thanks Manfred for all of your help. I greatly appreciate it!!!
|
|
#423
03-01-2014, 01:10 PM
|
||||
|
||||
|
No problem Konstantine,
I do not know if you know Michaels (mk310149) grandiose Launch pad Shuttle MLP of EDU-Craft in 1:144, he has built all three Paper kits by David Maier, absolutely outrageous.   Source: papermodelers.com (mk310149) 
__________________
Greetings from Germany Manfred Under construction: Launch Pad 39A with Challenger STS-6 (1:144)
|
|
#424
03-01-2014, 11:48 PM
|
||||
|
||||
|
I saw that too before! It is so awesome!!!. That would make for an awesome display!!! How do you attach images in a post, like without using a URL link?
|
|
#425
03-02-2014, 02:32 AM
|
||||
|
||||
|
Hi Konstantine,
I don't make attachments, I make a screenshot, save it as a jpg in PaintShopPro and upload it in ImageShack (800x600). Then I take the Direct Link and paste it via the Insert Image button as a picture in the post. 
__________________
Greetings from Germany Manfred Under construction: Launch Pad 39A with Challenger STS-6 (1:144)
|
| Google Adsense |
|
#426
03-02-2014, 08:28 AM
|
||||
|
||||
|
amazing building!
I`m kind of lost for words to describe this build...with that being said...I`ll have to go with incredible!!
Bill 
__________________
----------------------------------------------- Seems to have been Deliberately Buried ----------------------------------------------- Where did Gunter Wendt ? 
|
|
#427
03-05-2014, 04:27 AM
|
||||
|
||||
|
Hello folks,
And for a change, now again on the TSM ladders. Since I still had experimented with the base of the ladders. In addition I originally wanted to try this railing part, or bend the ladder supports individually. 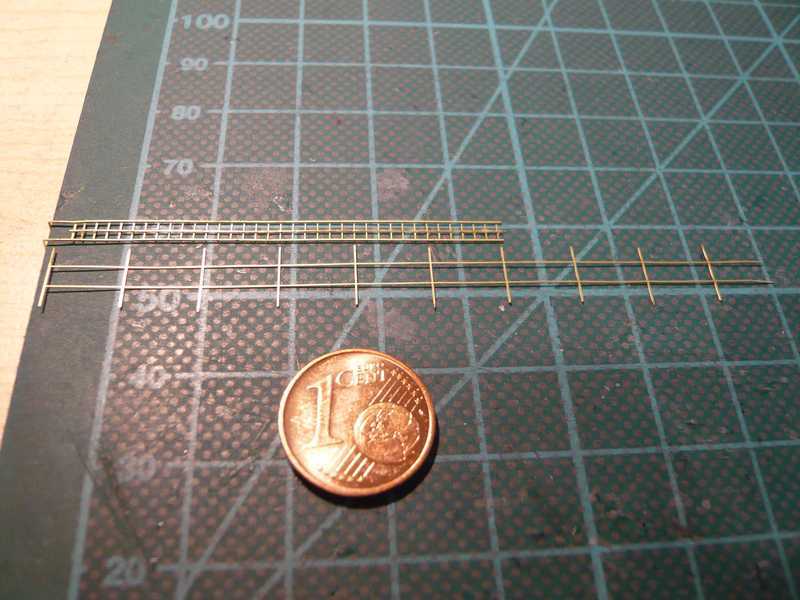 For the bend I have this brass square profile (3x3 mm) used and first time bent over a support from 0,2 mm brass wire, 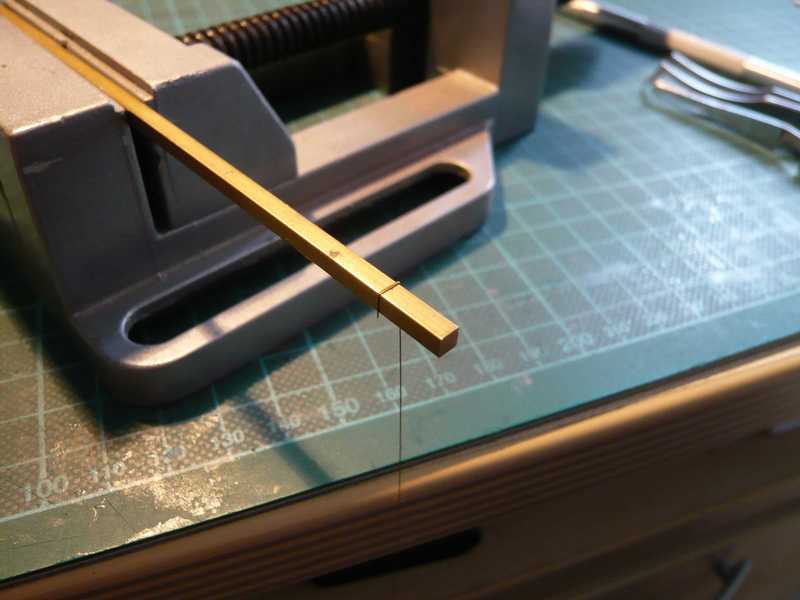 what would nearly fit to the ladder width. 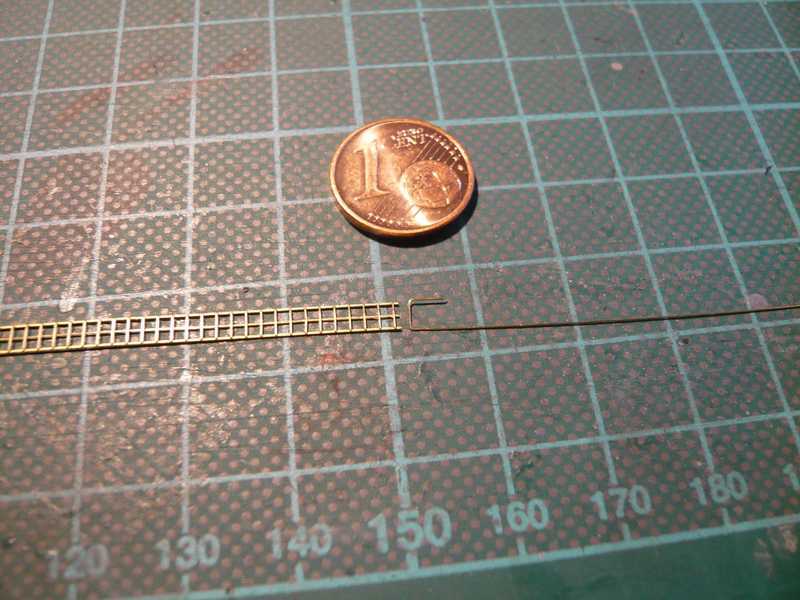 So I have now bent the supports of the railing as well, 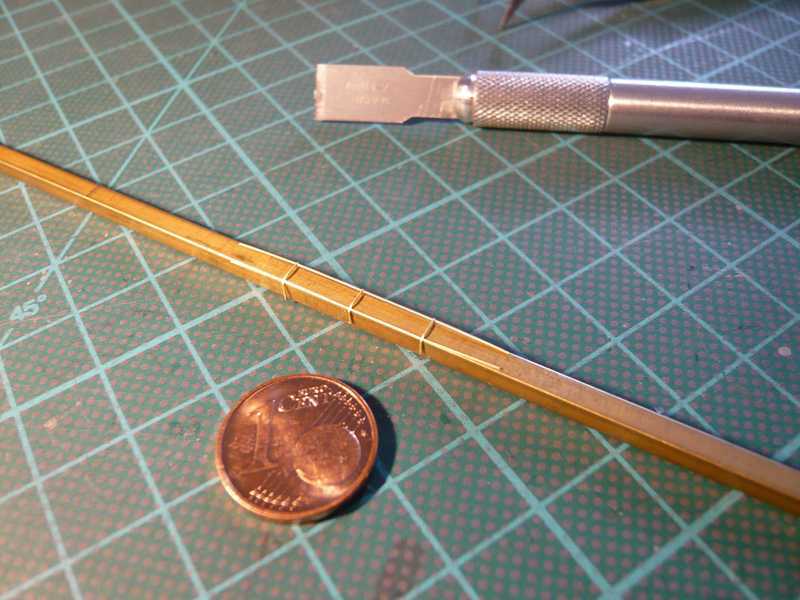 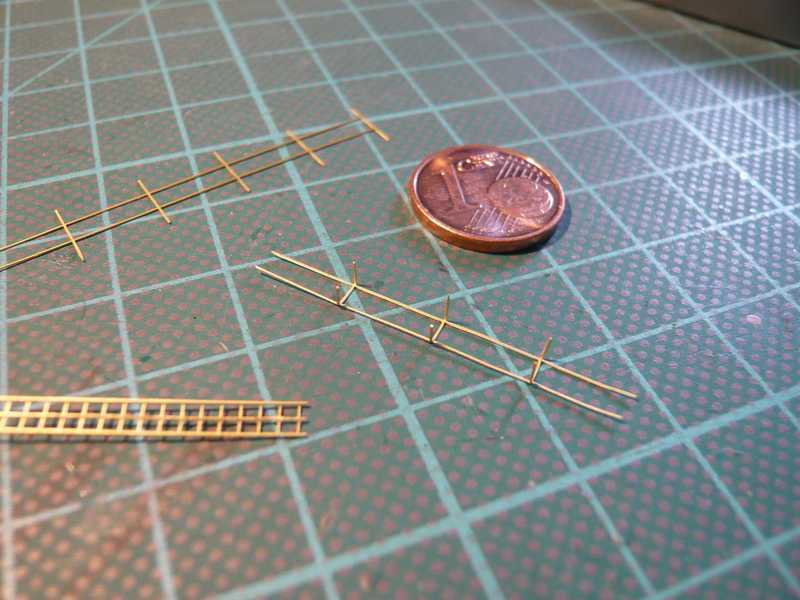 and adapted this base on the ladder. And as you can see, you can pretty well align the ladder from the rung spacing and width to the substructure.   But if you look closely, you can see another problem, which I had not considered when bending the ladders.  Since the ladder rungs are after bending on the cutting mat minimally below the ladder stile, there is a small gap between the stile and the longitudinal strips of the base, which I'm so not like. That should both lie close to sticking it well. Since the ladder rungs are after bending on the cutting mat minimally below the ladder stile, there is a small gap between the stile and the longitudinal strips of the base, which I'm so not like. That should both lie close to sticking it well.  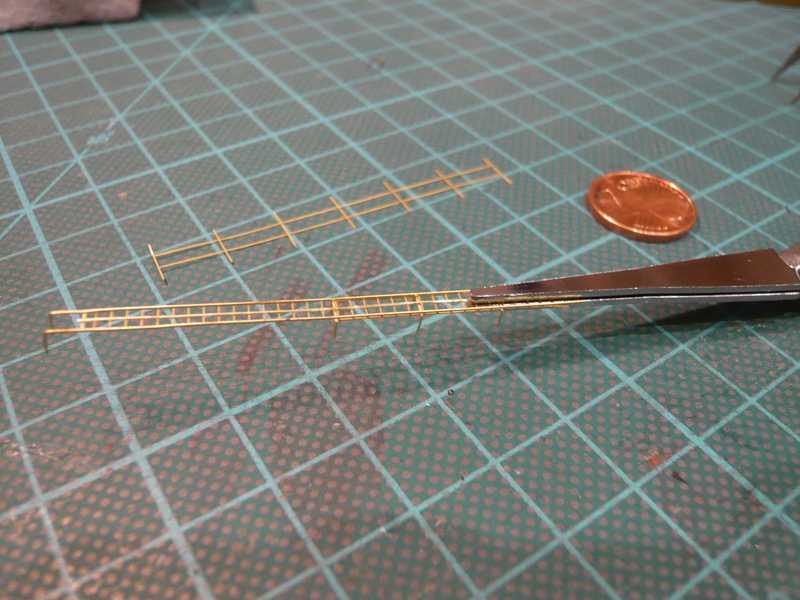 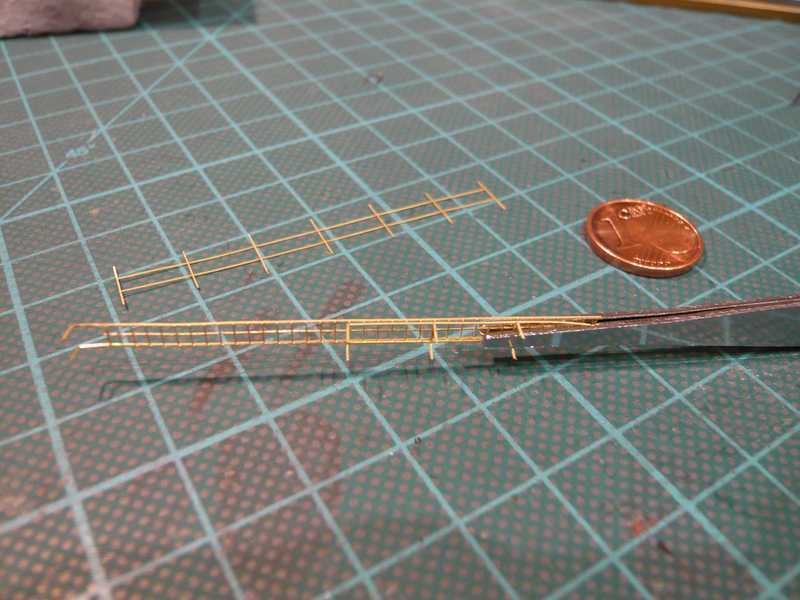 In this picture the gap is a little bit clearer. 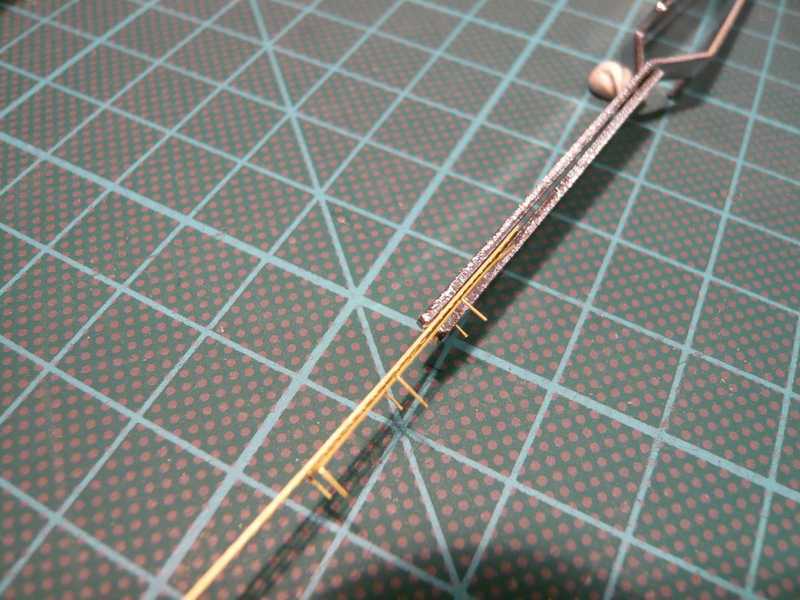 Since I'll probably have to think of something during bending so that the ladder rungs do not protrude downward. And if that does not work, maybe the variant with the individual supports is indeed expensive, but possibly better solution. 
__________________
Greetings from Germany Manfred Under construction: Launch Pad 39A with Challenger STS-6 (1:144)
|
|
#428
03-05-2014, 06:07 AM
|
||||
|
||||
|
Manfred, the ladder workis simply astounding (as is the rest of this build). There are some absolutely Master Builders of ladders and stairs on this forum!
Joe
__________________
Currently building Heinkel Models/Ron Miller Authentic Nautilus.
|
|
#429
03-06-2014, 08:13 AM
|
||||
|
||||
|
Thanks Joe for your kind words, but they use but for this paper, right?
 During my current crosstrainer tour I again considered back and forth, and now I probably still choose the variant with the individual ladder supports. That with the substructure of the rail but is not as the yellow of the egg, especially because this variant would be suitable only for the two ladders at the outer sides of the TSMs. And also, the handling of this extremely fragile structures, in particular in the attachment on the TSM that's not for the faint of heart.  Since the supports of the four ladders at the side of the Service Platform boxes are standing both on the boxes as well next to it, the legs of the rail for the longer sub-assembly supports at the left side of the ladders would be too short.  And also the distances between the supports to the spars of the base are almost twice as large as the original. Therefore, it is more favorable overall, choose the other variant for the TSM ladders, which I am now going to put all on the same principle to individual posts. And also the distances between the supports to the spars of the base are almost twice as large as the original. Therefore, it is more favorable overall, choose the other variant for the TSM ladders, which I am now going to put all on the same principle to individual posts.  Source: NASA That's why I tried here once with this variant further, which was already in the last post shortly see,  and have prepared two supports from 0.3 mm brass wire, which are about 1.3 mm above the ground. 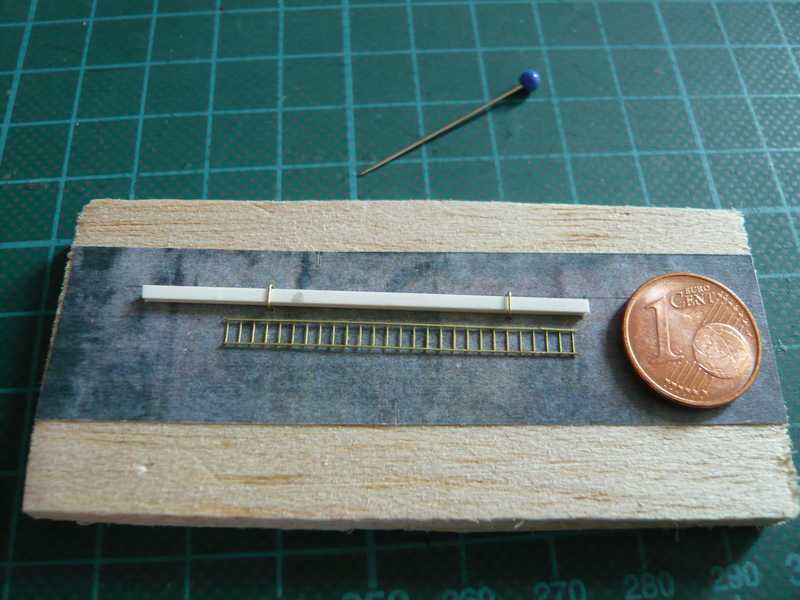 And so it then looks with applied ladder, where then every 5th rung a support will stand. 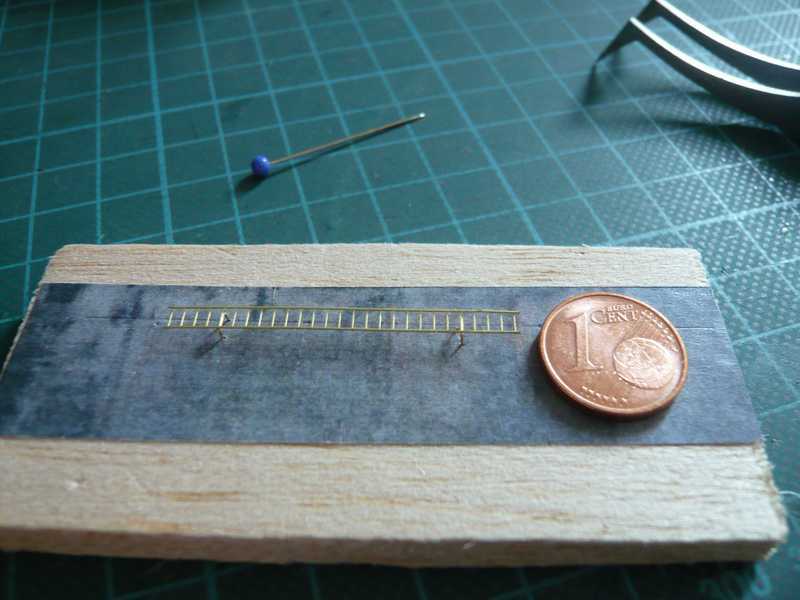 Since we're on the rungs, as there are above the ladders also four smaller individual rungs to the fastener sitting above, as can be seen in this picture. I also wanted to try still the same on the occasion.  Source: NASA For this I used 0,2 mm brass wire. For these rungs, as well as in the ladder supports discussed above, it is advisable to make one foot a little longer, because this positioning and insertion is made easier in the pricked holes. 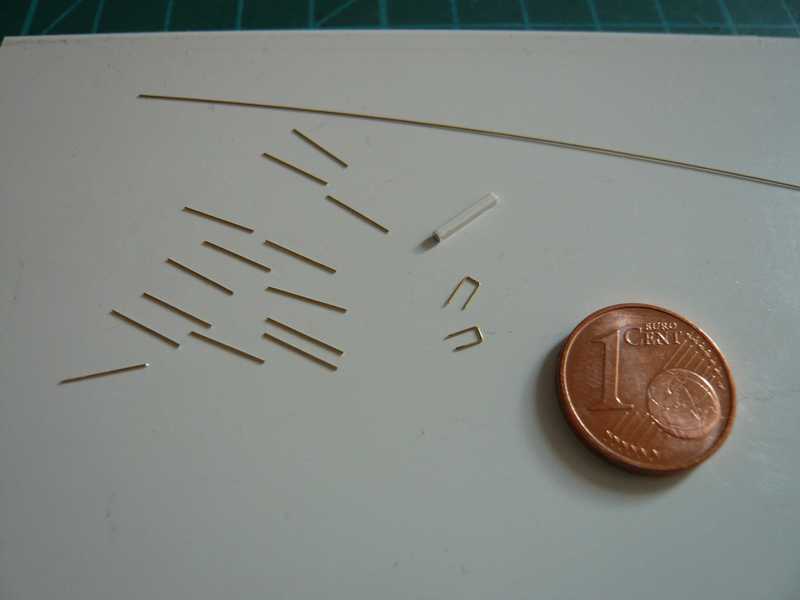 Here a first rung is inserted. Because now follow two rungs below and one above. 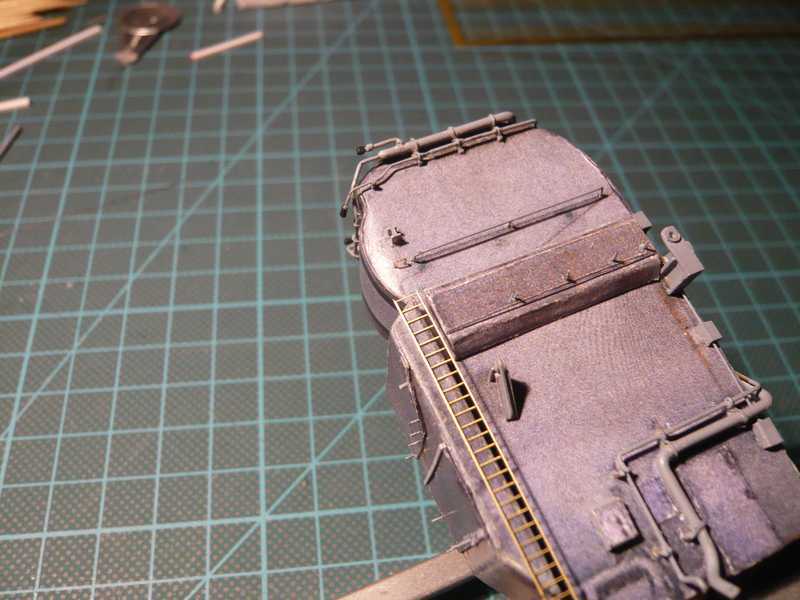 So that's enough for today with these little details that in any case unlikely to be visible on the finished model.
__________________
Greetings from Germany Manfred Under construction: Launch Pad 39A with Challenger STS-6 (1:144) Last edited by spacerunner; 10-04-2016 at 09:23 AM.
|
|
#430
03-08-2014, 10:13 AM
|
||||
|
||||
|
Hi there,
today even a little bit transverse patch.  I had already a long time ago a Bug (4'') bought, which is this great bending tool here, which at latest for bending PE parts from the LVM detail kits should be used, which must then be bent at the Tower in all directions. 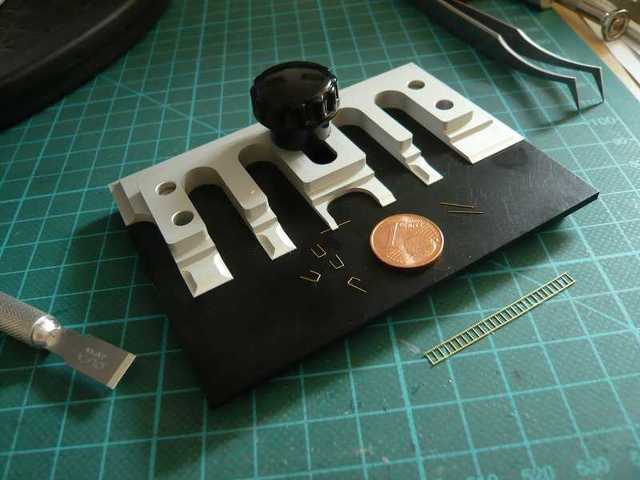 This tool I have now used for bending this little ladder steps on the top of the TSMs, and that is really better than using tweezers, since you can clamp the part to be bent under the fingers and then turn around calm. And then today came also the red LEDs (0401), and therefore I have made a first test.  These LEDs I want to use for the caution lights (beacons).  Source: NASA And so there was suddenly a practice alarm without warning,  only they do not blink, but this is also provided. Well, now I'm going to dismount the Pure White LEDs and replace soon by the Sunny White. And now the lampshades have to get the finishing touch and paint before they go into the electrical workshop. So boredom can not arise, it is going round ... 
__________________
Greetings from Germany Manfred Under construction: Launch Pad 39A with Challenger STS-6 (1:144)
|
| Google Adsense |
 |
|
|


 Linear Mode

