


|
|
|
#431
 03-08-2014, 11:24 AM
|
||||
|
||||
|
Pad 39a
Manfred,
Your build is completely in a category of no other! It will be a product of which others will look in awe. There will be no other of it`s type on this planet. You may be going crazy....but rest assure.....you will be a very proud crazy person to have this masterpiece displayed in your home. Bill 
__________________
----------------------------------------------- Seems to have been Deliberately Buried ----------------------------------------------- Where did Gunter Wendt ? 

|
|
#432
03-08-2014, 11:49 AM
|
||||
|
||||
|
Thank you Bill for your effusive compliments, you make me quite embarrassed.
 BTW, scratch building of all these tiny details in 1:160 at the MLP is a real challenge, but still makes fun, if it succeeds then. There are so many little things to which you could also be waived, but that's also the incentive to try it.  But I've already said several times, at the end I need to be convinced and satisfied himself, otherwise all this is neither fish nor fowl!  Especially the lighting breathes new life into the MLP, but it is also a rather difficult chapter, which costs a lot of extra time.  
__________________
Greetings from Germany Manfred Under construction: Launch Pad 39A with Challenger STS-6 (1:144) Last edited by spacerunner; 10-04-2016 at 09:19 AM.
|
|
#433
03-09-2014, 07:29 AM
|
||||
|
||||
|
MANFRED,
Even tho it may cost you extra time to build the lighting chapter, we all agree that it is well worth the effort. The lighting will take this build to many next levels, and the personal exercise of building an electrical dept from the ground up just makes the lighting that much more fun to watch. Thank you for letting us see, and for sharing, your personal growth into this exciting new chapter of your build. I can't wait for the FSS/RSS lighting!!
__________________
OMG, I have finally discovered what's wrong with my brain: On the left side, there is nothing right, and on the right side, there is nothing left.
|
|
#434
03-09-2014, 05:58 PM
|
||||
|
||||
|
Thanks Rich for your nice words,
you're right, and you know what you're talking. The lighting is a very exciting and challenging chapter for real space modelers as we are. BTW, do not panic, but only the MLP is illuminated, then follow FSS/RSS with their felt 10.000 lamps!
__________________
Greetings from Germany Manfred Under construction: Launch Pad 39A with Challenger STS-6 (1:144)
|
|
#435
03-24-2014, 07:44 AM
|
||||
|
||||
|
Hello together,
after a light spring fatigue I have browsing in the meantime, some older images sources according to the hazard warning lights. But somehow I have not the right clarity, as with these red and/or yellow beacons of those days back in the STS-6 on MLP-2. So far, my friends from the NSF forum unfortunately could not help me too, but I stumbled across a very interesting thread that makes me high hopes. So I have found a contemporary witness (39B), who has worked at the time during the reconstruction and modification of the Pad 39B there and has been reported about in detail with although partially slightly yellowed, but still great photo scans. And if there were any technical ambiguities, what you may not believe it, he was more often on the Pad 39A, so always close to the base. Maybe he can answer my special questions.  Since I now know the lamps pretty good on the FSS and the MLP, I have now started, the lights on the RSS to look a little closer. And this my standard reference photo is again a good overview. 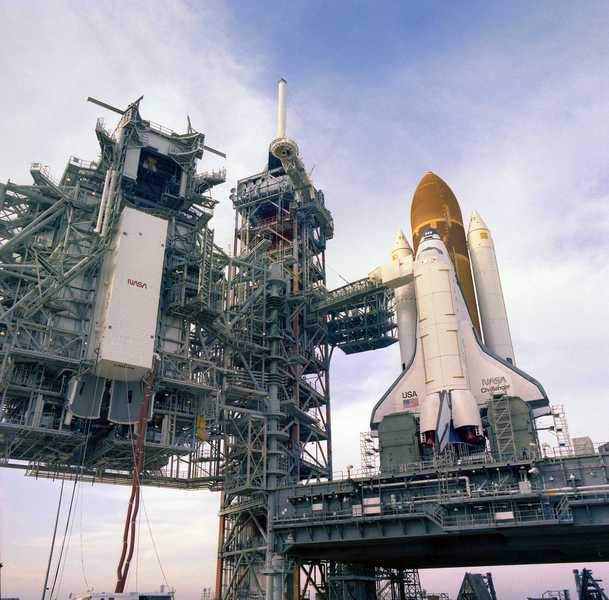 Source: retrospaceimages.com (STS-6) And as you can see it, there are the same lamps are mounted as in MLP with the classic lampshades.  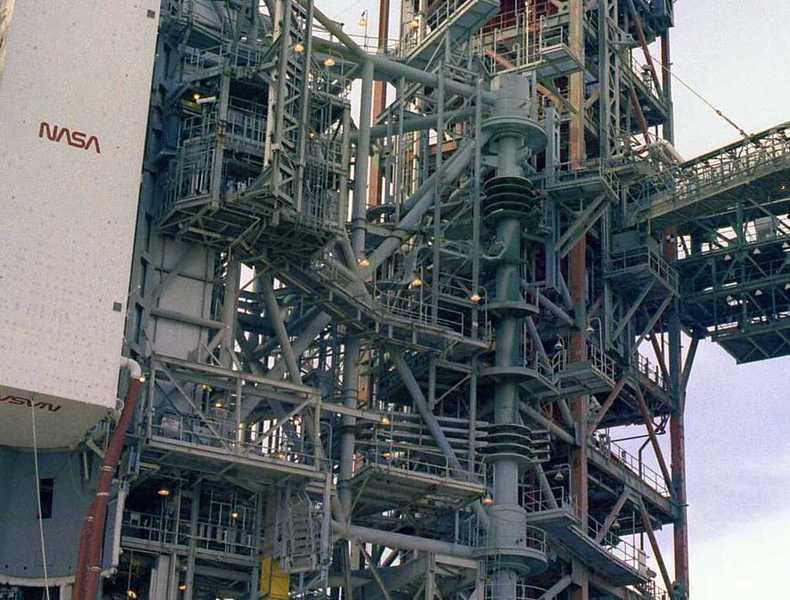 On the newer "old" photos the lamp shape becomes even clearer as the following pictures show. 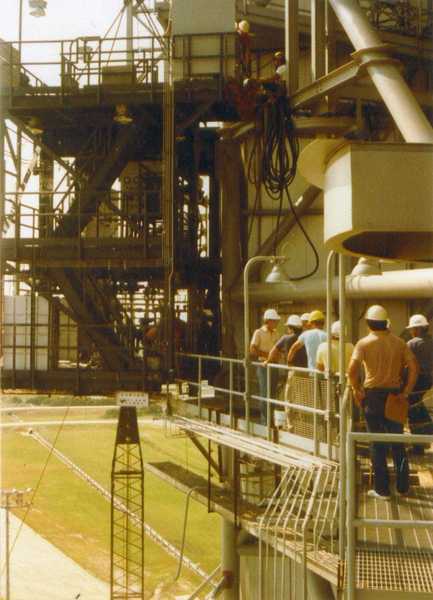 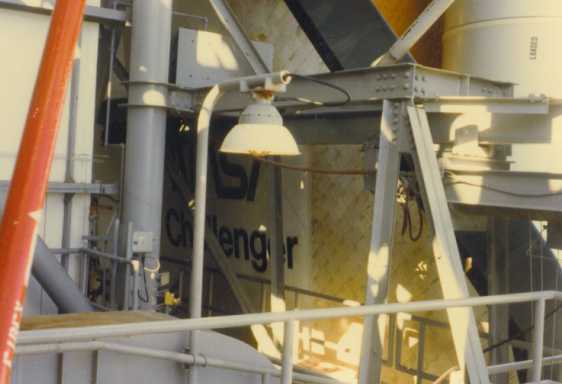 Source: J. MacLaren (39B) NASASpaceflight.com And so I can use my recent lampshades from the ferrules for the RSS lamps. Of course I've tried and picked out the lamps from the Revell kit. 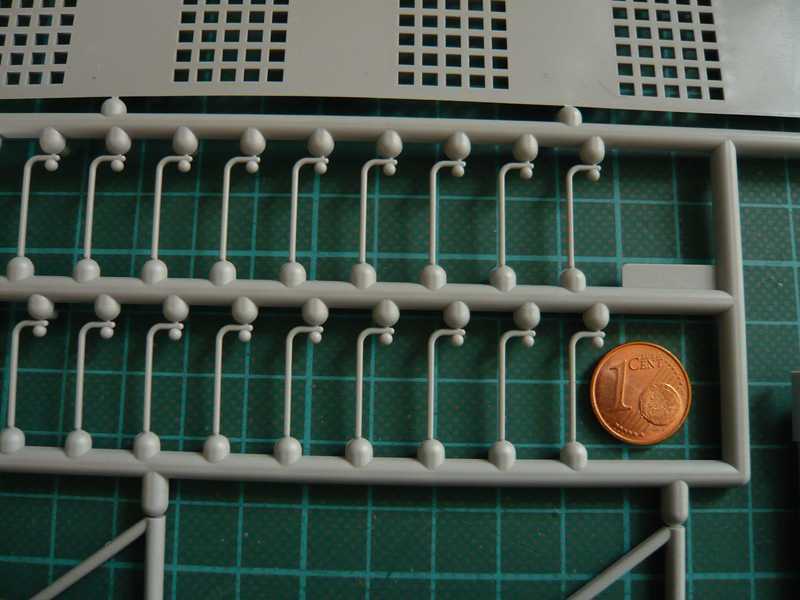 These are the arc lamps here, of which 40 pcs. are included in the kit, but they were never installed in this spherical shape on the pads.  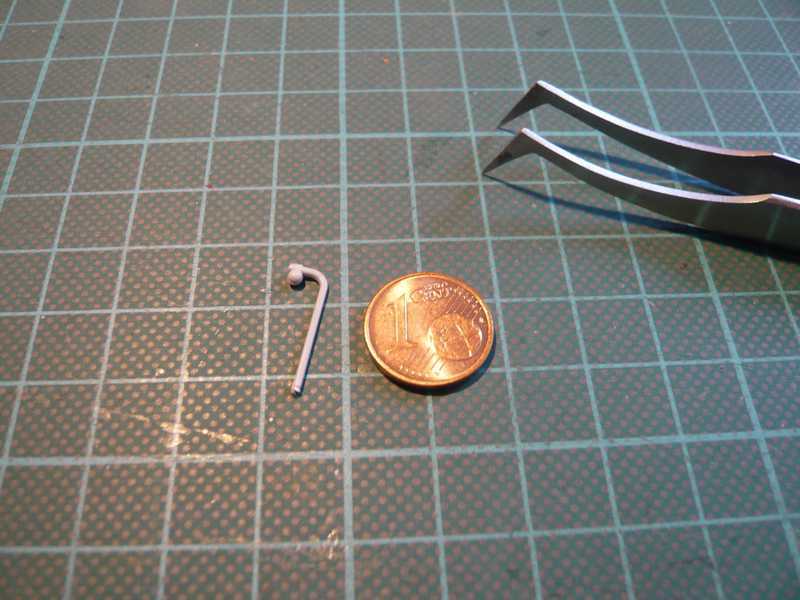 And that's why I like my screen lamps but much better, 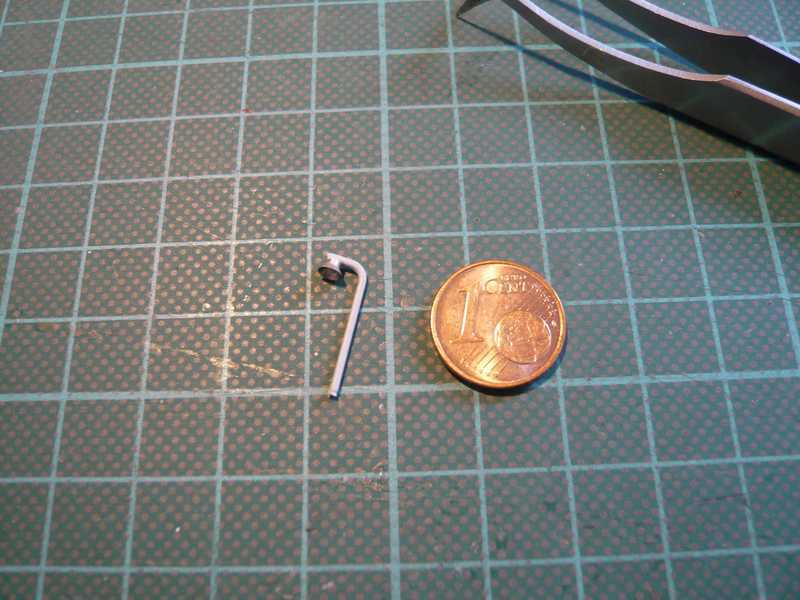 or what do you think? 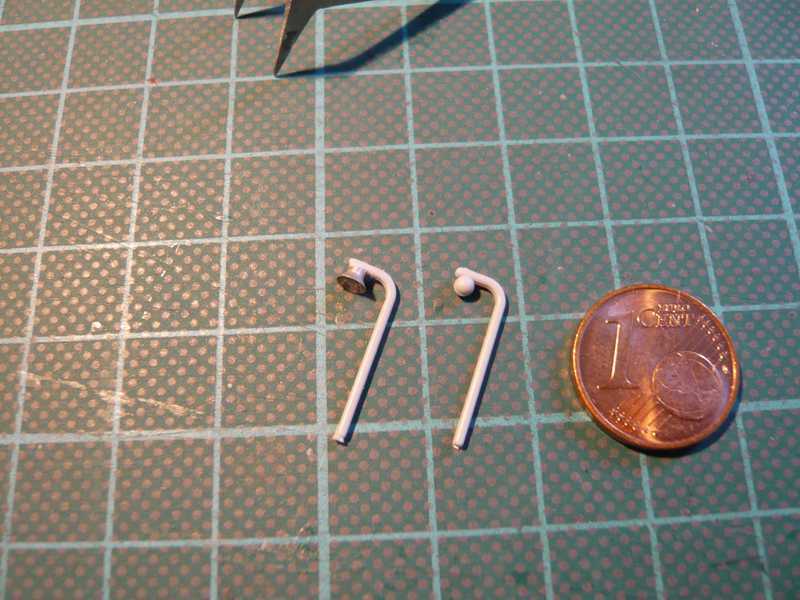 Okay, the arcs are 1 mm in diameter, what's a little too strong, but I would anyway prefer to use a thinner brass tube in order to thread the LED wires still. 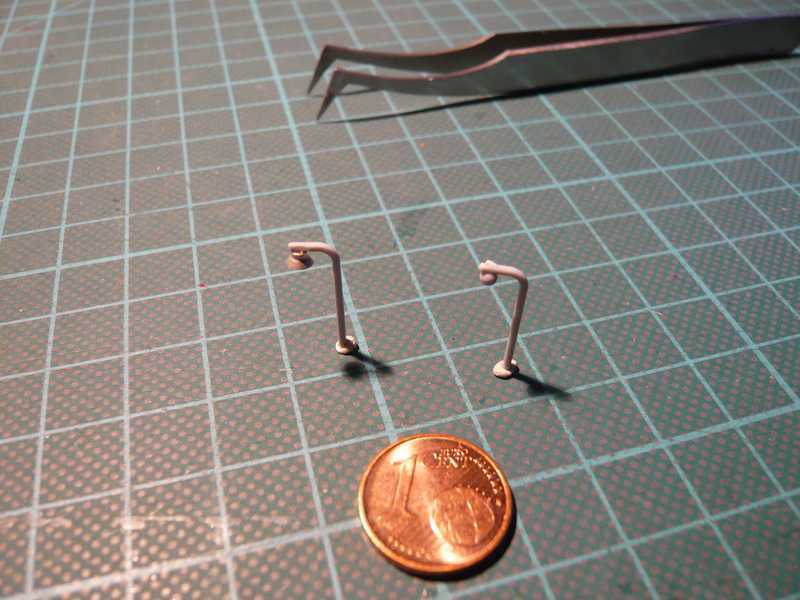 So long for now.
__________________
Greetings from Germany Manfred Under construction: Launch Pad 39A with Challenger STS-6 (1:144) Last edited by spacerunner; 10-04-2016 at 09:18 AM.
|
| Google Adsense |
|
#436
03-24-2014, 04:43 PM
|
||||
|
||||
|
Pad 39a (Saturn`s pad)
Manfred,
you never cease to amaze me! Bill
__________________
----------------------------------------------- Seems to have been Deliberately Buried ----------------------------------------------- Where did Gunter Wendt ?
|
|
#437
03-24-2014, 04:56 PM
|
||||
|
||||
|
Thanks Bill for your nice words, this compliment I like to give back to you.
__________________
Greetings from Germany Manfred Under construction: Launch Pad 39A with Challenger STS-6 (1:144)
|
|
#438
03-28-2014, 08:30 AM
|
||||
|
||||
|
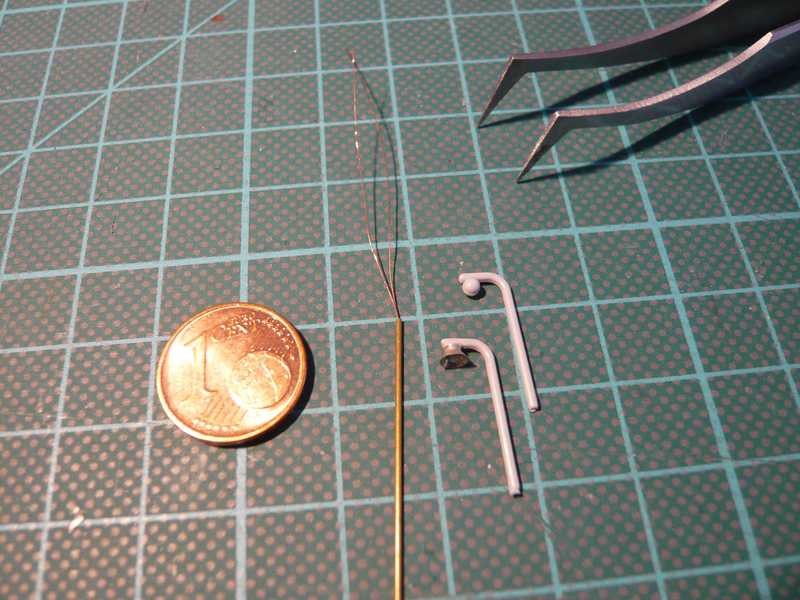
Have the same time my thin brass tubes checked and in 0.7mm diameter found one. And here two Cu wires are times trial basis threaded with diameter 0.15 mm, which is still so relatively easily.
 For my lampshades with about 3 mm in diameter, the pipes should have 0,5 mm diameter to remain about the scale but also to realize them. Such pipes with a diameter of 0.5 mm and 0.09 mm wall thickness, there are also with STEBA. Although the bending radius of the arc lamps is relatively large, you would have the LED wires but probably be inserting before bending of the pipes, because this should be any more difficult in the bent state, but were up to trying.  Source: J. MacLaren (39B) NASASpaceflight.com  Source: J. MacLaren (39B) NASASpaceflight.com For information only on the edge for all Space Shuttle historian: How do I know now of James, on his photos (between Christmas and New Year 1985) one can see the Challenger in preparation for the first shuttle launch from the new Pad 39B for mission STS-51L (01281986), which was known to her fate mission. 
__________________
Greetings from Germany Manfred Under construction: Launch Pad 39A with Challenger STS-6 (1:144) Last edited by spacerunner; 10-04-2016 at 09:11 AM.
|
|
#439
03-30-2014, 06:41 AM
|
||||
|
||||
|
MANFRED,
Your light shields look great! Much better than the kit lights. I hadn't really noticed the globe lamp covers in the kit. I should study the parts better. However this is not a project to be started just yet. I have plenty of other builds going on right now. I'm excited to see some more bending for the light shield supports. The brass tubing will hide the wiring nicely. Long live the memory of those we lost on STS-51L.
__________________
OMG, I have finally discovered what's wrong with my brain: On the left side, there is nothing right, and on the right side, there is nothing left.
|
|
#440
03-31-2014, 03:39 PM
|
||||
|
||||
|
Thanks Rich for your kind words,
although these Heroes have lost their lives, they will remain immortal in the memory of men for all time. Again to the arc lamps, to get a thinner tube one could use the actual metal tube as the return conductor so that one only has to thread one wire through the tube. For this I first have to solder every negative pole of the LEDs to the brass tubes and then connect each brass tube by a soldered wire to the next. 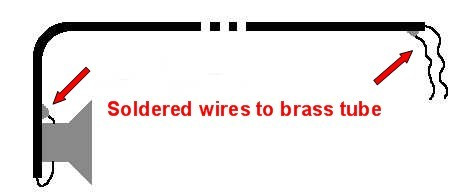 That is certainly a greater effort than threading the wires. And threading the wires from 0.1 mm over this short length of about 20 mm should already be doable, I think.  Therefore first I will try to pull the wires through the tube, maybe it will work.
__________________
Greetings from Germany Manfred Under construction: Launch Pad 39A with Challenger STS-6 (1:144) Last edited by spacerunner; 10-04-2016 at 09:13 AM.
|
| Google Adsense |
 |
|
|


 Linear Mode

