


|
|
|
#1
 07-29-2013, 02:15 PM
|
||||
|
||||
|
Space Shuttle Launch Pad 39A with Challenger STS-6 (1:144)
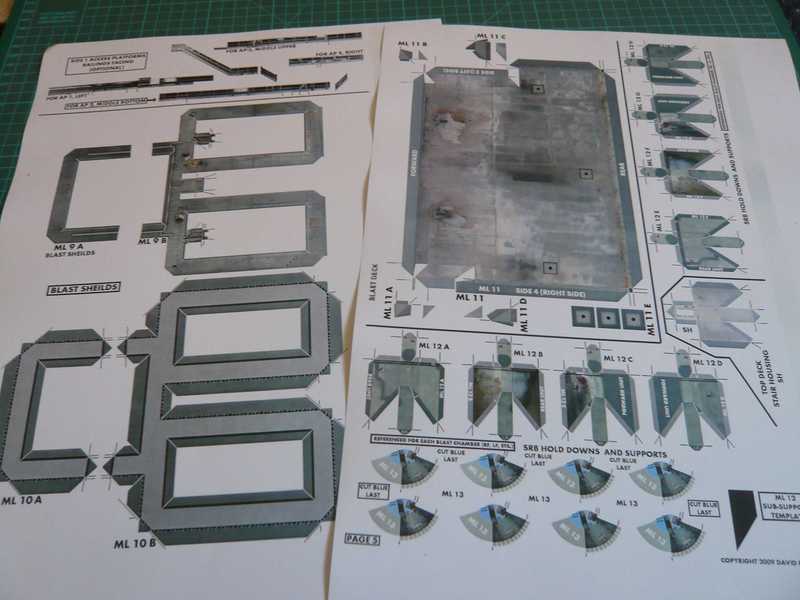
Back to the Beginning of NASA's Space Shuttle Program Tribute to Challenger's Maiden Flight - STS-6 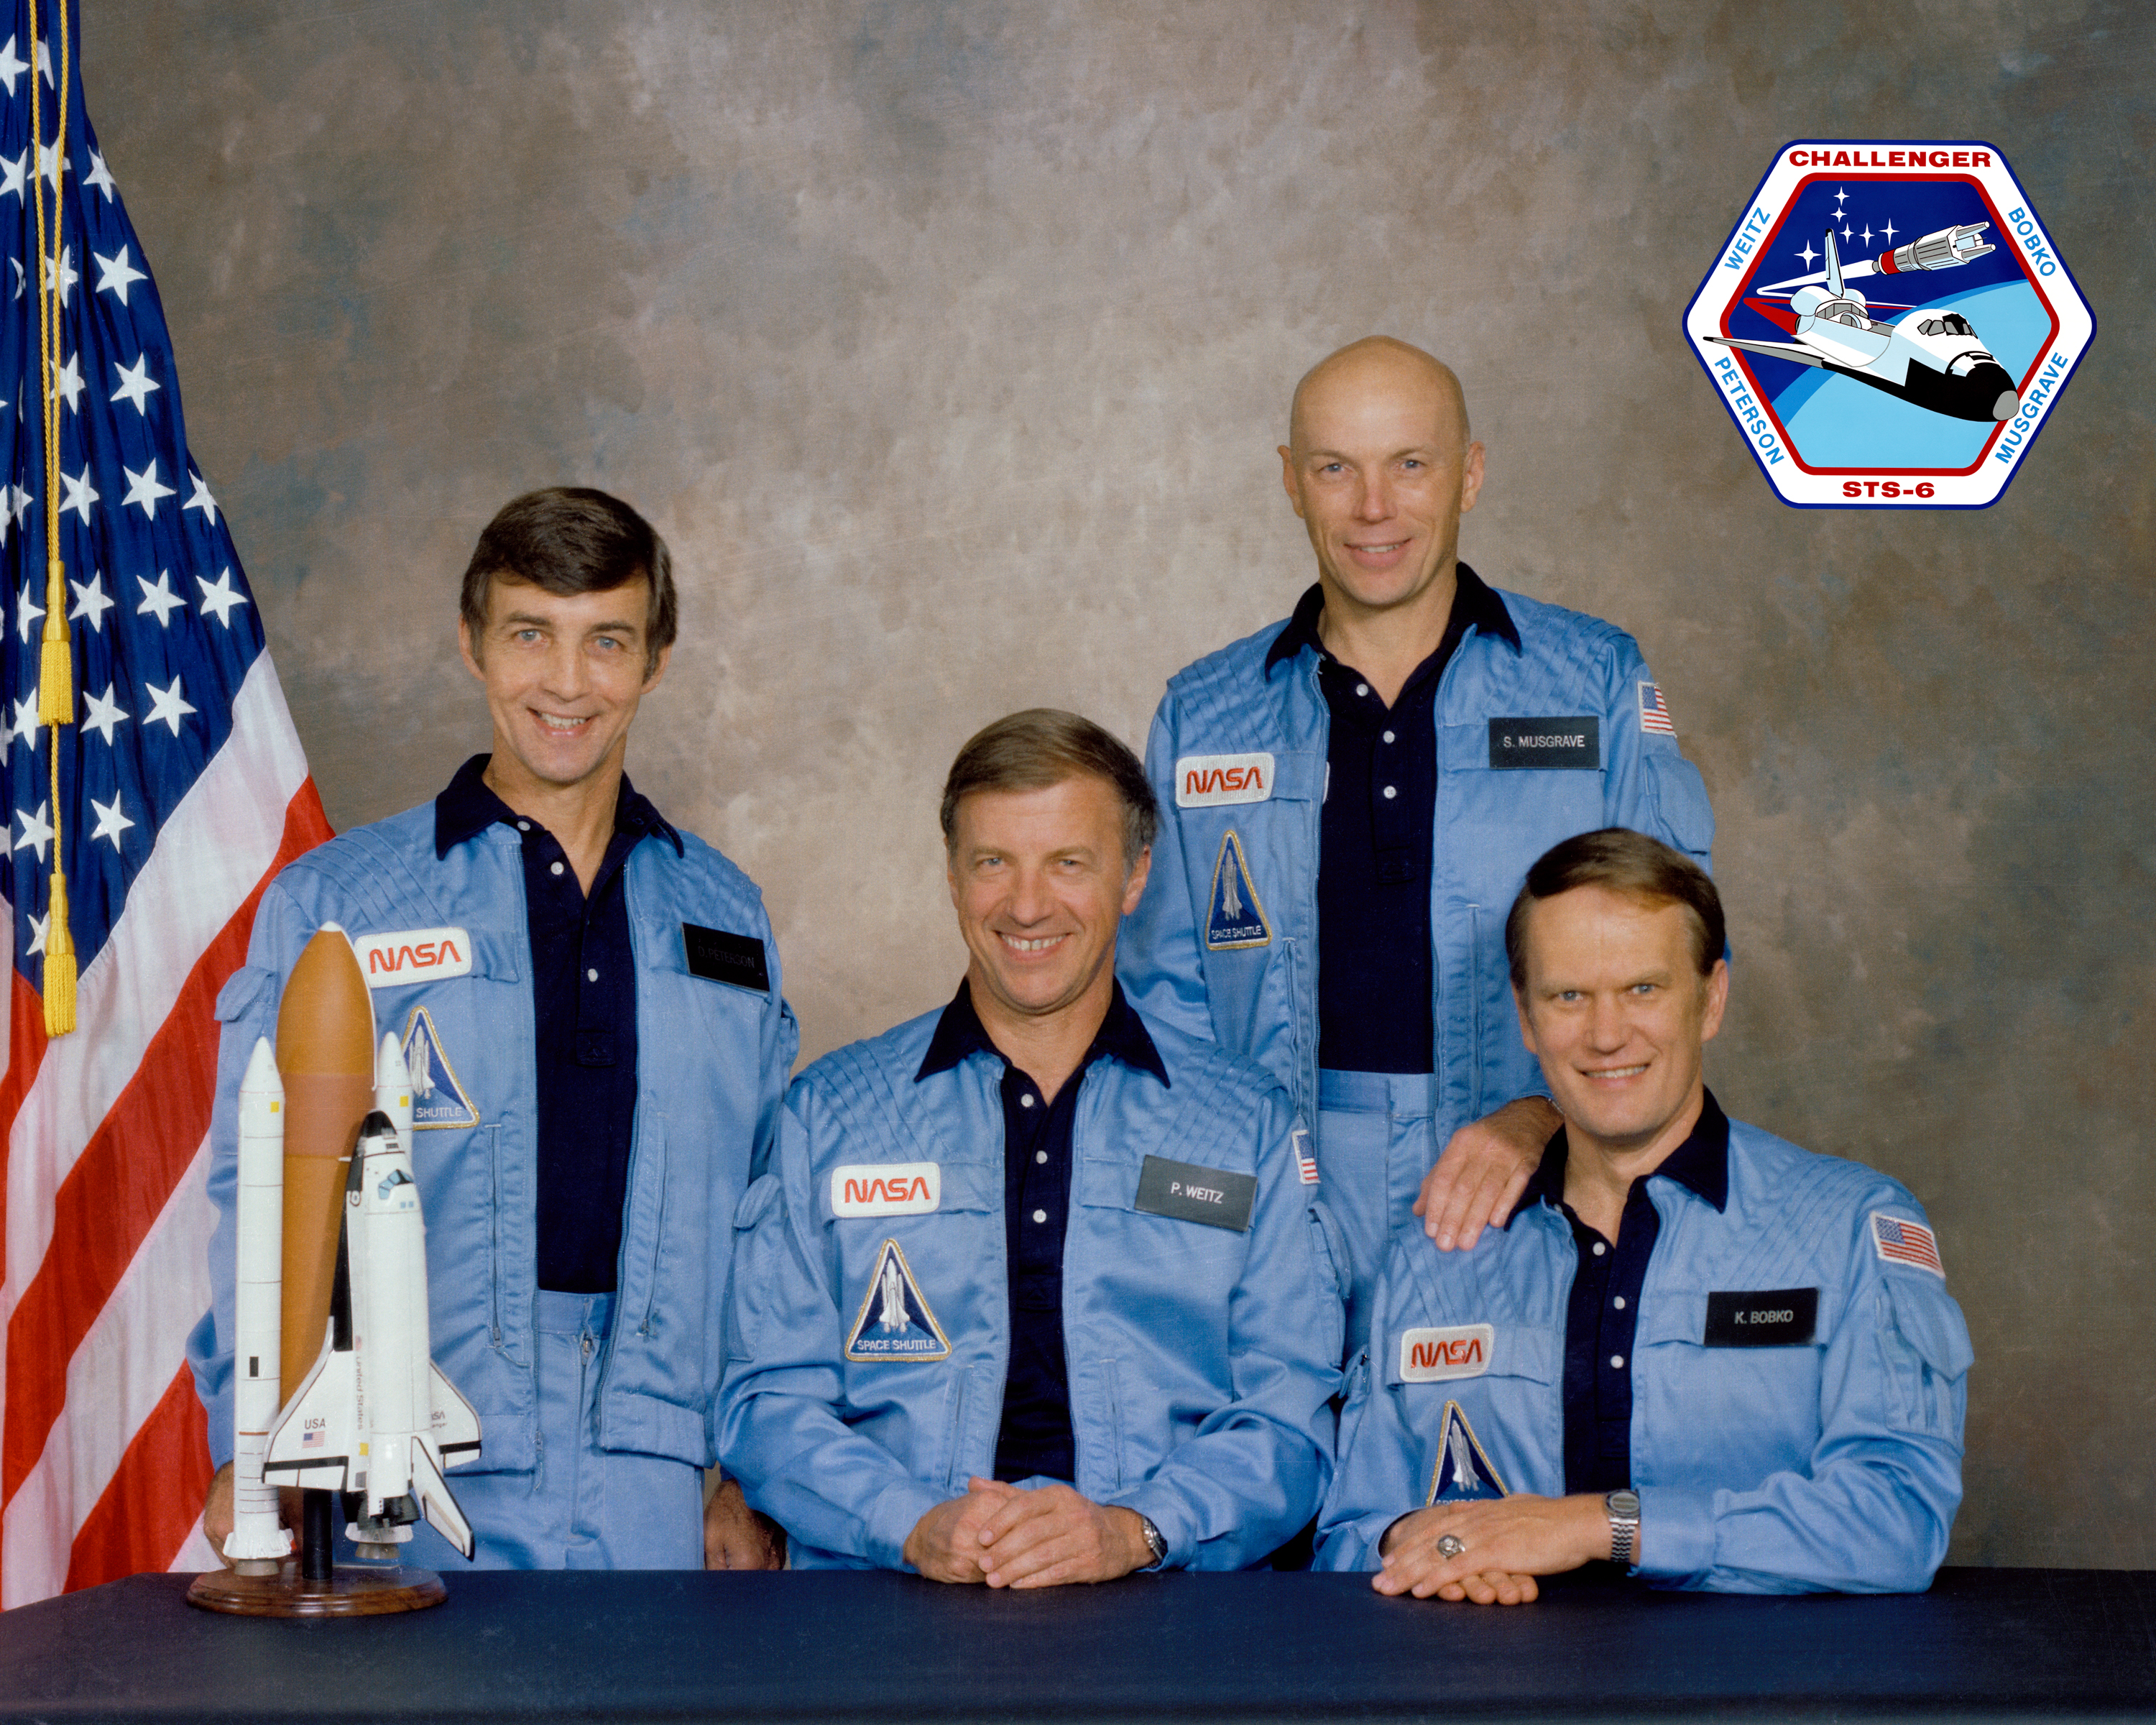 L-R: Donald Peterson †, Paul Weitz †, Story Musgrave, Karol Bobko Source: wikipedia.org To the prehistory: After conclusion the NASA Shuttle program with the last Atlantis-Mission (STS-135), I dedicate my first real space modeling project to the beginning the legendary space shuttle era before more than 30 years. I was inspired to this major project by similar space modeling projects in the German forum Raumfahrer.net. I decided for the STS-6-Mission with Challenger (04/04/1983) as guidance version for my build, because I would like to build the tower version from the initial years of shuttle era with the red lattice windows and the partial red FSS grating structure inclusive hammerhead crane, which fascinated me somehow. The following picture shows the Challenger during the Roll-out in the fog on the way to the Launch Pad 39A, 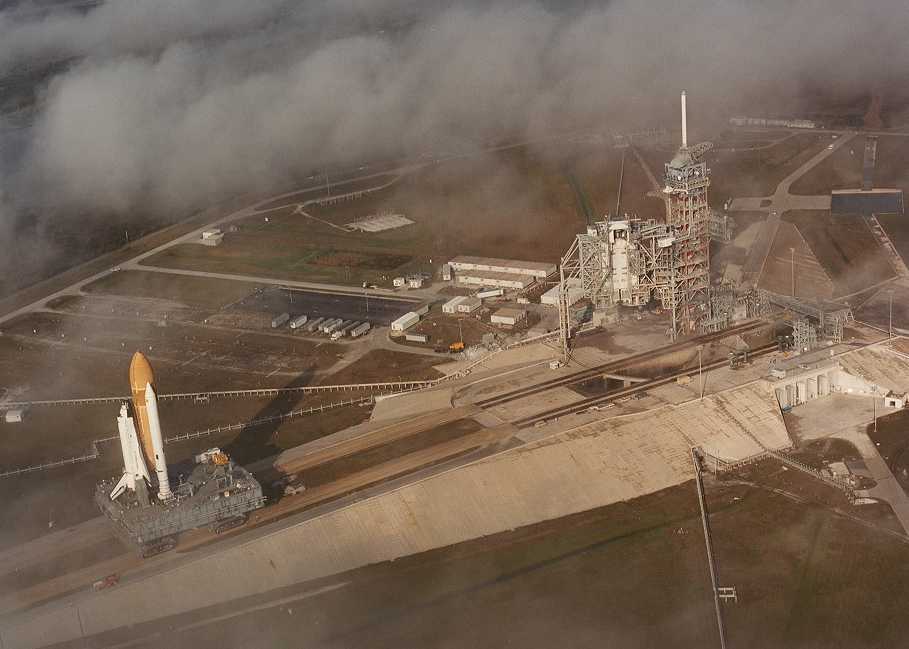 Source: NASA during the countdown on the pad,  , ,Source: retrospaceimages.com as well as after the lift-off to the STS-6-Mission. 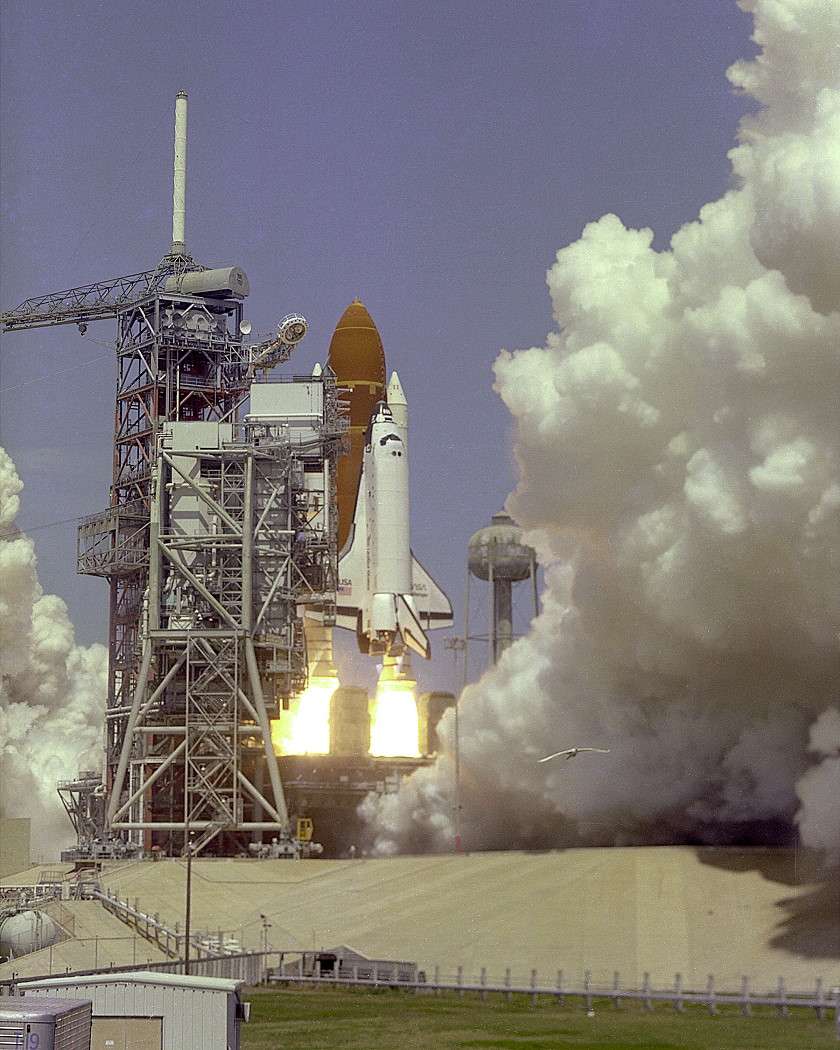 Source: NASA To the project: To be built is the Launch Pad 39A with Launch tower, Shuttle stack, as well as Mobile launcher platform (MLP) and Crawler transporter (CT). Basic module for my project is thereby the Revell kit 4911 in "scale1:144", in quotation marks and red, because one already is thereby for the cardinal problem of the old Revell kit, the scale dilemma, to which one could be written its own chapter and therefore some more words. For the addition of the launch tower FSS I've bought the Detail kits No. 1-5 of LVM Studios. Since I decided for the STS-6-Mission with the Challenger, with the Detail kits of LVM one can represent thereby the elevator shaft of the tower in the original building technique with the red lattice windows, as it in the early years the shuttle era looked quite. In addition Detail kit No. 1 contains parts for the complete staircase in the tower, which is completely missing with Revell's 4910/4911. The LVM kits contain photo etched parts (PE) from thin brass sheet metal, with which very finely detailed structures can be produced as well known. For building MLP and Crawler I use cardboard-model kits by David Maier from EDU-Craft Deversions on scale 1:144. The kits consist in each case of 13 colored building sheets of cardboard (27.5 cm x 42.5 cm) as well as a building guidance on CD-ROM. To the scale problem: As most of you will know, Revell kit 4911 is seriously underscale and not true to scale 1:144, which lead inevitably to problems with the building. Therefore one has two possibilities, if one liked to use the Revell kit. Either one builds the kit Out Of Box (OOB), because in such a way the building groups FSS, RSS, shuttle stack and MLP fit to each other from the size, only stop is not everything on a scale 1:144, but only shuttle stack. Or one is compelling by partial scale adjustment to compromises and to scratch building, if one liked itself to orient halfway at the original. Of course one can do the build also without the Revell kit by overall scratch building. As way out of the scale dilemma I decided for a compromise settlement. Therefore I made myself first of all own assembly drawings, in order to receive a better overview. Starting point for my considerations was the following drawing of member Halbtoter in the German Raumfahrer.net forum, which shows a comparison between the Revell kit 4911 and the FSS/RSS in the true scale 1:144. 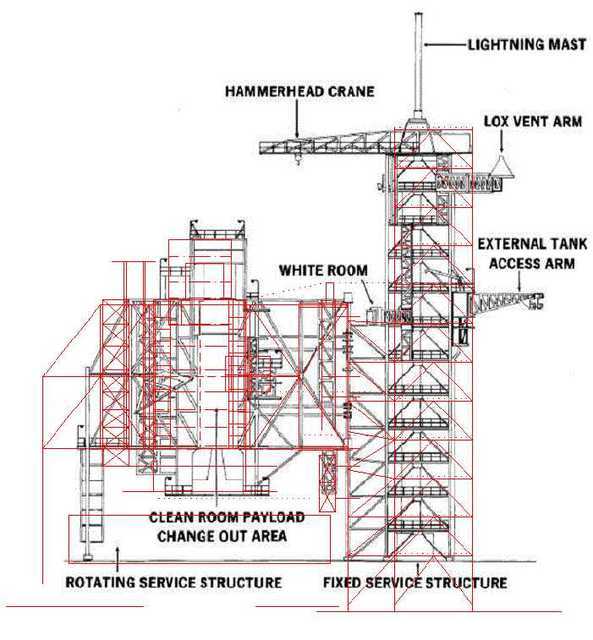 Source: Halbtoter The black design originates from the Revell building guidance, and the red version is drawn by Halbtoter by original plans of NASA in 1:144. It becomes clear one when exact looking that the red MLP (1:144) does not fit no more into the Revell RSS. Since this line tangle can confuse one first however and in addition the mini MLP of the Revell kit is not with drawn in, I made myself in addition the following designs:  This design illustrates clearly the descriptive scale dilemma of the Revell kit 4911, if one would build all OOB. The serious error is evenly the much to small MLP (1:200!!!) of the Revell kit, which does not fit somehow at all the total proportions. In addition it comes that also the FSS Tower (RSS probably similar) is too low approx. 7,6 cm thereby only one scale of approx. 1:168 corresponds. The image quality must accept your stop, because there two transparency sheets lie one above the other. The next design shows now a comparison of the RSS/FSS with MLP in 1:144 (with me black!!!) and in contrast to the Revell conditions in 1:168 and/or 1:200 (red). 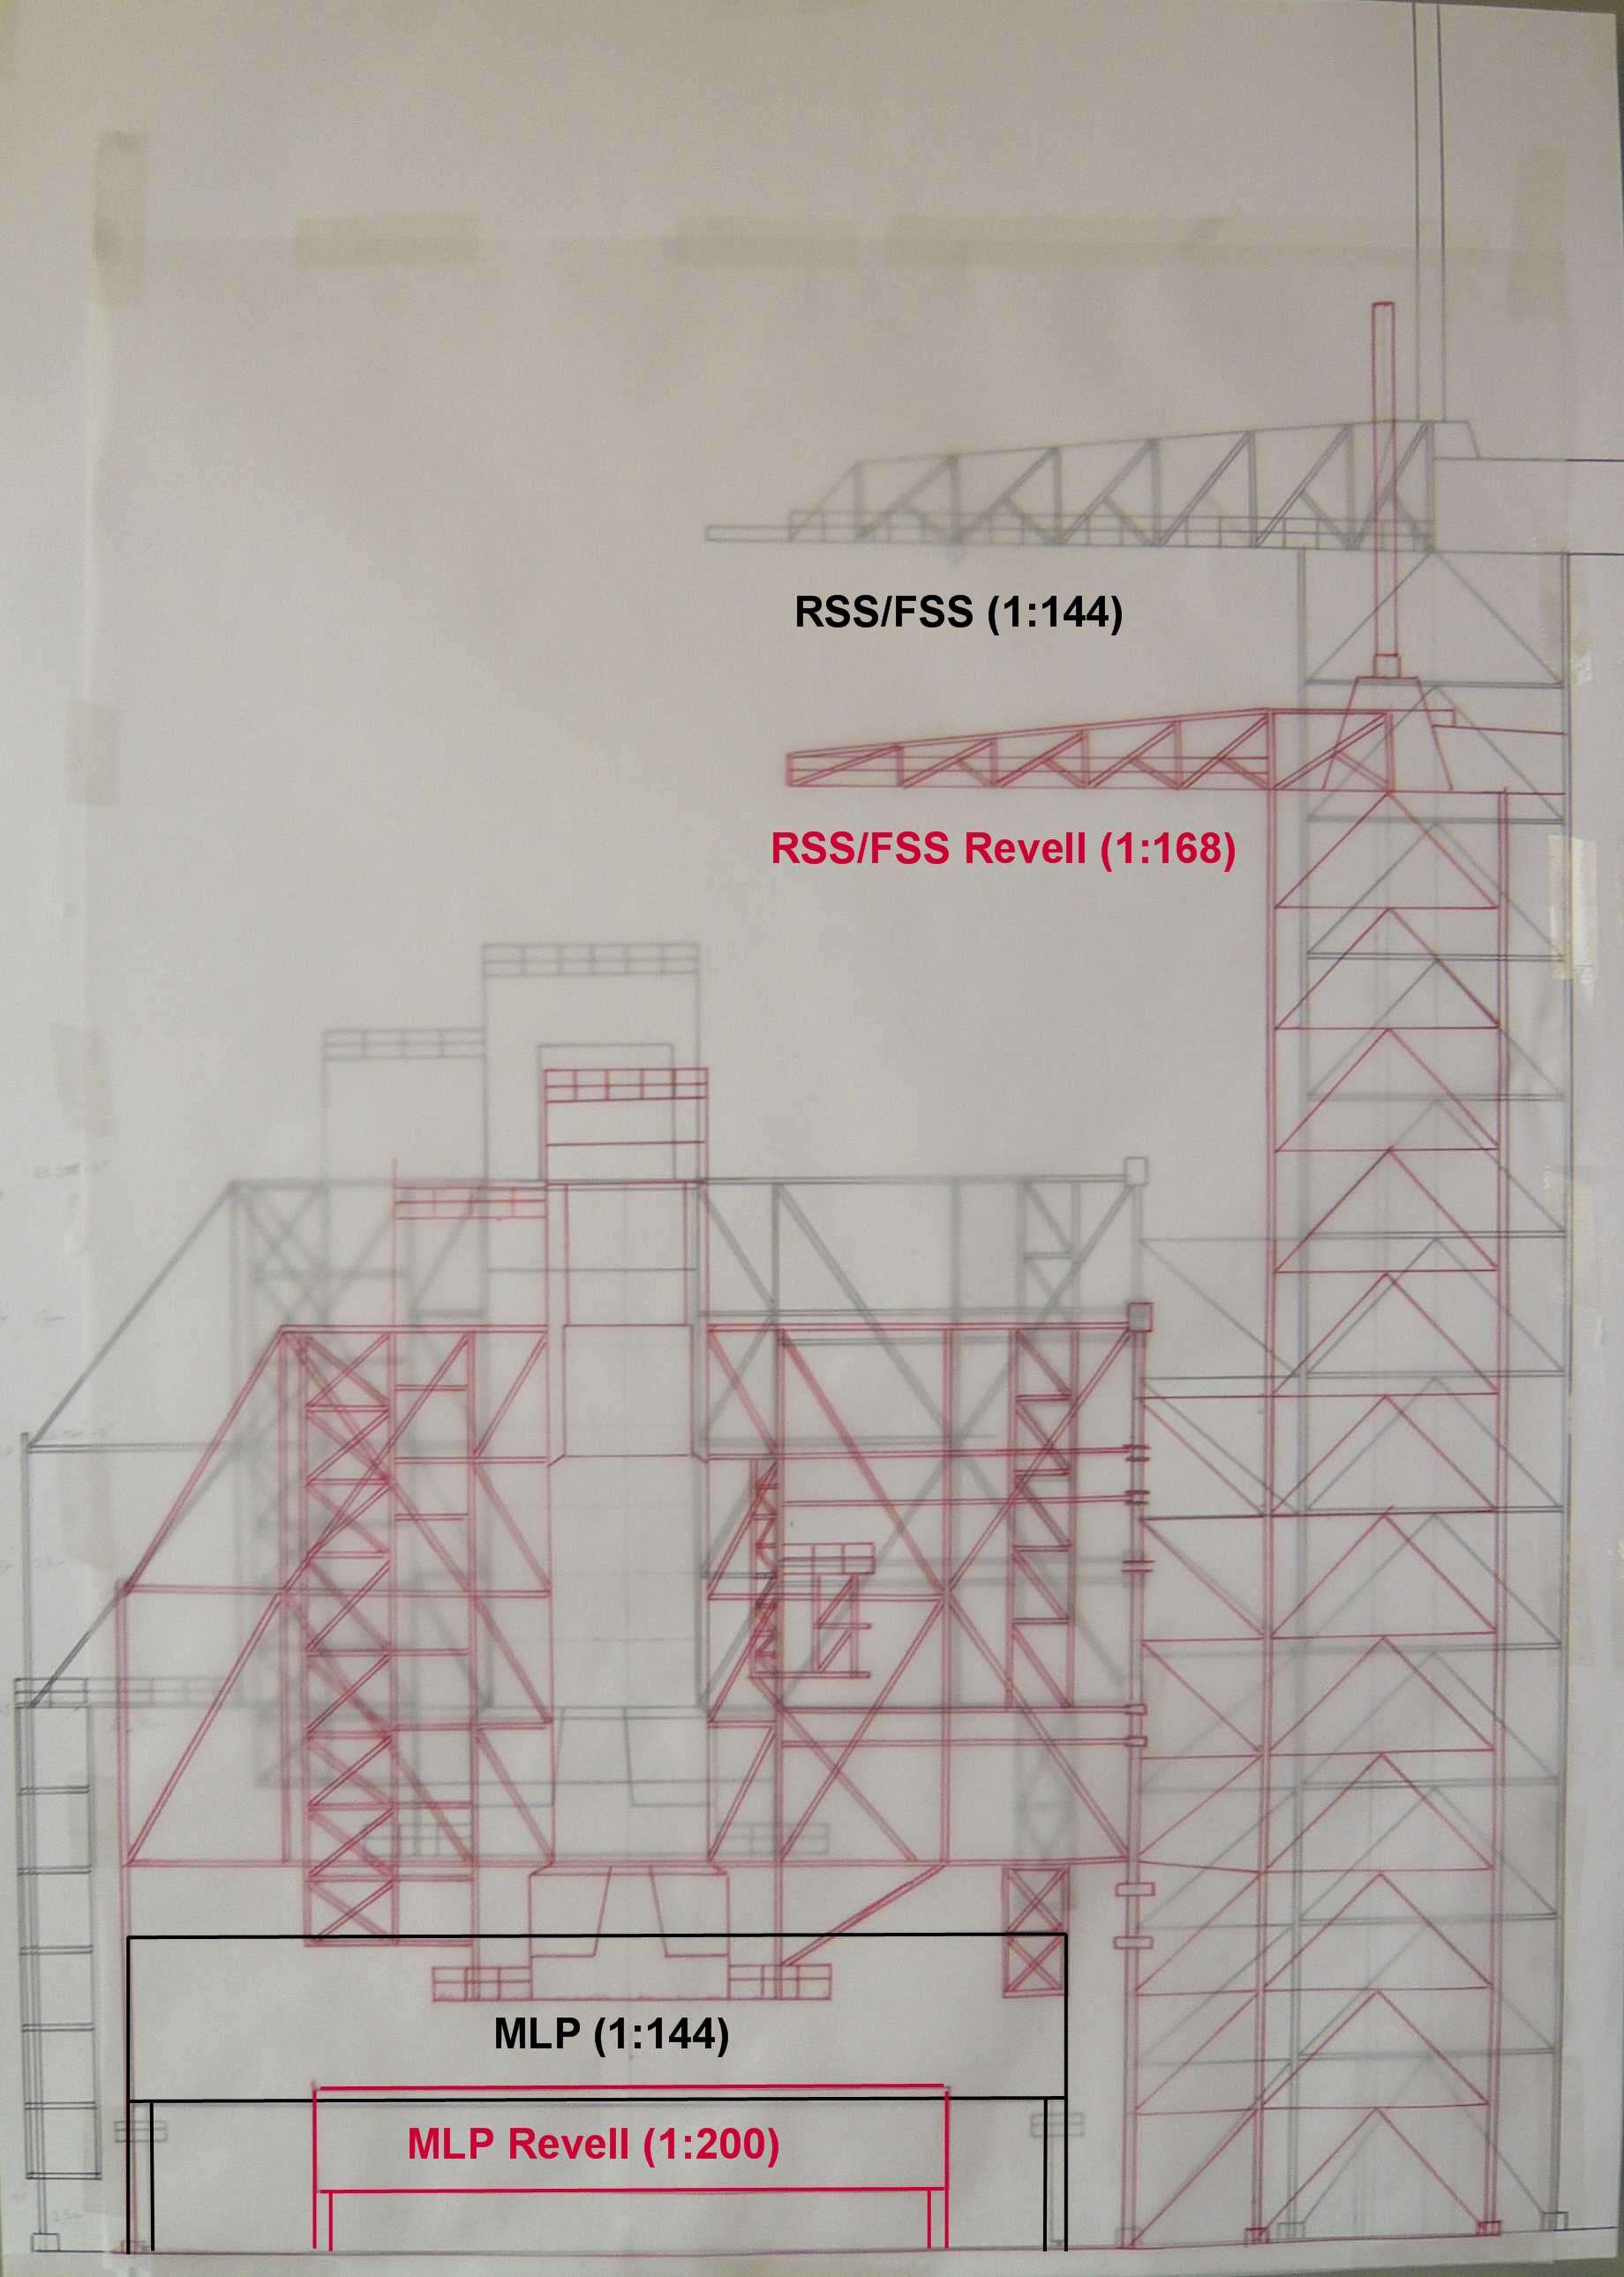 Considering this awkward situation I came to careful consideration in the long run that one does not come with the scale around a compromise unfortunately around, if one liked to use at least the FSS and RSS as main components of the Revell kit. And in such a way now past planning for my project looks as compromise settlement, with which I will build MLP and Crawler in 1:160 and in addition FSS and RSS in the height are supplemented around approx. 3 cm. I hope now that the result will then contently place me also to some extent.  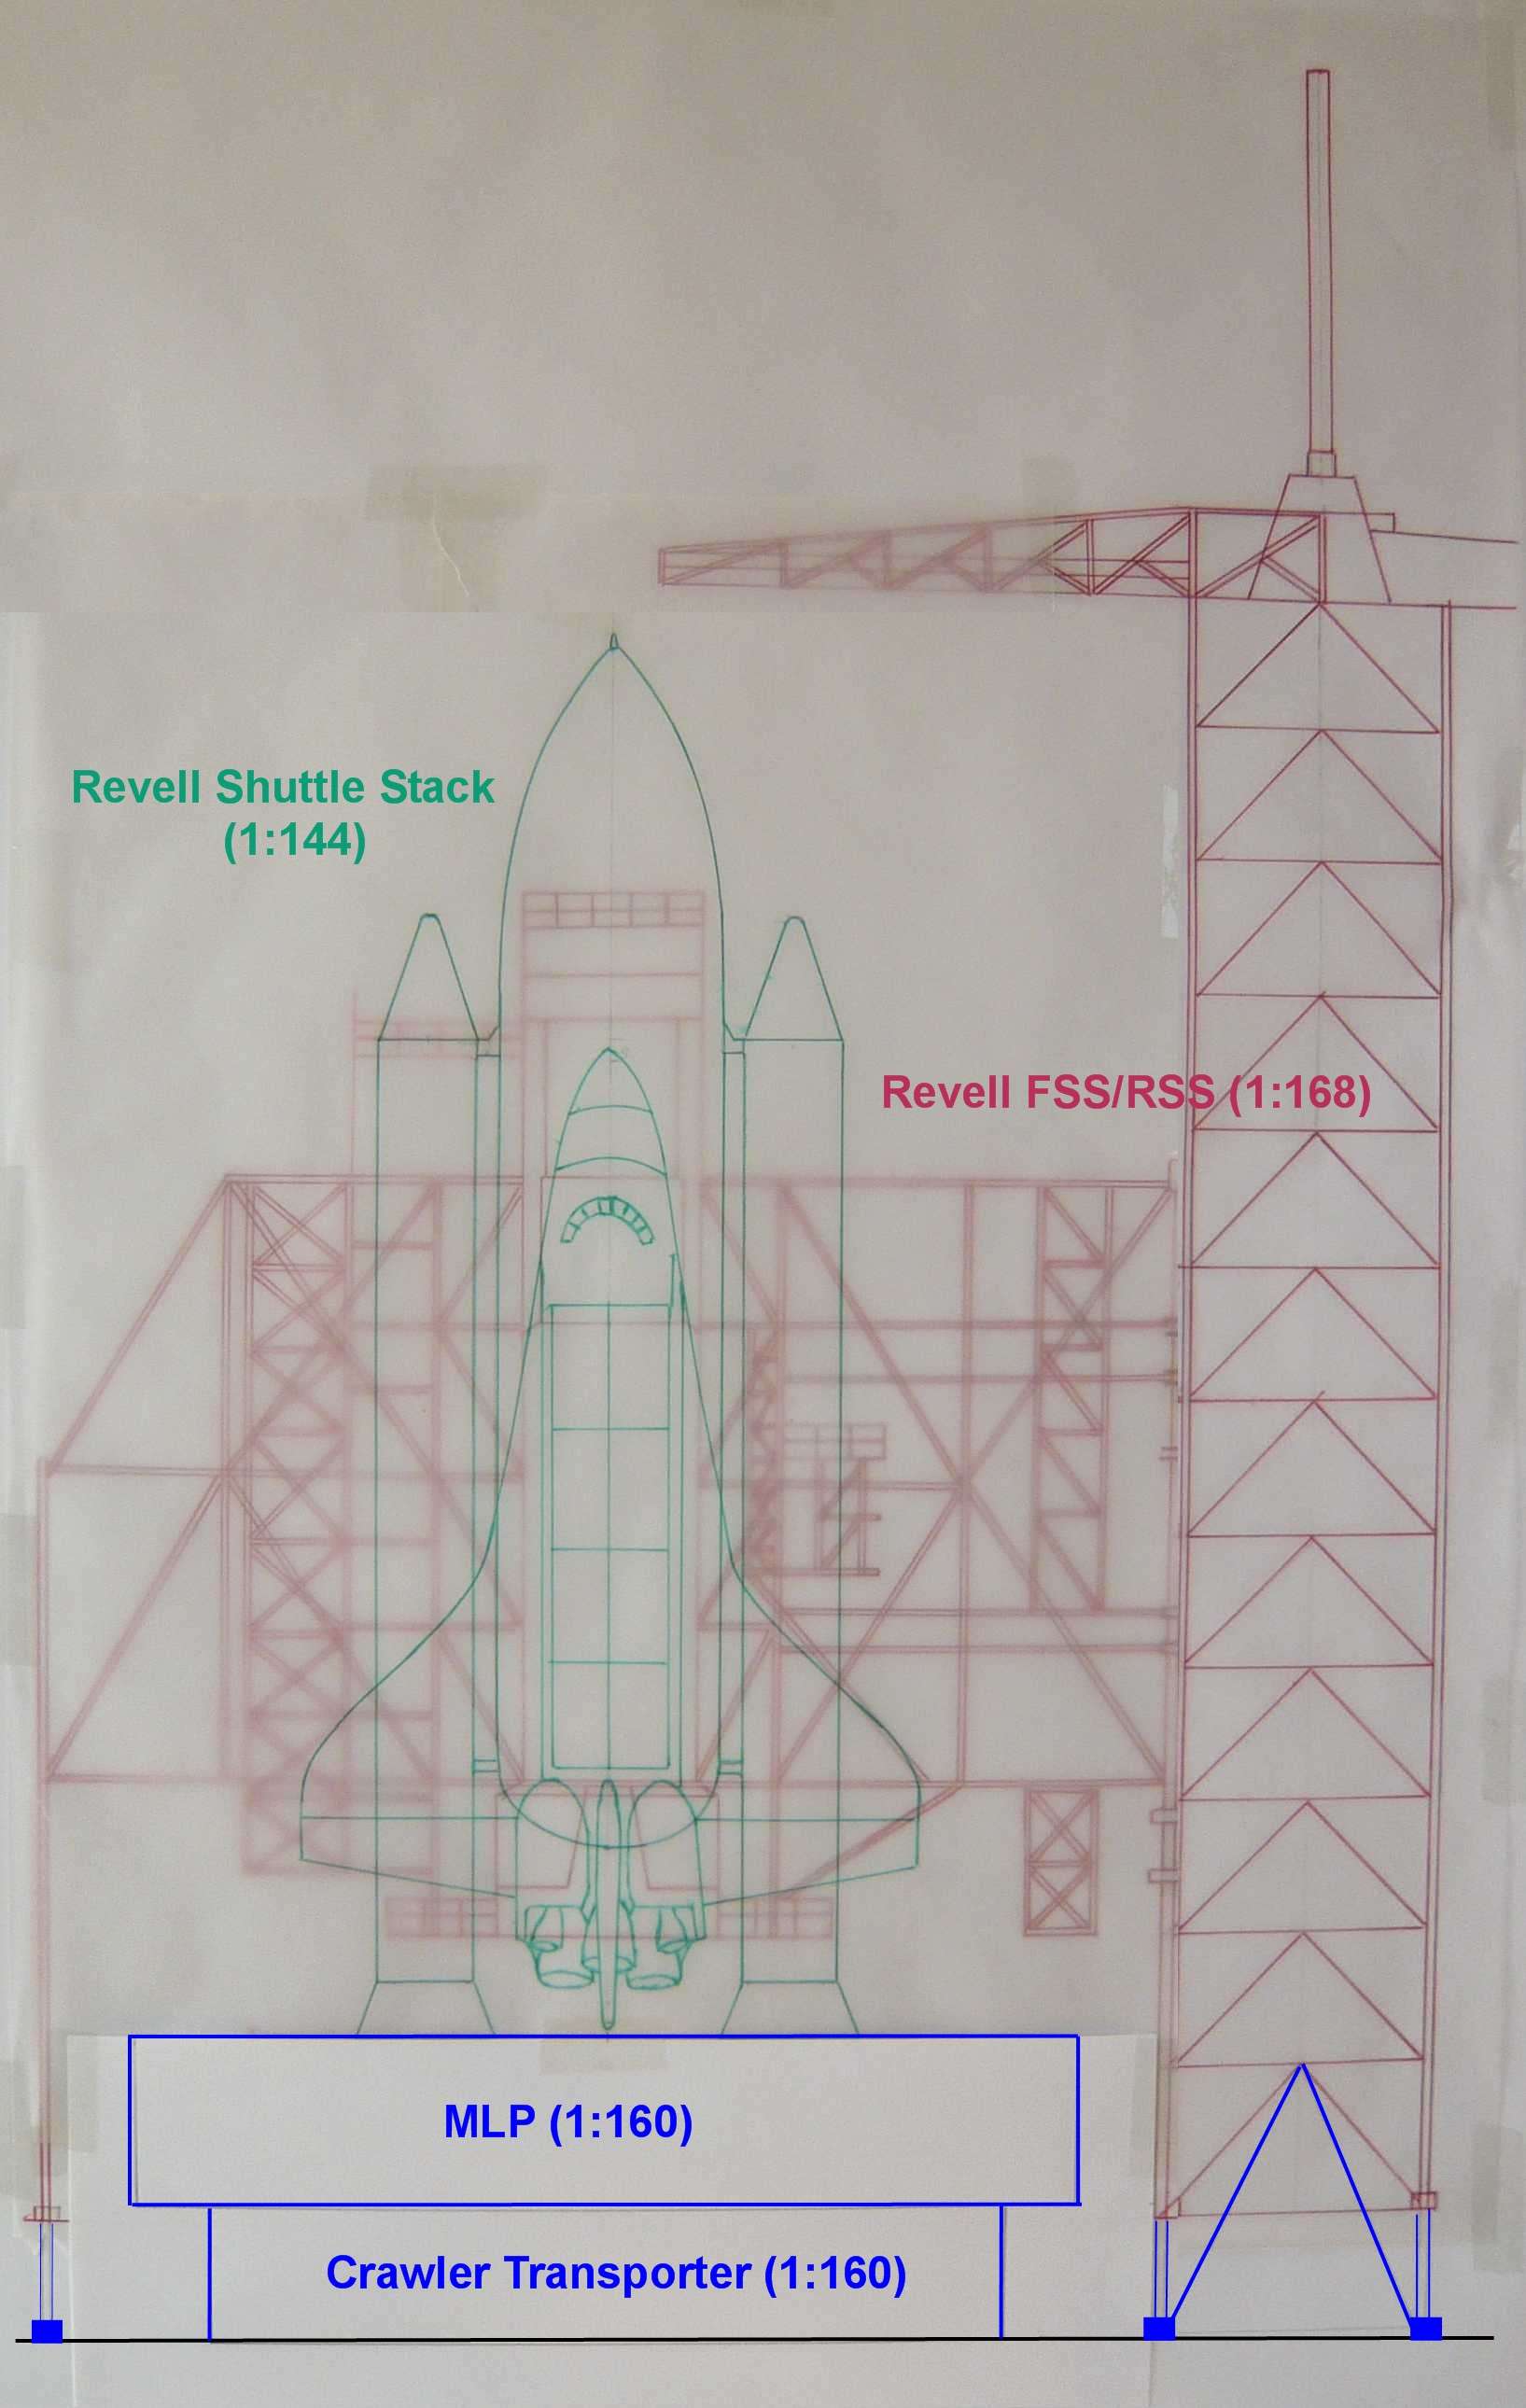 So, now however enough the preface and thus finally to the building and to the first parts and pictures. First part of my project will be the MLP, for which I procured myself the cardboard model kit of EDU-Craft Diversions on a scale 1:144, with which one the MLP-2 used with the mission STS-6 can build. Since I will build however MLP and Crawler transporter on a scale 1:160, first I went with the 1:144 cardboard sheets into the copy shop to reduced it to 1:160. Here is a small selection from the 13 MLP sheets. 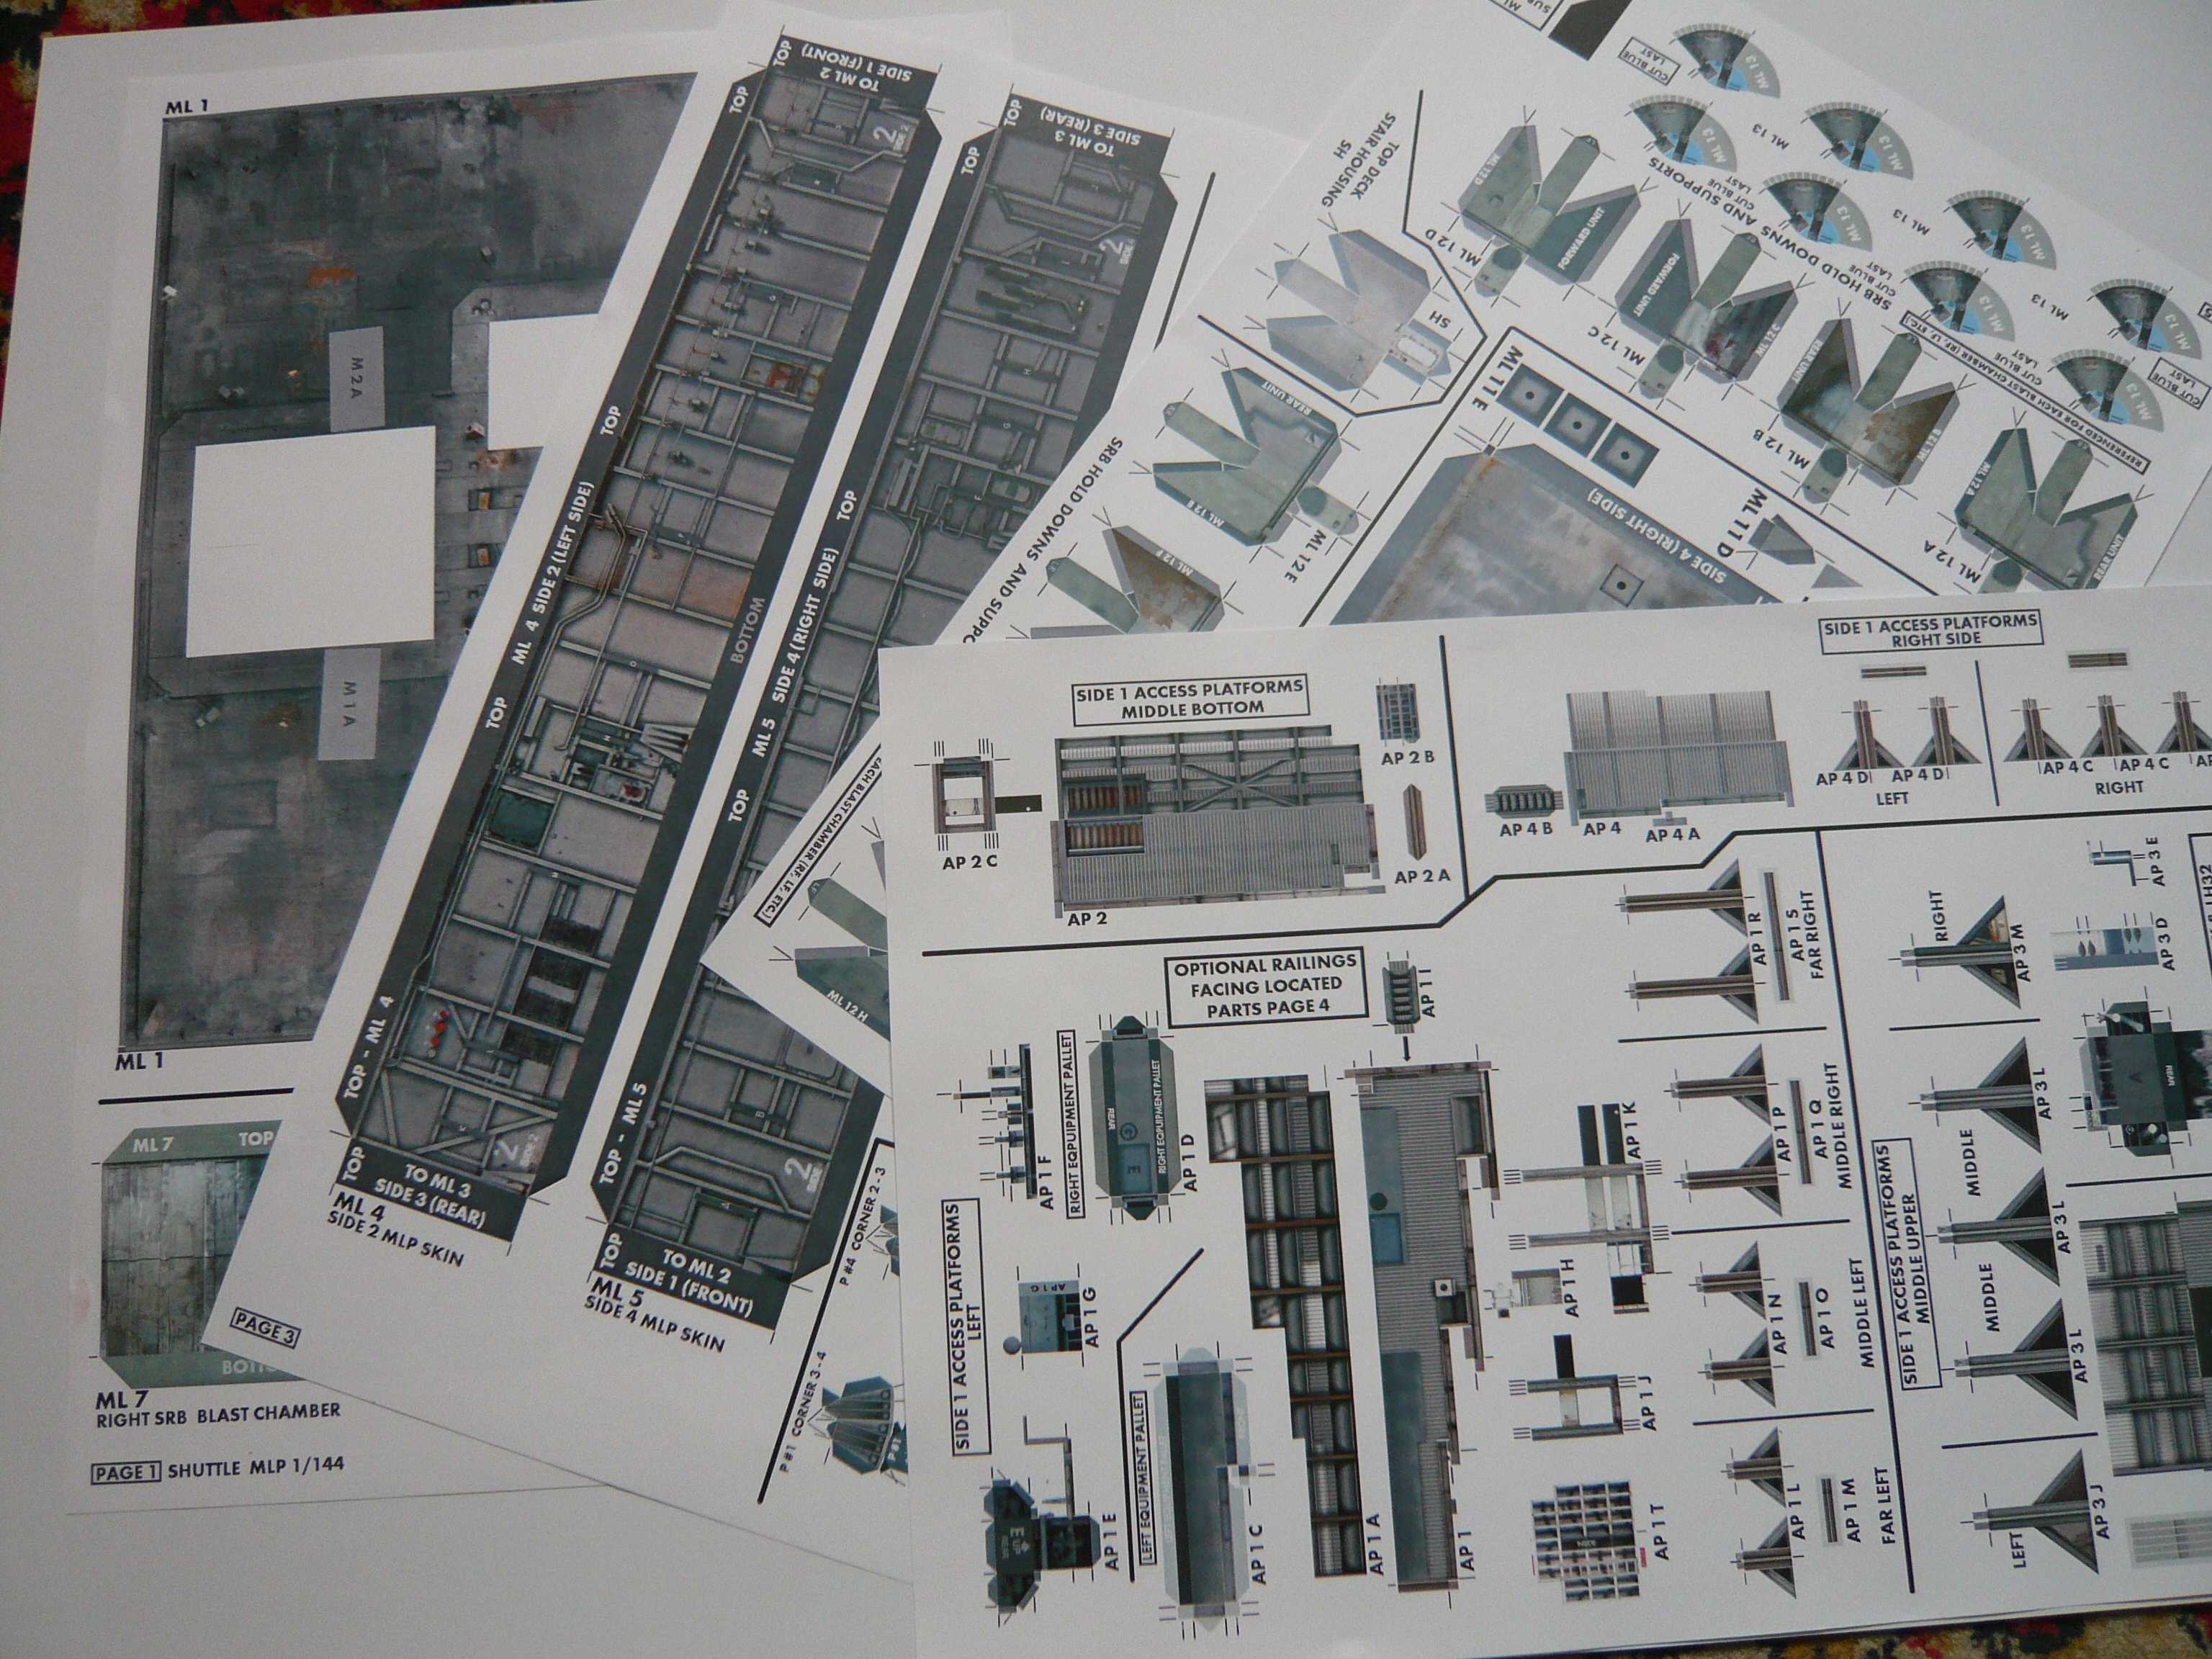 The two following pictures show now what then from it is to become, the MLP, first without 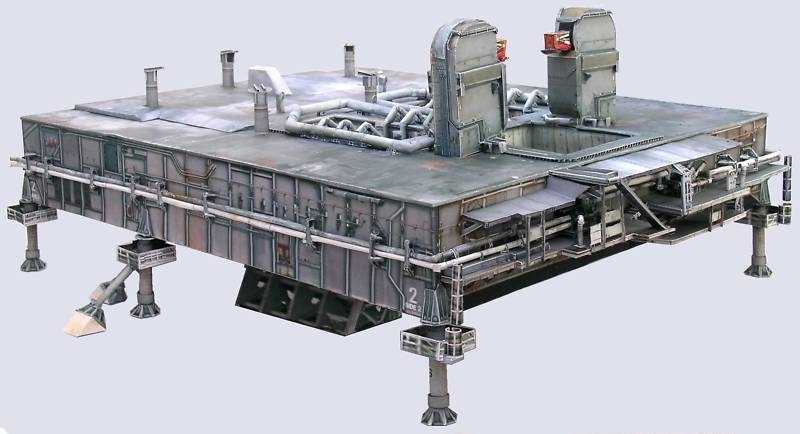 Source: EDU-Craft Diversions and here at the same time with shuttle stack as impressive comparison with Revell's mini MLP.  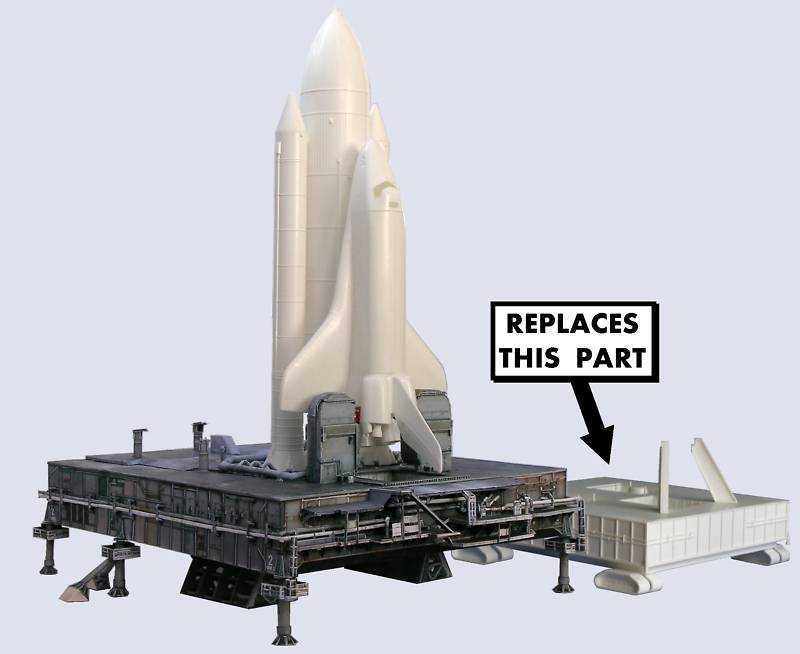 Source: EDU-Craft Diversions And in my next post I will show you first pictures of my building site, if you are interested in this mixed media build. 
__________________
Greetings from Germany Manfred Under construction: Launch Pad 39A with Challenger STS-6 (1:144) Last edited by spacerunner; 11-15-2018 at 05:36 PM. 
|
| Google Adsense |
|
#4
07-29-2013, 09:32 PM
|
|||
|
|||
|
very interested :D thanks for sharing.
|
|
#7
07-29-2013, 11:42 PM
|
||||
|
||||
|
Hi all together,
and thanks Guys for your compliments and interest,  then we can go on and start the main engine! then we can go on and start the main engine! And now some first pictures of my MLP building yard. This is the larger part of the MLP platform top side here.  And here the smaller part of the platform top side (continuation), the front (Side 1) and back (Side 3) as well as the left SRB Blast Chamber. 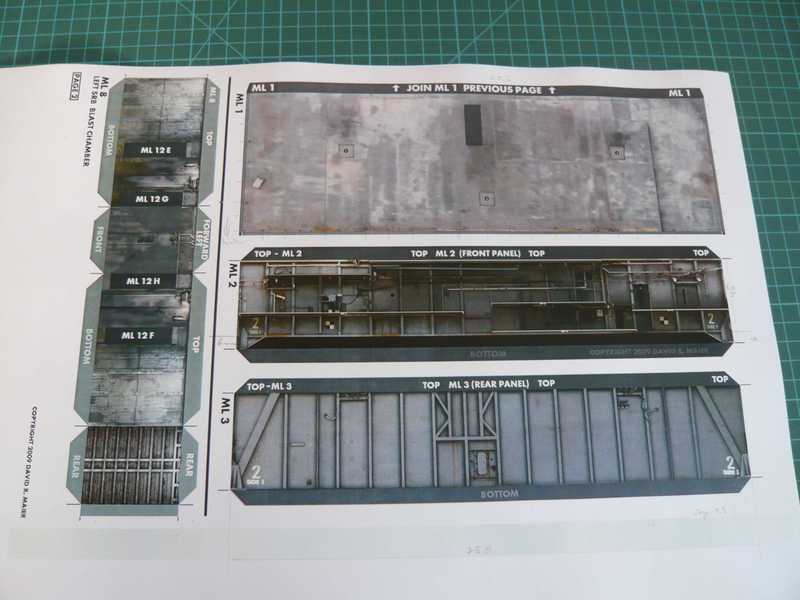 The next picture shows the two side panels of the MLP, Side 2 and Side 4, the right SRB Blast Chamber as well as the SSME Blast Chamber and parts of the 6 MLP "feet" (pedestals). 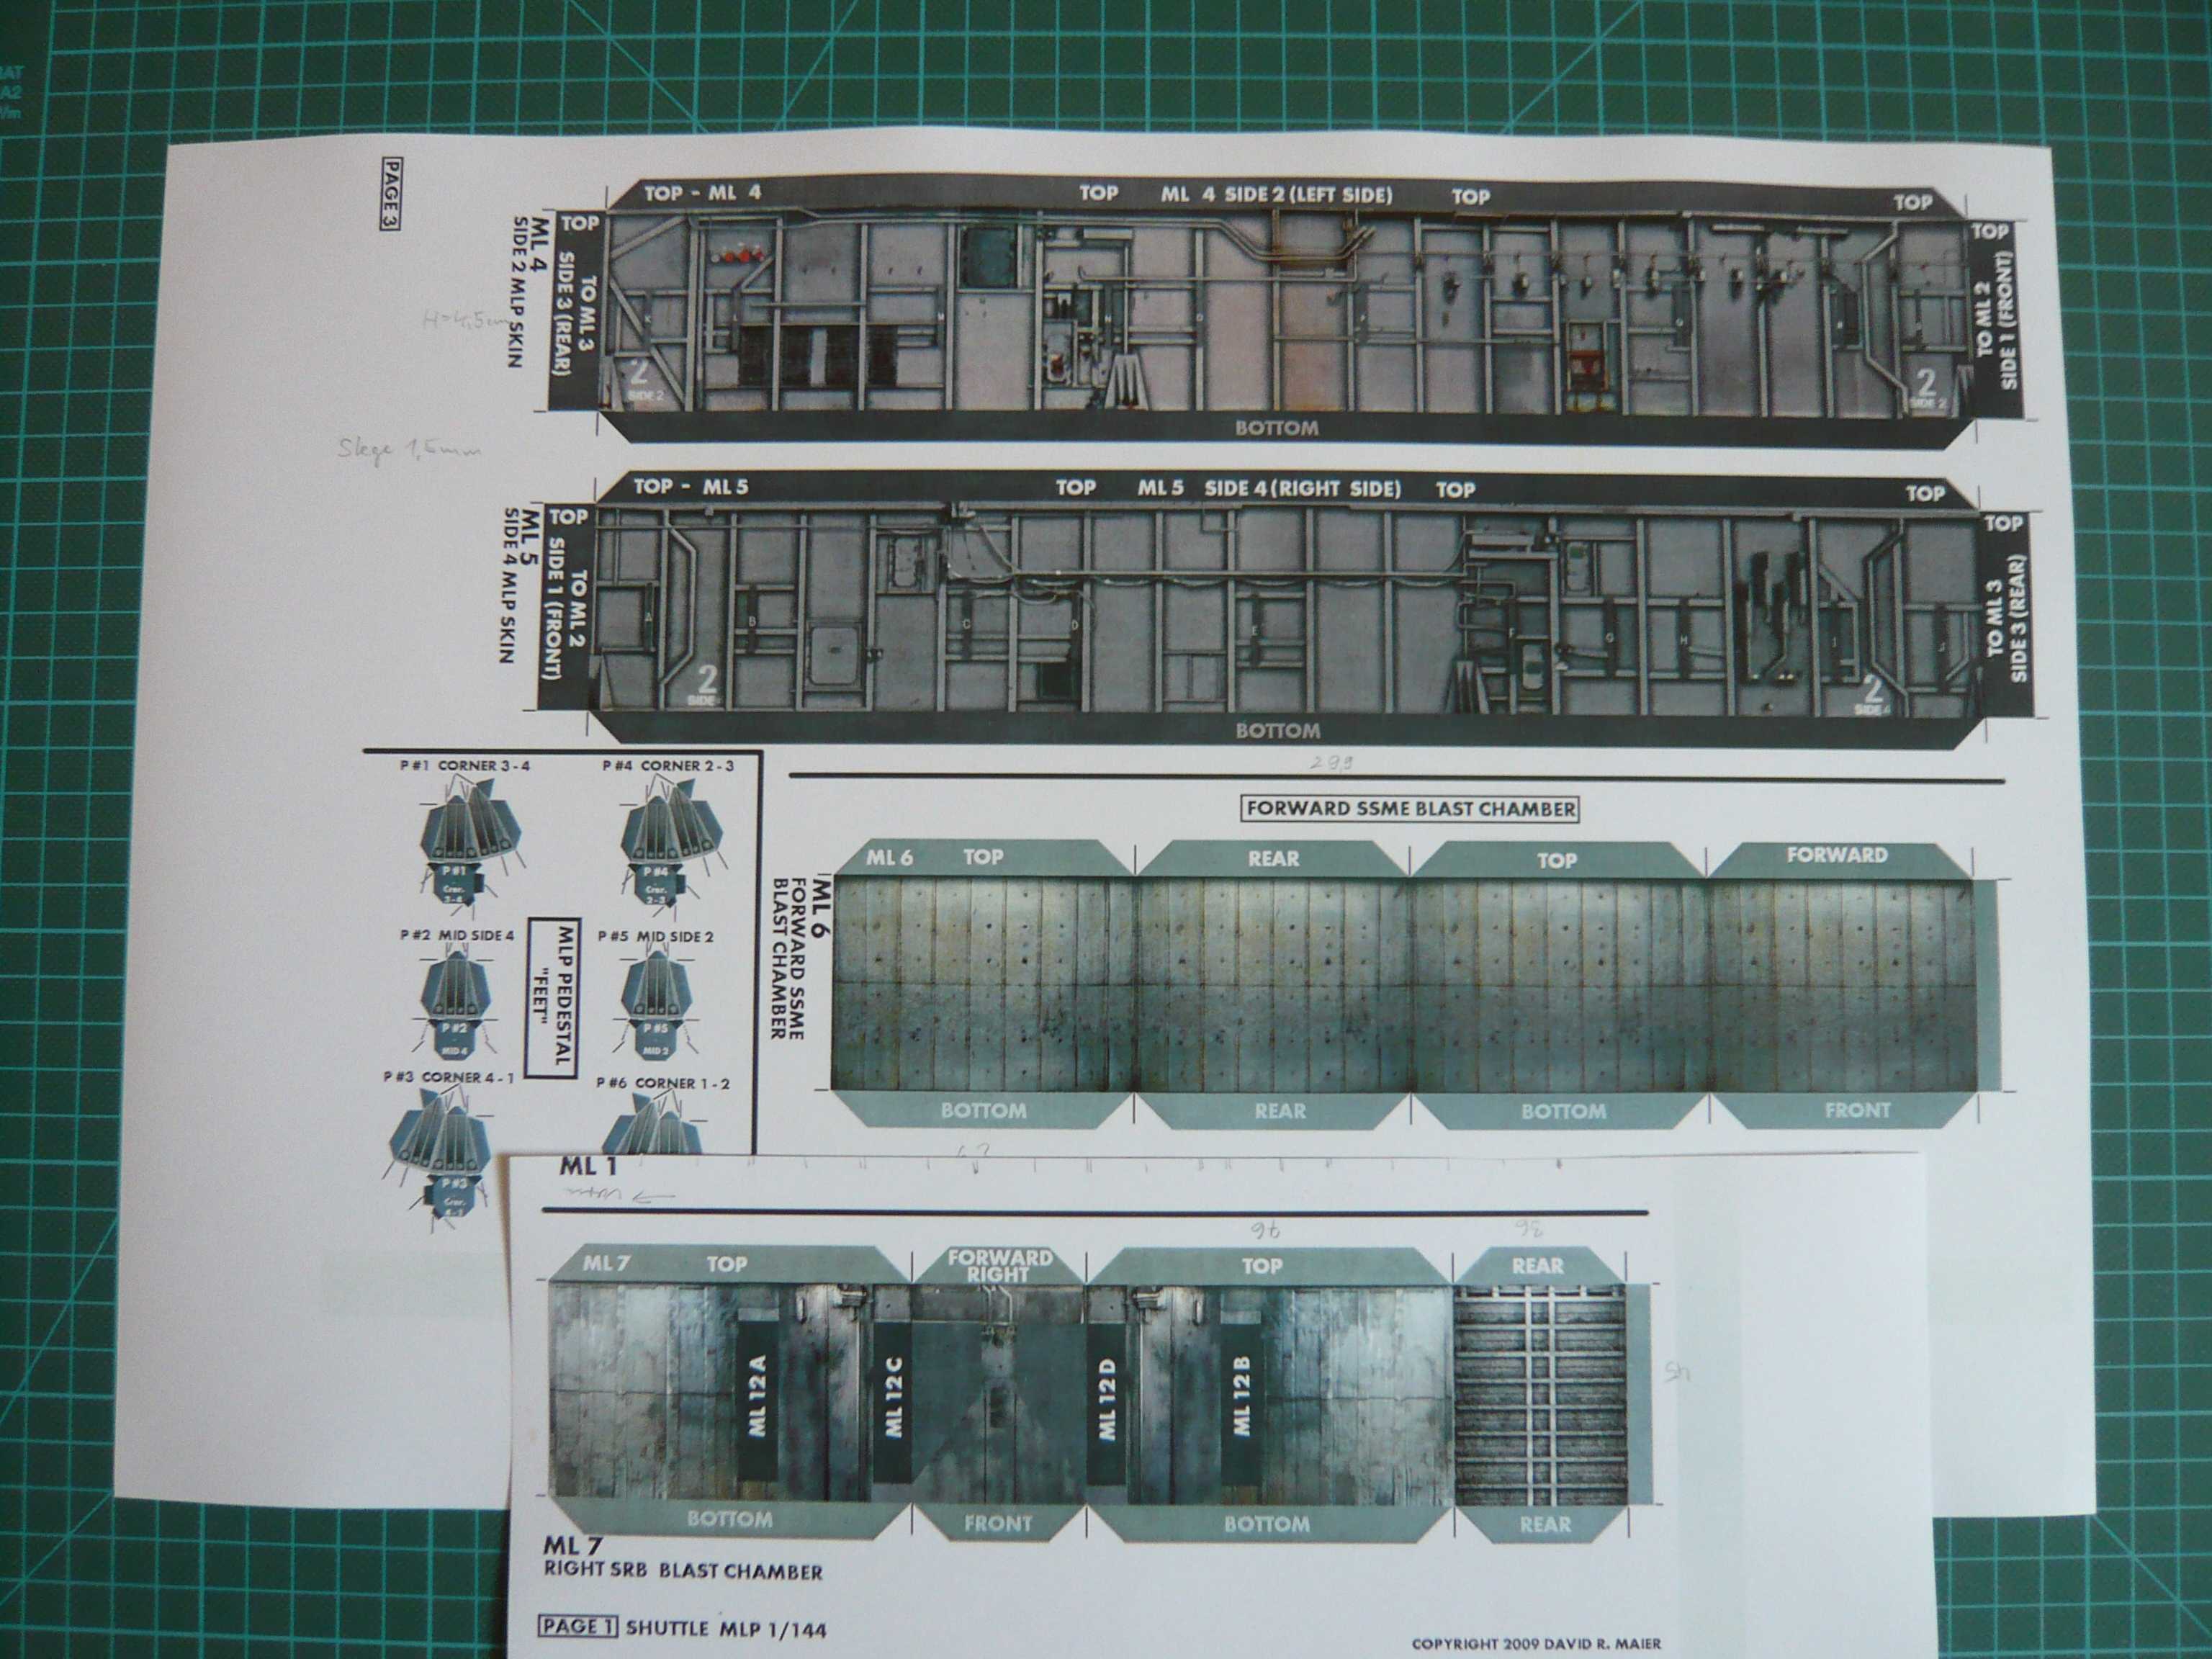 Since to me however a pure cardboard version appears not strong enough as foundation for shuttle stack nevertheless, I decided to give to the MLP a load-carrying sub-construction from hardboard and balsa which are then pasted with the colored cardboard. But not all details from cardboard look so mad and manufacture of special delicate parts could be very difficult (e.g. railings and in particular long and thin pipes!!!) Therefore I've intended, to build not everything of paper from the kit. Additional small parts and armatures as well as lines, railings and stairs I will scratch build of plastic sheet or metal. Let's go now first times into the wood ..., here the upper and lower cover plate of 1.8 mm hardboard. 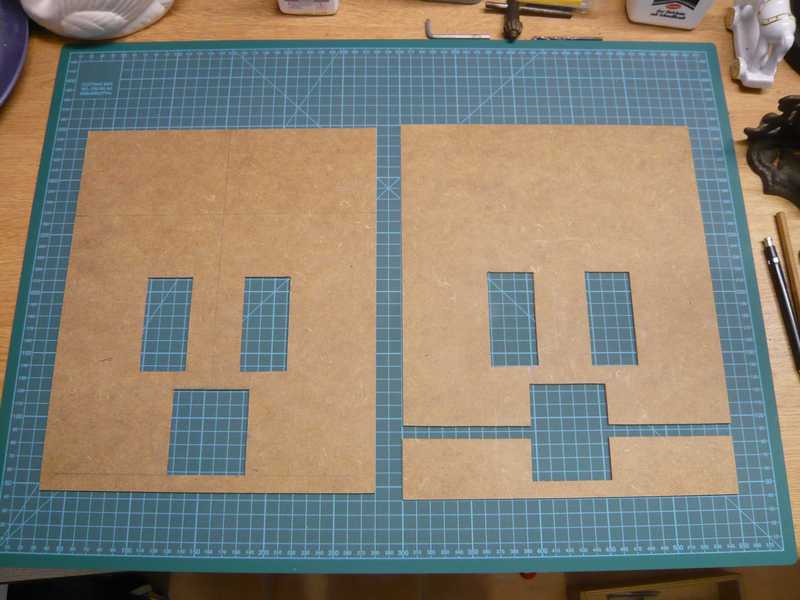 On the upper cover plate the side panels and the retaining structure from Balsa were then glued on. 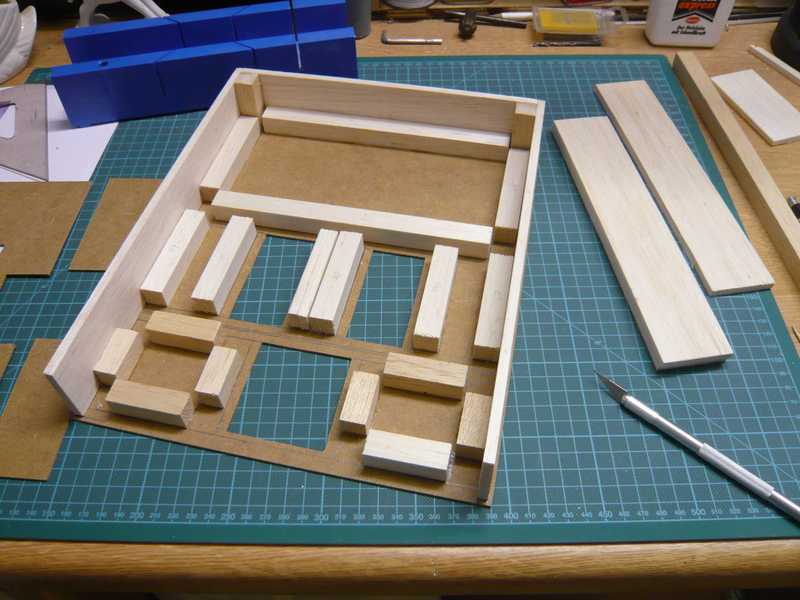 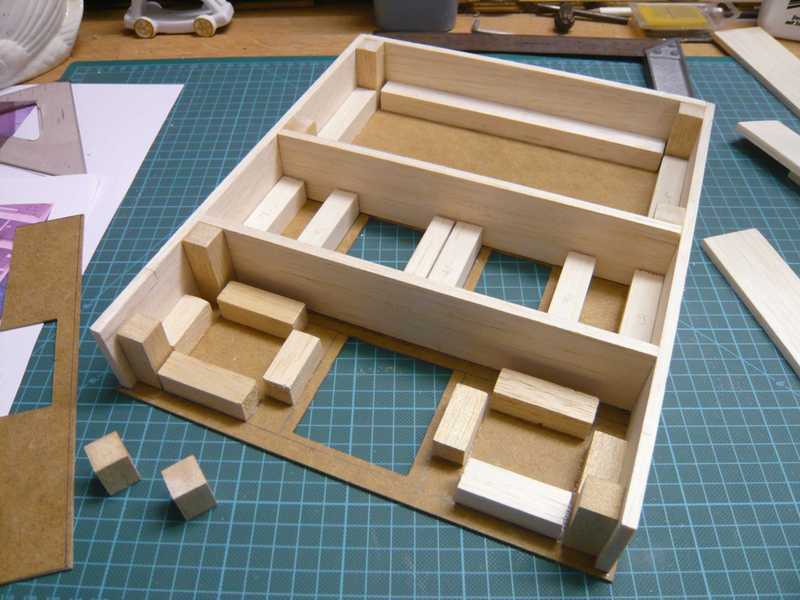 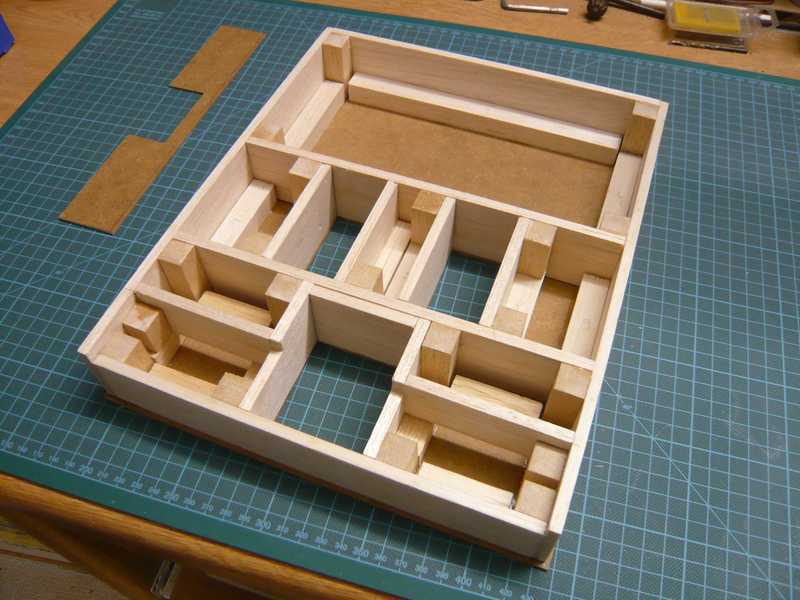 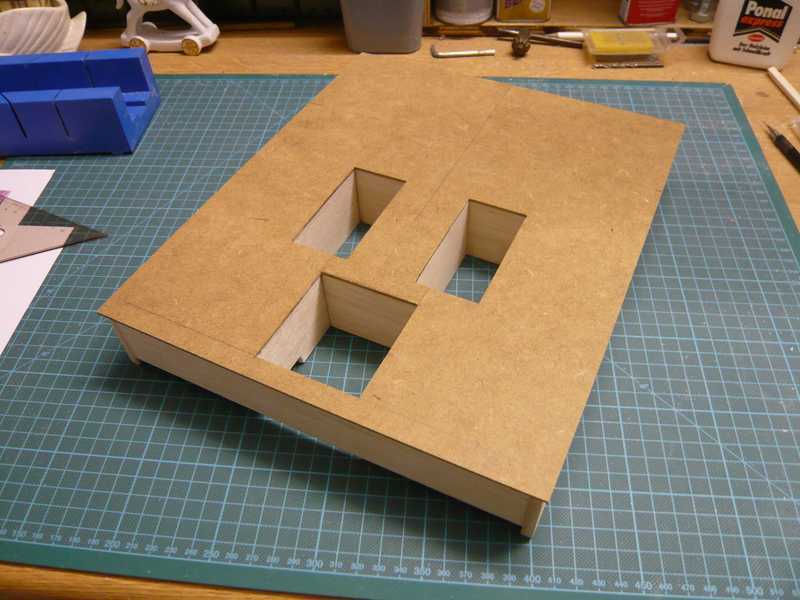 So, thus the MLP shell construction has already times a quite tidy stability and might some launches loosely so probably get over. Wow, now I'm however glad, the beginning is made and updates follow soon.  And if you notice something, what might be made better, for constructional criticism or other proposals, hints and general feedback I'm very grateful. And if you notice something, what might be made better, for constructional criticism or other proposals, hints and general feedback I'm very grateful.
__________________
Greetings from Germany Manfred Under construction: Launch Pad 39A with Challenger STS-6 (1:144) Last edited by spacerunner; 09-16-2016 at 05:26 PM.
|
|
#8
07-31-2013, 07:18 AM
|
||||
|
||||
|
And here is a next update.
The carcass part looked last still rather naked. Therefore now first times the top deck got its decoration wallpaper. There first however times was the question about the most favorable sticking variant. Since such can full-laminar probably be pasted a relatively large surface of nevertheless approx. 30 cm x 25 cm from the tube or even with a Pritt pin rather more badly, I decided for sticking spray (Uhu). And thus it went then also completely well, although one must be careful, otherwise sticks there fast also everything else ...  Next was the front Side 1, whereby still following is to be entered afterwards: As one can see in one of my last pictures, this front in the paper kit has the same height as the remaining MLP sides, which does not correspond however to the original, how one can see at the step on this NASA photo, which goes up to the center of the SSME Blast Chamber. 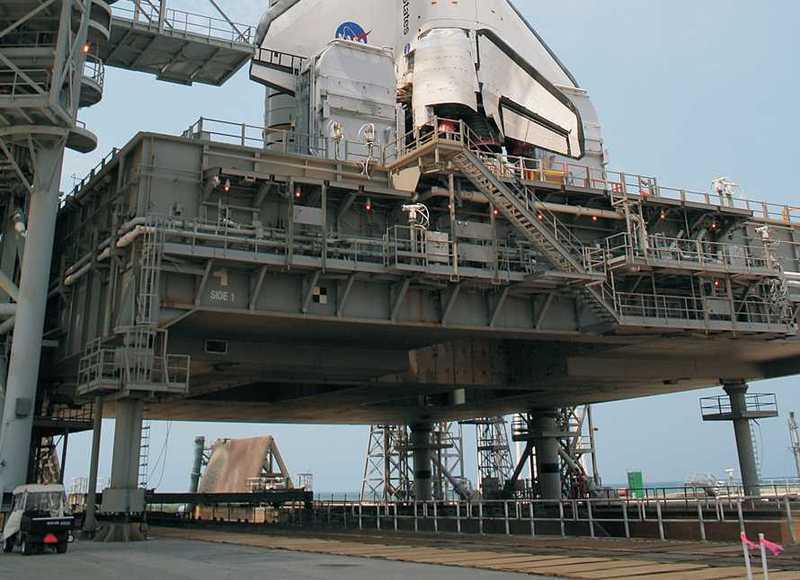 Source: NASA Without this step the building of the MLP base would be somewhat easier, which however was not in my sense. Therefore I have corrected this small omission sin of Mr. Maier by the appropriate step. 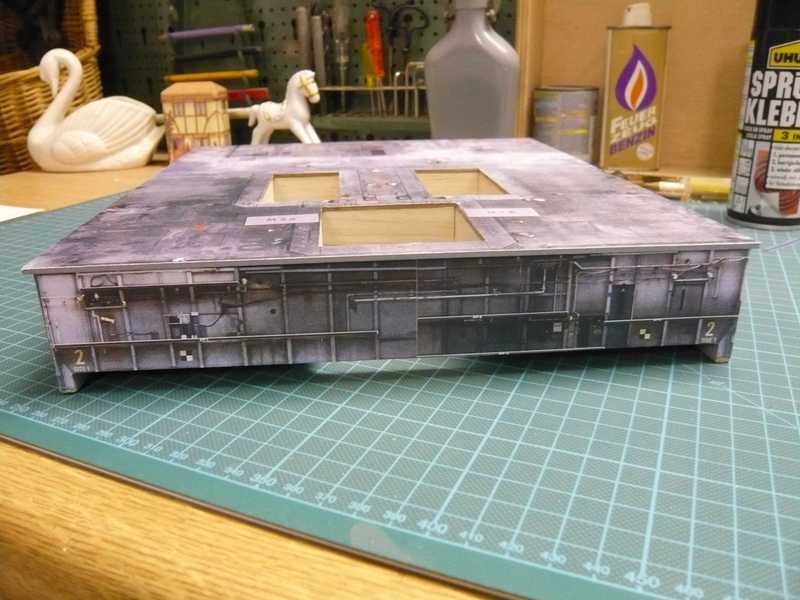 And then finally still the remaining 3 sides of the MLP followed. 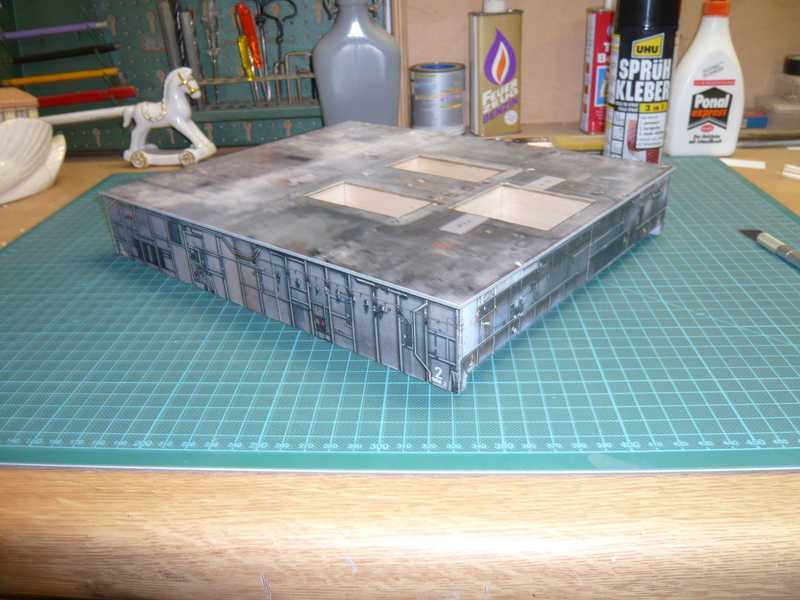 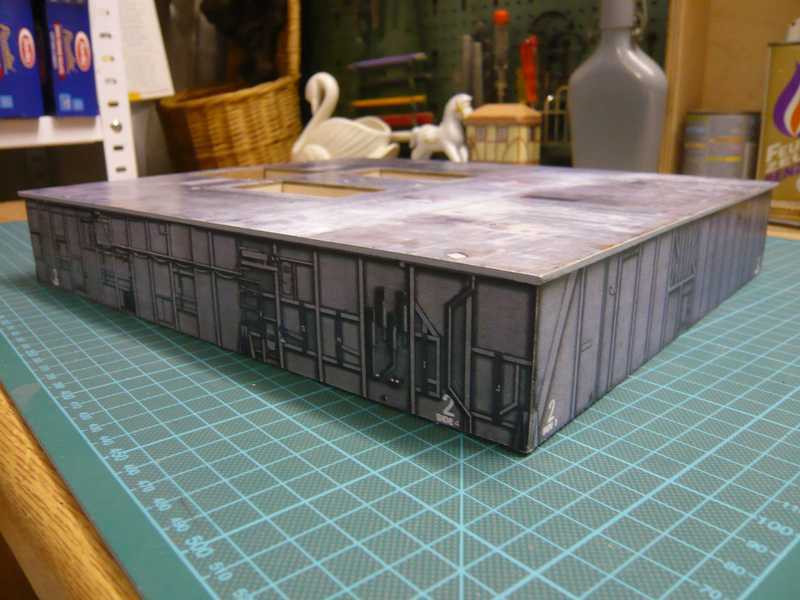 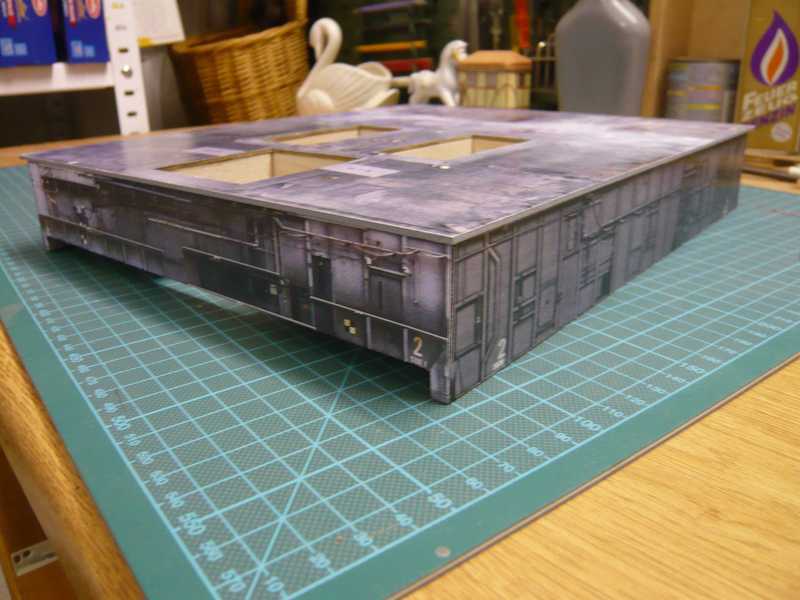 Now the MLP looks equal already many nevertheless better. Next the bottom side was completed, which got a grey painting from the Tamiya spray. 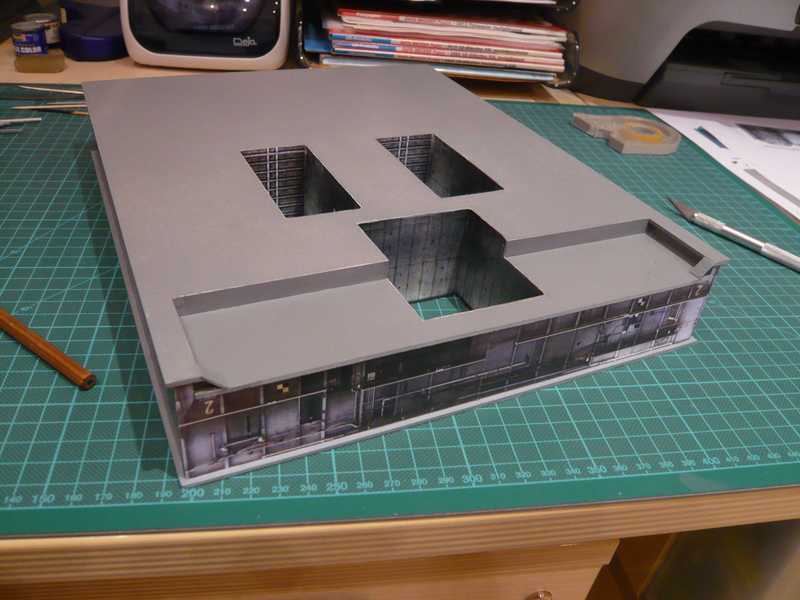 Thus then the outside covering of the MLP would be actually already nearly complete. 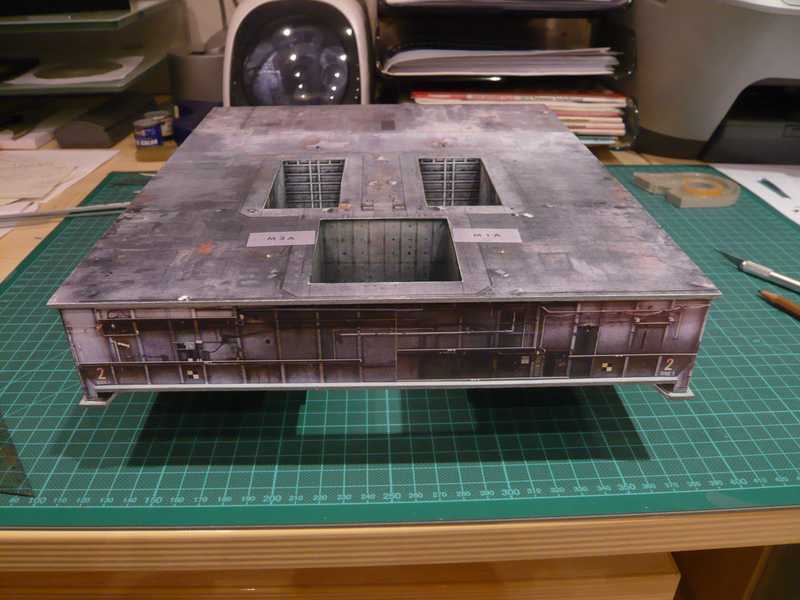 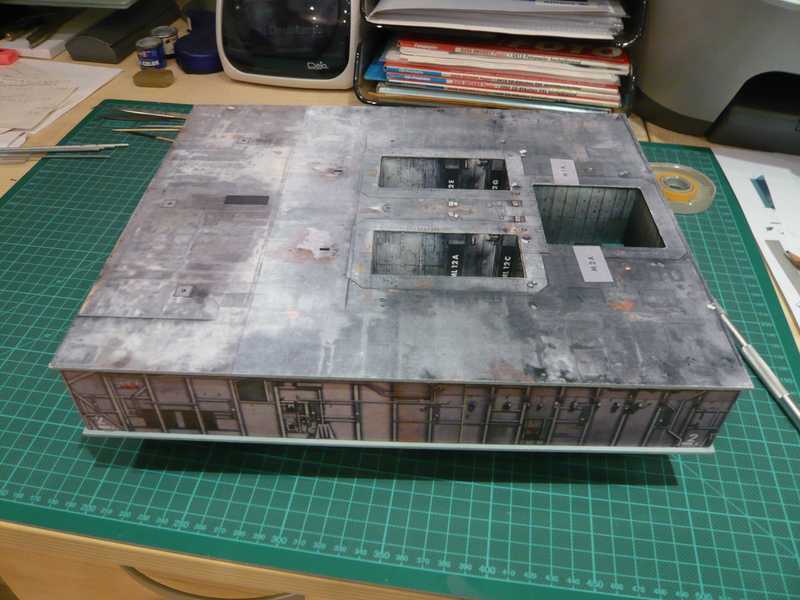 And as one can see, became already also Blast chambers for the two Rocket booster (SRB) as well as the Main engine (SSME) disguises. During launch the hot exhaust gases are derived by these openings. 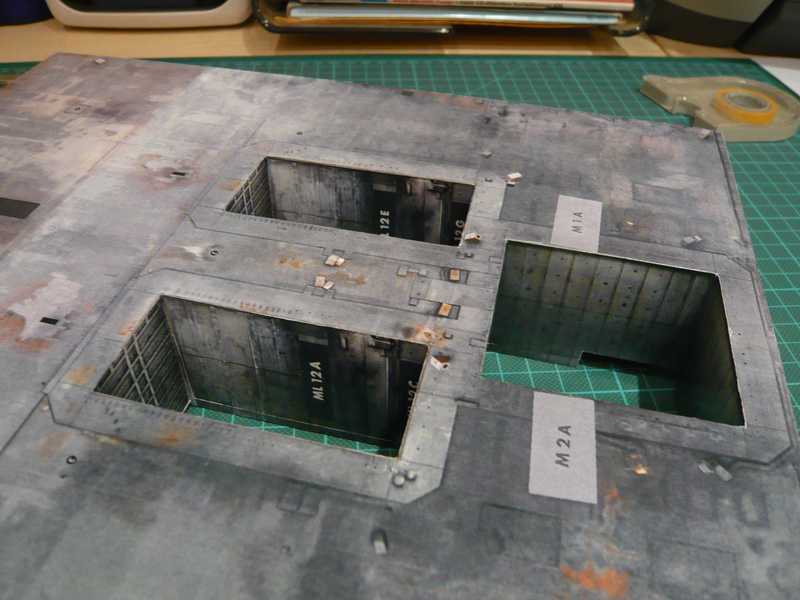 Although everything don't look bad already, however Blast chambers are just like the 4 sides to be structured later still further by scratch building with Evergreen Styrene strips. Therefore I've prepared already some meters of strips (1x1 mm and 1.5x1.5 mm), as well as priming and paints. That must happen with my mixed media building method (unfortunately) before sticking together, since following painting is absolutely taboo. And that will be simultaneous then for me also the entrance into the Airbrushing, with which I have so far still no experience. Property in addition on recommending my modeling shop forwards to test the Aqua Color colors of Revell. Then I unpacked my Airbrush basic set from Revell with compressor, loaded the gun and completely started courageously straight. Knew so far only the terrible vapor from the Tamiya sprays. And those are now my first proud results, approx. 6 current meters, which wait now for the cut. 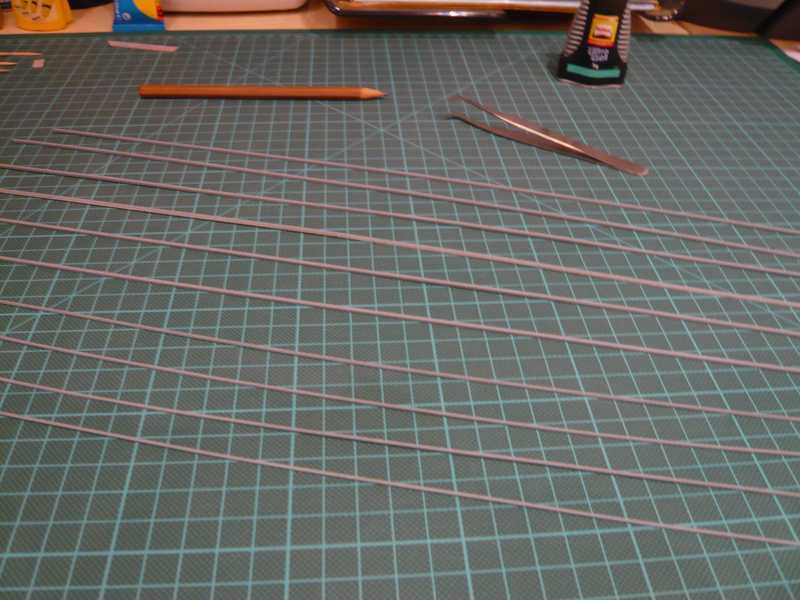 Those are profiles 1.5x1.5 mm for the MLP sides and 1.0x1.0 mm for the SSME Blast chamber. With the result I am so far quite actually content, but every beginning is difficult ... And now the freshly painted profiles should come naturally also on the right places. And so the first meter profile 1.5x1.5 mm is already glued, and it looks already quite good for the beginning. This 3D effect looks much better than the 2D printing surface, isn't it? 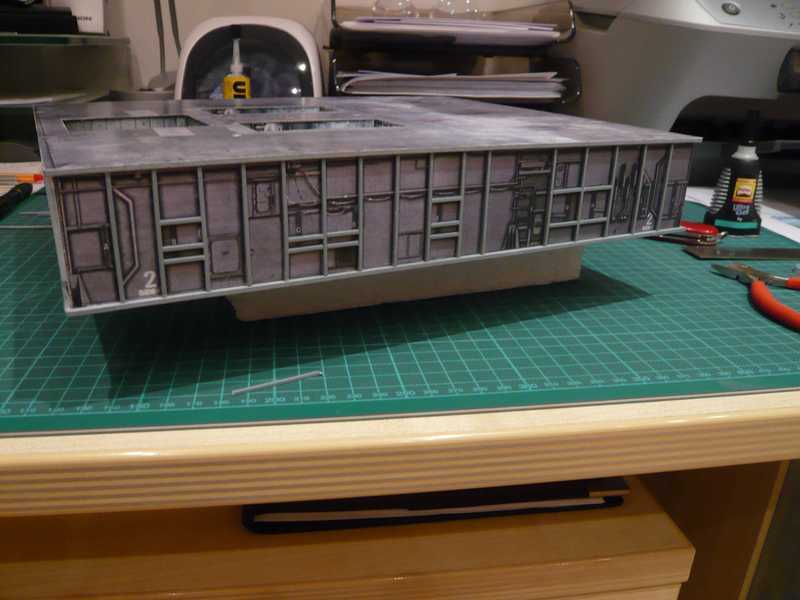
__________________
Greetings from Germany Manfred Under construction: Launch Pad 39A with Challenger STS-6 (1:144) Last edited by spacerunner; 09-16-2016 at 05:39 PM.
|
|
#9
08-01-2013, 02:49 AM
|
||||
|
||||
|
There now however already still some meters of profiles lie before me and wait patiently for their dispatching. But occasionally the Blast deck and Blast Shields follow now.
 So that this very flat part should not bend with the sticking assembly in the center and to remain stable in itself, I imagined that a reinforcement from Balsa would be completely appropriate. 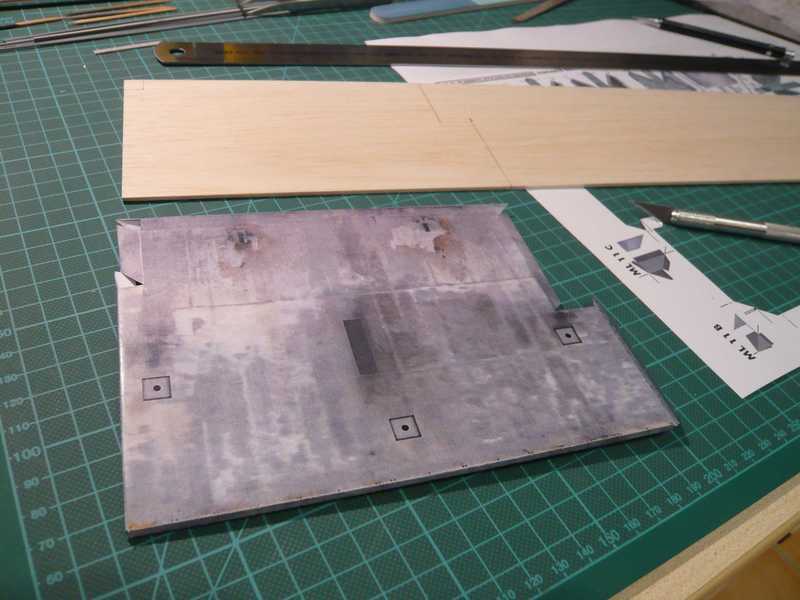 After bonding the Balsa board inside, the lateral chamfers were glued to. After this Blast deck could to be glued at its intended place. One must look already exactly, in order to recognize the flat part. 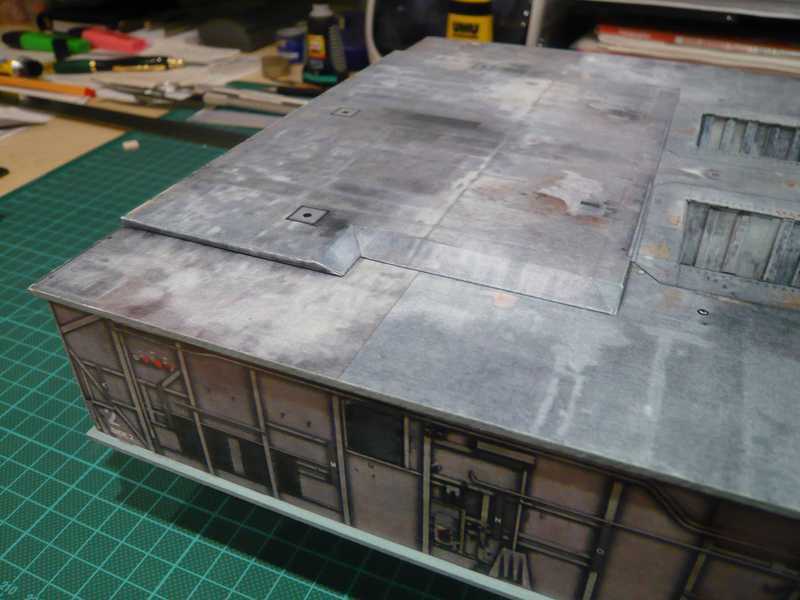 Subsequently, I have prepared the covering of the SSME Blast chamber, where must still reinforcement profiles be drawn in. For it I used the painted 1x1 mm profiles and cut of it 34 pieces on length. 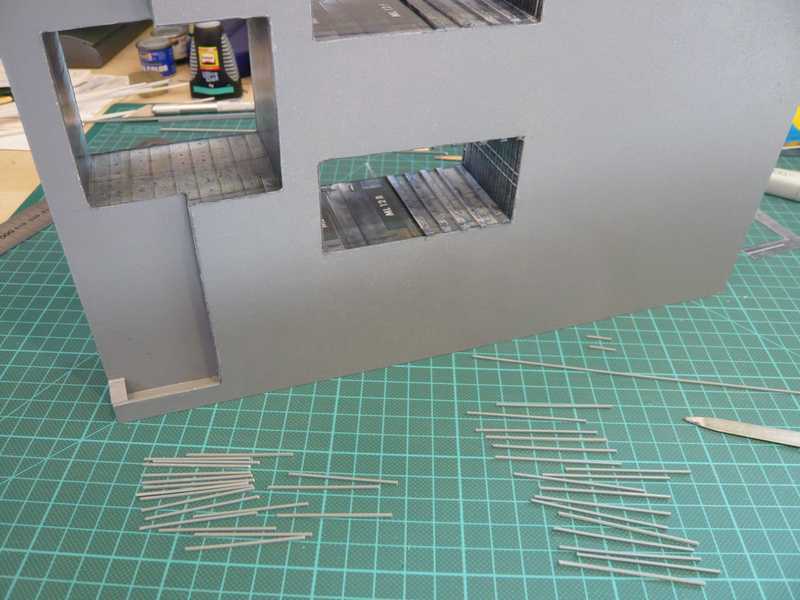 And then the profiles with tweezers and superglue were glued, and so then one after another came to its place. That was, as already feared, a rather stressful affair. But then it (and also myself) was bushed.  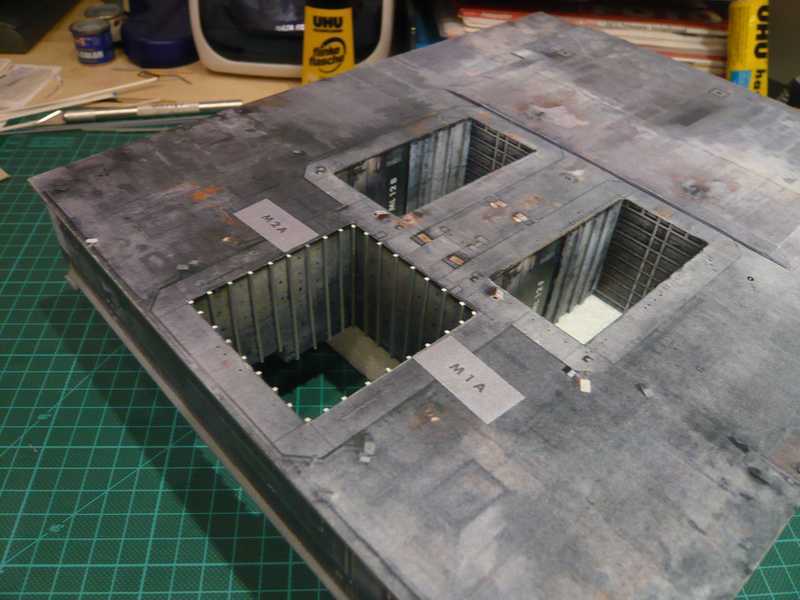 And then are missing "only" still the reinforment profiles (1x1 mm) at the rear walls of the SRB Blast chambers, I wanted to scratch build also. For the lateral profiles I used paper strips copied from the kit. But I state only straight ones that I must airbrush for it only again which. There I must have miscounted myself probably somehow. Therefore followed next only still the preparation of the parts for the Blast shields over the 3 chambers. On the left side there are the parts for the underbody, into which for reinforcement an insert from cardboard (right) is glued, and below them the upper covers lie. 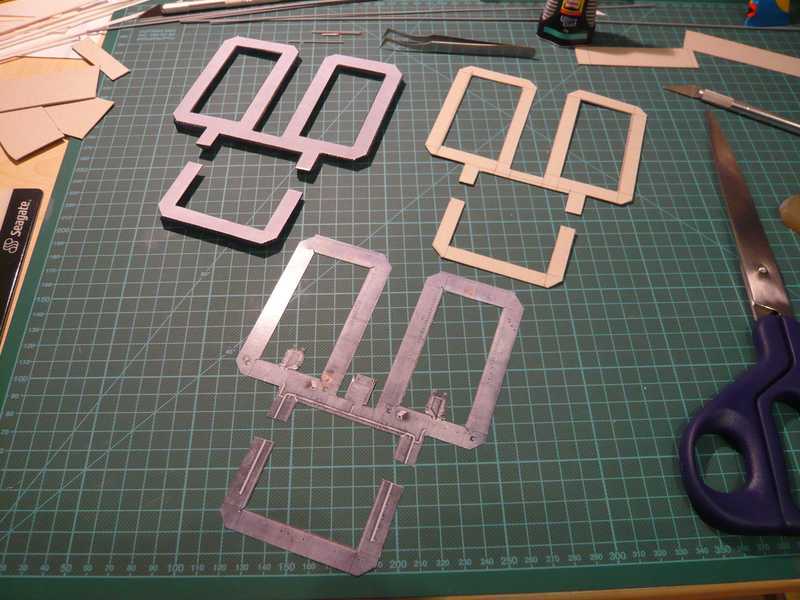 The SSME Blast shield is interrupted by the recesses for the two Tail service of masts (TSM). The front part of the Blast shields is already completely glued on the picture, with underbody inclusive reinforcement and cover. After bonding the cardboard reinforcement then also the underbody of the SRB Blast shields could be glued on the deck. 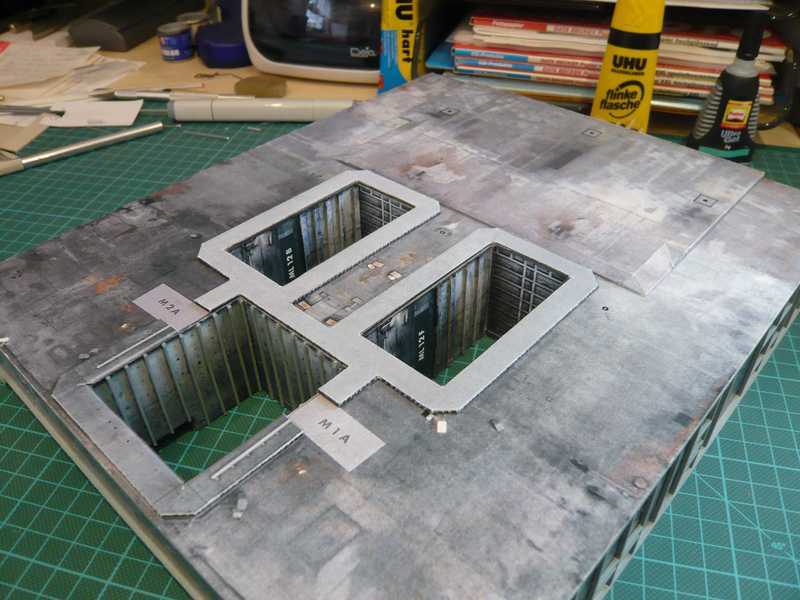 With covering the underbody I will however wait still until the reinforcment profiles (1x1 mm) at the rear walls of the SRB Chambers are glued, since there is otherwise possibly no clean edge. Therefore I planned still the shifting of the reinforcement profiles at the MPL-Side 3, which is fortunately not completely as complex structured up to the middle small articles as the other sides. Thus first again the necessary profiles were suitably cut, 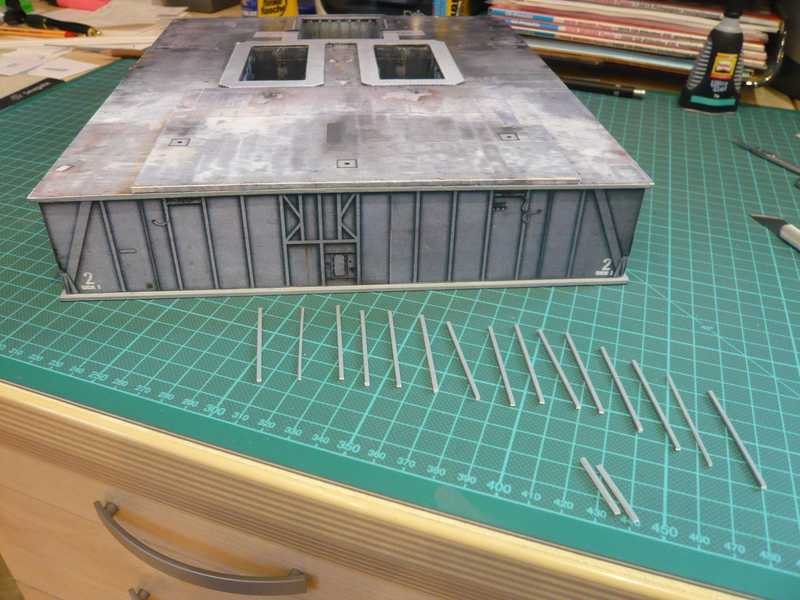 then each part with the tweezers moved, with a toothpick the back carefully with Superglue dabs, and then with calm hand glued on first attempt in the correct position on the intended place. And in such a way it finally looks if everything folded. 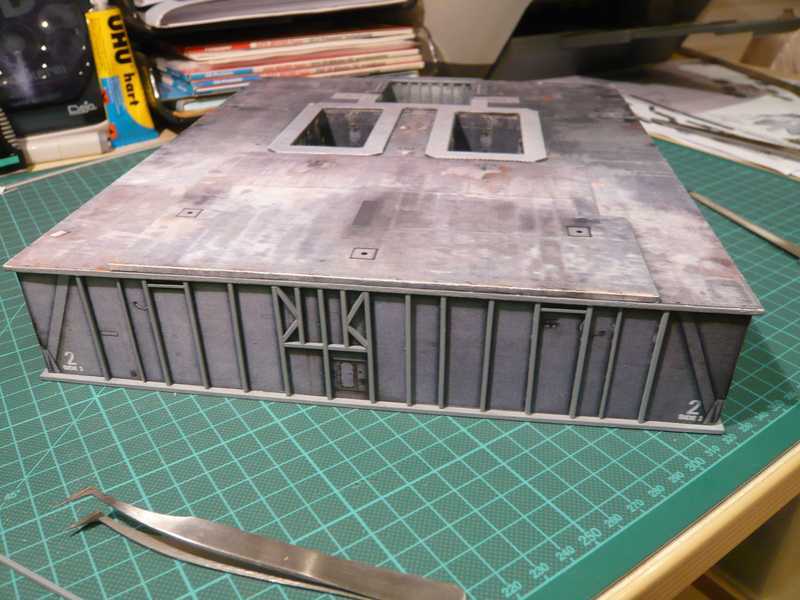 Now only still the two outside profiles (4x1,5 mm) are missing, which must be only still painted however.
__________________
Greetings from Germany Manfred Under construction: Launch Pad 39A with Challenger STS-6 (1:144) Last edited by spacerunner; 09-16-2016 at 05:42 PM.
|
|
#10
08-01-2013, 08:29 AM
|
||||
|
||||
|
Manfred,
purely amazing work.......I can see that you have a few years of modeling experience behind you and gave this build much thought before beginning it! Bill 
__________________
----------------------------------------------- Seems to have been Deliberately Buried ----------------------------------------------- Where did Gunter Wendt ? 
|
| Google Adsense |
 |
|
|


 Linear Mode

