


|
|
|
#581
 08-30-2014, 04:34 PM
|
||||
|
||||
|
Hi friends,
now I will continue with the rear Double-ROFI on the LOX-TSM, of which I have a very nice direct shot here, of which I have picked me further dimensions for the selection of suitable parts, so inter alia the diameters of the inner tubes and the casing. The ROFIs are identical on both TSMs, which you can convince yourself, by scroll once around in the panoramic shot.  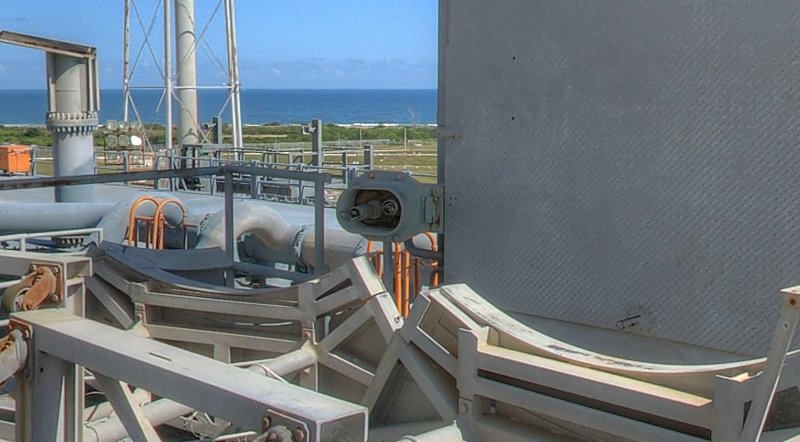 Quelle: NASA Here are some parts to be seen, which might also be considered for the ROFIs, such as ferrules, brass wire and U-profiles. 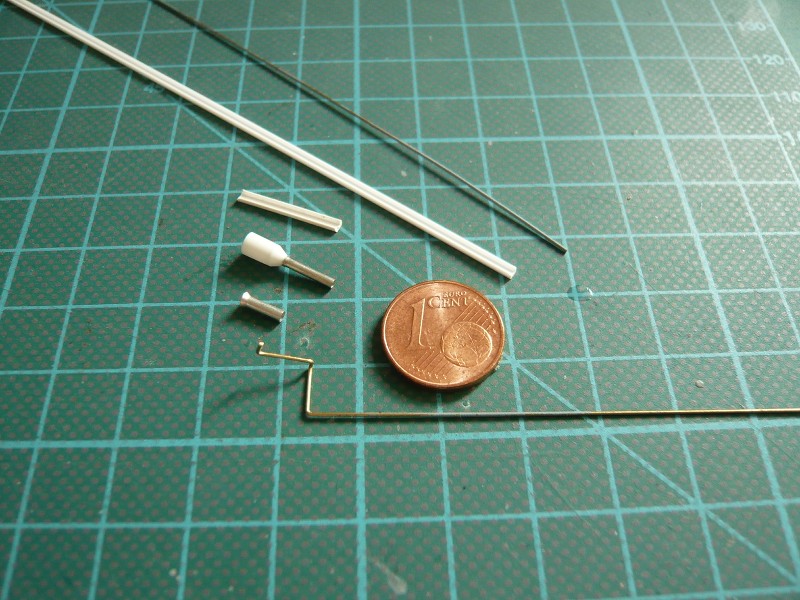 For the casing of the double-ROFIs I then tried it out a few variants. In my estimation this should be about 1.5 mm high, 2.2 mm wide and 2 mm deep. The two inner tubes could be made from brass wires (Ø 0.5 mm). In the first attempt I have a strip of aluminum foil 7.0x2.0x0.1 mm gradually rolled in my bending tool. 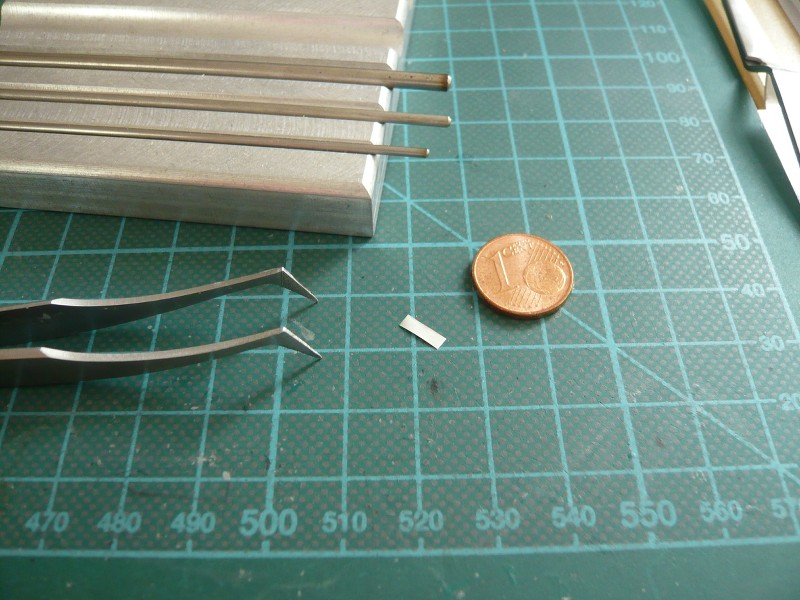 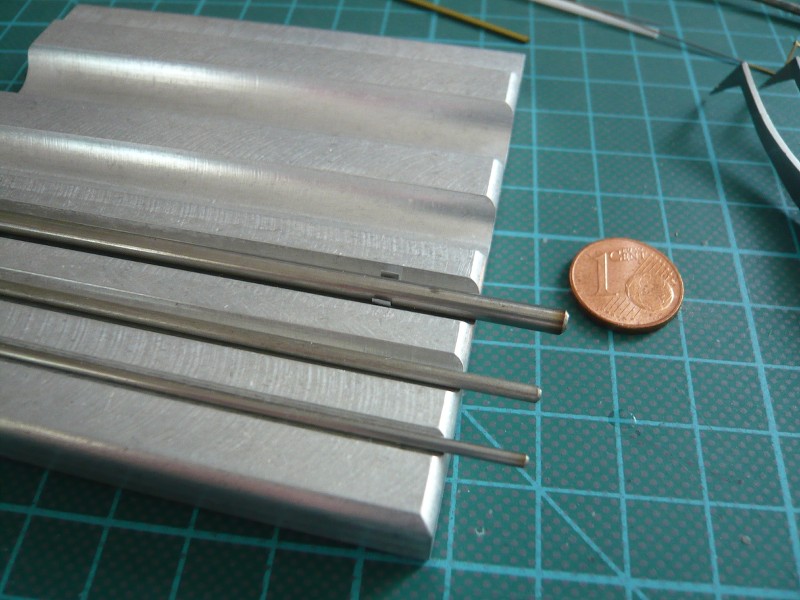 Here you still have to stick the sleeve together below.   Here, this sleeve is trial basis placed on the TSM, but it is still a bit too wide through the adhesive seam.   In the second attempt, I have an aluminum tube (Ø 2.0 mm) gently compressed to 1.5 mm, which looks relatively well in shape and the solution comes closer. Now you would have them only to separate a 2 mm long piece. 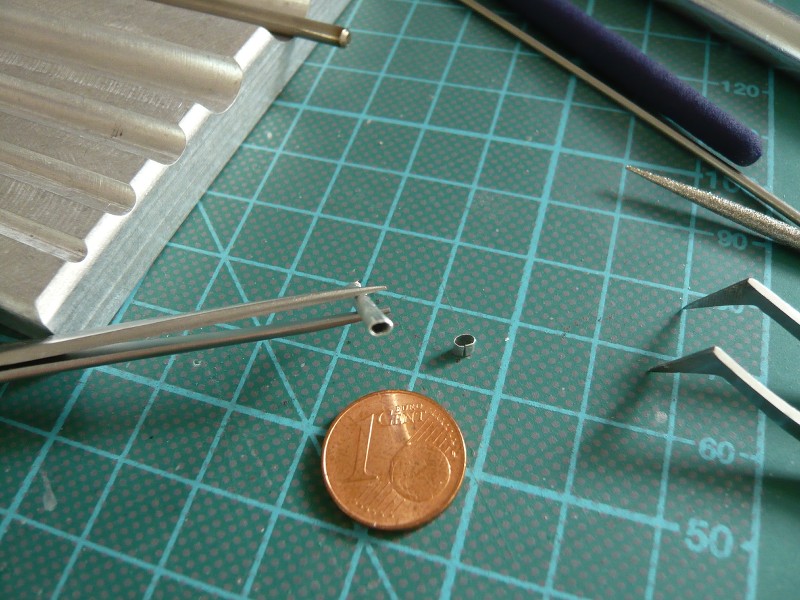 Here is another attempt with a strip of paper, which is but a bit too wide and probably is more likely should drop out. 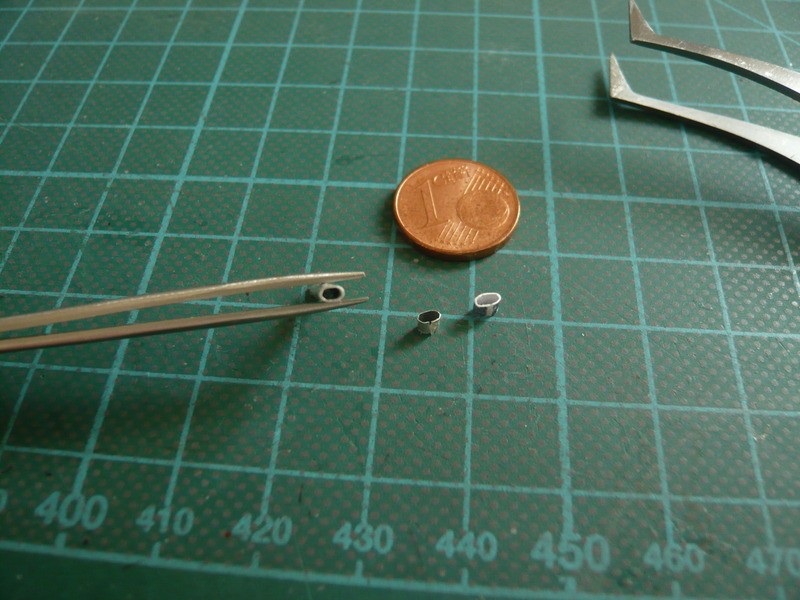 And here are the aluminum tube with inserted brass wires (Ø 0.5 mm) for the two inner tubes, what my expectations quite close to that. 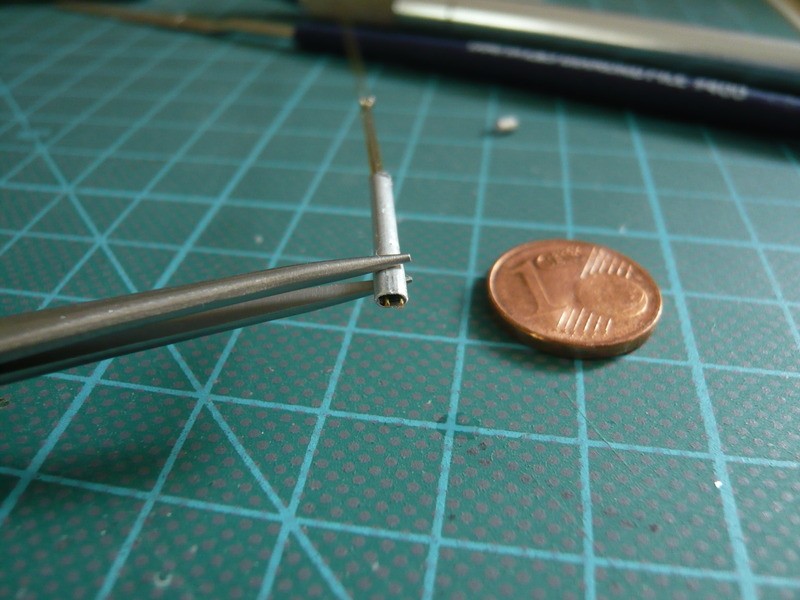 And finally, another attempt with a ferrule (2.1 mm diameter), which was a 2 mm long piece separated and compressed to 1.5 mm. And this variant I will now probably take, because the sleeve is a little more thin-walled.  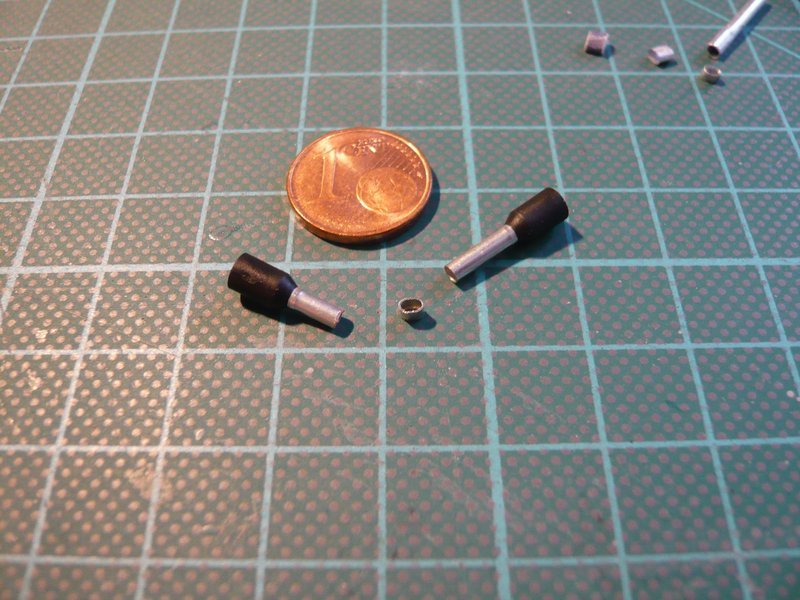 That's it for today with the experiments, and tomorrow then follow the bent pipes and the bracket. 
__________________
Greetings from Germany Manfred Under construction: Launch Pad 39A with Challenger STS-6 (1:144) Last edited by spacerunner; 09-28-2016 at 05:55 AM. 
|
|
#582
09-01-2014, 04:58 PM
|
||||
|
||||
|
Hi Guys,
and the construction of the rear LOX-ROFI I will now continue, the installation can be seen in this picture here very nice. This protrudes due to its double version substantially further outwards than the front ROFI and is directed slightly inwards, while the holder is perpendicular to the box. 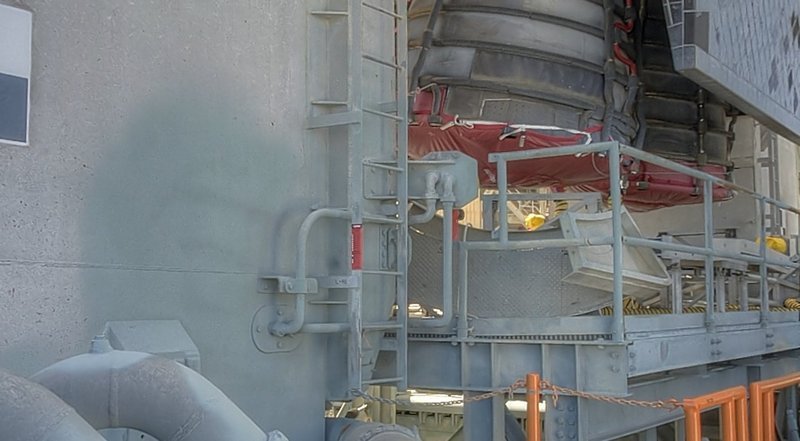 Source: NASA After careful consideration of these views, I have realized that I must perform the installation in two steps.  First I have to install the bracket to the base plate and the "double tube" with the inner tubes directly on the front edge of the box with the angled bracket sits a bit under the ladder. And in the second step, I can then install from the other side, the two bent pipes which run beneath the ladder and attached to the service box, as you can see here again. 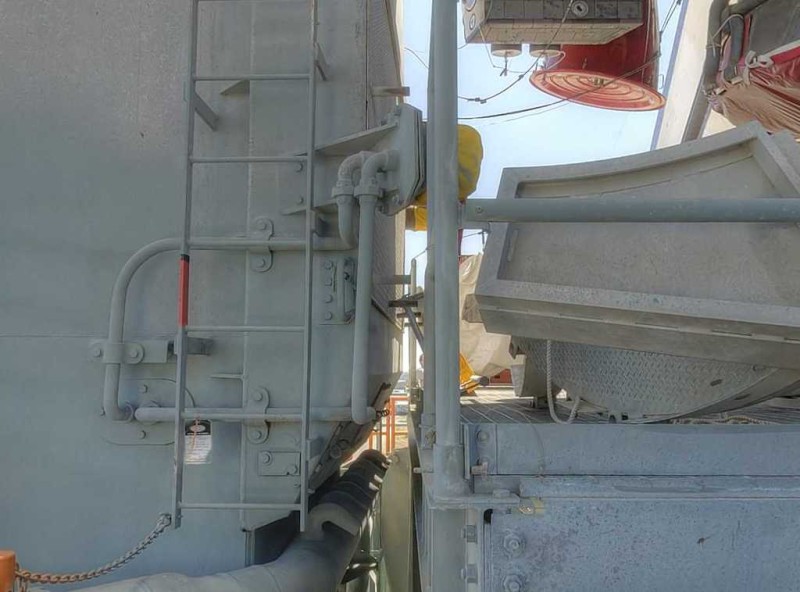 Source: NASA For the holder I initially wanted to use a U-beam, which can be seen in the following image, either a piece of Evergreen profile 1,0x1,5 mm or a self-built profile 1,5x1,5 mm with slightly higher sides because the ROFI must continue to protrude outward. In addition, the housing is located on a pattern of the base plate of paper.  For the manufacture of the pipes I have now drawn their position in this template from the Paper Kit, 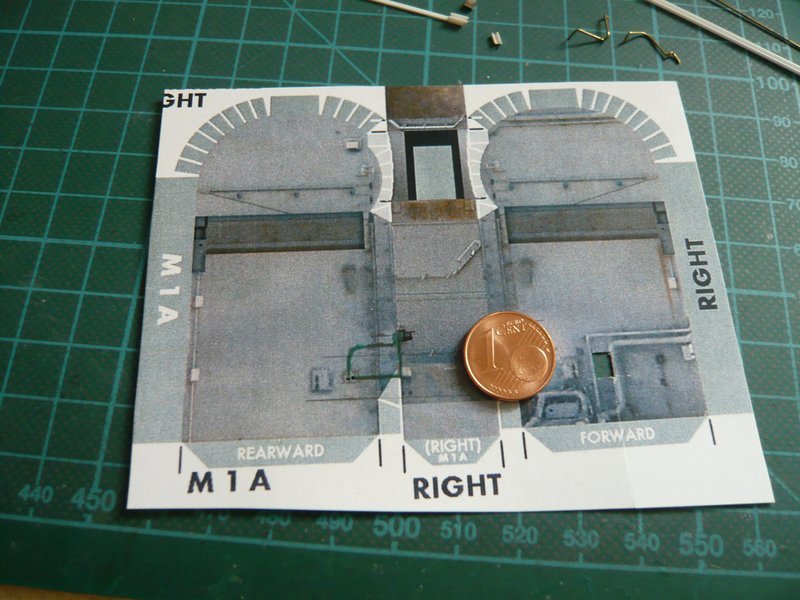 then bent them from brass wire (0.5 mm), 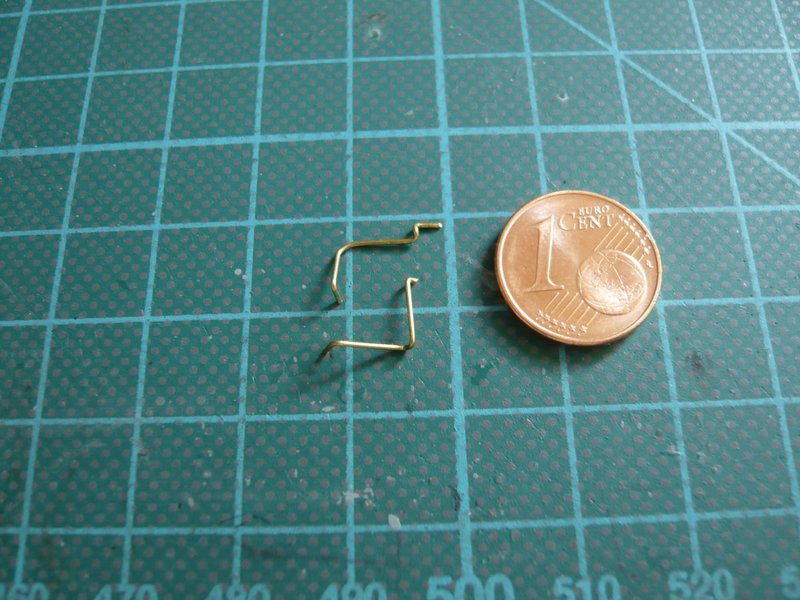 and tried temporarily together with the sleeve, but even without the base plate. 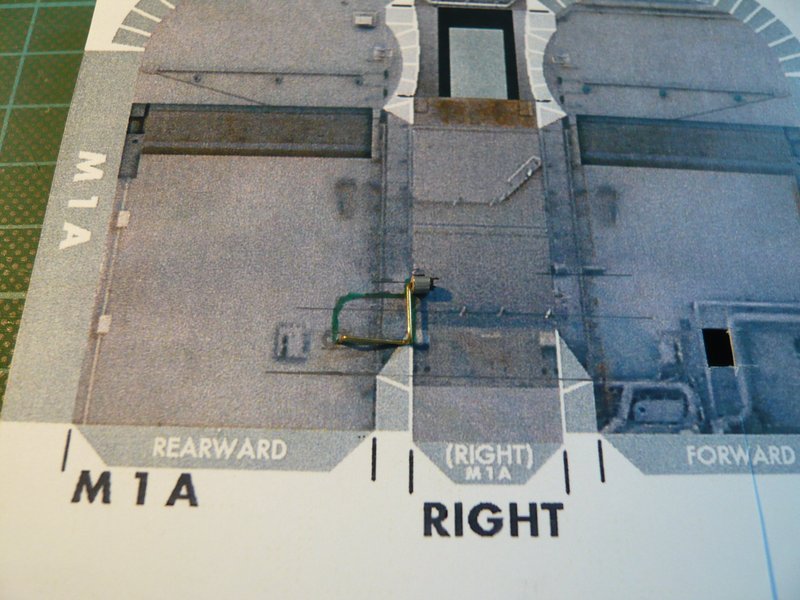  And it seems also so far already times completely good to fit.  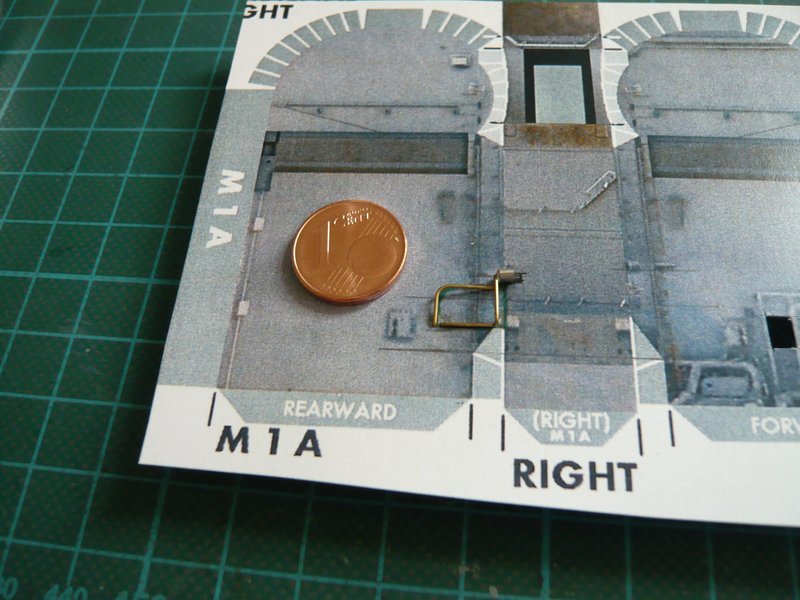 And here I've tested with my pattern, the position of the holder that sits on the box next to a support bracket.  The place is already times right, but the final shape and the seat I have to think again and test in conjunction with the sleeve. That's why I started to build the front half with the holder and drawn the base plate to 0.3 mm sheet on which the double pipe stands with the two inner tubes, initially everything again on a trial basis.  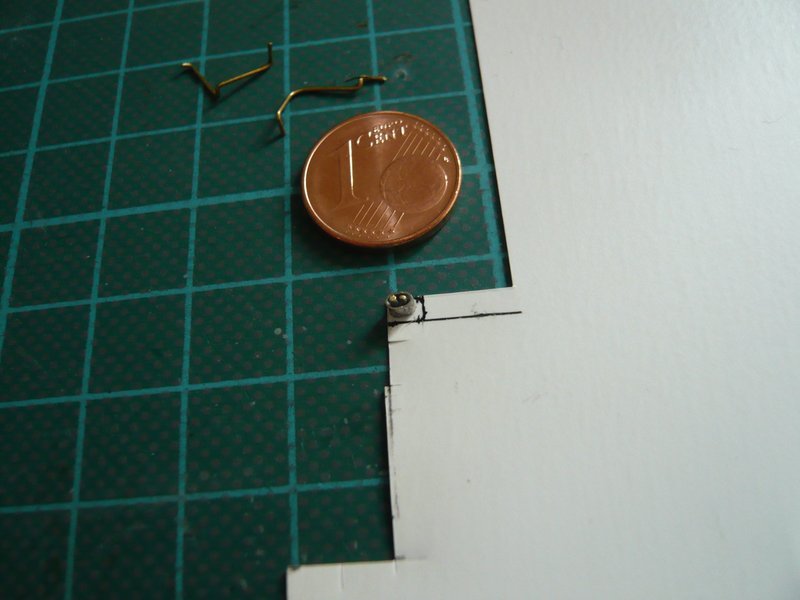 If the holder will then be mounted, I can make the fitting on the box and see if or how well fit the part. 
__________________
Greetings from Germany Manfred Under construction: Launch Pad 39A with Challenger STS-6 (1:144) Last edited by spacerunner; 09-28-2016 at 06:00 AM.
|
|
#583
09-05-2014, 08:35 AM
|
||||
|
||||
|
Hello together,
today I have taken the holder up again in more detail, I will now scratchbuild from individual parts, because the Evergreen U-profile does not match yet so right.  First of all I want to try building from paper, and this is the blank of the tiny holder, for which I have used the lower sketch. 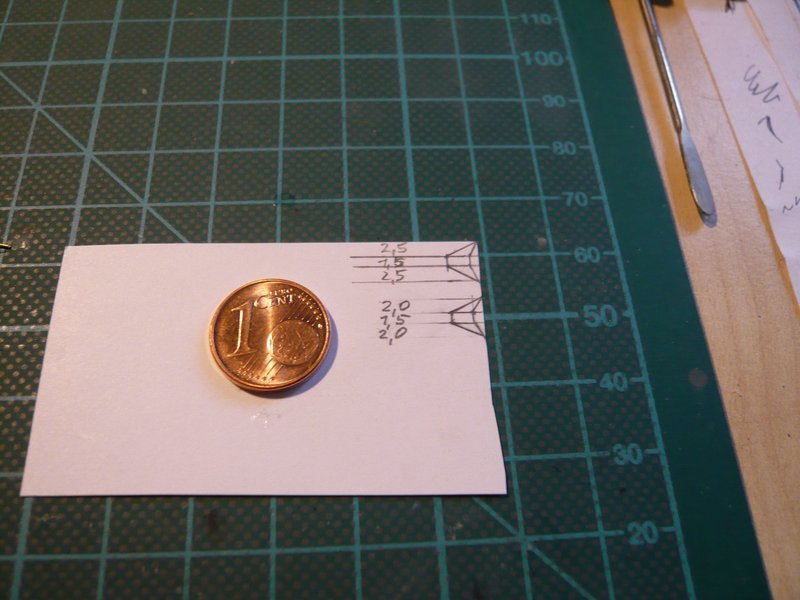 Here it is cut, and next to the double tube sleeve on the base plate. Below is an evergreen strip 1,0x0,3 mm, which I will use as a base in the final plastic holder. For the sides I suppose then also 0.3 mm sheet. 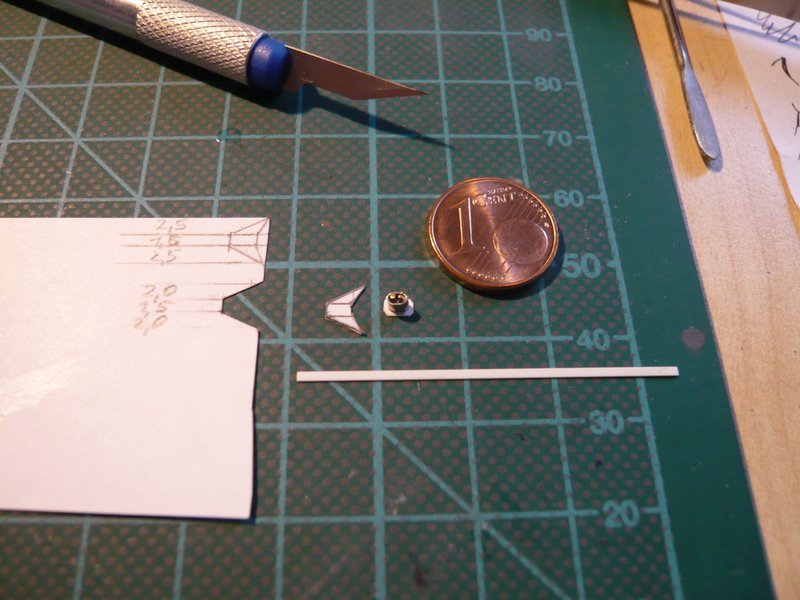 Then I folded the holder and glued to the base plate with the sleeve, which is seen here from the front, 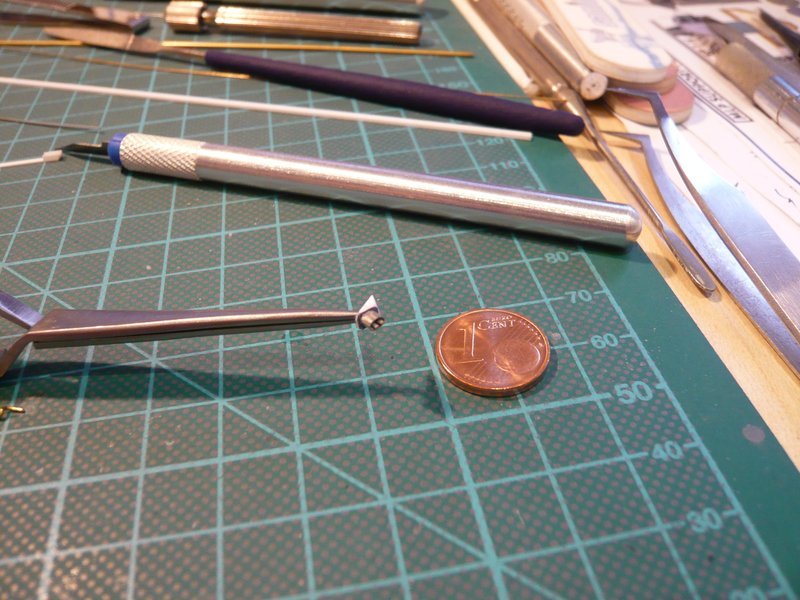 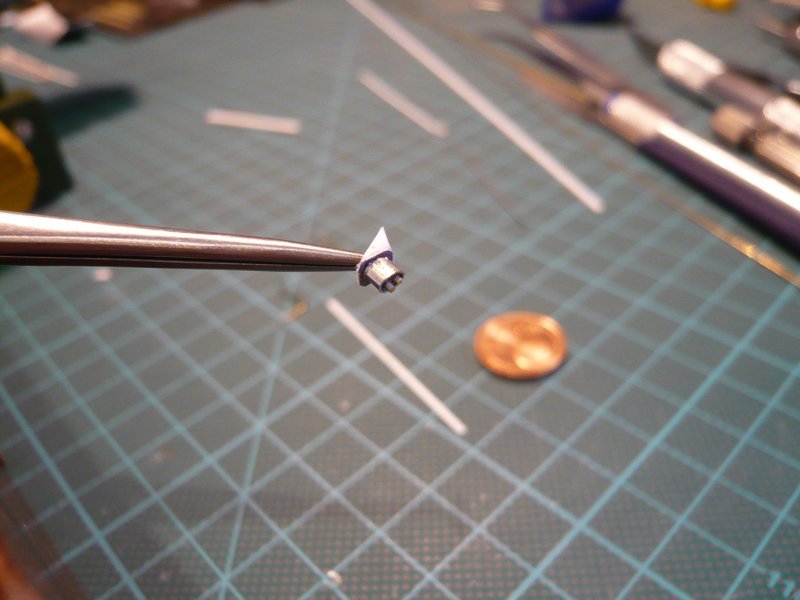 and here from behind. 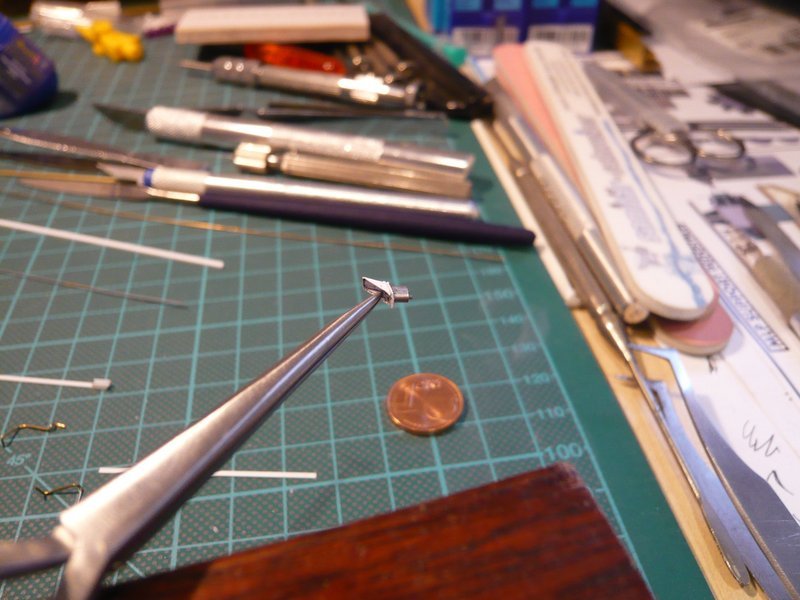 As I said, that's all for now only provisionally, to see whether and how the size fits. And here I have put the ROFI to the TSM, and I must say, so similar could fit that already. 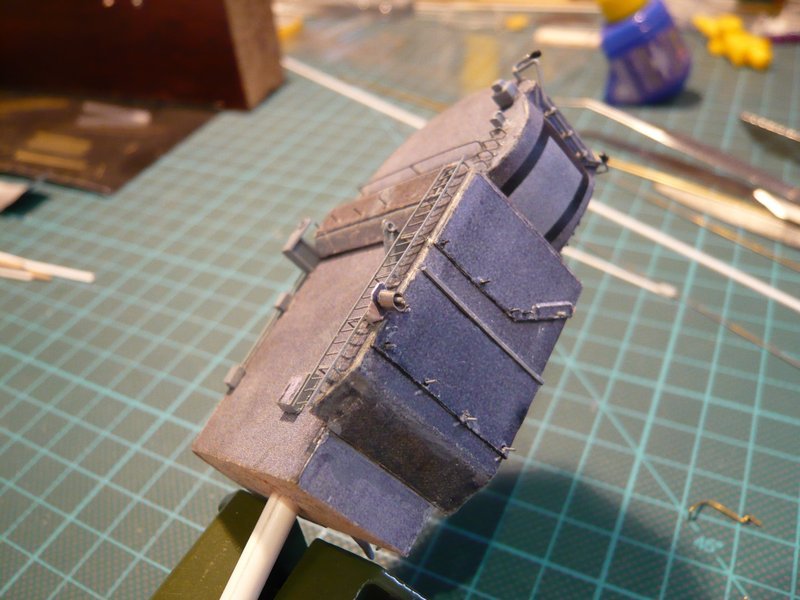 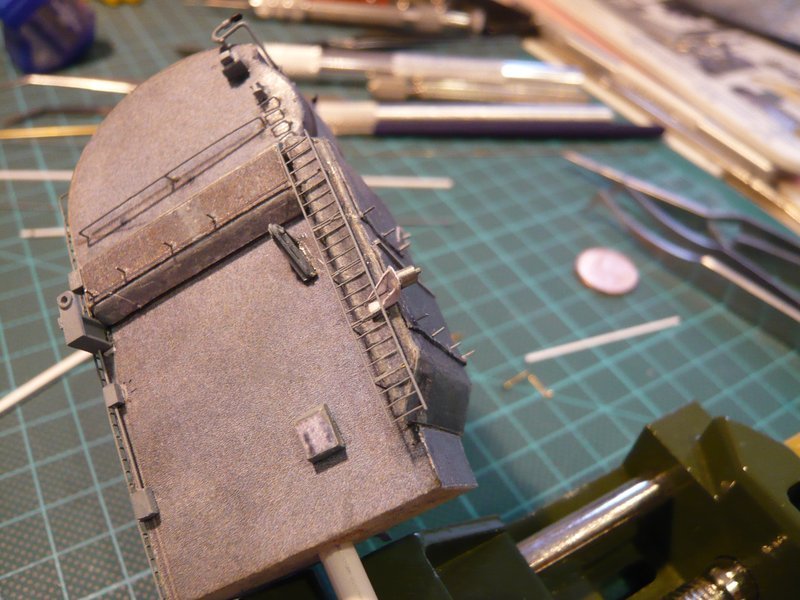 Or what do you think?
__________________
Greetings from Germany Manfred Under construction: Launch Pad 39A with Challenger STS-6 (1:144)
|
|
#585
09-09-2014, 03:16 PM
|
||||
|
||||
|
Thanks Mario,
the ROFI looks not bad, but it seems to be slightly oversized.  Meanwhile, I have the dimensions specified something else, thereby the sleeve becomes slightly shorter, whereas the final styrene construction will make the holder something of filigree. And for the pipes I'll use 0.4 mm copper wire instead of 0.5 mm brass wire. Then the ROFI will certainly better fit for the TSM design.
__________________
Greetings from Germany Manfred Under construction: Launch Pad 39A with Challenger STS-6 (1:144)
|
|
#586
09-09-2014, 06:42 PM
|
||||
|
||||
|
Wow! Such detail!!!
Chris
|
|
#587
09-11-2014, 09:12 AM
|
||||
|
||||
|
Thanks Chris, now I know a little bit more abaout the ROFI details.
Hi folks, During detailed definition of the dimensions I unexpectedly found still new close-ups from a different perspective on which I could detect and measure the ROFI details more clearly. It has struck me suddenly that the holders of the rear and front ROFIs distinguish. While the rear holder has a U-shaped construction, which I was not previously aware,  Source: NASA can be seen at the front holder that this only has a slanted stiffening up, and down is open. Without this knowledge I had built this holder U-shaped too. 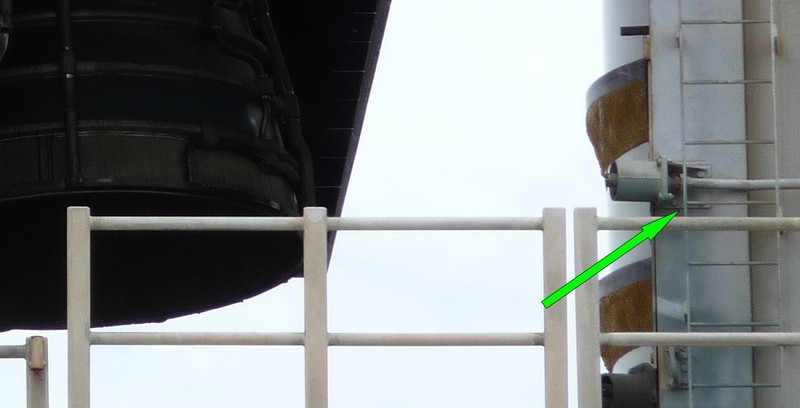 Source: NASA Here are now the new parts for the ROFIs, in the middle 0.5 mm brass wire (gray) and 0.4 mm copper wire. 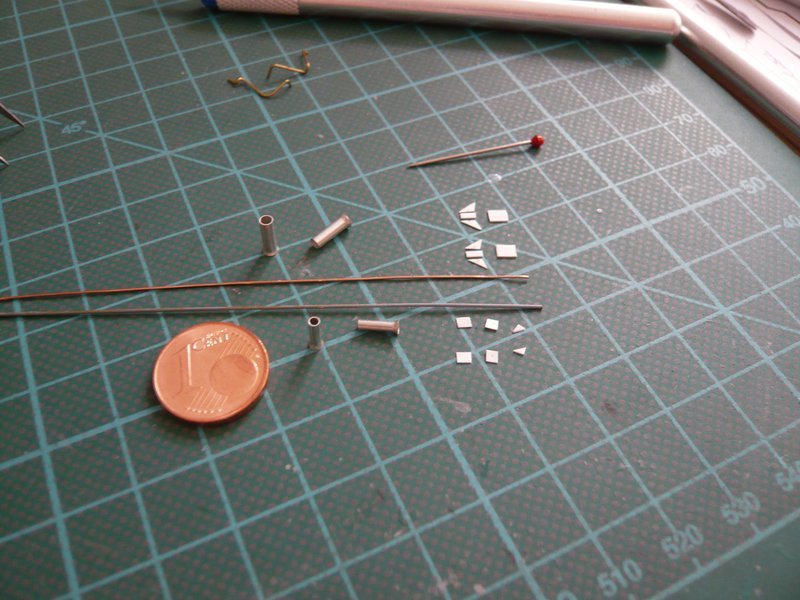 Above are the parts for the rear double-ROFIs and in front that for the front simple ROFIs. For the holders I take 0.2 mm sheet, and for the sleeves I use ferrules, Ø 2 mm (rear) and 1.5 mm (front). Now I just have to shorten the sleeves and flatten slightly the rear ROFIs, followed by the assembly, which I'm very excited. 
__________________
Greetings from Germany Manfred Under construction: Launch Pad 39A with Challenger STS-6 (1:144) Last edited by spacerunner; 09-28-2016 at 05:45 AM.
|
|
#588
09-13-2014, 09:48 PM
|
||||
|
||||
|
Space Shuttle Launch Pad 39A with Challenger STS-6
Manfred,
Your determination, tenacity and model building skill on this incredibly complicated and arduous project is just mind-blowing! It is so very interesting to watch and read, and I have learnt a lot of new techniques by following this thread. Thank you very much for sharing your knowledge! Keep up the excellent work, Manfred! All the best from Stockholm, Bengt ")
|
|
#589
09-14-2014, 03:36 AM
|
|||
|
|||
|
Well, what can I say, ...
This is a HUGE Euro-Cent! 
|
|
#590
09-14-2014, 04:13 PM
|
||||
|
||||
|
Quote:
 which give me encouragement to keep on biting through these tricky detailed stuff. which give me encouragement to keep on biting through these tricky detailed stuff.  As long as you and the other guys are interested and like it, I will gladly share it with you further.
__________________
Greetings from Germany Manfred Under construction: Launch Pad 39A with Challenger STS-6 (1:144) Last edited by spacerunner; 09-28-2016 at 05:46 AM.
|
 |
|
|


 Linear Mode

