


|
|
|
#601
 09-22-2014, 04:46 PM
|
|||
|
|||
|
This thread makes my jaw drop, I could NEVER replicate this amazing model.
GREAT JOB! -RunwayOneSixRight (Matthew) 
|
|
#603
09-23-2014, 02:38 PM
|
|||
|
|||
|
What? Where?
__________________
This is a great hobby for the retiree - interesting, time-consuming, rewarding - and about as inexpensive a hobby as you can find. Shamelessly stolen from a post by rockpaperscissor 
|
|
#604
09-23-2014, 02:56 PM
|
||||
|
||||
|
Tanks Guys for your nice words.
Robert, don't understand your problems with the images, what's going on?  Today only a short update. As I suspected, the supply pipe of the front ROFI is actually slightly inclined angled down to the TSM wall, as you can see here pretty well in this picture. 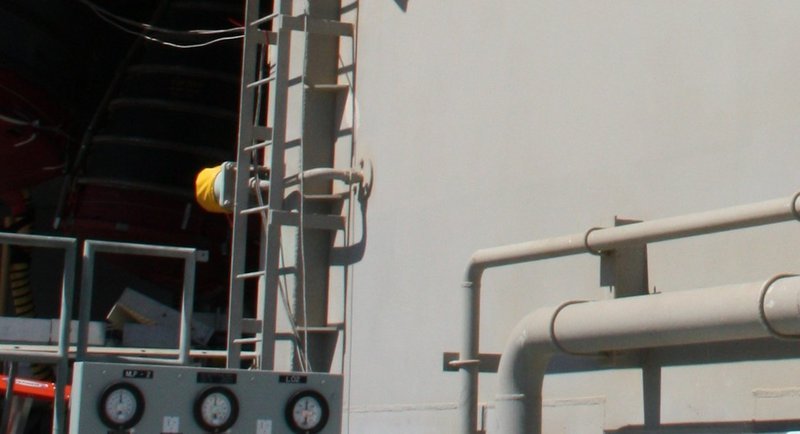 Source: NASA But I'm still not quite satisfied with the first prototype of the front ROFI.  That's why I now have clarified and added some details, and these are now the final parts of the front ROFIs. That's why I now have clarified and added some details, and these are now the final parts of the front ROFIs.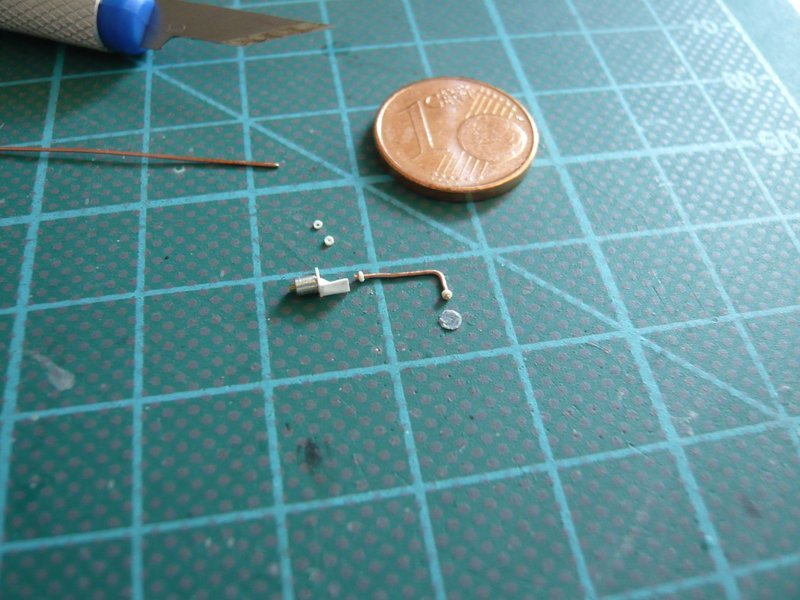 I hope that the two small cap nuts are still visible, if not, just the magnifier can help.  The first round connector plate (made of paper) was yet a little too big, because with 0.4 mm wire diameter that should not be 2.0 mm but rather 1.7 mm in diameter. So I have converted a ferrule (Ø 2.0 mm) into a small punch tool, since the sleeve has precisely this inner diameter. Unfortunately, my little tool has survived only the first use and then was slightly bent, but now I have ever got a plate with 1.7 mm diameter, and the second I will also get still.  
__________________
Greetings from Germany Manfred Under construction: Launch Pad 39A with Challenger STS-6 (1:144)
|
|
#605
09-26-2014, 01:21 PM
|
||||
|
||||
|
Hello folks,
and here we go, the same parts I needed again for the second front ROFI. For the second base plate I first had to make a new punching tool, 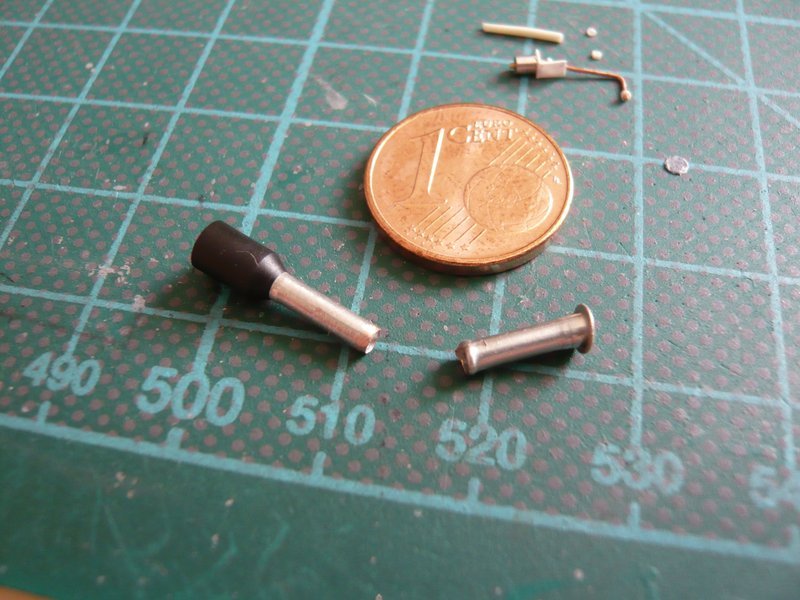 and then bending the supply line and cutting rings for the union nuts. Before fitting the rings I have this slightly widened. 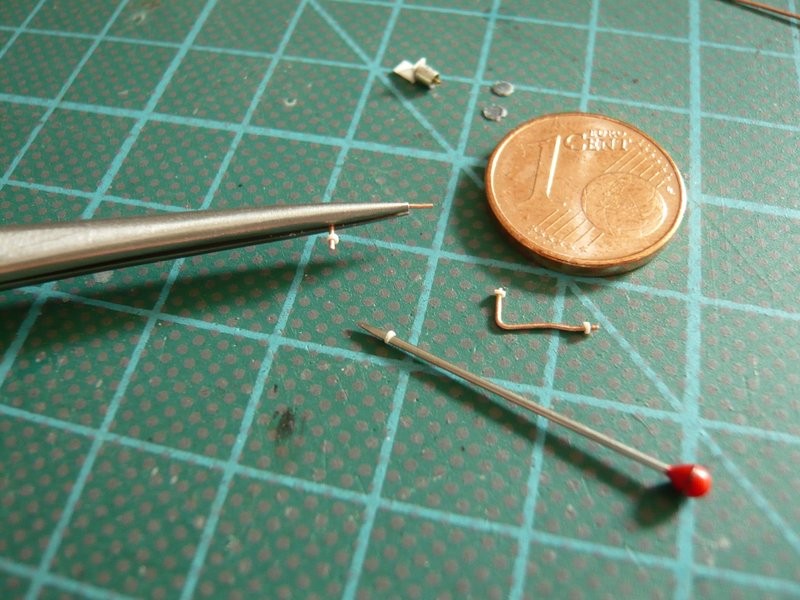 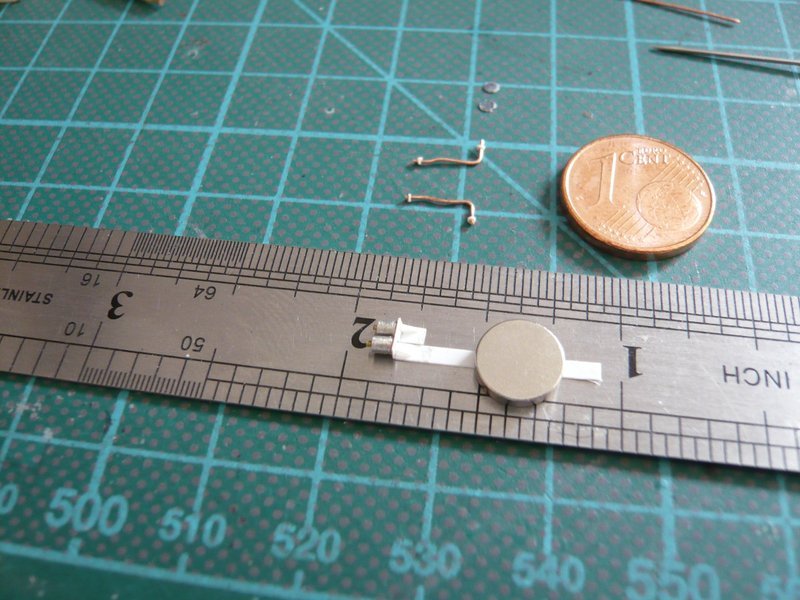 And then I have the supply lines modified and adapted a bit.  After that I have bent on the TSM-template the inner line from 0,4 mm copper wire, where I proceeded step by step. The difficulty here is that the supply line is relatively small and must be made two bends in tight spaces.  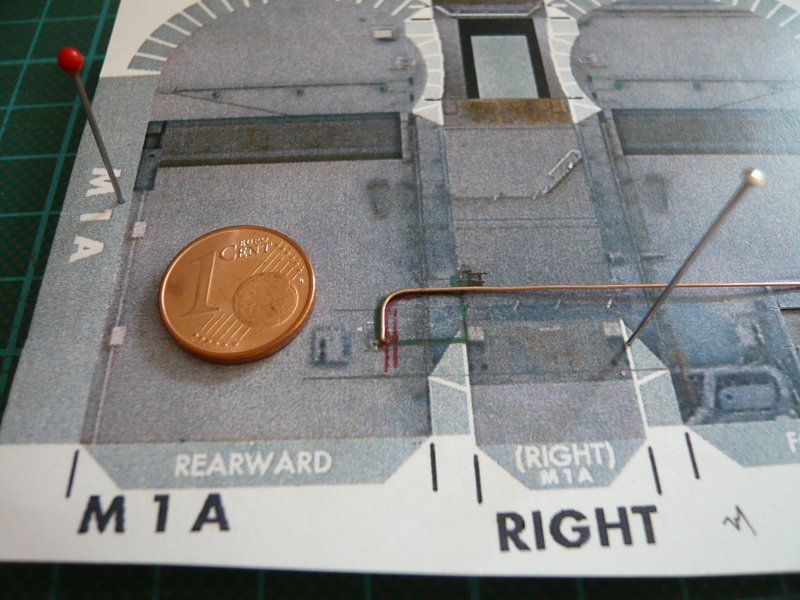 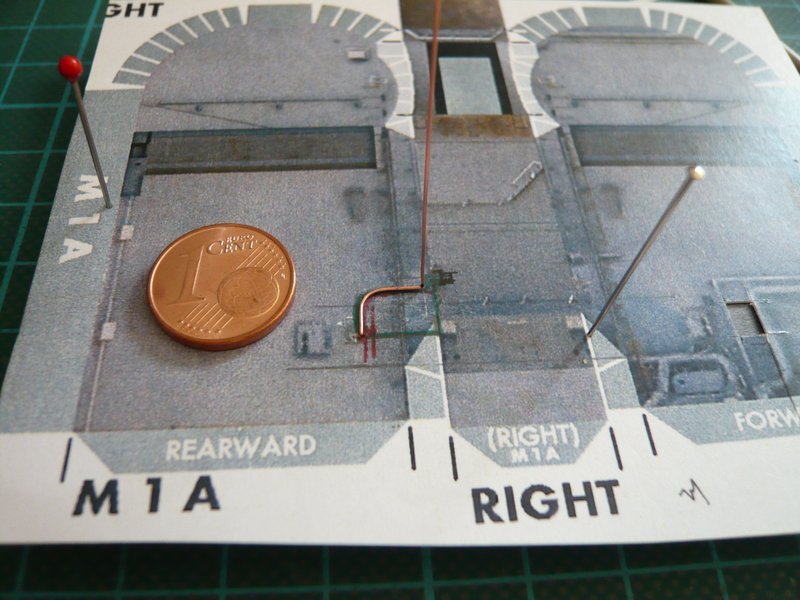 Thus, the following bow of the line up was pretty tricky, because he could be only a skimpy millimeter.  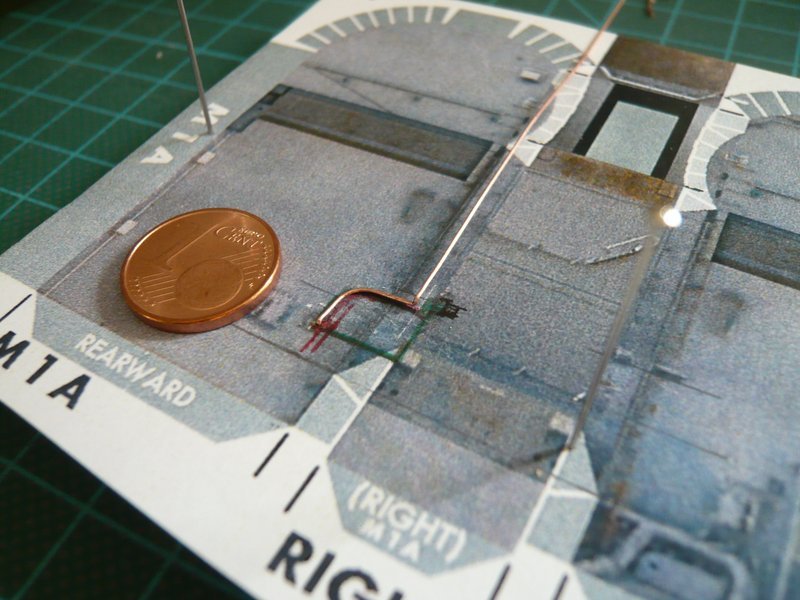 The line runs between the service hatch-box and the ladder, as seen here, 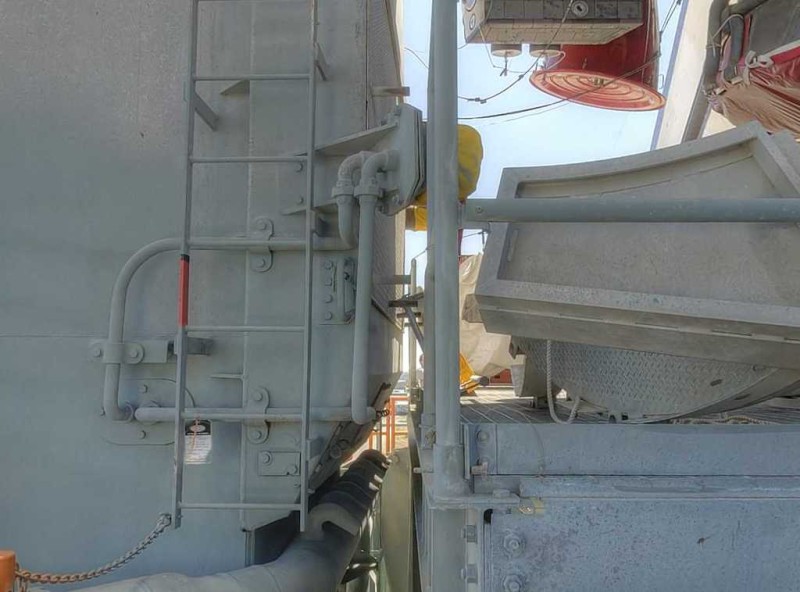 Source: NASA and this fits quite well so far. 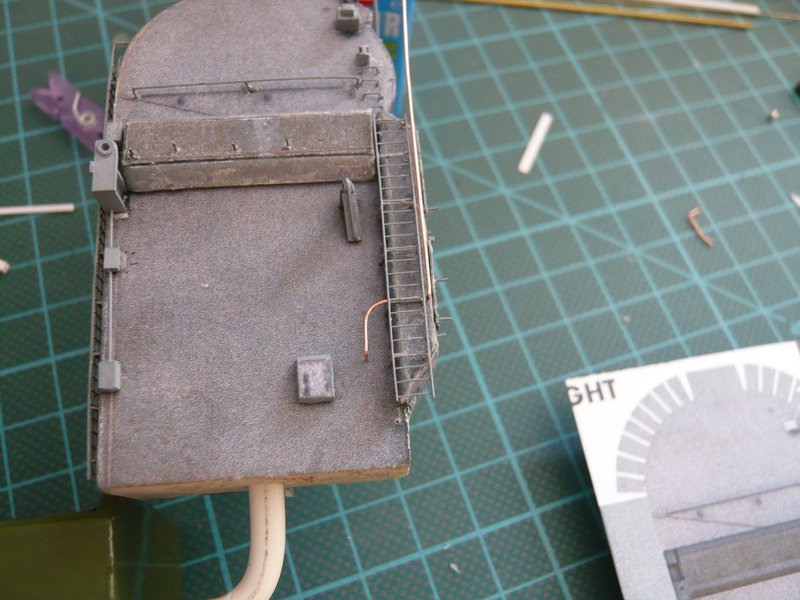 The next bow runs now right to the ROFI holder and is also relatively short. 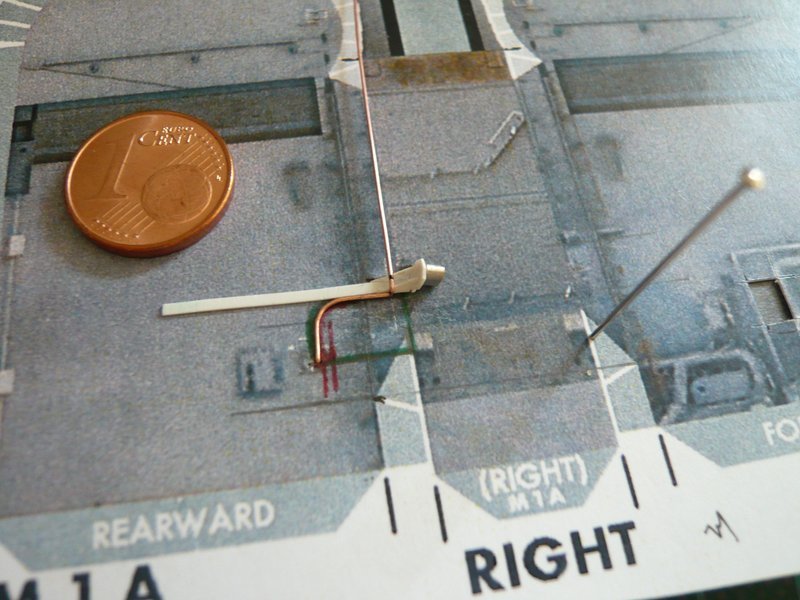 And now the last cut only follows, then this supply line is finished, 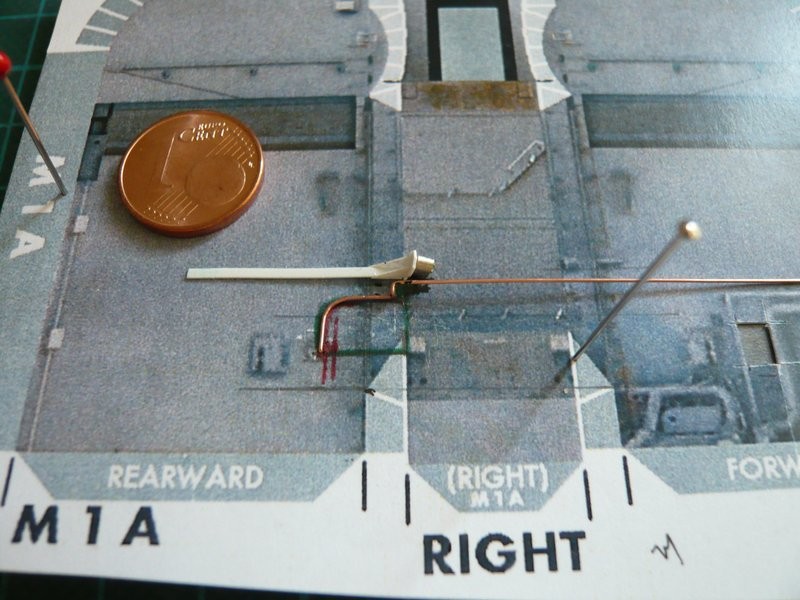 and can be tried together with the ROFI. 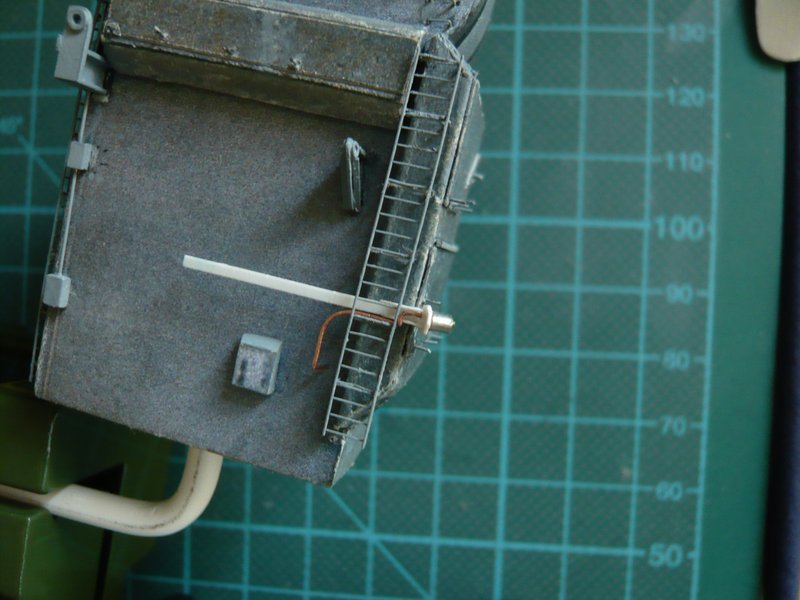 As you can see, the front end is still too long and needs to be filed down slightly. But as the two parts fit together already quite well.  Now the same procedure is carried out only laterally reversed for the supply line at the LH2-ROFI as long as the work routines are fresh.
__________________
Greetings from Germany Manfred Under construction: Launch Pad 39A with Challenger STS-6 (1:144) Last edited by spacerunner; 09-28-2016 at 05:21 AM.
|
|
#607
09-27-2014, 07:32 AM
|
||||
|
||||
|
Great work! Keep up the fantastic detail!
Chris
|
|
#608
09-28-2014, 09:37 AM
|
||||
|
||||
|
Thanks Gene and Chris for your nice words of enthusiasm, which I am very pleased.
 These tiny details in this small scale cost a lot of time and some do not succeed the first time. I wonder sometimes and say, this can not be true, where is this little part? Only a small episode, not the first time that happened to me.  The other day one of the two double ROFIs was suddenly gone, I thought I was going crazy.  I have searched until the floor and found nothing, then on my desk and found nothing. Then I thought, I'm going to have to build this tricky ROFI again. I have searched until the floor and found nothing, then on my desk and found nothing. Then I thought, I'm going to have to build this tricky ROFI again.  But then I had the saving idea, maybe he slipped under the storage boxes on the table? But then I had the saving idea, maybe he slipped under the storage boxes on the table? And actually, as I put away the third box, the ROFI lay there completely innocent and unscathed on the desk and I was relieved and very happy. 
__________________
Greetings from Germany Manfred Under construction: Launch Pad 39A with Challenger STS-6 (1:144) Last edited by spacerunner; 09-28-2016 at 05:15 AM.
|
|
#609
09-29-2014, 02:38 PM
|
||||
|
||||
|
Hi all together,
I would rather still remain on LOX-TSM and continue with the outer supply line of the rear ROFIs. It goes to the right and then in a double bend upward. 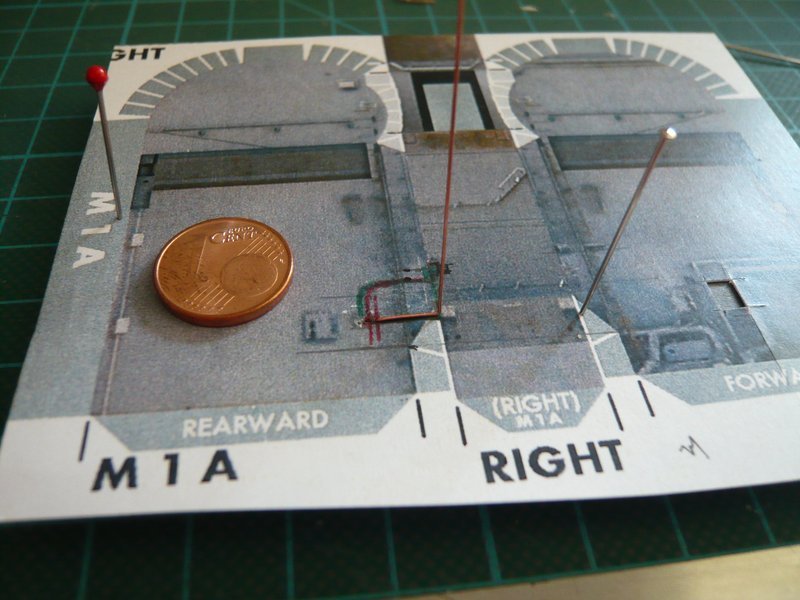 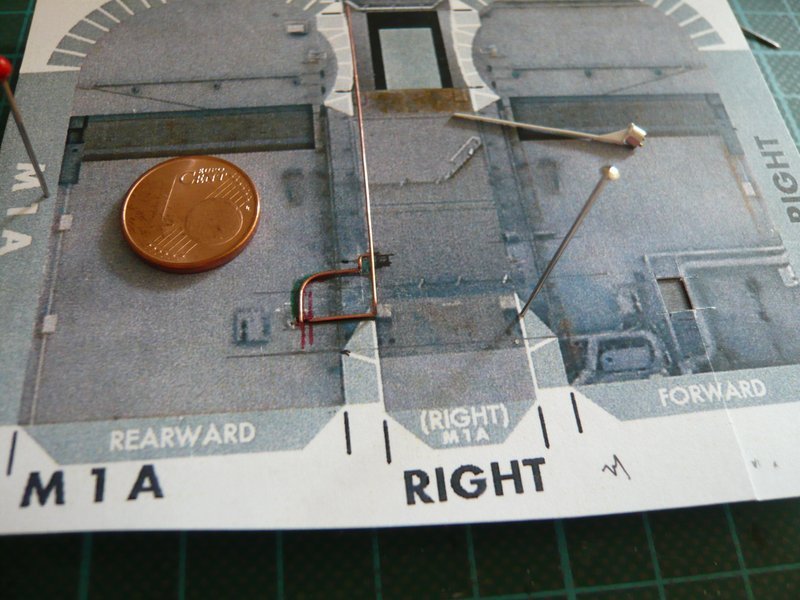 And here already together with the ROFI to the test on the template, 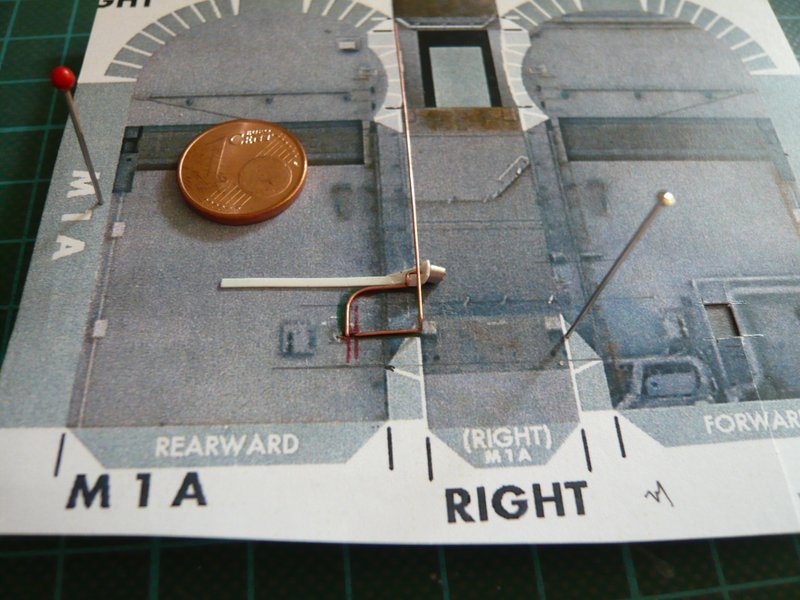 and here on the TSM. As you can see, the line but hanging down above, whereby everything has slipped somewhat. This shows that these test fittings are quite a stressful affair already and not work the first time around. But one needs to check the situation of these small parts already accurate and correct if necessary, when everything has to fit together correctly later. 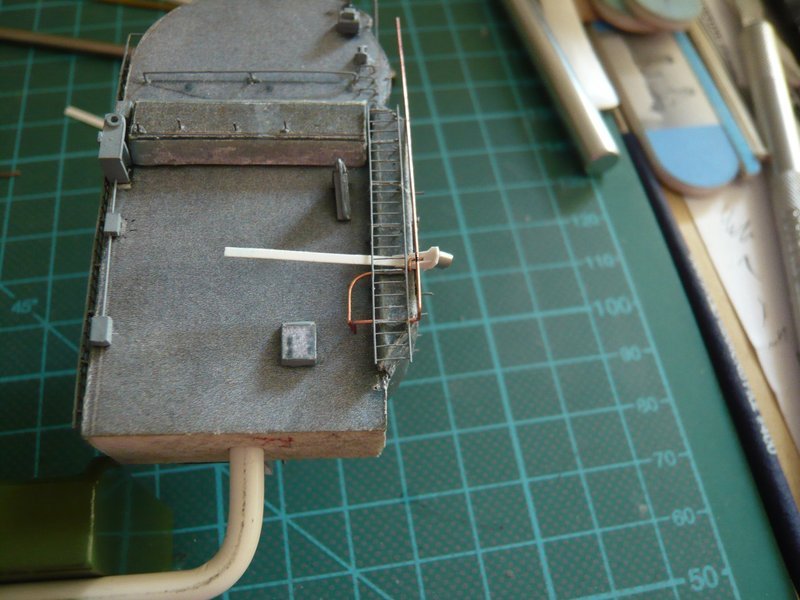 By supporting this looks better. And now is missing only a short arc to the right up to the base plate. 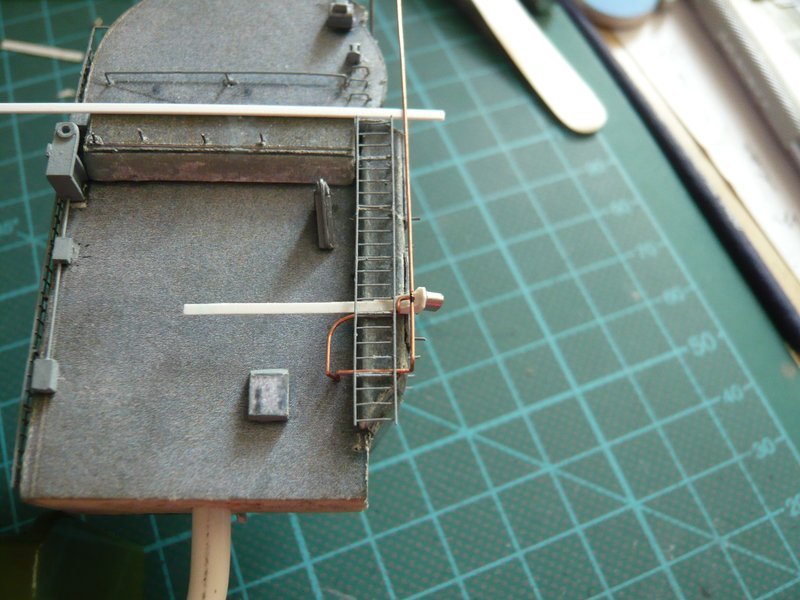 From the arrangement it's okay, just above the line is slipping too far inwards, because there simply is missing support. 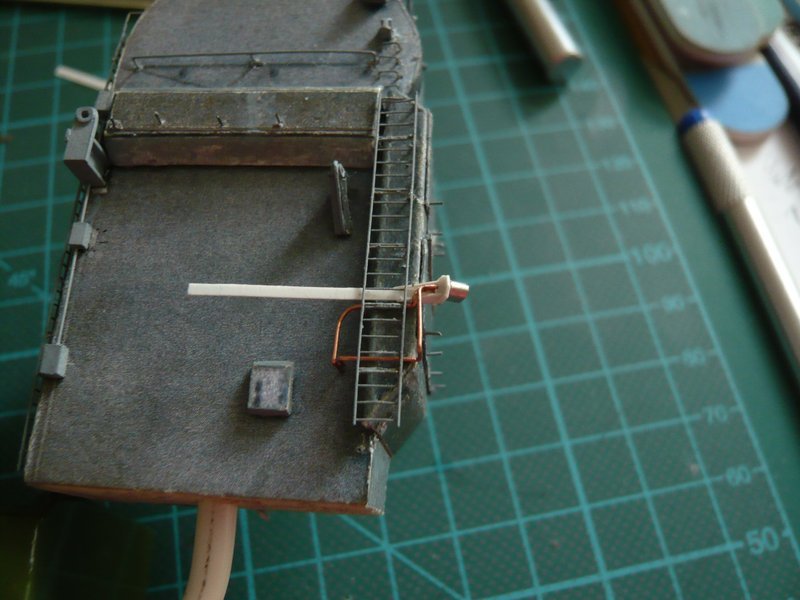 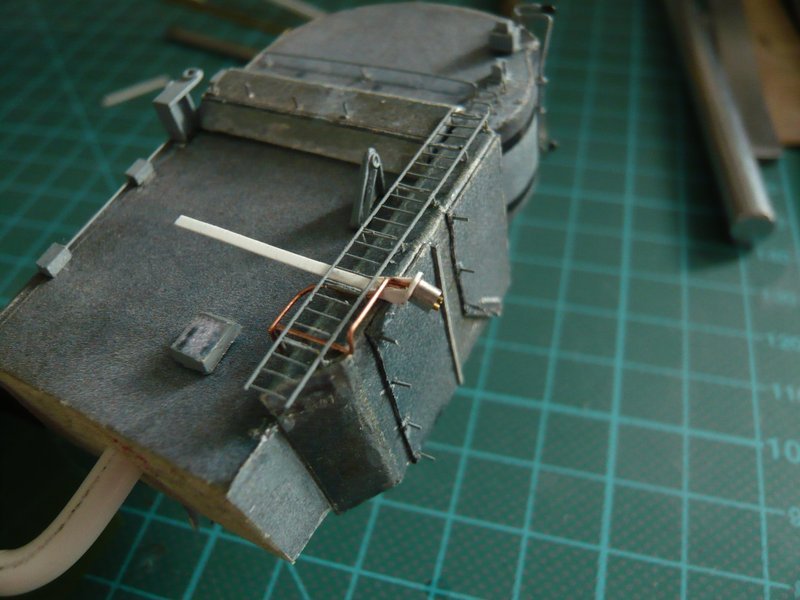 Now I must not forget winding up the union nuts, and then missing the base plate and a small bracket on the inner line.
__________________
Greetings from Germany Manfred Under construction: Launch Pad 39A with Challenger STS-6 (1:144)
|
|
#610
09-29-2014, 04:13 PM
|
||||
|
||||
|
That's very cool and small. I've made a few space shuttles, but never the launch pad! So much skill! Hope you continue on this build

|
 |
|
|


 Linear Mode

