


|
|
|
#151
 07-01-2017, 10:13 AM
|
||||
|
||||
|
Thanks to all of you my friends!
I understand perfectly that's not possible to all the people following the thread to comment at any update (eventually it would be a little "messy"). Nevertheless I have to say that every single appreciation word I receive is pure joy for my old heart. So thank you all for your great support. It's an important part of this adventure, more important than you can imagine, believe me. I had many demonstrations that this adventure is followed by a lot of people and knowing this is a great incentive to keep working even if the time I have to spend on it is always too little... There's one thing I want to point out - I don't know if I made it clear in my previous posts - this is a just a test build to assess the accuracy of my design and, once it will be completed and - as correctly Nando said - I'll have organized all the pieces, numeration, instructions and so on, this model will be shared for your building pleasure. So stay tuned... 

|
|
#152
08-26-2017, 08:01 AM
|
||||
|
||||
|
Hello everyone! I was away for a while, excuse me my friends. Summer time means to me less time for modeling and no time for posting.
I spent a lot of time outdoors and the wheater here was so sunny this year that we had no rainy day forcing to stay at home. But I wasn't completely out of service... here is a little update on the shuttle project. First of all, the knobs. I felt like the dashboard was a little too flat so I decided to add the two knobs to every screen. Perhaps they are just a little too big, but this is the littlest diameter I was able to handle. Anyway I like the final appearance once they was mounted. OK some of them look up and others look down... but perfection is not of this world... (obviously this doesn't apply to Spacerunner, but I think he is not from Earth! )Then I placed the HUD boxes in place and realized an element to close the lower part of the dashboard. All kept in place by the usual microtabs I always like very much. Last photos refer to dashboard upper wall, this part will help giving the correct shape to the front cabin wall.
|
|
#153
08-26-2017, 08:09 AM
|
||||
|
||||
|
Next I wanted to start adding the two middle walls but I realized that the tabs, once placed, will be unreachable so it won't be possible to keep them in place, pressed to the external walls. So I had an idea that can be useful in other similar situations.
I realized many little 90° tabs to keep the big tabs in the right position once they are closed inside. In the first photo you see the 90° tabs and in the second their application Now the big tabs are forced to stay at 90° so I can glue them without need to keep them pressed.
|
|
#154
08-26-2017, 08:13 AM
|
||||
|
||||
|
Here we have a BIG problem!!!
Evidently I made a mistake taking measures and now the side wall elements are too short and don't reach the middle wall (see first photo). I already corrected the files (so don't worry: the model you'll build won't have this bad fitting) but it's too late for my model, unfortunately I didn't notice this bug till now. I don't want to destroy the wall and build it back again. I'll study something later to cover that gap. If you remember I had another bad fitting issue with middle walls in my first test build. At least those issues are now resolved (see photos). Much better than the first try... isn't it? And... finally, I placed the central consolle to the floor. Now to the front walls and the windows... See you soon!
|
|
#155
08-26-2017, 11:07 AM
|
||||
|
||||
|
Tonino - great work, still enjoying this build thread. Didn't realise you would be releasing this for us to build - woo hoo!
__________________
"It's all in the reflexes."
|
| Google Adsense |
|
#156
08-29-2017, 08:32 AM
|
||||
|
||||
|
Good to see you back, Tonino!
Beautiful work on those knobs! Ì just found some interesting "historical reference" for your "mockup" 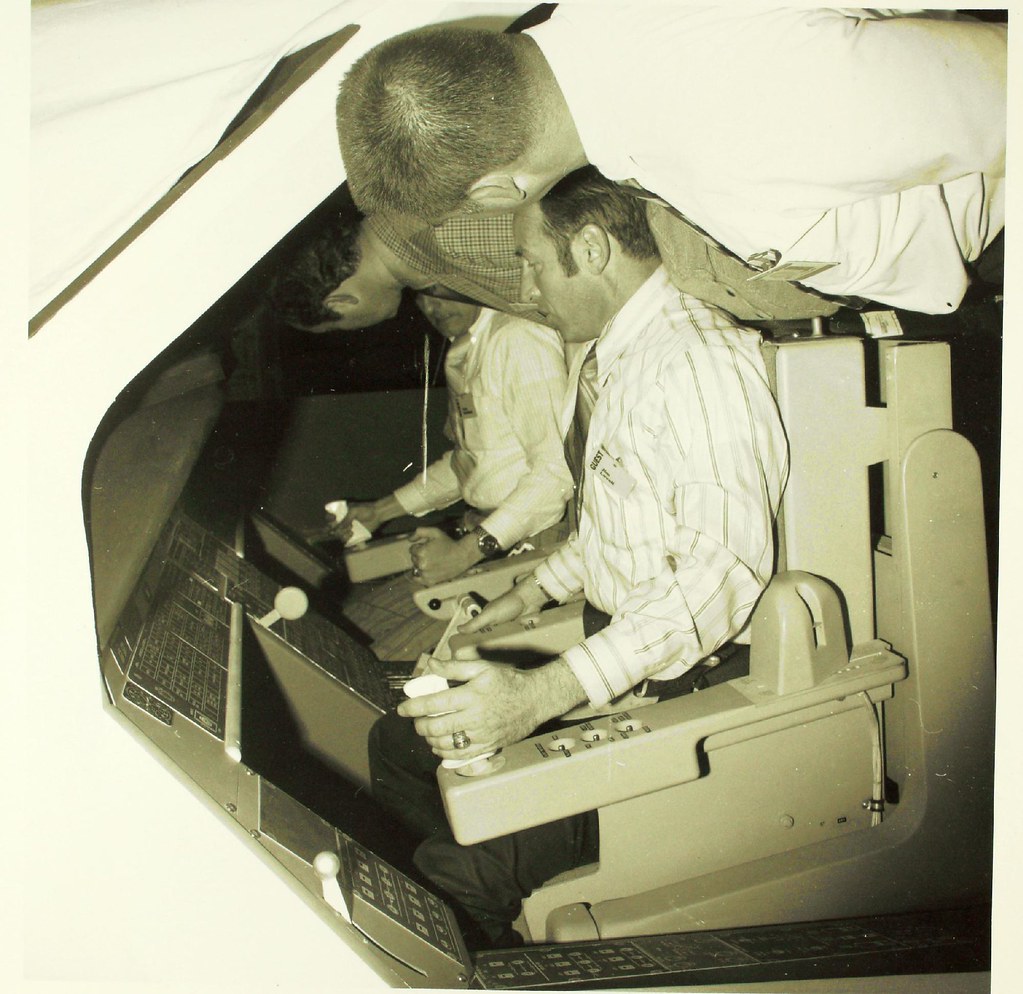 Space Shuttle Program by SDASM Archives, on Flickr Space Shuttle Program by SDASM Archives, on Flickr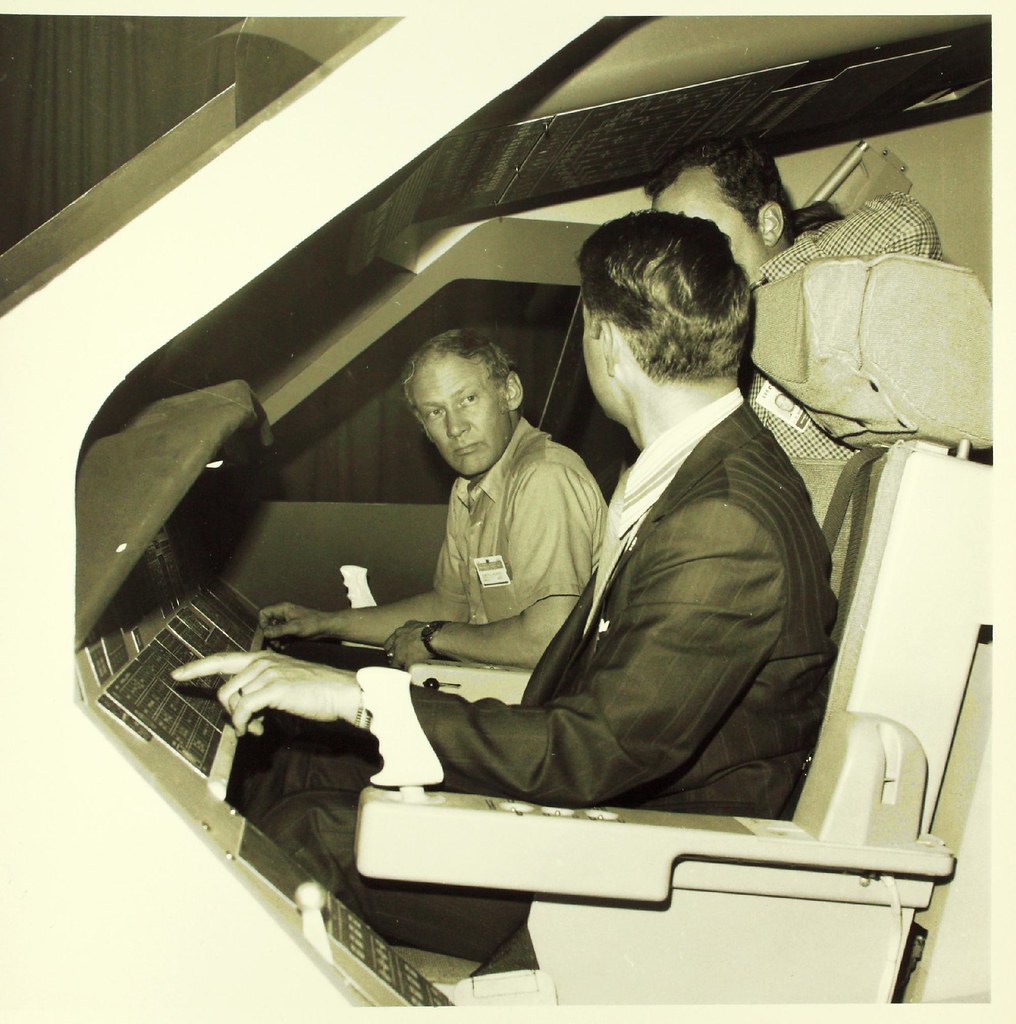 Space Shuttle Program by SDASM Archives, on Flickr Space Shuttle Program by SDASM Archives, on FlickrBest, Nando 
__________________
My builds Last Udon's LM @ 1/96;Colliers Ferry Rocket (1952);Gundam Sinanju MS-06S Current Apollo CM 1-24 Fat Man & Little Boy available here
|
|
#158
09-17-2017, 10:45 AM
|
||||
|
||||
|
Very nice images Nando! Unfortunately the definitive cockpit was much more complex than this. My job would have been very easier!
Well... let's return to "post summer" configuration (sigh!) I'm back to work (the real one...) and, thanks God, to modeling time too First of all I fixed that bad gap in my left side wall. I hate when I have to destroy something of what I've done... like scratching away all velcro patches. Left wall fixed... Then I tried to add some more volume to windows frames, now they are much better than before. Finally I joined upper dashboard to front wall to start defining the shape of the front section. Now it's ready to accept front panel and front side consoles...
|
|
#159
09-25-2017, 07:29 AM
|
||||
|
||||
|
Good repair work on the side panel, mainly because you don't use any cad software to design the model.
Good work on the windows and on the dashboard. This black backdrop surely will enhance the panel details. BEST, Nando
__________________
My builds Last Udon's LM @ 1/96;Colliers Ferry Rocket (1952);Gundam Sinanju MS-06S Current Apollo CM 1-24 Fat Man & Little Boy available here
|
|
#160
09-25-2017, 04:03 PM
|
||||
|
||||
|
Thanks Nando, you're always too kind.
Now is time to assemble cockpit front half. First of all side consoles are joined to dashboard (photo#1). Then I realized a big mistake in my part scomposition. I decided to paste hud boxes to dashboard leaving two square windows for their passage. This caused the upper side to curve upward slightly for the traction exercited by side walls (photo#2). I tried to correct this problem with a piece of thick cardboard (1 mm.) glued inside (photo#3). The piece corrected pretty well my mistake and - additionally - added two tabs to keep hud boxes in place (photo#4). Then I joined together dashboard and front walls (photo#5). And, to complete the section, I added front panels and HUD knobs (photo#6). Then I realized the central element where panel F1 is placed (photo#7 and 8). And finally a nice astronaut's point of view! (photo#9)
|
| Google Adsense |
 |
|
|


 Linear Mode

