


|
|
|
#31
 01-27-2017, 06:21 AM
|
|||
|
|||
|
Atlas D Launcher in 1/48 Scale from Leo Cherkashyn
Hi all,
Here's a smaller version of the Atlas D launcher that I started on MANY years ago. I believe it's Erik te Groen's little Mercury capsule on top (and bottom). I think I made it in 1/96 scale. It was printed on a few sheets of RedRiver metallic paper that a very friendly member here on the forum sent me. It is, however, still not finished, it survives in a shoe box. The lines, by the way, were incsribed/ embossed with an empty ball-point pen: 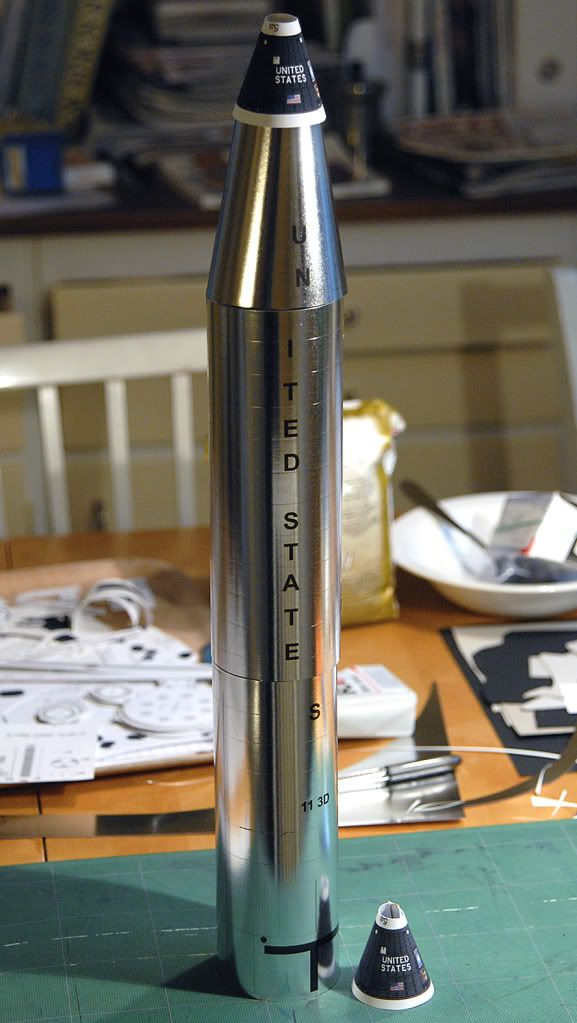 And here is a photo of the 'real deal' at the exhibit at Kennedy Space Center - a rather more dull appearance. But it has been subjected to all kinds of weather since the mid 60s.: 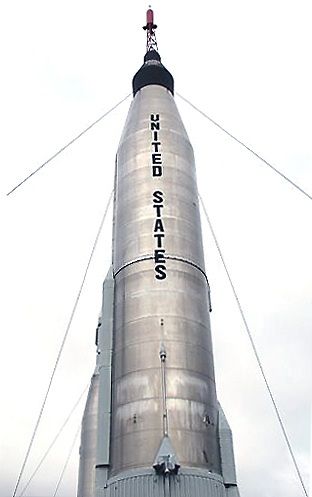 All the best, Bengt in Stockholm ")
Last edited by Bengt F; 01-27-2017 at 06:41 AM. 
|
|
#32
01-27-2017, 06:38 AM
|
|||
|
|||
|
Corrugated Metal Plates on Mercury & Gemini Capsules
Thanks, luke strawwalker,
Yes, "corrugations" is probably the correct english term. Much the same as the corrugated surface of the pre-war German Junkers metal aircraft. Besides cooling the surface, it also gave added stability to the metal plates. Here's my first trial on those corrugations in card, with an embossing tool: 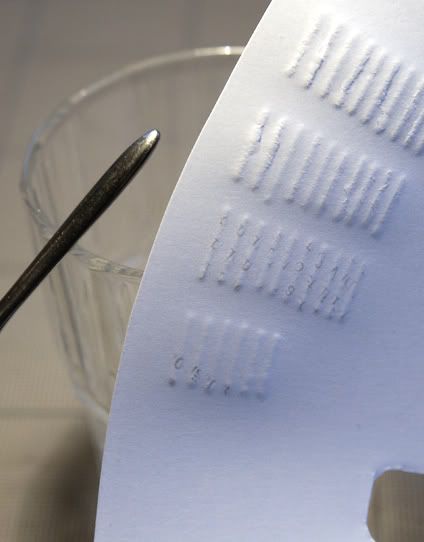 And the flip side (harder to see) - it's Carl's 'Sigma 7' model which he made in honor of the departed astronaut Walter 'Wally' Schirrah: 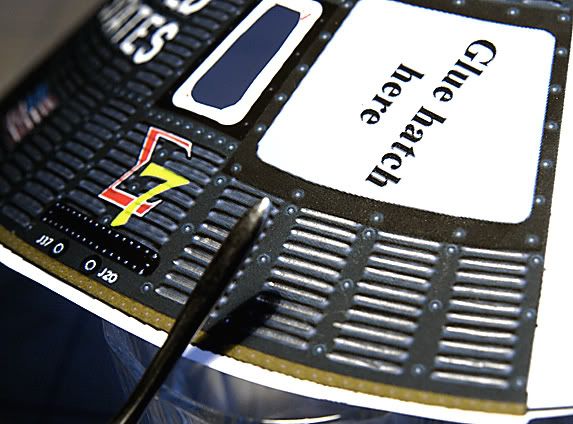 All the best, Bengt in Stockholm
|
|
#33
01-27-2017, 11:24 AM
|
||||
|
||||
|
Hei, friend.
It looks amazing. How have you done to embroided from the inner (not printed side) of the card? How have you marked the lines, please?
|
|
#34
01-27-2017, 11:35 AM
|
|||
|
|||
|
Quote:
|
|
#35
01-27-2017, 11:59 AM
|
|||
|
|||
|
Embossing & Carl's Sigma 7 Mercury Model
Hi chicharrero,
I simply embossed down (quite hard) on the printed side with the embossing tool and a small ruler. Under the printed part, I placed several soft papers (for example toilet tissue), so that I would get the deep imprints. I thought about holding the printed part over some steam (boiling kettle) but I actually never tried it. That might make the embossed lines more even, not cracking the paper so easily. Here is Carl's 'Sigma 7' model (centre) in a 'weathered' version (I think it was the one before the last one finally released) that I was working on at the time: 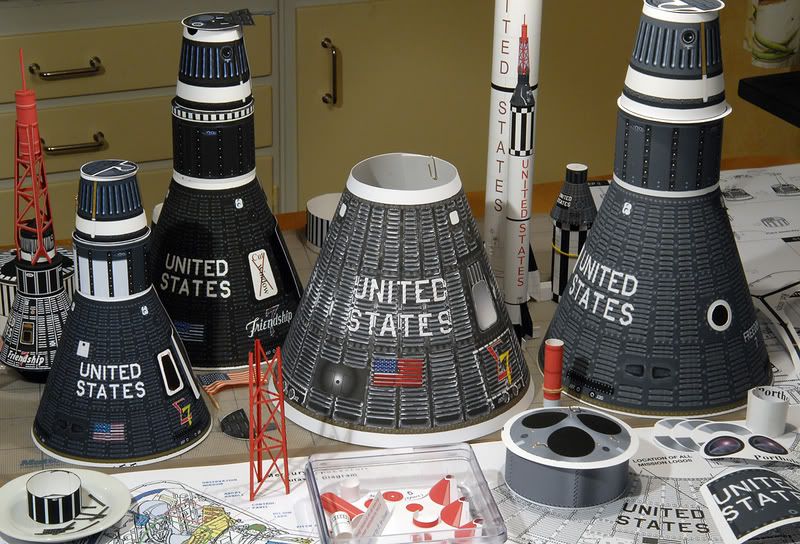 I helped Carl just a little bit then with the directional thrusters and the brown edge (down in this photo) - it was called 'Pattern B':  And this is a close-up photo of the real Mercury hardware: 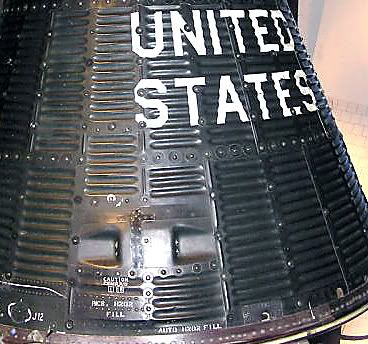 All the best, Bengt in Stockholm
Last edited by Bengt F; 01-27-2017 at 12:55 PM.
|
| Google Adsense |
|
#36
01-27-2017, 05:33 PM
|
|||
|
|||
|
That model is a great gift! I was a launch officer on the Atlas E and this really brings back memories. The only real difference in profile between the D and the E was an additional vernier rocket motor mounted opposite the single one on the D model.
|
|
#37
01-29-2017, 07:01 PM
|
||||
|
||||
|
@Chicharrero and Jonathan, you don't have to do eleborate work on the backside of the print at all. The embossing is all done from the printed side. The actual corrugations on the Gemini and Mercury capsules are depressions, not ridges. The skin of the capsule is a flat surface and the corrugations are inward.
You can clearly see that at the picture of the real deal Bengt added in his last post. So you can just emboss the corrugations inward. That is how it works. (It suddenly reminds me a bit of how Barnes Wallis in the second world war tried out a golf ball textured round bomb to see how it behaved in keeping course when bounced on water surfaces. He was looking for the best shape for the bomb that would be used for the dambuster raid. He eventually settled for the well-known drum-shaped bomb but he knew golf balls could be aimed very precisely due to these dimples on their surface. I wonder if, apart from the metal being able to expand, the mercury capsule corrugations also helped the capsule with its aerodynamic qualities..)
|
|
#38
01-30-2017, 06:49 PM
|
||||
|
||||
|
Hey! I turned a golf ball into a bomb!
 
|
|
#39
01-30-2017, 09:46 PM
|
|||
|
|||
|
Nice bomb design; I like it!
For those interested, here is a little piece of history. This is the official photo diagram of the first maned Mercury launch, released by the USAF for public consumption.  I apologize for the orientation, but the system refuses to post it any other way.
|
|
#40
02-01-2017, 06:44 PM
|
||||
|
||||
|
Here are a few parts of the Atlas that I had trouble with.
 OK, I admit I really don't know what this is or what it's for, but I did find photographs to help me figure out what it should look like.  Adding a strip of card inside the ring that holds the capsule to the booster adapter helps a lot.  It should fit in snug enough to keep the spacecraft attached without too much fuss.  There were a lot of things on and around the first stage that are a bit vague or just plain hard to see on the assembly diagram. Namely the assembly of the vernier thrusters, parts A002a and 003-1. I added a piece of heavier wire for the vent hose that runs along the big vent line. I also based my squibs and their location on photos I found of Atlases (Atlii?? ) being assembled. I used spare bits of dark gray and red to create them. (I always print spare sheets on a model with as many complicated small parts as this one has).You'll also note that the Atlas can't stand up on it's own due to the vent pipe. I made the simplest of temporary stands by gluing two 3cm by 10cm blocks of foamcore back to back to get about 1cm clearance. Then I glued spare engine liners (cones) on to help support and stabilize the booster. But it's not quite good enough. Strong breezes have knocked my model over several times already! One more tip, when searching (Google) for photos I found better detail photos by searching "atlas 109d" than what I got using "mercury atlas".
|
| Google Adsense |
 |
|
|


 Linear Mode

