


|
|
|
#261
 03-23-2018, 09:51 PM
|
|||
|
|||
|
Quote:

|
|
#262
03-24-2018, 08:32 AM
|
|||
|
|||
|
Hi Mark
Read your thread on your method for "making a cylinder round by using tension" Laminating Curved Surfaces???????? A very nice method. I have now tried it for the 1/24 scale model size. Sadly I unable to use it since the circumference is so big that either I need to use more than one piece of material (so the tension gets "absorbed" by the two or more joints), or, to use only one piece then the material is so long it needs to be so strong that it is too stiff to curve into the cylindrical shape (at least for what I have tried). However thank you for the suggestion. Quote:
(I have no links to the company) Regards Kevin
__________________
Normally the most advanced tech I use is a pencil.
|
|
#263
03-24-2018, 09:38 AM
|
|||
|
|||
|
Completing the 1/48 thrust structure
Dear all
Whilst thinking about what to do for the 1/24 model (see post 260) I realized that the 1/48 model had fallen behind the 1/24 model in the thrust structure region, so decided to finish that off. Needed to be completed were the 4 "grills" on the base of the thrust structure (still don't know what they are called or their function, does anyone know?), the gimbal actuator struts for the F-1 engines, attach the fins, motion targets on the fairings, retro fit the retro rocket motors,attach the F-1 engines and also attach the "air flow curves on the fairings (again still don't know what their proper name is or their function, just guessing it is to do with directing airflow. Does anyone know?). So here are some photos showing the various parts being cut out and assembled     Just want to point out that the retro rocket motors specify that they should be printed on 160 gsm paper. However I found that when rolling the main body of the retro rocket motor it was too stiff. I reprinted on 120 gsm and this was much better. I decided to attach the F-1 engines and the fins using magnetic paper exactly as I had done earlier for the 1/24 model. Here are the "grills" and ferrous paper F-1 mounts along with the fins attached  I then "retro fit" the retro rocket motors. What a nightmare that was! They definately should be added to the model BEFORE the fairing is attached and absolutely before the fairing internal support struts are attached. Remember the reason I am retro fitting these rocket motors on the 1/48 model is because I only learned about these parts on the updates sheets after I had already build the fairings and their internal struts.  The attachment of the gimbal actuator arms were done slightly differently to the 1/24 model. The parts were cut out the same as the 1/24 case. I then used "tooth picks" (cut to the correct length) as a rod and slid (not glued) parts "a" (the prongs part that joins the outrigger arm) and "c" (the red part) on each end of the rod. Then, with the F-1 engine in situ I adjusted the length of the arm and then glued the arm to the outrigger (at the correct angle (as shown)  Once glue is dry (so angle is fixed) I removed the engine, removed the rod and "red" part, glued the red part to the rod. Then I glued part "b" (the middle box of the gimbal actuator arm) to only one of the four gluing points on the red part, making sure part "b" did not glue to the rest of the rod. I then placed the rod (friction fit only) pack into part "a" of the gimbal actuator arm. So the arm is fixed in angle but adjustable in length. Finally made sure I labelled each engine since the lengths and angles of the gimbal actuator arms are all individual.    And here they are all finished.  Finished off by attaching the motion targets and air flow guides. So here are some photos of the finished thrust structure          As you can see the rocket can stand on its own engines. Regards Kevin
__________________
Normally the most advanced tech I use is a pencil.
|
|
#265
03-26-2018, 02:13 AM
|
|||
|
|||
|
Thanks rifleman. Really appreciate your support.
Regards Kevin
__________________
Normally the most advanced tech I use is a pencil.
|
| Google Adsense |
|
#266
03-26-2018, 03:46 AM
|
|||
|
|||
|
Space cards and a "fix" to corrugated ring issue
Dear all
I was browsing around the forum when the following thread by ARMORMAN caught my eye Paper Promotional and Toys The breakfast cereal "Weetabix" has been going a long time and for many years has offered various things. Before my time, in the 1950's it had models you could make. Here is an example of the packet from that era and one of the vehicles (Photos from Weetabix summary of all offers issued with the cereal) 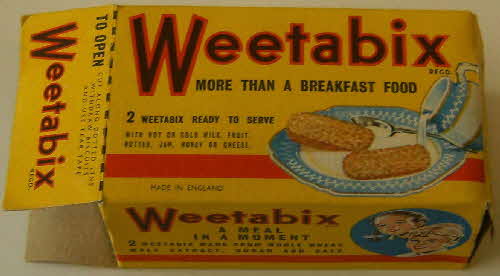 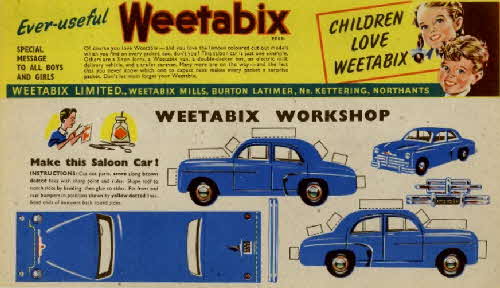 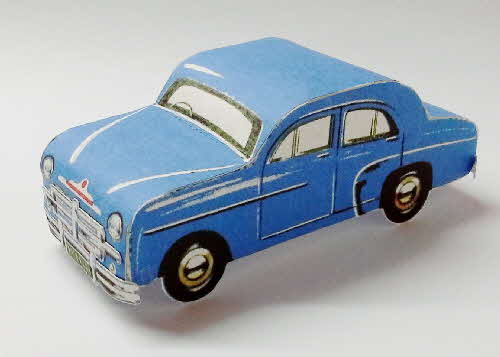 A while back (in posts 189 and 190) I mentioned cards you could collect in 1972 from PG tips tea about the race into space (a little reminder below)     Pre the space race PG tips had had another series about space called "Out Into Space" (released in 1956 before sputnik)  This photo is from Out Into Space - A set of Brooke Bond tea cards from the 1950's which also shows pictures of the cards. For example 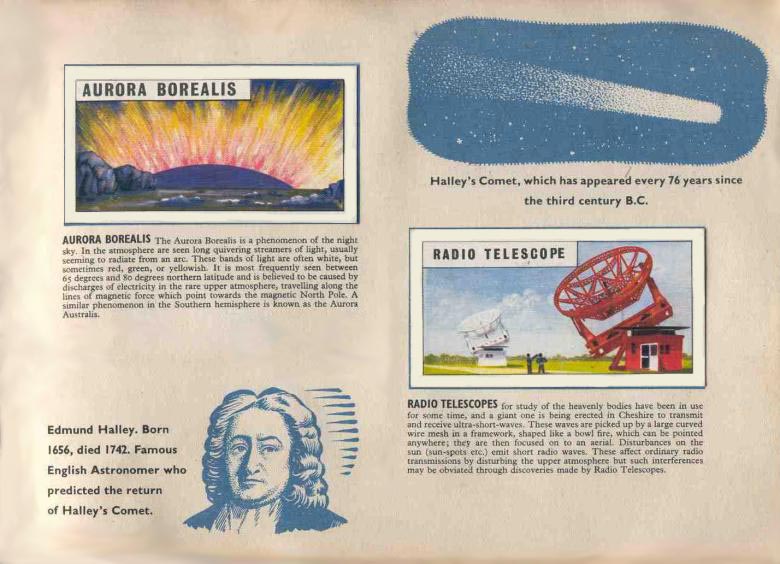 What is very striking is how there is no mention of rockets (the above card is the most advanced engineering one in the set) and just what a change is going to take place in the next 10 years. It is staggering the acceleration of progress over this period. It must have been incredible to live through sputnik, vostock, mercury, voskhod and gemini. I have now learned that Weetabix produced two sets of cards "Conquest of space set A" (in 1957) and "Conquest of space set B" (in 1959). They are really very far sighted, and what a difference a year makes between "out into space" and "set A" as well as between "set A" and "set B" Here are some from "set A"  (from cerealoffer.com) and now some from "set B" 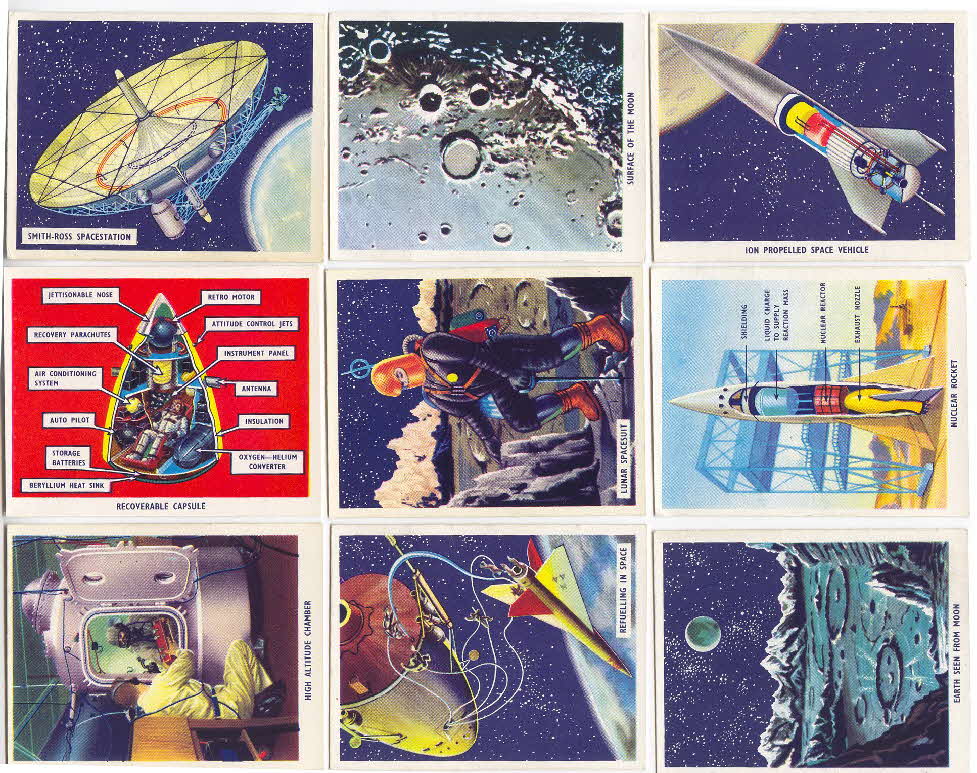 (from cerealoffer.com) This got me thinking were there any other "space cards" of that sort of era? Well, I came across these. 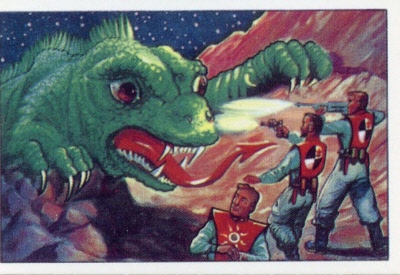  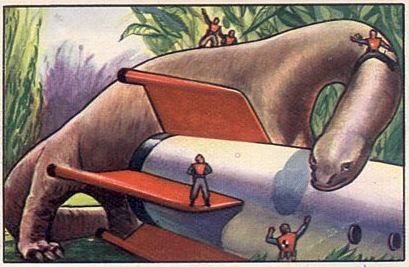 These are samples from the series of cards entitles "Jets-Rockets-Spacemen" produced for "Bowman Bubble Gum" (in USA) in 1951 and tells the adventures of the crew of the Rocketship 6X52. You can read about it here The Next Jets-Rockets-Spacemen trading cards (Kurt Kuersteiner) which is where the above sample photos are. Has anyone ever heard of Bowman's bubble gum or these cards? Does this bring back memories for anyone? Anyway, by looking at all these cards, it suddenly dawned on me a way to "fix" the corrugated ring issue! Strange what makes ideas pop into your head. Regards Kevin
__________________
Normally the most advanced tech I use is a pencil.
|
|
#267
03-28-2018, 02:05 PM
|
|||
|
|||
|
Well done .........Is this basically a Greet et al 1/48 resized to a 1/24 ?
I would be interested to know if, you have had to modify anything to ensure a better fit... And I also assume that instead of using Paper, we would have to use Card for rigidity as 180g paper would not surfice.....I built the 1/96 version in A4 and I found it was to flimsy......Your thoughts and advice please.......Well Done and congratulations on the Engine Builds.....
|
|
#268
03-29-2018, 02:14 AM
|
|||
|
|||
|
Thanks for the complements Astronut1.
To answer your questions: I think you will get a lot of information/answers if you work your way through this thread. I have tried to give headings to all the posts related specifically to building the models stating with either 1/48.... or 1/24... depending which model they are relating to. Here is a quick overview to your questions though I am building both the Greelt et al 1/48 Saturn V and a 1/24 version which is all the part doubled in size (along with any additional "strengthening bits" needed). It is essential to ensure that you have the main download AND the "updates" (see post 187) From just enlarging everything the F-1 engines, thrust structure and stage one have had only a couple of "issues" in terms of fit/markings. For the F-1 engines there was a former that was a little small and a red line being off centre (see post 29). For the thrust structure and the stage one you just need to make sure that the width of each section of a ring is 340 mm at the top and at the bottom. For my copy I found the "red lines" were not always 340 mm apart on the 1/24 model. For the 1/48 model there are a number of issues with the interstage (all easily manageable), see posts 77, 78, 84, 85 and 86 which will take you through the whole process. For the 1/48 model there are issues with stage two. It is essential to have the "updates" which correct MOST of the problems. I am still only part way through posting stage two for the 1/48 model but the lowest section (which I needed to modify) is covered in posts 98 (which explains the problem) and 149, 150 and 151 take you through the build of my solution. For the rest of stage two and the rest of the 1/48 model you will have to wait until I post how I get on. For the 1/24 model I have only just finished the thrust structure. However I anticipate no additional problems in terms of fit since they will have been sorted by doing the 1/48 model in advance (hence the reason for doing both models with the 1/48 slightly ahead of the 1/24 model). In terms of the make of paper being used, that is covered in post 21. For the 1/48 model I am using the lower value of the weight (gsm) specified by the designers. For most of the rocket I have not needed to add any additional "strength". The only exception is where the body of the rocket is only one layer of paper thick (after all the parts have been glued into place) I have added a panel on the inside (of 220 gsm) to make it two layers thick. I also added a couple of extra formers in stage one. I don't think this was strictly necessary but it felt a lot better for it. For the 1/24 model I have again used the lower value of weight of paper specified in range for the parts as given by the designers EXCEPT for where the range was 220 - 240 gsm. Here I used 250 gsm (since this weight is readily available in A3 size whereas 220 and 240 were not). Actually printing, joining and putting in the required extra strengthening parts is (basically) what this thread is about. For the 1/48 model there is no need for extras (other than the "belt and braces" double thickness mentioned above). However I would not use less than 220 gsm for the body of the rocket. Given what you said for your 1/96 model it sounds (to me at least) that even though scaling down people should stick to 220 gsm for the body of the rocket. For the 1/24 model I would advise to stay with 250 gsm for the body of the rocket and use "strengthening struts" of some kind. I am making the body 3 layers thick. I do not think there is any advantage to more and I still think you need some sort of inner support to stop buckling under its own weight. Also I would NOT increase the paper weight to more than 250 gsm since this start have crushing/cracking/bending/curving issues Please note that I am no expert, this is just my thoughts Hope this has helped regards Kevin
__________________
Normally the most advanced tech I use is a pencil.
|
|
#269
03-29-2018, 03:16 AM
|
|||
|
|||
|
1/48 stage two looking ahead
Dear all
With the 1/48 model, the situation with stage two was that the lower ring and it's thrust structure was complete. I have now looked at the updates of stage two. The good news is that a lot of "missing bits" are in these updates. The unfortunate news is that there are no instructions so I have been trying to figure out what is what etc. One thing I was checking out was the difference between the interstage between stage two-stage three of the original download and the updates version. That is the "cone shape" parts 70,71,72 and 73. I could not visually tell if there was a difference so I made both. Here they are  The "updates" version is on the left, original version on the right. The updates version is about 10mm taller. More crucial however is the diameter of the bottom of the updates cone is smaller than the original version and the updates version matches the diameter of the diameter of stage two. In other words it fits! Even better the top of the cone matches the diameter of stage 3. So it fits top and bottom! (A very pleasing photo below showing this)  By the way these are not the correct parts below and above the cone but they are of the same diameter of the correct parts. The parts shown are just resting on each other. So using the updates parts is vital at this point. There are just a couple of other minor things for me to figure out, exactly where certain of the exterior add on parts go on stage two, but I should be able to do that relatively easily. This means that stage two for the 1/48 model can now go ahead. Regards Kevin
__________________
Normally the most advanced tech I use is a pencil. Last edited by Algebraist; 03-29-2018 at 03:17 AM. Reason: punctuation
|
|
#270
03-30-2018, 03:55 AM
|
|||
|
|||
|
1/24 internal structure of thrust structure finished
Dear all
The latest progress on the 1/24 model is to put in the remaining inner structure on the thrust structure. First I used "monster" (giant circle cutter) to cut two formers of outer radius 216 mm and inner radius 70 mm. Then using 3M super 77 glued then together with corrugations at right angles to each other (see post 177). The 70 mm inner radius is no accident. This means that the cut out middle of this former is/should (fingers crossed) be the correct size to be a former for stage three of the rocket. It is then glued to the joining tabs already in the rocket (these tabs are from the part that connects the thrust structure to the USA ring.  I have decided that running the entire length of the body of the rocket will be 12 struts, separated by formers, arranged in the positions of a clock face. As you can see I have marked 4 positions which corresponds to where the rocket would rest on the hold down arms. So now to make some struts. These are the same design as used in the lower part of the thrust structure (triple layered, see post 181). Because the former is already glued in place I need the struts to be a very tight fit (so that they can do their job) so I measured the gap and decided to make the struts 113 mm high by 80 mm deep. Here are some photos of the "lumber yard" making the struts    Next I cut out the joining tabs. They are and added to a strut to form an "I" shaped girder.   And here are the first 4 girders along with them glued into place. Having the model on a turntable (see post 259) made things so much easier. (If you have a go at this size of rocket I really recommend the turntable).   As you can see I have marked the positions of the other 8 girders. Here they are made and then glued into place   The photos don't really capture the size of the model so here are Gunter and Wernher having a look round to give some scale.  The sheer size of some of the parts means that I have to think about when I glue things. For example I could only just physically reach the furthest ends of the girders when gluing them into place without crushing the top of the USA ring. This will be most critical when doing the USA to corrugated ring, which is next! So now it is onto stage one Current height of model is 76 cm (30 in) Regards Kevin
__________________
Normally the most advanced tech I use is a pencil.
|
| Google Adsense |
 |
| Tags |
| apollo, moon, rocket, saturn v |
|
|


 Linear Mode

