


|
|
|
#11
 10-07-2010, 11:21 AM
|
|||
|
|||
|
Hull Plating is a Humbling Experience
Hello,
Thank you for your comments. Fairing or smoothing the hull was next. I used an expensive Fourmost Sanding Stick which has a flat surface good for the convex surfaces of the frames 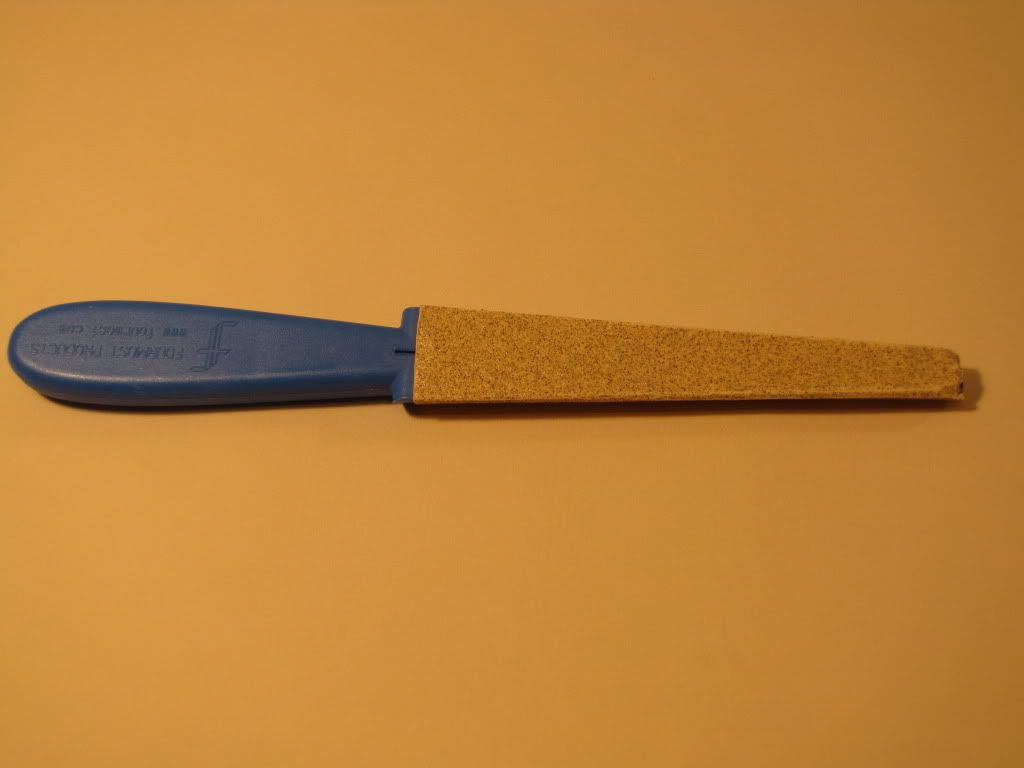 And a half round surface which is good for the concavities on the frames. 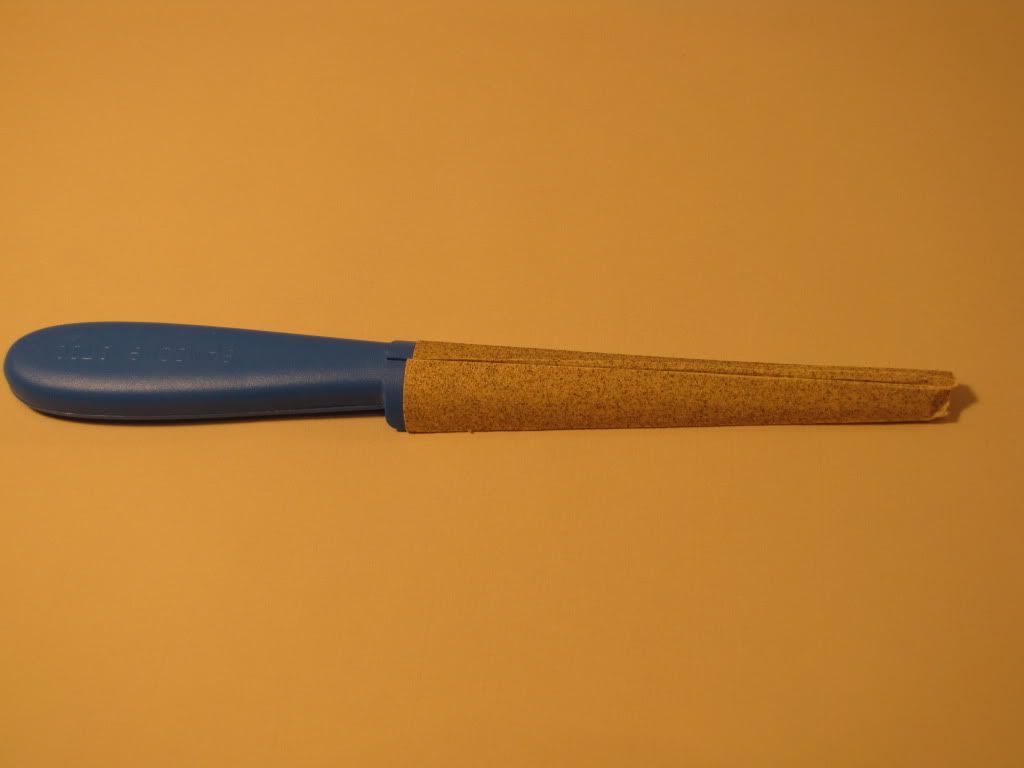 The stick is available from many suppliers. It is very inexpensive and comes with a template so you can cut the sandpaper to the size and shape for the stick out of full sheets of sandpaper in any grade you like. The sanding part of the stick is about 5 inches long so it spans several frames to help guide you while smoothing. I tried very fine sandpaper (400 grade) based on posts I have read. Maybe its the laser cut frames but the fine sandpaper was not taking off any material. I switched to an old fairly worn piece of 100 grade and it seemed to work well, but it is easy to take off too much unless a very light touch is used. The strips of red paper for covering the edges of the frames come attached to the hull plates. Here is one hull plate with the strip still attached and then cut away. 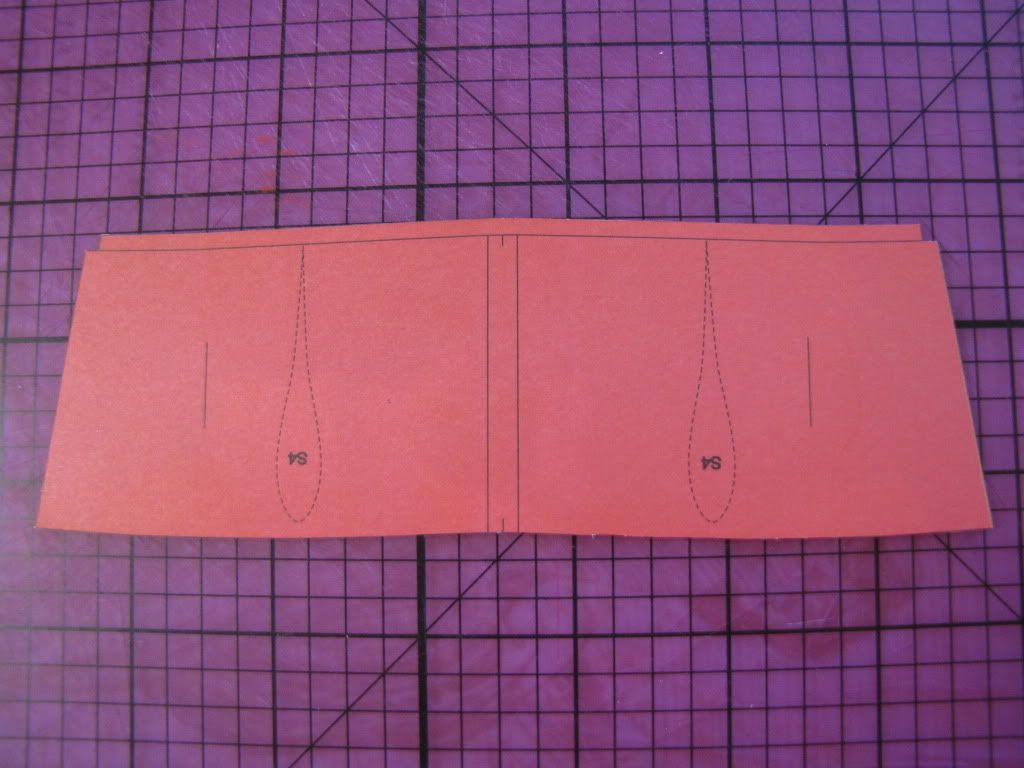 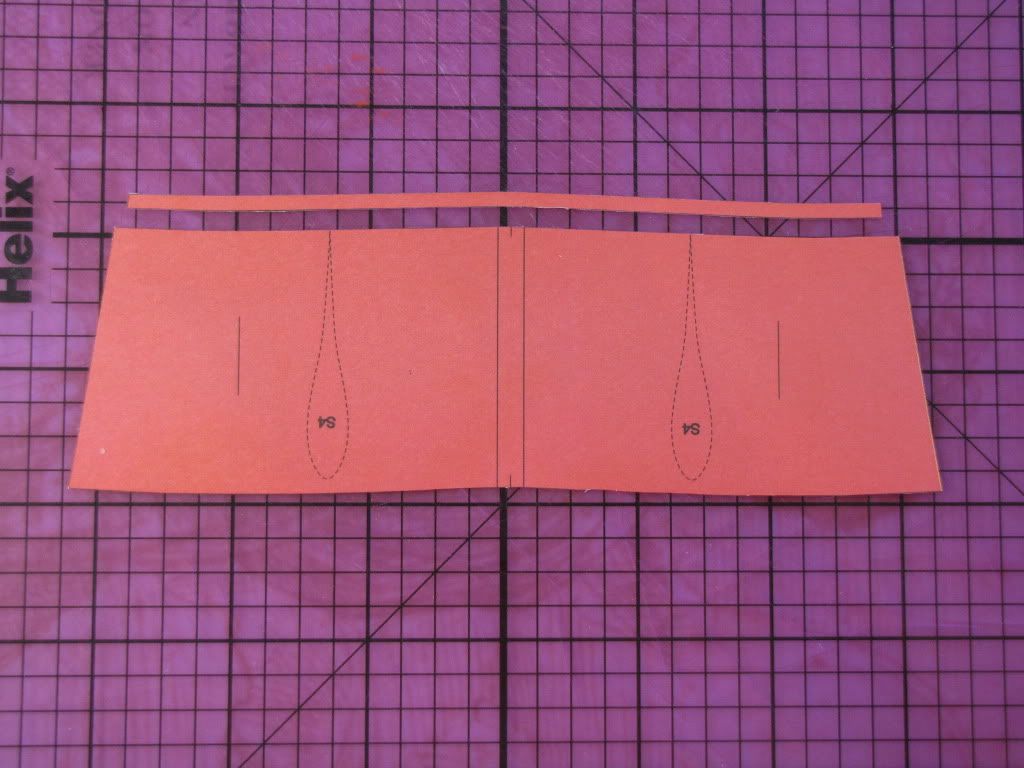 On some of the hull plates only short strips are included which do not cover all of the frame surface. Here is a picture of the two pieces that make up the first frame at the bow. You can see the short strips on the pieces labeled D1L and D1P. 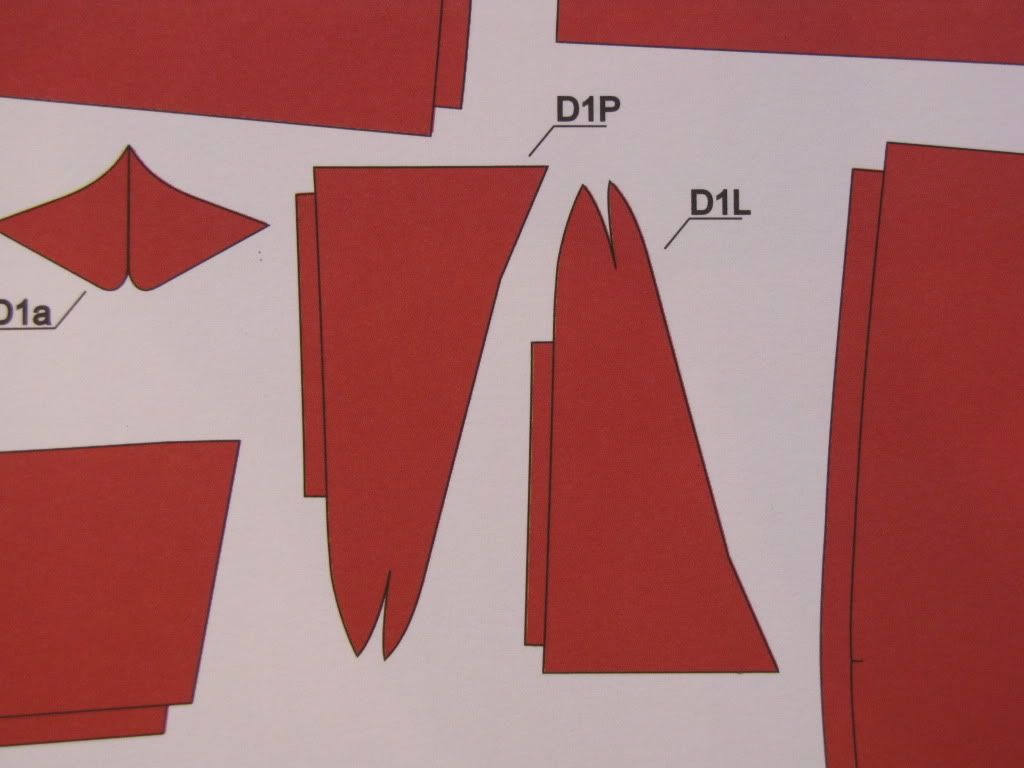 I don't know the proper name for the strips that cover the edges of the frames but I call them furring strips (like the wood strips put on a brick wall to allow attachment of sheetrock or wood paneling). Now for attaching the hull plates. I began at the second plate, leaving the bow unplated for the time being. The first couple of plates were edge painted but after that I remembered I would be painting the hull green so I could leave them unpainted. The first plates went on easily 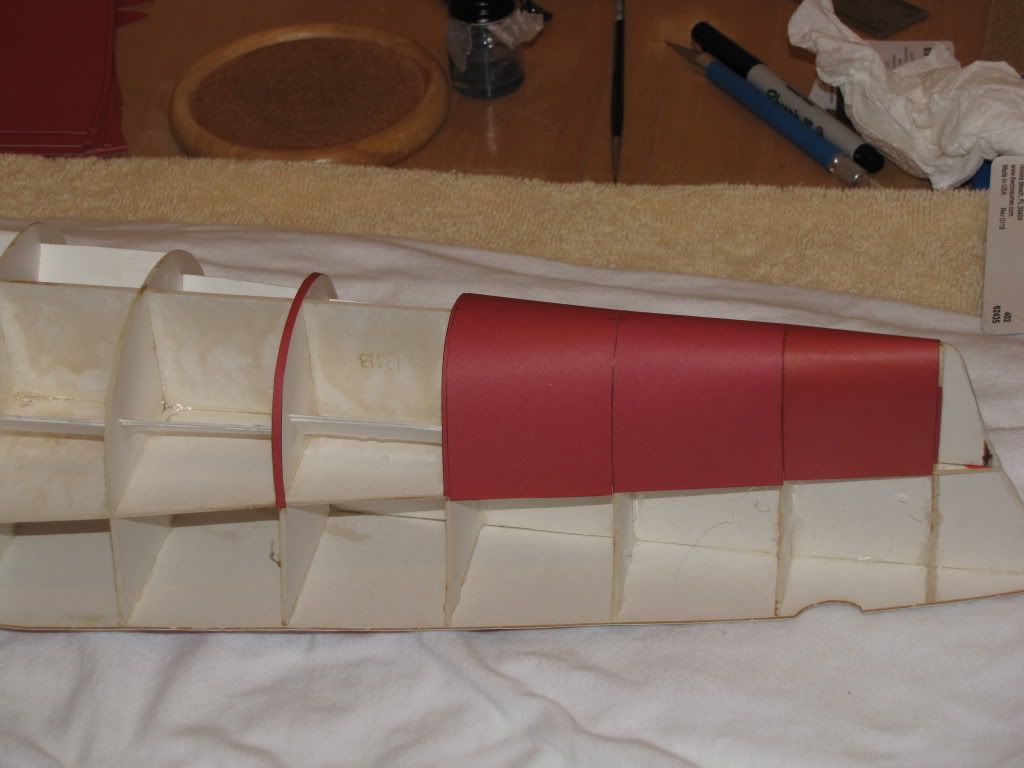 but I soon realized that the furring strips that came with the model are only 3mm wide and did not give sufficient wiggle room for attaching the plates. I xeroxed some plates to get some extra red printed paper and started cutting out my own furring strips at least 6 and often 8 mm wide. I will first show you pictures showing the plating went on almost perfectly with no buckling or waviness. 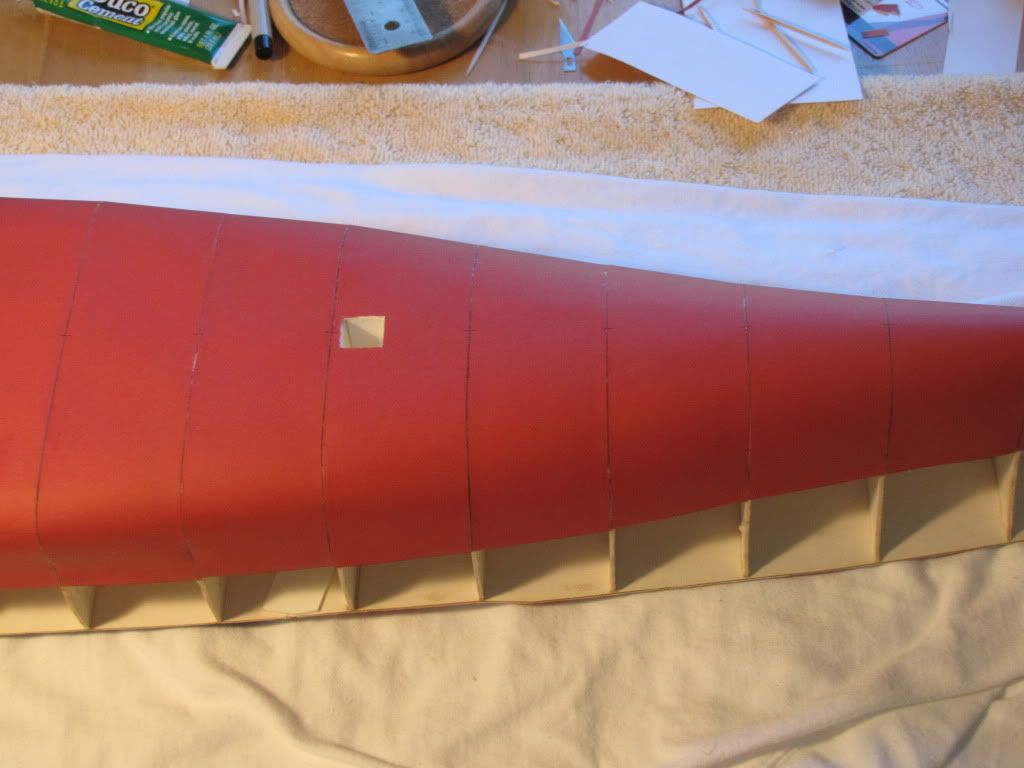 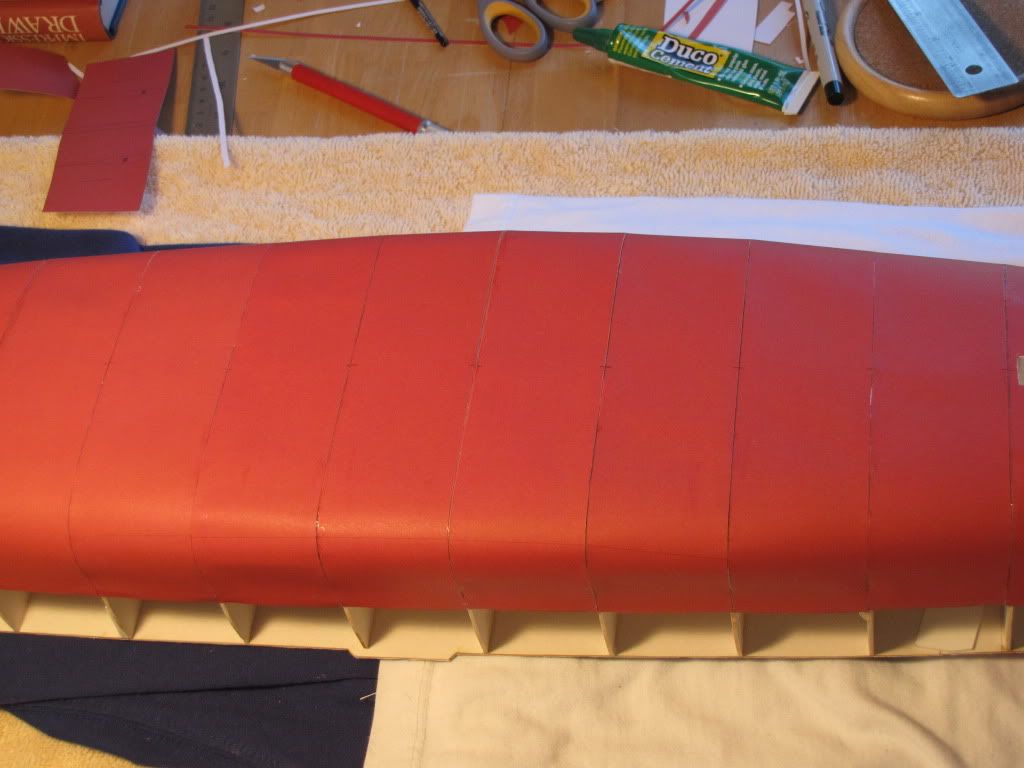 Now I will be honest and show you the plates in less flattering light. 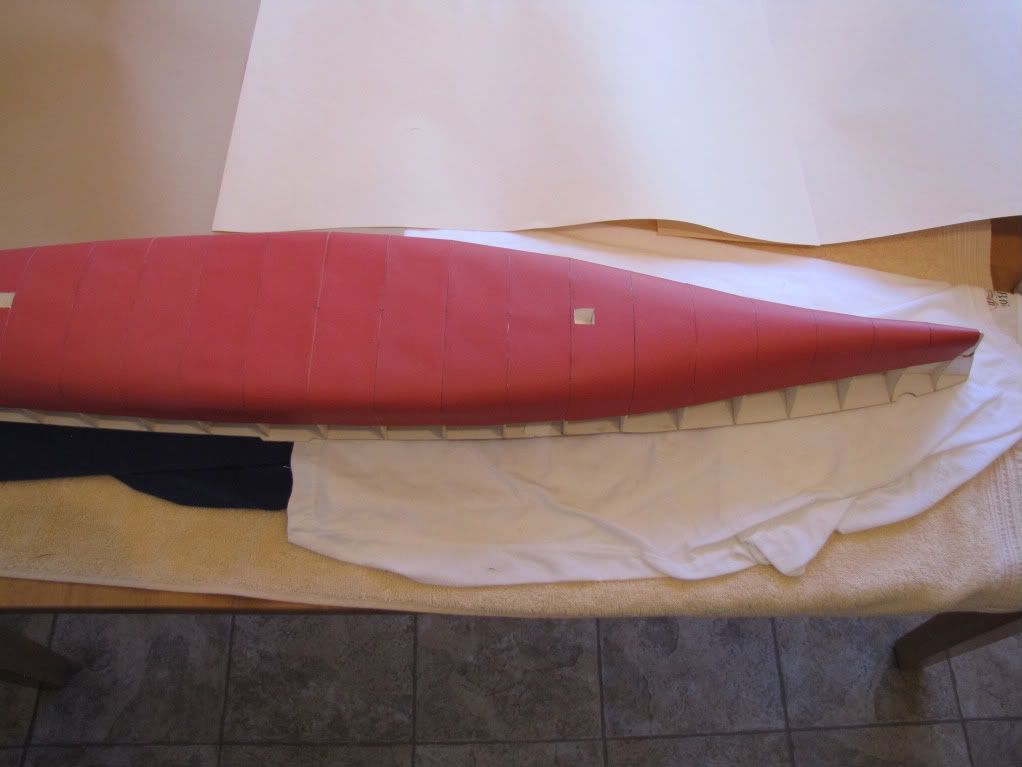  The areas where the plates are curved are not too bad but the large flat areas are not good. It's true that the broadest flat areas will not be easily visible when the model is upright on the display board but I obviously have a lot of room for improvement. The seam of the final plate at the stern is shown next. (The second plate from the end has not yet been fully glued down). 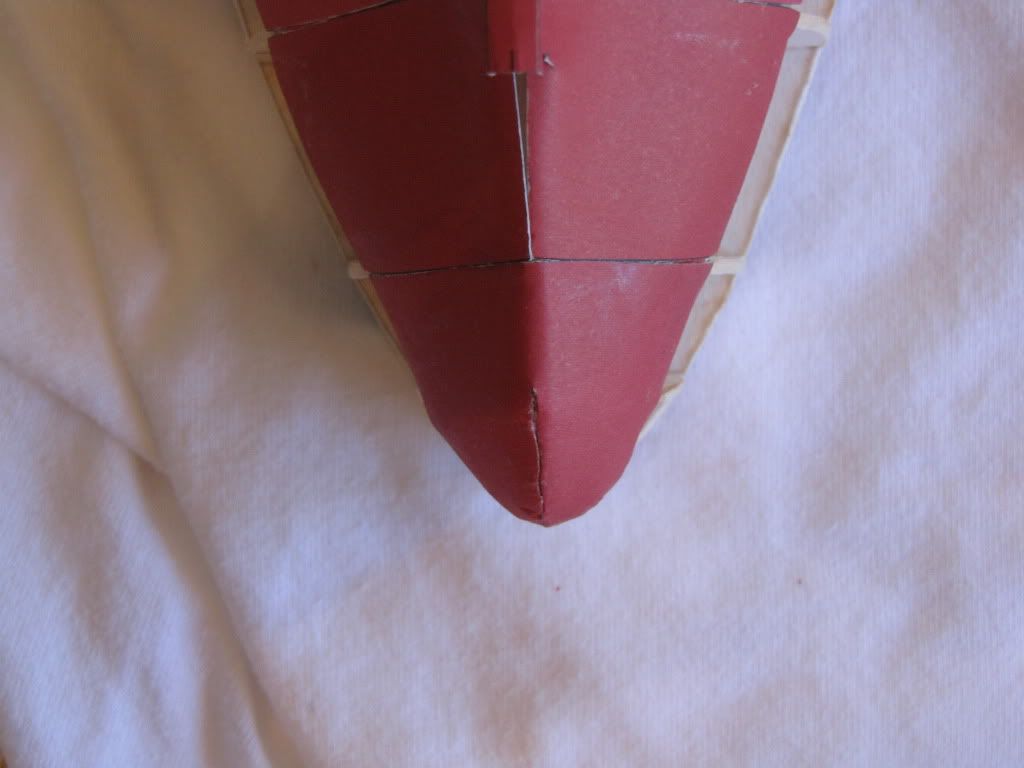 That seam at the very end of the stern looks like the incisions on Boris Karloff's neck in the old Frankenstein movies. Maybe if I had touched up the edges with paint it would look better. Rather than repeat my mistakes at the bow, I am going to show how the left and right bow plates fit and I will appreciate any advice you may offer on how to minimize the seam here. (The stern seam will be hidden but this bow seam will be very visible. 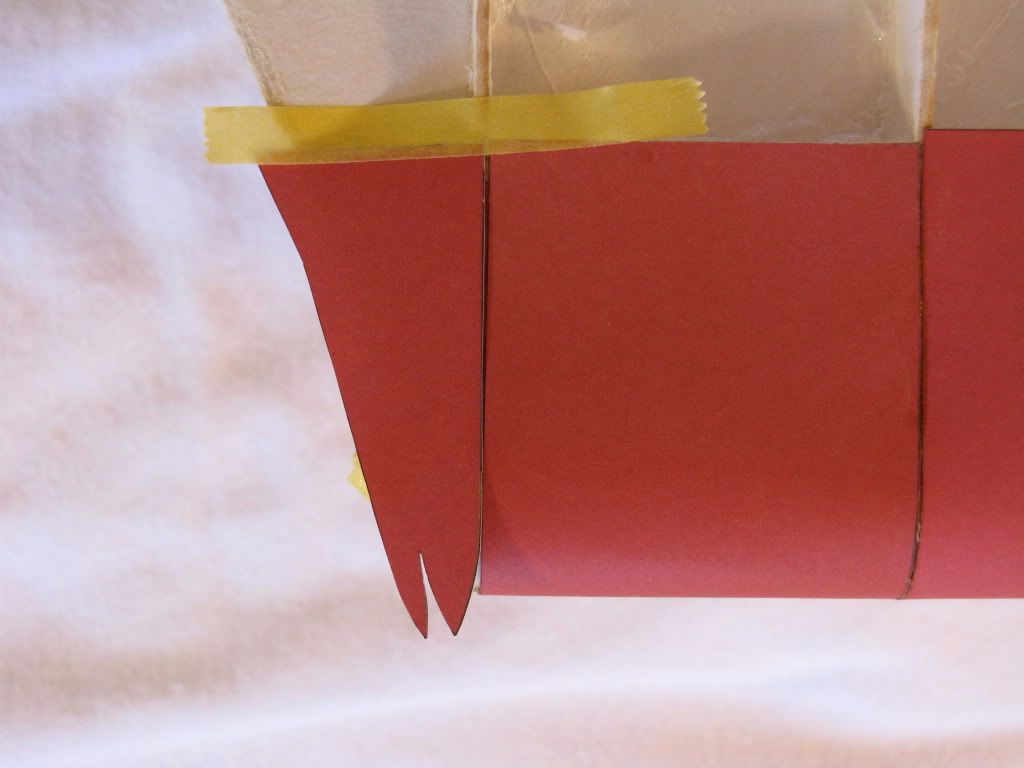 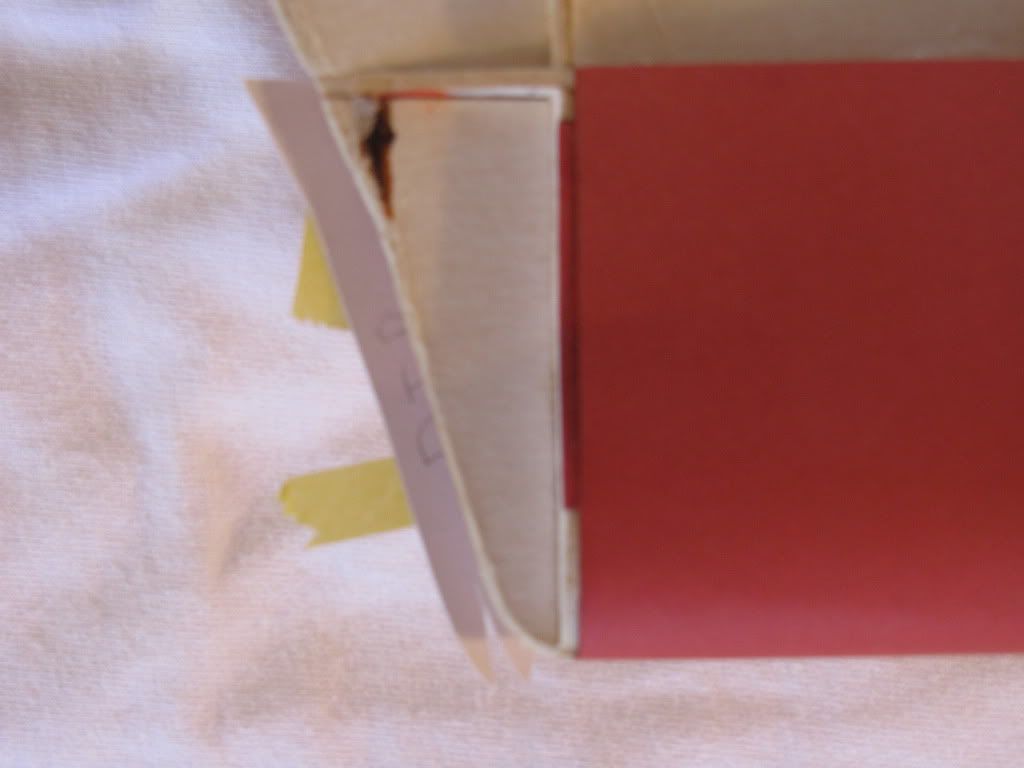 The pieces are pretty long and if I match up the front edges it will extend way past the cardboard support. Do I cut them both back to the "correct" length and put the seam in the middle? Do I overlap one side and then trim the other to the midline? Any help will be appreciated! Thanks, Greg 
|
|
#12
10-07-2010, 11:58 AM
|
|||
|
|||
|
Hi Greg,
she´s waiting for me too, but in scale 1:400 and as a waterline model!. I´ve copied the original with 50%, so i´ve got a model in my favorite scale. I´ve only to make the "North Carolina (JSC. 1:400) ready, then - maybe - the Roma will be get under my knife. Maartin
|
|
#13
10-07-2010, 03:36 PM
|
|||
|
|||
|
Greg, building fast and looking good, I bought this beauty a long time ago, just haven't fit her in yet. Looking forward to your struggles, fixes, and successes.
Maartin, good luck building her in 1/400. There is a big detail difference between JSC 1/400 and everyone else's 1/200. Joe
|
|
#14
10-08-2010, 10:40 AM
|
|||
|
|||
|
Using a Japanese Book Drill for Portholes
Martin and Joe,
Good luck on your builds. Hopefully, you will be able to learn from my mistakes. Taking a break from the hull plating I am going to punch out the hull portholes using my Japanese Book Drill. I have a set of punches that you hit with a hammer but none as small as the portholes on this model which I measure at 2mm. So I purchased this book drill which is shown below which has tips of 1.5 mm, 2.0 mm, 2.5 mm, 3 mm, 3.5 mm and 4 mm. (An optional tip of 5 mm is available but I did not buy it) 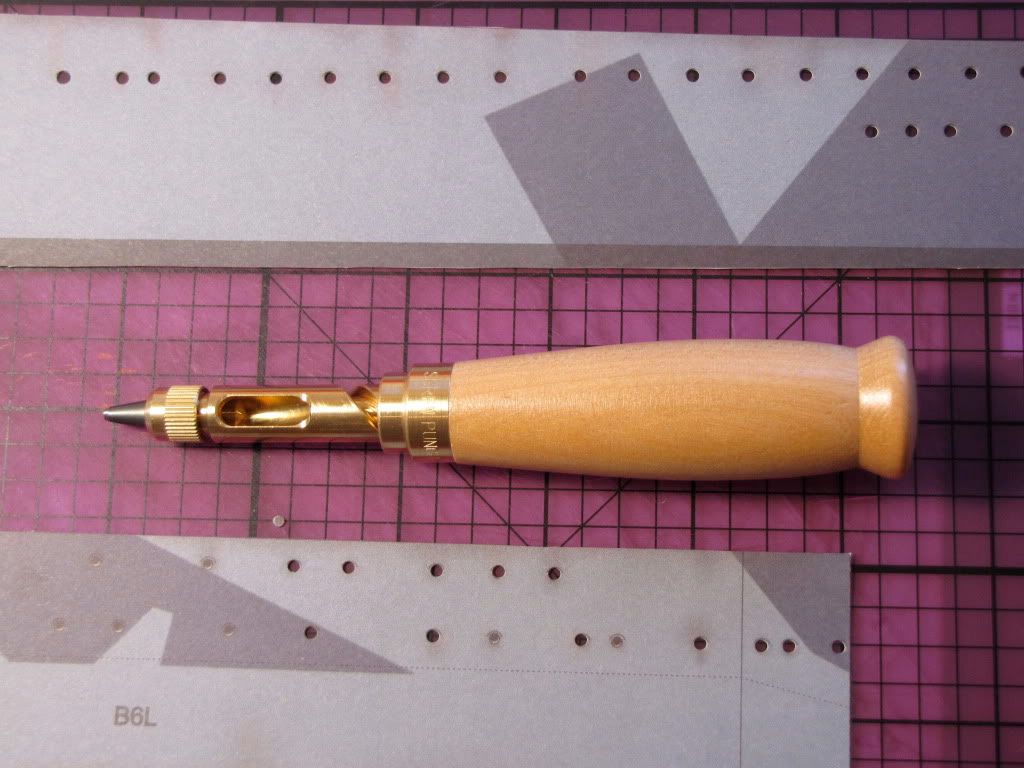 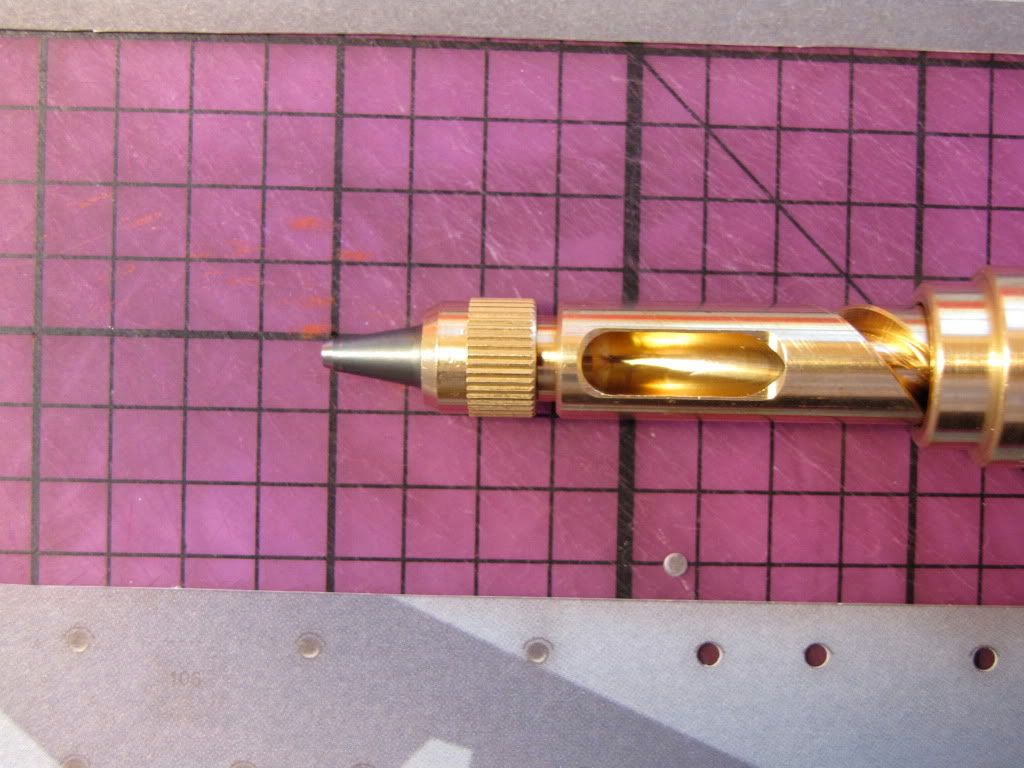 The tips are razor sharp and the device is very easy to position and with a little pressure the tip rotates cutting out a perfect, in this case 2mm circle of paper. 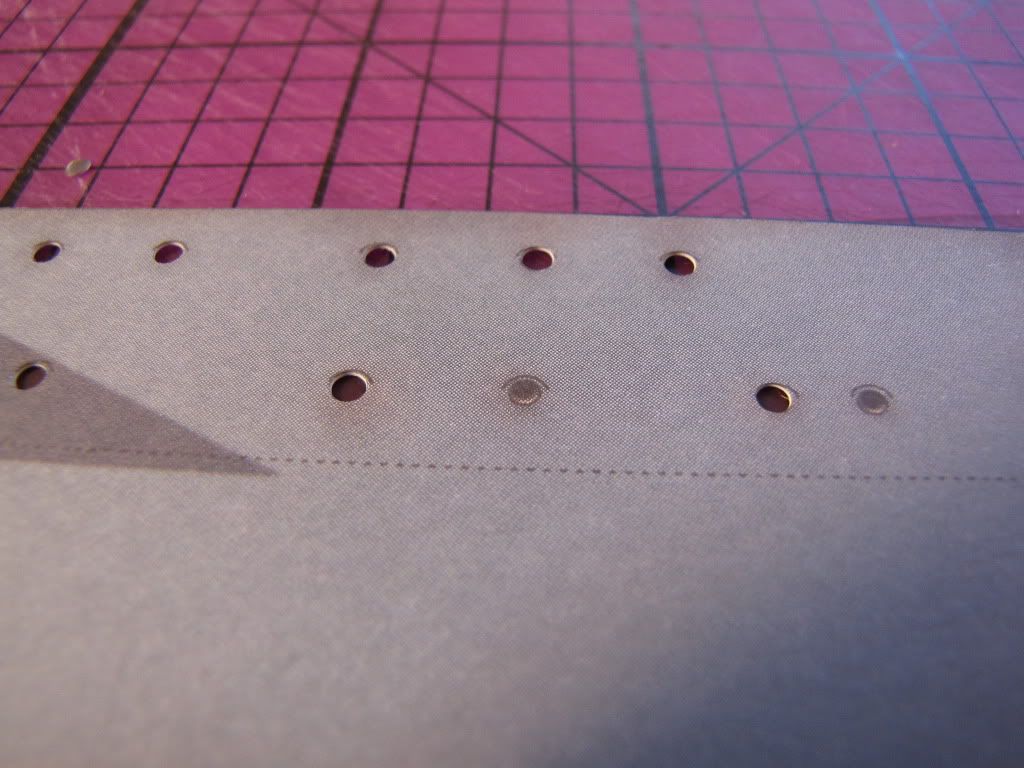 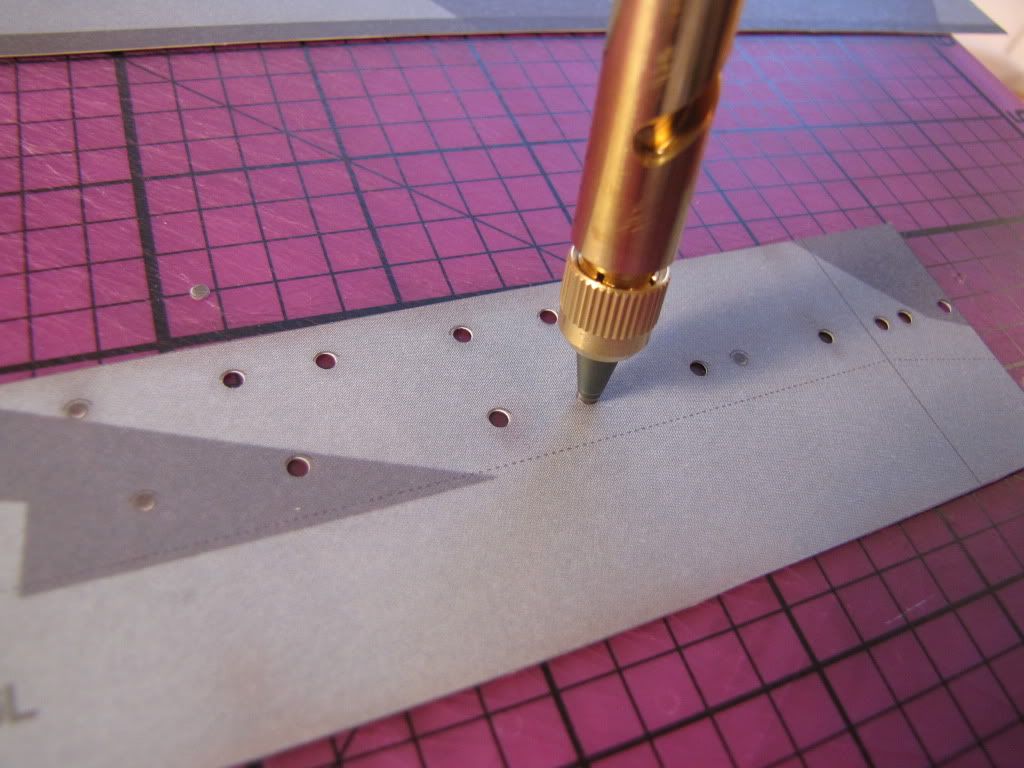 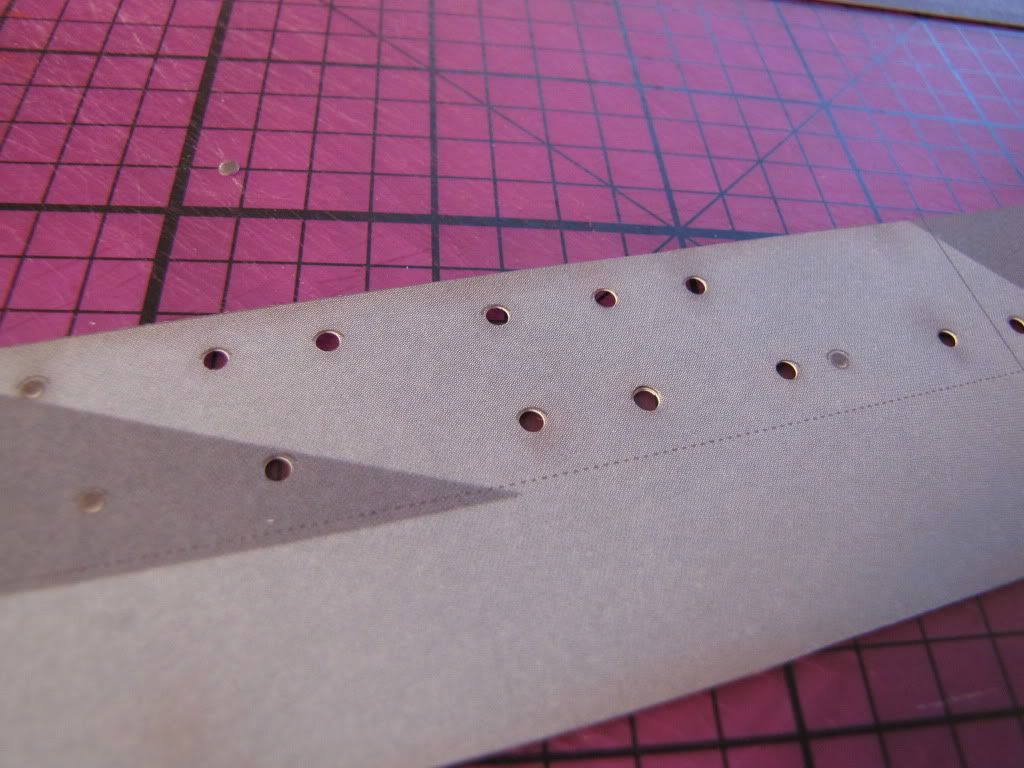 The device will cut out a perfect 2mm circle of paper no matter how hard you press it and how much the tip rotates. But because the tip is tapered on the outside, the hole left in the paper can vary in size. Here is a closeup of the tapered tip.  The harder you press, the more the tip rotates and the wider the hole becomes. Below are three holes with varying pressure and rotation of the tip. At the top is slight pressure which caused about an eighth rotation of the tip. This left a hole just a fraction of a millimeter greater than two millimeters. The next holes show what happens if you push harder causing a 1/4 turn and then 1/2 turn of the tip. The hole will be progressively larger. With a little practice, I found it easy to apply just enough force to get the 1/8 turn and the right size hole. 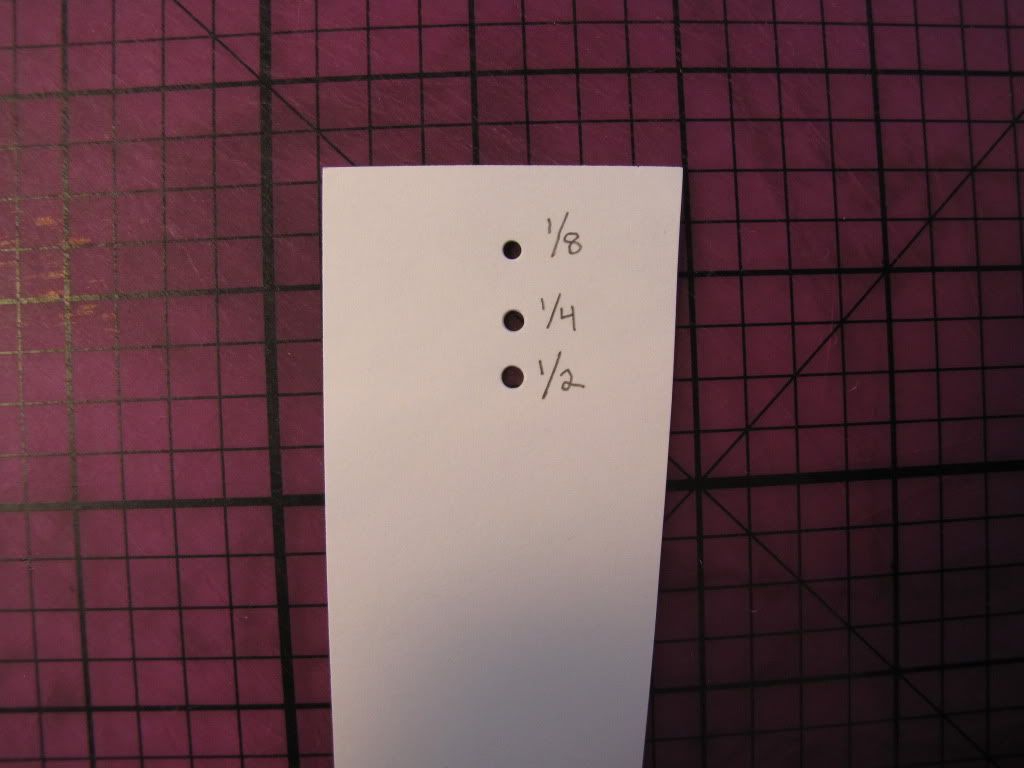 It is hard to describe how fast it is using a book drill for the portholes. I doubt that I spent more than 20 minutes (excluding the time for photos) in punching out all the portholes. If I had used a hollow punch that I had to reposition, stabilize and knock with a hammer for each hole, it would have taken much, much longer. The biggest downside to the book drill is the cost. I bought it from Bonnie's Best Art Tools online for $78 dollars with shipping. It is supposed to be an authentic Japanese drill rather than a cheap knockoff. Bonnie's was easy to deal with and sells replacement tips so I went with this company. Other posters may have experience with the less expensive alternatives. Greg
|
|
#15
10-08-2010, 02:13 PM
|
|||
|
|||
|
Finishing the Hull Plating
I am going ahead with the plating at the bow. I glued the bowplate on one side
 and then folded over the excess. I used Aleene's Tacky Glue for attaching these plates because it softens the paper making it easier to fold over. 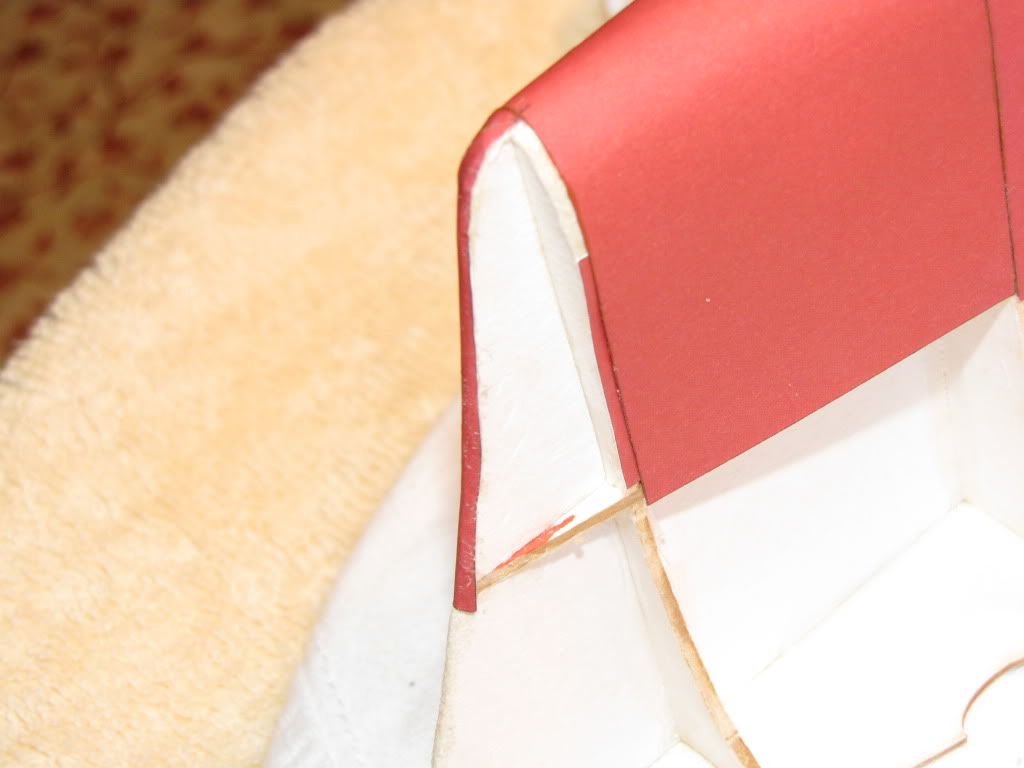 Then the other side was positioned temporarily and the midline of the bow marked with pencil. The excess material was trimmed off this side and the plate glued into position. 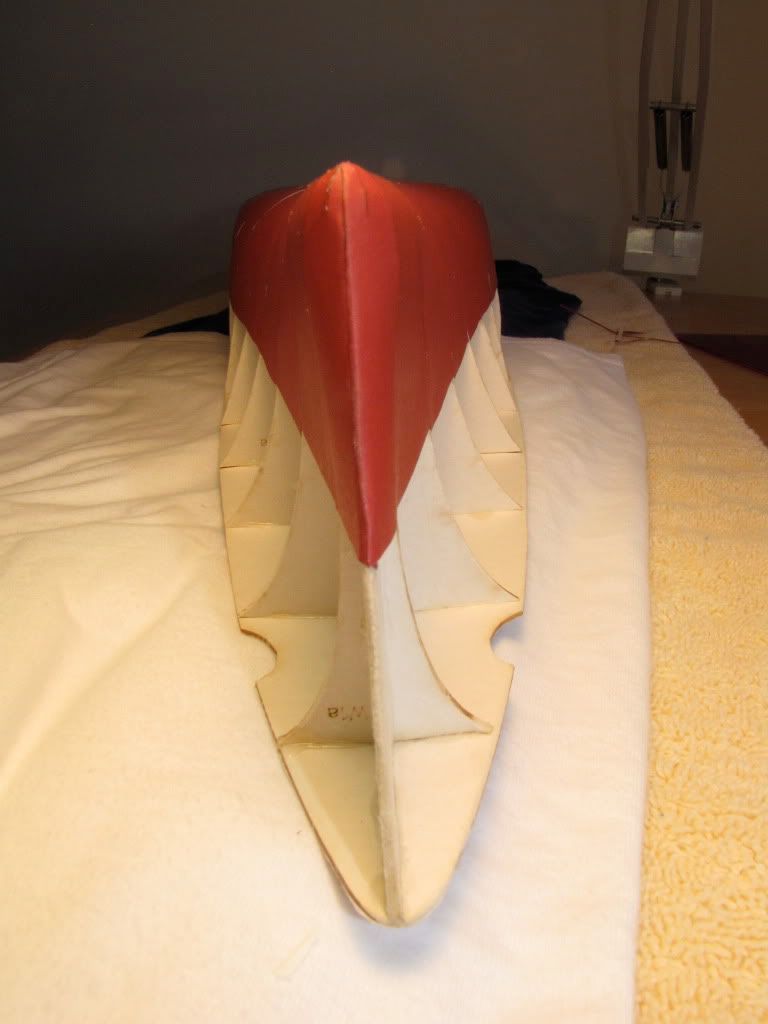 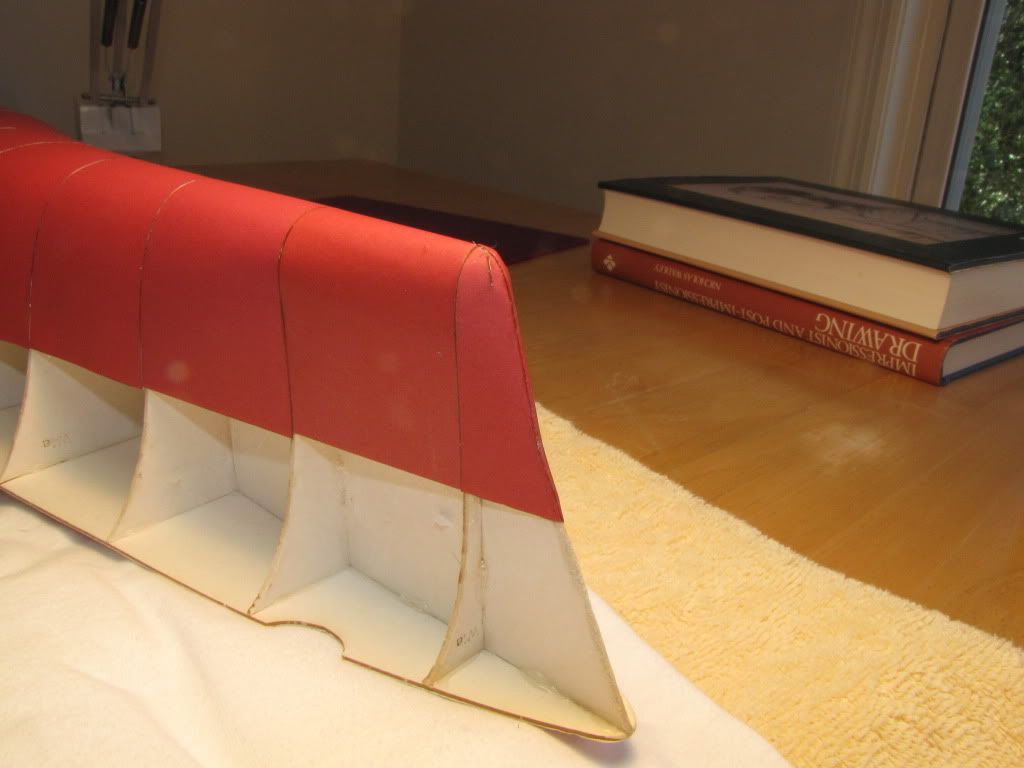 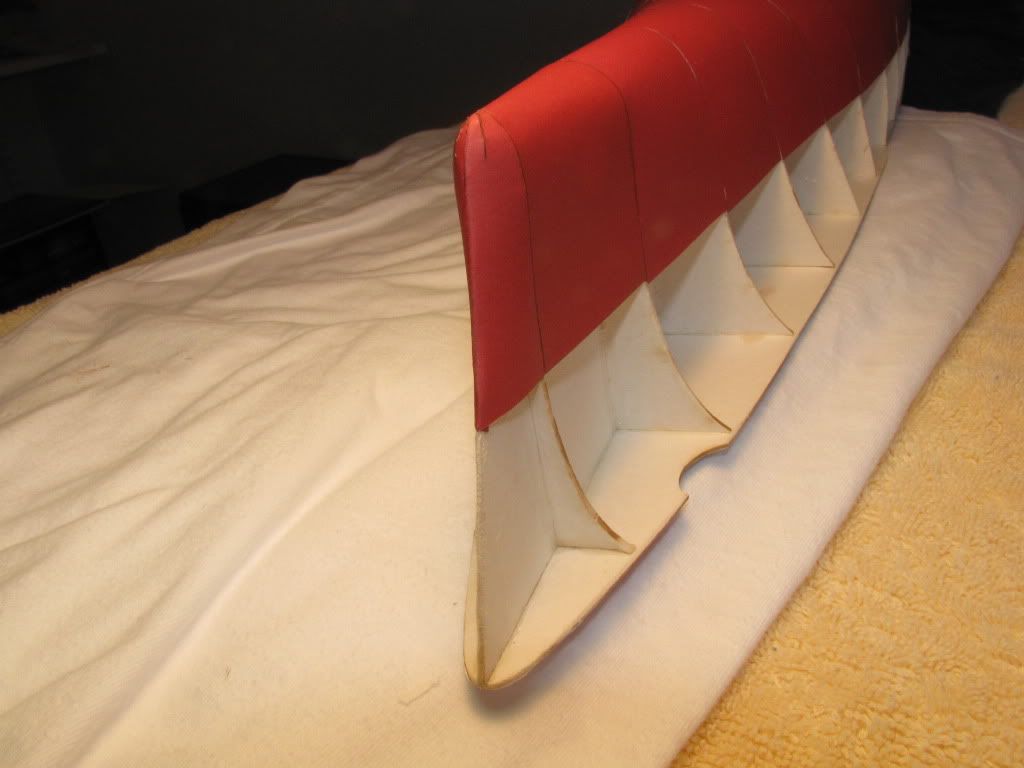 There is a small piece of plating that protrudes out of the bow towards the bottom of the hull. I will glue this on towards the end of the bill, otherwise I'll be knocking it off daily. The hull plating is now complete. 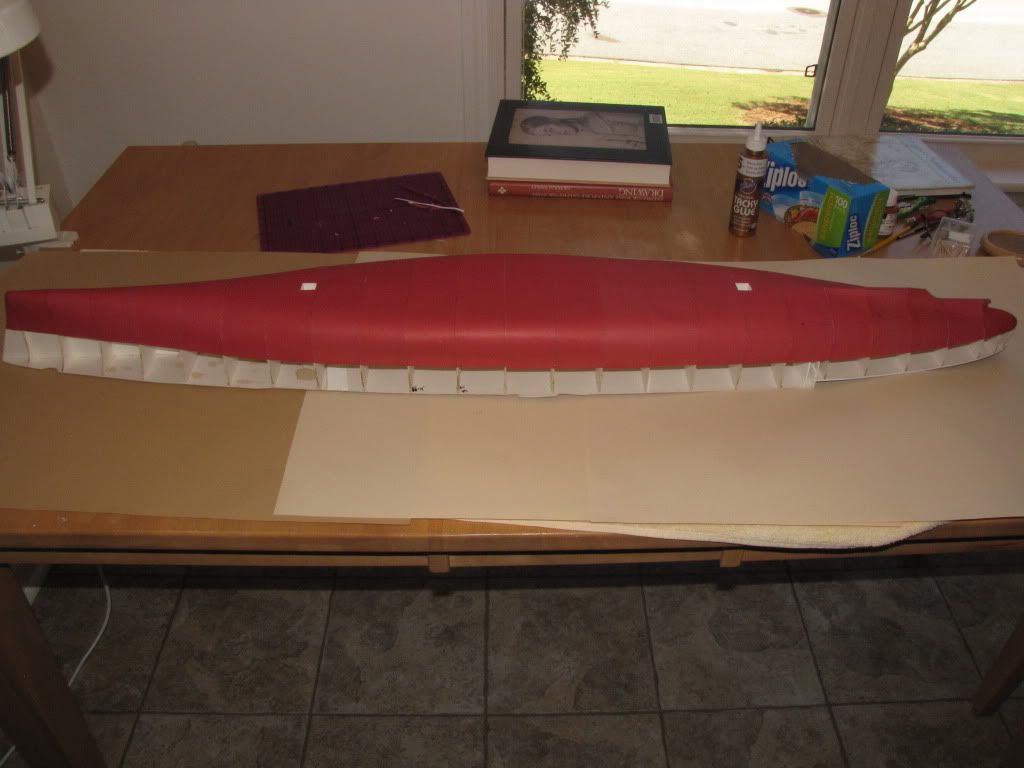 Here are some photos with the model temporarily placed on the display board.  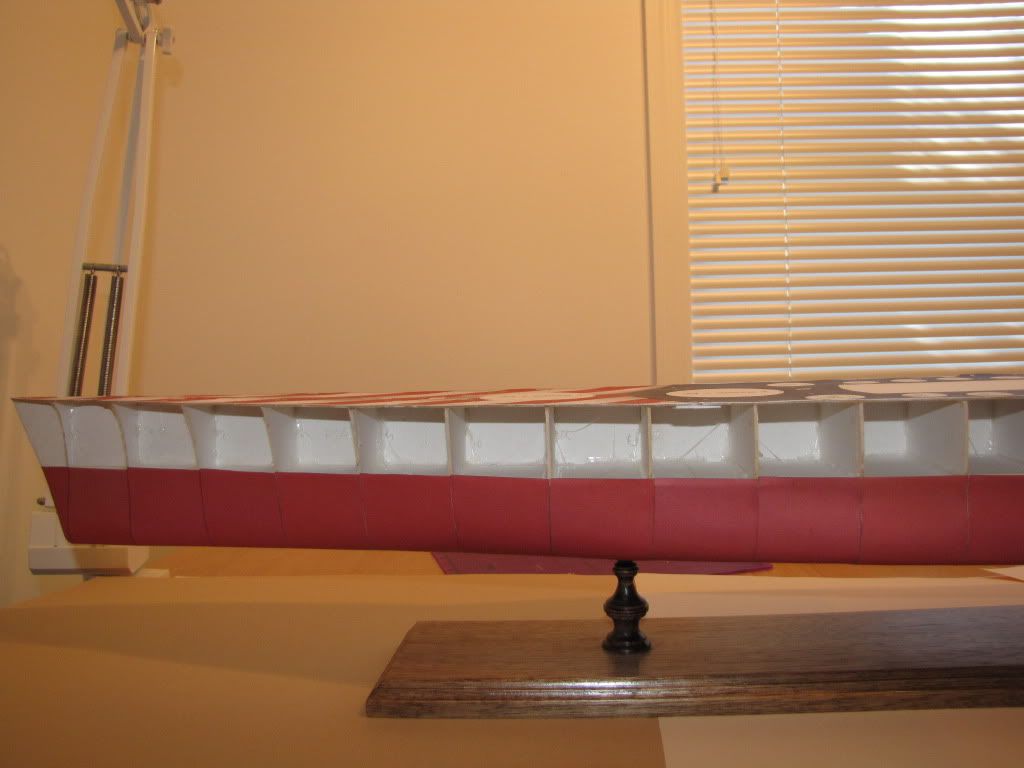 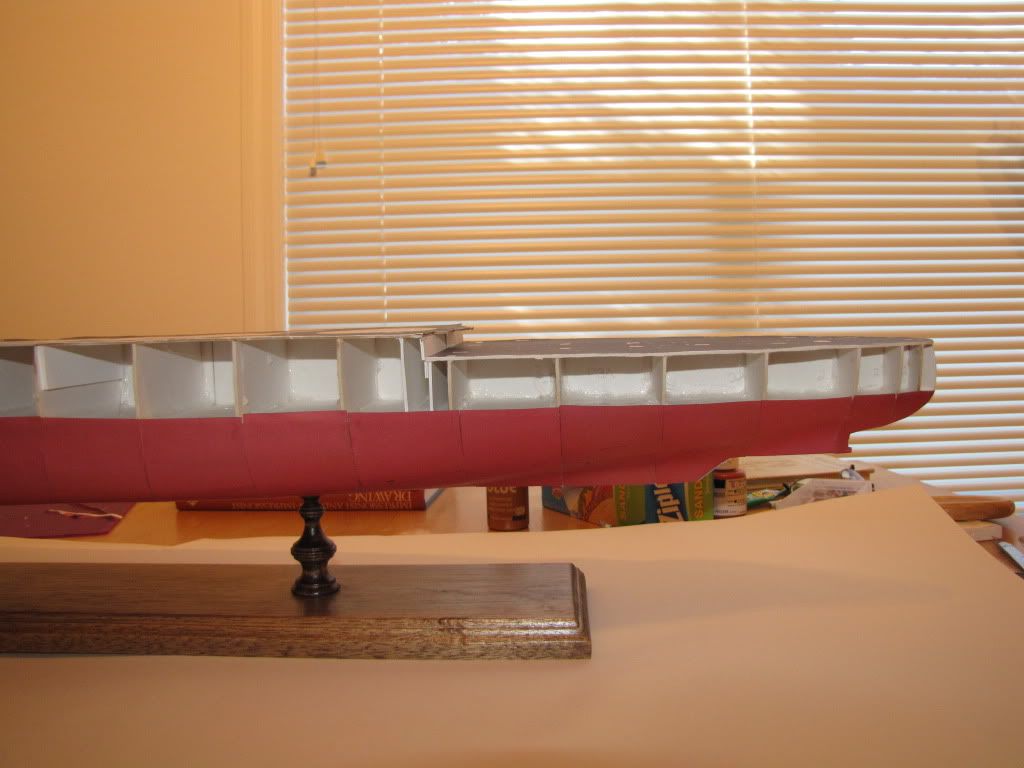 Now on to smoothing the seams and painting the hull green. Greg
|
| Google Adsense |
|
#16
10-08-2010, 06:53 PM
|
||||
|
||||
|
Hi Greg,
Nice capping on the bow of your hull plate additions. It looks like you figured out the answer to your problem with that last plate. I like the added detail of punching out the port holes, that book drill looks like a nifty tool if not a bit of expensive. Looking forward to the color change.
__________________
Jay Massey treadhead1952 Las Vegas, NV
|
|
#17
10-09-2010, 07:35 PM
|
||||
|
||||
|
Beautiful work on the hull. You are certainly doing a fine job with a very challenging build.
I find my Japanese brass screw punch to be an exceptionally valuable tool. My recollection is that it cost about half as much three years ago. Don
|
|
#18
10-14-2010, 11:48 AM
|
||||
|
||||
|
Always good to see an "Italian Heavy" in the forum. Nice work on Roma. This is a fantastic kit, and you're doing an expert job on her.
I liked you're explanation/tutorial on mounting to the base. Thanks.
__________________
Recently Completed: 1/700 USS Nevada (resin) In the Shipyard: 1/350 USS Washington (resin) On the Horizon: Dom Bumagi USS Helena 1/200 (60% complete)
|
|
#19
10-23-2010, 05:22 PM
|
|||
|
|||
|
Painting the Hull
Don, Jay and Eibwarrior - thanks for your comments.
The last couple of weeks have been spent on deciding on an approach to painting the red paper hull, some testing of techniques, and in general repeating my mistakes and calling it experience. I have some experience painting with acrylics on canvas and art board but little experience with painting acrylics on paper. I assumed that acrylics, like watercolors, would cause the paper to cockle or buckle. Some papers are worse than others so I ran a test with a sample of paper from the Roma model. (You will see a variety of colors in these photos as I am using up various odds and ends of acrylic paints.) The final green color for the hull will not show up until the very end of the paint process. The photo below hopefully shows the buckling of the Roma paper when it has been painted with Liquitex acrylic. 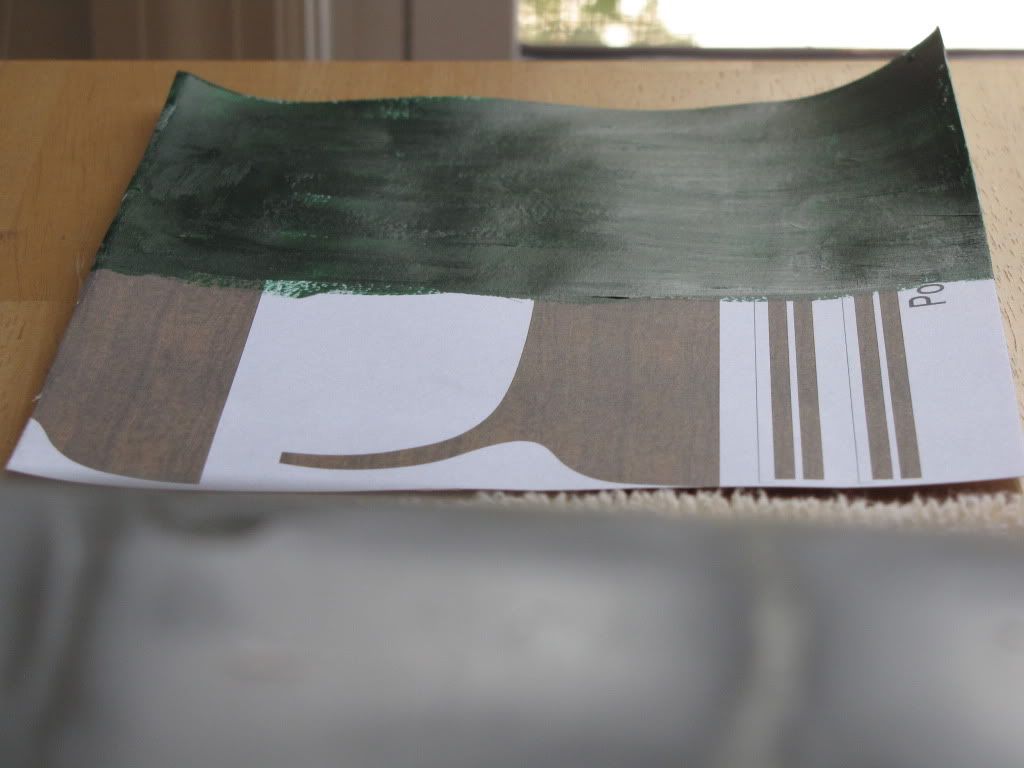 After much trial and error I opted for the following. Four coats of acrylic sealer and then two coats of Tamiya primer in the spray can. Show below on the left and right are the acrylic sealers I used. Mod Podge and Patricia Nimock spray cans are shown on the left and right. They are apparently the identical product since the manufacturer and directions for use are identical. The only downside to the products is the toluene in the spray and I always use a respirator with carbon filters even when I spray outside. The Tamiya primer in the center is labeled for plastic and metal but it is a lacquer primer and I can't imagine why it wouldn't work just fine on paper. Both acrylic sealers even give directions that if you plan to put a lacquer on prints, first seal them with with four coats of the acrylic sealer to prevent bleeding of the prints. 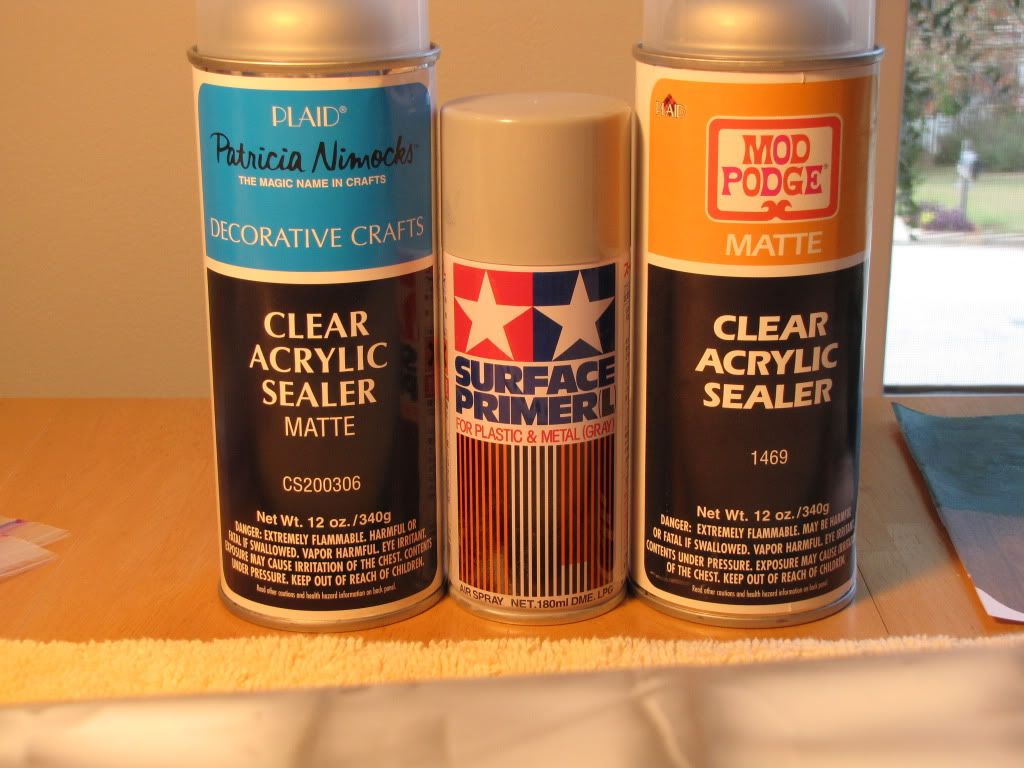 Here is a sample of Roma paper with 4 coats of acrylic sealer, applied per the manufacturer's directions and two coats of Tamiya primer which is grey. Then a coat of liquitex acrylic painted onto the sample. The same acrylic that was used previously. The acrylic looks matte here because the primer has a "toothy" surface. The lacquer based primer is another coating where I believe either a respirator or paint booth is needed. (I have a small paint booth but at 50 inches in length Roma will not fit.) 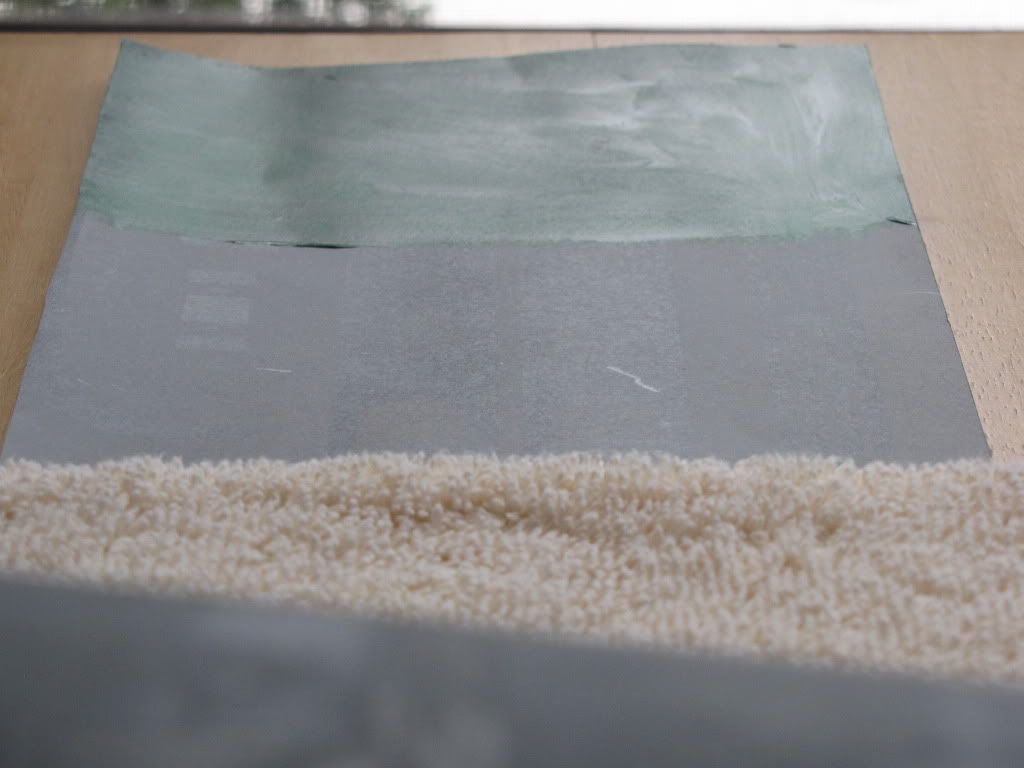 The paper really stayed pretty flat when the acrylic was applied and the solvents in both the acrylic sealer and Tamiya primer evaporate very quickly so the hull of Roma can be sprayed outdoors and in a matter of hours moved to the safety of the indoors. Here is the hull with 4 coats acrylic sealer, 2 coats of Tamiya primer and 2 coats of Liquitex medium viscosity neutral grey acrylic. No sanding has been done yet. 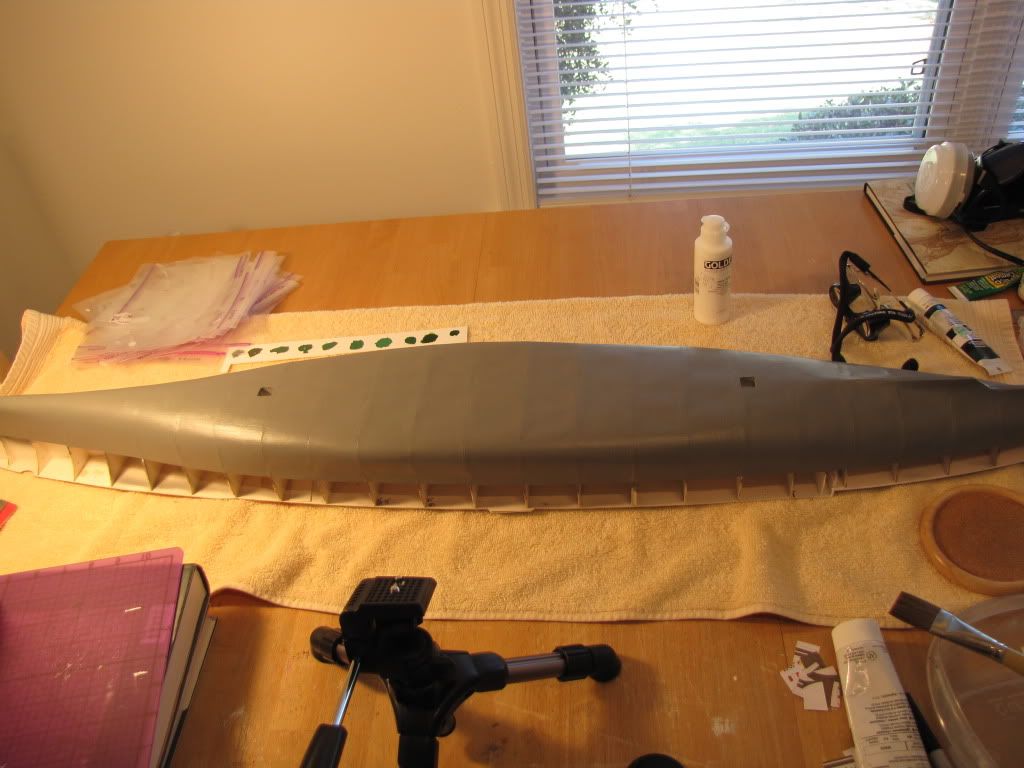 Next post - close ups of the hull showing the "problem" areas and using heavy body acrylics and acrylic gels to hopefully improve the appearance. I will also give my experience with sanding these acrylics and just briefly describe working with different viscosity acrylics.
|
|
#20
10-23-2010, 08:00 PM
|
||||
|
||||
|
Hi Greg,
Wow! That is a lot of work to get to where you got it, but it does look pretty nice. I use Krylon "Preserve It" as a sealer to keep the ink jet ink from bleeding while I am working on printed sheets from my printer and after a couple of coats of it I have used enamels and acrylics without having any problems in the past. The hull bottom of my PC 553 was enameled after two coats of Preserve It without any warping. Preserve It does have a pretty good "Whang" to it so out door use or a spray booth is recommended. My Roma kit is from January 2010 and has the green hull bottom, here is a reduced scan of one of the pages of the hull plates if you would like it for reference for yours. 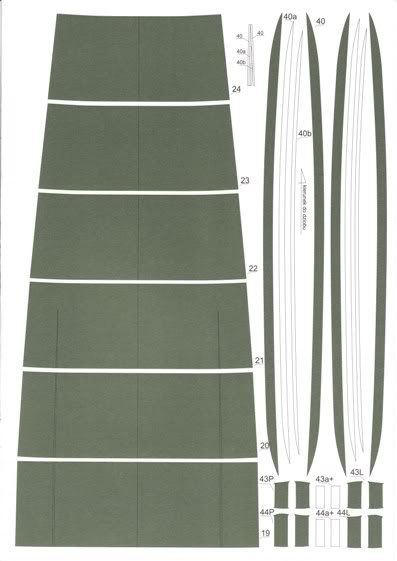
__________________
Jay Massey treadhead1952 Las Vegas, NV
|
| Google Adsense |
 |
|
|


 Linear Mode

