


|
|
|
#1
 10-05-2010, 02:43 PM
|
||||
|
||||
|
Treadhead's IJN Nagatsuki from Gremir in 1/200 scale.
Hi All,
Yes, I know Ed (TinCan871) has been doing a bang up job on this ship, but he had to go do a stint of house sitting and as a result, I am "jonesing" for my IJN Fix. Here is a link to Ed's excellent build here, sure hope he gets back and turns to on it again soon. GreMir IJN Nagatsuki 1/200 We also have Lex's excellent build of Modelik's IJN Fuyuzuki, an Akizuki class destroyer going on, but again, he has other irons in the fire that is keeping him away from the modeling bench, Here is a link to Lex's build project. IJN Fuyuzuki [Modelik 1:200] So since I can't live vicariously through either one of their builds I have to do the only thing that I can, break out my copy of Michael Krol's IJN Nagatsuki from Gremir Models and go to work.:D Michael provides us with Grzegorz Nowak's excellent design of this Mutsuki Class Imperial Japanese Navy Destroyer. The Nagatsuki was the 8th ship of this design produced. It was also a further development of the earlier Minekazi and Kamikazi classes of destroyer. This also explains why all three classes share a certain similarity overall. They followed the German Navy destroyer design with a set of torpedo tubes installed in a well deck forward of the bridge structure and aft of the first gun mount. The number "30" emblazoned on her side indicated her ship number in the building of ships for the IJN at this time period. Later on she received her name in 1928 when all IJN ships in service were named. The number "22" on her bow indicates that she was a member of the 22nd Destroyer Division. By the time the war started she and her sister ships were actually outclassed by newer designs of IJN Destroyers as far as speed and weaponry were concerned. Despite this she had an active service life, escorting, patrolling, and providing support for several actions early in the war through to her participation as part of the Tokyo Express. Starting in 1941 she and five of her sisters were updated to act as fast transports with better machinery and other improvements. During a run on the night of July 5, 1943 she became engaged in the Battle of Kula Gulf and took a 6 inch shell hit to her bridge. Two hours later her navigator got her stranded on a coral reef off Kolombangara and that was the end of her career. Despite efforts of her crew and the destroyer Satsuki she was not to be pried loose from that reef. Since there was no way to move the ship off the reef her skipper ordered everyone ashore where they made the five mile trek to Vila, a Japanese Army Base. Allied aircraft made short work of the ship and that was her grave. There are still a few remnants of her left there still, rusted bits of boilers, underwater. Her skipper survived the war and later a book on his exploits was published, I managed to dig up a copy of it and that introduced me to the ship and was one of the reasons I was so stoked to find it in Michaels' catalog. I do like the bases that Michael provides for his line of ship models and while you could laminate them to some sheets of card to beef them up a bit to do this job, I am having too much fun turning them out with some wood cores from Balsa Wood. This does give you a much sturdier base to mount the finished model to and I like the look. To that end I start out by trimming the base pieces out from the sheet and gluing them down to some sheet balsa using the same spray adhesive that I use to laminate the sheets of the formers with. 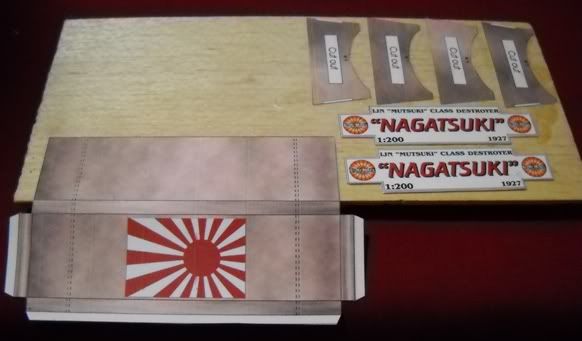 Because the center spine of the base is thicker than the rest of the base, I had to laminate another piece of balsa to the first in that area to meet the required depth of that section. 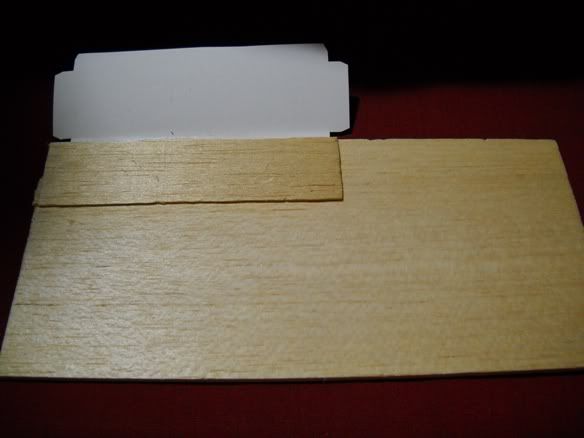 Once the glue dried overnight it is just a matter of trimming out the parts and assembling them to make up a very happening little base to set the model on. It also doubles as a work stand once you get the bottom plates on the hull form if you need one to save the rudders and propellers from any damage when building the ship. I also used a dark brown Sharpie Marker pen to go over the edges of the light colored wood sections.  The next thing to turn my attention to was the hull formers. These are all laminated up to a thickness of 1 mm. I like to use 110 pound cardstock for most of my ship builds, single ply works well for most things and a triple lamination brings it out to .027" for pretty close to 1mm. Laminating the two sheets with the hull formers first with some Krylon Spray Adhesive to scrap sheets of 110 pound cardstock and then shooting them over with some Krylon Preserve It to fix the colors saw these all done while the rest of the kit sheets were being printed out on my Epson Printer. Once the rest of the parts were dry, I shot them with some of the Preserve It for good measure and this morning I was able to cut out the formers and start my plan of attack. 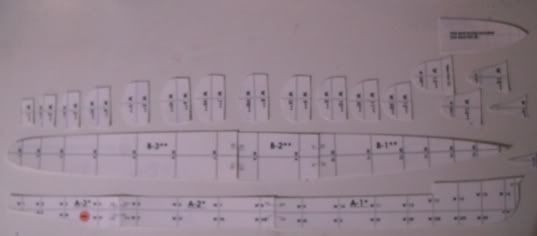
__________________
Jay Massey treadhead1952 Las Vegas, NV 
|
| Google Adsense |
|
#2
10-05-2010, 07:10 PM
|
||||
|
||||
|
Hi All,
Watching episodes of B5 and working away at fitting together the hull forms for this little project is how I have enjoyed spending my afternoon so far today. I am going to print another copy of the three piece horizontal former to glue to the bottom of the already laminated pieces in order to line up the sections that make up the lower hull Roman Numeral marked formers. The very end pieces on the bottom sections fore and aft are two sections loose and have to be precisely placed to make the hull plates fit properly so having a sheet with all the markings laid out will make it easier. I do like the idea that the ship has provision for a waterline type of hull configuration if wanted. 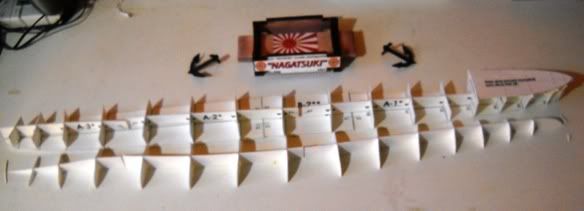 Remembering Ed's (Tin Can 871) problem with one of his hull formers being a little proud when he went to add the hull plates gives me reason to make sure that the formers are all in alignment before I go with the plates. I am also going to add sections of card board on the lower end and balsa wood in between the upper formers before adding any plates bottom or side. I do like the way that it added stability and strength to the hull of the HMS Savage model. I am also planning to piece together all of the hull plates off the model and then glue them in place as a single sheet. Seeing how well that procedure worked out on David ESP's project here, makes me want to see how it will work on a longer hull design. Scatchbuild 58 ft Western Rivers Towboat - 1/96 scale
__________________
Jay Massey treadhead1952 Las Vegas, NV
|
|
#3
10-06-2010, 05:59 AM
|
||||
|
||||
|
Hello Jay,
Your new project is off to a good start, and you have already covered a lot of ground. I'm looking forward to following your Japanese beauty. Mike
|
|
#4
10-06-2010, 05:54 PM
|
||||
|
||||
|
Thanks Michael,
I just couldn't deal with not having any IJN ships running amok on the forum.  I made a paper copy of the three sections of the horizontal formers to get the number and positions of the formers for the lower hull section and glued them to the already laminated sections. Using ordinary typing paper made sure that it wasn't going to add to the thickness too greatly but still provided me with a guide to attach the other formers in the right places. Making up the bottom half of the hull form was much easier than trying to guess where things went. 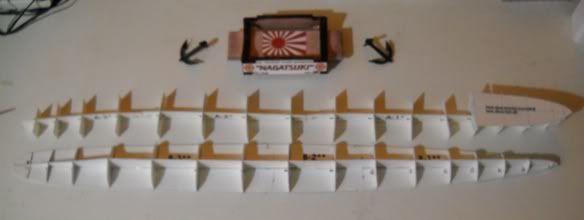 After it dried overnight I went after the top section of the formers and lined them up as good as I could so things would be ship shape for the next steps to follow. It is starting to look more like a ships' hull now. 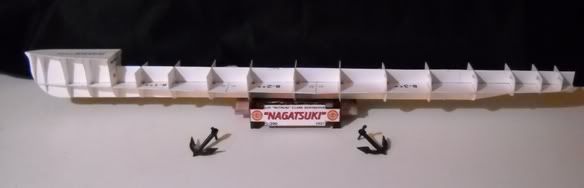 Next up will be adding the cardboard sections to the lower hull as I did with the HMS Savage. Once those are in place I will add the balsa wood pieces to the upper hull sections. This time I am going to do it before adding the decks. That will allow me to sand things down smooth to get a better area to glue those decks to. The forward deck section also has to get its' edges rounded to follow the trick little insert that is laminated up and already in place.
__________________
Jay Massey treadhead1952 Las Vegas, NV
|
|
#6
10-08-2010, 06:41 PM
|
||||
|
||||
|
Thanks Greg,
Finished overall length looks to be just under 20 inches, a bit shorter and a little narrower than my HMS Savage project. I do like the IJN destroyer designs that they came up with during the pre war and war time period. This one and the two previous were improvements over the last German WWI designs. For their time they were top of the heap as far as the rest of the world was concerned, by the time the war started they were second class and relegated to transport, patrol and escort duties while newer designs were given the Fleet assignments to travel with the big boys. After getting the hull formers all together and letting the glue dry over night I got started on adding the card and balsa wood inserts to fill the formers and make a much more solid hull. I tried this with the HMS Savage project and it came out really well as far as skinning things was concerned. As much handling with the HMS Savage as I have been doing, there isn't any divots or dents in the hull anywhere which was a problem for my previous card model ships. Since I am planning on assembling the hull plates as a unit off the ship and then applying them to the form, this method of filling the hull up should work a lot better for me. If anything, once I get the plates ready to apply, a little trimming should be the only thing I really have to deal with. Here is the start of all that stuffing and filling that I am babbling about. 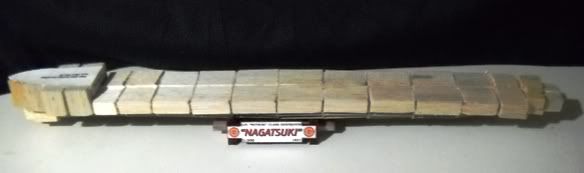 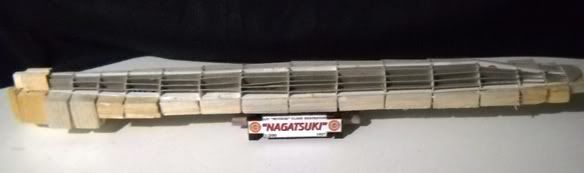
__________________
Jay Massey treadhead1952 Las Vegas, NV
|
|
#8
10-12-2010, 10:18 PM
|
||||
|
||||
|
Thanks Don,
Between the IJN and RN, I have enough to keep me busy for a while. Whittling down all that excess balsa wood and smoothing things up has started to make the very nice lines of this hull start to come along. Block sanding keeps the lines more or less straight. I did use a 1 and 1/2 inch diameter section of PVC Pipe as a form to work out the reverse curve up in the bow section. 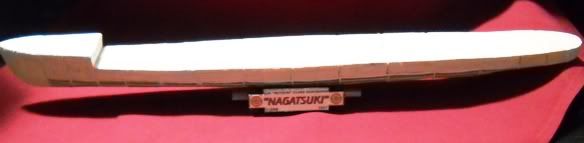 With the cardboard sections added to the bottom of the hull in between the formers to strengthen them up and give some added gluing area for the hull plates, smoothing them down with the sand paper makes things look a lot better. All this work is more to keep my ham handed mitts from crushing the hull as I handle it to add the rest of the parts than for anything else. I will also admit to liking the added weight that it gives the finished model.  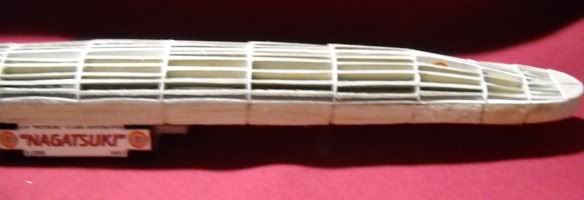 Now it is on to working on the hull bottom plates. As I stated before, I will be making these up as a solid single piece then adding them to the hull form. This is more of an experiment to see if this doesn't make this task a little easier than adding individual plates one at a time.
__________________
Jay Massey treadhead1952 Las Vegas, NV
|
|
#9
10-13-2010, 08:46 PM
|
||||
|
||||
|
Hi All,
Working on my model projects in the living room of my apartment sometimes has drawbacks. Most of the time it isn't a problem, sometimes when company comes over, what ever I am working on is right there for one and all to see. Today I was having a good old time and a nice day off working away at the Nagatsuki, the Kawanishi Rex and HMS Savage. One of my Kayak fishing buddies wanted to borrow an ice chest and came over cause he knew that I was holed up working on stuff. When he spotted the ongoing projects he asked what it would take to get me to make him a copy of the IJN Nagatsuki. Discussing things we came up with a workable trade and he expressed just what he wanted in the way of a model. He wanted a waterline hull version on the water rather than the full hull type. So now I have a couple of IJN Nagatsuki models on the bench at the same time. 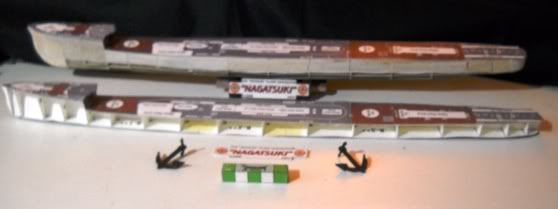
__________________
Jay Massey treadhead1952 Las Vegas, NV
|
|
#10
10-14-2010, 09:38 PM
|
||||
|
||||
|
Hi All,
I got to spend a fun day working on the Nagatsuki twins. I wanted to keep them both up to the same level of accomplishment but now that I have gotten on to putting up the deck houses and bridge structure, that sort of fell by the wayside. I did manage to get all the parts cut out for the second ships' forward structure. That will be what I am planning on working on after I get out of the salt mines tomorrow. I did manage to get the hull bottom plates assembled in one sheet with the exception of the two piece forward bow section plates and the fan tail plate. This was mostly because I wasn't sure how well they would fit up to a single long plate section. I did have to cut down the long bit to fit things up on the bow, but that was to be expected after seeing what had happened to Tin Cans' build in this same area. The side plates went on with hardly any problems, I did have to trim the fan tail sections down just a little on the back top edges so that they would join together evenly and fit up to the sides towards their forward edges. Adding the base parts for the various deck structures was easy enough. The way the structures are built up using thick base and roof parts is pretty common place and a good way to make up things quickly and easily. I am planning on opening up the bridge windows rather than just have solid light colored panels. The way things are constructed with the open back end the reference sources that I have available, I should be able to add a few things to make it look reasonably well detailed. 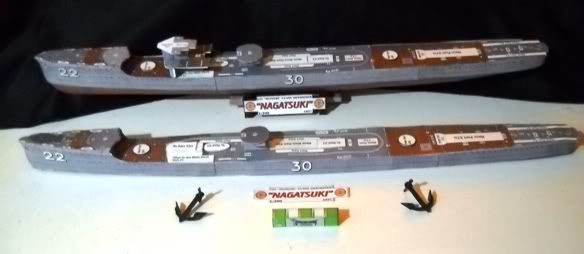 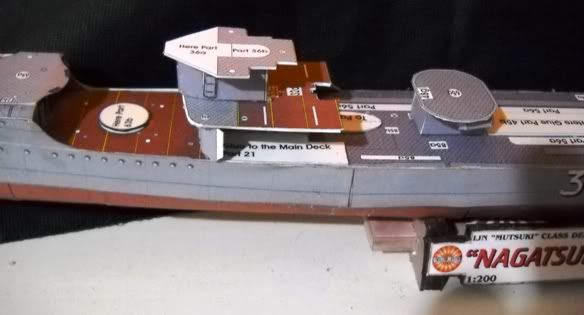
__________________
Jay Massey treadhead1952 Las Vegas, NV
|
| Google Adsense |
 |
|
|


 Linear Mode

