


|
|
|
#1
 04-23-2009, 11:56 AM
|
||||
|
||||
|
HMS Cossack Destroyer Micromodel
I cut out part for this last night, and today I assembeld much of the ship. This model has many straight bends and things fit well. I ruin only the second chimney pipe becasue I color the inside black with a Sharpie and it bleed through. I had make a copy that is a little bit different in color, but I made it closer with color pencils.
So this is HMS Cossack by Micromodel. Model is approx 1cm width by 11.5cm length. So it is not very big. But it has not very many "small" parts compare to the Alder's Gate. But I think I must make some things from "bristle" and matchstick... like antenna and cannon. I let pictures show for themselves the work involved... The boat is one large piece. I cut the tab off the deck part (see next picture) and make new tabs. 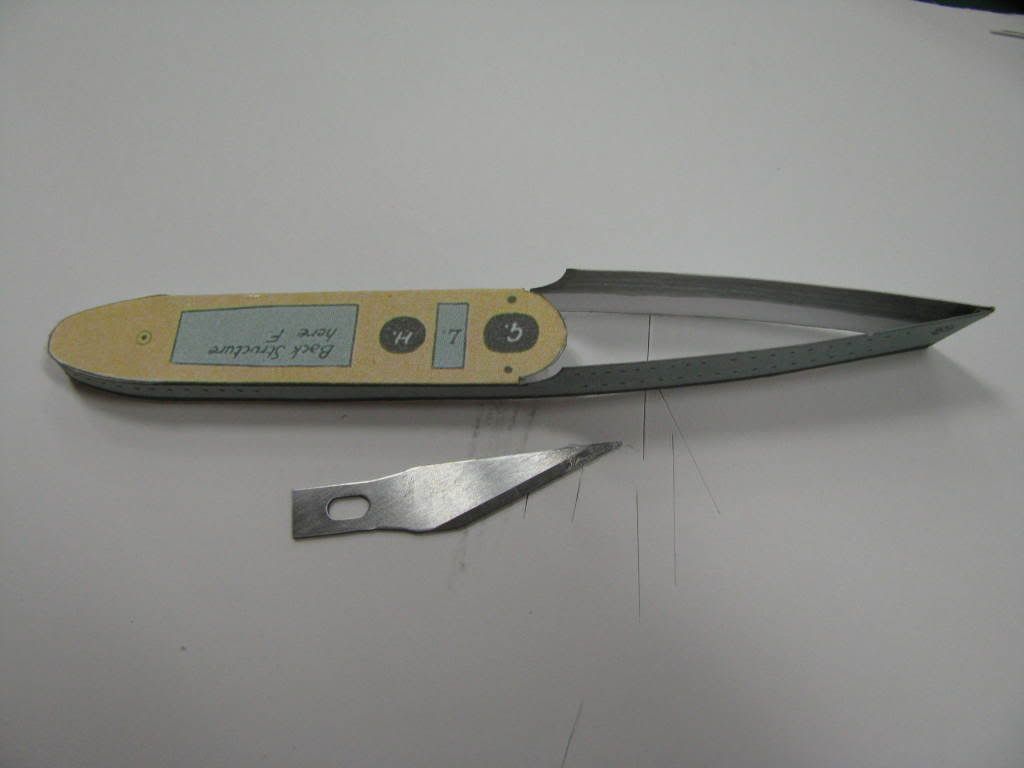 I cut the printed tab off the deck part and make better ones. You can see there is not much instruction! 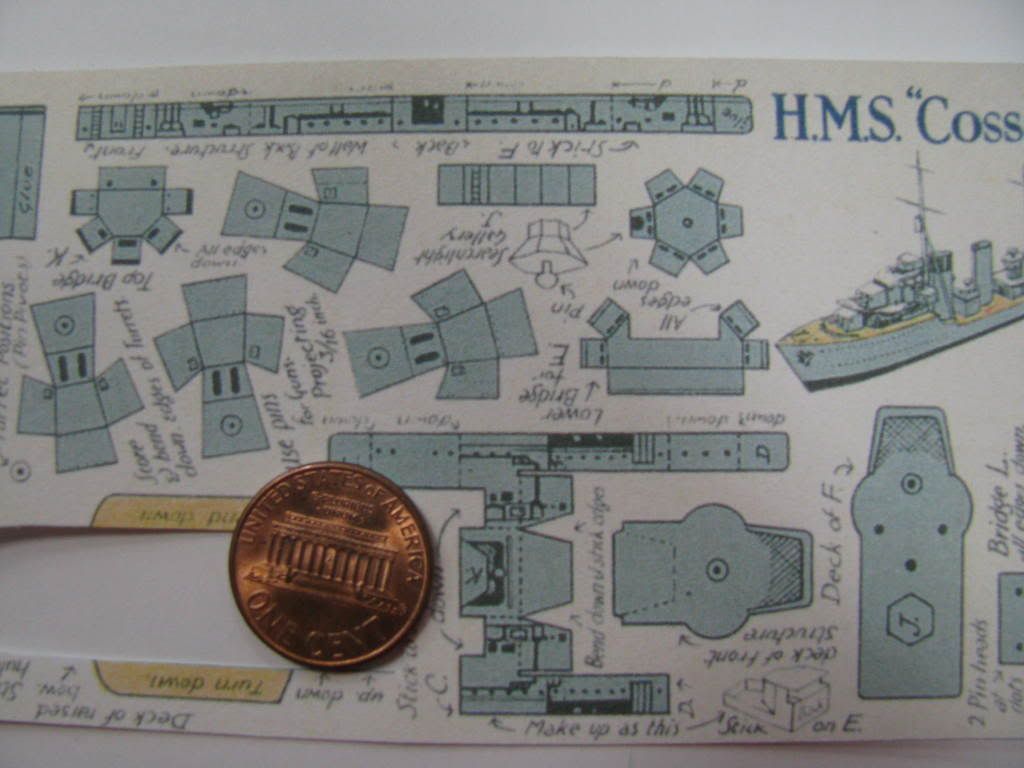 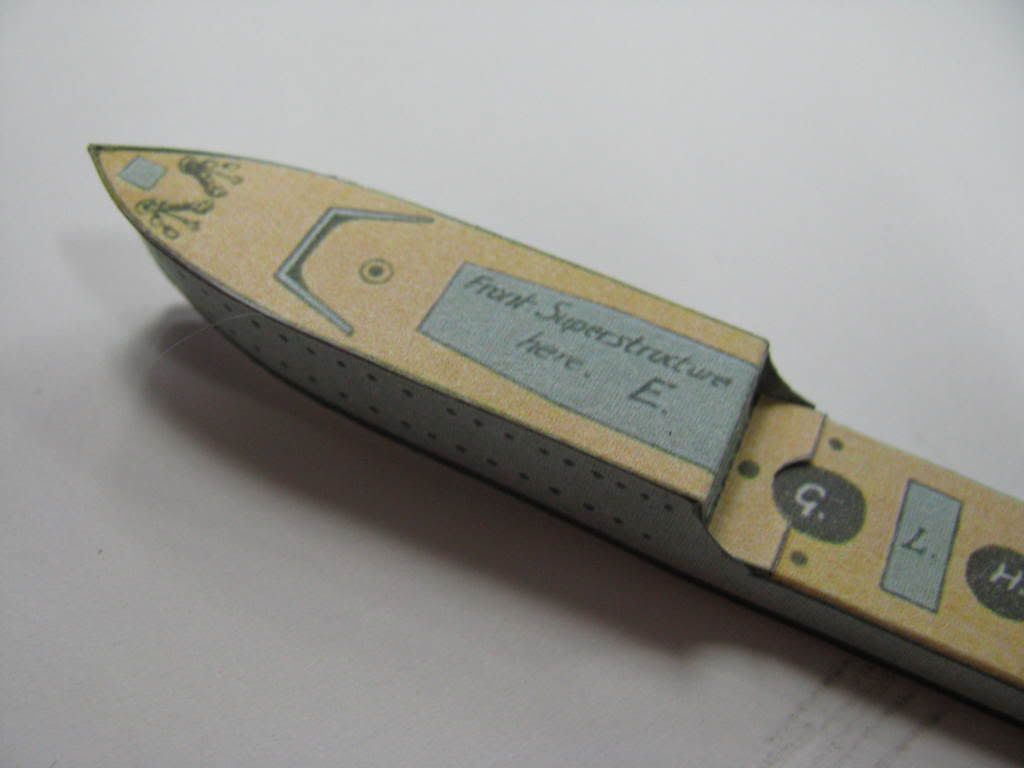 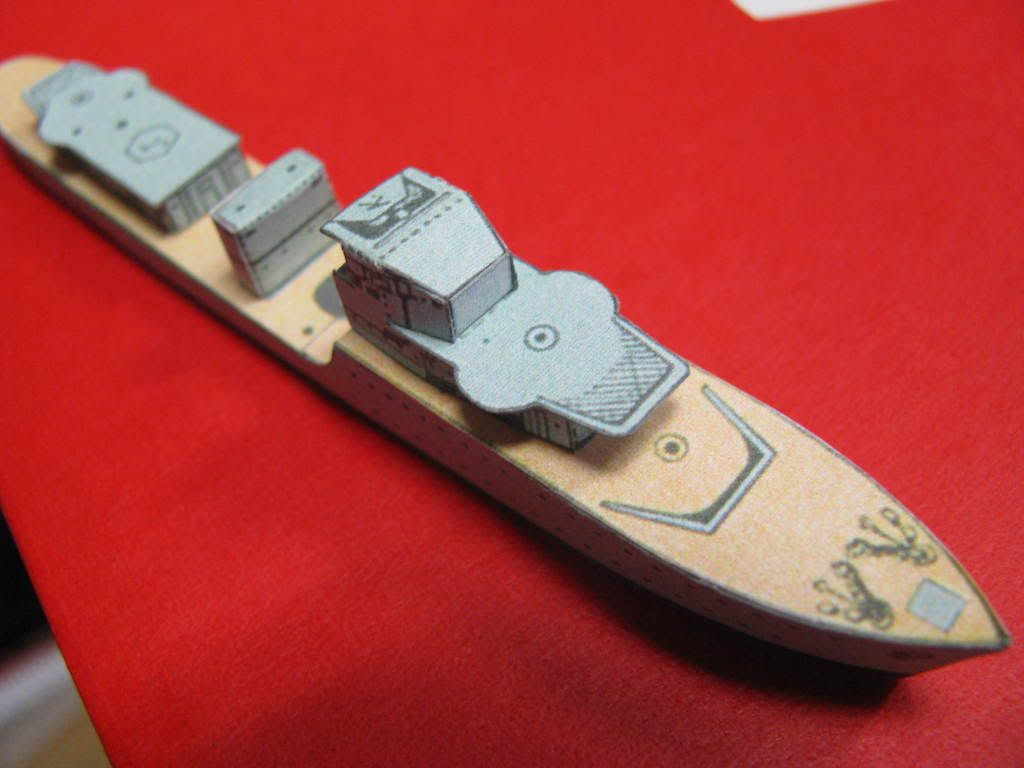 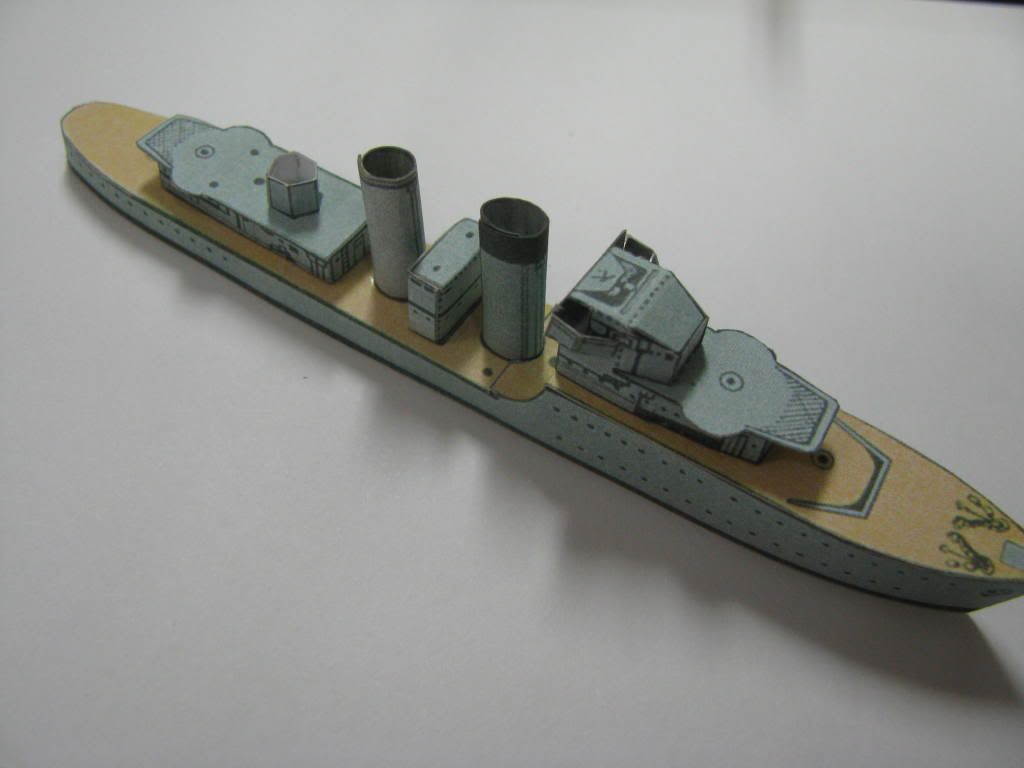 Im not sure how to describe it, but in the red photo, the vertical piece above where the tower will go, behind the mesh detail, in the model it is just hollow there. I assume they believe the gun tower will cover the hole. But I fill it in just to make sure. 
|
| Google Adsense |
|
#4
04-23-2009, 12:57 PM
|
||||
|
||||
|
Thank you. I looked up HMS Cossack on Wikipedia and it was 111.2 meter long. So it would make the model approx 1/950 scale if I divide correctly.
I like the small models very much. They are interesting to handle. Here is the real boat http://en.wikipedia.org/wiki/HMS_Cossack_(F03) named after Cossack people of the Ukraine!! Ship was sunk by U-Boat.
|
|
#5
04-23-2009, 02:16 PM
|
||||
|
||||
|
Cossack was a very famous Royal Navy ship, primarily for its roll in intercepting the German tanker Altmark and freeing British prisoners in February 1940.
And the "Tribal" class destroyers, of which Cossack was one, were very good-looking ships. And your model of the Cossack is very good looking, too! Don
|
| Google Adsense |
|
#6
04-23-2009, 02:27 PM
|
||||
|
||||
|
This model build very well even with much building on some of the small structures. It is hard to know where some parts bend, though. I have scored everything, mostly on inside, using burnishing ball tool and that helps. Also, I cut or re-make some of the printed tabs so I can make parts lie more flat rather than overlap. Or I add tabs where there are none. I glued also some wood inside the hull to support the edge of the deck and the curve at the back. Also, the build-up platforms have some wood inside to support the deck that goes on top. I have to make all the antennae out of wood or wire...
|
|
#7
04-23-2009, 04:18 PM
|
||||
|
||||
|
NIce job on a tiny ship model. Adding tabs on something that small surely helps keeping things straight and in line. Looking forward to seeing the completed project.
__________________
Jay Massey treadhead1952 Las Vegas, NV
|
|
#8
04-24-2009, 04:42 AM
|
||||
|
||||
|
Your work on this tiny model is wonderful!
I cannot understand how the cuts are so clean and the glueing - well, it doesn't look like there is any glue! Even with fresh blades, close-up photos at this size usually show some fuzz.
|
|
#9
04-24-2009, 08:10 AM
|
||||
|
||||
|
Thank you very much for the kind words. For cutting I use the small Fiskars Scissors I had shown previously. On the small models, unless it is a very large part, most cuts are only a couple of cm's long and it is not hard to stay straight. Plus these are hand drawn model parts so they vary some any way. The scissors cut VERY crisp. I use also X-Acto #11 knife and the craft blade knife I show also in photo before. To make cut clean also, I try to cut ONCE if I am using a kife. Not to go back over the cut again and again unless it is very thick card. I use not too many blades. I think I use perhaps two blades per one large model or two small models from one blade. Unless I break the tip.
To apply glue I use some special tecniques. But it is simple and no big secret. I use plastic tops from water and soda bottle to put glue inside. Then I use tooth pick to transfer glue to model. With Clear glue like Devcon and Duco it dry very quickly so you can only transfer glue once or twice. You can also take those clear glues and reduce with Acetone/Nail Polish Remover and apply with a paint brush. But often I just squeeze glue from the tube onto the inside of the part and spread it with my finger to the very edge. I can have good control with my finger and it isn't messy. I trust my hand and finger skills better than using a tooth pick. Lala's Tool Set Last edited by Keds_Girl_Lala; 04-24-2009 at 08:14 AM.
|
 |
| Thread Tools | |
| Display Modes | |
|
|


 Linear Mode

