


|
|
|
#21
 03-19-2013, 02:33 PM
|
||||
|
||||
|
Thank's Jagolden.
Yes it does, feels more complete. I have given it some thought. I will look at the paper ones in the kit, but will probably go for wire or styrene scratch built. Jim 
|
|
#22
03-21-2013, 07:55 PM
|
||||
|
||||
|
Welcome everyone, tonight's update.
Have been working on the side ballast tanks the last couple of days. Got the skins shaped and assembled. Started installing the formers, but kept running into joints that would separate and would have to re-glue. The left side is finished and am working on the right tank. Here's hoping that I will be able to start attaching these to the hull tomorrow. ") Here are some progress shots for tonight. 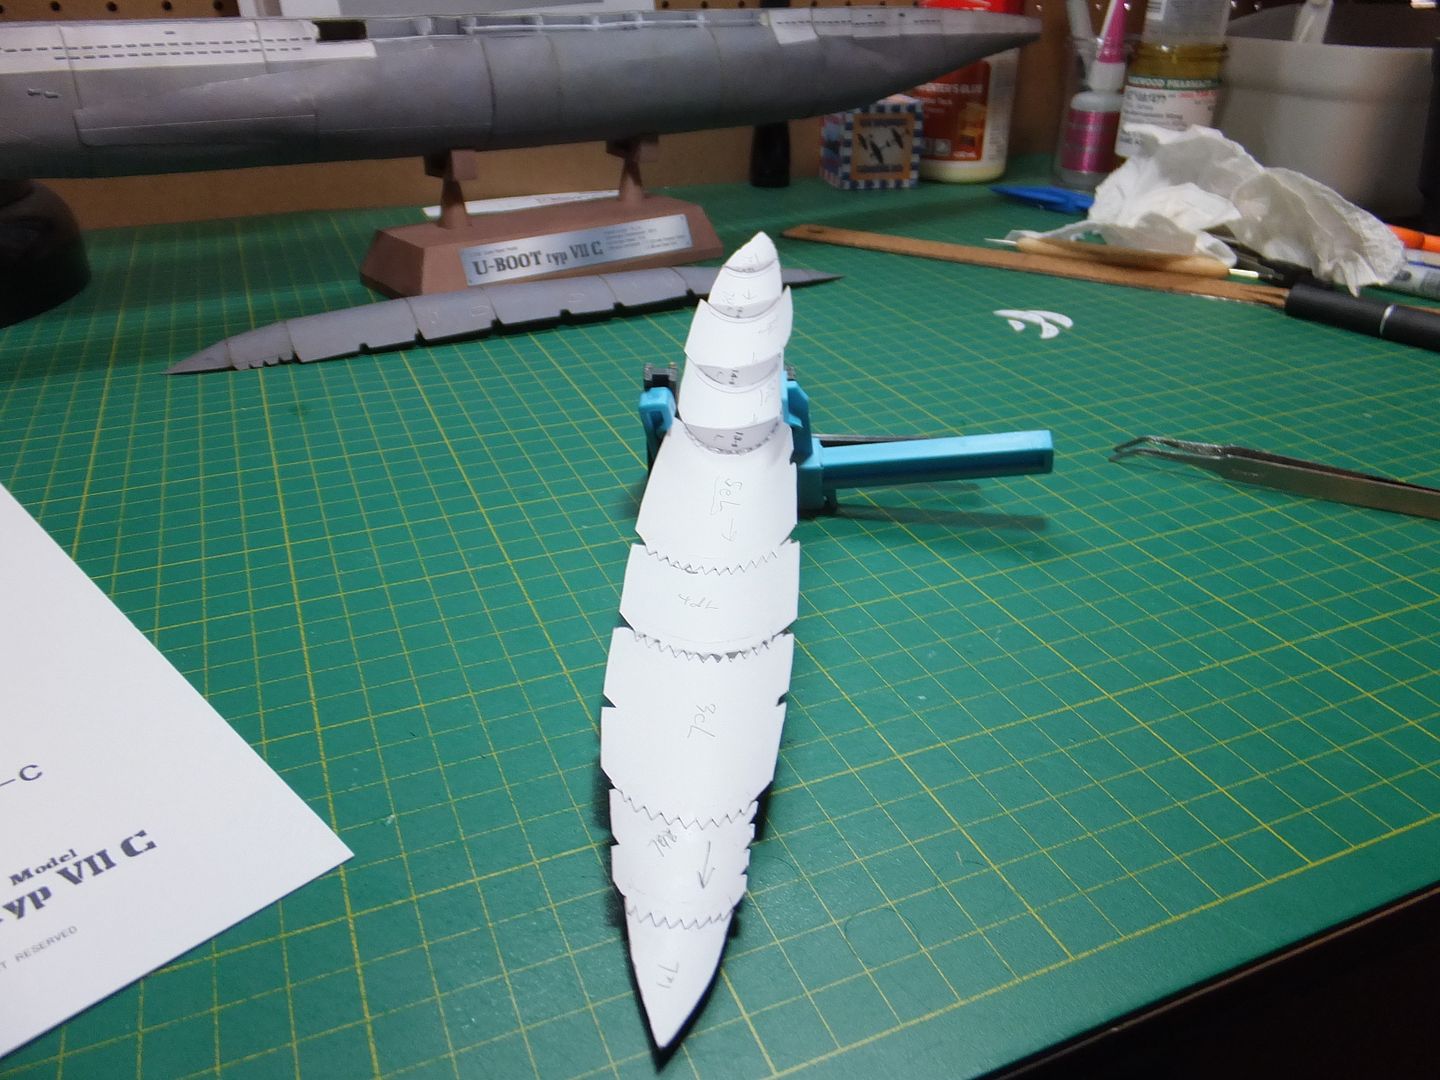 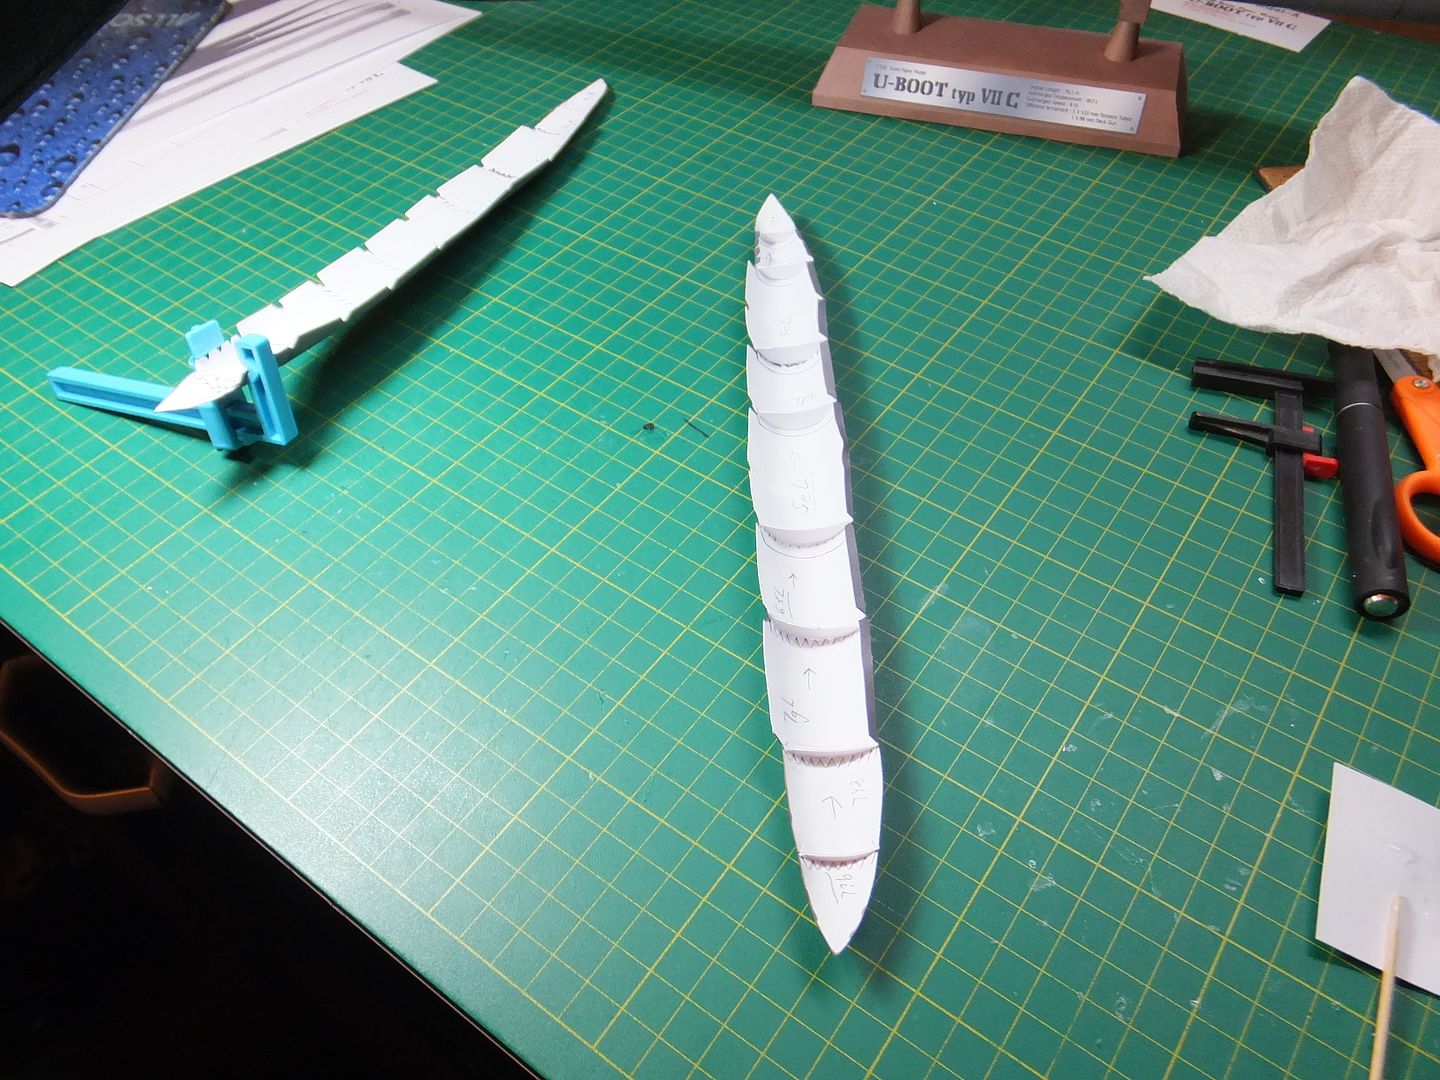  I hope you are enjoying my build. Jim
|
|
#23
03-24-2013, 07:25 PM
|
||||
|
||||
|
Tonight's update.
The saddle tanks are installed. Those things were not easy. It was not until the second one that I was starting to get a technique into installing them. When ever I build another one, I will have a better handle on it. Here only the top is glued in place and waiting to dry. 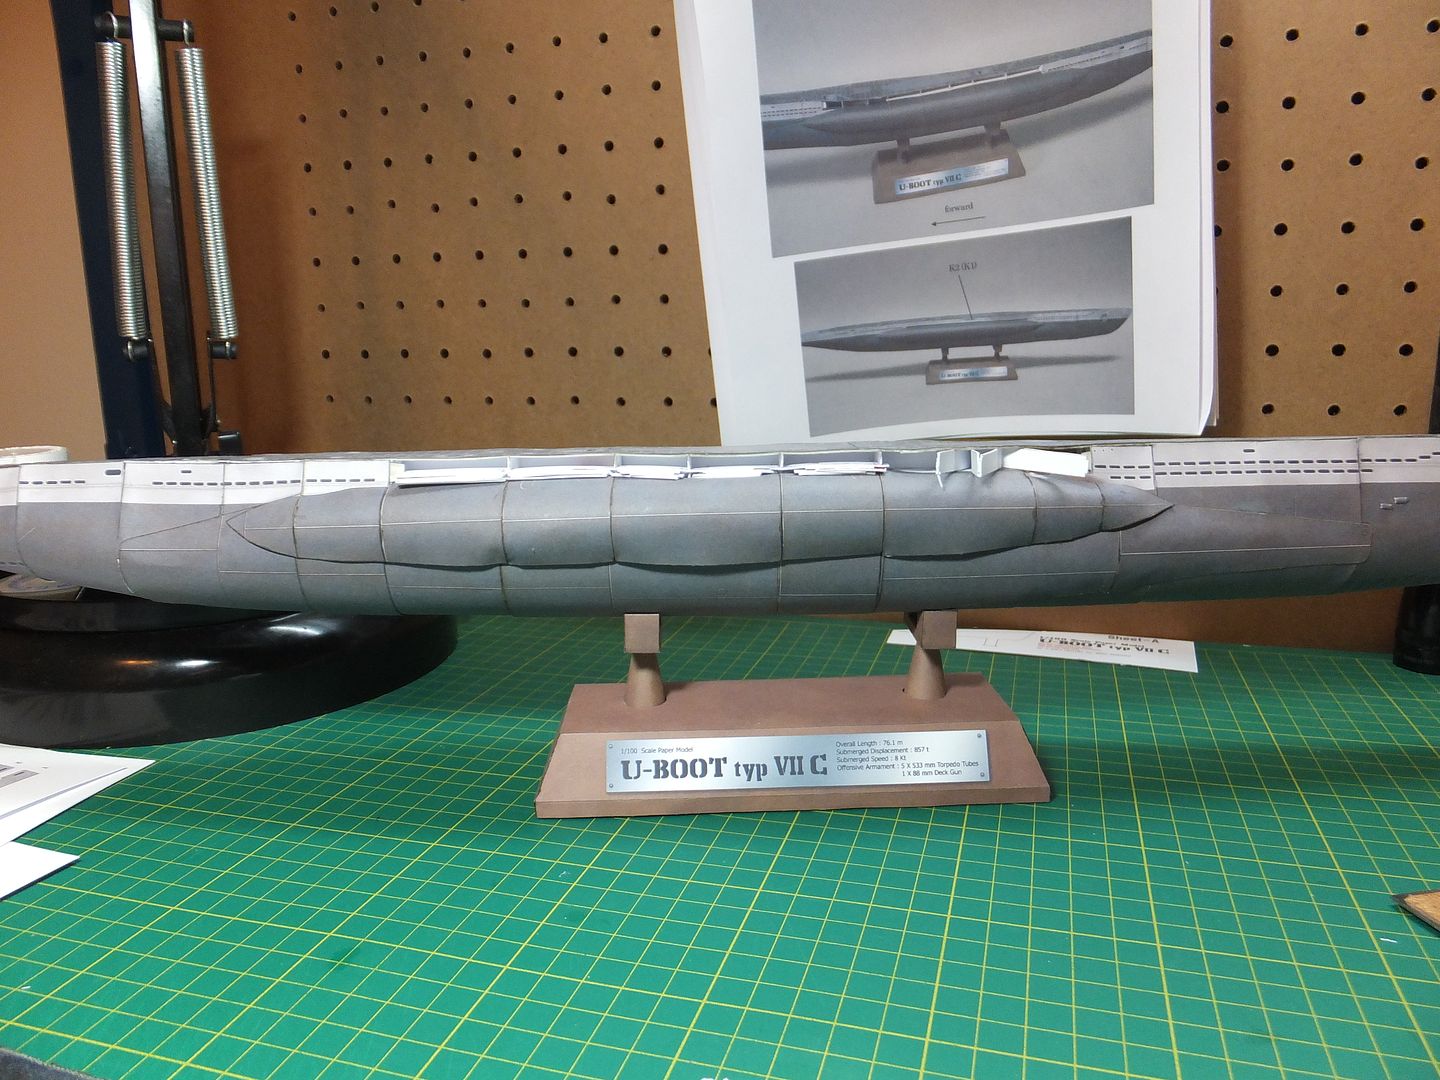 The bottom of the 2nd tank is glued but have some points to glue up after the rest cures. 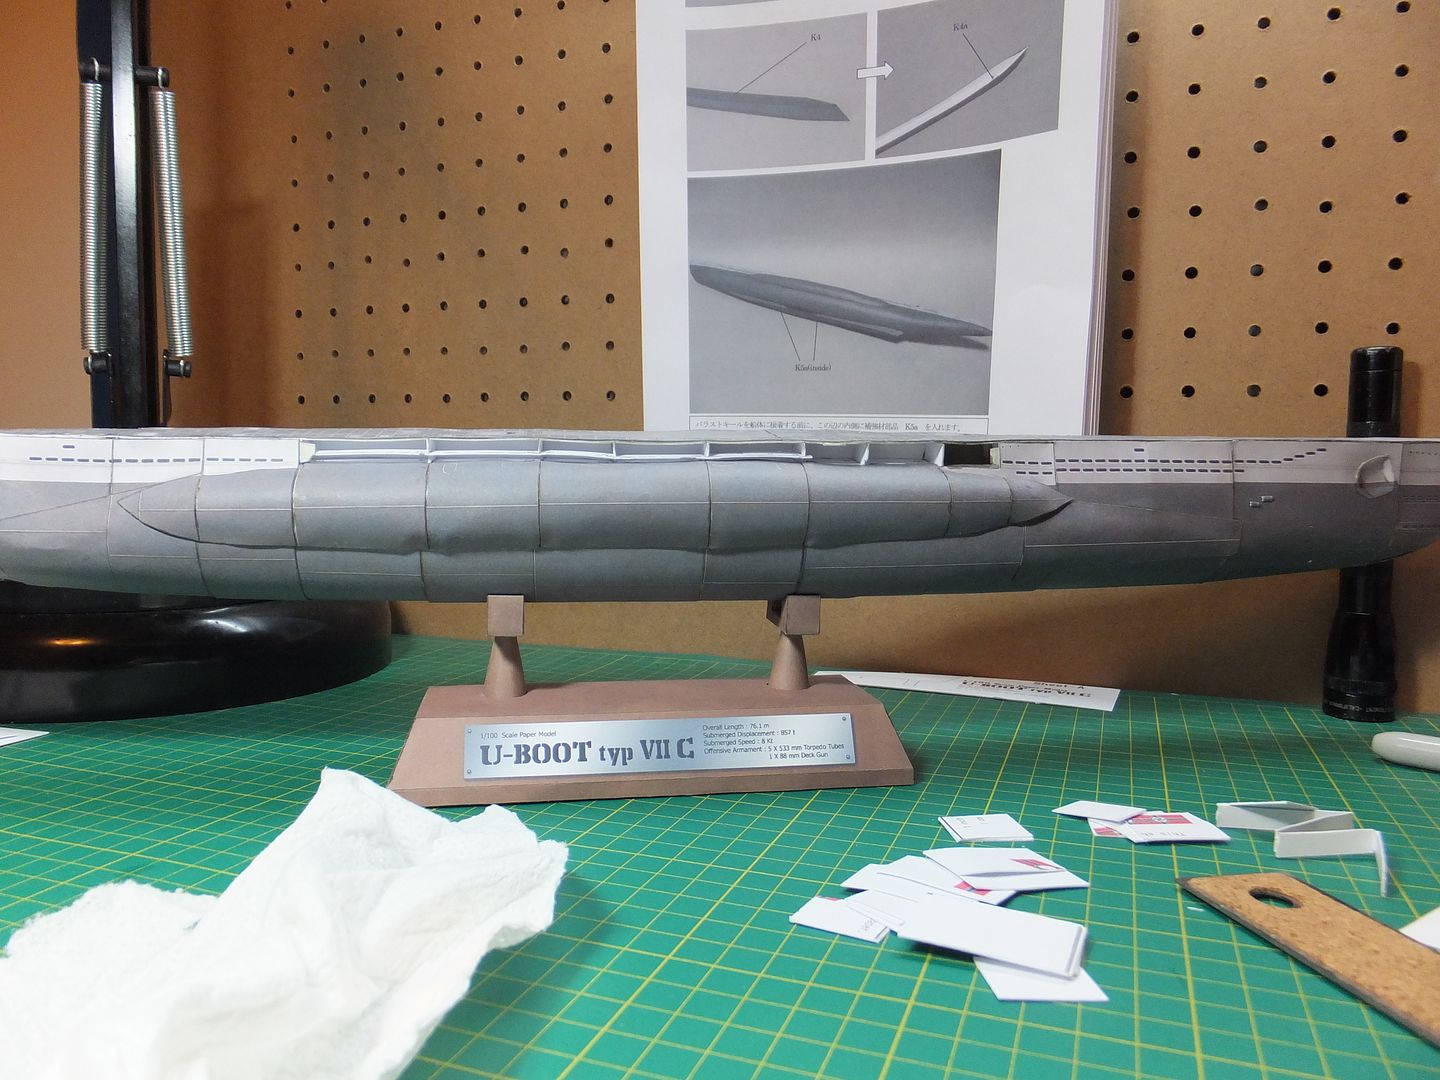 Today started the keel. It went together quite well. The keel was in 3 pieces and when joining to the centre, had to add joining strips to keep the joint flat and even. It fastened to the hull fairly easily. One thing I noticed was that the centre of the keel thins out leaving a gap between the keel and the hull. I'm not sure it's purpose, will have to research the reasoning for this. Keel installed. 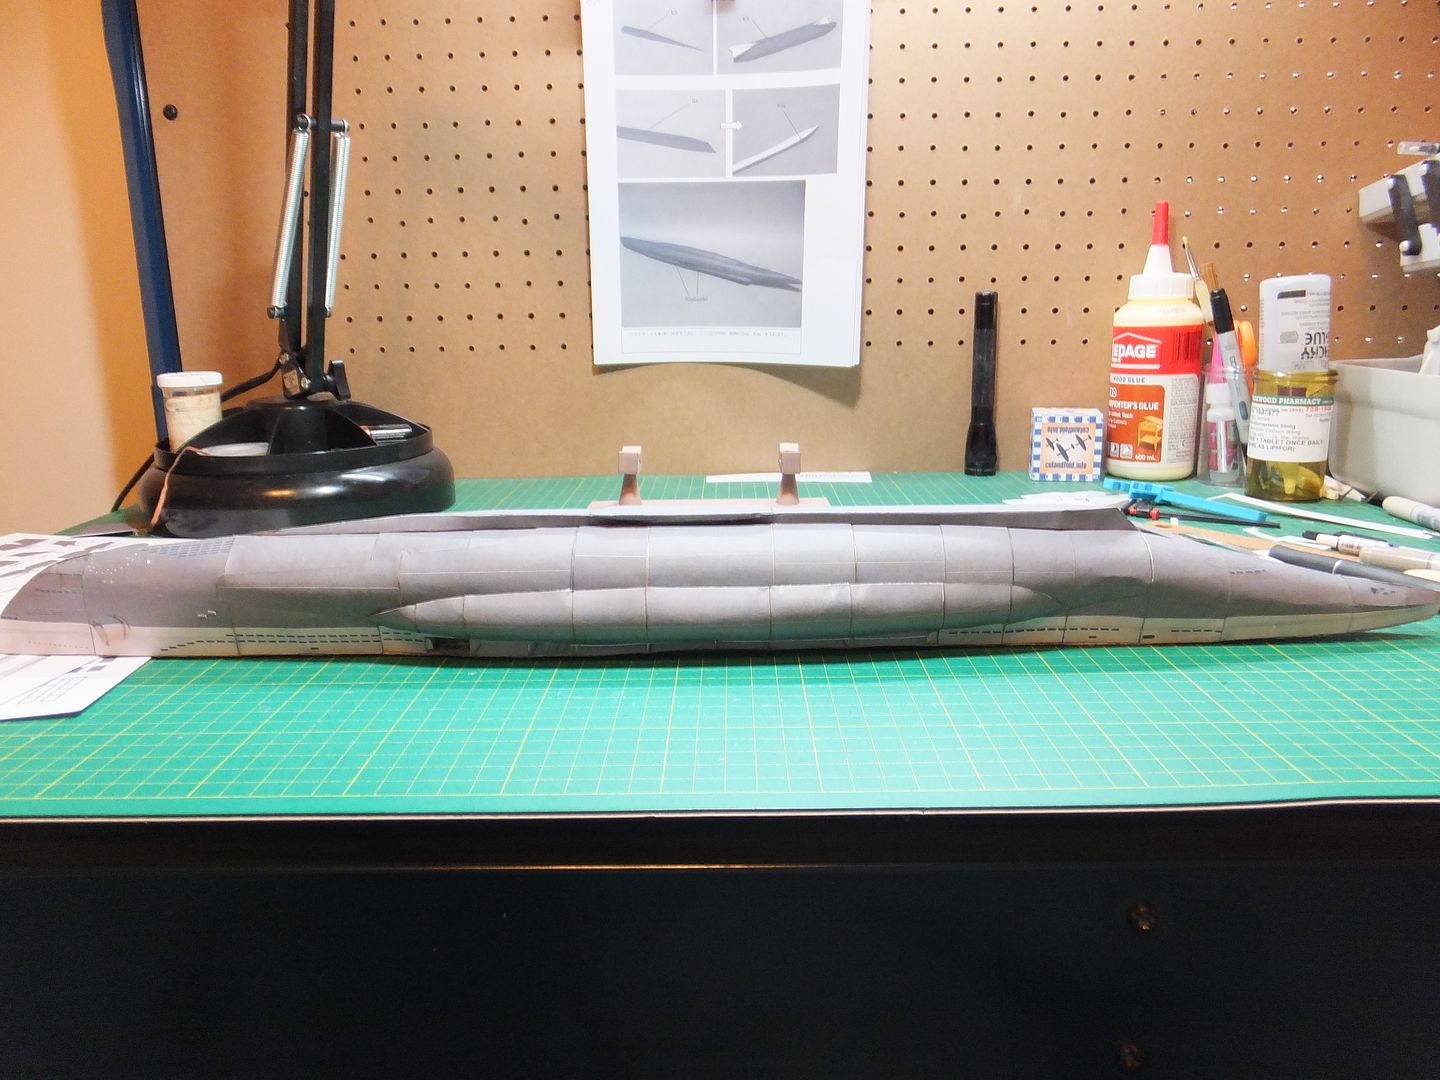 Side view. 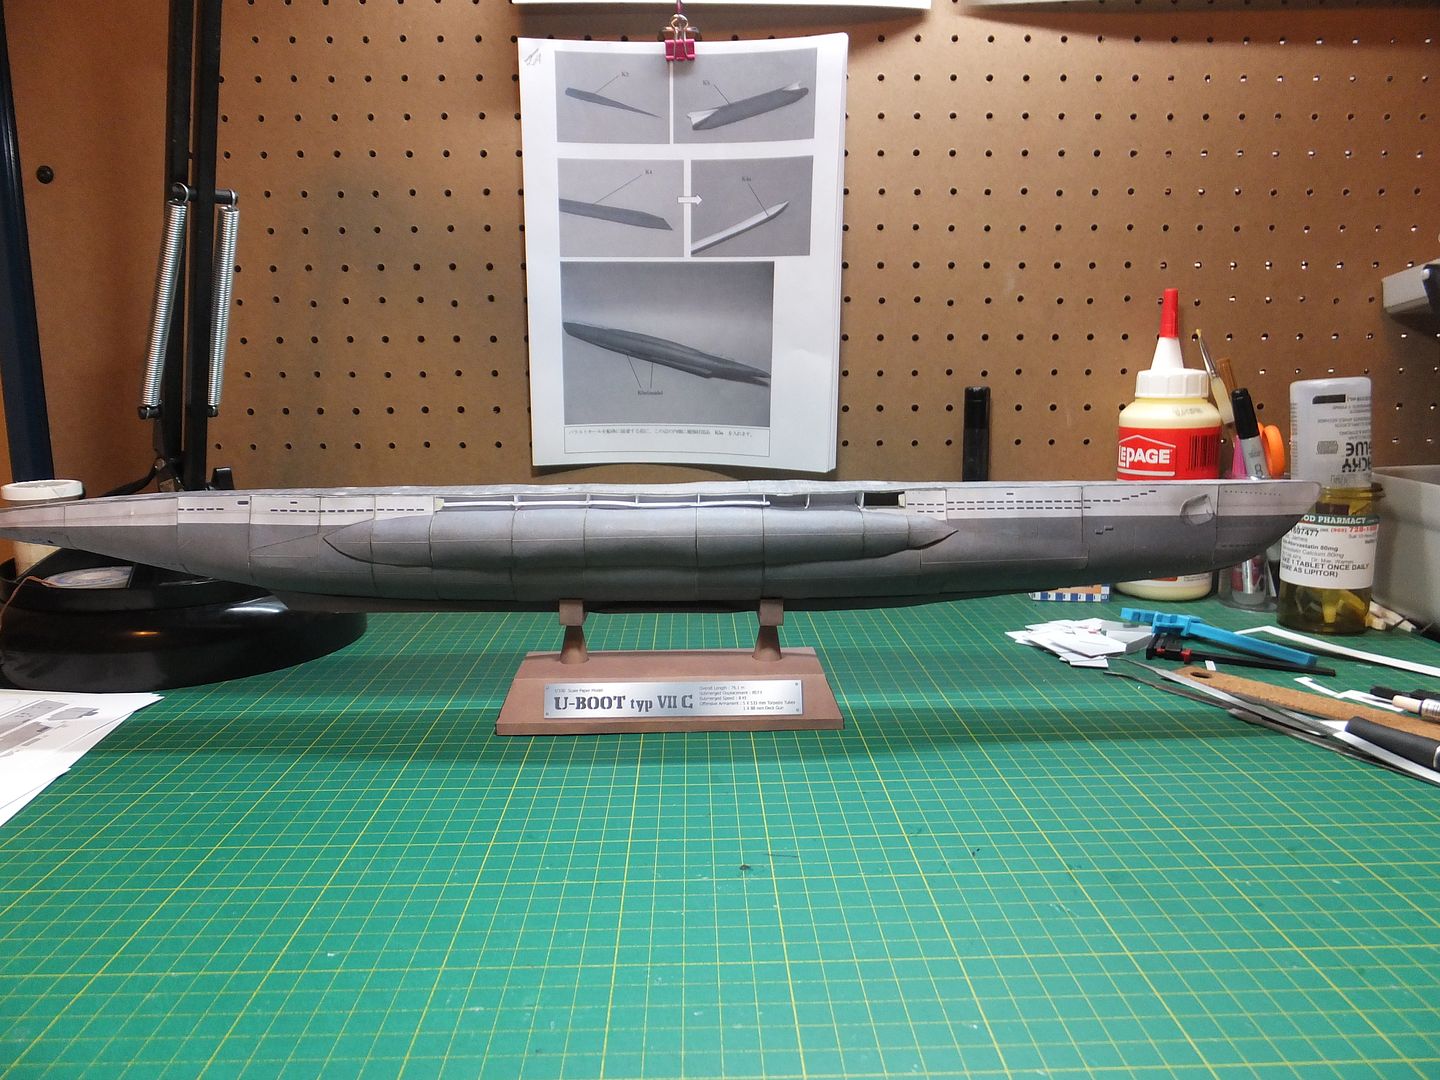 Forward on view as she stands tonight. 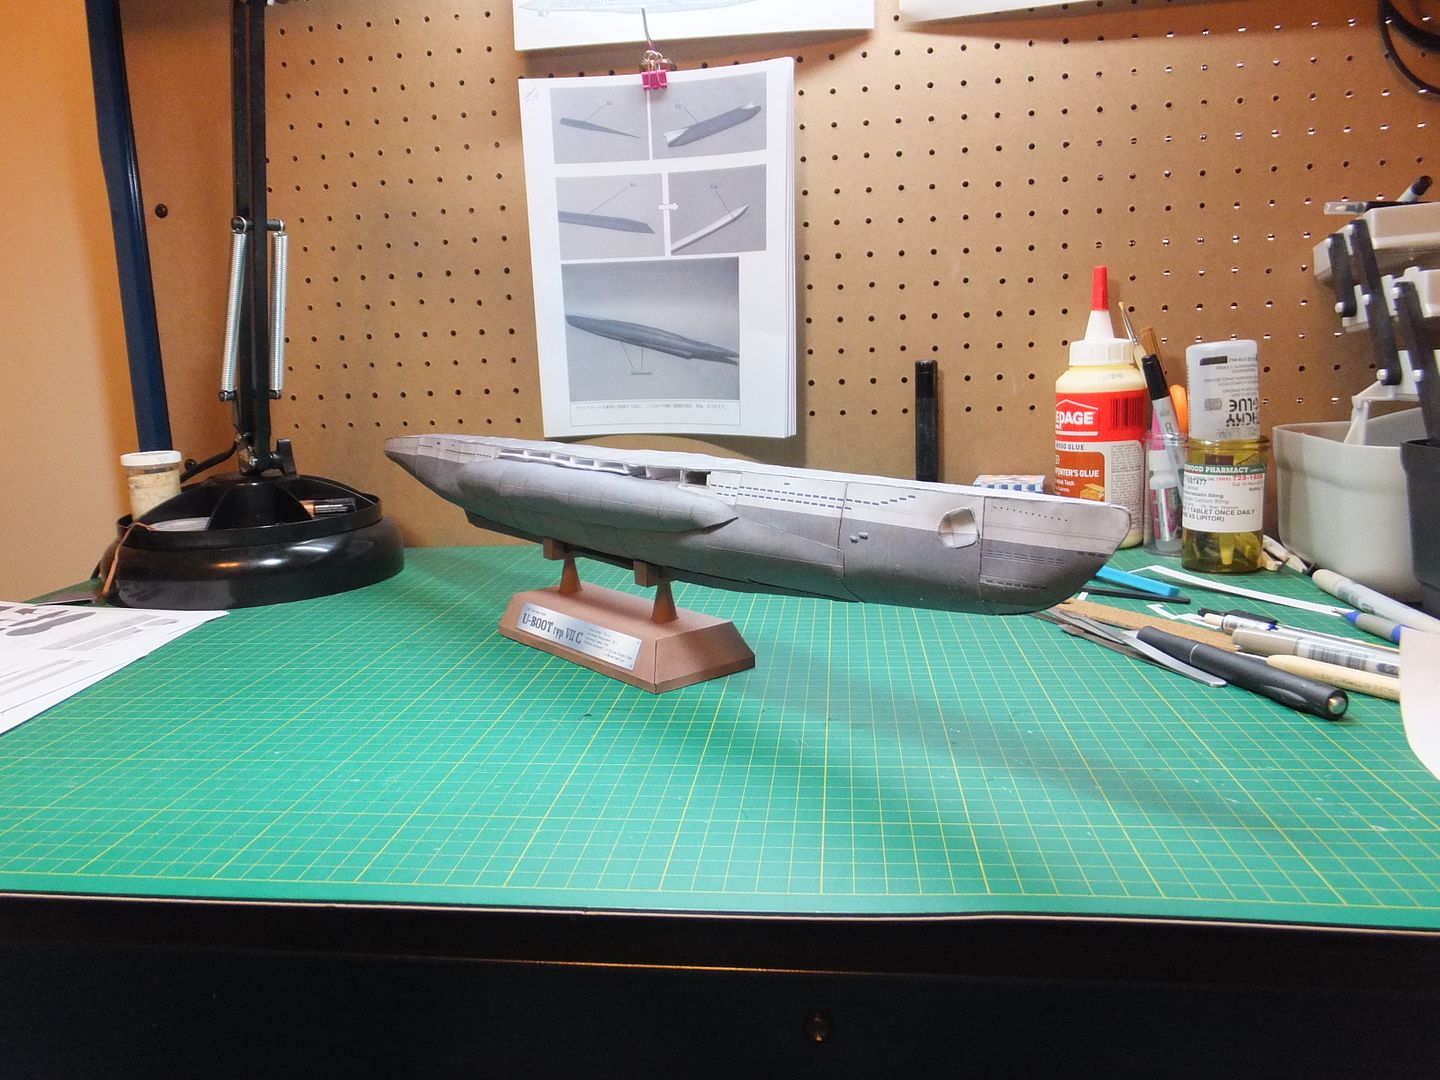 Next up is to start the superstructure for the prop shafts, rudder and rear dive planes. Have a good evening. Jim
|
|
#24
03-25-2013, 06:02 AM
|
||||
|
||||
|
Looking good, Jim. Saddle tanks can be a bear.
Interesting about the keel. That's the next thing I'll be tackling on kooklits type VIi. His version has some very funky folds to it. Looking forward to more.
__________________
Currently building Heinkel Models/Ron Miller Authentic Nautilus.
|
|
#25
03-25-2013, 07:16 AM
|
||||
|
||||
|
wow, shes really coming together!
I don't remember anything too funky with the keel piece on kooklik's u-boat? But then again, it was quite a long time ago. I looked to see if I had photos of that assembly, but I don't. ... yes, the "side bulgy things" as I called them were a challenge. Although this sub has much fewer parts in those saddle tanks. Not sure if thats a good thing or not?...since the extra internal structure on Kooklik's model, does help to keep the shape. But you still have to deal with the edges of the tanks and how they need to be glued against the hull. I did the same as you...glued small sections at a time until I had glued the length of the tanks. I found the biggest trick to assembling the saddle tanks is preforming some sort of shape into parts (before assembly). The more you get a part formed and get it to hold its form, the better the assembly will go. I remember adding some "straps" to the inside of the tanks to keep some areas from flaring out badly. Heres my assembly of the kooklik "side bulgy things": Attack Tiger U-Boat Build - Kooklik Repaint
__________________
SUPPORT ME PLEASE: PaperModelShop Or, my models at ecardmodels: Dave'sCardCreations
|
| Google Adsense |
|
#26
03-25-2013, 08:03 AM
|
||||
|
||||
|
Thank you Jagolden and Dave.
Yes Dave you are right. The tanks needed more curve and support. Their internal structure was minimal. If I was to do it again I would increase the internal structure to help it keep it's shape and be more true. Not that they still would not be a fight, but would be easier to handle. Yours came out real nice. Jim
|
|
#27
03-26-2013, 06:34 PM
|
||||
|
||||
|
Hello Time for an update.
Been working the last few days on the lower stern section. Have vertical plane installed and the exit ports for the prop shafts.  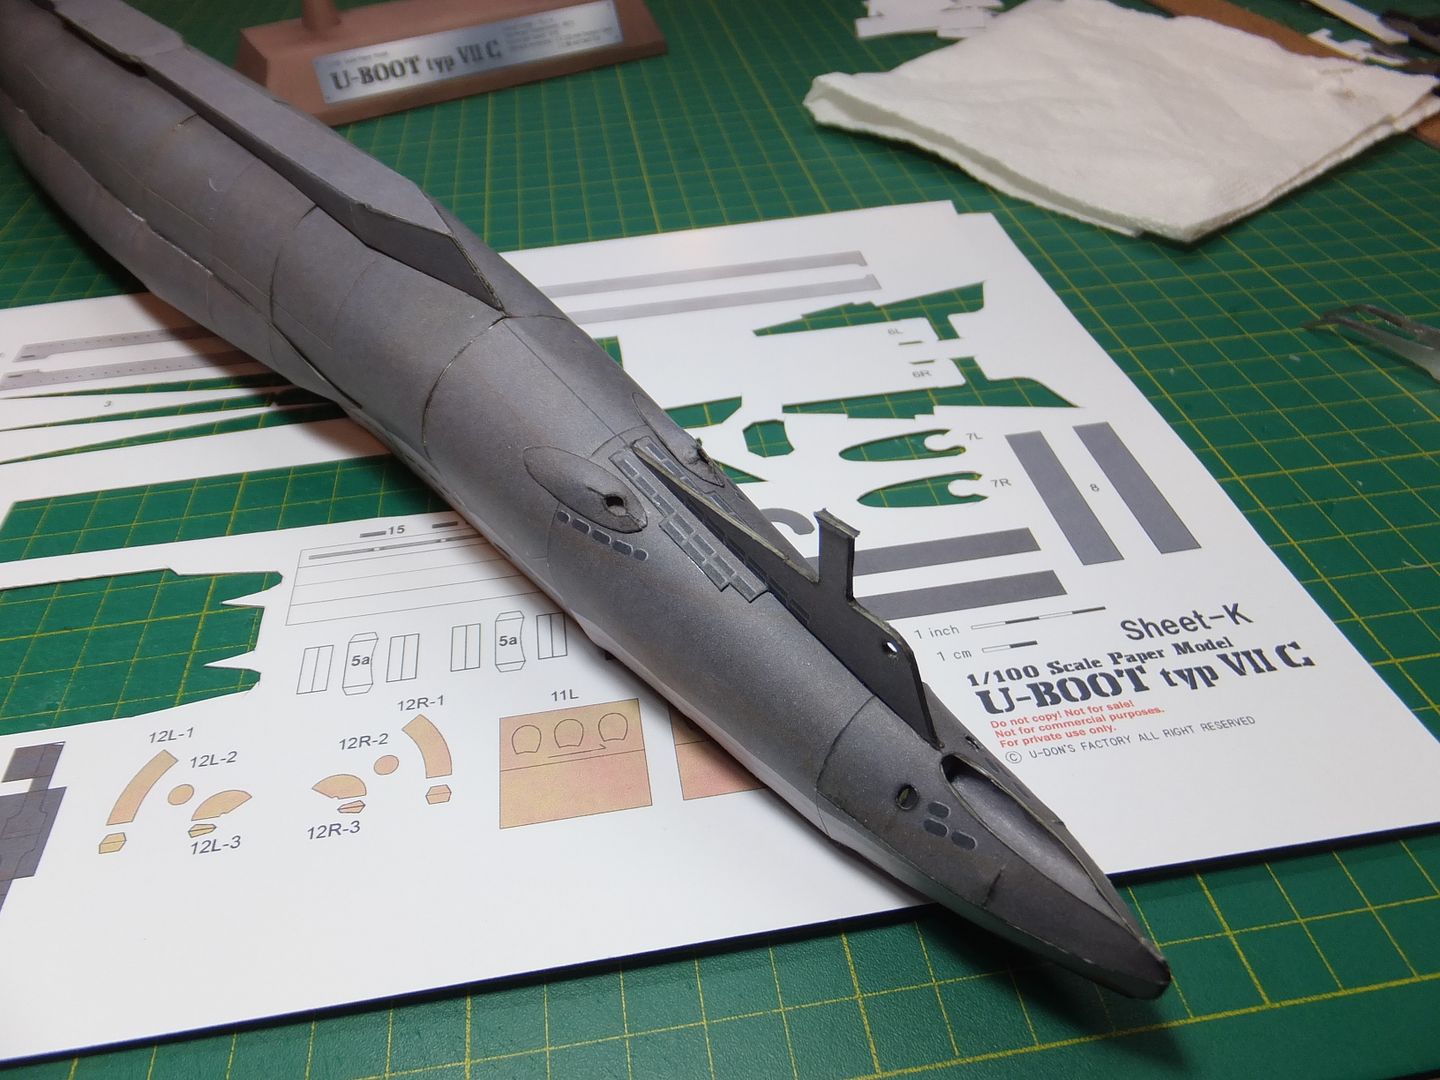 Then went to work on rolling the prop shafts and their support.  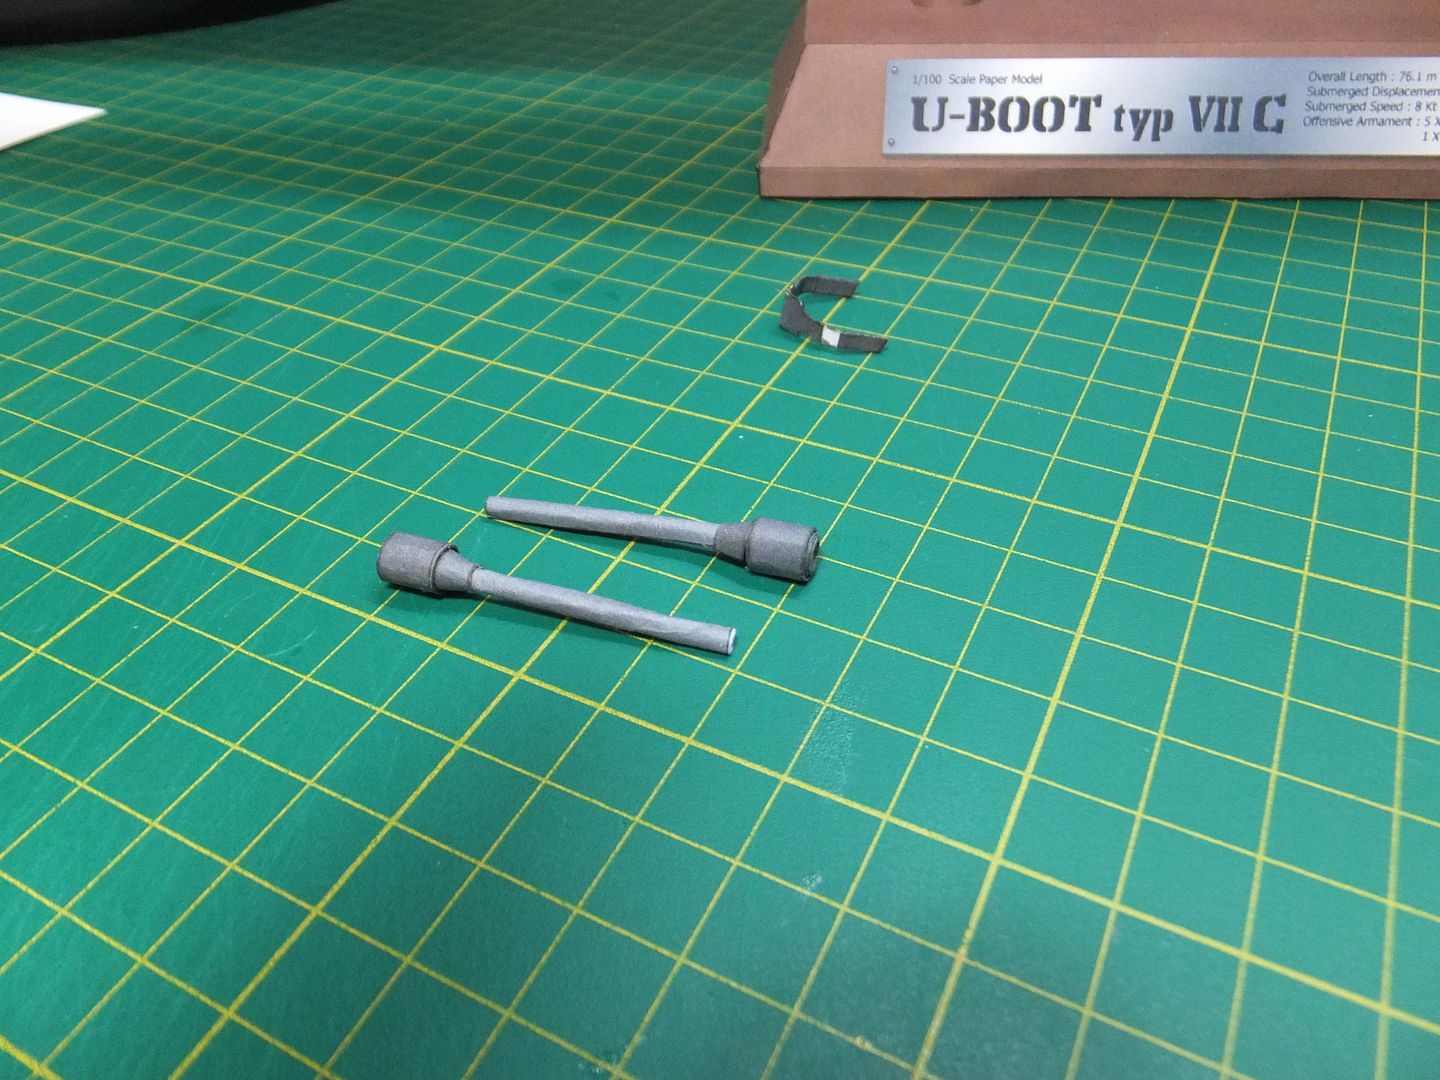 Here those pieces are attached. 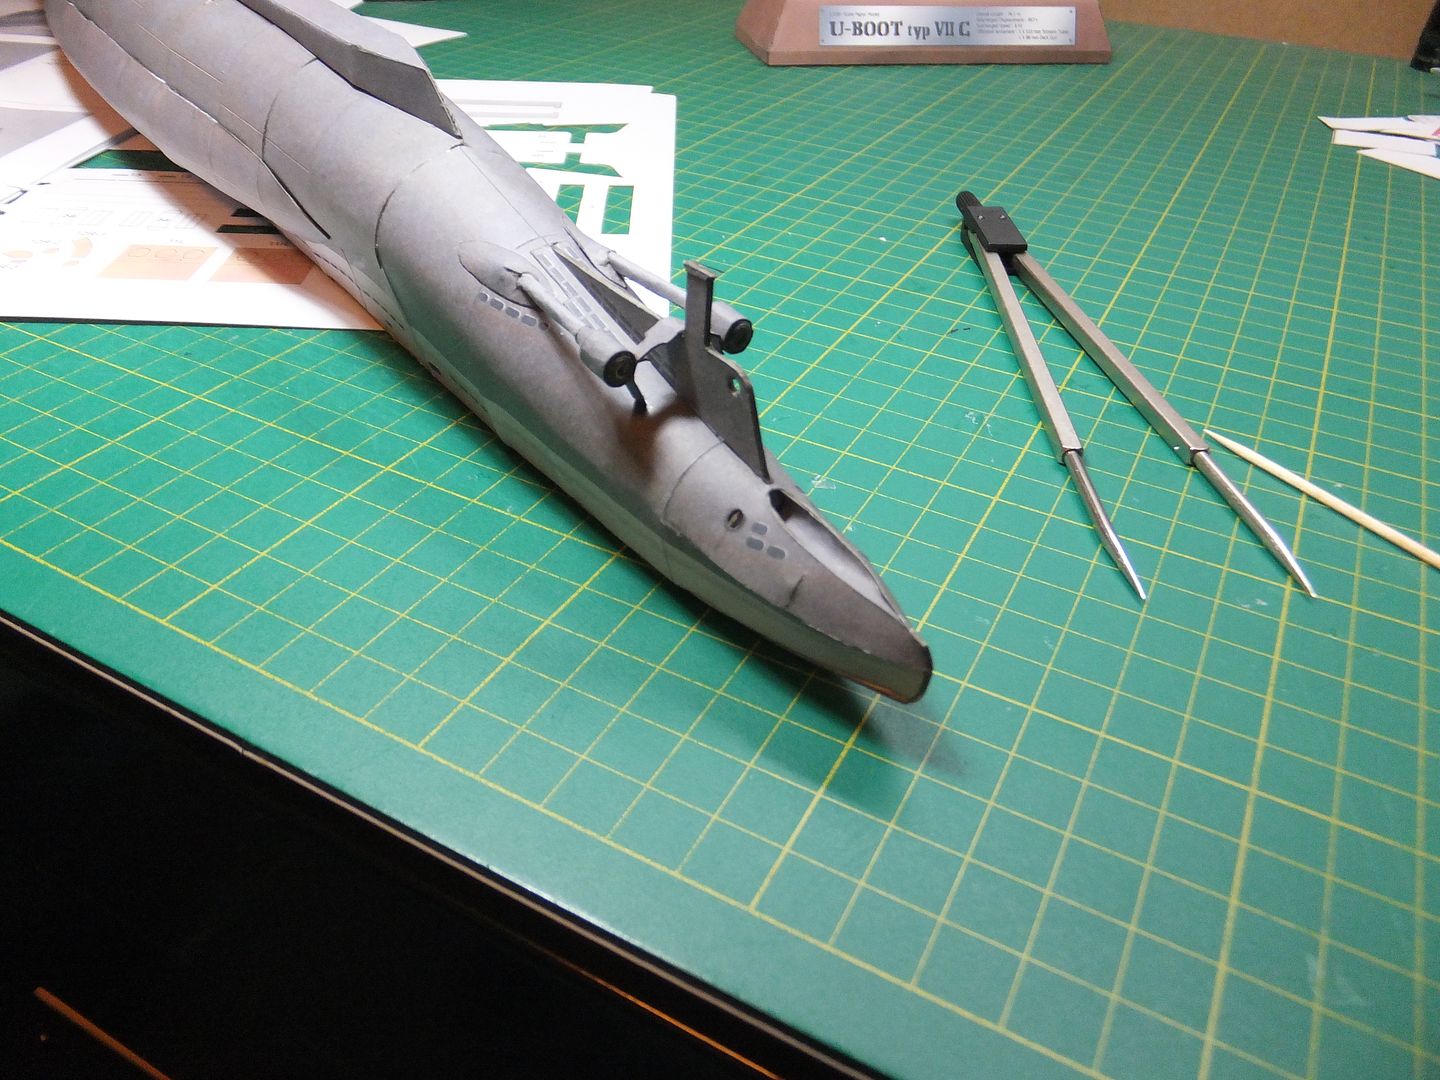 Last night started on the props and got the hubs assembled. 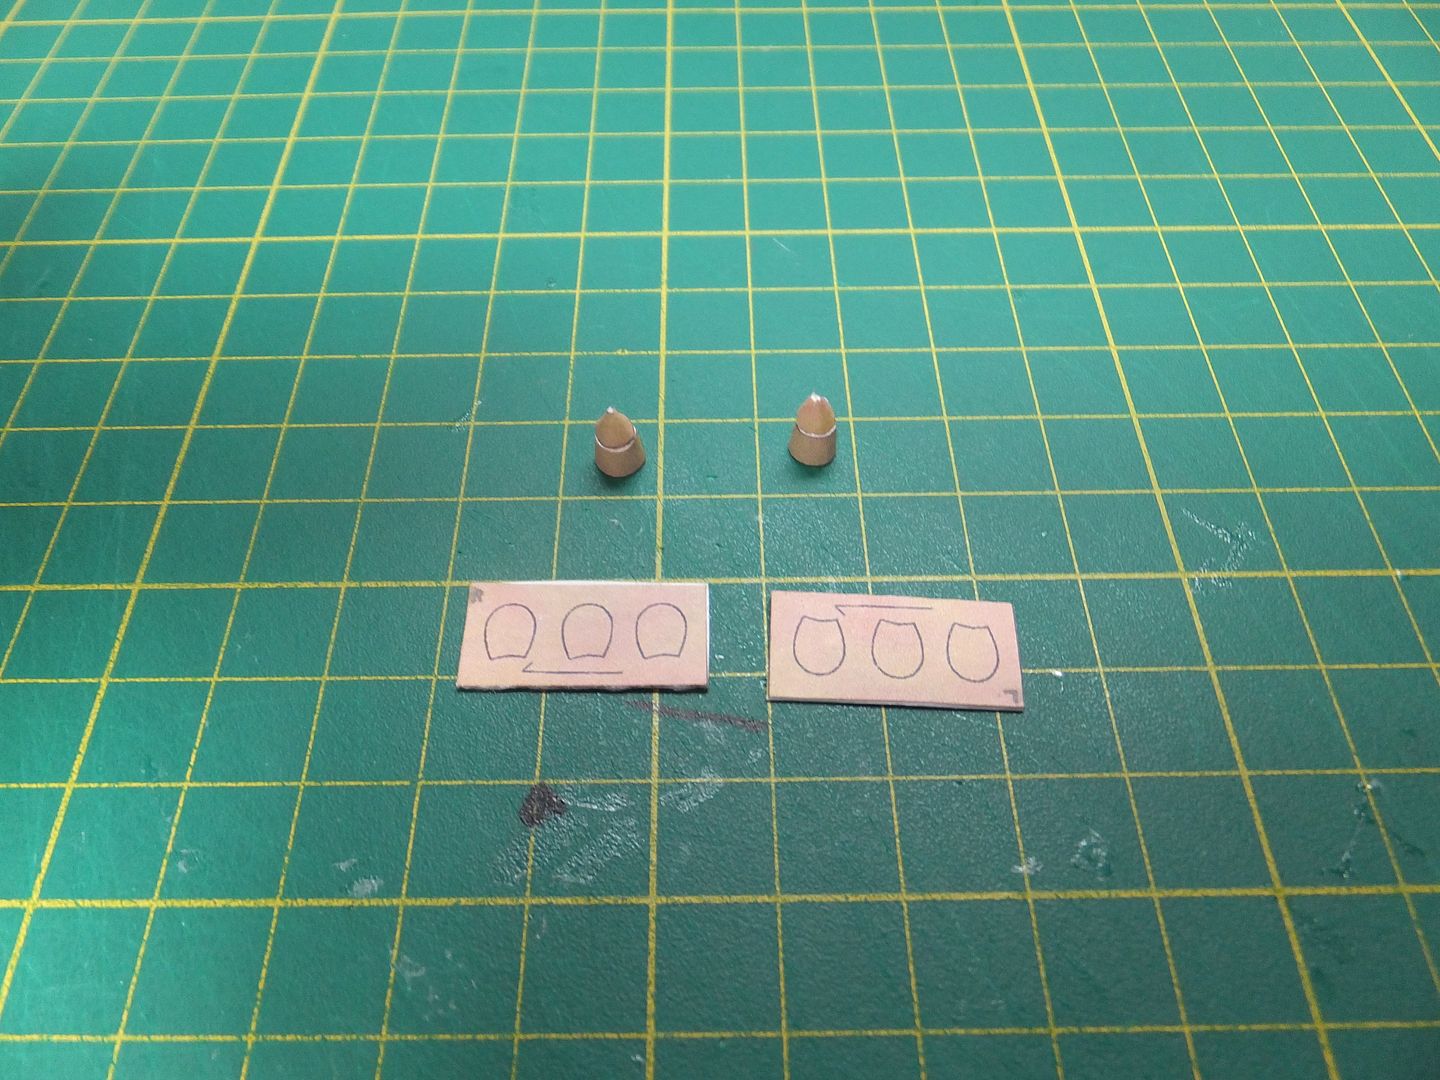 Tonight I have one prop built and will start the second. 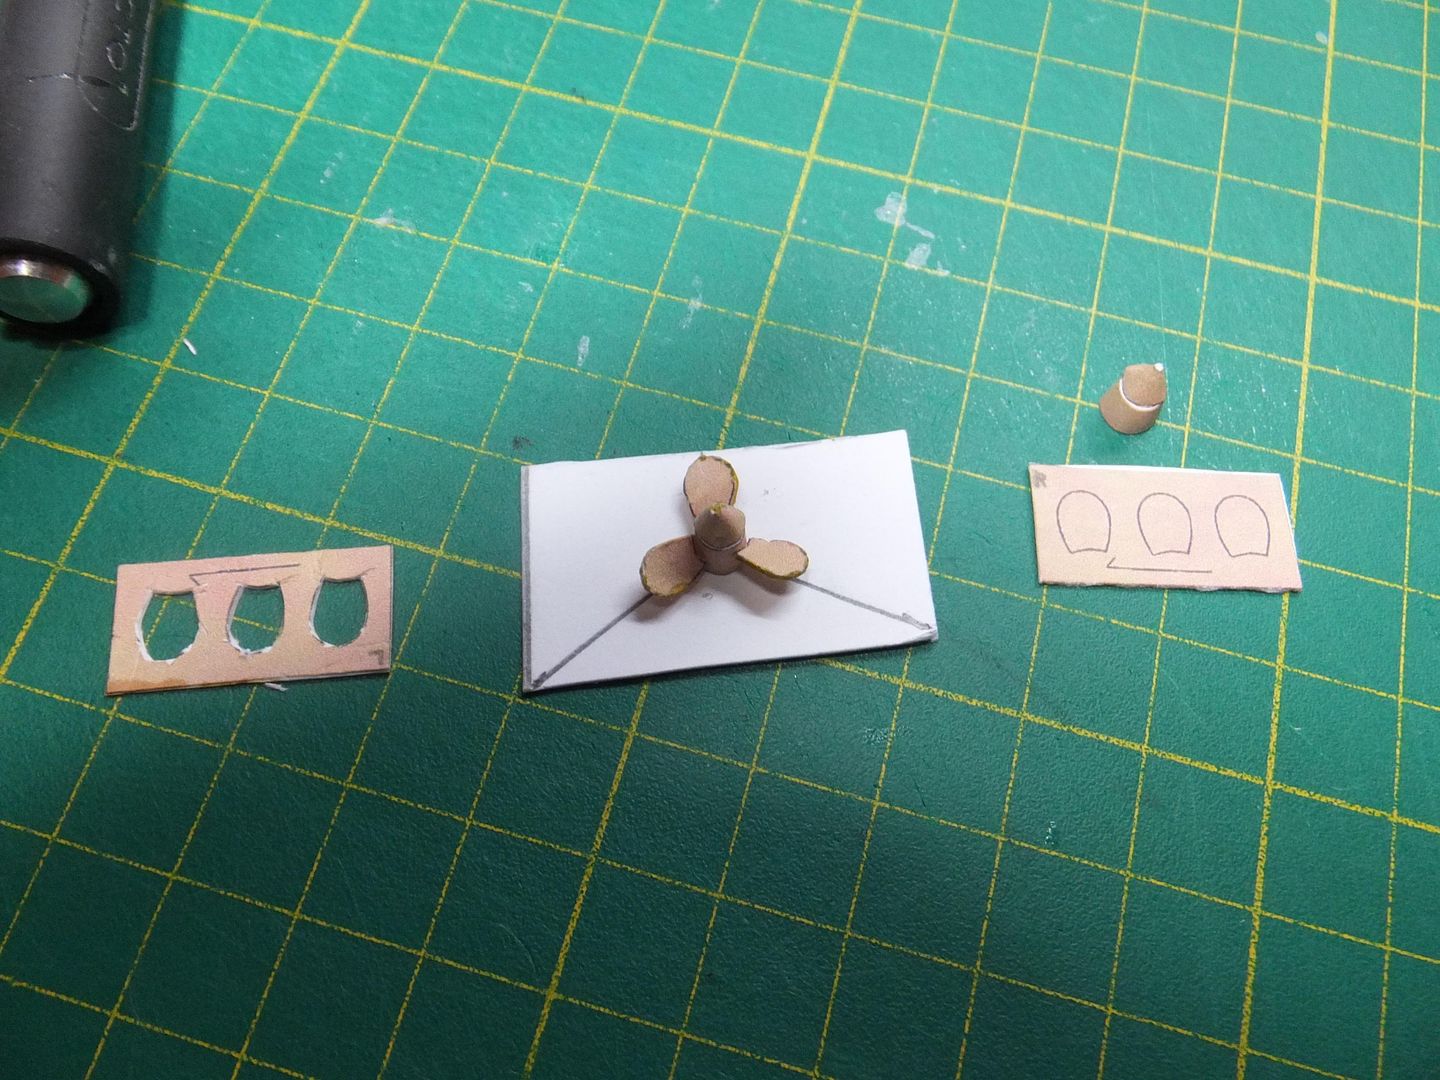 Tomorrow hope to have these attached. I hope you find this build interesting. I know I'm learning a lot from this build, and having fun. Jim
|
|
#28
03-27-2013, 08:47 PM
|
||||
|
||||
|
Tonight's update.
A fairly fruitful day building. Finished the props and have them installed. To me it feels more like a ship once the props are on. 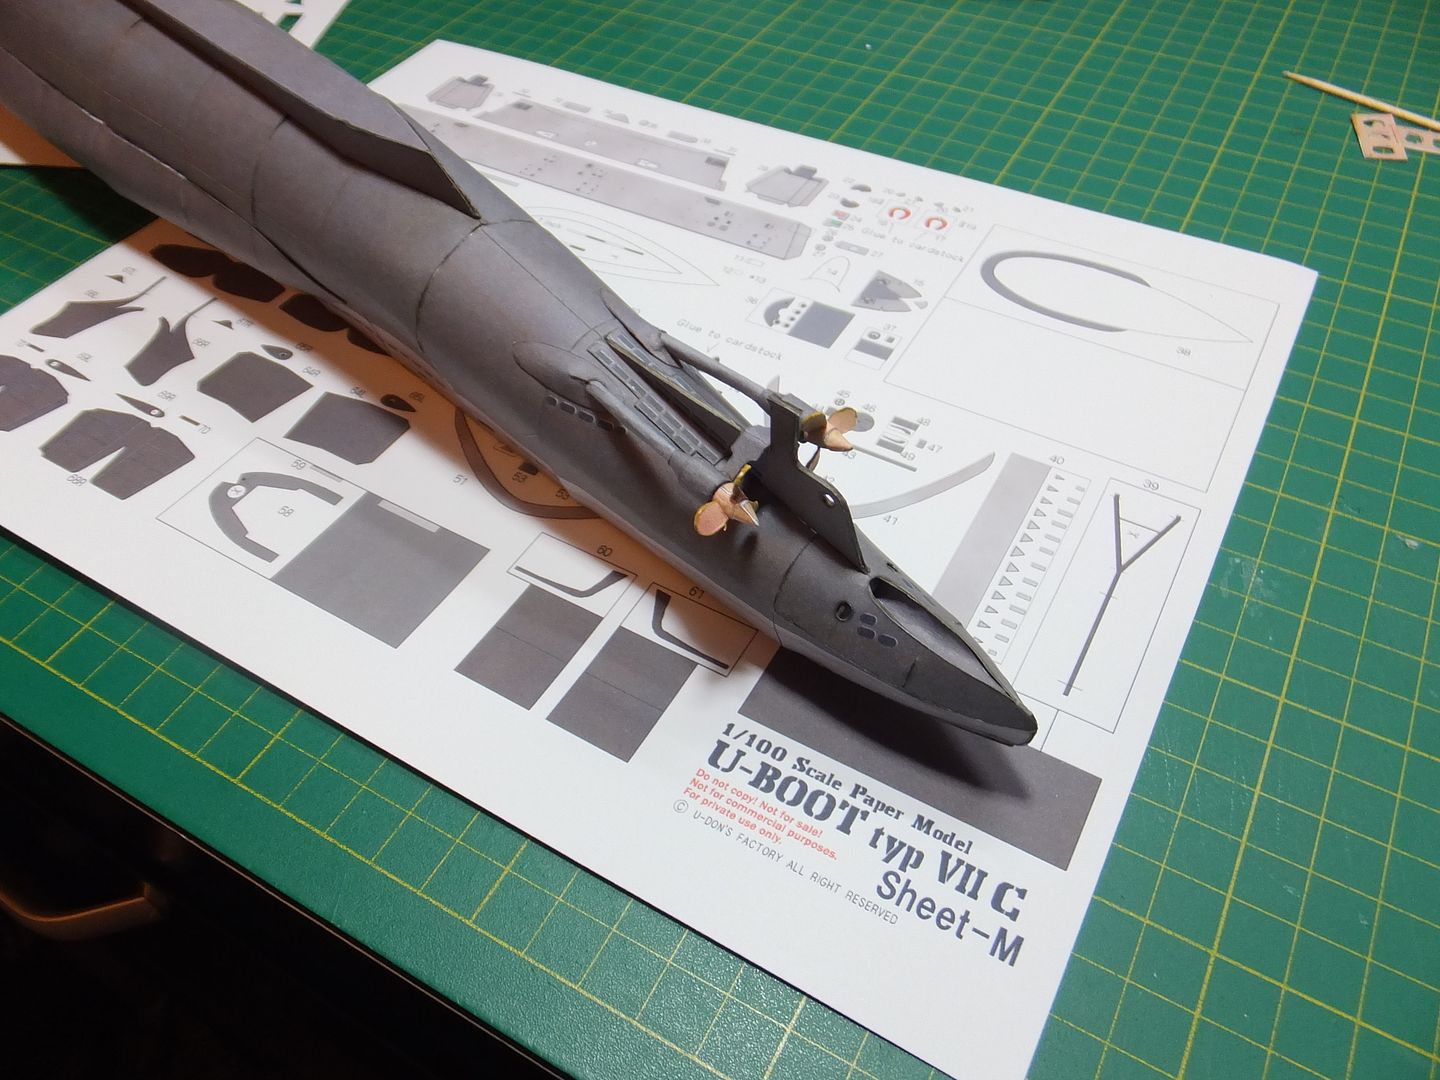 Next the aft dive planes were constructed and installed. Rolling the pin for these small enough was fun. Maybe should have used normal paper for these other than my normal card, but they worked and definitely are not flimsy. 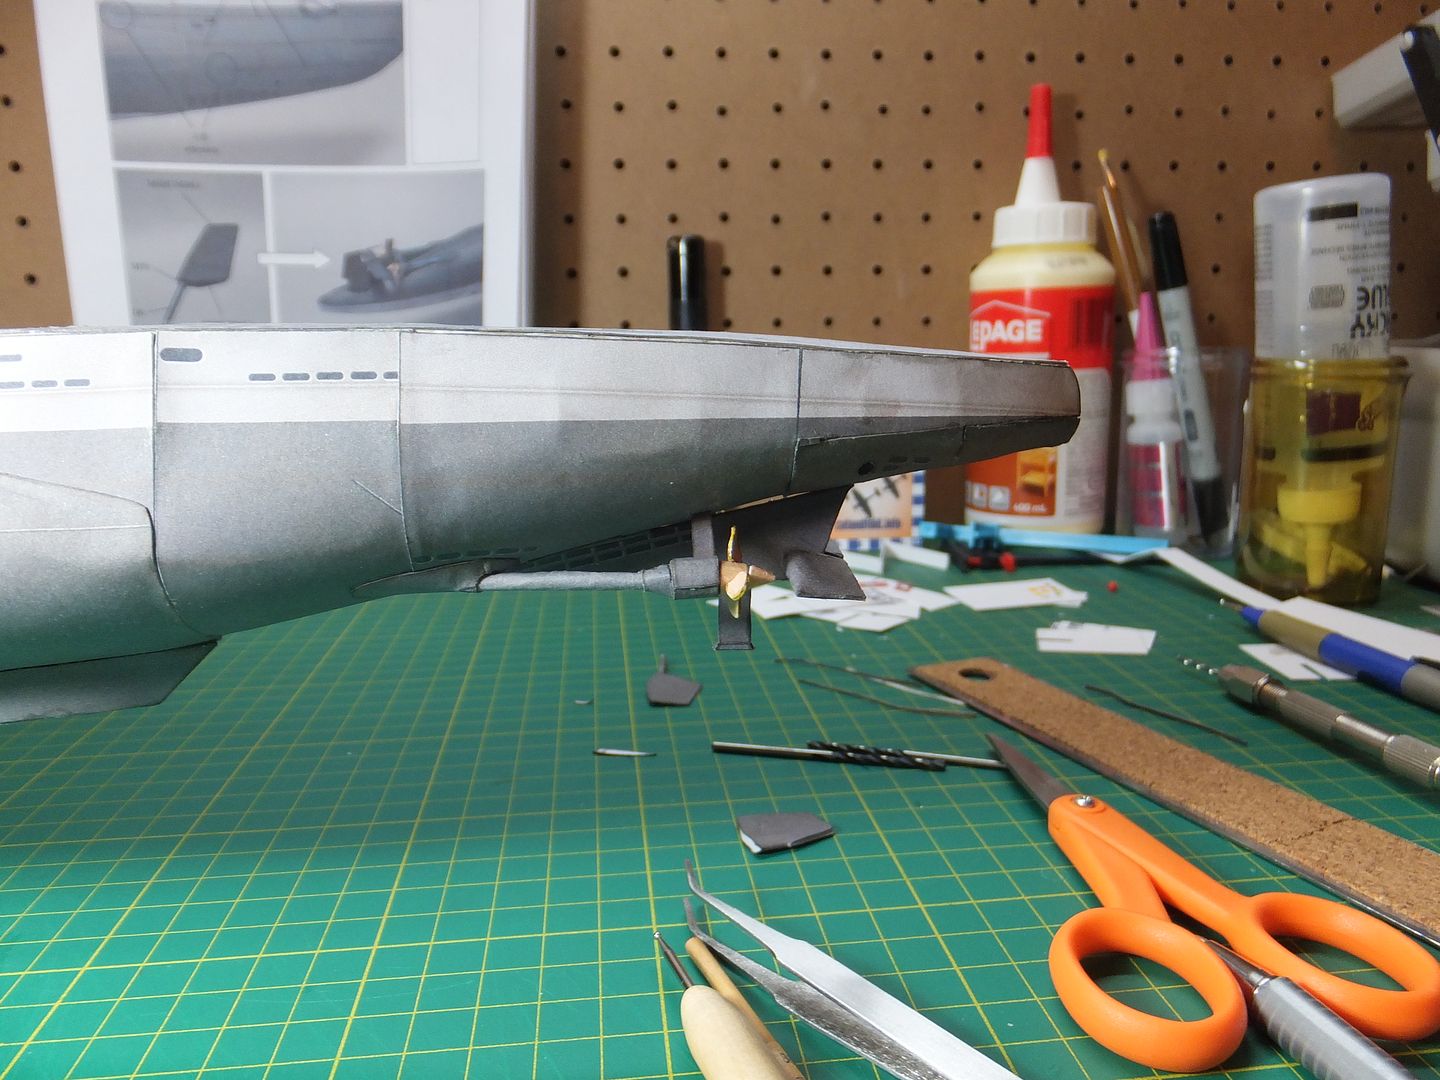 Finally installed the upper centre hull skin. No more exposed framework. I was concerned that these were going to give me problems after the trouble with the saddle tanks, but they didn't. 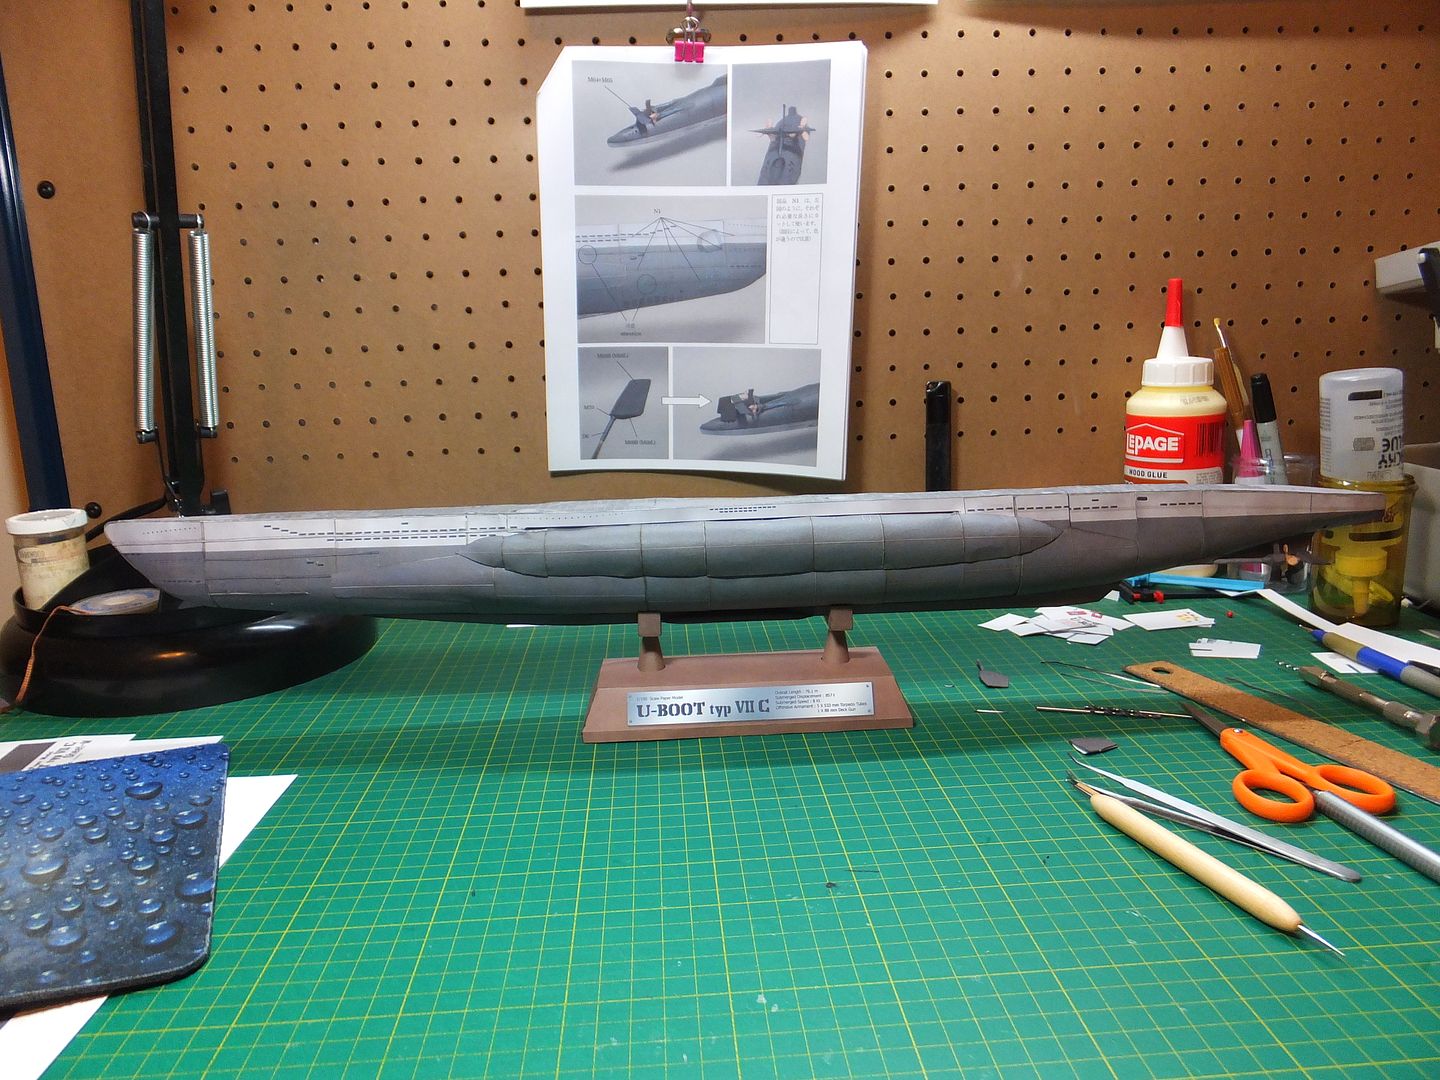 Some detail was added to the bow area. 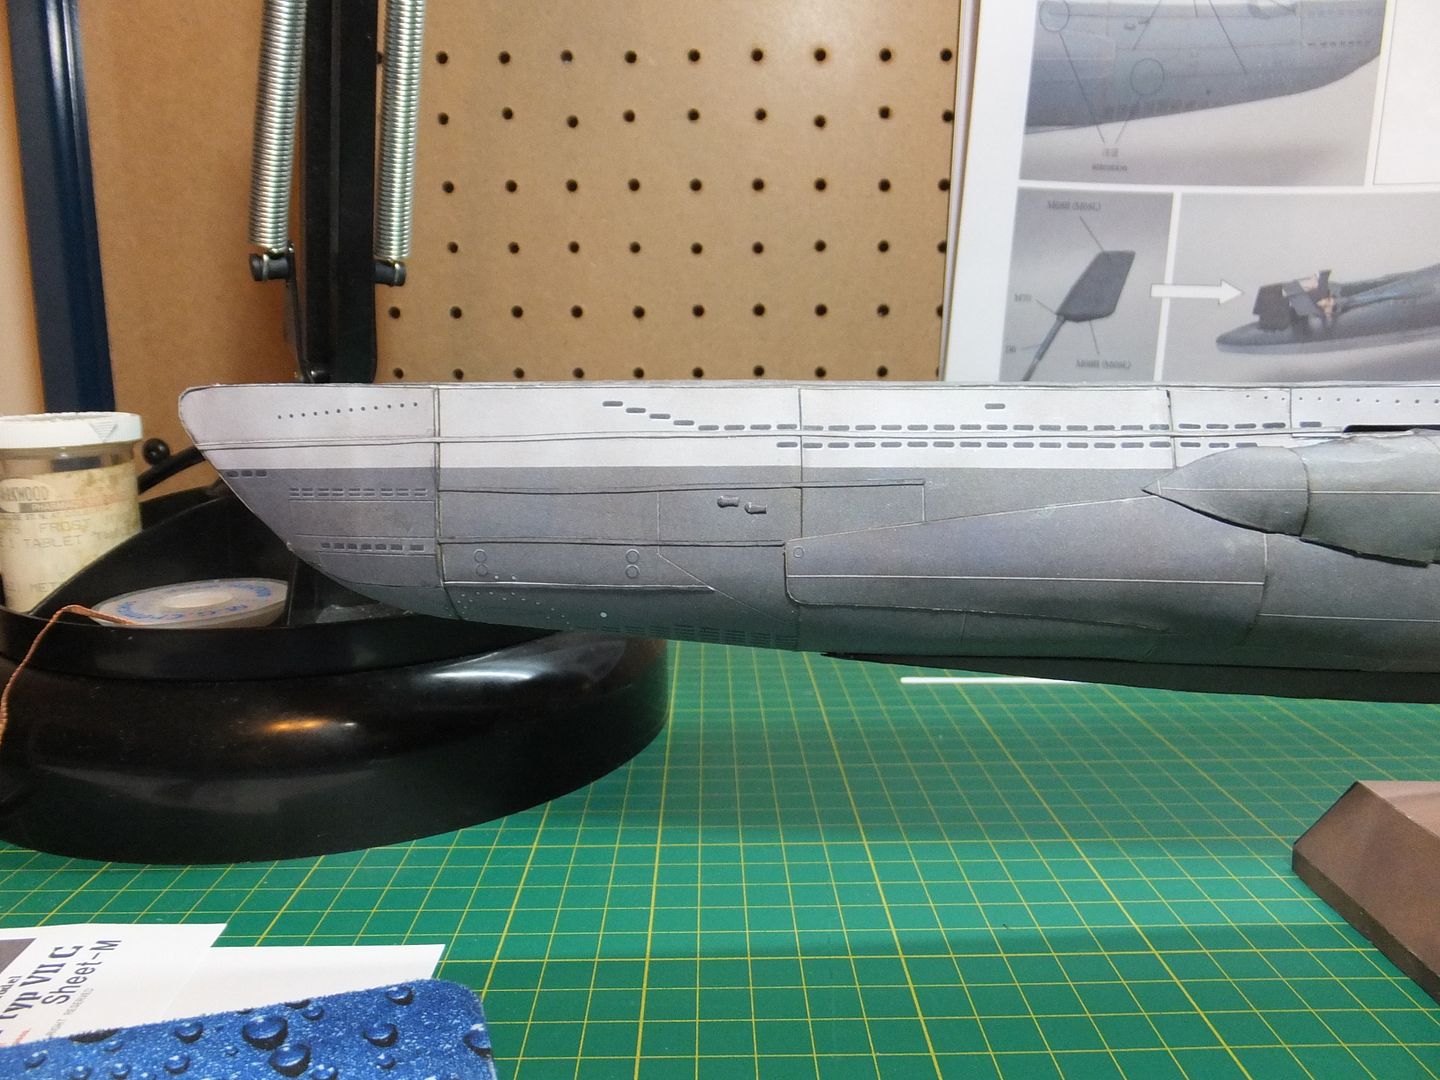 Right now I am working on the rudders. One is complete. 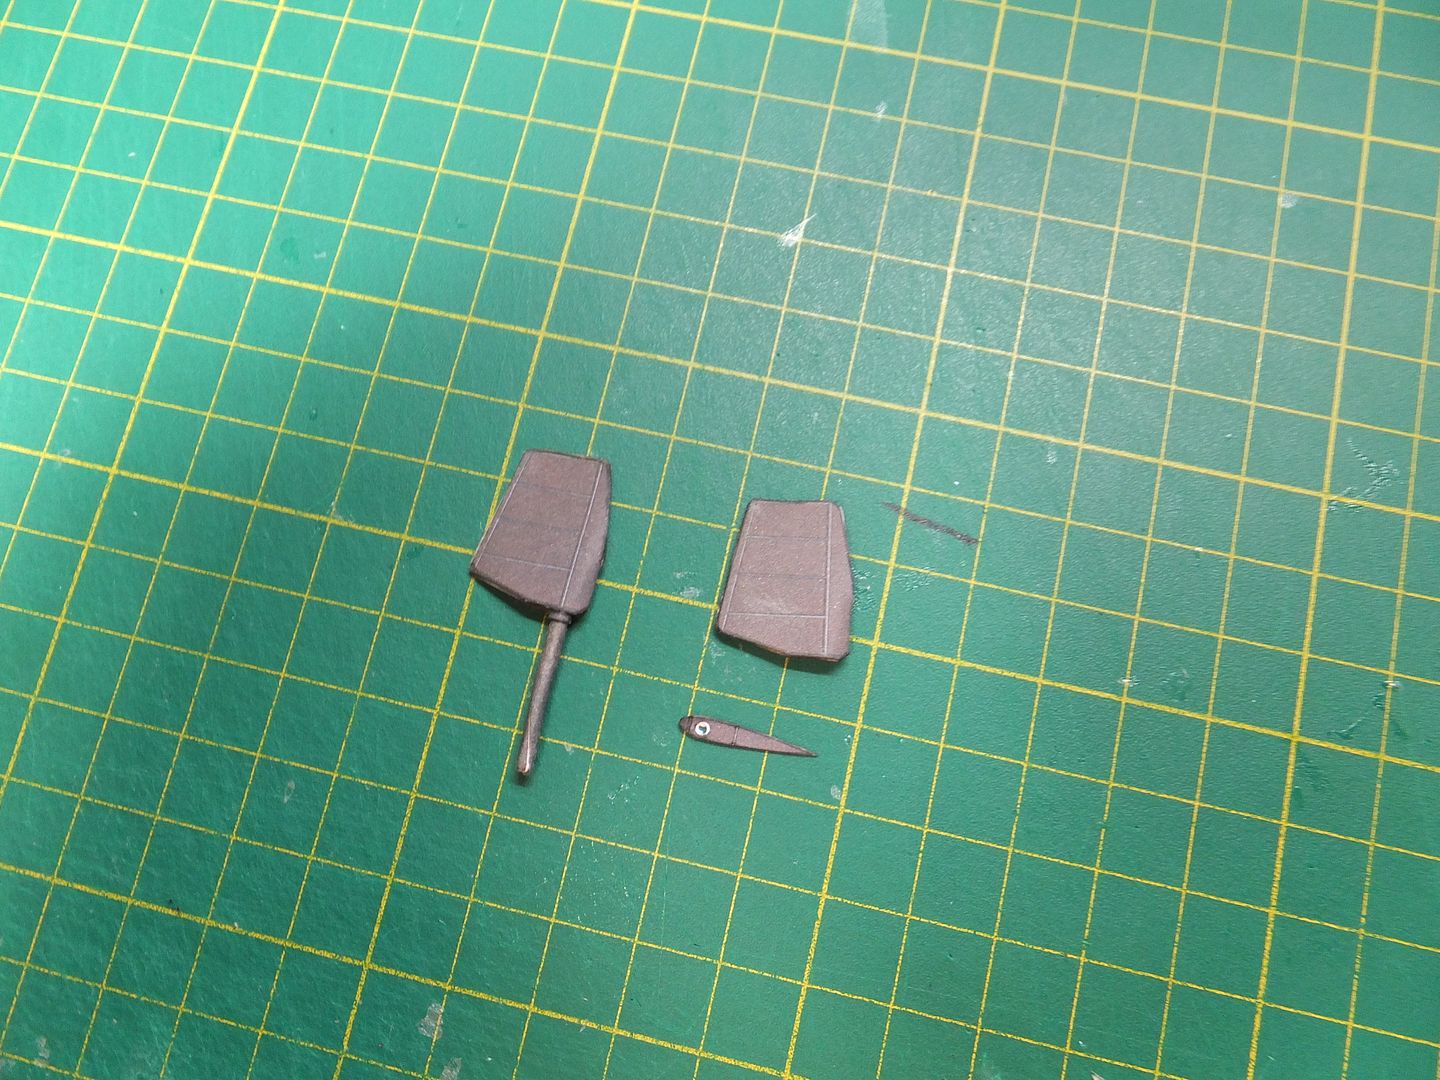 That's where I am at tonight. Have a nice evening. Jim
|
|
#29
03-27-2013, 09:48 PM
|
||||
|
||||
|
Ahoy Jim
That Pigboat looks great you done a swell job on her it looks great from my end the more of these you tackle they get better with each build you soon will ingest the build and know its secrets how to build it beter then before...... A Hardy Well Done \ Boats 
__________________
TURN TWO CONTINUE SHIPS WORK
|
|
#30
03-28-2013, 05:26 AM
|
||||
|
||||
|
Thank you Boats.
Jim
|
| Google Adsense |
 |
|
|


 Linear Mode

