


|
|
|
#61
 01-31-2009, 09:28 PM
|
||||
|
||||
|
Ahoy Shipmates,
I have gotten the paint on the props and the related hardware as well as the rudder. I used some Testors' Brass from the old stocks that I had and some Testors' Red that is the same as the rattlecan hull red that I used on the rest of the hull. To line up the parts on the hull I used a section of styrene rod in each set and eyeballed everything as best I could. I must admit that looking at the flat kit parts I had my doubts about being able to shape them into anything resembling a prop, but it came off fairly well. 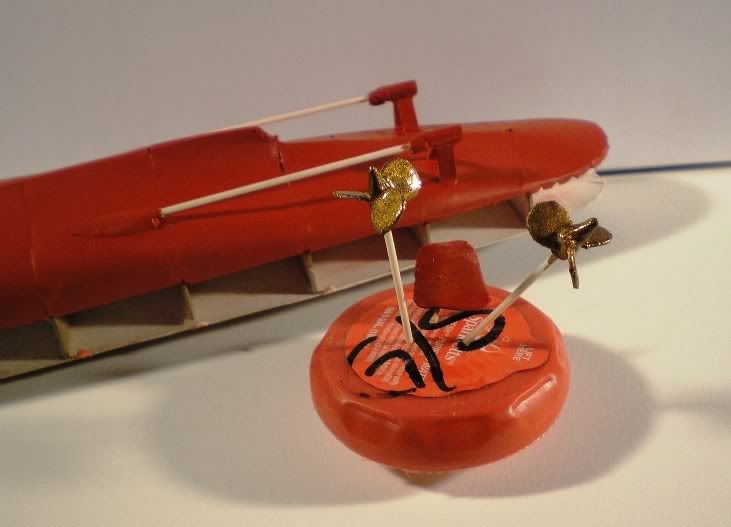 The instruction graphics don't really show you much else than a single overhead angled view of how the bearings and fairings to mount the shafts to the panels on the hull bottom. I would have preferred some measurements but you take what they give you. I did go ahead and paint the shafts black before actually mounting everything and once the paint had dried things did flow out a little more than what it looks like here so they don't look too awful for a first effort. Looking at it from an aft view, they all line up and look even from side to side and the rudder is in the center so I am happy with how it all turned out. For an old "divine waterline" plastic kit modeler like myself it seems strange to have all this stuff hanging on the bottom of one of my builds.  :D :D Jay massey treadhead1952 Las Vegas, NV 
|
|
#62
02-01-2009, 08:44 AM
|
||||
|
||||
|
That's the way she's done treadhead. I find the more of these that you do, the easier it becomes.
Sanding and painting paper are not common skills. You've done well here. Looks like you've got some good coats on the props. I know what you're saying about all this time and effort below the waterline. It's something we labor over that is completely out of view (typically).
__________________
Recently Completed: 1/700 USS Nevada (resin) In the Shipyard: 1/350 USS Washington (resin) On the Horizon: Dom Bumagi USS Helena 1/200 (60% complete)
|
|
#63
02-01-2009, 09:56 AM
|
|||
|
|||
|
szablone are the wood and wire parts. They are usually shown 1 to 1 scale so you can use them as templates. As some one else mentioned, pick up a polish/english dictionary. You only need a few words and all will become clear!

__________________
Fred Bultman
|
|
#64
02-01-2009, 02:33 PM
|
||||
|
||||
|
Thanks Guys,
I am considering starting another kit already, just with all the things that I have picked up with this one so far, I can see that while a lot more involved than a styrene kit build, the end results are a whole lot more enjoyable to tinker at as well as figure out. Thanks for the addition to my vocabulary there Fred, I was considering hunting down a Polish/English Dictionary, I tried using babbelfish but it seems to be rather limited in what it can do. I have gone through the local retail and second hand bookstores but nothing came of it. I guess I will have to "Amazon" it. After work today I am planning on starting on the bow section with its' anchor pockets and getting the rest of the hull closed up, my fingers are just itching to get to it. Jay Massey treadhead1952 Las Vegas, NV
|
|
#65
02-01-2009, 11:32 PM
|
||||
|
||||
|
Ahoy Shipmates,
WAH!!! I got home, all set to get busy with the hull plates, to whip up the anchor pockets and all that cool stuff. When I hit the copy button on my printer after carefully centering the page to get the best of the plates, my printer decided that I had sucked the "red" dry! After stewing about it I checked over the pages that I did have printed out and saw that I had two of the small boats and their related parts so I set about seeing what I could do with them. It took a bit of figuring to see just how some slices in the top edge could be translated into the correct folds to create the shape I figured they should be. After a bit of folding and gluing the transom in place maybe I could make it look sorta like a small boat. Getting the floor boards centered was another bit of fiddling. I finally just filled the bottom of the boat with enough Aleene's Tacky Glue to set the floorboard panel in and make it stick rather than try and be delicate about it. Then came the little bits that were supposed to be the thwarts and such. Spacing them out so that they would look right with the cuts that were supposed to be the oar locks didn't work out so hot. It left the after decking a little too long to fit properly and then there was that section in the middle that was supposed to be cut out. To make the best of a bad situation, I chopped off the forward cross thwart, that opened up the middle so I could easily remove the offending middle a lot easier, bob the side pieces and then glue it in place. Gluing the final thwart in place so that it looked more or less sorta like it should. Of course, I would hate to be the poor schmucks sittin' there, afraid they are gonna get some serious shin bruises. Well now, glue the keel piece on and we are all done. Got that part cut out carefully, it even fit like it is supposed to, the curve of the bow nestling into the crook, the stern transom joint right down into the angled corner. But then I noticed, it had no tiller to steer with, that and the top of it was about an 1/8th inch shy of actually reaching the top of the bow, sigh. Cut out a piece of the scrap that had been cut off to make the keel and glue it in place on the bow, cut off another slice to make a proper tiller. glue it in place and let it sit for a bit to dry. After it had dried a bit, look at it. hmm, seeing lots of white showing here and there at the edges of all those thwarts and the top edge just doesn't quite look right either, break out the Sharpie marker pen and go around the edges of everything, turn it over and do the same to the bottom of the keel. Paint the new bow piece and tiller with some Model Master Acryl in Kure Gray and let that dry a bit, there that looks a little better but it still seems to be missing something. Oh yeah, what's a row boat without any oars. Cut out oars from one of the many extra bottom panels that I had made up which caused that red ink cartridge to run bone dry, straighten them out, glue them in place, much better. But wait, something else needs to be in there, oh yeah, no painter rope on the bow to tie it up to stuff to keep it from just sorta drifting off. Get out a little white thread, use the Aleene's Tacky Glue to stiffen it up a bit and get rid of the curls that it was in to begin with. Take a bit of styrene tubing of an appropriate size and wrap it around the tubing to make a coil, use a little more glue to keep things in shape. Slide the whole thing off the tube and then take a minidrill and pinvise and pop a hole in the bow. I used a needle to open it up enough to accept the threads' free end and create a loop then glued those pieces together and put it in place in the bow with another dot of glue. So this is what I wound up with.  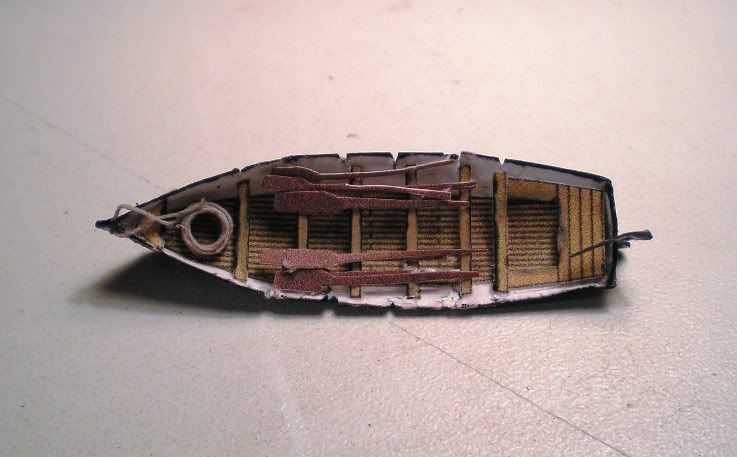 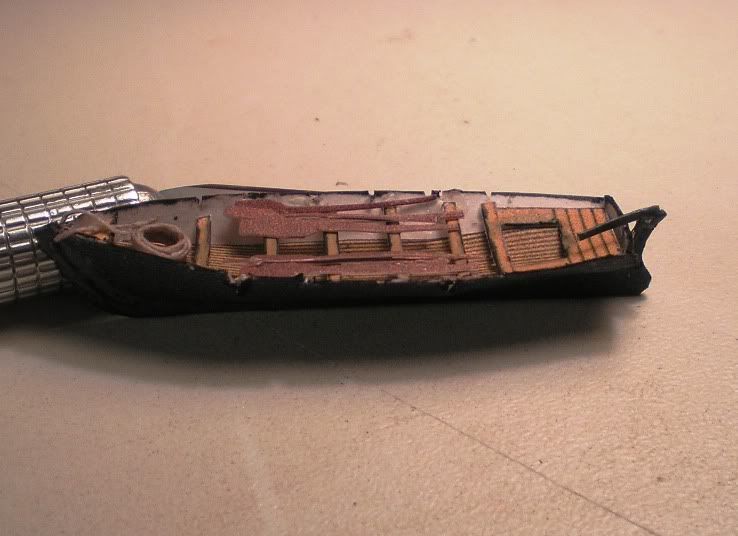 Now I got to make one more and then two motor launches and my small boat needs will be met. :D Oh yeah, I was just too lazy to go out and buy another Ink cartridge, I will go pick one up tomorrow while I am out and about at work. But I did have a lot of fun dreamin' up what to do with this little boat, not quite sure if it is what the folks at answer Models had in mind, but I like it. Jay Massey treadhead1952 Las Vegas, NV
|
| Google Adsense |
|
#66
02-01-2009, 11:40 PM
|
||||
|
||||
|
Quote:
Regards, Charlie
|
|
#69
02-02-2009, 06:58 AM
|
||||
|
||||
|
Yes, that is a small boat. I think there at least a few of those in almost every build. I'm looking at approx a dozen in my current project. Nice closup work with the camera.
Mike
|
|
#70
02-02-2009, 07:08 AM
|
||||
|
||||
|
Thanks Guys,
It was a fun little project to updetail a bit. After working in 1/700 scale for so long having a little room to tinker with stuff like this makes for a much more interesting build to me. I got used to having to use PE sets with parts that were flea sized in an effort to dress up those kits, so this is like having a half an acre to work in. Not to mention, no expensive brass parts were harmed in it's construction. :DJay Massey treadhead1952 Las Vegas, NV
|
| Google Adsense |
 |
|
|


 Linear Mode

