


|
|
|
#41
 01-27-2009, 08:13 PM
|
||||
|
||||
|
Hi Shrike,
Thanks for the art work, that is sort of what I had figured looking at Redhorses' build of his great looking Isuzu and others. The joining strips themselves are about 1/4 inch wide, the little 1/8 inch wide one is the one I meant as a sort of "fudge" strip in case you have a shortfall in the plating. I am all antsy to get started on that part of the build, I have popped out copies of the plates and strips on card that is the same thickness as the original kit parts, way more than enough to do the job just in case I run into problems, it also saves the originals for future reference. Looking over things on my inner hull with as critical an eye as I can, I have found a few places where the bulkhead forms don't quite reach the edges of the vertical and horizontal forms. So I am in the process of using some strips and Aleene's Tacky Glue to remedy the situation to ensure as good a finished inner hull form as I can before I add any other parts. Once the glue dies and I can sand things down smooth again it will be time to work on the strips and plating. but I am in no big hurry, I figure slow and easy does it. While stuff is drying I can work on the deck plates and get them ready to slap on. Jay Massey treadhead1952 Las Vegas, NV 
|
|
#42
01-27-2009, 08:42 PM
|
||||
|
||||
|
Sally's?...,
Shrike,
Glad I'm not the only one who clandestinely shops at Sally's. I've lost count on the number of the washable-reusable nail boards in my collection. The dishwasher really does a great job getting them clean but sometimes they need a good brush scrub in the deep sink. Jay, Can't believe how you're marching on with the build. I like the recovery catches. They're near and dear to my heart too for some odd reason. Hull plates are fairly difficult to get right. Applying strip paper "T"s to the former is part of the solution. The former is the base of all that goes on top, if it's not right everything else will be wrong too. Take time to Zen-out and meditate on visualizing the next step in the process. I learned from some of the master European paper modelers that careful sanding of the formers is key to perfecting the plate fit. The idea is to form a "radius curve" on the former so that when the strip paper "T" is applied it will also curve gently along with the incoming and outgoing plates. This is accomplished by slightly burnishing the strips with a convex tool so the curve is accomplished before the strip is applied to the former. Some seal the strip with nitrocellulose dope (sanding sealer also works) once all the "T" strips are in place. A final light sanding "smooths" the surface for the application of the hull plates. One important item when it comes to hull plates is "Cut Large, Trim Smaller to Fit". This may be time consuming but a well trimmed and fitted hull plate is one of those "in process" triumphs that's hard to describe. Always begin plating at the middle and alternately work toward the stem and stern one plate pair at a time otherwise the keel will "banana" on you..., Best regards, +Gil
|
|
#43
01-28-2009, 11:12 AM
|
|||
|
|||
|
TH, just be aware that there are differing schools of thought on whether to start plating at the ends or the middle. Gil is absolutley right, the frame must be smooth and even to get perfect plating. Sounds like you are getting it.
Bet you thought you gave up sanding... 
__________________
Fred Bultman
|
|
#44
01-28-2009, 01:56 PM
|
||||
|
||||
|
Thanks Guys,
Uh, no, givin' up on sanding is not likely to happen with most anything I do in the modeling department! :D Actually, I rather enjoy working out how the parts should go together and when they don't, it is usually about the only way to work your way out of the situation. Of course, I didn't think that a paper model would require quite as much as I am discovering, but that is okay. The more I go along, I am seeing where things have to be in a certain position otherwise, they will sneak up and bite you later on. Having a printer and access to be able to make new stuff to fix what went wrong is a blessing rather than a curse. As I work my way along, I have decided that with the decks now mounted and the structure stiffened up even more, it would probably work for me to put the bow and stern pieces on first, the stern looks like a bear with the compound curve, but I will muddle through it somehow or other. Like I said I have managed to get the decks secured to the inner hull. I used Aleene's Tacky glue to do the deed, stuff works great. Adding them showed where I had to do a couple more adjustments to make them fit right, but it wasn't any big problem, just adding a little material to build up areas where parts didn't quite meet up. 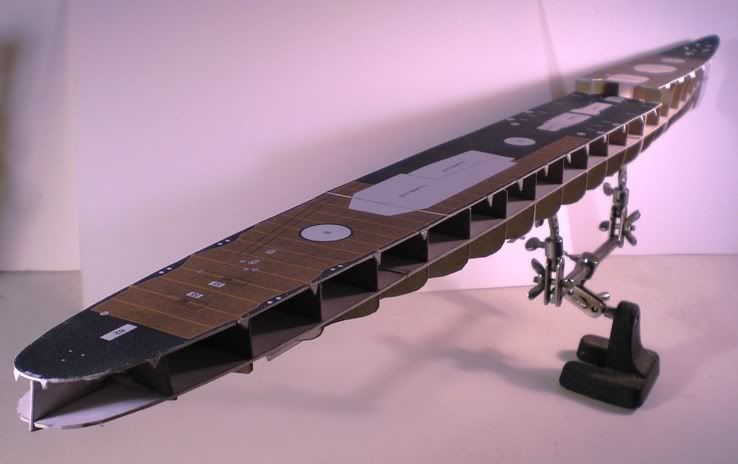  Here are the "L" brackets that I added in the bow section so it would keep that nice upward sweep and guarantee that nothing would be coming unglued later on as I work things over. I also added some to the stern section. At this point, I think it may very well have been overkill, but it won't hurt anything so they get to stay. 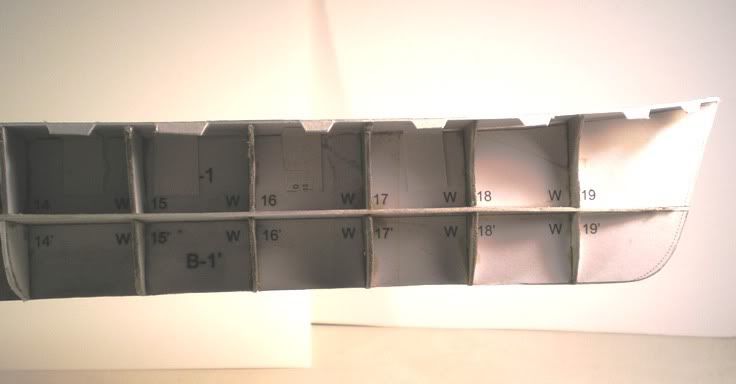 You can see where I had to add some material to one of the bulkhead formers so that the hull plating won't be sinking in and should follow the line of the curve of the hull without any problems, of course, I still get to sand a little more. At the back of the step up from one deck to another you can also see where I had to add some to keep from bending down the back of the deck to meet the bulkhead, but it came out okay, so I am happy with it. You can also see the tabs that I added. 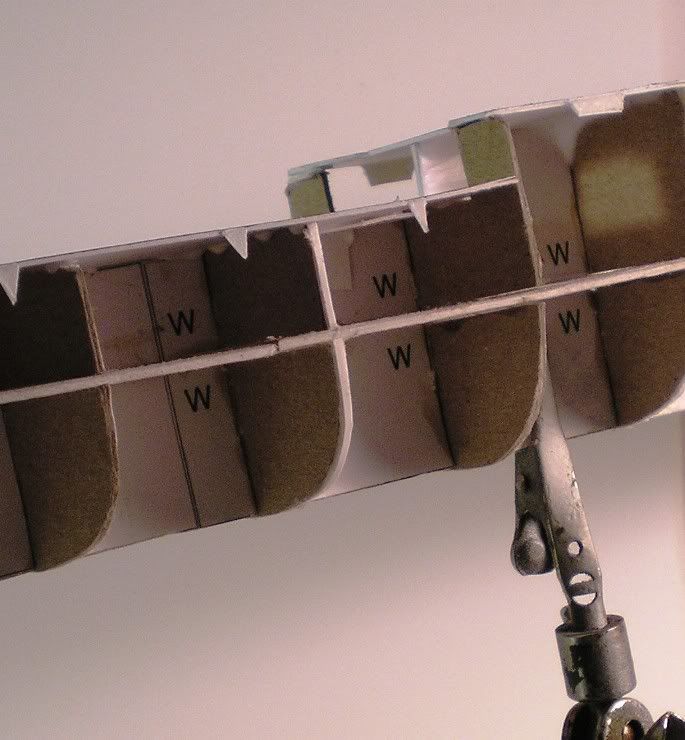 I did these, by drawing them onto the deck patterns and then trimming the decks with a hobby knife. After gluing the deck to a second sheet to get the needed thickness, I waited until things had set up a bit then trimmed the decks out of the second sheet. At that point, I drew the knife point across the tabs at the deck edge and removed the thickness of the original card sheet off of each tab. The tabs are formed from the under laying sheet and not the top sheet so that they fold under without actually increasing the deck edges' width but will still catch the side panels when I add them to offer a little more gluing surface. The forward deck got more generous tabs since I figured out how to do this so I wouldn't have any problems fitting the hull sides. So this is where I am at this point. Now that I am off on my 2 and a half day weekend, I plan to get the bottom of the hull shaped up with its' strips and plates after fitting the bow and stern. Jay Massey treadhead1952 Las Vegas, NV Last edited by treadhead1952; 01-28-2009 at 01:59 PM. Reason: Forgpt to add the last photo, oops!
|
|
#45
01-28-2009, 02:08 PM
|
||||
|
||||
|
Outstanding craftsmanship. The tabs seem to be a lot of work, but should pay off when you attach the hull sides.
Excellent explanation and photographs! That was one big destroyer. Don
|
| Google Adsense |
|
#47
01-28-2009, 02:19 PM
|
||||
|
||||
|
As you work with your new "card" shipbuilding skills, I think all of us are discovering you are quite a writer. The next person to build this boat will be able to refer to this thread for a lot of valuable detailed information. And your camera work is thorough.
I found the hull plating (below the waterline) on my current build to be quite challenging, but not impossible. So I'll be watching to see how yours goes. Mike
|
|
#48
01-28-2009, 11:19 PM
|
||||
|
||||
|
Thanks Guys,
I appreciate the support as I work my way through this, my first paper model kit. After over 40 years of styrene abuse, scratchbuilding and kitbashing, this is testing a lot of the things I have learned over the years. It is also proving to be highly interesting and entertaining. Since I will be adding the hull bottom plating, the thought occurred to me that I had better build the kit stand for the ship before I get too far into things. Once the hull plates are on and the rudder and props go in place, it would be hard to just lay it on the bench without risking damage. No where in the number lists is there any suggestion to add any thickness to the parts of the stand but I didn't think that it would be very substantial that way. I cut the parts out with my scissors first, pretty starightforward in that respect. I did note that there seemed to be a forward and after upright parts to the assembly and when I checked all four pieces against each other I found that there was a bit of a problem. The forward parts are actually smaller all the way around than the after parts. As I compared the two front parts of the nameplates to the rear part that was supposed to be a backing, I discovered a similar discrepancy, the backs were smaller all the way around, I didn't know if this was a common situation and was not able to find any information about stands in any of the threads that I had visited before, so I arrived at my own solution. 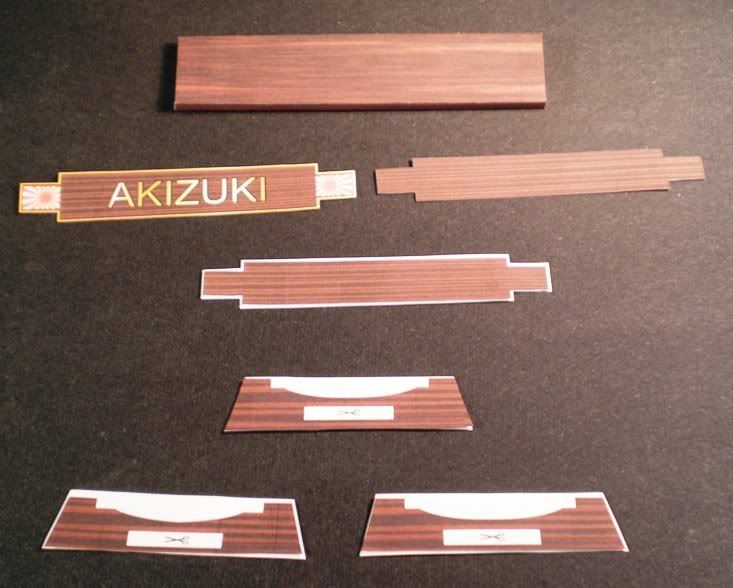 Folding the main center part was fairly simple, I used a ruler to guide the back of my hobby knife blade along the fold lines on the rear face to create an indentation and then turned the edges up and glued it together, tucking flap "A"'s into slot "B"'s until I had a nifty little wood looking rectangle about a 1/4 inch thick. As careful as I was, I still managed to have a little white paper showing through at the odd corner here and there, but I was not too concerned about it at this stage of the game. Turning my attention to the end pieces and the name plates I decided to use a sheet of my newly purchased "for real Bristol" vellum 100 pound weight paper to add some thickness and sturdiness to these parts. Gluing them to the sheet using the faces of each part first, I let the glue set then trimmed them all out. Applying the rear parts I paid attention to the way they fit to each other and tried to lay them so that they were centered on the back of the parts. As to the two different sized end pieces, I had made duplicate copies so that I could just use an extra set of the larger end pieces and do a little judicious trimming to form the differently shaped bow part. After trimming the parts from the backing I applied the back of each centering everthing up so that when I cut the mounting holes out as well as the actual resting cradles I wouldn't have any white paper showing through at the edges. My first attempt at putting the stand together showed that I needed to open the holes up just a little more to allow them to go over the thick part of the stand. Before I started the actual assembly, I used a Brown colored marker pen to run around the edges of the parts, the backs of the nameplates where there was a size difference between those parts and the places on the thick part of the stand where I had a bit of white showing through at the corners and edges. I did that then using some more Aleen's Tacky Glue ran a bead over the dotted lines where the side parts were supposed to go on the thick part. After getting the parts and the bead to meet up for straight, I added some more glue all the way around the upper and lower sides inside and out to lock the parts in place. Adding the nameplates was simply a matter of centering things up as best I could after gluing the parts mounting surfaces. 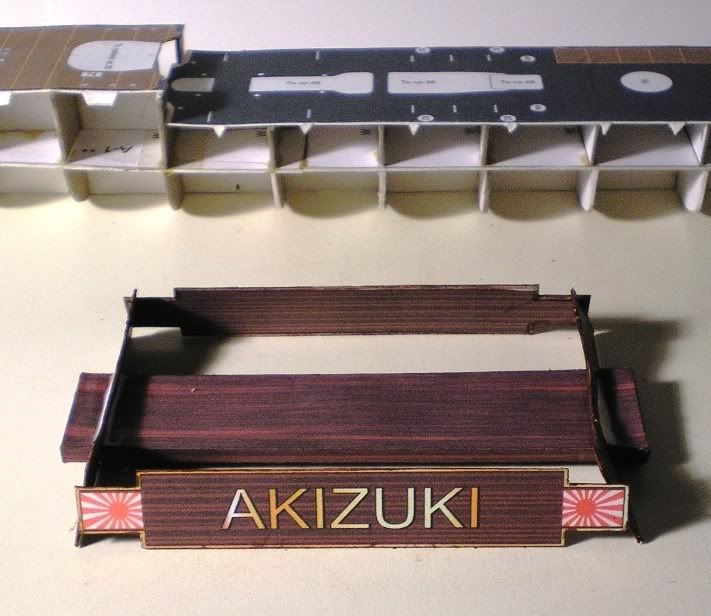 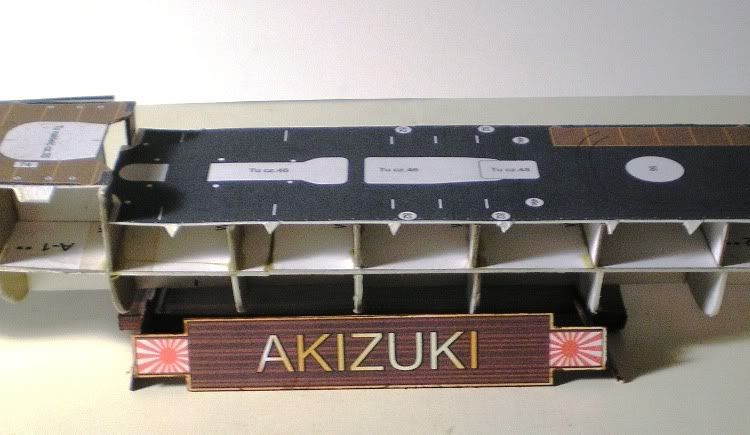 Now that I have the stand constructed, I am free to start working on that hull bottom plating. I do have a question, should I actually use the strips on all of the bulkhead formers or just some of them more towards the middle? From what I have seen from cutting some of the plates out, it is obvious that the plates only go up to the edges of the middle horizontal hull longitudinal part, I am assuming to make a clean transisition and not have any humps and bumps under the plates, the strips will have to go up to the same point on the part of the hull that the plates do. I want to make this go as cleanly as possible and not have to use that narrow "fudge" strip that is included in the strips. Jay Massey treadhead1952 Las Vegas, NV Last edited by treadhead1952; 01-28-2009 at 11:22 PM.
|
|
#49
01-29-2009, 10:04 AM
|
|||
|
|||
|
I think the stand parts were ment to be glued to 1mm or 2mm thick caard. Thats fairly standard, and normally there will be asterixes to show you the correct thickness. Strips usually only go up to the waterline, if you take them to the deck, the center of the plates will bow unless you then add strips along the deck. Accept that ther is some fudging here...
__________________
Fred Bultman
|
|
#50
01-29-2009, 10:31 AM
|
||||
|
||||
|
Thanks Fred,
I was wondering about that. I went back and looked over the page with the stand parts and while the rest of the model shows *'s and **'s for various parts, the stand parts are just out there on their own. I suppose "answer" may have put those instructions in the written part of the directions or just figured you were supposed to know that little bit of information. Reading the thread from another newby, I found out that those dashed lines at the bow indicate where I am supposed to bevel it down to a point, glad I found that one out before getting all happy with the glue this morning. :D It is off to the races with my hull strips and plating today, lets see how this part goes. Jay Massey treadhead1952 Las Vegas, NV
|
| Google Adsense |
 |
|
|


 Linear Mode

