


|
|
|
#11
 04-21-2014, 08:57 PM
|
||||
|
||||
|
Boy I picked a great time to be lurking in the ship forum. Great to see you're reviving the Montana class project Lancer...
I remember test building that hull framework a few years ago and it is a beast! Very long. Also I still have the test turret on one of my shelves. I look at it from time to time and wonder about this project. Glad to hear you're finally getting time to finish her off.... Best of luck!
__________________
Recently Completed: 1/700 USS Nevada (resin) In the Shipyard: 1/350 USS Washington (resin) On the Horizon: Dom Bumagi USS Helena 1/200 (60% complete) 
|
|
#12
04-21-2014, 09:04 PM
|
||||
|
||||
|
Test images
Lancer,
I ran across some of those old test build photos tonight. Here's a little primer to get everyone's juices flowing. 
__________________
Recently Completed: 1/700 USS Nevada (resin) In the Shipyard: 1/350 USS Washington (resin) On the Horizon: Dom Bumagi USS Helena 1/200 (60% complete)
|
|
#13
04-21-2014, 10:23 PM
|
|||||||||
|
|||||||||
|
SJPONeill: Glad to be back... Funny how life gets in the way, isn't it? I sincerely hope that your "interest" isn't all you follow the thread with. I value your insights and skills, and hope you contribute to the thread.
mire-chan: Thank you. I hope I live up to expectations. Darwin: Glad you're going to be following. Herky: Thank you. Wait till you see the rest of it. LOL! Oldenburger67: Quote:
Quote:
It is almost too ambitious for me too, Thomas... ") Quote:
I have, as I mentioned in my initial post, several sets of documents, from many sources, in particular the Naval Surface Warfare Center, the Naval Historical Center, and a couple of friends in the National Archives who were all kind enough to provide me with enough information to determine what elements I wanted to include in the model. It's all covered in the Design Study #8 thread linked in my original post. Quote:
Quote:
Quote:
Don't worry... I was a teacher myself once in another life, and I understand. I used 0.030" chipboard laminated to 100lb cardstock for the frames, stringers, and longerons. I'm using 65lb cardstock for everything else, except certain fittings and details, and there I am using standard 20lb copier paper because it isn't quite as stiff. I incorporated triangular "squares" made from 0.022" chipboard laminated to 65lb cardstock as stiffeners for the frames and stringers. They are basically squares cut corner to corner, in three different sizes. They did a reasonably good job of keeping everything square. Except for one place, where I got in a hurry, and, well... You'll see. Quote:
Sorry, but it won't. As I stressed in the original post, I don't feel comfortable or confident in my ability to produce instructions detailed enough to satisfy me. I'm no Ken West, in that I don't have either his skill in designing, or his luck in having a test builder like Billy Leliveld, who can also do notes and instructions, so unless someone wants to take Billy's role on, I probably won't be producing a full kit. Quote:
Quote:
CMDRTED: I didn't know there was any other ship model out there that had a Seahawk model in it. I wouldn't mind utilizing it for my own build, but I was really rather hoping someone would offer a very simplified design for use, in case the ship ever did make it to a real kit. I certainly don't have the skill or chops to do an airplane of any kind, so I may just have to do without it. Thanks for the info. Hiob: Thank you for your kind praise. I have been following your Hiei build with great interest, and no small amount of envy for your great skills. You are an artist, ranking right up there with Doris and Billy. I would be really pleased to see what you could do with my very meager design skills. I'm not at all confident that what I am producing is up to your skill level. I do have the full hull, as I've mentioned, but I have so many parts drawn that I just can't be sure which skins go where, which ones were modified to fit properly, or which ones are even the right ones. I also never got to the rudder or bilge keels, and frankly, I have no idea how to go about doing them. So, that, along with space, time, and other considerations, are necessarily limiting me to a waterline model. Besides, I never did get past the first weather decks, and doing the full superstructure is proving to be a serious test. Hangman: I understand perfectly. Believe me, I do. Don: Thank you very much for your kind praise. I've always respected your opinions, and I hope this turns out well enough to not disappoint you. Mark: Good to hear from you! Things just came to a point where I decided I just had to finish the thing, so here we are. In many ways, the superstructure is proving to be more challenging than the hull was. Thanks for posting those old build pics. I had forgotten what those initial design phases were like. Nothing seemed to want to fit together. Very discouraging at first. But those pics are a real blast from the past. Let me thank you all for your kind contributions. From following Adam's build, Doris' builds, Billy's amazing builds of Ken's designs, and Mark's build from when he did that magnificent Arizona, I can certainly tell all of you without guile, that I am not going to be working up to those levels of skill and talent. I'm finishing up the skins, and starting on the superstructure, and by golly, this is turning out to be more difficult than the hull was. There are so many little fiddly bits that I just am having the darnedest time figuring out what goes where and how it goes together. My computer and printer are in one room upstairs, at the back of a very large 5 bedroom three story house, and my build space is on the first floor at the front of the house. So, if I need to redesign a part, reprint a part, or come check the design drawings, it's up and down two flights of stairs to do it. It gets old. I also want to warn you all that I fully intend to cheat. I have a friend in Charleston who has a nice little 3D printer. He's going to be making all my AA guns. Heh. So far, there are 42 of the 20mm Oerlikon mounts, and 36 of the 40 MM Bofors mounts. There is no way in hell that I am going to cut out all those tiny little parts, glue them all together under a microscope, and try to make them even reasonably resemble each other, when I can get Craig to print them out where they're all identical. That's just a no-brainer for me, even if it is cheating. In my down time from actual building, I have managed to design up a few details, such as the Fire Control directors, two radars, and a couple of cranes. Geesh, these things are going to take longer than the basic ship will! Let me give you a little tease of what I mean, and show the parts for the main radar unit. Keep in mind that the original radar antenna was a little over fifteen feet wide. At the scale I am building, however, it is just 61/64" wide... Now, I haven't built this thing yet, but it is coming.
|
|
#14
04-25-2014, 10:52 PM
|
||||
|
||||
|
Time for another update...
I've been working on getting the basic skins done, and ran into a major problem with the drawings. It's been so long since I worked on the thing, that I am having an unimaginable amount of difficulty trying to find which skins are the corrected versions, and then trying to fit them to the skeleton. I've had to take so many skins on and off the skeleton that I am not sure that I might not have damaged some of the edges of the frames. Oh well, I know I have a set of skins that fits, and since I've built that skeleton about 15 or 16 times, I'm not going to worry about it. Once I find all the right skins, I'm going to save them all over into another folder, and rename them all, so that I know which ones are which. My bad. Here are a couple of photos to show some of the progress finding and applying the correct skins. 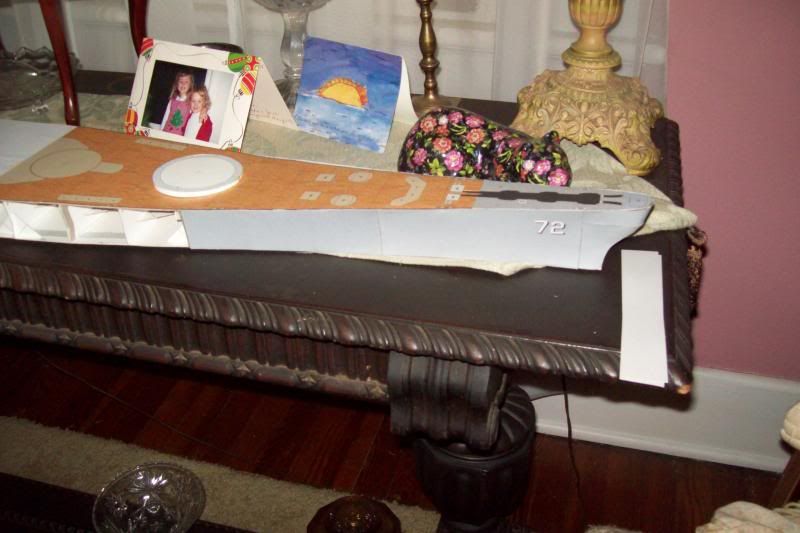 This is as far as I have been able to get, and I really don't want to mess things up any more, trying to figure out which skins are which. So, until I can get the skin issues sorted, I'm going to be moving on to other parts of the ship that haven't been subjected to a build yet. This is part of what stopped the original project, that I started focusing on one issue, and never advanced beyond it. Can't stop now! So, I'm going to be moving on to parts that have never been dealt with, namely the Citadel and superstructure. I decided that rather than try to build in place on the deck, I would build each component separately, so that I can move things around, and turn them upside down, this way and that, and not have to worry about having that nearly five foot long hull in the way. So I did this: 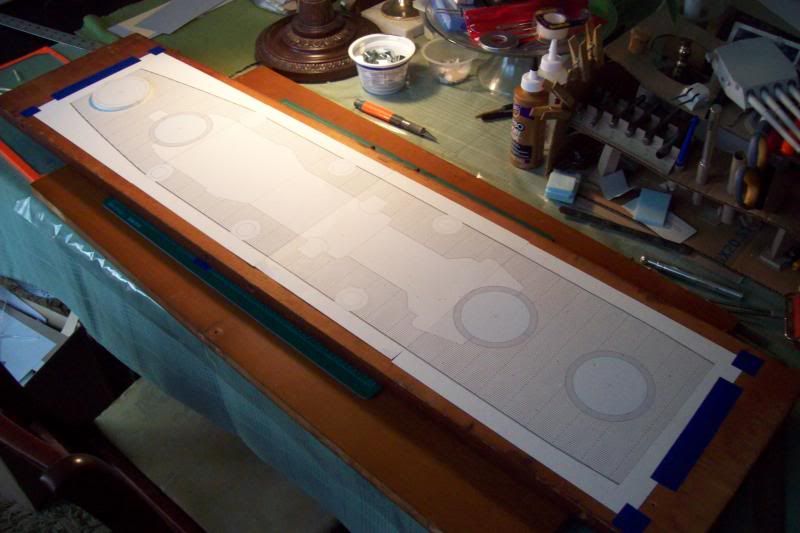 I printed out the deck plates (without the wood grain) that contained weather decks and structure, and taped them together on a board, to have one consistent deck layout from which to work. Much, much easier to work on this way. If I do say so myself, this thing is not only frakking huge, but it's really rather interesting as well. And quite beautiful in a naval sort of way. I got the first barbette down, and then realized that this portion of the deck is still somewhat slanted away from the bow, and so I made a note to make another one that was beveled front to back. That is to say, on the final build, the front face of the barbette is narrower than the back. 3.23° of slope, if anyone's interested in that particular bit of trivia... I did a test build of the slanted Barbette Alpha, and it fits the slope of the deck perfectly, with the top face of the barbette being level, as you can see in the first picture in this post. Sometimes, I amaze even myself...  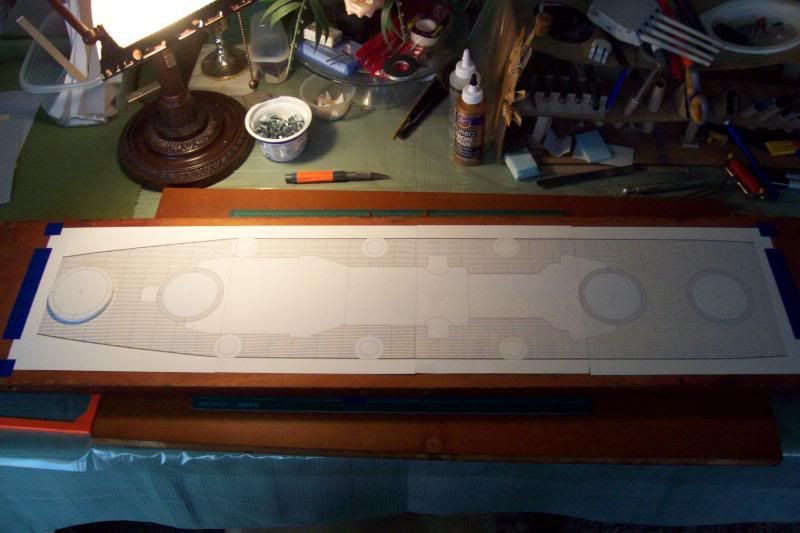 Here, the main weather decks are IP (in progress) and clockwise from the top left: Amidships, Forward, and Aft (under construction). I don't recall where I got this tip from, but whenever I have a part that has to be glued perpendicular to a laminated plate, I always use large nuts to hold the vertical sides against the baseplates while the glue dries. As you can see, the technique works very well. Plus, I get to joke about my big nuts to my wife, whenever she gives me grief about me spending so much time modeling... So it's good in more than one way.  Forward weather deck in place on the test deck. 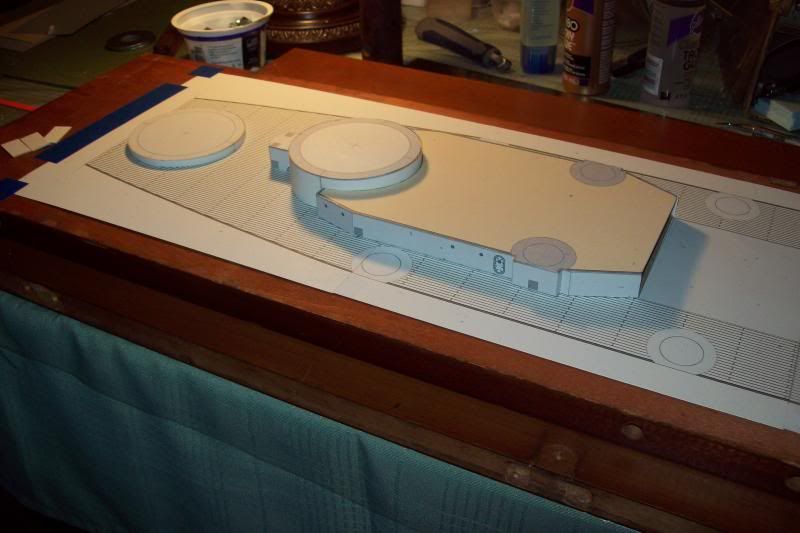 Amidships weather deck being glued in place. 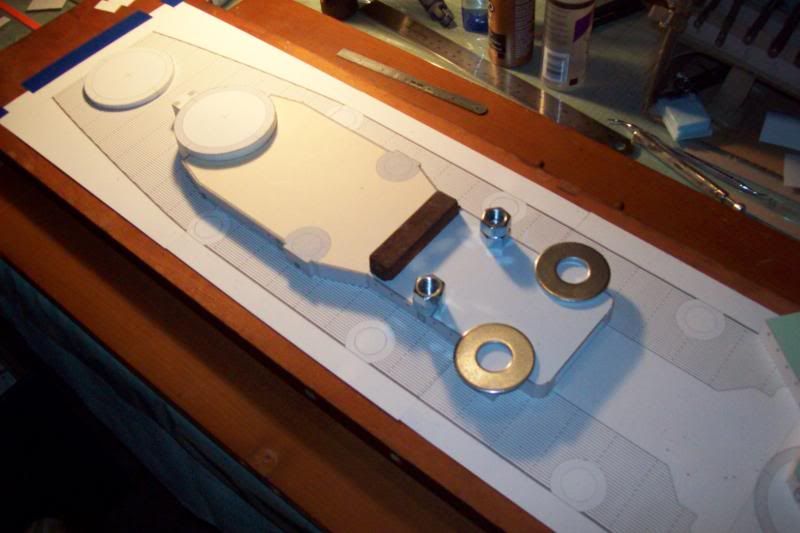 Aft weather deck down, Barbette Delta in place, and Barbette Charlie being glued in place. 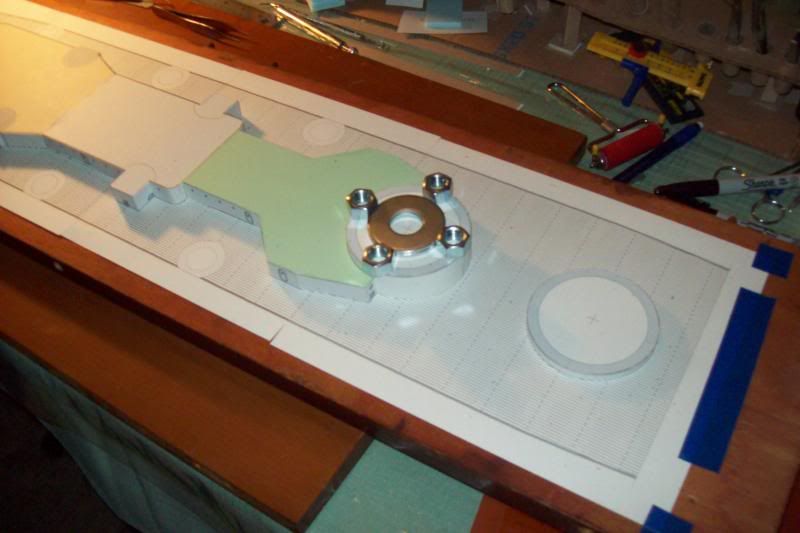 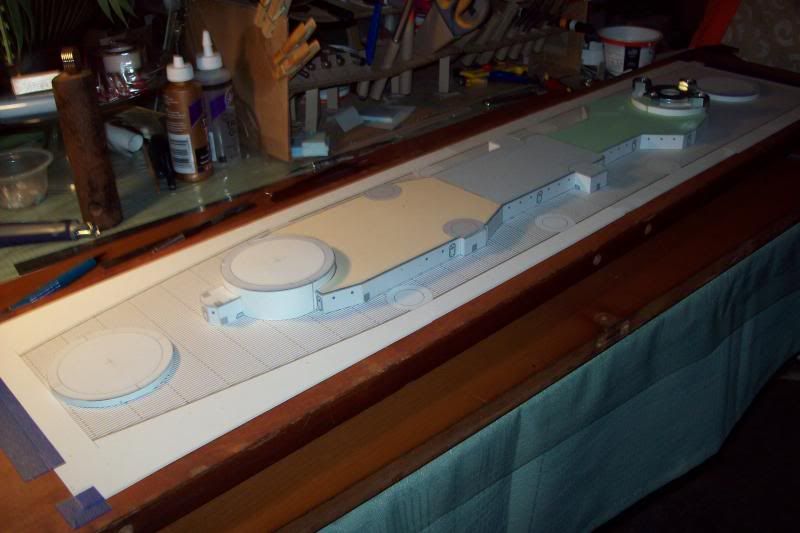 All the weather decks and barbettes in place. So far, so good. Everything fits, and looks good. 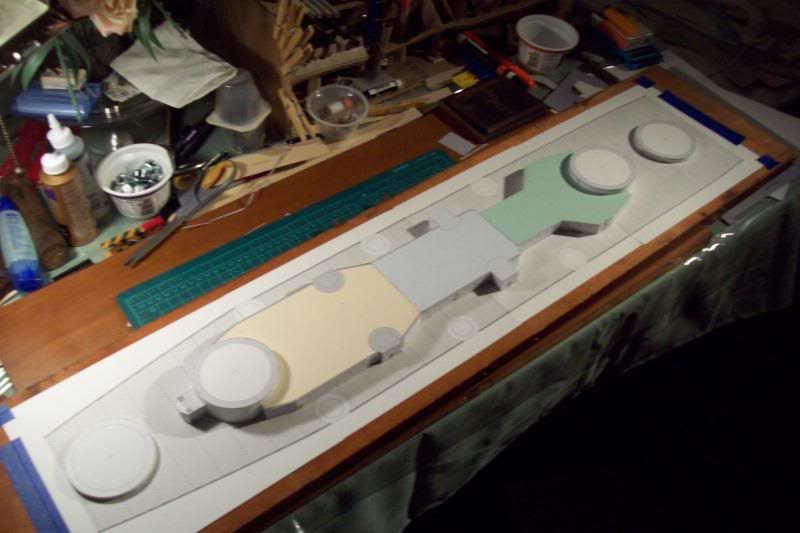 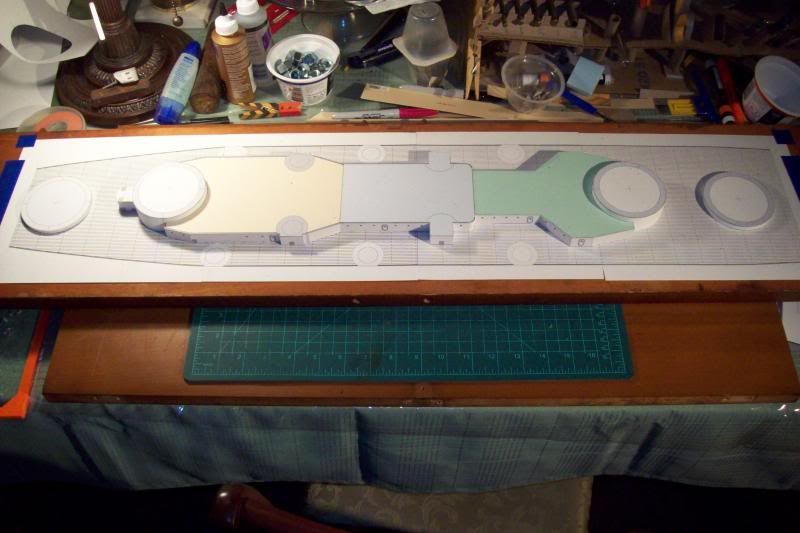 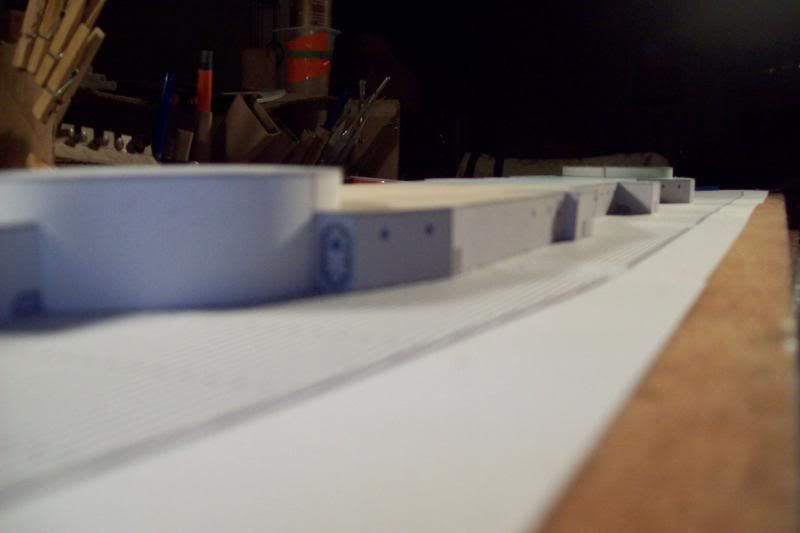 So much for trying to get artistic... I'm making progress on getting the parts to lay out and be built correctly, and this coming week I'll be working on getting together the forward superstructure, which includes the bridge, forward mast, radars, fire control directors, access towers, the forward stack, and all the miscellaneous things you find on modern battlewagons. I'm not going to do any details like rails, radars, guns, or anything else, since this is just a test build to make sure the theoretical design translates to something buildable. Once I get parts that work, and can be assembled, then I'll go back to those final component drawings, and decorate them up with portholes, vents, hatches, and all the other details that make the body of the ship look like it's supposed to look. Once I get the final build done, I will then and add guns, rails, hatches, ladders, life rafts, boats, cranes, and all that other maddening detail that will probably take longer than it did to construct the bloody superstructure! As always, build technique comments are especially welcome, as is encouragement, and all snarky criticism will be gleefully ignored. 
|
|
#15
04-26-2014, 10:00 PM
|
||||
|
||||
|
Wonderful progress. Yes, as I recall you had gone through several iterations to the skins of the hull, and it was a tough part of the build.
But forge through. Things are looking great. As always, your skills and techniques are far better than you give yourself credit for. Looking good!
__________________
Recently Completed: 1/700 USS Nevada (resin) In the Shipyard: 1/350 USS Washington (resin) On the Horizon: Dom Bumagi USS Helena 1/200 (60% complete)
|
| Google Adsense |
|
#16
04-26-2014, 10:15 PM
|
||||
|
||||
|
Thanks, Mark!
I'm forging ahead at the Speed of Government™ I can't get it out of my head that I still have to build TEN 5" mounts, and four main battery turrets. Not to mention tiny radars, fire control directors, and all those damn AA guns... Now I am glad I picked the scale I did. I could not have built this at 1/350 or 1/700. No way.
|
|
#17
04-27-2014, 04:21 AM
|
|||
|
|||
|
Hello Lancer,
first of all thank you very much for your kind answer!! Where did you learn so good German ? Your model looks already quite promising. Don't make you so much stress!! Don't look what you still have to do, see what you have already done!! How much people design their own cardboard models? Regard this model as a recreation from your daily work, not as an additional trouble you have to do. And while you built, you can sail on her, in your fantasy , the seven seas !! I wish you a relaxed day The Oldenburger
|
|
#18
04-27-2014, 05:21 AM
|
||||
|
||||
|
i like it,my government forges ahead quite quickly but unlike you usually in the wrong direction,like the use of nuts,a piece of sheet metal about the size of a cutting mat & bunch of small magnets also works well
__________________
I think life is a big game, and i keep loosing because i never learned the rules.
|
|
#19
04-27-2014, 08:10 AM
|
||||
|
||||
|
Fascinating project.
It is always fun to see a ship that was never built brought to life. Mike
|
|
#20
05-03-2014, 06:40 PM
|
||||
|
||||
|
Quote:
Deine Worte sind sehr freundlich und hilfreich, mich motiviert, weiter. Ich schätze es.
|
| Google Adsense |
 |
|
|


 Linear Mode

