


|
|
|
#61
 01-31-2012, 03:43 AM
|
||||
|
||||
|
The completed bow except that there a a bit of a gap right at the pointy bit that I have yet to fill...
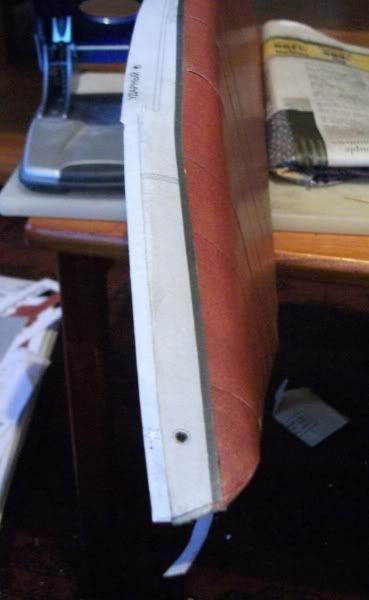 I thought that I had taken a picture of it but I added all the angled braces that support the bow wall; 14 little triangular pieces that went in really smmothly but, as I found will fly a mile if the bow side flexs at all. The join between the wall and the deck is quite fragile so I will probably dribble some more glue along the interior seam to strengthen it up. There are also the odd gap around some of the seams where the hull has distorted in the time it has taken me to psych myself into completing the hull - I'll see how it looks when I get some more of the deck fittings fitted and see what I can conceal under 'stuff'... Being on a bit of a roll, I moved right on to fitting the main deck sheets - the stern sheet went on beautifully but the forward sheet (which covers the forward 2/3) reacted with the glue and all bubbled up. The pale areas on the forward deck is where I have been trying to rub out the bubbles. As it happened, I needed have panicked as it seems that the bubbles started to go down as the glue cured - I'm away from the next couple of days so will see what it is like when I get home. 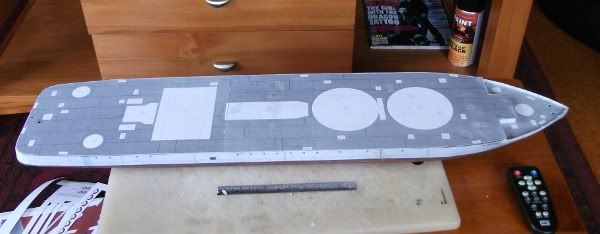 Just to get a feel for what the next stage will look like I temporarily placed the deckhouse structures in place... 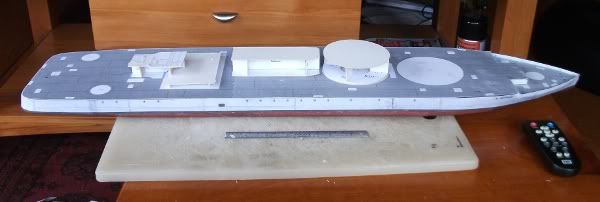 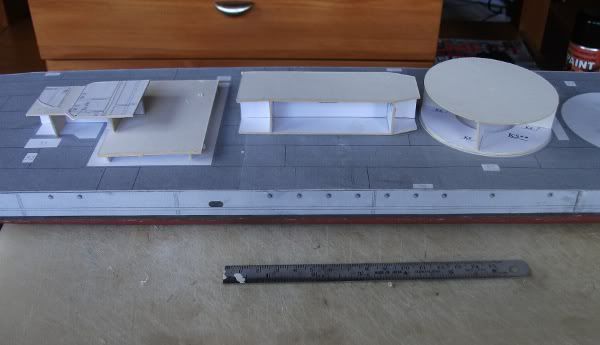 Lessons from the last couple of days: Big sheets of paper stretch - I was worried that the forward deck sheet was about 2mm too short but after I fixed it in place, I had about a 1.5mm surplus left over the forward edge of the main deck. When I test-fitted the forward main deck sheet, I didn't really thing about checking the smoothness of the underlying surface as, of course, the rigid dry paper sat smoothly over any minor roughness. Different story altogether when the paper is soft with glue and the very forward edge of the main deck is quite bumpy where the sheet has conformed to the contours of the under-surface...should not be a diffuclt thing to fix but lesson learned.
__________________
Please critique my posts honestly i.e. say what you think so I can learn and improve... The World According to Me 
|
|
#62
01-31-2012, 11:29 AM
|
||||
|
||||
|
Simon,
Great build thread my friend.Hopefully once I have a little more experience building in card I can attempt a project along the same lines as yours. I'd love to upscale an Ironclad form the War of Northern Aggression 1861-1865.There's certainly are so many excellent kits available for such a project. Looking forward to your next update. Highest Regards, Gregory Jouette
|
|
#63
02-07-2012, 02:10 AM
|
||||
|
||||
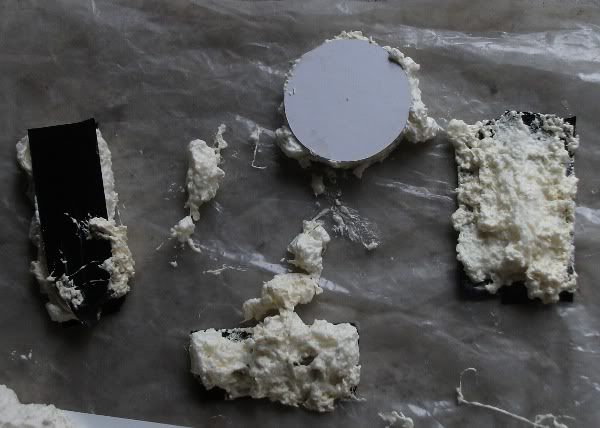 It looks a lot worse than it is...these are the major structural components of the superstructure that I thought I'd fill with expanding foam to provide a solid backing for the walls. Got a bit out of hand as the can of foam I bought was actual meant to be fitted to a separate trigger assembly...in the absence of said trigger assembly, I tried releasing the foam by pressing directly on the nozzle - it worked - to a point - but control was, shall we say, erratic... I then made matters worse by trying to finesse the foam into corners I had missed due to aforementioned control issues...needless to say, the Golden Rule remains 'Don't touch the foam til its fully cured'... I'll let the parts sit until the weekend and then tidy the m up with a large sharp knive....
__________________
Please critique my posts honestly i.e. say what you think so I can learn and improve... The World According to Me
|
|
#64
02-07-2012, 02:55 AM
|
||||
|
||||
|
Simon: You and I often ride in the same chariot! The I-400 hath posed similar problems!
Jim
__________________
1914--1918. WE WILL REMEMBER THEM.
|
|
#65
02-15-2012, 12:43 AM
|
||||
|
||||
|
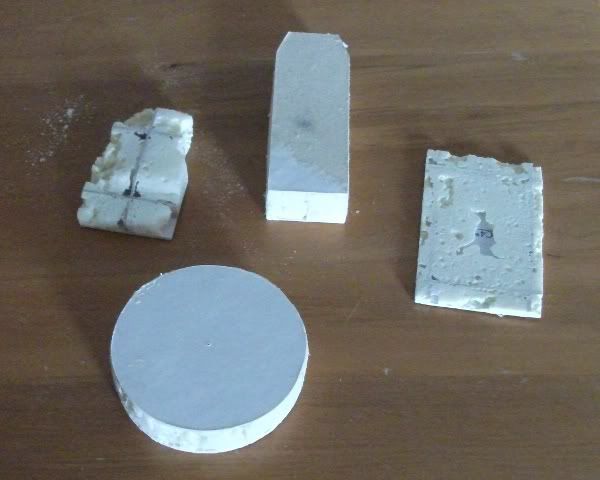
I left the foam for a whole week before trimming and sanding back the surplus foam (see above)
__________________
Please critique my posts honestly i.e. say what you think so I can learn and improve... The World According to Me
|
| Google Adsense |
|
#66
02-15-2012, 10:58 AM
|
||||
|
||||
|
Looking forward to more of your work with foam, and how it fits into the project.
Mike
|
|
#67
02-15-2012, 03:31 PM
|
||||
|
||||
|
Simon:
See my earlier post re your work! I wish that we lived closer together...would much like to knock back a pint with you anytime! Methinks that when we stop learning from our work, and experimenting, we will be forced to take up harp lessons with the "choir invisibule" (M. Python)  You have taught me many things already! Your Udarnyi and my I-400 have many things in common, so I watch you closely! Quest boldly into the unknown! You do good work! Jim
__________________
1914--1918. WE WILL REMEMBER THEM.
|
 |
|
|


 Linear Mode

