


|
|
|
#1
 01-23-2011, 11:58 AM
|
|||
|
|||
|
I will open with a big thank-you to Waldemar Kalinowski for such a beautiful design its waaaay too good to be cut by the likes of me! Maybe you should consider letting Gremir ePublish your inspiring work & save us mortals some heart-break?!
How I got a decent scan /jpg :- First the scan I removed the lid from the scanner as trying to fit a B4 page on the bed is impossible with 100% accuracy with it in place. (Holding it up should also work but as mine will happily come off I got it out of the way.) As is visible from the fold line it is actually best to scan sideways as then you have full control of edge orientation vs page bending. Nice straight scans. You do need to find an anvil of suitable footprint to put on the model page caution should be exercised as to the weight resistance of the glass. I found grouping smaller heavy items better to pin the page whilst allowing me access to adjust orientation. 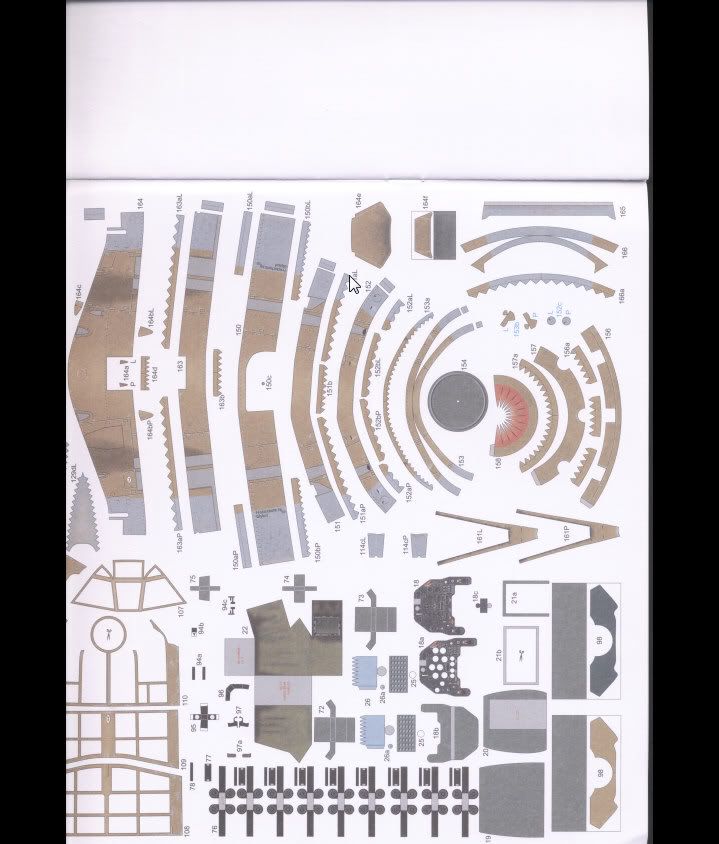 The output was set to 600dpi jpg all colour/contrast controls set to 0 or normal. Scan style was set to colour photo in the scanner software. I used IrfanView to batch scan via the TWAIN interface rather than risking the scanner supplied software with its poor feature set. 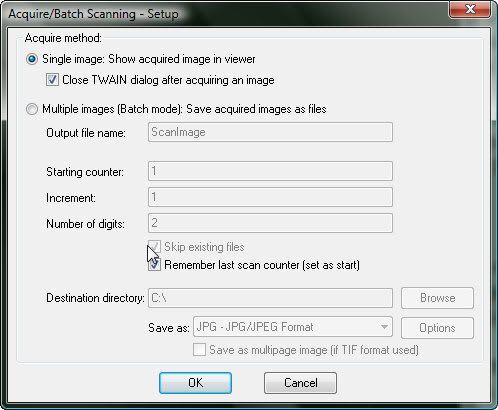 I will add that a lower dpi results in more visible dots take it to 100 & you get the poor news-print effect on the images. As you can see from the following even tho it was scanned at 600 the header has not held the info & I have a rather big page to print (see the preview-a small corner on a full sheet) when that info hits the pinter the warping of scale occurs (Thats my theory anyway) 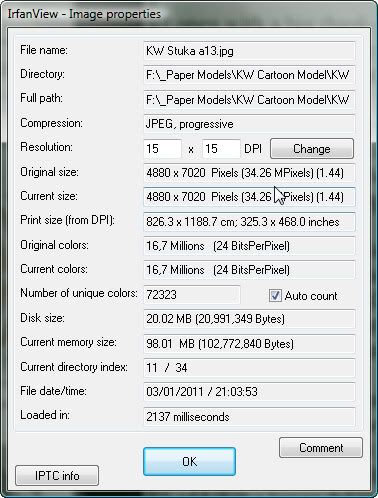 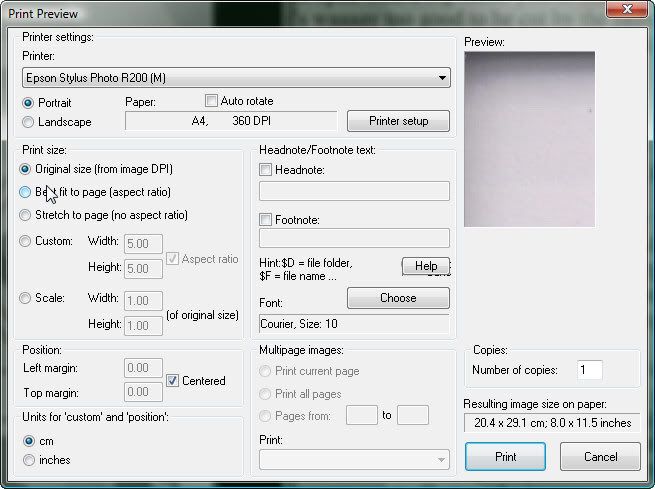 Using IV to fix the dpi & then using it to print using dpi gives the right scale to page output. To do this the files were loaded into the batch processing tool of IV 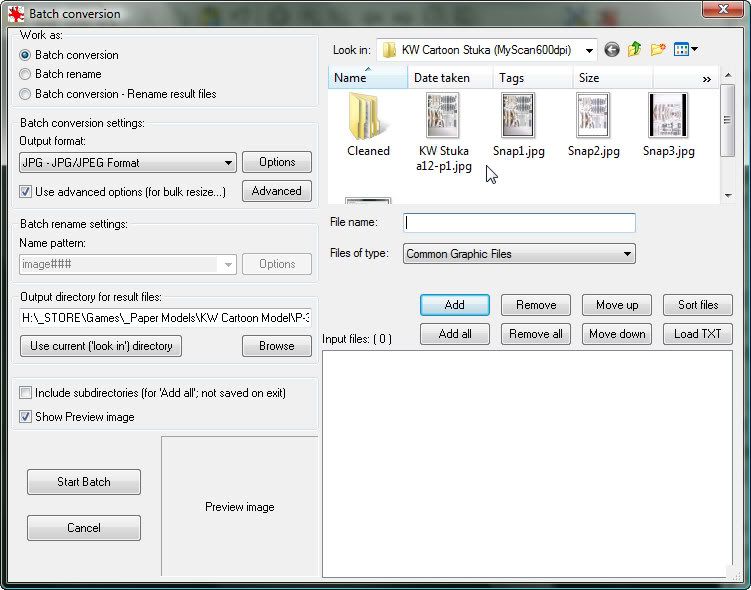 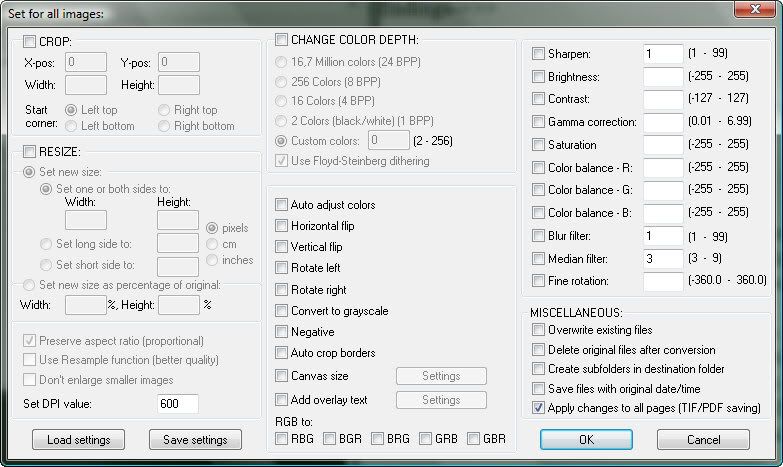 In advanced you can set a lot of options I was interested in fixing the dpi so entered 600 in the bottom left. (This free prog could solve a lot of issues with this toolset.) Second on to Photoshop As you can see in the raw scan (1st pic at start of post) colours suck. Dusty, cloudy, kinda fuzzy, tonally skewed not so great Auto colour correction - 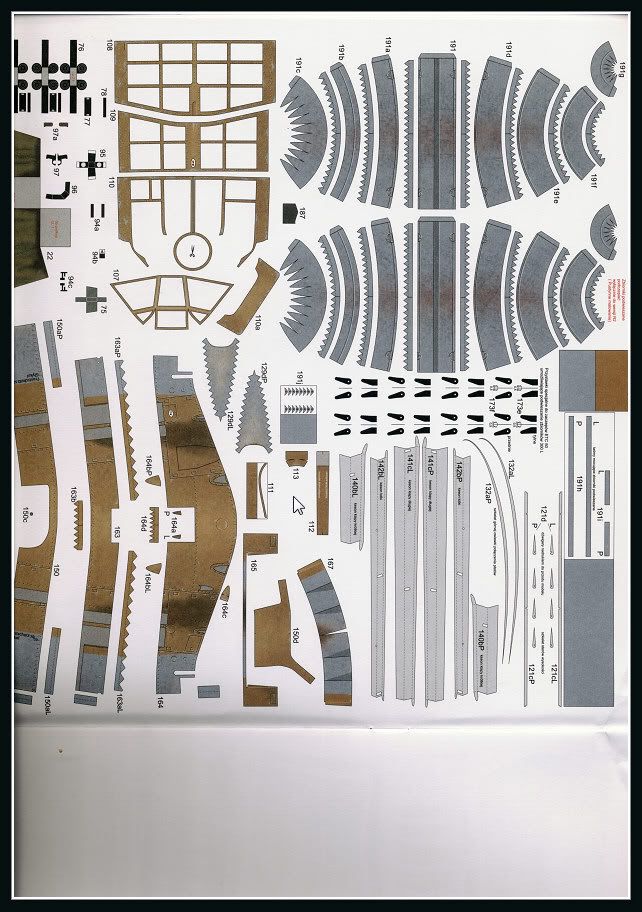 Yeah not so much ") Notably using auto values on the different pages resulted in all the pages having different tones. The algorithm was selecting the 'best' solution per image not per image set...! Adjust canvas size to the paper size to be printed (This should match the area you set the scanner to scan - I scanned a page of my output paper first & then set the scanners bounding field to match - depends on scanner & software but somewhere is a tool to fix scan area.) Known quantities reqd. Adjust image size - Enter res @600 & check the other values (should be obvious from my images which is wrong i.e. where I skipped the needed corrections in canvas size to show what can go wrong). 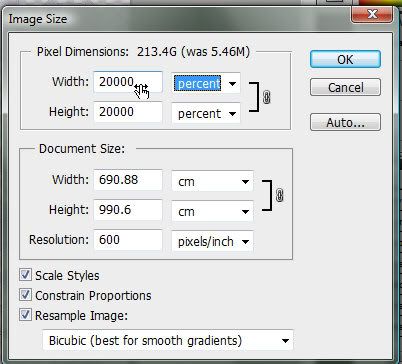 So set image to 16bit, adjust levels (mid range had best impact for me), & then get my best buddy the magic eraser into the game. 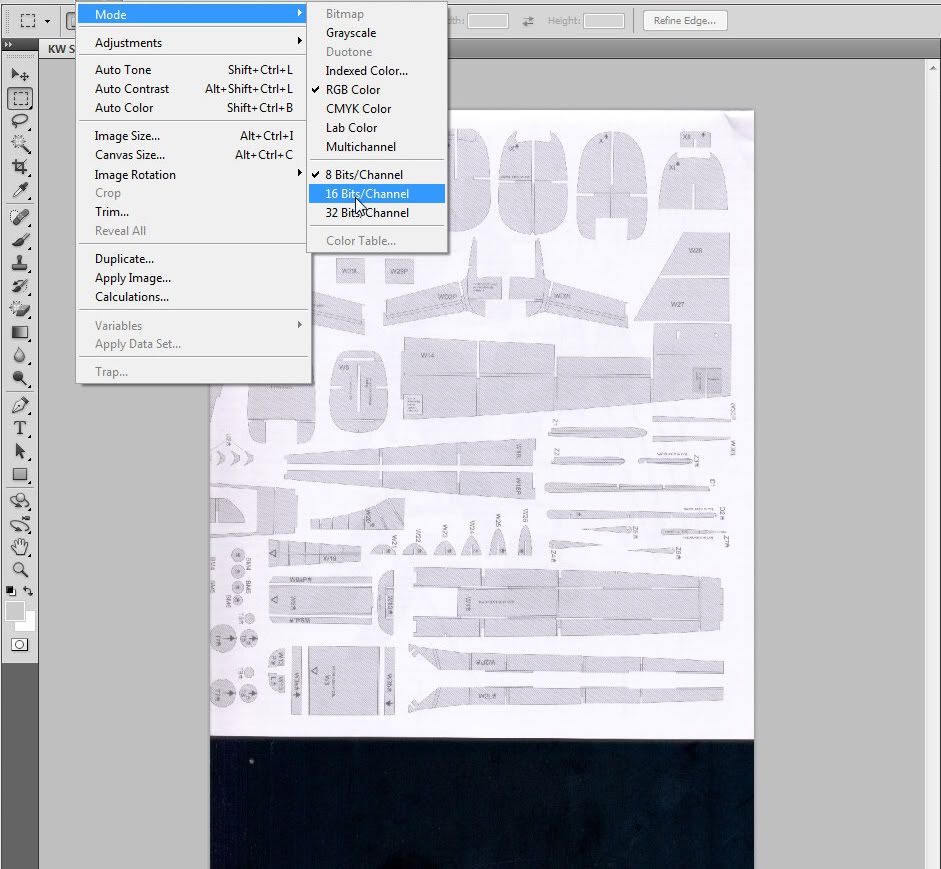 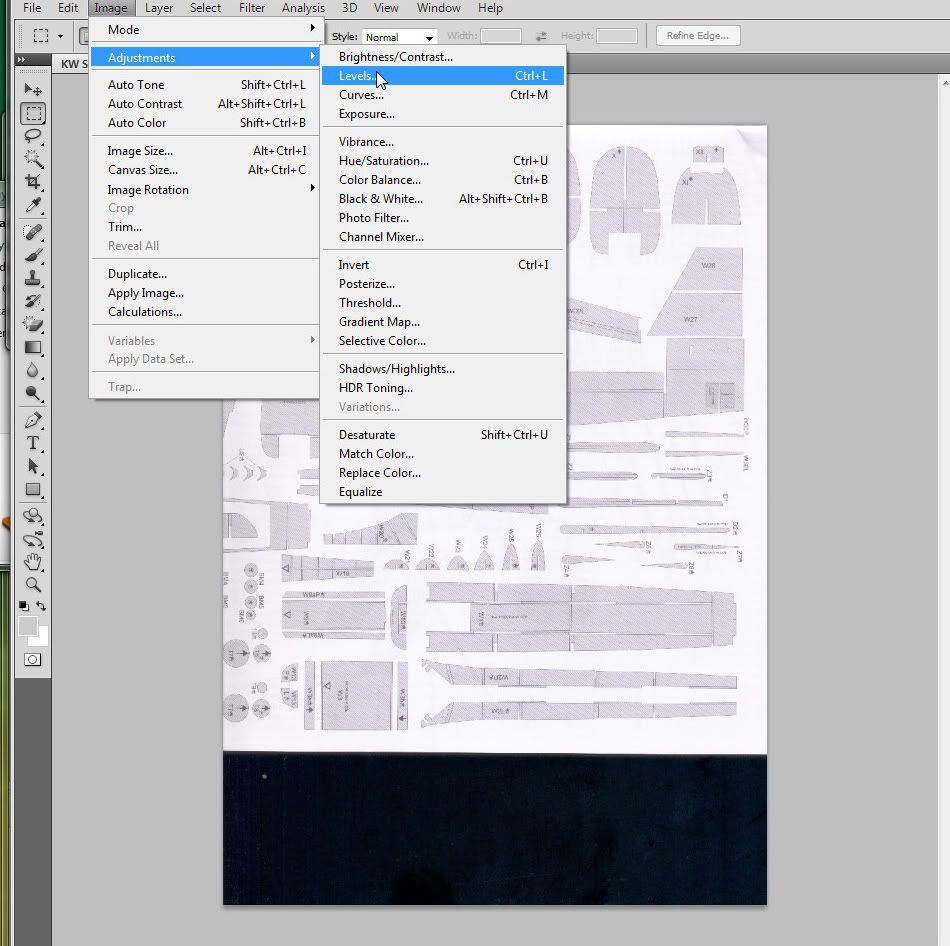 As you can see the mess is nuked & a transparent area is created. Not only does this mean no ink printing shadows but I can now slide the whole thing to the center of the page. (Selection box/move tool) (3rd image below). 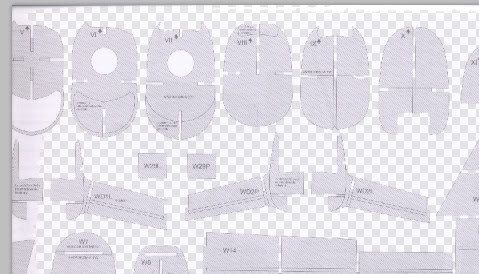 I now kill off all partial elements with the normal eraser, using a selection box limits where I can get the eraser into trouble spot the deliberate mistake? 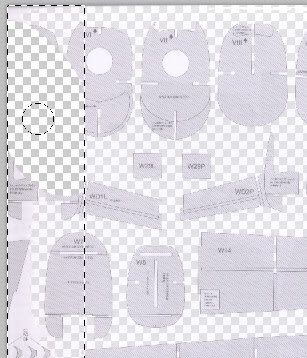  (Moving a section is now easy - in reality I slid the whole bunch around a bit so the print area/model area correlation was maximized.) Now a save (a new copy not an overwrite obvously!) 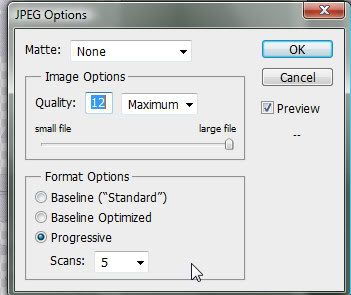 If you have avoided the errors you will get a print preview that matches where you want things to be & that when printed will be at the correct scale. 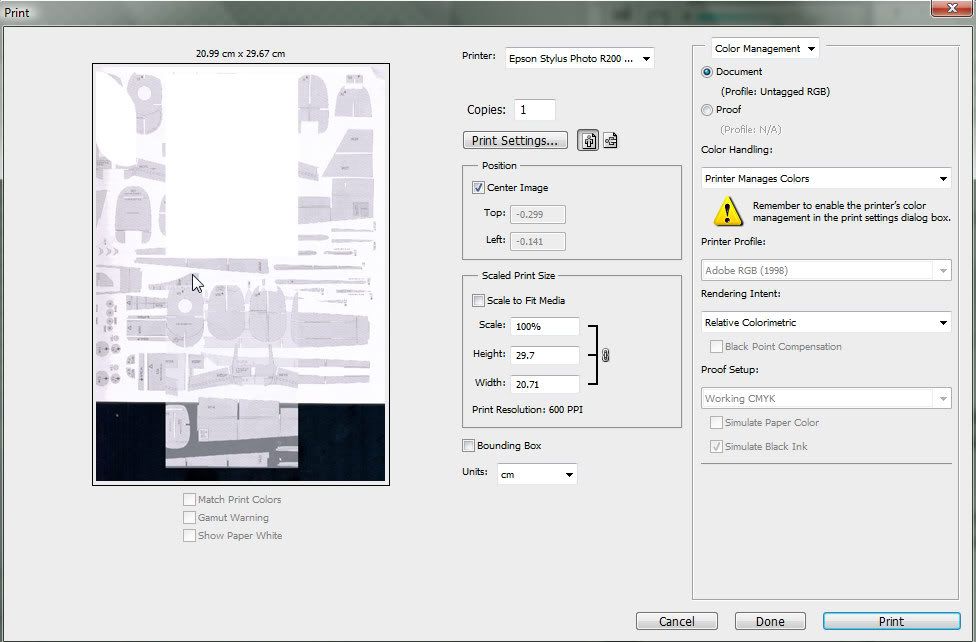 To be sure I used a micrometer on my original & on the output page, checking elements at random at top, bottom & middle of print run, randomly to verify constant fidelity. Best to do a draft colour run of a single part infested sheet before sacrificing the best paper  ) )Info on PS usage etc: - Photoshop eraser Colors?? - Why Don't Printed Colors Match What I See on the Monitor? also has links to calibration info. 
|
| Google Adsense |
|
#2
01-23-2011, 12:00 PM
|
|||
|
|||
|
Taaadaa - my resultant page after a bunch of tweaks -
 vs the other half of the original (showing overlap) Well Leif, that little job has saved the model from the knife fo a few more days. 
Last edited by hirondelle; 01-23-2011 at 12:15 PM.
|
|
#3
01-23-2011, 12:46 PM
|
||||
|
||||
|
Right. We all have our own ways of postponing the "setting of the knife to the model". Just one thought:
At the beginning of your thread you mentioned that you removed the lid of the scanner. I wonder if that is such a great idea, at least if it leaves some of the scanning surface uncovered. Years ago I received extreme advice to the point of covering the whole scanner with something inpenetrable to light, in order not to mess up the scanner's own measuring of the background. I haven't really paid any heed to that, but then again, my scanner stands in a dark corner. I am not so sure about these things, but I thought the scanner sort of measured the whole area during the prescan, to determine a general sensitivity level to be applied to the real scanning in the next step. If you leave a part of the scanning area (glass bottom) uncovered, this would mess things up completely, I would have thought. I keep the lid on the scanner and let the lid press down on the printed model, even to the point of deforming the printed booklet slightly, exactly in order to prevent any spurious light sipping into the scanning area. The weight I use on top of the lid to press the printed booklet down - your anvil - is an old-typ ironing iron, weighing some 2.5 kilo. If I think it is warranted I will put two of those really heavy lumps of iron on top of the lid. Anything to keep the lid - and thereby the printed model - tight, and "light-proof" against the scanning surface. Perhaps I have misunderstood the whole thing about leaving the lid open. Apologies in that case for wasting space. Leif Last edited by Leif Ohlsson; 01-23-2011 at 01:02 PM.
|
|
#4
01-23-2011, 01:07 PM
|
||||
|
||||
|
With my hated HP all-in-one I can take the lid out of the hinges and still place it over the scanner bed.
I sometimes use 3M Magic Tape to hold the original sheet in position. I use a Concise Oxford Dictionary and the Oxford Dictionary of Quotations to weigh down the scanner lid. Works a treat. David
|
|
#5
01-23-2011, 01:33 PM
|
|||
|
|||
|
Quote:
  I did the prescan on the plain page with the top down, then un hooked it so as to allow freedom of interaction. That way I get an independent 'white' reference too. Only one prescan to set parameters, (scanner is under the desk in a dark spot), then the batch of pages. As far as color goes you can see from my result it's good when 'repaired'. Also I think modern hardware can cope better with greater disparity of input, tolerances & corrections run on a higher level than did the original tech.
|
| Google Adsense |
|
#6
01-23-2011, 02:42 PM
|
|||
|
|||
|
Be careful with that auto color correction, it can turn your blues to yellow, with photoshop I much prefer to adjust everything manually and write down what you change.
If you scan and print alot it might be an idea to gamma/color match your scanner, monitor and printer, but you'd need a color target bought from a shop, not off ebay (and not one you printed, obviously). It's not as difficult as people make out.
|
|
#7
01-24-2011, 09:42 AM
|
|||
|
|||
|
Leif - I maybe should've also stated the obvious (to me) - the B4 paged booklet when open is about 19.69 × 27.83in (B2)
The scanner bed is just about 10x14in - so coverage is less of a problem than cross-ref of which corners you are scanning in order to build up the parts on a 'friendly' sheet size. Hence lid had to go - not enough space & breaking the spine & forcing a (slightly rippled) page fit wasn't working. D-Hs weights & tape are the way to secure the barn-door on the scanner.
|
|
#8
01-24-2011, 09:48 AM
|
||||
|
||||
|
Like I said, I knew I would step into it somehow...
I remember scanning a couple of those big originals. Like you, I guess, I did it in two scans per original page and then spent a bit of time in Photoshop piecing them together, trying not to divide a part. Not always possible, I remember, particularly when it came to wings and other big parts. I can only sympathize. For the technical discussion, I must bow out and leave you to more competent sparring-partners... Leif
|
 |
|
|


 Linear Mode

