


|
|
|
#1
 01-13-2012, 04:51 PM
|
||||
|
||||
|
Is there a thread on folding long parts ?
Hi all . I need advice on the best way to fold long slender pieces multiple times. I am building the Spida Tatra extreme trials truck in 1/32. The frame rails are long and require 4 folds .
What is the best way to do this. Here is a link to a build of the Tatra Done by Chapuzas100. Tatra Extreme Trials Truck / 1:32 / Spida Models 
|
| Google Adsense |
|
#2
01-13-2012, 05:20 PM
|
||||
|
||||
|
No thread I know of. However, when confronted with this problem, I 'rough cut' the part leaving as much paper as I can beyond the part outlines. I score the fold lines, then fold the paper holding a metal ruler with its edge along the fold line. This is the same principle as using a metal break to fold sheet metal. After the folds are made, I then trim off the excess paper around the outline of the part. And, if all else fails, do as I do and cheat...enlarge the little SOB to 1:24 scale.
__________________
It's not good to have too much order. Without some chaos, there is no room for new things to grow.
|
|
#3
01-13-2012, 05:53 PM
|
||||
|
||||
|
Using small 90 degree gussets at each fold will help. I used it on the MT-LB body,
and it provides some much needed stiffness in these situations. Just put a few on each inside fold line.
__________________
Ray Respect the Paper, RESPECT IT! GET OFF MY LAWN!
|
|
#4
01-13-2012, 08:07 PM
|
|||
|
|||
|
The classic method is to crease the opposite site of the bend with a tool of some sort - I use a pointed nib in an Exacto handle, others use dull knifes and cetera. As already pointed out it is often easiest to do before cutting out the part since you have better leverage for the fold.
The possibly best but also possibly difficult is to back-mark the part (poke holes from the front at the ends of the lines, flip the part and draw LIGHTLY with pencil) and then cut a shallow V on the line with a fresh and sharp knife of your preference. Also, folding with a straightedge after any technique can help the straightness.
|
|
#5
01-14-2012, 02:04 AM
|
||||
|
||||
|
I agree with Texman. Some extra gussets will realy help.
Might also be worth thinking about adding some internal strength to this box section. Especially if it has to bear any weight. Tim
|
| Google Adsense |
|
#6
01-14-2012, 02:22 AM
|
||||
|
||||
|
Even better is making an extra set of parts and backing the frame pieces on an appropriate thickness of cardboard, then wrapping the cardstock around it. Makes a part that is hell for stout.
__________________
It's not good to have too much order. Without some chaos, there is no room for new things to grow.
|
|
#7
01-14-2012, 06:45 AM
|
||||
|
||||
|
Expanding on the tip for using the edge of a ruler - if you take two thin steel rulers and sandwich the part between them with the fold line at the edge, you can then carefully bend the part making several passes, bending a little more each time and working your way along the part. Technically it's a bending brake (Google for tool info). Once folded, a simple jig (something flat with a straight "step" that's a bit less than the thickness of the finished part) that gives you a straight, right angle to hold the bottom/side of the part against while gluing will keep the part straight and avoid twisting.
Yogi
|
|
#8
01-16-2012, 09:44 AM
|
||||
|
||||
|
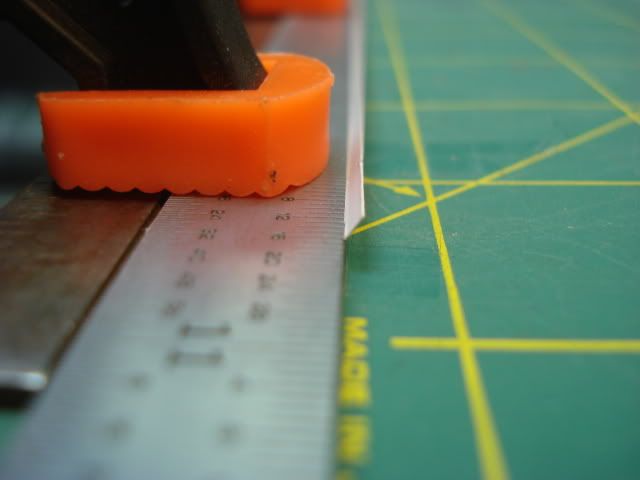
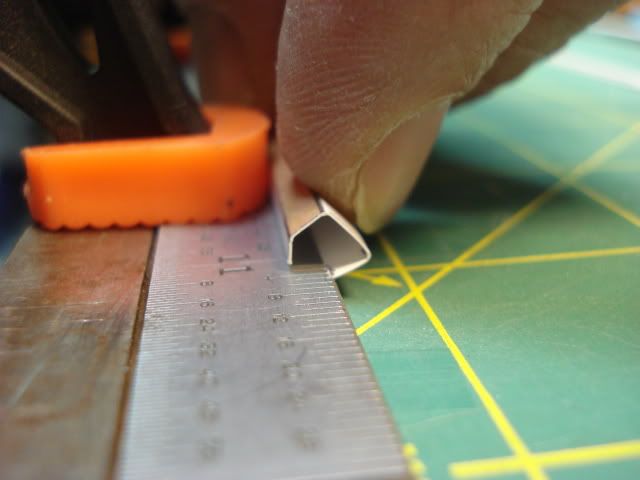
Thanks for all the help. Here is what I did. The idea of a break was what I went with using a couple of steel rulers and some small clamps. I scored the fold lines on both sides and then clamped the pieces down and slowly worked the bends. So here are some pics of what I did.
|
|
#9
01-16-2012, 09:56 AM
|
||||
|
||||
|
This has turned out to be a very interesting and informative thread. Thanks for starting it, rixtoys. Looks like you have developed a simple and effective paper bending brake.
I once used a similar contrivance belatedly to put a bend into a part of a model that I had earlier failed to bend properly. Don
|
 |
| Thread Tools | |
| Display Modes | |
|
|


 Linear Mode

