


|
|
|
#1
 05-04-2012, 03:01 PM
|
||||
|
||||
|
Petal Design Vs. New method
I was waiting on some reference material to arrive for a design I was working on when I decided to take a break and revisit an old enemy of mine. The GPM 155 Phantom F4E . This is one of those models that make you cringe at the sight of it. Well I built the center fuel tank and hated how it looked. What follows is a record of how I defeated what would have ruined my model. The good news is it took about 45 minutes and was pretty straight forward. Just like printing, you can always fix a mistake by just painting again on the part.
I don't think you have to jump through a bunch of hoops to paint. Just use a primary pallet of colors and mix them in the tray as you go. Then you will know when the color is right. I used green, added in blue, then added in yellow. Black was added to get the right shade. Then I let that dry. I then did a top coat of grey, same base coat with white and black added to make lighter. This is the final coat that was rolled onto the sponge to acheive the texture of the printed part. When the model is all done the small difference will never be noticed. 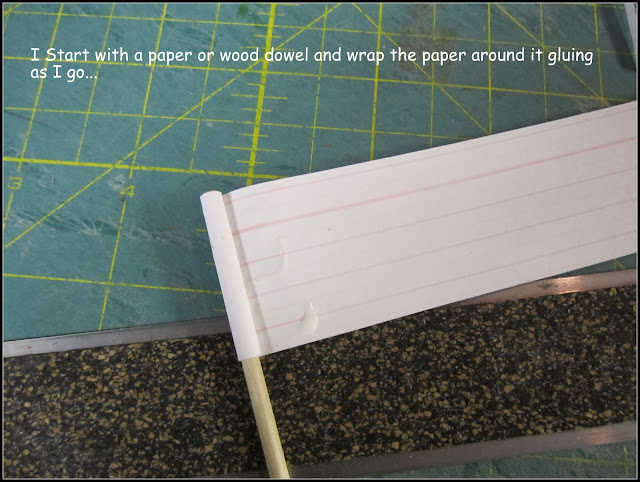    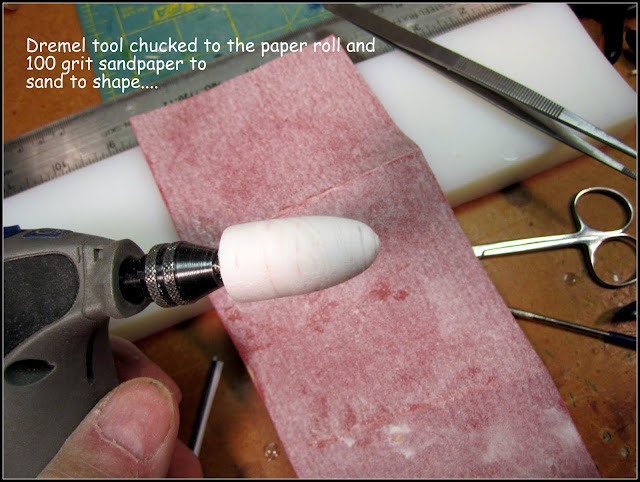    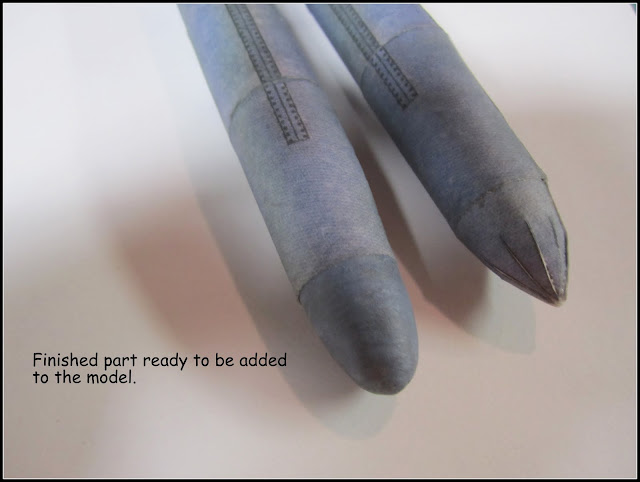
__________________
Mike Dixon Anything in paper is fine with me 
|
| Google Adsense |
|
#3
05-04-2012, 03:26 PM
|
||||
|
||||
|
Quote:

__________________
Mike Dixon Anything in paper is fine with me
|
|
#4
05-04-2012, 04:49 PM
|
||||
|
||||
|
Great!!!!!!!!!!!!!!!!!
Petal design is like watching the original Tron movie today. It is so last century! Thanks Isaac
__________________
My gallery [http://www.papermodelers.com/gallery...v-r-6&cat=500] Recent builds Meteor F1, Meteor F8, Mig-Ye8, NA Sabre, A-4E Skyhawk,Mig-15 red, Mig-17 repaint
|
|
#5
05-04-2012, 05:17 PM
|
||||
|
||||
|
Excellent way to go !
|
| Google Adsense |
|
#6
05-04-2012, 05:31 PM
|
||||
|
||||
|
Quote:
(I'm not a fan of petals, but I do the best I can)
__________________
Ray Respect the Paper, RESPECT IT! GET OFF MY LAWN!
|
|
#7
05-04-2012, 05:41 PM
|
||||
|
||||
|
Certainly the way to defeat the dreaded "petal".
I've used something similar for a while and suggest using sanding sealer before you start sanding - this gives a much better finish and you don't get any tearing of the paper fibres during sanding - the "furry" effect. I usually rough the part down to approximate shape, reapply sanding sealer and finish with fine grade sand paper. Oh - unless you have no sense of smell don't apply sanding sealer indoors. It's ok when it's dry though. Regards, Charlie
|
|
#8
05-04-2012, 05:59 PM
|
||||
|
||||
|
Quote:
__________________
Mike Dixon Anything in paper is fine with me
|
|
#9
05-04-2012, 06:07 PM
|
||||
|
||||
|
Sweet! I've seen this technique on konradus and other European forums, but it's nice to see it here as well!
Say, Mike, when/where did you pick up that F-4E? That thing is rare! And, speaking of the furry effect.... "That Tiger Tank has real fur!" :D
|
|
#10
05-04-2012, 06:12 PM
|
||||
|
||||
|
I've used the sanding sealer on shaped things like cupolas and headlights for AFV models - these are made from stacks of card - in your application with 80 gsm paper the glue is probably acting like a sealer.
Regards, Charlie
|
| Google Adsense |
 |
|
|


 Linear Mode

