


|
|
|
#21
 08-22-2016, 02:34 PM
|
||||
|
||||
|
QWell here's my basic modelling kit.
Picture 1 From left to right.....
Picture 2 - My trusty work magnifying googles (and low level eye protection). Picture 3 - An o!d mouse mat I have used for years and years as a cutting and glue mat! Apologies if the pictures are low quality - just did all this using my phone only.....
__________________
The SD40 is 55 now! 
|
|
#22
08-22-2016, 03:18 PM
|
||||
|
||||
|
Quote:
I think everyone was just checking in to show they have their tools. You don't need all that. A hobby knife and cutting mat are pretty much your primary tools. You need to have something with a dulled point to make the fold scores. I'm surprised no one has mentioned the dead ball point pen that used to be used by a lot of members here for that. And you need glue. You don't want School Glue because it has too much water in it. Any craft glue will work. Scissors are optional. I find that I cut curves more smoothly with scissors than with a knife VK
__________________
A fine is a tax when you do wrong. A tax is a fine when you do well.
|
|
#23
08-22-2016, 03:27 PM
|
|||
|
|||
|
Michaels craft store has closed here in Savannah, GA but we have a Hobby Lobby and they always have 40% off coupons on line to print out. I usually seal my models before scoring and cutting but opted not to on this build. I also forgot to include that the markers I use are Faber-Castell pitt artist pens.
|
|
#24
08-22-2016, 03:28 PM
|
||||
|
||||
|
Dear Modelers:
The trails and tribulations of printing with out a home printer (it Died) took thumb drive to Office Max got an officious clerk who refused to print AirDaves PDF. Went to branch Library close to home they refuse to print card stock, Went to next closest Library first printer only printed blue second printer only printed yellow the librarian did change the inks and finally I got a print. HP Office jet pro 6230, Printed actual size on Walmart 110# cardstock. Photo taken outside in sun light. I did not coat my cardstock. I will shoot it again on work bench sure looks blue paper in photo. Dear Liz: This will be a learning experience for all of us. After many years of modeling O made my own Modeling Bench from an old sewing machine base, some where in the forum is a thread on what it looks like, What works for one may not be best for every one. Photo:
|
|
#25
08-22-2016, 03:33 PM
|
|||
|
|||
|
VK,
I had dead ball point pen in my list. just sayin' 
|
| Google Adsense |
|
#26
08-22-2016, 03:56 PM
|
||||
|
||||
|
Zoinks! Less than 24 hours and I'm already behind. Sprogs, ignore my list, it's really just like everyone else's -- none of it is any better, even in my mind.
Printer: Canon inkjet MX922 with Canon inks (Pixma 250 and 251) Paper: Hammermill 67 lb. cover stock white Bristol, U.S. 8-1/2 x 11 inch Tools: See picture below. I have a lot of knitting needles lying around so that's what I curl paper with. I like the largest yarn darner needle for scoring. The square card at upper right is a scrap piece of paper that I put drops of glue on. I'll probably use the watercolors for edge coloring. Looking forward to Airdave's next lesson!
|
|
#27
08-22-2016, 04:26 PM
|
||||
|
||||
|
Here Is my starter picture.
Printer is a brother dcp j4110dw with brother ink. Don't know the make of the paper but it's a smooth white 170g. Picture shows the tools am likely to use on this build. The Swann Morton hexagonal scalpel handle with an 11p blade. The pair of tweezers a bamboo skewer that used to apply glue the glue I use Evo stick white wood glue I usually squeeze out a blob, onto a bit of gash corrugated card. 6 inch steel rule. I tend to use a scalpel to cut everything out with and I also use it for scoring making a light cut along the scoreline. watercolour pencil for edge colouring I will shave off some colour onto a plate and then mix with water to get a consistency and strength the colour to do the job. And finally tools that I can't show you in the picture because they're holding the camera 10 very dextrous folding holding manipulating fingers. And to complete the quote Bob's your uncle and Fanny's your aunt. 
__________________
David........... Paper modelling gives you a happy high. currently building. c GAZ 51 ALG 17, wagon 111a. unex DH411 excavator and spitfire Mk 9
|
|
#28
08-22-2016, 04:28 PM
|
||||
|
||||
|
Miles...I guess you can't fault the copy guy for doing the right thing when it comes to intellectual property.
Unfortunately, this protection is not consistent across copy outlets. And...its quite simple to verify that the model is a public download and print item. It only says "do not copy" on the model sheet. It doesn't say "do not print". Since it hasn't been printed yet, "copy" obviously applies to copying the digital form. Doesn't it? Although you could argue that it does apply to printing more than one copy...? LOL Sorry you had so much trouble Miles.
__________________
SUPPORT ME PLEASE: PaperModelShop Or, my models at ecardmodels: Dave'sCardCreations
|
|
#29
08-22-2016, 04:31 PM
|
||||
|
||||
|
romanmodels (David?)...I noticed you are using EVO-STIK Wood Adhesive.
You might have the wrong glue for this project. This "Van" does not have an Interior. We are only building the outer body of the Van. You should have purchased the "EVO-STIK Wood Adhesive Exterior" Glue.
__________________
SUPPORT ME PLEASE: PaperModelShop Or, my models at ecardmodels: Dave'sCardCreations
|
|
#30
08-22-2016, 05:44 PM
|
||||
|
||||
|
Step 1 Preparation of the printed Model Sheet.
I print on plain white 65lb/176gsm Cardstock (not cover stock, but thats just my preference for paper) I design these models with 65lb cardstock in mind...I use .25-.3mm as a tolerance for sheet thickness. (Glue adds some thickness) The weight appears to be suitable for these models, I've never felt the need to substitute any lighter materials. And I definitely wouldn't use anything heavier, since at this scale it becomes harder to fold, crease and curve small parts cleanly. I generally save my 110lb (199gsm) card for models with larger flat parts that need a bit more rigidity. I use a Brother Printer/Scanner/Copier...its got one of those innobella stickers on it. Something to do with bright and colourful Inks. What do I know? It was cheap. And the printing looks great to me. ..and I found that refilled cartridges work really well in this machine and are very cheap online. 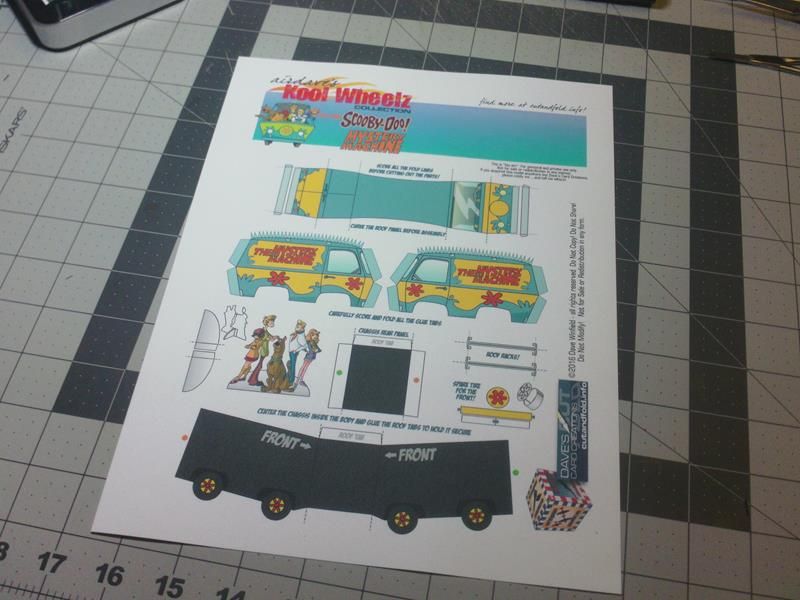 You may notice a slight difference in the model sheet I am using. Its exactly the same model as yours...I just printed my prototype version. It just happened to be open (on my computer) at the time, so I printed it. ... So...once the sheet is printed (and ready to use) my first step is to prescore all the fold lines ...making it easier to fold parts cleanly after they are cut. I usually provide indicator lines on my KoolWheelz models showing you where to score and fold. And I usually suggest on the KoolWheelz models to prescore all the fold lines. Regardless, you should study the model...and get an understanding of all the necessary folds, creases and bends, before you start cutting things out. On some models there is an abundance of Valley and Mountain folds, and I will usually diffferentiate with dotted lines of differing colour and/or style. I think this model has all Mountain folds. You need to score a number of structural fold lines, as well as all the folding glue tabs around the perimeter of the body sides. Always use a straight edge, wherever possible, to score clean straight lines. Avoid doing anything freehand, if you can. 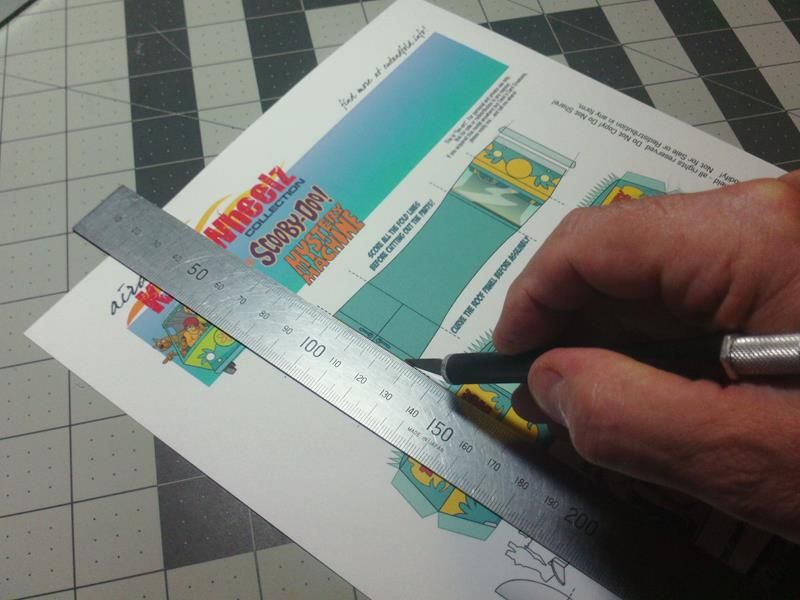 My Scoring Tool is an old Hobby Knife handle with a dulled Blade. I ground the blade almost flat against a stone. And I rounded the sharp tip. I finished the blade with fine Emery paper to reduce any sharp edges and smooth the blade completely. You have to learn to apply enough force to fully crease your paper and cardstock without breaking through any of the paper's fibers. Once you start tearing the fibers, the paper will come apart at the fold line. And you get that white creased look breaking through the printed colour. So...you're trying to put a good "dent" in the paper...thats about all. 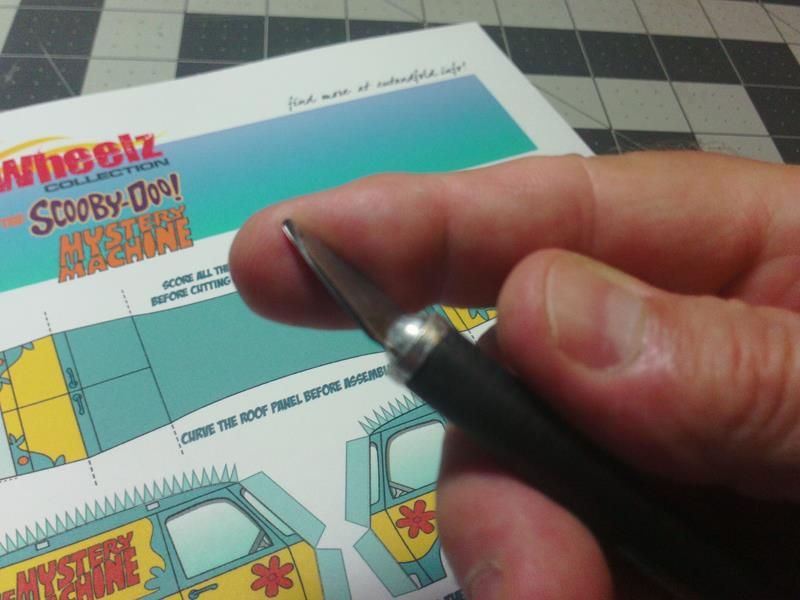 ... As I mentioned, you should always try to score against a solid straight edge for the best straight lines. But sometimes, you must score a curving or rounded line, and you must do this free hand. The Glue tabs, along the curved roof line of the body sides, must be scored to fold. Try scoring the entire line focusing on one tab at a time. Each one is a short straight line...and as you progress, it forms the curve of the roof. Take your time and do it carefully. This is a very obvious part of the model when it is assembled. 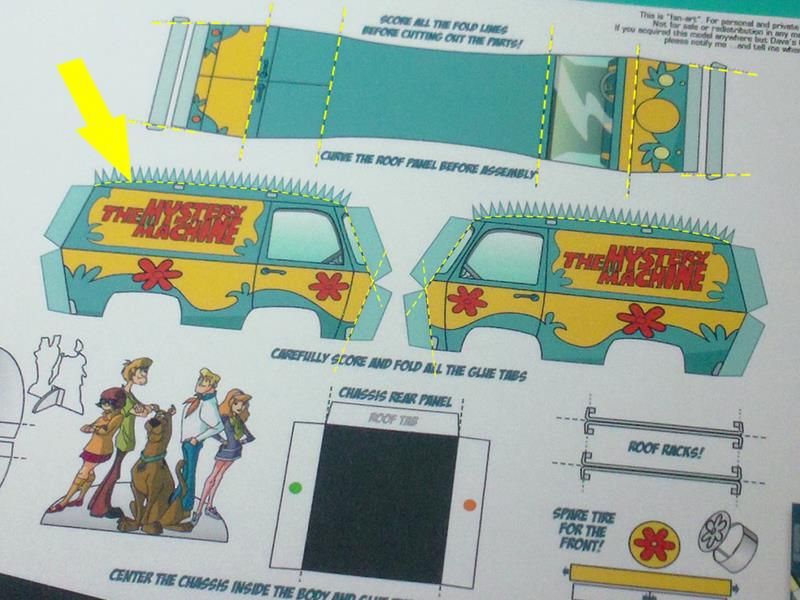 ... Its easy, at this point to deal with all the indicated fold lines...and any that might not be indicated. Its also easier to deal with them now, before the sheet is cut up. But don't guess. On my model all the fold lines are indicated, but on some models they are not. If you aren't sure about folding a part, then don't score it yet. Try to determine if it is a fold line or wait until you get the parts cut and ready for assembly. If you score something that isn't supposed to fold, it will be weak at the crease line and it will want to fold later. ... Okay class..lets score!
__________________
SUPPORT ME PLEASE: PaperModelShop Or, my models at ecardmodels: Dave'sCardCreations
|
| Google Adsense |
 |
| Thread Tools | |
| Display Modes | |
|
|


 Linear Mode

