


|
|
|
#1
 08-21-2016, 05:32 PM
|
||||
|
||||
|
KoolWheelz Mystery Machine Group Build & Tutorial
Spawned from a member's request for some basic Model building instruction,
this Group Build is better named as a Group Tutorial. We all build the same model, following along as I instruct, one step at a time. Everyone is invited to post their progress and contribute to the tutorial as it develops. If you don't wish to contribute, you are still invited to build the model and just have fun with the activity as a group. When we are done, we can share our final results. Please...this is only for models built as originally intended. .............................. Lets start with out first KoolWheelz model: 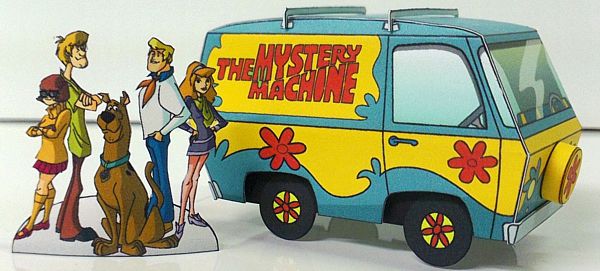 If you need the model get it (free) here: Koolwheelz Cartoonz This is the newly released (2016) version of the Scooby Doo Mystery Machine. I decided to update my model by recreating the actual TV Cartoon version. So, if you have the old (GMC Van) version, you'll need to get it! The plan is to post the assembly of the model slowly...step by step...one part/section/stage at a time. This might go slowly for some of you, but keep in mind we have many participants who need time to catch up. I'll try to post each step 12-24 hours apart, unless we get caught up in discussion at any point. This will be my own method tutorial, as I would build this model. Feel free to offer alternate options for building any section. Also, feel free to post photos of your progress as we go. Please don't jump ahead or post anything ahead of where we are in the build as a group. Make sure you share your own ideas and advice...and tell us what tools, materials, etc you use.  ................................. My Tools...or, my "recommended tools" list for this build. I use a lot of different tools when building paper models, but for this build, I will use: Glue (Aleenes Tacky Glue) Scissors to cut out parts from the sheet. Hobby/Craft Knife for more precise cutting. A metal Straight edge/Rule for precise cutting and folding of parts. A scoring tool for making fold lines/creases. Wooden dowels for rolling and shaping parts. Tweezers for handling small parts, and to assist in shaping parts. Artists Markers for edge colouring and minor touchups. 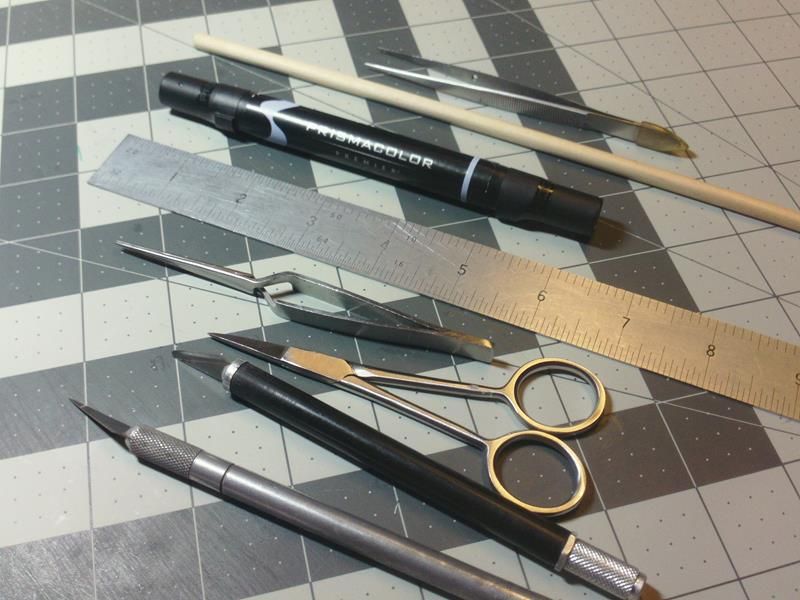
__________________
SUPPORT ME PLEASE: PaperModelShop Or, my models at ecardmodels: Dave'sCardCreations Last edited by airdave; 08-21-2016 at 05:48 PM. 
|
| Google Adsense |
|
#2
08-21-2016, 06:06 PM
|
||||
|
||||
|
Boose's Tools
Paper: Neenah Bright White Premium Cardstock 67#, .0075"/0.19mm
Glue (Aleenes Tacky Glue) Scissors (Fiskars Soft Touch) Hobby/Craft Knife (Excel with #11 blade) A metal Straight edge/Rule (Westcott stainless steel with cork backing) A scoring tool (Kemper straight needle) Wooden dowels (and stainless steel rolling sticks) Tweezers Artists Markers (Tombow and Pitt Artist Brush Pens) Glue applying devices (V-6 jar top and cocktail stick [also useful for rolling tubes]) Last edited by Don Boose; 08-21-2016 at 06:23 PM.
|
|
#3
08-21-2016, 06:19 PM
|
||||
|
||||
|
Dear Friends:
And we are off, take our time, and have fun. Assembled my tool kit cleaned of the work bench(pushed the whale boat to the next table). I have the MM PDF on a thumb drive on key chain will stop at office max after work tomorrow to have it printed. Photo of tools, Questions just ask. Model on, Miles
|
|
#4
08-21-2016, 07:40 PM
|
||||
|
||||
|
Not too many tools here - I glue and cut it on a budget
 GLUE: elmers glue all with toothpick from pocket knife to apply it thinly SCISSORS/KNIFE: sharpened pocket knife TWEEZERS: small tweezers from pocket knife for clamping small parts and larger tweezers for larger parts EDGE COLORING (not pictured): almost-dry markers (so they don't bleed or color too dark) and colored pencils 
__________________
PAPERENGINEER Designs in progress: -C-2A Greyhound -Br.1050 Alize
|
|
#5
08-21-2016, 08:12 PM
|
|||
|
|||
|
Here is my list of tools:
Scissors: Fisker #1 Phillips head screw driver shaft for rolling paper Fisker finger knife 3 types of tweezers Pigma pens for coloring edges Straight edge for scoring & measuring Angled and straight clamps for gluing (ex soldering tools) Dull Xacto for scoring
|
| Google Adsense |
|
#8
08-22-2016, 03:43 AM
|
|||
|
|||
|
Printer: Canon MG 5220
Settings: Plain Paper, High Quality Ink: Canon ChromaLife 100+ Paper Size: US Ltr Paper: OfficeMax premium index cardstock 110lb Knife: X-ACTO X3000 Glue: Aleene's Tacky Glue Dead ballpoint pen scribe strait edge tweezers magnifying visor to see what i'm doing
|
|
#9
08-22-2016, 05:30 AM
|
||||
|
||||
|
Printer: Canon MG 5220
Settings: Plain Paper, Standard Quality Ink: CISS from InkProducts Paper Size: US Ltr Paper Weight: 65 lb/176 gsm Glue: Aleene's Quick Dry Tacky Glue Knife: Fiskars Soft Grip Blades: Excel #11 Scissors: Fiskars Micro-Tip Edging: Prang Colored Pencils Straight edge:Helix Non-Slip metal ruler Cutting mat: What ever is available (I have a bunch) Clamping: Various squeeze to open tweezers Plastic toothpick to apply glue Vinyl tablecloth section applied to hardboard for scoring fold lines Crochet needle enclosed in wood for scoring Wood dowel sharpened and slightly dulled on one end for scoring Plus other implements used but not even thought about during the build. 
__________________
~Doug~ AC010505 EAMUS CATULI! Audere est Facere THFC 19**-20** R.I.P. it up, Tear it up, Have a Ball
|
|
#10
08-22-2016, 06:52 AM
|
||||
|
||||
|
Kevin brings up a good point with me...
there are many time zones to deal with. And then there's free time...not being at work, etc. Not everyone will get around to reading and responding to posts within a twelve hour period. So, I will need to wait at least 24 hours between posts. Longer, if we get into any discussions. The "Steps" in this "tutorial" will be minimal steps in assembly. Some of you may be impatient to move forward with your builds. Please try to restrain yourselves! lol Let everyone catch up. Even the smallest of steps could be a major learning experience for a newbie. Nice to see everyone sharing their "tool kit". One other thing I forgot to mention... some folks like to "seal" their printed pages before assembling a model. I often do this... spray a sealer or clear protective coat onto the printed Parts page to protect it from wear and tear, and make it more moisture-proof. Cleaning up smudges and excess glue is a bit easier too. Some top coats can even give a gloss or sheen to the surface. I won't get into "sealing" in this thread. There are plenty of discussions here regarding clearcoats, sealers and spray topcoats. Heres a recent one: What protection do you use!!!?
__________________
SUPPORT ME PLEASE: PaperModelShop Or, my models at ecardmodels: Dave'sCardCreations
|
| Google Adsense |
 |
|
|


 Linear Mode

