
 |
|
#1
|
||||
|
||||
|
Making smaller tubes
MAKING SMALLER TUBES
There was a "contest" at the old cardmodels.net that sounded "How small can you roll" And as far as for tubes....you can make pretty small ones with some practice.Tubes wit a diameter of 1mm is not unusual.Barrels for machinguns f.eks. But when making small tubes the same rules goes.Use a tool to shape it well before you glue it together. This example is of one of the axels for the rear wheels on the Luchs. The diameter on the tube is 4,5mm First I cut away the flip at the end 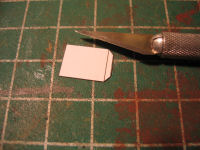 And glue it inside as shown before 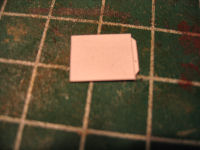 Next is to find a rod with a proper diameter.The rod I used was a 1,5mm welding electrode. 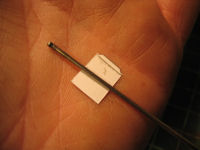 Now after some rolling the tube is tight enough 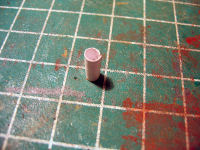 Then it's to glue it together applying some pressure at the joining point with some tweezers and we have a nice round tube. 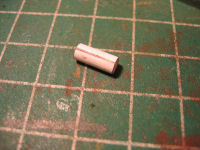 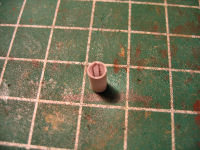 More to come..... |
| Google Adsense |
|
#2
|
||||
|
||||
|
Quote:
This forums' collective skill-set is tremendous & I think that & the ongoing need for invention & problem solving in paper-modelling is the impetus that keeps me trying to get something right. Thanks for the helpful pointers 
|
|
#3
|
||||
|
||||
|
Thanks, Johnny always good to see your take on techniques.
|
|
#4
|
||||
|
||||
|
You can also roll very small tubes easily (with minimal "overlap" bulges) by using several layers of light paper. This also rolls more easily than card with less potential to crease. Shape the roll around your mandrel/core, then unroll partly and apply glue to at least one full wrap. The more laminations you apply glue to, the stronger the part. A little pressure on the outer seam while still on the mandrel/core will flatten it almost completely.
Yogi |
|
#5
|
||||
|
||||
|
It is possible to eliminate the "overlap" by simply rolling the tube from a single layer of card (or thinner paper for smaller sizes) and "butt joining" the seam.
It helps to chamfer the joining edges by undercutting so the edges meet without leaving a gap when glued together. Of course, the smaller the tube, the greater the angle of the chamfer. Some kits are designed to allow this technique; one simply leaves off the joining tabs. Of course, for me to say that this is possible to do and to describe how to do it does not necessarily mean that I can actually pull it off, at least not every time! |
| Google Adsense |
|
#6
|
||||
|
||||
|
Some great input!
@Retired_for_now Concentric lamination (where the seams don't align) would be a very neat solution allowing a lot less bulging. Must try that. @Thomas Meek Can I ask what you use for the chamfer, I automatically think file but I'm thinking on small parts the paper grain could beome 'fluffy' & messy if not done right. (I'm guessing) The need to experiment with all these techniques is creating a huge to-do list & the clock is ticking... 
|
|
#7
|
||||
|
||||
|
Medved;
I just tilt the knife blade when cutting the joining edges so that instead of cutting a square edge, it cuts an edge which is slanted. |
|
#8
|
||||
|
||||
|
Quote:
i.e. as / & / (where the coloured face would be undercut & the tab face extending) it wouldn't have to be super exact but could increase the surface area for glue unobtrusively & bulge free. - which I guess is what you are doing... 
|
|
#9
|
||||
|
||||
|
medved;
Well, not really... The problem being that the outside circumference of a tube of any size is greater than the inside circumference, depending upon the thickness of the wall of the tube, i.e.paper thickness. If the paper is cut perfectly square, when the we bend it into a tube the inner edges will meet but leave a gap in the outer surface \/. Since it is the outer surface that interests us, if we slant the blade when cutting, we can cut back on the inner surface so that when the outer surface meets, the inner surface is out of the way and the edges meet evenly from inside to outside, thus ||. Then the problem becomes the dread Creeping Edge Color but if the joint is perfect edges won't show. Unfortunately I haven't got that far yet but still trying. Of course, using thinner paper will minimize the problem, but beware: I ruined a printer trying to run tracing paper through it. The resulting jam and my attempts at removing it forced the print heads out of alignment and the thing was never the same afterwards. |
|
#10
|
||||
|
||||
|
Quote:
I think the join lines on any paper model are the most obvious sign of the mode & type of construction, & as such, the most critical area in attempting the 'trompe l'oeil' paper modelling is capable of. Add that to the basic skill level required for a clean & square assembly & newbies like me have trouble. Thus I am glad to be able to learn from you & other experts on this forum! As an aside I gave a friend a Fiddlers Green freebie & it has destroyed his will to continue... So paper is not for the faint of heart it seems. 
|
| Google Adsense |
 |
|
|