


|
|
|
#1
 01-07-2009, 10:58 AM
|
||||
|
||||
|
Rotary Engine Cowls
Hello All,
Leif Ohlssons 1:16 Maly Modelarz Sopwith F1 Camel project is of great interest to me (see: Experimenting with kitbashing). This aircraft has been a favorite of mine for as long as I can remember. I decided that a separate tutorial would be better than interrupting Leifs wonderful thread. I noticed that Leif indicated some trepidation toward building the cowl, which for some odd reason, I could not leave alone (imagine that). I studied Pavel Mistewicz cowl design. It is an excellent design. In fact hes done something that Ive been thinking about adding to the petal tire design. The doubling of the middle segment with the glue tabs eases the construction by providing a stable ring by which the other two sections can be added. I began by scanning the cowl sections with Photoshop and scaling them up by 206.25% to attain the proper 1:16 scale.  Printed on chip board the parts were cut out (chip board is the grey-brown cardboard on the back of notepads). Parts 37 and 37a were formed and glued together. Part 38 (nose) and parts 37/37a were glued together. The assembled parts were then worked with a spherical dapping punch and wooden clay forming tool to add curvature to the piece against a soft vinyl bucking piece. You have to be careful not to overdo the forming process. Too much will produce bumps and lumps that will need to be sanded out later.  Part 39 was then glued to the assembly.  The glue tabs were trimmed and the assembly rough sanded with open weave wall board sand paper (regular 60 grit sand paper would work just as well).  Card modeling paste was applied to the external surface. Joint compound or spackling paste will also work well but requires PVA (white glue) for good performance (40-50% PVA to joint compound). Set aside to dry.  The first coat was rough sanded smooth before the second paste coat was applied. The second coat was sanded smooth in preparation for primer.  I skipped over using a primer coat and airbrushed the piece with silver paint for a quick look at the overall effect.  +Gil 
|
| Google Adsense |
|
#2
01-07-2009, 11:44 AM
|
||||
|
||||
|
Gil that makes an EXCELLENT cowl! We cardmodelers expect to see those seams sometimes (though they didn't exist on the original object being modeled). Although for myself I don't plan to treat a whole plane with sanding and painting I would love to use a perfect cowl like this, and maybe other highly visable details also would be helpful to make fair with these types of methods. Drop tanks or bombs, of course tires. (I've been lathe turning my tires of wood don't tell anybody)
__________________
regards Glen
|
|
#3
01-07-2009, 12:50 PM
|
||||
|
||||
|
and THAT my friends is why Gil is a Master Modeler......... and an excellent teacher too, because he always is very willing to share!
john
|
|
#4
01-07-2009, 02:01 PM
|
||||
|
||||
|
Thats just brilliant!!
|
|
#5
01-07-2009, 03:25 PM
|
|||
|
|||
|
You've scored a bullseye again, Gil. I'm going to experiment with this for a potential upcoming 1:33 build. It would be nice to have a smooth cowl.
Carl
|
| Google Adsense |
|
#8
01-08-2009, 09:24 AM
|
||||
|
||||
|
I agree, wholeheartedly. A most welcome contribution! So glad to see the paste coming into its right for one of the application where it is most sorely needed. And very timely, too, for me.
Leif
|
|
#9
01-08-2009, 12:17 PM
|
||||
|
||||
|
Excellent results...Gil...Thanks for sharing this..Question: How does this technique work in small scales 1/72 scale?
A while back we were making up the Avro 504K (in 1/72) and tried some plastic wood filler (thinned down) and it worked quite well. Another technique that works quite well at small scale is to create a 'watch spring' type cowling in paper and use filler again. Unfortunately pin holes tend to be a problem. At 1/144 I asked a toolmaker to produce some brass blanks which were then made into molds for Camel cowling and for 1/144 scale wheels. These were then cast and the rest of the model made in paper. I have not seen this modeling paste before in NZ? Can you suggest a supplier?
__________________
www.byairclassique.com Art Deco paper models, prints and cards. Models from Contour Creative Studio available here...http://www.ecardmodels.com/index.php...anufacturer=26
|
|
#10
01-08-2009, 12:33 PM
|
||||
|
||||
|
1/144 Sopwith Camel
A number of years back we started designing (stupidly) in 12 foot to the inch. The good thing about a printed model in small scale is the detail, the bad thing is the engineering.
The model is the prototype and I abandoned the project in favour of a larger scale 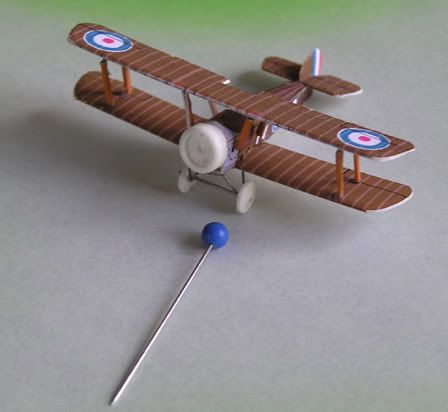
__________________
www.byairclassique.com Art Deco paper models, prints and cards. Models from Contour Creative Studio available here...http://www.ecardmodels.com/index.php...anufacturer=26
|
| Google Adsense |
 |
| Thread Tools | |
| Display Modes | |
|
|


 Linear Mode

